Home>Garden Essentials>How To Decorate On Fake Grass
Garden Essentials
How To Decorate On Fake Grass
Modified: October 19, 2024
Learn how to beautifully decorate your garden on fake grass with our expert tips and ideas. Create a stunning outdoor space that is both low-maintenance and visually appealing.
(Many of the links in this article redirect to a specific reviewed product. Your purchase of these products through affiliate links helps to generate commission for Storables.com, at no extra cost. Learn more)
Introduction
Creating a beautiful outdoor space is something many homeowners aspire to. However, not everyone has the time or space to maintain a natural lawn. That’s where fake grass comes in. Fake grass, also known as artificial turf or synthetic grass, offers a low-maintenance alternative that looks and feels like the real thing.
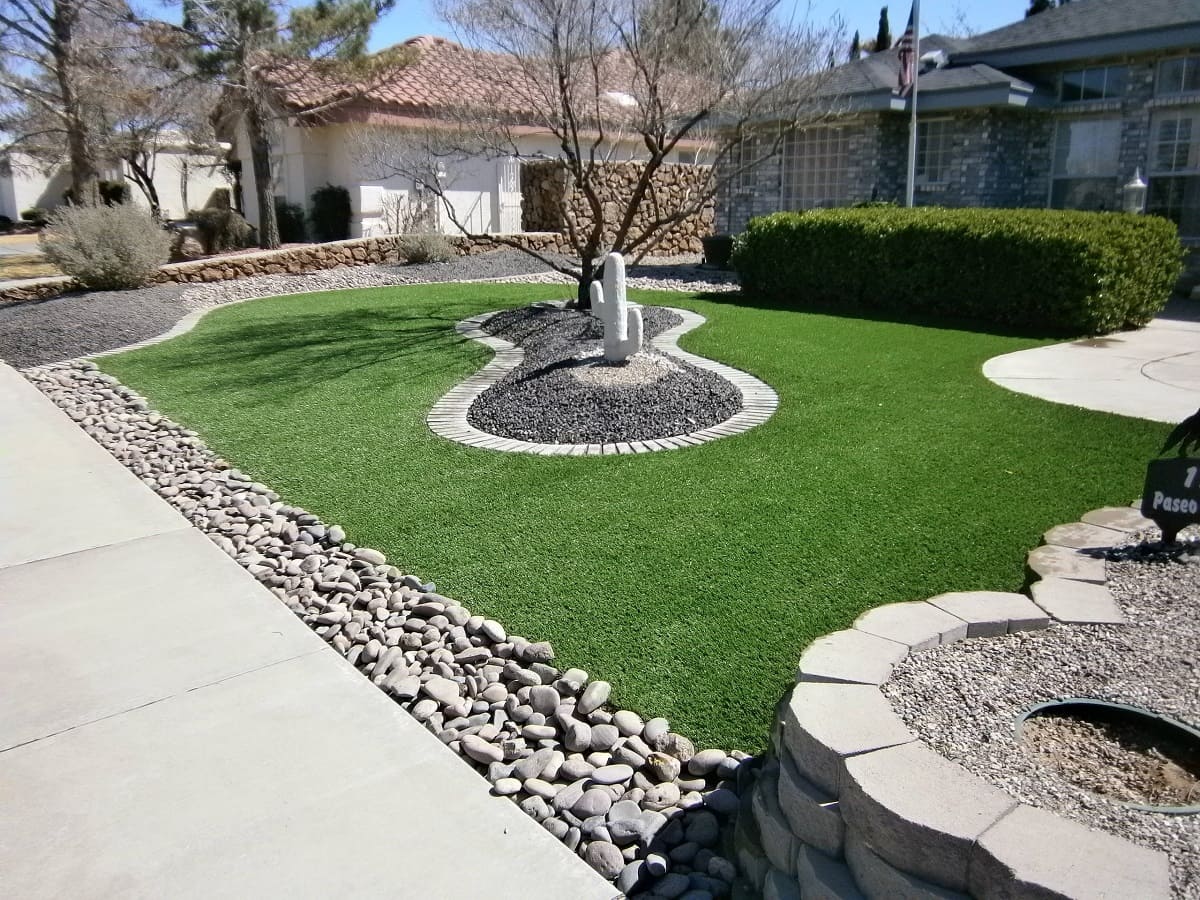
But fake grass isn’t just for sports fields or putting greens; it can also be used to create stunning decorative areas in your backyard. Whether you want to transform a small patio, a rooftop terrace, or a larger garden space, decorating on fake grass can provide endless possibilities.
In this article, we will guide you through the process of decorating on fake grass, offering tips and ideas to help you create a beautiful and inviting outdoor space. We’ll cover everything from preparing the area to adding decorative elements, so you can enjoy a stunning outdoor oasis without the hassle of traditional lawn care.
So, if you’re ready to unleash your creativity and transform your outdoor space, let’s dive in and discover how to decorate on fake grass!
Key Takeaways:
- Decorating on fake grass is a fun and creative way to transform your outdoor space without the hassle of traditional lawn care. From measuring and preparing the area to adding decorative elements, each step is crucial for a successful and visually appealing installation.
- By following the step-by-step process and incorporating your personal style, you can create a stunning outdoor oasis for relaxation, entertaining, and enjoying nature. Fake grass offers water-saving benefits and eliminates the need for harmful pesticides or fertilizers, making it an eco-friendly choice for your outdoor sanctuary.
Read more: What Is Fake Grass
Materials Needed
Before you begin decorating on fake grass, it’s important to gather all the necessary materials. Here’s a list of items you’ll need:
- Fake Grass: Choose high-quality artificial turf that suits your needs and preferences. Consider factors such as pile height, color, and durability.
- Measuring Tape: Use a measuring tape to accurately measure the area where you’ll be installing the fake grass.
- Utility Knife: A utility knife will come in handy for cutting and shaping the grass as needed.
- Weed Barrier Fabric: To prevent weeds from growing through the fake grass, use weed barrier fabric as a base layer.
- Adhesive or Turf Tape: Depending on the type of fake grass you choose, you may need adhesive or turf tape to secure the grass in place.
- Sand or Rubber Granules: If you want extra stability and cushioning, consider using sand or rubber granules to infill the fake grass.
- Garden Decorations: To enhance the overall look of your fake grass area, gather decorative elements such as potted plants, outdoor furniture, lighting fixtures, and accessories.
- Garden Tools: Have basic gardening tools on hand, such as a rake, shovel, broom, and hose, for preparing the area and maintaining the fake grass.
It’s important to note that the specific materials needed may vary depending on the size and complexity of your project. Always consult the instructions provided by the fake grass manufacturer to ensure you have the appropriate materials for a successful installation.
Now that you’ve gathered all the necessary materials, it’s time to move on to the next step: measuring and preparing the area!
Step 1: Measure and Prepare the Area
The first step in decorating on fake grass is to measure and prepare the area where you’ll be installing it. This will ensure that you have the right amount of fake grass and create a solid foundation for the installation.
Start by measuring the dimensions of the space using a measuring tape. Take into account any irregular shapes or obstacles that may affect the installation process. It’s always a good idea to add a few extra inches to your measurements to account for any cutting or trimming that may be required.
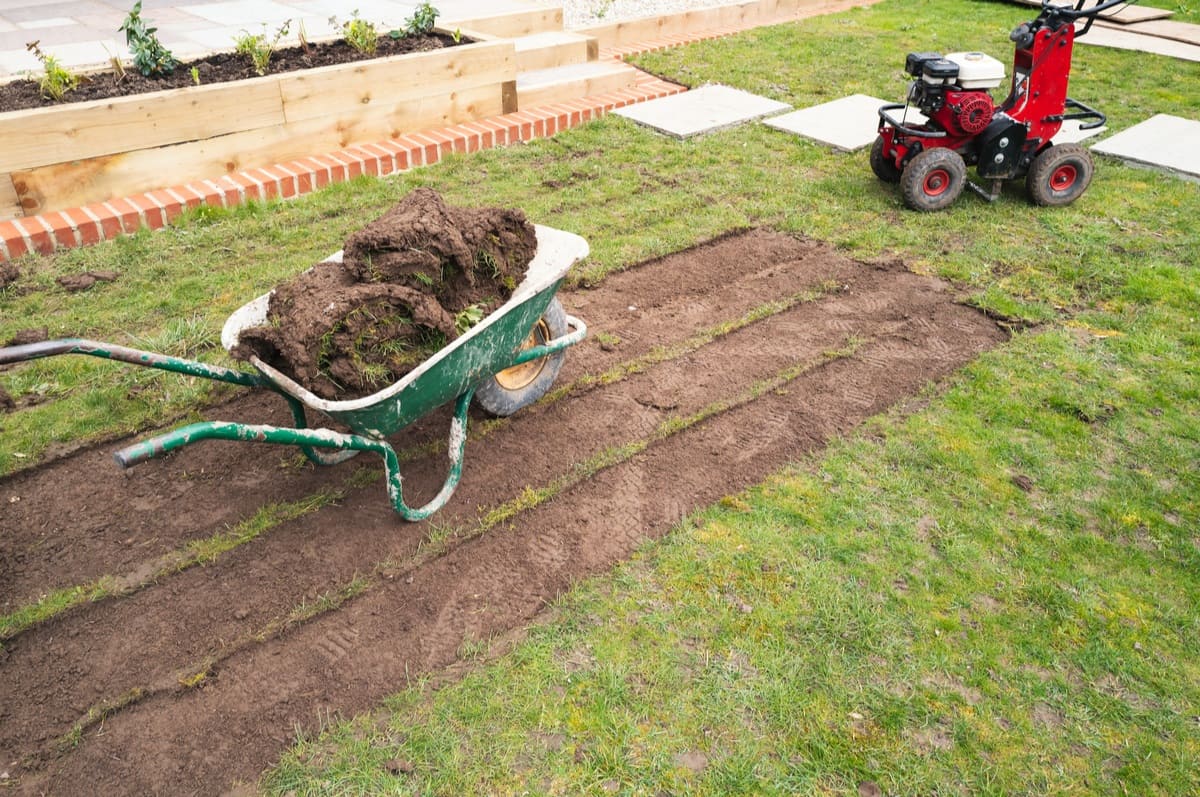
Once you have the measurements, clear the area of any debris, rocks, or plants. Use a rake or shovel to level the surface, ensuring that it’s smooth and free of any bumps or uneven spots. This will help create a flat and stable platform for the fake grass.
Next, if necessary, install any necessary edging to define the boundaries of the fake grass area. This can be done using materials such as plastic or metal edging. Secure the edging into the ground, making sure it’s level and aligned with the measurements of the area.
Finally, if you’re concerned about weed growth, it’s recommended to lay down a weed barrier fabric. This will help prevent weeds from penetrating through the fake grass and causing unwanted issues over time. Cut the fabric to fit the area and secure it in place using landscape pins.
By measuring and preparing the area properly, you’ll set the stage for a successful installation and ensure that your fake grass area looks seamless and well-maintained. With the area ready, it’s time to move on to the next step: cleaning and leveling the surface!
Step 2: Clean and Level the Surface
Once you have measured and prepared the area for your fake grass installation, it’s time to clean and level the surface. This step is crucial as it ensures a smooth and even base for the fake grass, resulting in a professional-looking finish.
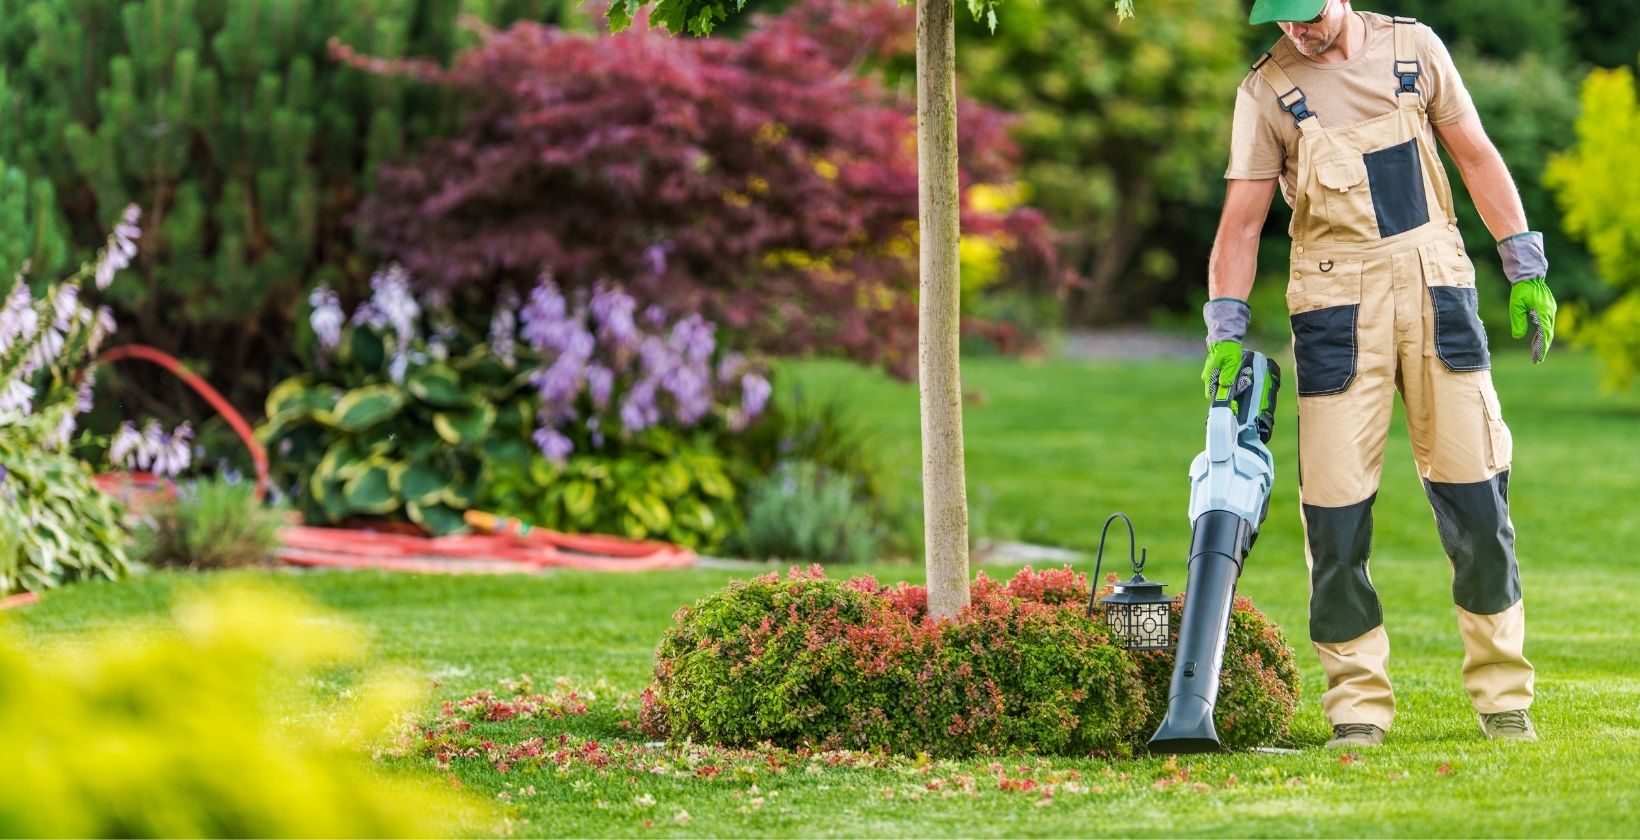
Start by removing any debris, such as sticks, leaves, or rocks, from the surface. Using a rake or leaf blower can make this task easier and more efficient. Clearing the area will help prevent any lumps or bumps in the final installation.
After clearing the surface, check for any uneven spots or dips. These can be leveled out using a shovel or garden rake. Fill in any low areas with soil and compact it using a tamper or the back of the rake. Conversely, if there are any high spots, remove some soil to ensure a level surface.
It’s important to ensure that the area is completely level before proceeding. Uneven surfaces may create issues with the installation and affect the overall appearance of the fake grass. Take the time to carefully level the surface, ensuring a uniform base.
Once the surface is level, it’s a good practice to lightly water the area. This helps settle the soil and provides a firmer base for the fake grass. Allow the water to soak in and then check again for any uneven spots. Adjust as needed.
Cleaning and leveling the surface sets the stage for a flawless fake grass installation. Now that your base is ready, you can move on to the next step: laying down the weed barrier and fake grass!
Step 3: Install Weed Barrier
Installing a weed barrier is an essential step when decorating on fake grass. The weed barrier helps prevent weeds from growing through the artificial turf, ensuring a pristine and maintenance-free area.
Start by unrolling the weed barrier fabric over the leveled surface. Make sure it covers the entire area and overlaps at the seams by a few inches. You can use landscape pins to secure the fabric in place, anchoring it to the ground.
Trim any excess fabric using scissors or a utility knife, making sure it fits neatly within the boundaries of your fake grass area. Take caution not to cut too much, as you want to ensure full coverage.
Once the weed barrier is in place, inspect the entire surface to ensure there are no gaps or areas where the fabric is exposed. Any exposed areas can allow weeds to penetrate the fake grass, so it’s crucial to address them before proceeding.
If you’re concerned about potential weed growth, you can consider using a pre-emergent weed control product. This can be applied to the soil before installing the weed barrier, providing an additional layer of protection against weeds.
Installing a weed barrier is an important step in maintaining a clean and pristine fake grass area. By preventing weed growth, you’ll be able to enjoy a beautiful and hassle-free outdoor space. With the weed barrier in place, it’s now time to move on to the next step: laying down the fake grass!
Read more: How To Cut Fake Grass To Size
Step 4: Lay Down the Fake Grass
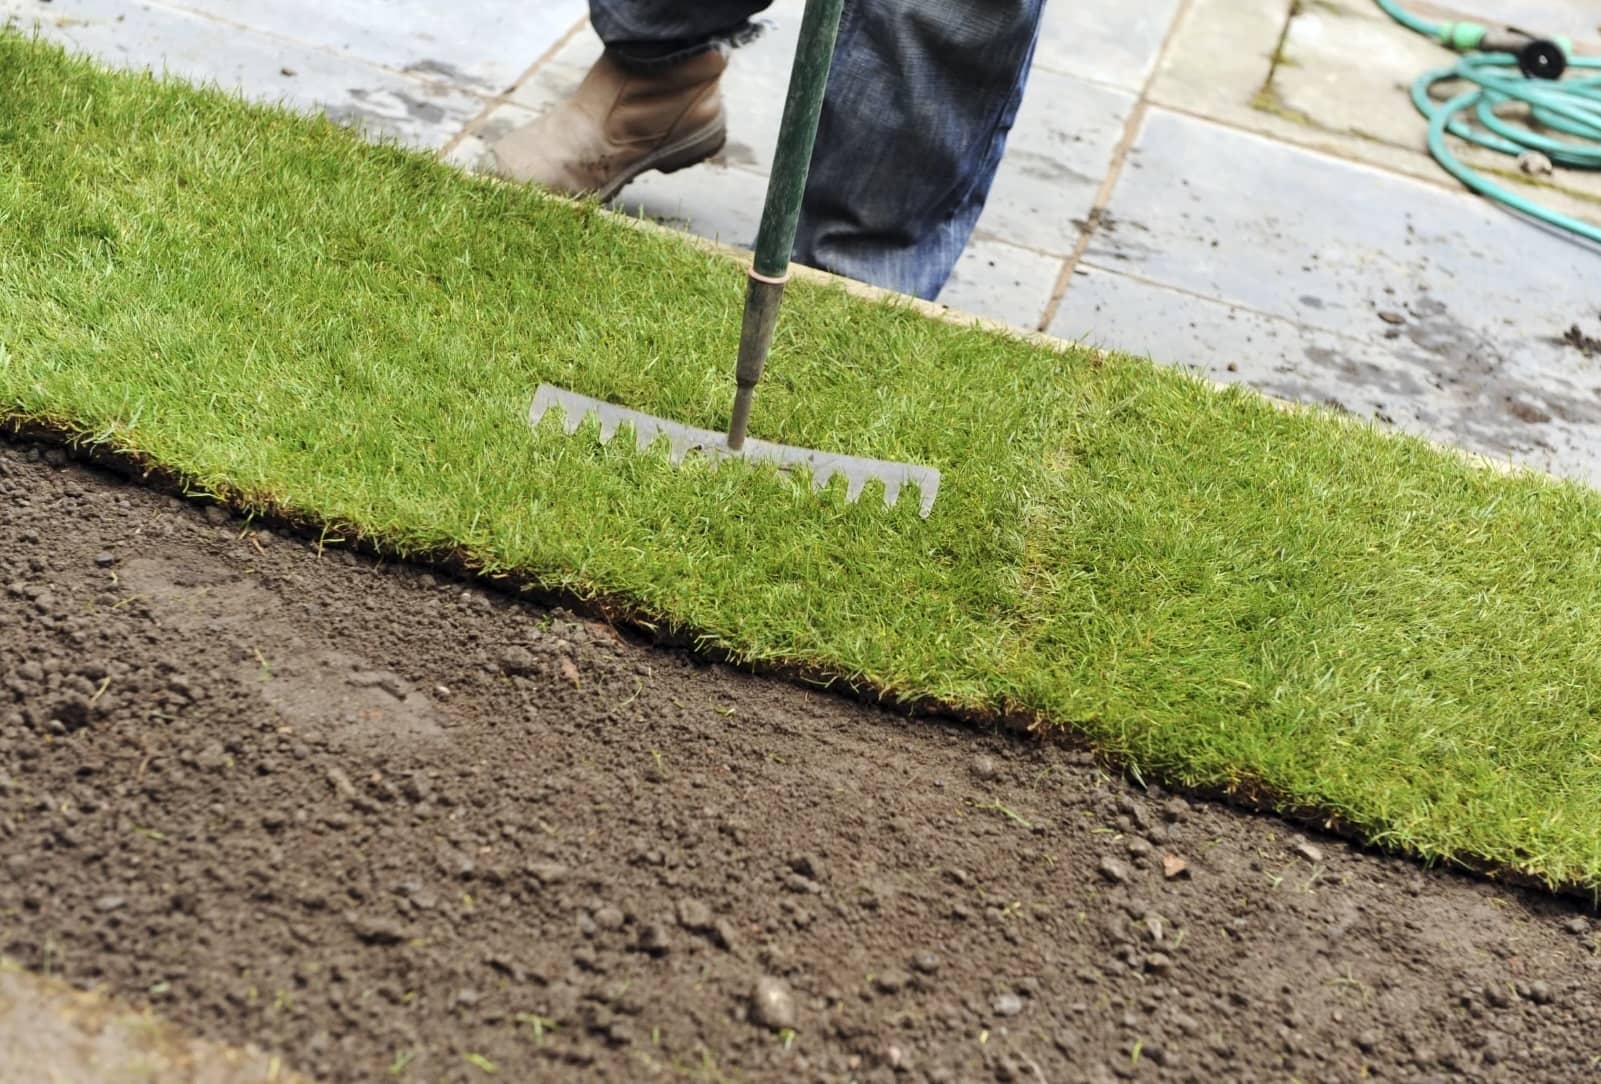
Once the weed barrier is in place, you’re ready to lay down the fake grass and bring your decorative vision to life. This step requires careful attention to ensure a smooth and seamless installation.
Start by unrolling the fake grass over the prepared area, allowing it to relax and settle for a few hours. This will help remove any creases or folds in the material, making it easier to work with.
Ensure that the fake grass is positioned correctly within the boundaries of the area. Make any necessary adjustments to ensure a proper fit. Remember to leave a small gap between any objects, such as walls or fences, to allow for expansion and contraction.
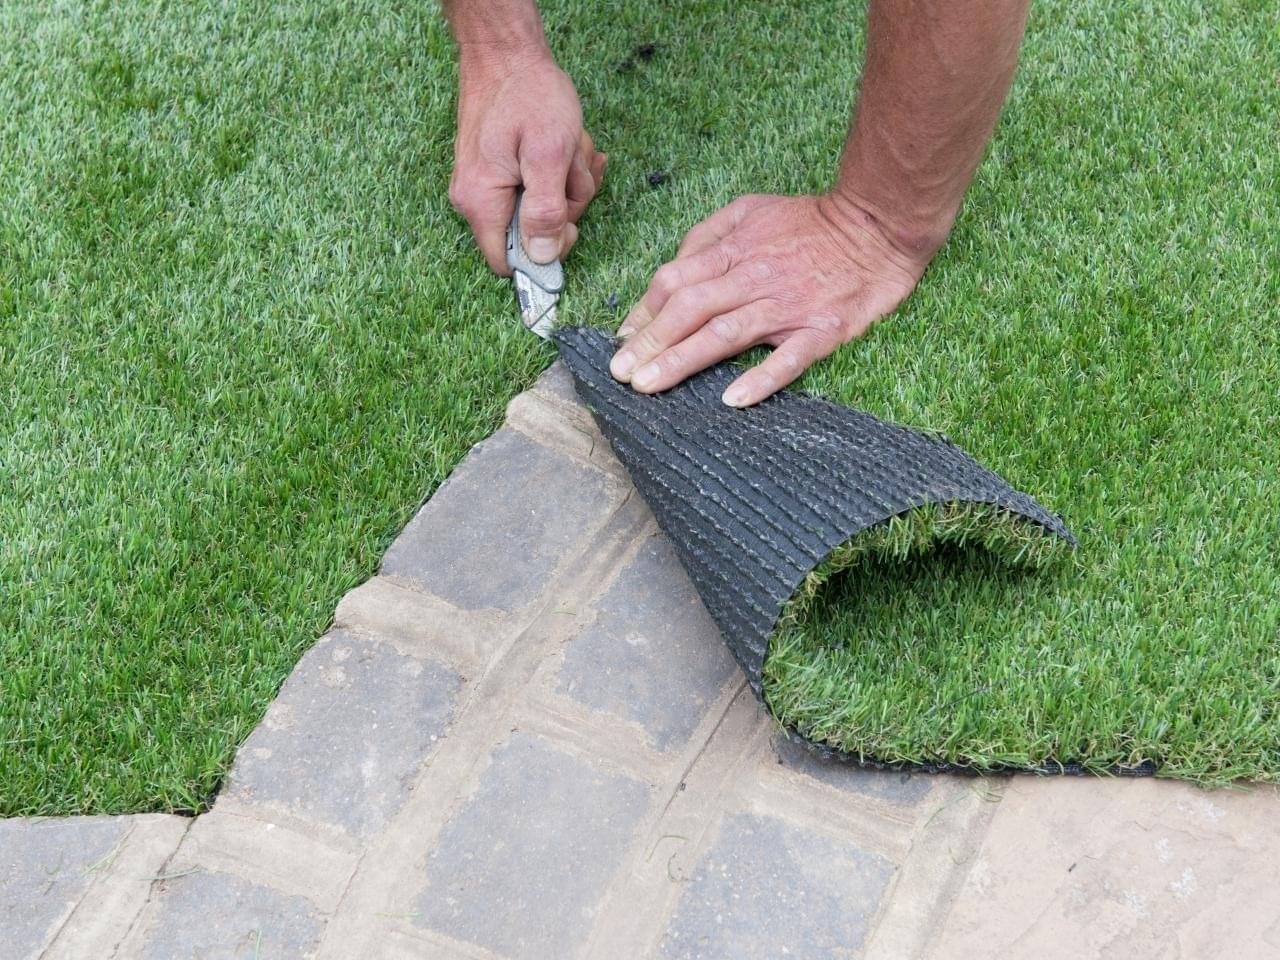
If your fake grass rolls come in different widths, you may need to cut and trim the pieces to fit the space. Use a utility knife to make precise cuts, following the manufacturer’s guidelines and your measurements. Take your time during this step to ensure neat edges and clean cuts.
Once all the necessary cuts have been made, carefully position each section of fake grass in its designated area. Avoid dragging the grass across the surface to prevent displacement or damage.
As you lay down the fake grass, ensure that the blades are facing the same direction for a consistent and natural appearance. Lightly brush the blades with a broom or bristle brush to help them stand upright.
Depending on the type of fake grass you’re using, you may need to apply adhesive or use turf tape to secure the seams between the different sections. Follow the manufacturer’s instructions and ensure that the seams are tightly joined for a seamless look.
Once the fake grass is in place, step back and inspect the installation. Make any necessary adjustments or corrections to ensure a smooth and visually appealing result. Take the time to carefully smooth out any wrinkles or uneven areas.
With the fake grass securely laid down, you’re one step closer to enjoying your beautiful outdoor space. Now it’s time to move on to the next step: securing the edges!
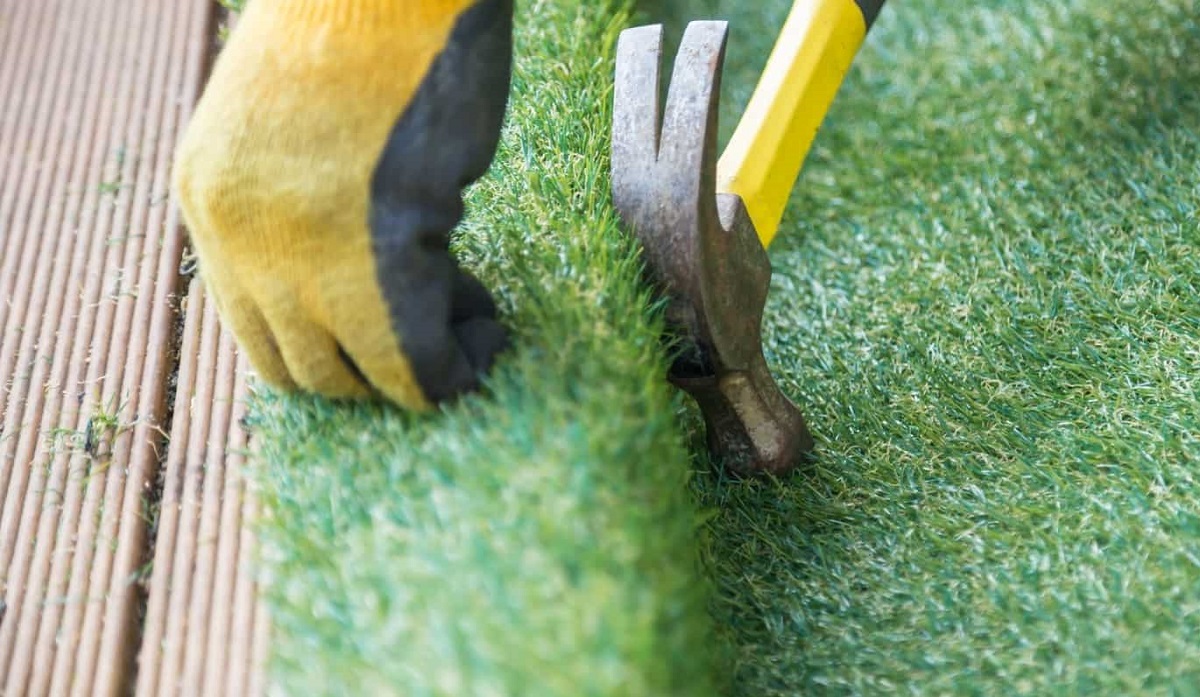
Step 5: Secure the Edges
Securing the edges of the fake grass is an important step to ensure its stability and longevity. Properly securing the edges will prevent the grass from shifting or lifting over time, especially in high-traffic areas or during extreme weather conditions.
There are different methods you can use to secure the edges of your fake grass, depending on your specific installation requirements and preferences:
1. Adhesive:
If you’re working with a permanent installation, you can use artificial grass adhesive to secure the edges. Apply a thin, even layer of adhesive along the edges of the fake grass. Press the edges down firmly onto the adhesive and hold them in place for a few seconds to ensure a strong bond. Follow the manufacturer’s instructions for drying and curing times.
2. Nails or Staples:
If you prefer a more temporary installation or want the flexibility to remove the fake grass in the future, you can use nails or staples to secure the edges. Place the nails or staples about every 6-8 inches along the edges, making sure they penetrate through the grass and into the underlying surface. This will anchor the fake grass and prevent it from shifting.
Read more: How To Lay Fake Grass Down
3. Anchor Pins:
Another option for securing the edges is to use anchor pins or landscape fabric pins. These are U-shaped metal pins that can be pushed through the fake grass and into the ground. Space the pins about every 1-2 feet along the edges to provide sufficient support.
Regardless of the method you choose, make sure to secure all edges of the fake grass, including corners and curves. This will ensure a uniform and professional appearance.
Take the time to carefully inspect the edges after securing them, making any necessary adjustments or corrections. Smooth out any uneven areas or bulges to achieve a seamless transition from the fake grass to the surrounding surfaces.
By properly securing the edges of your fake grass, you’ll ensure its stability and longevity, allowing you to enjoy your beautiful outdoor space for years to come. With the edges secure, it’s time to move on to the next step: trimming and shaping the grass!
Step 6: Trim and Shape the Grass
Trimming and shaping the fake grass is an important step to achieve a polished and natural-looking installation. By carefully cutting the grass to the desired shape and length, you can create clean edges and seamless transitions within your decorated area.
Start by assessing any areas that require trimming or shaping. This could include the perimeter edges, around obstacles like trees or flower beds, or any irregular spaces within the fake grass area.
Use a sharp utility knife or grass shears to trim the grass as needed. Take your time and make precise cuts, following a steady and controlled motion. It’s better to make small, incremental cuts rather than trying to trim off a large portion all at once.
If you’re trimming the perimeter edges, place a straight edge or a garden hose as a guide to ensure a clean and straight cut. This will help create a neat boundary and a professional finish.
In areas where the fake grass meets a hard surface, such as a pathway or patio, use the utility knife to carefully trim and tuck the edges under the surface. This will create a seamless transition between the fake grass and the surrounding paved area.
Additionally, if you have any curves or irregular shapes within the fake grass area, use small, angled cuts to maneuver around those areas and maintain a natural-looking appearance.
As you trim and shape the fake grass, periodically step back and assess the overall look. Make any necessary adjustments or refinements to ensure a visually appealing and cohesive result.
Remember, be patient and take your time during this step. Precision is key to achieving a clean and well-groomed fake grass area that will enhance your decorative landscape.
With the fake grass trimmed and shaped to perfection, you’re almost ready to enjoy your beautifully decorated outdoor space. But before you do, let’s move on to the next step: joint sand application!
Step 7: Joint Sand Application
Applying joint sand to your fake grass is an important step that helps enhance its stability, durability, and natural appearance. The joint sand fills in the gaps between the grass blades, providing support and preventing them from shifting or matting over time.
Here’s how to apply joint sand to your fake grass:
1. Gather the necessary materials:
You’ll need joint sand specifically designed for fake grass installations. Make sure to choose a sand that is suitable for your specific type of fake grass and follow the manufacturer’s recommendations.
Read more: How To Make Fake Grass
2. Prep the fake grass:
Before applying the joint sand, brush the fake grass with a stiff broom or rake. This will help lift the grass blades and ensure an even distribution of the sand.
3. Spread the joint sand:
Start by pouring the joint sand onto the fake grass, targeting the areas where the grass blades meet. Use a broom or brush to spread the sand evenly, making sure it fills in the gaps between the blades. Work the sand into the grass, ensuring it reaches the base layer.
4. Brush in the sand:
Once the sand is spread, use a stiff broom or brush to brush it into the grass fibers. This action will help the sand penetrate deeper into the turf, providing stability and preventing the grass blades from matting.
5. Repeat the process if needed:
If there are any areas where the sand hasn’t completely filled the gaps, or if you want to achieve a thicker infill, repeat the process until you’re satisfied with the result. Take care not to overfill the grass, as this may affect its appearance and functionality.
Read more: How To Install Fake Turf
6. Remove excess sand:
After brushing in the sand, use a leaf blower or a gentle stream of water to remove any excess sand from the surface. This will give your fake grass a clean and finished look.
Applying joint sand to your fake grass will help maintain its integrity and provide a more natural and realistic appearance. Take the time to ensure an even distribution of the sand and periodically brush the grass to prevent it from matting. With the joint sand applied, your fake grass area is almost complete!
Now, let’s move on to the final step: adding decorative elements to enhance your outdoor space!
Step 8: Add Decorative Elements
Now that you’ve laid down and completed the installation of your fake grass, it’s time to add the finishing touches and bring your decorative vision to life. Adding decorative elements will help personalize your outdoor space and create an inviting atmosphere. Here are some ideas to inspire you:
1. Potted Plants and Gardens:
Add a pop of color and texture by placing potted plants or creating a small garden within your fake grass area. Choose plants that thrive in containers and complement the overall aesthetic of your outdoor space. You can use decorative planters or group plants together to create a lush and vibrant display.
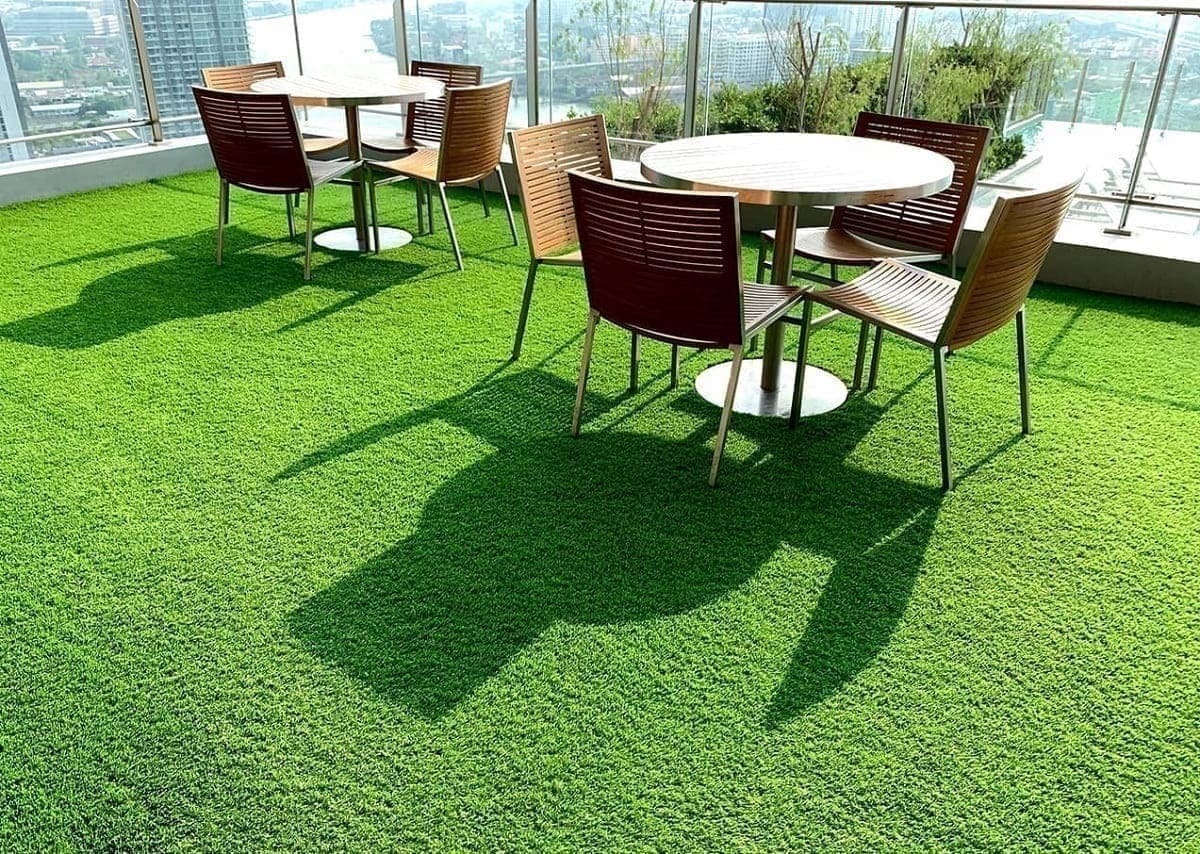
2. Outdoor Furniture:
Create a cozy seating area by incorporating outdoor furniture. Choose weather-resistant pieces that are comfortable and stylish. Whether it’s a lounge chair, a bistro set, or a cozy outdoor sofa, furniture will provide a place for relaxation and entertainment in your fake grass area.
Read more: How To Clean Fake Greenery
3. Lighting Fixtures:
Add ambiance and extend the usability of your outdoor space by incorporating lighting fixtures. String lights, lanterns, or solar-powered pathway lights can create a warm and inviting atmosphere, especially during evenings or nighttime gatherings.
4. Water Features:
Consider adding a water feature such as a small fountain, birdbath, or a decorative pond. The soothing sound of running water and the visual appeal of a water feature can elevate the overall aesthetic and create a tranquil outdoor environment.
5. Outdoor Rugs and Cushions:
Add comfort and style by placing outdoor rugs or cushions on your fake grass. By layering different textures and patterns, you can create a visually interesting and comfortable seating area. Choose materials that are weather-resistant and easy to clean.
6. Decorative Accessories:
Don’t forget the small details! Incorporate decorative accessories such as outdoor artwork, wind chimes, garden sculptures, or decorative stones. These elements can personalize your outdoor space and add character and charm.
When adding decorative elements, consider the overall theme and style you want to achieve. Aim for a cohesive and harmonious look that complements the beauty of your fake grass area.
Remember to maintain and care for your fake grass and the decorative elements regularly. Clean the furniture, water the plants, and remove any debris to keep your outdoor space looking fresh and inviting.
With the addition of these decorative elements, your outdoor space will become a beautiful and inviting oasis. Enjoy your new fake grass area and the endless possibilities it brings!
Congratulations! You’ve successfully completed all the steps to decorate on fake grass and create a stunning outdoor space. Now it’s time to sit back, relax, and enjoy the beauty and low-maintenance benefits that fake grass has to offer.
Always remember to follow the manufacturer’s guidelines and recommendations for your specific type of fake grass to ensure proper installation and maintenance. Happy decorating!
Read more: What Is The Best Fake Grass
Conclusion
Creating a beautiful and low-maintenance outdoor space is made easy with fake grass. Whether you want to transform a small patio, a rooftop terrace, or a larger garden area, decorating on fake grass offers endless possibilities to unleash your creativity.
In this comprehensive guide, we’ve walked you through the step-by-step process of decorating on fake grass. From measuring and preparing the area to adding decorative elements, each step is crucial to ensure a successful and visually appealing installation.
By following these steps and incorporating your own personal style and preferences, you can create a stunning outdoor oasis for relaxation, entertaining, and enjoying nature. Whether you’re looking for a space to host outdoor gatherings, a peaceful retreat for meditation, or a vibrant garden for outdoor dining, fake grass allows you to achieve your desired look without the hassle of traditional lawn care.
Remember to choose high-quality fake grass that suits your needs and preferences. Take the time to properly measure and prepare the area, laying down a weed barrier for added protection. Secure the edges of the fake grass to ensure stability, and trim and shape the grass for a polished appearance.
Don’t forget to add your personal touch by incorporating decorative elements such as potted plants, outdoor furniture, lighting fixtures, and creative accessories. These additions will transform your fake grass area into a welcoming and stylish outdoor space.
Lastly, regular maintenance and care will help keep your fake grass area looking its best. Brush the blades, remove debris, and clean any furniture or accessories to maintain a fresh and inviting atmosphere throughout the seasons.
Now that you have the knowledge and guidance, it’s time to let your creativity flourish and create a beautiful outdoor space on fake grass. Enjoy the beauty, functionality, and low-maintenance benefits that fake grass brings, and make the most of your outdoor lifestyle.
Remember, consider the environment as well. Fake grass offers water-saving benefits and eliminates the need for harmful pesticides or fertilizers, making it an eco-friendly choice for your outdoor sanctuary.
So go ahead, start your fake grass decoration project and enjoy your stunning and stress-free outdoor retreat!
Frequently Asked Questions about How To Decorate On Fake Grass
Was this page helpful?
At Storables.com, we guarantee accurate and reliable information. Our content, validated by Expert Board Contributors, is crafted following stringent Editorial Policies. We're committed to providing you with well-researched, expert-backed insights for all your informational needs.
0 thoughts on “How To Decorate On Fake Grass”