Home>Garden Essentials>How To Germinate A Bur Oak Acorn
Garden Essentials
How To Germinate A Bur Oak Acorn
Modified: March 15, 2024
Learn the step-by-step process of germinating a bur oak acorn in your garden. Discover expert tips and tricks for successful growth.
(Many of the links in this article redirect to a specific reviewed product. Your purchase of these products through affiliate links helps to generate commission for Storables.com, at no extra cost. Learn more)
Introduction
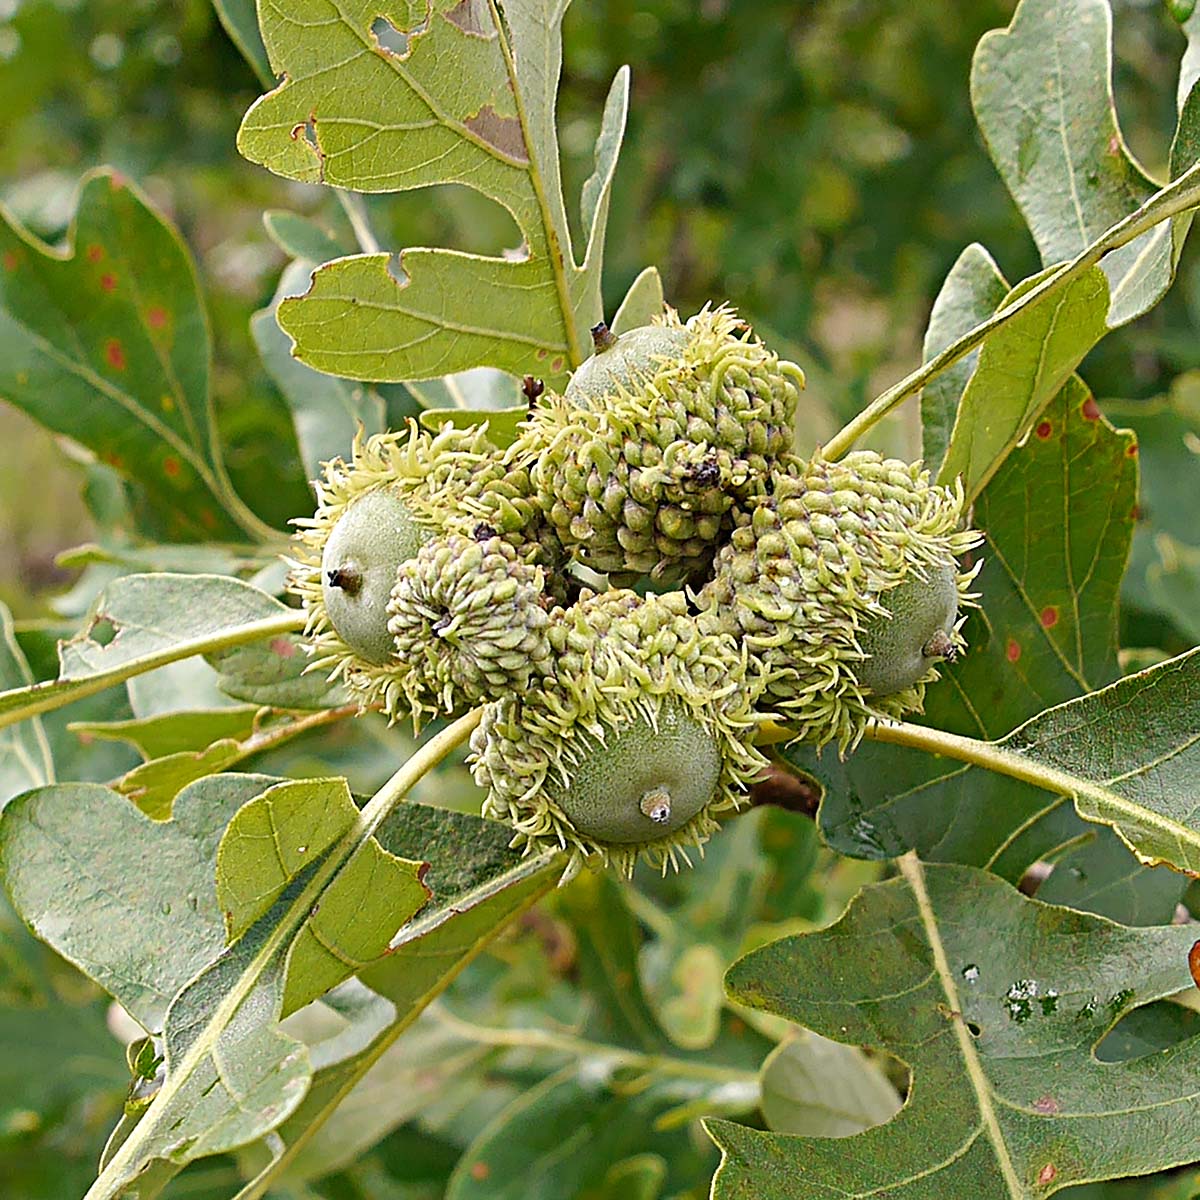
Welcome to our comprehensive guide on how to germinate a bur oak acorn. The bur oak, scientifically known as Quercus macrocarpa, is a majestic tree native to North America. It is prized for its stunning foliage, rugged bark, and ability to withstand harsh weather conditions. This article will walk you through the step-by-step process of germinating a bur oak acorn and nurturing it into a healthy sapling.
Before we dive into the details, let’s briefly talk about why germinating a bur oak acorn can be a rewarding experience. By starting from an acorn, you have the unique opportunity to witness the growth and development of a tree from its humble beginnings. Moreover, growing your own bur oak allows you to contribute to the preservation of this wonderful species and create a natural oasis in your garden or landscape.
Germinating and nurturing a bur oak acorn may seem daunting, but fear not! With some patience, care, and the right techniques, you can successfully grow your own bur oak tree. So, let’s roll up our sleeves and get ready to embark on this exciting gardening adventure.
Key Takeaways:
- Growing a bur oak tree from an acorn is a rewarding journey that requires patience, care, and attention to detail. By following the step-by-step process, you can witness the miracle of nature and create a beautiful addition to your garden or landscape.
- From collecting and preparing the acorns to nurturing and transplanting the germinated seedlings, each step is crucial in ensuring the successful growth of a bur oak tree. With proper care and dedication, you can enjoy the beauty and ecological value of this majestic species.
Read more: How To Germinate English Oaks
Step 1: Collecting the Bur Oak Acorn
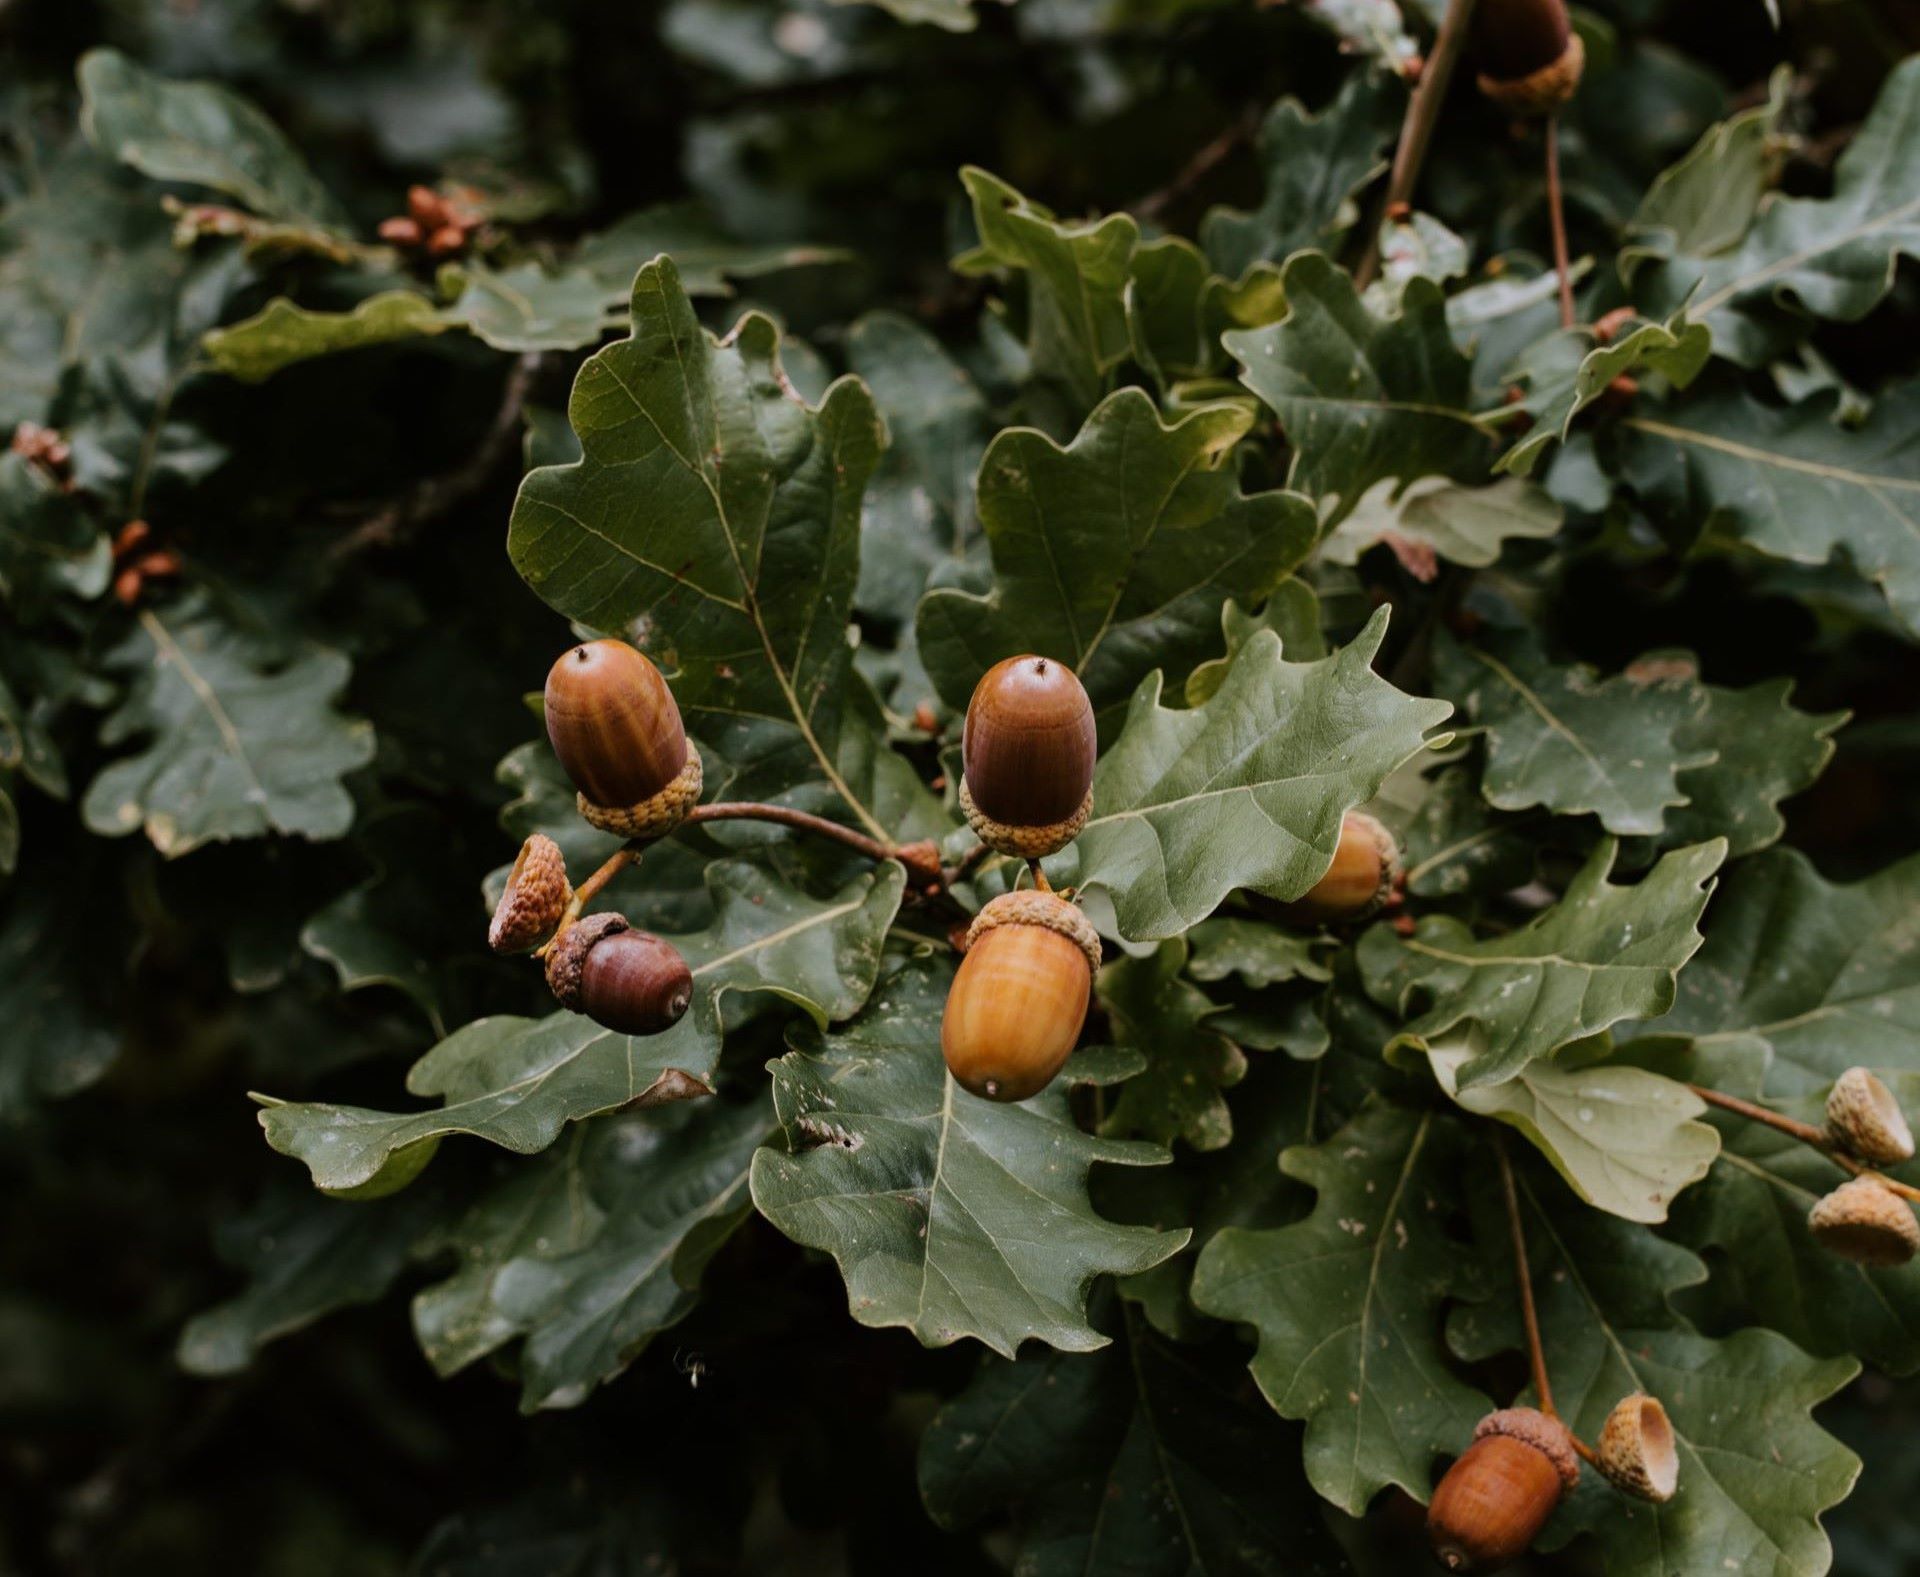
The first step in germinating a bur oak acorn is to collect a healthy and mature acorn. It is important to choose an acorn that is fully ripened and free from any signs of damage or disease. Here are some tips to help you collect the perfect bur oak acorn:
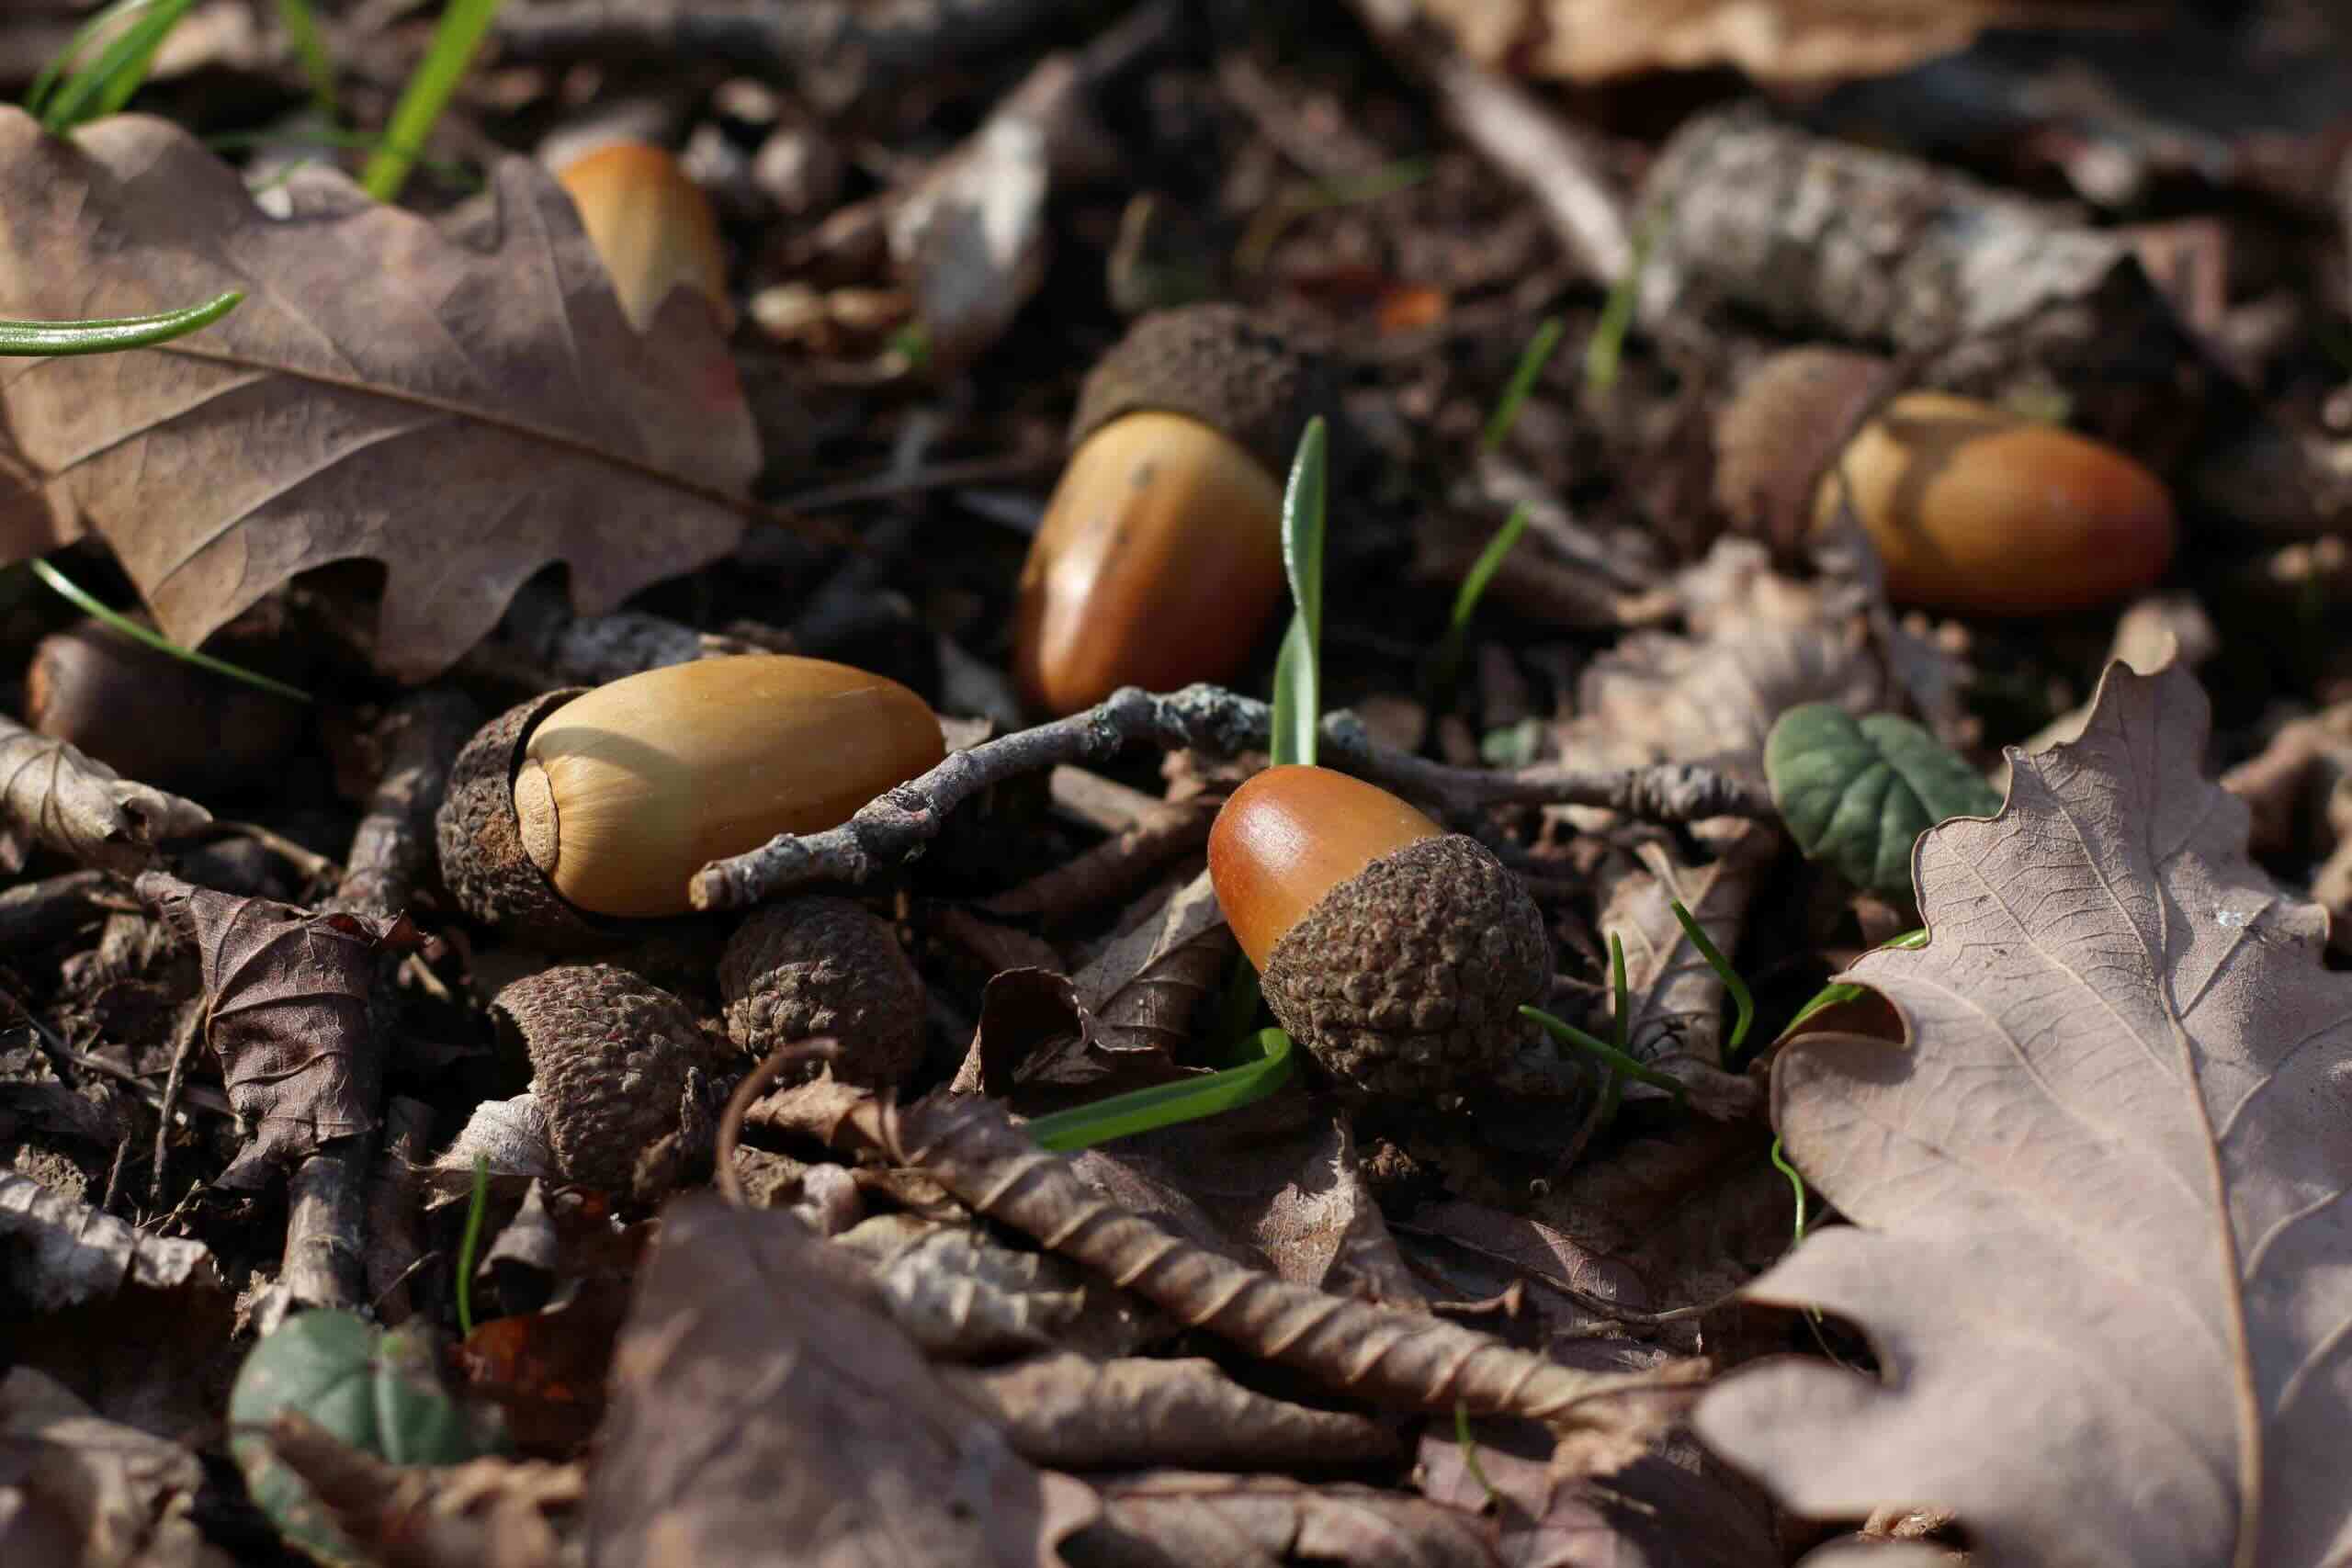
- Timing: The best time to collect bur oak acorns is in the autumn when they naturally fall from the tree. Look for mature acorns that have already detached themselves from the tree’s branches. Avoid collecting acorns that are still attached, as they may not be fully matured.
- Visual Inspection: Examine the acorns closely for any visible blemishes or damage. Choose acorns that have a smooth, intact outer shell. Avoid acorns that have cracks, holes, or signs of insect infestation.
- Weight and Size: Healthy bur oak acorns are typically large and heavy. They should feel solid and dense in your hand. Avoid acorns that feel light or hollow, as these are likely to be immature.
When collecting bur oak acorns, it’s a good idea to gather a few extras, as not all of them will successfully germinate. This way, you’ll have a greater chance of achieving successful germination and growing a healthy bur oak tree.
Once you have collected your bur oak acorns, it’s important to handle them with care and store them properly until you’re ready to germinate them. Place them in a well-ventilated container such as a paper bag or a cardboard box. Keep the container in a cool, dry place away from direct sunlight. Avoid storing the acorns in airtight containers, as this can promote the growth of mold or cause the acorns to rot.
Now that you know how to collect and store bur oak acorns, you’re ready to move on to the next step: preparing the acorn for germination.
Step 2: Preparing the Acorn for Germination
After collecting the bur oak acorns, the next step is to prepare them for germination. Proper preparation ensures that the acorns have the best chance of sprouting and developing into healthy seedlings. Here’s what you need to do:
- Inspecting the Acorns: Before preparing the acorns, examine them closely to ensure they are in good condition. Discard any acorns that show signs of damage, mold, or insect infestation.
- Soaking the Acorns: To improve the chances of germination, soak the acorns in water for 24 to 48 hours. This process, known as stratification, mimics the natural conditions the acorns would experience in the wild during the winter months.
- Choosing a Stratification Method: There are two main methods of stratifying acorns: wet stratification and dry stratification. For wet stratification, place the soaked acorns in a plastic bag with slightly damp peat moss, vermiculite, or sand. Seal the bag and store it in the refrigerator for 60 to 90 days. Dry stratification involves placing the soaked acorns in a breathable container such as a mesh bag or a tray with peat moss or sawdust. Keep the container in a cool and dry place, like a garage or a basement, for the stratification period.
- Monitoring the Acorns: Regularly check the acorns during the stratification period to ensure they remain moist. If the acorns in the bag show signs of drying out, lightly mist them with water. If condensation forms on the inside of the bag, it’s a sign that the acorns are too wet, so open the bag for a short period to allow excess moisture to escape.
After the stratification period is complete, remove the acorns from their stratification containers and discard any that show signs of mold or rot. The remaining acorns are now ready for germination.
With the acorns properly prepared, you’re ready to move on to creating the ideal germination environment in the next step.
Step 3: Creating the Ideal Germination Environment
Creating the ideal germination environment is essential to ensure successful sprouting and growth of your bur oak acorns. Follow these steps to provide the optimal conditions for germination:
- Choosing the Right Container: Select a container that is at least 6 inches deep and has drainage holes at the bottom. This will allow excess water to drain away and prevent the acorns from sitting in stagnant water, which can lead to rotting.
- Preparing the Soil: Use a well-draining potting mix composed of a combination of peat moss, perlite, and compost. Fill the container with the potting mix, leaving about an inch of space from the rim.
- Planting the Acorns: Make a small indentation in the soil about an inch deep. Place the prepared acorns in the indentation, pointy end facing upwards. It’s recommended to plant multiple acorns in case some do not germinate.
- Watering: Gently water the soil until it is evenly moist, but not soaked. Ensure that the water reaches the depth of the acorns without causing waterlogging. Maintain moisture by misting the soil lightly if it starts to dry out.
- Location: Place the container in a warm and well-lit area, such as a sunny windowsill or a greenhouse. Bur oaks prefer full sun, so choose a location that receives at least 6 hours of sunlight per day.
- Temperature: Keep the germination environment at a consistent temperature of around 70-75°F (21-24°C). Avoid extreme temperature fluctuations, as they can hinder germination.
- Humidity: To maintain the necessary humidity levels, you can cover the container with a clear plastic bag or use a humidity dome. This prevents excessive moisture loss and creates a greenhouse effect for the acorns.
Monitor the moisture level of the soil regularly and adjust watering as needed. It’s important to keep the soil moist but not overly wet, as this can lead to rotting. Be patient, as it can take anywhere from a few weeks to a few months for the acorns to germinate. Once you see signs of sprouting, it’s time to move on to the next step: caring for the germinating acorn.
Plant the acorn in a pot with well-draining soil, and keep it moist. Place the pot in a sunny spot and wait for the acorn to germinate, which can take several weeks. Keep the soil consistently moist, but not waterlogged, to help the acorn sprout.
Step 4: Planting the Acorn
Once your bur oak acorn has successfully germinated and developed a healthy root system, it’s time to plant it in a suitable location. Follow these steps to ensure proper planting:
- Selecting the Planting Site: Choose a location in your garden or landscape that provides ample sunlight, as bur oaks thrive in full sun. Ensure the soil is well-draining, as waterlogged soil can lead to root rot. Avoid areas prone to frost pockets or excessive wind exposure.
- Preparing the Planting Hole: Dig a hole that is wider and slightly deeper than the root system of your germinated acorn. The depth should allow the acorn to be planted at the same level as or slightly higher than its current position.
- Amending the Soil: Mix organic matter, such as compost or well-rotted manure, with the excavated soil. This helps to improve soil fertility and drainage. Avoid using chemical fertilizers at this stage, as they can harm the young and delicate root system.
- Planting the Acorn: Carefully remove the germinated acorn from its container, taking care not to disturb the roots. Place it in the center of the planting hole and gently backfill with the amended soil mixture. Firmly but gently press down the soil around the base of the seedling to secure it in place.
- Watering: Give the newly planted acorn a thorough watering to settle the soil and provide moisture to the roots. Afterward, water regularly to keep the soil consistently moist but not waterlogged. Provide deep watering rather than frequent shallow watering.
- Mulching: Apply a layer of organic mulch, such as wood chips or shredded bark, around the base of the seedling. This helps to retain moisture, suppress weed growth, and regulate soil temperature. Keep the mulch a few inches away from the trunk to prevent rot.
It’s worth noting that bur oak trees have an extensive root system, so be sure to give your seedling enough space to grow and develop. As the tree matures, its roots will spread out to anchor it firmly and provide access to water and nutrients.
Continue to water and monitor the newly planted acorn regularly, especially during dry spells or periods of drought. With proper care and maintenance, your bur oak seedling will continue to thrive and grow into a magnificent tree.
In the next step, we’ll cover essential care tips for the germinating acorn to ensure its healthy development.
Read more: How To Store Acorns For Squirrels
Step 5: Caring for the Germinating Acorn
Once your bur oak acorn has germinated and been planted, it requires proper care and attention to ensure its healthy growth and development. Follow these guidelines to provide the necessary care for your germinating acorn:
- Watering: Water the germinating acorn regularly to keep the soil moist but not waterlogged. Aim to provide a deep watering once or twice a week, depending on the weather conditions. Check the moisture level of the soil by sticking your finger about an inch into the soil—if it feels dry, it’s time to water. Be mindful not to let the soil dry out completely or become too soggy.
- Fertilizing: Avoid fertilizing your germinating acorn during its first year of growth. The small root system is sensitive and can be harmed by the excess nutrients. Instead, focus on providing a nutrient-rich soil during the initial planting stage. After the first year, you can start fertilizing sparingly with a balanced slow-release fertilizer following the instructions on the packaging.
- Weeding: Regularly inspect the area around your germinating acorn and remove any weeds or competing vegetation. Weeds can compete with the young tree for nutrients and water, hindering its growth. Be careful when weeding to avoid disturbing the shallow root system of the bur oak.
- Pruning: Resist the temptation to prune the young bur oak acorn. Pruning can be done once the tree has established itself and is in its dormant period (typically during late winter or early spring). At that time, you can remove dead, damaged, or crossing branches to improve the tree’s structure and health.
- Protection: Protect your germinating acorn from potential threats such as pests or harsh weather conditions. Use fencing or tree guards to prevent animals from nibbling on the tender bark. Shield the tree from extreme temperature variations, frost, or strong winds using mulch or frost cloth.
- Observation: Regularly observe the growth and development of your germinating acorn. Look for any signs of pests, disease, or stress. Early detection allows for timely intervention, preventing any major issues from arising.
By providing proper care and attention, you are setting the stage for your bur oak to flourish and become a beautiful and resilient tree over time. Stay patient, as it may take several years for your germinating acorn to reach its full potential.
Now that you have a healthy and well-cared-for germinating acorn, it’s time to move on to the final step: transplanting it into a larger pot or outdoors.
Step 6: Transplanting the Germinated Acorn to a Larger Pot or Outdoors
As your bur oak acorn continues to grow and develop, it will eventually outgrow its initial container. Transplanting the germinated acorn into a larger pot or outdoors is necessary to provide ample space for its roots to expand and allow for continued growth. Here’s how you can successfully transplant your germinated acorn:
- Timing: The best time to transplant your germinated acorn is during its dormant season, which is typically in late winter or early spring. Transplanting during this period allows the tree to adjust to its new environment before the growing season begins.
- Selecting a Larger Pot or Planting Site: If you choose to transplant the acorn into a larger pot, ensure it has sufficient drainage holes and is at least one size up from its current container. If you prefer planting outdoors, select a suitable site with well-draining soil and ample sunlight, ensuring it provides enough space for the mature bur oak to grow.
- Preparing the New Pot or Planting Hole: If you are using a larger pot, fill it with a well-draining potting mix, leaving enough space for the acorn’s root ball. If planting outdoors, dig a hole that is wide and deep enough to comfortably accommodate the root system of the acorn.
- Removing the Acorn: Carefully remove the germinated acorn from its current container, ensuring you avoid damaging the roots. Gently loosen the soil around the root ball and untangle any circling roots to encourage healthy growth.
- Placing the Acorn: Position the germinated acorn in the center of the new pot or planting hole, making sure it sits at the same level as or slightly higher than its previous position. Backfill the pot or hole with soil, gently firming it around the root ball to ensure stability.
- Watering: Give the newly transplanted acorn a thorough watering to settle the soil and provide moisture to the roots. Afterward, continue to water it regularly to keep the soil consistently moist, especially during the initial establishment period.
- Mulching and Stake Support: Apply a layer of organic mulch around the base of the acorn to conserve moisture, suppress weed growth, and regulate soil temperature. Consider staking the tree for extra support if necessary, using soft ties to avoid damaging the young trunk.
- Monitoring and Care: Keep a close eye on your transplanted acorn and provide ongoing care as needed. Regularly monitor its watering needs, inspect for pests or diseases, and ensure it receives adequate sunlight and nutrients.
Remember, bur oak trees are known for their resilience, but it’s still essential to provide proper care during and after the transplanting process. Be patient, as it may take several years for the tree to establish itself fully and mature. With time and attention, your bur oak will reward you with its beauty and grace.
Congratulations! You have successfully completed all the steps to germinate, care for, and transplant a bur oak acorn. Enjoy watching your tree grow and flourish as it becomes a beautiful addition to your garden or landscape.
Hopefully, this guide has been informative and helpful in your journey to grow a bur oak from an acorn. Happy gardening!
Conclusion
Growing a bur oak tree from an acorn is a rewarding and fulfilling experience that allows you to witness the miracle of nature firsthand. Throughout this comprehensive guide, we have explored the step-by-step process of germinating a bur oak acorn and nurturing it into a healthy sapling.
From collecting the perfect bur oak acorns to preparing them for germination and creating the ideal germination environment, each step plays a crucial role in ensuring successful growth. With proper care, including watering, fertilizing (after the first year), pruning (when necessary), and protecting the young tree, you can create the ideal conditions for your bur oak to thrive.
Transplanting the germinated acorn into a larger pot or outdoors is an important milestone. It provides the necessary space for the roots to expand and allows the tree to continue its growth journey. By choosing the right planting site or pot, preparing the appropriate soil, and ensuring proper watering and care, you set the stage for a healthy and beautiful bur oak.
Throughout the entire process, patience is key. It may take several years for your bur oak to reach its full height and grandeur. But with each passing season, you will witness the growth and transformation of your tiny acorn into a magnificent tree that adds beauty, shade, and ecological value to your garden or landscape.
Remember to always observe and adapt to the needs of your bur oak tree. Be attentive to signs of distress, pests, or disease, and take timely action to ensure the tree’s well-being. With nurturing and care, your bur oak will become a lasting legacy, providing shade, shelter, and a connection to nature for generations to come.
So, with enthusiasm and dedication, embark on this exciting gardening adventure, and embrace the joy of growing a bur oak from an acorn. Happy gardening!
Frequently Asked Questions about How To Germinate A Bur Oak Acorn
Was this page helpful?
At Storables.com, we guarantee accurate and reliable information. Our content, validated by Expert Board Contributors, is crafted following stringent Editorial Policies. We're committed to providing you with well-researched, expert-backed insights for all your informational needs.


0 thoughts on “How To Germinate A Bur Oak Acorn”