Home>Garden Essentials>How To Germinate Malabar Spinach
Garden Essentials
How To Germinate Malabar Spinach
Modified: March 16, 2024
Learn how to germinate Malabar Spinach in your garden and enjoy fresh, nutritious leaves all season long. Get expert tips and step-by-step instructions!
(Many of the links in this article redirect to a specific reviewed product. Your purchase of these products through affiliate links helps to generate commission for Storables.com, at no extra cost. Learn more)
Introduction
Welcome to the world of gardening! If you’re an avid gardener or someone who simply enjoys the beauty of plants, then you’ve come to the right place. In this article, we’re going to explore the fascinating process of germinating Malabar spinach—a vibrant and nutritious leafy green that is popular among gardeners and culinary enthusiasts alike.
Malabar spinach, also known as Basella alba or vine spinach, is a unique plant with lush green leaves and a distinctively tangy flavor. Originating from Southeast Asia, this vegetable is now grown all over the world for its versatility in cooking and its impressive nutritional profile.
Germinating Malabar spinach can be a rewarding and fulfilling experience. Not only will you have the satisfaction of growing your own food, but you’ll also get to witness the transformation from a tiny seed to a thriving plant. With the right guidance and a bit of patience, you’ll soon be enjoying your very own homegrown Malabar spinach.
In this article, we’ll guide you through the step-by-step process of germinating Malabar spinach, from preparing the seeds to providing the ideal growing conditions. We’ll also cover how to care for the seedlings, common troubleshooting issues, and the best time to harvest your Malabar spinach plants.
Whether you’re a seasoned gardener looking to add a new vegetable to your repertoire or a beginner eager to try your hand at growing your own food, this article is for you. So, let’s dive in and learn how to germinate Malabar spinach!
Key Takeaways:
- Germinating Malabar spinach is a fun and rewarding process that involves preparing the seeds, choosing the planting method, and providing ideal growing conditions to ensure successful growth.
- Harvesting Malabar spinach leaves allows you to enjoy fresh and nutritious greens in various dishes, from salads to smoothies, while encouraging continuous growth for a bountiful supply.
Read more: How Long Does It Take Spinach To Germinate
Step 1: Gathering Supplies
Before you begin the process of germinating Malabar spinach, it’s important to gather all the necessary supplies. Having everything ready will ensure a smooth and efficient germination process. Here are the supplies you’ll need:
- Malabar Spinach Seeds: Start with high-quality Malabar spinach seeds. These can be purchased from local nurseries, garden centers, or reputable online seed suppliers. Make sure to check the expiry date and choose seeds that are viable and fresh.
- Seed Trays or Pots: You’ll need containers to sow your Malabar spinach seeds. Seed trays with individual compartments or small biodegradable pots are ideal for germination.
- Seed Starting Mix: Use a well-draining seed starting mix that is light and fluffy. This provides the right conditions for the seeds to germinate and grow.
- Watering Can or Spray Bottle: A watering can with a fine rose or a spray bottle will help you provide moisture to the seeds without disturbing them.
- Labels: It’s important to label your containers to keep track of the different varieties of Malabar spinach or any other useful information.
- Gardening Tools: Have basic gardening tools handy, such as a hand trowel or a small garden spade, for planting and transplanting the seedlings.
- Grow Lights (Optional): If you’re starting your seeds indoors, consider using grow lights to provide adequate light for germination and early growth.
- Heat Mat (Optional): A heat mat placed under the seed trays can help maintain consistent soil temperature, promoting faster and more successful germination.
Once you’ve gathered these supplies, you’ll be well-prepared to begin the germination process of your Malabar spinach seeds. Remember to check that everything is clean and in good condition before starting. Now that you’re ready, let’s move on to preparing the seeds in the next step.
Step 2: Preparing the Seeds
Properly preparing the seeds is crucial for successful germination. Here’s what you need to do:
- Soaking the Seeds: Start by soaking the Malabar spinach seeds in water for about 24 hours. This helps to soften the hard seed coat and promote faster germination. Use room temperature water and a glass or container that is large enough to accommodate the seeds.
- Scarifying the Seeds: After soaking, some gardeners recommend scarifying the Malabar spinach seeds to further enhance germination. Scarification involves gently scratching or nicking the seed coat with a file or sandpaper. This process helps water penetrate the seed coat and improves seed viability. However, it’s important to be cautious and avoid damaging the seeds or removing too much of the seed coat.
- Stratifying (Optional): Stratifying the Malabar spinach seeds can also increase germination rates, especially if you live in a warm climate. This process simulates the plant’s natural winter dormancy period. To stratify the seeds, place them in a damp paper towel or in a plastic bag with some moist vermiculite or peat moss. Leave them in the refrigerator for 1 to 2 weeks before sowing.
- Drying the Seeds: If the seeds have been soaked, scarified, or stratified, allow them to dry slightly before sowing. Spread them out on a paper towel or a clean surface and let them air dry for a few hours. Make sure they are completely dry before moving on to the next step.
By following these steps to prepare your Malabar spinach seeds, you’ll significantly enhance their germination potential. Soaking, scarifying, and stratifying can help break the seed dormancy, allowing the seeds to sprout more readily. Once your seeds are ready, it’s time to move on to selecting the planting method in the next step.
Step 3: Choosing the Planting Method
When it comes to planting Malabar spinach, you have a few options to choose from. Consider the following methods and select the one that best suits your gardening space and preferences:
- Direct Sowing: Direct sowing involves planting the Malabar spinach seeds directly into the ground or containers where they will grow. This method works well if you have a large garden space or if you prefer to grow the plants in their final location from the beginning. Prepare the soil by loosening it and removing any weeds. Make small shallow holes or furrows, spaced around 6 to 8 inches apart. Place one or two seeds in each hole or space and cover them lightly with soil.
- Seed Trays or Pots: Starting the seeds in trays or pots indoors or in a greenhouse allows for better control over the growing environment. Fill the trays or pots with the seed starting mix, and sow one or two Malabar spinach seeds in each cell or pot, covering them with a thin layer of soil. This method gives you the advantage of being able to closely monitor and care for the seedlings before transplanting them outdoors.
- Pre-Germination: If you want to give your Malabar spinach seeds a head start, you can pre-germinate them. To do this, place the soaked and slightly dried seeds between damp paper towels or in a damp cloth. Keep them in a warm area, such as on top of the refrigerator or near a heat source, for a few days until you see small white roots emerging. Once the roots appear, carefully transfer the pre-germinated seeds to the planting method of your choice.
Each planting method has its benefits, and the choice ultimately depends on your personal preferences and gardening situation. Direct sowing is convenient for those with ample garden space, while using seed trays or pots provides more control over the germination process. Pre-germination can give your seeds a boost and increase the chances of successful sprouting.
Now that you’ve selected your preferred planting method, let’s move on to the exciting part—planting the Malabar spinach seeds! Follow the next step to ensure proper planting and maximize the potential for successful germination.
Step 4: Planting the Seeds
Now that you have prepared your Malabar spinach seeds and chosen a planting method, it’s time to sow them and kickstart the germination process. Here’s how to plant the seeds:
- Prepare the Soil: If you’re direct sowing in the ground, prepare the soil by loosening it with a garden fork or tiller. Remove any weeds or debris, ensuring a clean and fertile planting area. If you’re using seed trays or pots, fill them with a quality seed starting mix, leaving a small space at the top.
- Sow the Seeds: Gently press the Malabar spinach seeds onto the soil surface, either in the prepared ground or in the cells of the seed trays. Space the seeds according to the specific seed packet instructions, generally around 6 to 8 inches apart. If you’re using seed trays, sow one or two seeds per cell.
- Cover and Water: After sowing the seeds, lightly cover them with a thin layer of soil or vermiculite. This will provide some protection and promote moisture retention. Water the soil gently using a watering can or spray bottle, ensuring it is evenly moist but not overly saturated.
- Provide Ideal Conditions: Place your planted seeds in a location that receives bright but indirect sunlight. If you’re using seed trays, consider placing a clear plastic cover or a plastic bag over them to create a greenhouse-like environment. Make sure to provide good ventilation and remove the cover once the seedlings begin to emerge.
Remember to label your containers or mark the planting areas if you’re growing different varieties of Malabar spinach. This will help you identify and track their progress as they grow.
Now that your Malabar spinach seeds are planted, it’s time to move on to the next step—providing the ideal growing conditions to nurture their germination and growth. Let’s explore how to do that in the following step.
Step 5: Providing the Ideal Growing Conditions
For your Malabar spinach seeds to germinate and grow into healthy plants, it’s important to create the optimal growing conditions. Here’s what you need to do:
- Sunlight: Malabar spinach thrives in bright, indirect sunlight. Place your seed trays or direct-sown areas in a location that receives at least 4 to 6 hours of sunlight per day. If you’re growing indoors, consider using grow lights to supplement the natural sunlight.
- Temperature: Malabar spinach prefers warm temperatures for germination and growth. Maintain a consistent temperature range between 70 and 90°F (21 and 32°C). If the ambient temperatures are lower, consider using a heat mat underneath the seed trays to provide gentle warmth.
- Moisture: Malabar spinach requires consistent moisture but should not be waterlogged. Keep the soil evenly moist, but avoid overwatering. Use a watering can or spray bottle to water gently, ensuring the soil remains damp but not saturated. Check the moisture levels regularly and adjust watering according to the weather conditions.
- Air Circulation: Good air circulation is important for preventing fungal diseases and promoting healthy growth. If you’re using a plastic cover or bag to create a greenhouse-like environment, make sure to provide ventilation by opening the cover or bag for a few hours each day once the seedlings emerge.
- Humidity: Malabar spinach prefers a moderate level of humidity. If the air in your growing area is dry, consider using a humidifier or placing a tray of water nearby to create a slightly more humid environment.
- Support: As the Malabar spinach plants grow, they will develop vines that need support. If you are direct sowing in the ground, install trellises or stakes near the planting area to provide support for the climbing plants. If you’re growing in containers, use a trellis or bamboo sticks within the pot to guide the vines upwards.
By maintaining these ideal growing conditions, you will provide the best environment for your Malabar spinach seeds to germinate and thrive. Consistent sunlight, temperature, moisture, and proper support will enhance their growth and ensure healthy plants.
Now that you’ve created the perfect growing conditions for your Malabar spinach seeds, it’s time to move on to the next step—caring for the germinating seeds. Let’s explore how to do that in the following step!
Soak Malabar spinach seeds in water for 24 hours before planting to help speed up the germination process. Keep the soil consistently moist and warm for best results.
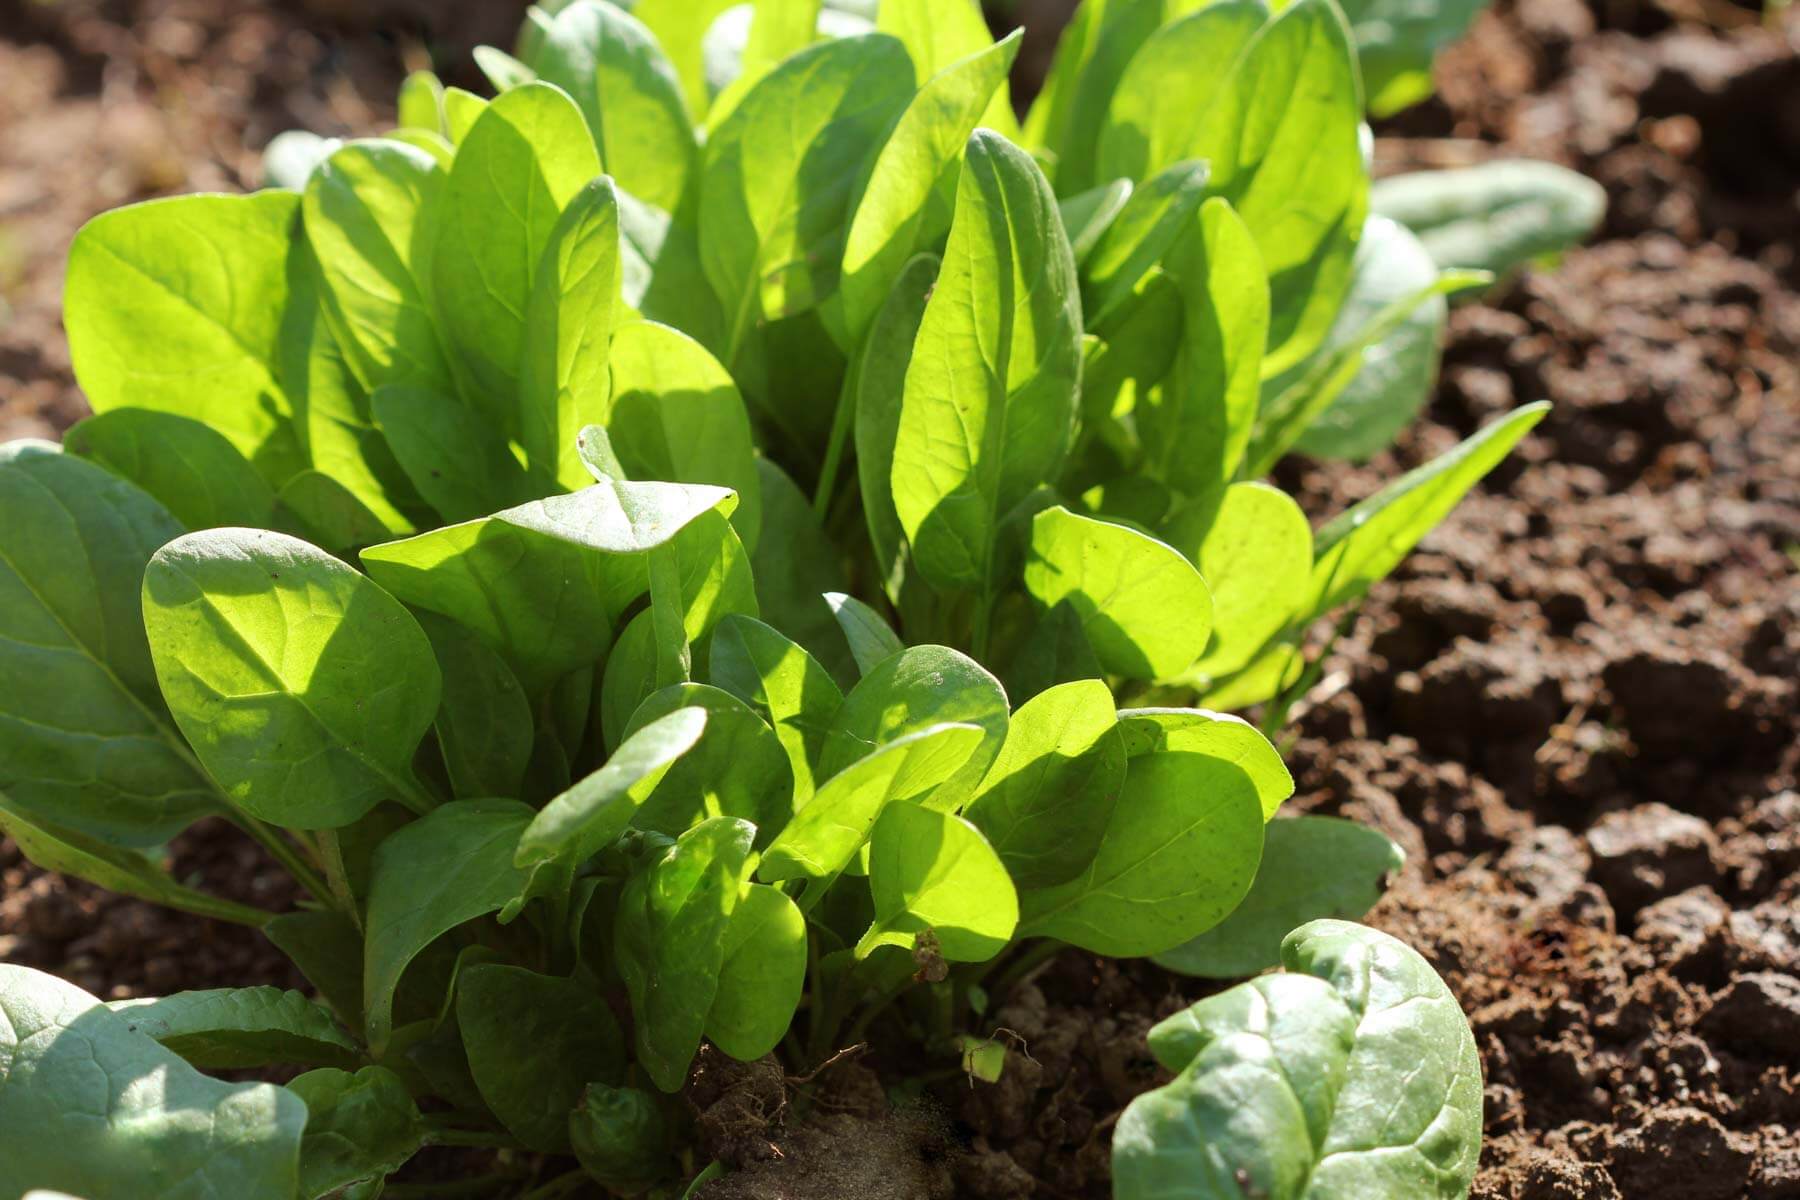
Step 6: Caring for Germinating Malabar Spinach
As your Malabar spinach seeds start to germinate and sprout, it’s important to provide them with proper care to ensure healthy growth. Here are some tips for caring for your germinating Malabar spinach:
- Watering: Continue to monitor the moisture levels in the soil and water the seedlings as needed. Aim to keep the soil consistently moist, but avoid overwatering, which can lead to root rot. Water gently using a watering can or spray bottle to prevent dislodging the delicate seedlings.
- Thinning: If you planted more than one seed per cell or hole, you may need to thin out the weaker seedlings to allow the stronger ones to grow unobstructed. Choose the healthiest-looking seedling and carefully snip off the excess ones at the soil level, taking care not to disturb the remaining plant.
- Fertilizing: Once the seedlings have developed their first set of true leaves, you can begin feeding them with a balanced liquid fertilizer. Dilute the fertilizer according to the instructions on the packaging and apply it every two weeks. Be careful not to over-fertilize, as this can lead to nutrient imbalances or burn the delicate plants.
- Support: As the Malabar spinach plants grow, they will produce long vines that require support. If you’re growing in the ground, guide the vines towards trellises or stakes to help them climb. For container gardening, use a trellis or bamboo sticks within the pot to support the growing vines.
- Weed Control: Regularly inspect the growing area and remove any weeds that may compete with your Malabar spinach plants for nutrients, water, and sunlight. Use caution when weeding to avoid disturbing the fragile seedlings.
- Pest Management: Keep an eye out for common garden pests such as aphids, slugs, or snails. If you notice any pest damage, take appropriate measures to control them. This can include handpicking the pests, using organic pest control methods, or introducing beneficial insects.
By providing the right care during the germination and early growth stages, you will set the foundation for strong and healthy Malabar spinach plants. Regular watering, thinning, fertilizing, and pest management will promote vigorous growth and help your plants thrive.
Now that you know how to care for your germinating Malabar spinach, let’s move on to the next step—monitoring their progress. Stay attentive and watch as your plants develop and flourish!
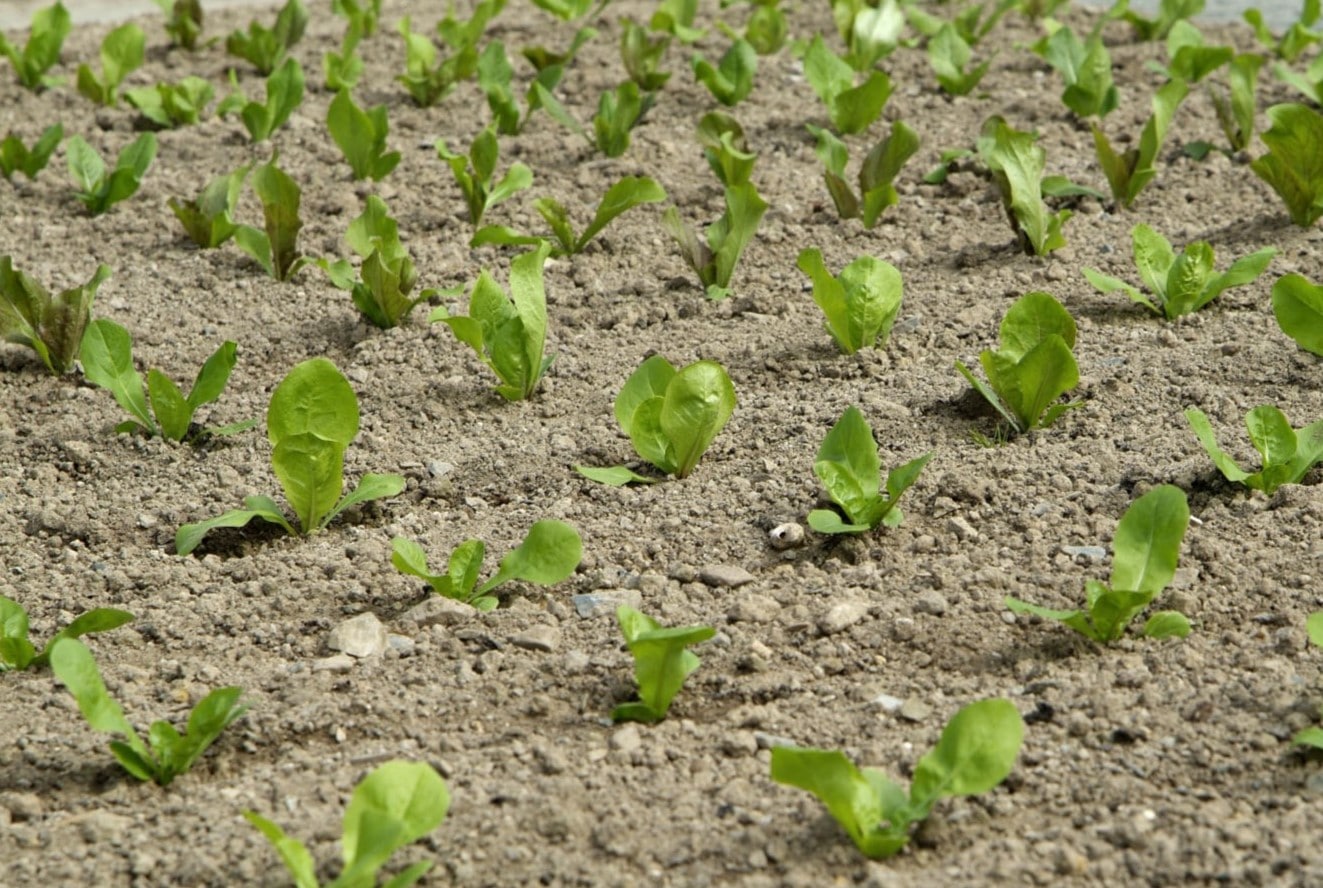
Step 7: Monitoring the Progress
Monitoring the progress of your Malabar spinach plants is an essential part of caring for them and ensuring their successful growth. Here’s how to monitor and track their progress:
- Observation: Take time each day to observe your Malabar spinach plants. Look for any changes in appearance, such as the emergence of new leaves, the growth of vines, or any signs of distress like wilting or discoloration. Regular observation allows you to catch any issues early on and take appropriate action.
- Height and Size: Measure the height of your Malabar spinach plants as they grow. Use a ruler or measuring tape to track their growth progress. Additionally, take note of the overall size of the plants, including the spread of their vines and the number and size of the leaves. This will give you an idea of how well they are developing.
- Leaf Health: Examine the leaves of your Malabar spinach plants for any signs of disease or nutrient deficiencies. Healthy leaves should be vibrant green and free from spots, holes, or yellowing. If you notice any issues, identify the cause and take corrective measures, such as adjusting watering or providing appropriate fertilization.
- Pest Infestation: Keep a close eye on your plants for any signs of pest infestation. Look for chewed leaves, webbing, or visible insects. If you notice any pests, take immediate action to control them and prevent further damage to your Malabar spinach plants. Organic pest control methods and introducing beneficial insects are effective options.
- Growth Rate: Note the rate at which your Malabar spinach plants are growing. Measure their growth incrementally over time to track their progress. This will give you an idea of how quickly they are developing, allowing you to anticipate when they will be ready for transplanting or harvesting.
- Overall Health: Assess the overall health of your Malabar spinach plants. Healthy plants will have strong stems, lush foliage, and vigorous growth. If you notice any signs of weakness or poor health, investigate the cause and take action to remedy the situation. This may involve adjusting growing conditions, providing additional nutrients, or resolving any environmental stressors.
Monitoring the progress of your Malabar spinach plants ensures that you catch any issues early on and make the necessary adjustments to support their growth and development. By regularly observing their appearance, size, leaf health, pest infestation, growth rate, and overall health, you can cultivate strong and thriving plants that will yield an abundant harvest.
Now that you know how to monitor your Malabar spinach plants, let’s move on to the next step—transplanting the seedlings when they are ready. Keep a close eye on their progress and get ready for the exciting step ahead!
Step 8: Transplanting the Seedlings
Once your Malabar spinach seedlings have grown to a certain size and are strong enough, it’s time to transplant them into their permanent growing location. Transplanting allows the plants more space to develop and ensures they have the necessary resources to thrive. Here’s how to transplant your Malabar spinach seedlings:
- Preparing the Transplant Site: Choose a well-draining area in your garden that receives full sun or partial shade. Prepare the soil by removing any weeds or debris and loosen it to allow for easy root penetration. You can also amend the soil with compost or organic matter to enrich its fertility.
- Watering the Seedlings: Before transplanting, water the seedlings gently to loosen the soil around their roots. Moist soil will help prevent excessive stress on the plants during the transplant process.
- Transplanting: Dig a hole in the prepared transplant site that is deep and wide enough to accommodate the entire root ball of your Malabar spinach seedling. Carefully lift the seedling from its container or seed tray, making sure to keep the soil and roots intact. Place the seedling into the hole, ensuring it is at the same depth it was growing in its previous location. Fill the hole with soil, gently firming it around the plant to eliminate any air pockets.
- Watering Again: Once the seedling is transplanted, water it thoroughly to settle the soil around the roots. This will help reduce transplant shock and ensure the plant is well-established in its new location.
- Providing Support: If you’re growing Malabar spinach varieties that are climbers, provide them with support at the time of transplanting. Install trellises, stakes, or any other support system that will allow the vines to climb and spread as they grow.
- Spacing: Space your Malabar spinach plants according to the specific variety and their growth habit. Generally, they should be spaced at least 12 to 18 inches apart to allow for proper air circulation and growth. Follow the recommended spacing guidelines provided on the seed packet or plant label.
- Post-Transplant Care: After transplanting, monitor your Malabar spinach plants closely and continue to provide regular care, including watering, fertilizing, and pest management. Protect the seedlings from extreme weather conditions, such as strong winds or heavy rainfall, if necessary.
Transplanting your Malabar spinach seedlings sets them up for success in their permanent growing location. With proper care and attention, they will continue to grow and thrive, eventually producing a bountiful harvest of delicious and nutritious leaves.
Now that you’ve successfully transplanted your seedlings, it’s time to move on to the next step—troubleshooting common issues that may arise during the growing process. Stay vigilant and address any challenges that come your way!
Read more: How To Store Washed Spinach
Step 9: Troubleshooting Common Issues
While growing Malabar spinach can be a rewarding experience, it’s not uncommon to encounter some challenges along the way. Here are a few common issues that may arise and how to troubleshoot them:
- Poor Germination: If you’re experiencing poor germination or no sprouting at all, check the quality of your seeds. Ensure that they are fresh and viable. If the seeds are old or have been stored improperly, they may have reduced germination rates. Consider purchasing new seeds from a reputable source.
- Pest Infestation: Malabar spinach is generally resilient to pests; however, occasional infestations may occur. Common pests include aphids, slugs, and snails. Control pests by manually removing them, applying organic pest control solutions, or introducing beneficial insects such as ladybugs or lacewings.
- Disease: Malabar spinach is typically resistant to diseases, but overly wet conditions can lead to fungal issues such as root rot or powdery mildew. Ensure proper drainage and avoid overwatering. If affected, improve air circulation, and consider using organic fungal sprays or treatments recommended for the specific disease.
- Nutrient Deficiencies: Yellowing leaves or stunted growth can be signs of nutrient deficiencies. Malabar spinach requires well-balanced soil with adequate levels of nitrogen, phosphorus, and potassium. Use a balanced organic fertilizer to provide essential nutrients or amend the soil with compost or organic matter to improve its fertility.
- Environmental Stress: Malabar spinach thrives in warm climates. If temperatures drop below 50°F (10°C), the plants may struggle or even die. Protect them from cold drafts or frost by covering them with a cloth or moving them indoors. Additionally, avoid excessive heat or extended periods of drought, as these can stress the plants.
- Improper Watering: Overwatering or underwatering can negatively impact Malabar spinach plants. Strive for consistent soil moisture, allowing the top inch of soil to dry out slightly between waterings. Avoid waterlogged conditions that can lead to root rot, while also preventing the soil from becoming overly dry and causing stress to the plants.
- Stunted Growth: If your Malabar spinach plants are not growing as expected, review their growing conditions. Ensure they are receiving adequate sunlight, proper temperatures, and appropriate spacing. Adjust the environmental factors as necessary to encourage healthy growth.
By troubleshooting these common issues and taking appropriate measures, you can overcome challenges and ensure the health and vitality of your Malabar spinach plants. Regular monitoring and proactive care are key to addressing any problems that may arise during the growing process.
Now that you are equipped with troubleshooting strategies, it’s time to move on to the final step—harvesting your Malabar spinach leaves and enjoying the fruits of your labor!
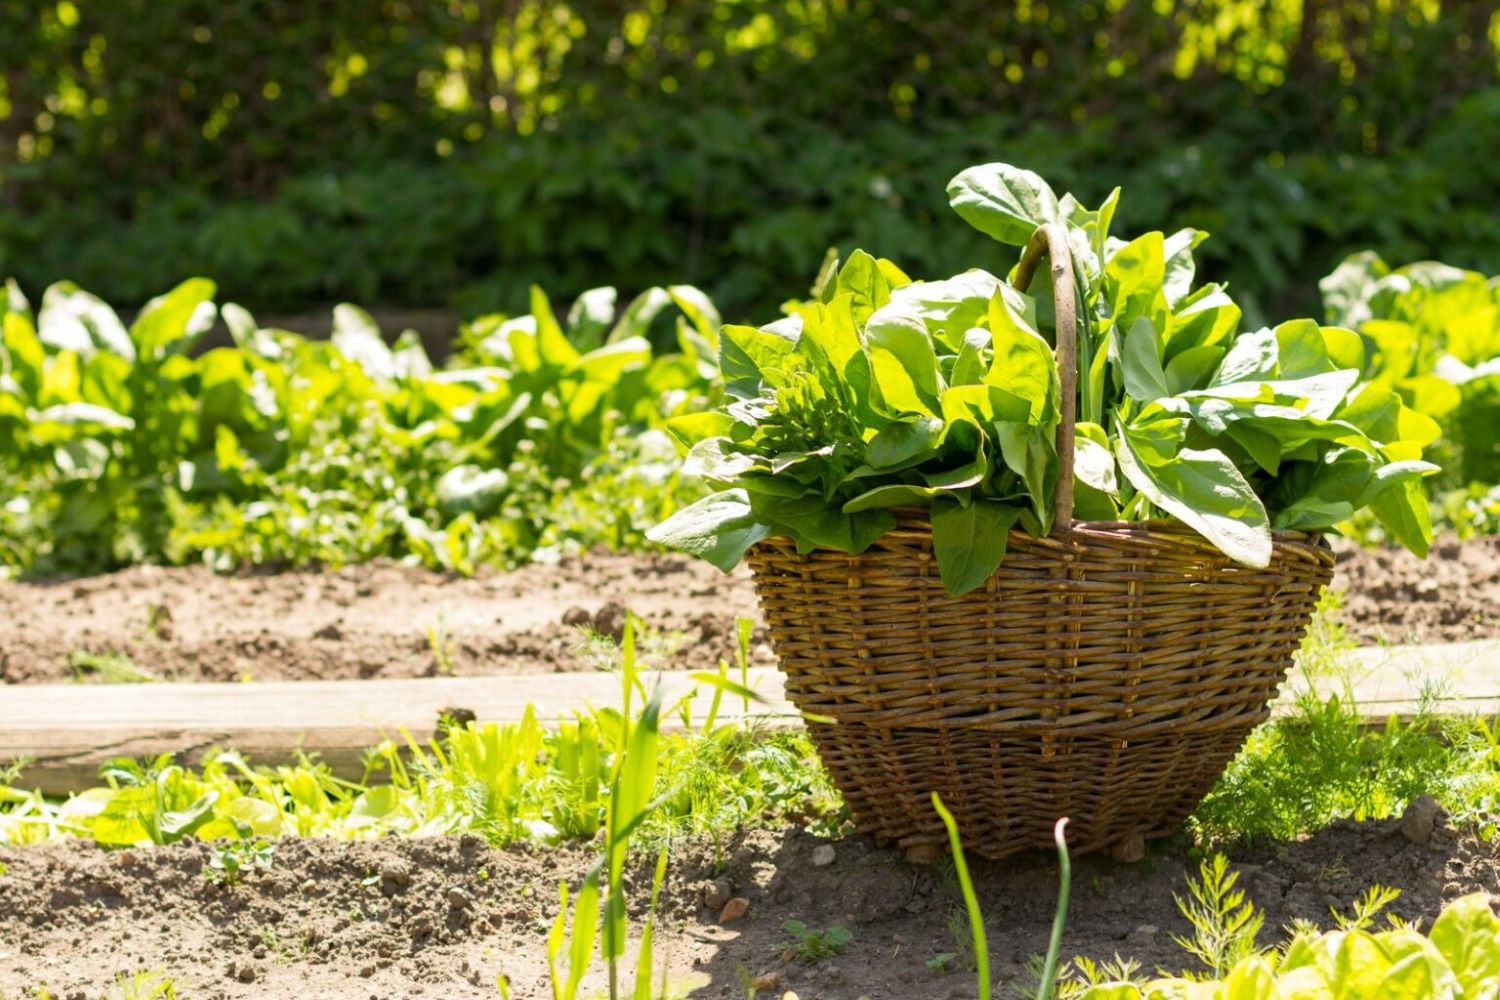
Step 10: Harvesting Malabar Spinach
Harvesting Malabar spinach is an exciting and rewarding step in the gardening process. Here’s how to harvest your Malabar spinach leaves for optimal freshness and flavor:
- Wait for Adequate Growth: Allow your Malabar spinach plants to reach a good size before harvesting. Typically, you can start harvesting the leaves when the plants have grown at least 6 to 8 inches in height and have developed several sets of leaves.
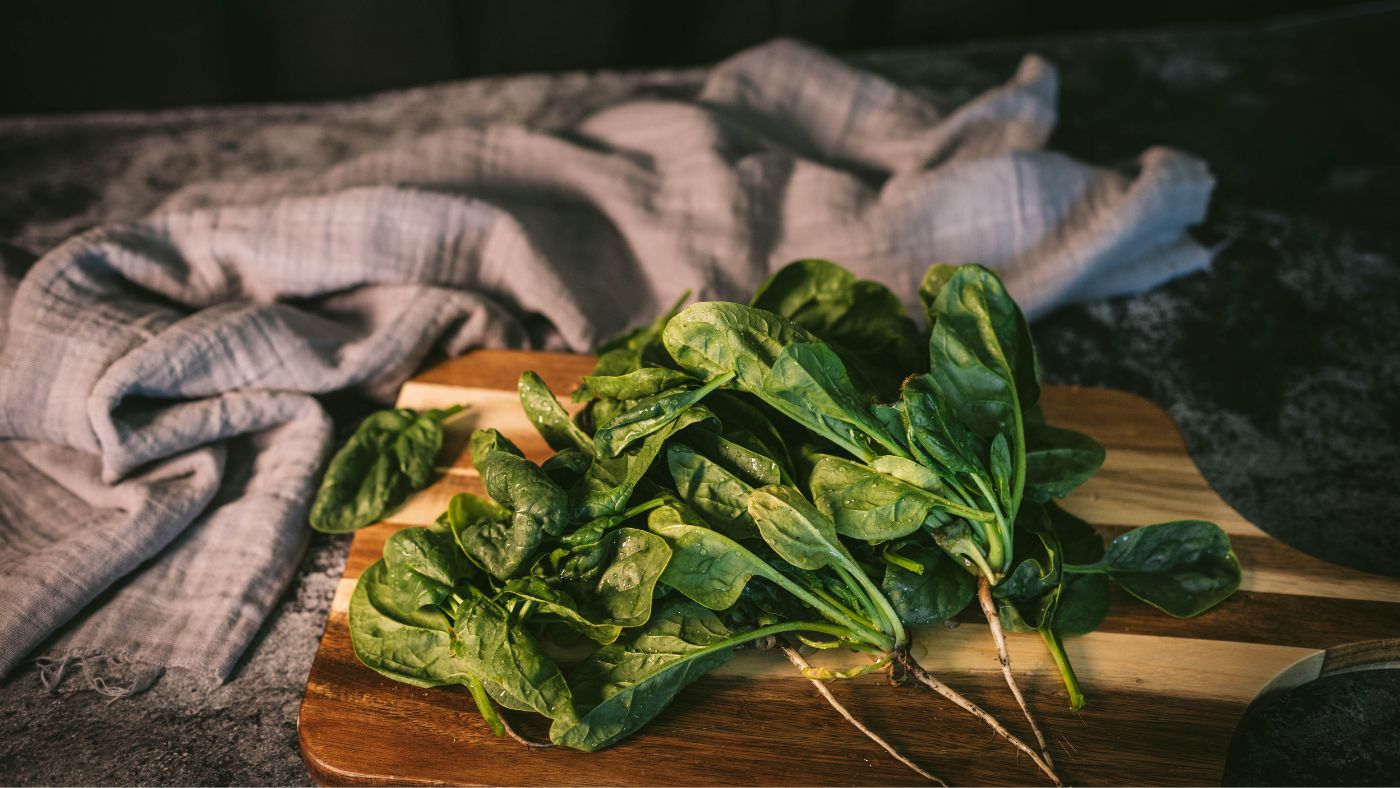
- Select the Leaves: When harvesting, choose the mature, fully developed leaves. Look for leaves that are large, vibrant green, and free from any signs of damage or discoloration. Avoid harvesting the younger, smaller leaves as they need time to grow and contribute to the overall health of the plant.
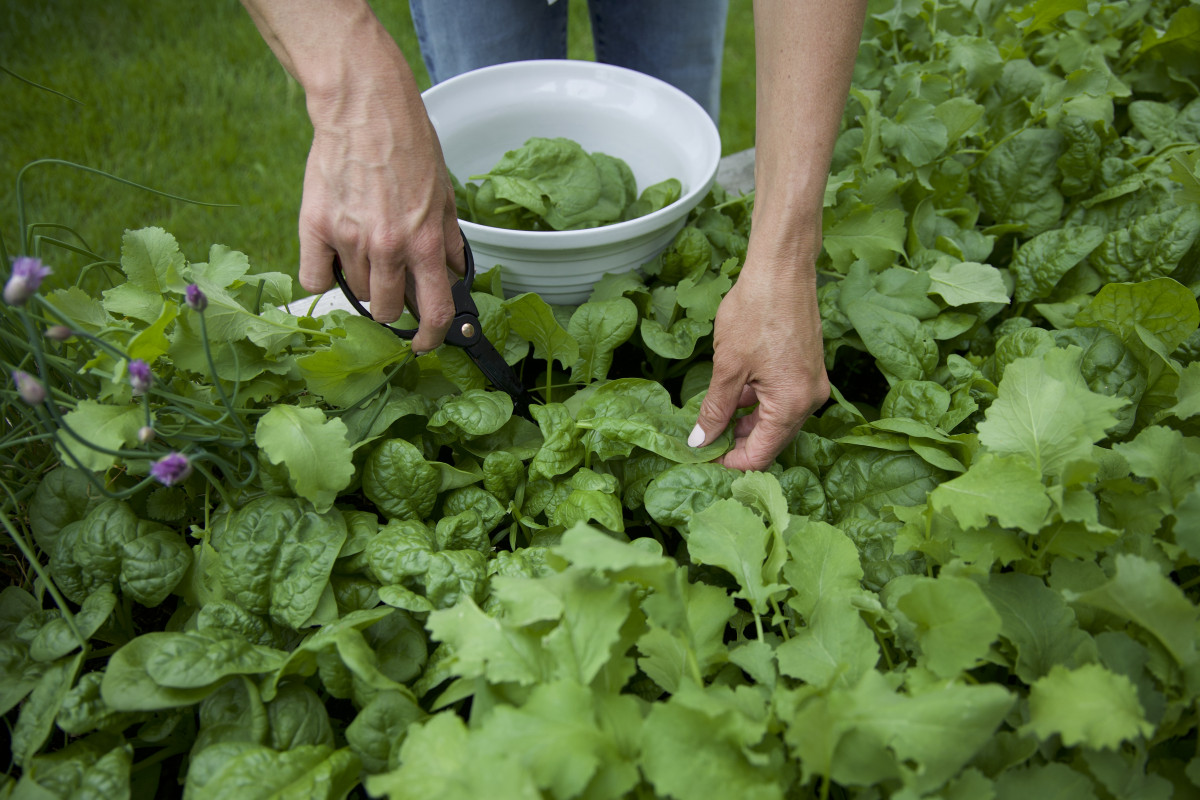
- Harvesting Method: To harvest the leaves, you have two options. The first is to cut individual leaves, preferably with scissors or gardening shears, at the base of the stem where they attach to the main vine. This method allows the plant to continue producing new leaves. The second option is to cut the entire vine near the base, especially if you plan to use a large quantity of leaves at once for cooking or preserving purposes.
- Regular Harvesting: Regularly harvest the mature leaves to encourage continuous growth and higher yields. The more you harvest, the more your Malabar spinach plants will produce. Aim to harvest every 2 to 3 days as new leaves emerge.
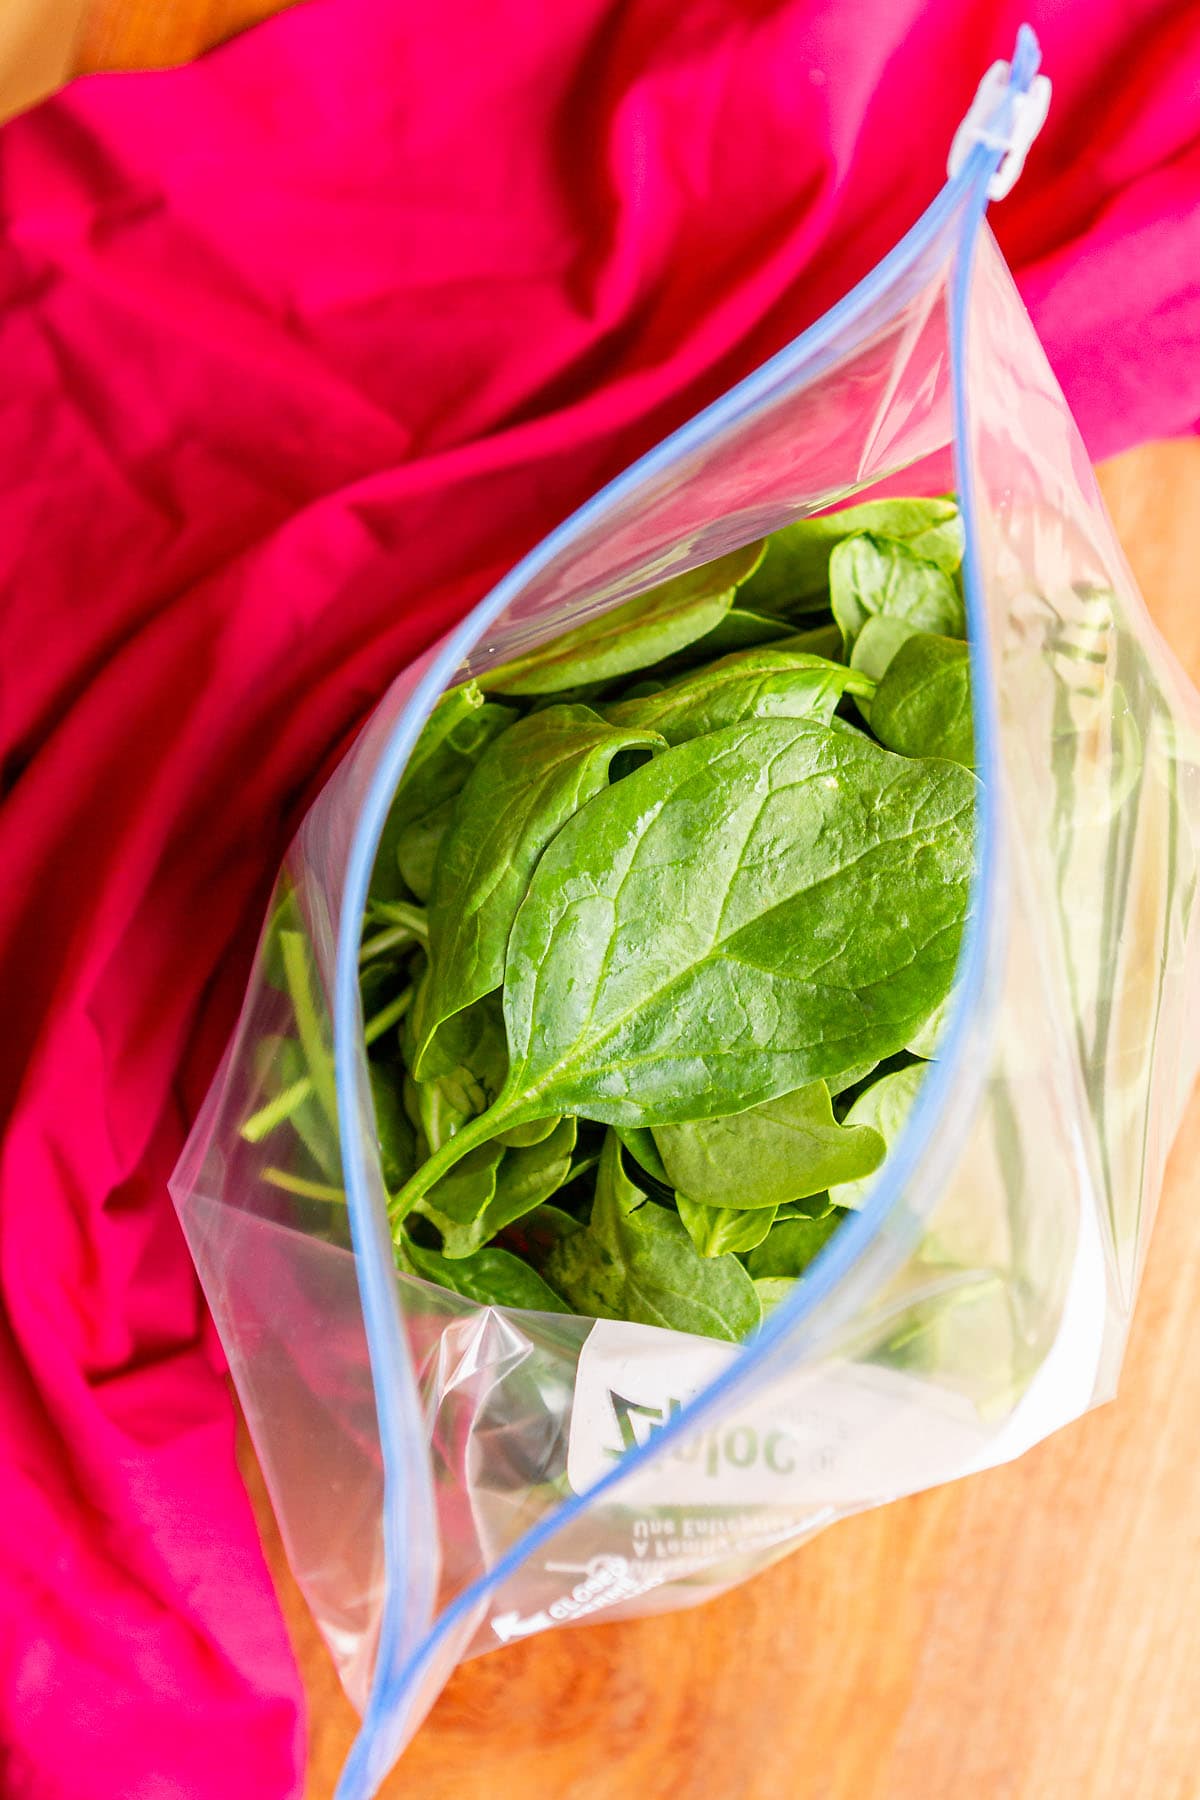
- Storing the Harvested Leaves: After harvesting, immediately rinse the leaves under cool water to remove any dirt or debris. Gently pat them dry or use a salad spinner to remove excess moisture. Store the leaves in a sealed plastic bag or airtight container in the refrigerator. They can stay fresh for up to a week but are best used within a few days for maximum flavor and nutritional value.
- Using Harvested Malabar Spinach: Malabar spinach leaves are versatile and can be used in a variety of dishes. They can be eaten raw in salads, blended into smoothies, steamed, sautéed, or used as a substitute for spinach in various recipes. Experiment with different cooking methods to discover your favorite way to enjoy the unique flavor and texture of Malabar spinach.
By following these guidelines for harvesting Malabar spinach, you’ll be able to enjoy a bountiful supply of fresh and nutritious leaves throughout the growing season. Remember to allow the plants to continue growing and replenishing themselves between harvests, and always harvest with care to minimize damage to the plant.
Now that you’ve successfully harvested your Malabar spinach, take a moment to appreciate the fruits of your labor and savor the delicious flavors that your own homegrown produce brings to the table!
Congratulations on successfully germinating and growing your Malabar spinach plants. Your journey as a gardener has been a rewarding one, and we hope this guide has provided you with the knowledge and confidence to continue exploring the wonders of gardening. Happy growing and happy harvesting!
Conclusion
Growing Malabar spinach is a fascinating and rewarding endeavor that allows you to connect with nature, nurture thriving plants, and enjoy the delicious and nutritious bounty they provide. Throughout this guide, we’ve explored the step-by-step process of germinating Malabar spinach, from gathering supplies to harvesting the leaves.
By following these steps and providing the ideal growing conditions, you can experience the joy of watching your Malabar spinach seeds sprout into vibrant plants. From soaking and preparing the seeds to choosing the planting method and caring for the seedlings, each stage plays a vital role in ensuring successful germination and growth.
Monitoring the progress of your Malabar spinach plants is essential for addressing any challenges that may arise, such as pest infestations, diseases, or nutrient deficiencies. By staying vigilant and taking appropriate measures, you can maintain healthy and thriving plants.
Once your Malabar spinach plants have reached maturity, it’s time to harvest the leaves and enjoy their freshness and flavor in a variety of culinary creations. Remember to harvest regularly to encourage continuous growth and maximize your yield.
Gardening is a journey of learning, patience, and resilience. As you continue to explore the world of gardening, don’t be afraid to experiment, make mistakes, and adapt your strategies. Each experience will contribute to your growth as a gardener and deepen your connection to the natural world.
We hope this guide has provided you with valuable insights and practical knowledge to successfully germinate and grow Malabar spinach. May your garden flourish, and may you continue to enjoy the beauty and abundance that gardening brings to your life.
Happy gardening and happy harvesting!
Frequently Asked Questions about How To Germinate Malabar Spinach
Was this page helpful?
At Storables.com, we guarantee accurate and reliable information. Our content, validated by Expert Board Contributors, is crafted following stringent Editorial Policies. We're committed to providing you with well-researched, expert-backed insights for all your informational needs.


0 thoughts on “How To Germinate Malabar Spinach”