Home>Garden Essentials>How To Grow Spinach From Seed
Garden Essentials
How To Grow Spinach From Seed
Modified: March 24, 2024
Learn how to grow spinach from seed in your garden and enjoy fresh, homegrown greens all season long. Find step-by-step instructions and tips for a successful harvest.
(Many of the links in this article redirect to a specific reviewed product. Your purchase of these products through affiliate links helps to generate commission for Storables.com, at no extra cost. Learn more)
Introduction
Welcome to the wonderful world of growing spinach from seed! Whether you’re a seasoned gardener or a beginner, this guide will provide you with all the information you need to successfully grow your own fresh and delicious spinach. Spinach is a versatile and nutrient-rich leafy green vegetable that can be enjoyed in salads, smoothies, soups, and a variety of other dishes.
Growing spinach from seed offers numerous benefits. First and foremost, it allows you to have complete control over the growing process, ensuring that your spinach is free from harmful chemicals or pesticides. Additionally, growing your own spinach is a cost-effective way to enjoy this healthy vegetable year-round, as seeds are generally inexpensive and can yield an abundant crop if properly cared for.
Before we dive into the details of growing spinach from seed, it’s important to note that spinach is a cool-season crop. This means that it thrives in cooler temperatures, typically between 35 and 75 degrees Fahrenheit (1 to 24 degrees Celsius). Spinach prefers full sun but can tolerate some shade, making it a versatile choice for gardens of all sizes.
In the following sections, we’ll cover everything from choosing the right seeds to harvesting and storing your spinach. So, grab your gardening gloves and get ready to embark on a rewarding journey of growing your own spinach from seed!
Key Takeaways:
- Growing spinach from seed allows you to have control over the process, ensuring fresh and chemical-free spinach. Choose the right seeds, prepare the soil, and provide proper care for a bountiful harvest.
- Harvest spinach when the leaves are young and tender for the best flavor. Store it properly for freshness, and experiment with different varieties and planting methods to enjoy a continuous supply of nutritious spinach.
Read more: How Long To Grow Spinach From Seed
Choosing the Right Seeds
When it comes to choosing spinach seeds for your garden, there are a few factors to consider. First and foremost, look for seeds that are labeled as “heirloom” or “open-pollinated.” These varieties have been cultivated over time and tend to be more reliable and flavorful than hybrid or genetically modified seeds.
Next, consider the variety of spinach you want to grow. There are numerous types to choose from, including savoy spinach with its crinkled leaves, smooth-leaf spinach that is easier to clean, and baby or “baby leaf” spinach that is harvested when young and tender. Each variety has its own unique flavor and texture, so pick the one that appeals to you the most.
Additionally, take into account the time it takes for the spinach variety to mature. Some types of spinach, such as “Baby’s Leaf” or “Bloomsdale Long Standing,” mature in as little as 40 days, while others may take up to 60 days. Choose a variety that aligns with the length of your growing season and your desired harvest time.
Lastly, it’s crucial to purchase your seeds from a reputable source. This ensures that you are getting high-quality, viable seeds that have a greater chance of germinating and producing a healthy crop. Garden centers, online seed suppliers, and seed catalogs are all excellent sources for acquiring spinach seeds.
Remember, choosing the right seeds is the first step towards a successful spinach harvest. Take your time to research and select the best options for your specific preferences and garden conditions. Once you have your seeds in hand, it’s time to prepare the soil for planting!
Preparing the Soil
Before planting spinach seeds, it’s essential to prepare the soil to create the optimal growing conditions for your crop. Here are the steps to follow:
- Choose a suitable location: Spinach prefers well-draining soil with a pH level between 6.5 and 7.5. Select a spot in your garden that receives at least 6 hours of sunlight per day.
- Clear the area: Remove any weeds, rocks, or debris from the planting area. This will prevent competition for nutrients and ensure that the spinach plants can grow without any hindrance.
- Loosen the soil: Use a garden fork or a tiller to loosen the soil to a depth of about 8 to 10 inches. This helps to improve aeration and allows the roots of the spinach plants to penetrate easily.
- Amend the soil: Spinach thrives in nutrient-rich soil. Prior to planting, incorporate organic matter, such as compost or well-rotted manure, into the soil. This will improve soil fertility and provide the necessary nutrients for healthy plant growth.
- Level and smooth the soil: Rake the soil surface to create a smooth and even planting bed. This provides a good base for sowing the spinach seeds and ensures even germination.
- Test the soil: It’s beneficial to conduct a soil test to determine its pH level and nutrient composition. Based on the results, you can make any necessary adjustments by adding lime to raise the pH or sulfur to lower it.
By following these steps, you will create a well-prepared soil environment that promotes strong root development and healthy spinach growth. Once the soil is ready, it’s time to sow your spinach seeds and watch them flourish!
Planting Spinach Seeds
Now that you have prepared the soil, it’s time to sow your spinach seeds. Follow these steps to ensure successful seed germination and healthy plant growth:
- Sowing method: There are two common methods for sowing spinach seeds: broadcasting and row planting. Broadcasting involves scattering the seeds evenly across the entire planting area, while row planting involves creating furrows and placing the seeds in rows. Choose the method that works best for you.
- Spacing: Space the seeds according to the recommendations on the seed packet. Typically, spinach seeds should be planted about 1 inch apart or in rows spaced 6 to 12 inches apart. This allows enough room for the plants to grow and prevents overcrowding.
- Planting depth: Plant the seeds at a depth of approximately ½ inch to 1 inch. Gently press the soil over the seeds to ensure good seed-to-soil contact.
- Watering: After planting, water the soil thoroughly to provide moisture for seed germination. Ensure that the soil remains consistently moist, but not waterlogged, throughout the germination process.
- Germination time: Spinach seeds typically germinate within 7 to 14 days, depending on the variety and environmental conditions. Be patient and keep the soil consistently moist until you see the seedlings emerge.
- Thinning: Once the seedlings are a couple of inches tall, thin them out to provide enough space for the remaining plants to grow. Space the seedlings about 4 to 6 inches apart to allow proper air circulation and reduce the risk of diseases.
Remember to keep an eye on the weather conditions, especially if you’re planting spinach in early spring or late fall. Although spinach can tolerate cooler temperatures, extreme frosts can damage or kill young plants. Providing a protective cover, such as a row cover or cloche, can help shield the plants if freezing temperatures are expected.
With proper planting techniques and care, your spinach seeds will germinate and develop into healthy seedlings. Now, it’s time to provide the necessary care to ensure a bountiful harvest.
Watering and Care
Proper watering and care are crucial for the growth and success of your spinach plants. Here are some important tips to keep in mind:
- Consistent watering: Spinach plants require consistent moisture. Keep the soil evenly moist throughout the growing season, but be careful not to overwater. Overly wet soil can lead to root rot and other fungal diseases.
- Deep watering: When watering, aim for deep penetration into the soil to encourage the development of deep and strong roots. Shallow watering can result in weak roots and shallow growth.
- Watering frequency: Monitor the soil moisture regularly and water whenever the top inch of soil feels dry. This may vary depending on the weather conditions, so adjust your watering schedule accordingly.
- Avoid overhead watering: To prevent diseases like powdery mildew, try to water at the base of the plants rather than from above. This helps keep the foliage dry, reducing the chances of fungal infections.
- Mulching: Apply a layer of organic mulch, such as straw or shredded leaves, around the base of the spinach plants. Mulch helps retain moisture, suppresses weed growth, and regulates soil temperature.
- Fertilizing: Spinach is a relatively low-maintenance crop and doesn’t require a lot of fertilization. However, adding a balanced organic fertilizer or compost once or twice during the growing season can help promote healthy growth.
- Weed control: Keep the area around the spinach plants free from weeds, as they compete for nutrients and moisture. Regularly remove any weeds that sprout and gently cultivate the soil around the plants to minimize weed growth.
- Supportive structures: If you’re growing larger varieties of spinach or if your plants face strong winds, consider providing support structures like small stakes or trellises. These can help prevent the plants from bending or breaking.
By providing proper watering and care, you will ensure that your spinach plants remain healthy and productive. This includes regular monitoring, addressing any issues promptly, and giving the plants the attention they need as they grow.
Next, let’s talk about pest and disease control measures to keep your spinach plants thriving.
Plant spinach seeds in well-draining soil with plenty of sunlight. Keep the soil consistently moist, but not waterlogged. Thin out seedlings to give them space to grow. Harvest leaves when they are large enough to eat.
Read more: How To Plant Spinach Seeds
Pest and Disease Control
While spinach is generally a resilient and low-maintenance crop, it is not immune to pest and disease issues. Here are some common pests and diseases that may affect your spinach plants, along with effective control measures:
Pests:
- Aphids: These small, sap-sucking insects can cause stunted growth and yellowing leaves. Use insecticidal soaps or neem oil to control aphid populations.
- Slugs and snails: These slimy pests feed on spinach leaves, leaving behind irregular holes. Set up slug traps, use organic slug bait, or manually remove them to prevent damage.
- Cabbage loopers: These caterpillars can quickly strip the leaves of your spinach plants. Handpick them off the plants or use organic insecticides containing Bacillus thuringiensis (Bt).
- Leaf miners: These pests create distinctive tunnels within spinach leaves. Remove infested leaves and use sticky traps to catch adult flies before they lay eggs.
Diseases:
- Downy mildew: This fungal disease appears as yellowish or brownish patches on the leaves, leading to yellowing and wilting. Provide good air circulation, avoid overhead watering, and use fungicidal sprays if necessary.
- Powdery mildew: Powdery white fungal growth appears on the leaves, causing them to become distorted. Remove affected leaves and use fungicidal sprays to control the disease.
- Fusarium wilt: This soil-borne fungal disease causes yellowing, wilting, and eventual death of the plants. Rotate your spinach crop yearly and avoid overwatering to prevent the spread of the disease.
- Leaf spot: Circular or angular spots with dark centers appear on the leaves. Remove and destroy infected leaves and avoid overhead watering.
It’s important to regularly inspect your spinach plants for any signs of pests or diseases. Early detection and prompt action will help minimize damage and prevent the spread of problems. Whenever possible, use organic and environmentally friendly methods to control pests and diseases.
Now that you are equipped with the knowledge of pest and disease control, let’s move on to the next step – harvesting your delicious spinach!
Harvesting Spinach
Harvesting spinach is an exciting and rewarding part of growing your own garden-fresh produce. Here’s how to properly harvest your spinach:
- Leaf harvesting: Spinach leaves can be harvested individually as needed. Start by picking the outer leaves while they are still tender and vibrant green. Leave the inner leaves to continue growing and provide a continuous harvest.
- Cut and come again: For a longer harvest period, practice a “cut and come again” approach. Cut the entire plant back to about 2 inches above the soil level when the leaves are about 4 to 6 inches long. The plant will regrow and provide multiple rounds of harvest.
- Baby spinach: To harvest baby spinach, which is highly tender and mild in flavor, simply pick the young leaves when they are about 2 to 3 inches long. This is usually done about 30 days after planting.
- Harvest timing: Harvest your spinach in the morning when the leaves are cool and crisp. As the day progresses, the leaves can become wilted and lose some of their freshness.
It’s important to note that if you wait too long to harvest spinach, the leaves will become more bitter and tougher in texture. Regular harvesting not only encourages new growth but also ensures the tastiest and most tender leaves.
During the peak growing season, you may be able to harvest spinach on a weekly or bi-weekly basis, depending on the growth rate of your variety. Keep an eye on the plants and adjust your harvesting schedule accordingly.
Once you’ve harvested your spinach, it’s time to enjoy the fruits (or rather, leaves) of your labor! But if you have a surplus or want to store some for later use, continue reading to learn about proper spinach storage methods.
Storing Spinach
Proper storage is essential to maintain the freshness and quality of your harvested spinach. Follow these guidelines to store your spinach and extend its shelf life:
- Immediate use: If you plan to use the spinach right away, simply rinse the leaves under cold water to remove any dirt or debris. Pat them dry with a clean kitchen towel or paper towel before incorporating them into your recipes.
- Refrigeration: For longer storage, place the unwashed spinach leaves in a perforated plastic bag or wrap them loosely in a damp paper towel. This helps to maintain the moisture and prevents the leaves from drying out. Store the bag or bundle in the crisper drawer of your refrigerator.
- Freezing: If you have an abundant harvest, you can freeze the spinach for future use. Blanch the leaves in boiling water for a brief period (about 2 minutes) and immediately transfer them to an ice bath to stop the cooking process. Drain well, pat dry, and pack them into freezer-safe containers or bags. Frozen spinach can be stored in the freezer for up to 6 months.
Remember to label your storage containers or bags with the date before placing them in the refrigerator or freezer. This will help you keep track of the freshness and prevent any confusion later on.
It’s worth noting that spinach is best consumed when it’s fresh, as it tends to lose some of its nutritional value and crisp texture over time. Therefore, try to use or preserve your harvested spinach as soon as possible to enjoy its full benefits.
Now that you know how to store your spinach, let’s explore some additional tips to ensure successful spinach growing.
Tips for Successful Spinach Growing
Growing spinach can be a rewarding endeavor, and with these tips, you can maximize your chances of a successful harvest:
- Choose the right time: Spinach is a cool-season crop, so plant it in early spring or late summer/early fall when temperatures are mild. Avoid planting during the peak of summer heat, as spinach prefers cooler conditions.
- Provide adequate sunlight: While spinach can tolerate some shade, it thrives in full sun. Aim for at least 6 hours of sunlight per day to promote healthy growth and vibrant green leaves.
- Practice succession planting: To ensure a continuous supply of spinach throughout the growing season, sow seeds every 2 to 3 weeks. This staggered planting will provide a steady harvest rather than a sudden glut of spinach.
- Monitor soil moisture: Spinach prefers consistently moist soil, so check the moisture level regularly. Avoid allowing the soil to become waterlogged or parched. Mulching can help retain moisture and regulate soil temperature.
- Control weeds: Weeds can compete with spinach plants for nutrients and moisture. Regularly remove weeds and keep the area around the spinach plants clear to reduce competition and promote healthy growth.
- Protect against pests and diseases: Monitor your plants for signs of pests or diseases and take prompt action. Use organic pest control methods whenever possible to minimize the use of harmful chemicals.
- Harvest early and often: Harvest spinach leaves when they are young and tender for the best flavor. Regular harvesting not only ensures a continuous supply but also prevents the plants from bolting or becoming bitter.
- Rotate crops: To reduce the risk of soil-borne diseases and pest infestations, practice crop rotation. Avoid planting spinach or other related crops in the same location for consecutive seasons.
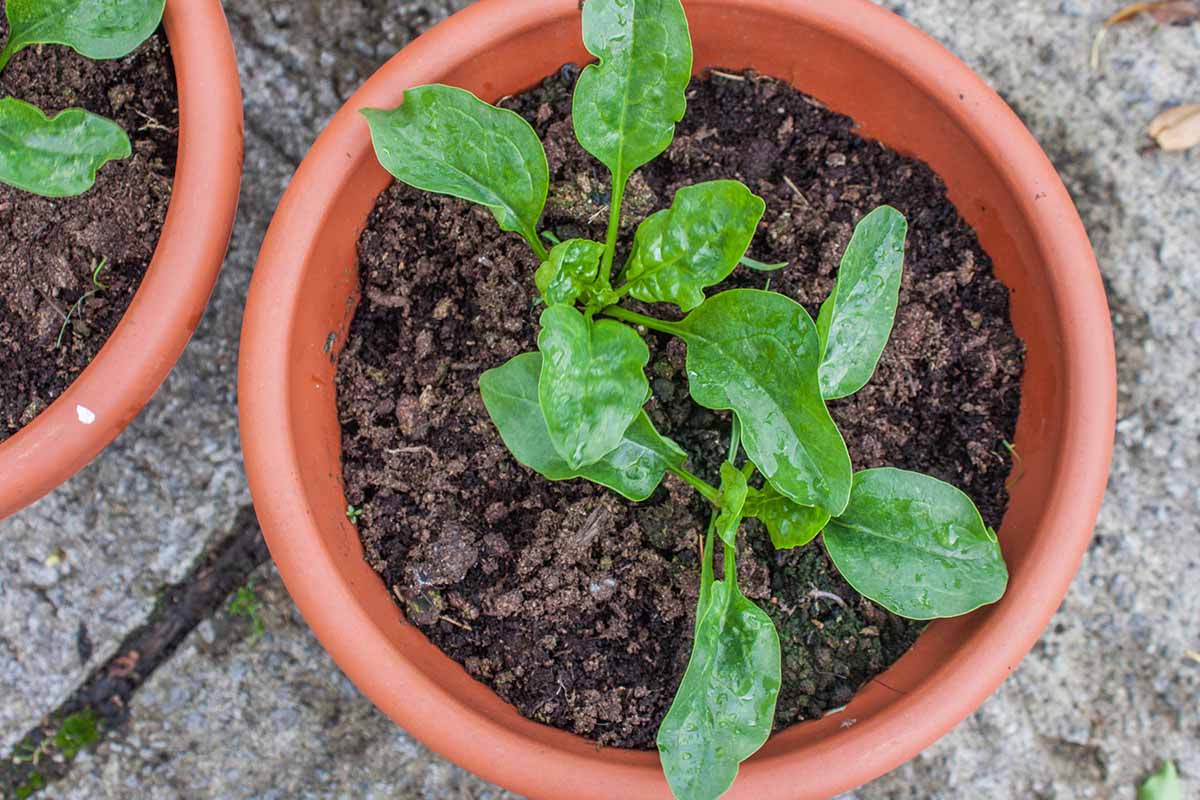
- Maximize space: If you have limited space, consider growing spinach in containers or vertical gardens. This allows you to grow spinach even in small spaces like balconies or patios.
- Experiment with varieties: Don’t be afraid to try different spinach varieties to find the ones that suit your taste preferences and growing conditions. Explore different textures, flavors, and growth habits to keep things interesting.
By following these tips, you can enjoy a bountiful harvest of fresh and nutritious spinach. Remember to observe your plants closely, be attentive to their needs, and adapt your care accordingly to ensure the best possible growth and yield.
Now that you have a comprehensive understanding of spinach growing, it’s time to get your hands dirty and start growing your own delicious and nutritious spinach!
Read more: How To Grow Okra From Seed
Conclusion
Congratulations! You’ve now learned the ins and outs of growing spinach from seed. By following the steps outlined in this guide, you can enjoy the satisfaction of harvesting your very own fresh and nutritious spinach right from your garden.
From choosing the right seeds to preparing the soil, planting, watering, and caring for your spinach plants, each step plays a vital role in ensuring a successful harvest. Remember to provide consistent moisture, check for pests and diseases, and harvest your spinach in a timely manner to enjoy the best flavor and quality.
As you embark on your spinach-growing journey, don’t forget to experiment with different varieties, planting methods, and techniques. Gardening is a continuous learning process, and each season presents an opportunity to improve and refine your skills.
Not only does growing spinach from seed offer you a fresh and sustainable source of this nutritious leafy green, but it also allows you to connect with nature, reduce food waste, and embark on a fulfilling gardening adventure.
So, roll up your sleeves, get your gardening tools ready, and start growing your own delicious spinach. Whether you have a large backyard or a small urban space, the joy and satisfaction of cultivating your own food are truly unbeatable.
Happy spinach growing!
Frequently Asked Questions about How To Grow Spinach From Seed
Was this page helpful?
At Storables.com, we guarantee accurate and reliable information. Our content, validated by Expert Board Contributors, is crafted following stringent Editorial Policies. We're committed to providing you with well-researched, expert-backed insights for all your informational needs.


0 thoughts on “How To Grow Spinach From Seed”