Home>Garden Essentials>How Long To Grow Spinach From Seed
Garden Essentials
How Long To Grow Spinach From Seed
Modified: August 27, 2024
Learn how long it takes to grow spinach from seed in your garden. Discover tips and techniques for a successful spinach harvest.
(Many of the links in this article redirect to a specific reviewed product. Your purchase of these products through affiliate links helps to generate commission for Storables.com, at no extra cost. Learn more)
Introduction
Spinach is a leafy green vegetable that is not only delicious but also packed with essential nutrients. From salads to smoothies, spinach can be enjoyed in various dishes. If you’re a gardening enthusiast, growing your own spinach from seed can be a rewarding and cost-effective option. However, it’s important to understand the proper techniques and timeframe required for successful spinach seed germination and growth.
In this article, we will guide you through the process of growing spinach from seed, covering everything from seed selection to harvesting. Whether you have a spacious garden or a small balcony, you can easily grow spinach and enjoy a bountiful harvest.
So, let’s get started and learn how long it takes to grow spinach from seed and how to ensure a thriving spinach garden!
Key Takeaways:
- Growing spinach from seed requires proper seed selection, soil preparation, and watering. Harvesting at the right time ensures a continuous supply of fresh and nutritious spinach leaves.
- Protecting spinach seedlings from pests and providing the right amount of sunlight and temperature are essential for a successful and bountiful harvest.
Read more: How To Grow Spinach From Seed
Selecting Spinach Seeds
Choosing the right spinach seeds is crucial for a successful and productive harvest. There are several factors to consider when selecting spinach seeds:
- Variety: Spinach seeds come in various varieties, each with its own unique characteristics. Some popular varieties include Bloomsdale, Tyee, and Baby’s Leaf. Consider factors such as taste preference, leaf texture, and growth habit when selecting a variety.
- Seed Quality: Look for high-quality spinach seeds from reputable suppliers or nurseries. Check the expiration date on the seed packet to ensure the seeds are fresh. It’s also helpful to choose organic or non-GMO seeds for a healthier and more sustainable garden.
- Climate Adaptability: Spinach generally prefers cool weather, but different varieties have varying levels of cold and heat tolerance. Consider your local climate and choose a spinach variety that is well-suited to your growing zone.
- Days to Maturity: The “days to maturity” information provided on the seed packet indicates the time required for the spinach plants to reach harvestable size. Different varieties have different maturity timelines, ranging from 35 to 50 days. Consider your desired harvest time and select a variety accordingly.
- Succession Planting: If you want a continuous supply of fresh spinach throughout the growing season, consider selecting multiple varieties with different maturity timelines. This allows you to stagger your planting and ensure a steady harvest.
Take some time to research and compare different spinach seed varieties before making your selection. Consider your gardening goals, climate, and taste preferences to find the perfect spinach seeds for your garden.
Preparing Soil for Spinach Seeds
Before planting spinach seeds, it’s important to prepare the soil adequately to provide a favorable environment for germination and growth. Here are some steps to ensure optimal soil conditions:
- Loosen the Soil: Spinach grows best in loose, well-draining soil. Use a garden fork or tiller to loosen the soil to a depth of around 6-8 inches. This will help roots penetrate easily and prevent waterlogging.
- Remove Debris: Clear the planting area of any weeds, rocks, or other debris that may hinder seed germination or impede root growth.
- Amend the Soil: Spinach thrives in nutrient-rich soil. Incorporate organic matter such as compost or well-rotted manure into the soil to improve its fertility. This will provide essential nutrients and improve moisture retention.
- Test the pH: Spinach prefers slightly acidic soil with a pH between 6.0 and 7.0. Test the pH of your soil using a soil testing kit, available at garden centers. If the pH is below 6.0, you can raise it by adding lime. If it’s above 7.0, sulfur or peat moss can be used to lower it.
- Add Organic Fertilizer: To further enhance soil fertility, you can incorporate a slow-release organic fertilizer that is rich in nitrogen. This will provide the necessary nutrients for healthy growth.
- Level and Rake the Soil: After amending the soil, level the surface using a rake to create a smooth and even bed for planting spinach seeds.
By following these steps, you will create a well-prepared and nutrient-rich soil bed for your spinach seeds. This will promote proper root development, nutrient uptake, and overall plant growth.
Planting Spinach Seeds
Once you have prepared the soil, it’s time to plant your spinach seeds. Here’s how to go about it:
- Sowing Method: There are two main methods for sowing spinach seeds: direct sowing and starting seeds indoors. Direct sowing involves planting the seeds directly into the garden bed, while starting seeds indoors allows for earlier germination and transplanting seedlings once they are established. Choose the method that suits your preferences and growing conditions.
- Timing: Spinach prefers cool weather, so it’s best to sow the seeds in early spring or late summer to take advantage of milder temperatures. Avoid planting in the peak of summer heat, as excessive heat can cause poor germination. Check the seed packet for specific recommendations on planting times for the variety you are using.
- Spacing: Spinach plants need adequate space for proper growth. Sow the seeds about 1/2 inch (1.27 cm) deep, with a spacing of 6-8 inches (15-20 cm) between each seed. You can either plant in rows or scatter the seeds evenly across the planting area.
- Watering: After sowing the seeds, gently water the soil to ensure good seed-to-soil contact. Avoid excessive watering that may cause the seeds to wash away or become waterlogged. Maintain consistent moisture in the soil throughout the germination and growth process.
- Thinning Seedlings: Once the seedlings have emerged and grown a few inches tall, it’s important to thin them out to allow for proper spacing and airflow. Thin the seedlings to a spacing of 4-6 inches (10-15 cm) between plants. Use scissors or garden shears to carefully snip away the excess seedlings at soil level.
- Mulching: Applying a layer of organic mulch around the base of the spinach plants helps retain moisture in the soil, suppresses weed growth, and maintains a more consistent soil temperature. Use materials such as straw, wood chips, or compost as mulch.
By following these planting guidelines, you will give your spinach seeds the best chance of germinating and growing into healthy plants. Remember to water regularly, keep an eye on the weather conditions, and monitor the progress of your spinach seedlings closely.
Watering Spinach Seeds
Water is essential for the germination and growth of spinach seeds. Proper watering practices ensure that the seeds receive enough moisture to sprout and develop into robust plants. Here are some tips for watering spinach seeds:
- Consistent Moisture: Spinach seeds require consistent moisture to germinate. Keep the soil evenly moist, but not waterlogged, throughout the germination period. Watering lightly once a day or every other day should be sufficient, but adjust the frequency based on weather conditions, as hot and dry climates may require more frequent watering.
- Avoid Overwatering: While it is important to provide adequate moisture, overwatering can be detrimental to spinach seeds. Excess water can lead to rot or fungal diseases that may hinder germination or damage the young seedlings. Always check the moisture level of the soil before watering and avoid saturating the soil.
- Water at the Base: When watering spinach seeds, it is best to water at the base of the plants rather than from above. This helps prevent splashing water onto the leaves, which can promote disease. Direct the water towards the soil, allowing it to penetrate the root zone.
- Use Mulch: Applying a layer of organic mulch around the spinach plants can help retain moisture in the soil. Mulch acts as a barrier, reducing evaporation and maintaining a more consistent soil moisture level. This is particularly helpful during hot and dry periods.
- Monitor Moisture Levels: Regularly check the moisture level of the soil by inserting your finger into the soil up to about an inch. If it feels dry, it’s time to water. If it feels moist, you can hold off until the soil dries out a bit. A moisture meter can also be used to accurately determine the soil’s moisture content.
- Adjust Watering as Plants Grow: As spinach plants grow, their water needs may change. Once the seedlings are established and have developed a strong root system, you can gradually reduce the frequency of watering while ensuring that the soil remains consistently moist.
By following these watering tips, you will provide the right amount of moisture for your spinach seeds, promoting healthy germination and vigorous growth. Remember to strike a balance between keeping the soil moist and avoiding overwatering to create optimal growing conditions for your spinach plants.
Read more: How Long To Grow A Pumpkin From Seed
Providing Sunlight for Spinach Seeds
Sunlight is crucial for the healthy development of spinach seeds. Spinach is considered a sun-loving plant and requires an adequate amount of sunlight to grow. Here are some tips for providing the right amount of sunlight:
- Select a Sunny Spot: When choosing a location for your spinach seeds, look for an area that receives at least 6-8 hours of direct sunlight each day. Ideally, this spot should have unobstructed exposure to the sun, such as in a south-facing garden bed or on a sunny balcony.
- Avoid Excessive Heat: While spinach thrives in sunlight, it’s important to note that excessive heat can pose challenges to seed germination and plant growth. In warmer climates or during the peak of summer, spinach can bolt (prematurely flower) and produce bitter leaves. To mitigate this, consider providing partial shade or using shade cloth during the hottest parts of the day.
- Utilize Reflective Surfaces: If your garden bed is situated in a partially shaded area or receives limited direct sunlight, you can maximize the available sunlight by using reflective surfaces. Place light-colored materials, such as white mulch or reflective garden stakes, around the planting area to help bounce and reflect sunlight onto the spinach plants.
- Rotate and Provide Even Sun Exposure: To ensure even growth and prevent plants from leaning towards the sun, rotate your spinach plants every few days. This allows all sides of the plant to receive equal sunlight exposure. Regularly monitoring the position and adjusting the orientation of the plant will help promote balanced and robust growth.
- Watch for Signs of Sunburn: While spinach enjoys sunlight, excessive exposure can lead to sunburn. If you notice leaves turning yellow or experiencing sunscald, which appears as white patches or browning, provide temporary shade or use lightweight row covers to protect the plants until conditions improve.
- Monitor Sunlight Changes: Keep an eye on the changing seasons and the movement of the sun. As the sun’s angle changes throughout the year, the intensity and duration of sunlight will vary. Adjust the positioning or provide additional shade as needed to ensure your spinach plants continue to receive optimal sunlight.
By following these guidelines, you will be able to provide the right amount of sunlight for your spinach seeds. Remember, finding the optimal balance between sunlight and heat is key to promoting healthy growth and a bountiful harvest.
Spinach seeds typically take 5-7 days to germinate and 40-45 days to reach maturity. Plant in early spring or late summer for best results. Keep soil consistently moist and provide plenty of sunlight for optimal growth.
Maintaining Temperature for Spinach Seeds
Temperature plays a crucial role in the successful germination and growth of spinach seeds. Being a cool-season vegetable, spinach prefers moderate temperatures for optimal development. Here are some tips to help you maintain the ideal temperature for your spinach seeds:
- Sowing Temperature: Spinach seeds germinate best in soil temperatures between 50°F and 75°F (10°C and 24°C). To ensure successful germination, it’s essential to monitor the soil temperature before sowing. If the soil is too cold, the seedlings may take longer to emerge or fail to germinate altogether.
- Avoid Extreme Temperatures: Extreme heat or cold can be detrimental to spinach seeds. High temperatures above 80°F (27°C) can cause poor germination, while frost can damage or kill seedlings. Therefore, it’s important to time your planting to avoid these extremes.
- Consider Seasonal Planting: Spinach is a cool-season crop that thrives in temperatures between 50°F and 70°F (10°C and 21°C). For most regions, early spring and late summer are the optimal times to plant spinach seeds. Planting during these seasons ensures that the soil and air temperatures are within the preferred range.
- Use Row Covers: If you want to extend the growing season and protect your spinach plants from cold temperatures, consider using row covers or cloches. These protective barriers help retain heat and provide insulation. Just be sure to remove the covers during warmer periods to prevent the plants from overheating.
- Utilize Microclimates: Take advantage of microclimates in your garden to create favorable temperature conditions for spinach seeds. Areas near walls, fences, or buildings tend to be slightly warmer, providing a protected environment for seed germination and early growth.
- Monitor Weather Forecasts: Stay informed about the weather conditions in your area. Pay attention to any extreme temperature fluctuations, heatwaves, or cold snaps. Adjust your planting schedule or take extra measures to protect your spinach seeds if necessary.
- Provide Shade: When temperatures start to rise during the summer months, providing temporary shade can help protect spinach plants from excessive heat stress. Use shade cloth or create shade using other garden structures to shield the plants during the hottest parts of the day.
By implementing these temperature maintenance strategies, you can create an environment that is conducive to the germination and growth of your spinach seeds. Monitoring temperature conditions and making necessary adjustments will contribute to a successful spinach harvest.
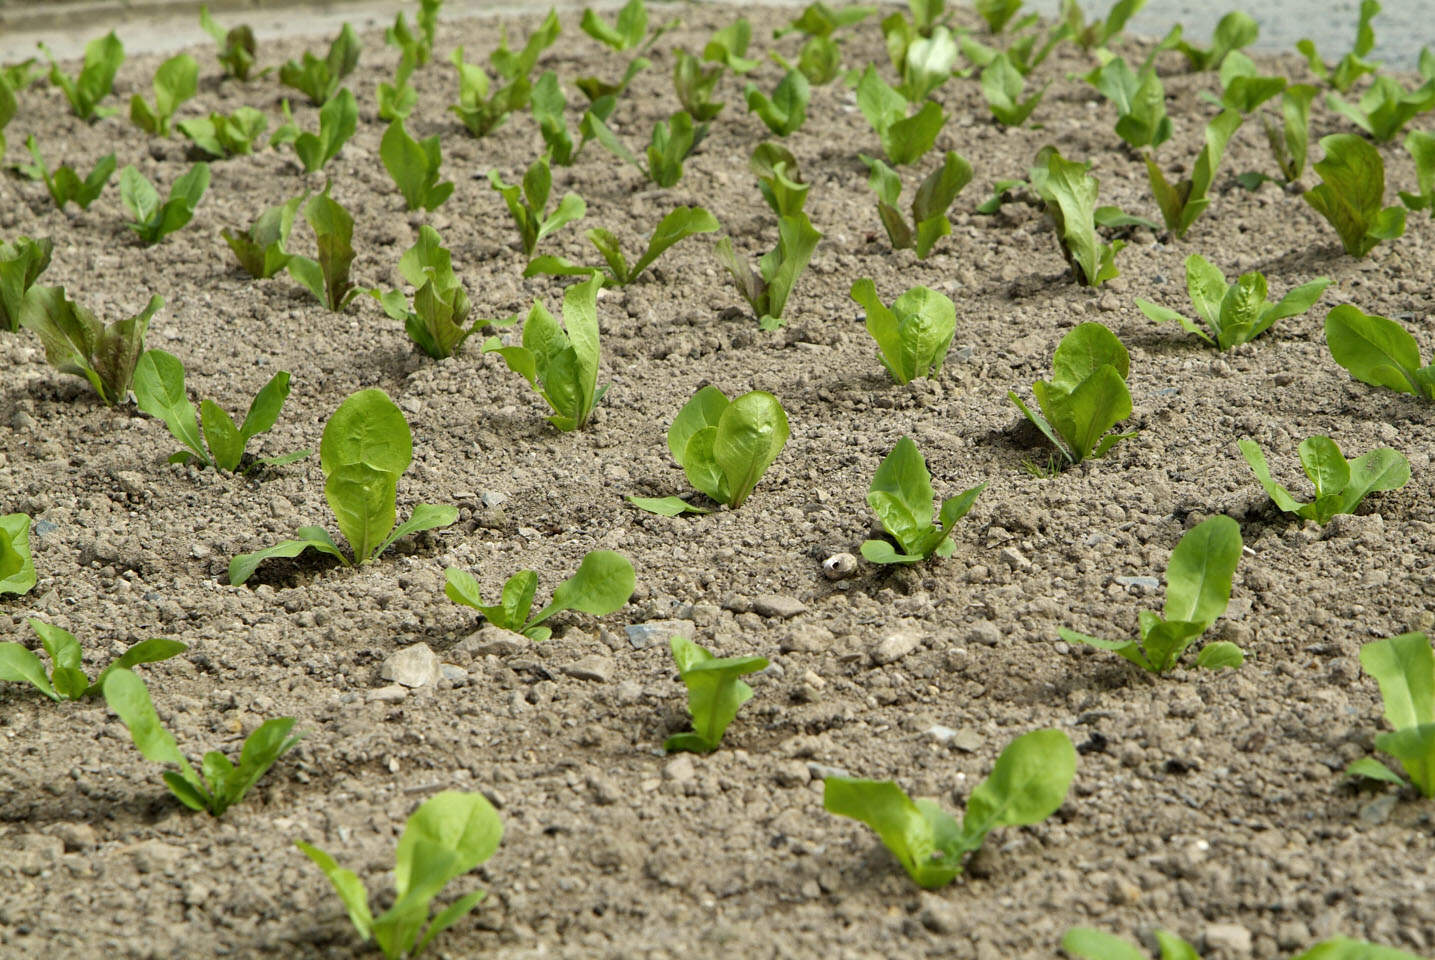
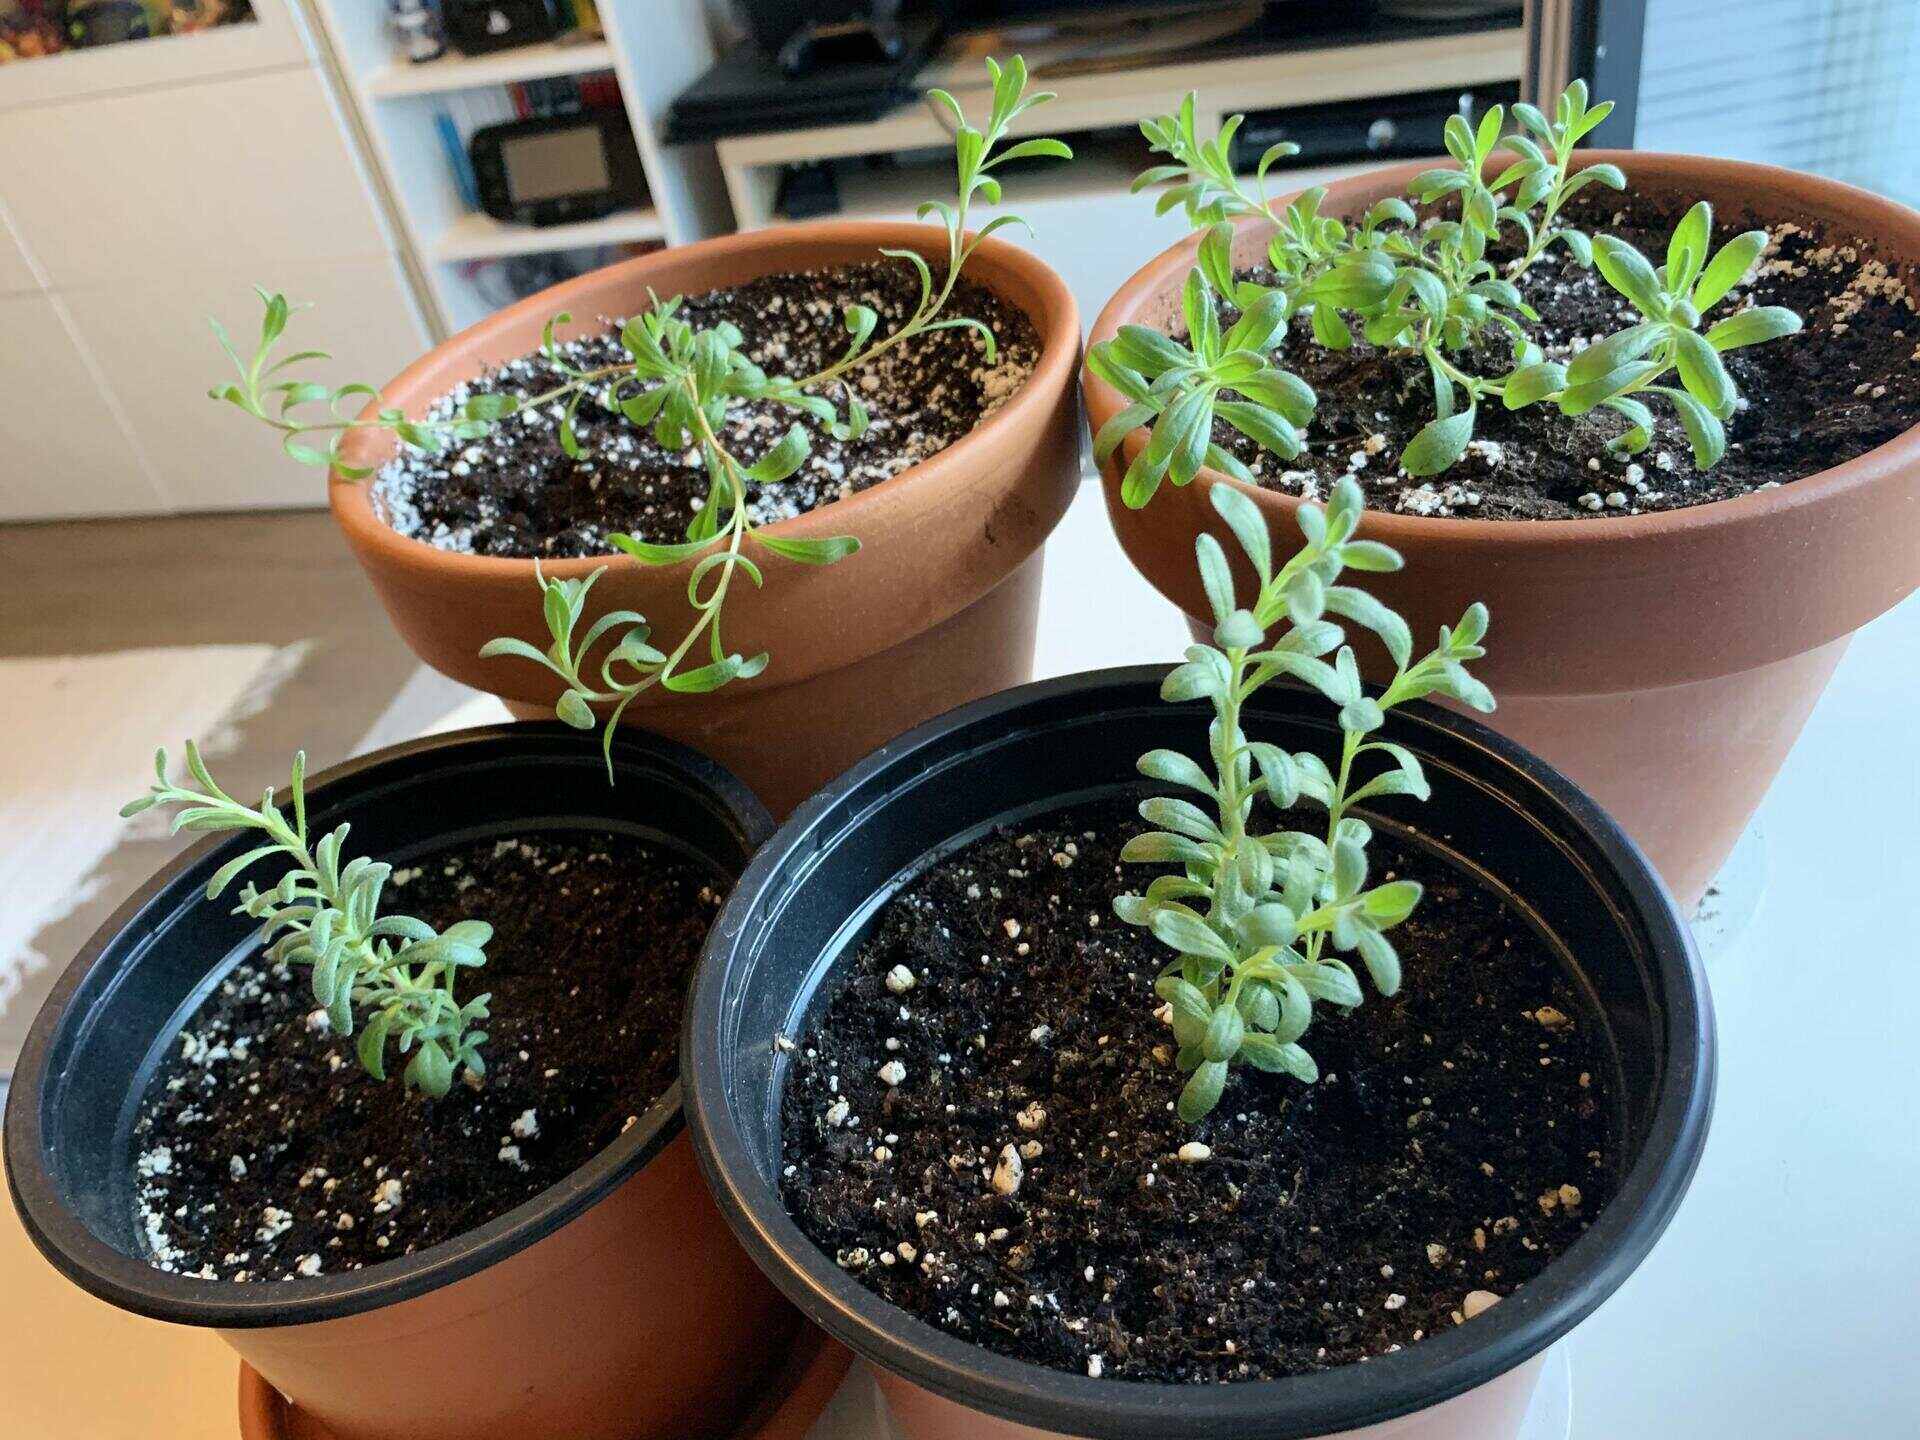
Thinning Spinach Seedlings
Thinning is an important step in growing spinach as it allows the remaining seedlings to have enough space, light, and nutrients to grow into healthy plants. Here’s how to properly thin your spinach seedlings:
- Timing: Thin your spinach seedlings once they have reached a height of about 2-3 inches (5-7.5 cm) and have developed their first true leaves. This typically occurs around 2-3 weeks after germination.
- Identify Crowded Seedlings: Look for spinach seedlings that are clustered close together. These crowded seedlings compete for resources, including water, nutrients, and sunlight. They can become weak and stunted if not thinned out.
- Choose the Strongest Seedlings: Identify the strongest and healthiest seedlings based on factors such as leaf color, size, and overall vigor. These are the plants that you want to keep and allow to continue growing.
- Prepare the Area: Before thinning, gently water the soil to help loosen it and make it easier to remove the excess seedlings. It”s important to work with moist soil to minimize damage to the remaining plants’ root systems.
- Remove Excess Seedlings: Carefully grasp the base of the unwanted seedlings and gently pull them out from the soil, ensuring that you don’t disturb the neighboring seedlings you wish to keep. Alternatively, you can use small scissors or garden shears to snip off the unwanted plants at soil level.
- Achieve Proper Spacing: Space the remaining spinach seedlings to allow them to grow and thrive. Aim for a spacing of at least 4-6 inches (10-15 cm) between each plant. This allows for proper air circulation, reduces the risk of diseases, and allows ample room for the plants to develop robust root systems.
- Dispose of Thinned Seedlings: Remove the thinned seedlings from the garden bed and either compost them or discard them in a designated green waste bin. Do not leave them in the garden bed, as they can attract pests or act as potential disease vectors.
Thinning spinach seedlings can be an essential step in promoting healthy growth and ensuring a bountiful harvest. It may seem challenging to remove some plants, but it’s a necessary practice to provide the remaining seedlings with the space they need to thrive. With proper thinning, you’ll give your spinach plants the best chance for success.
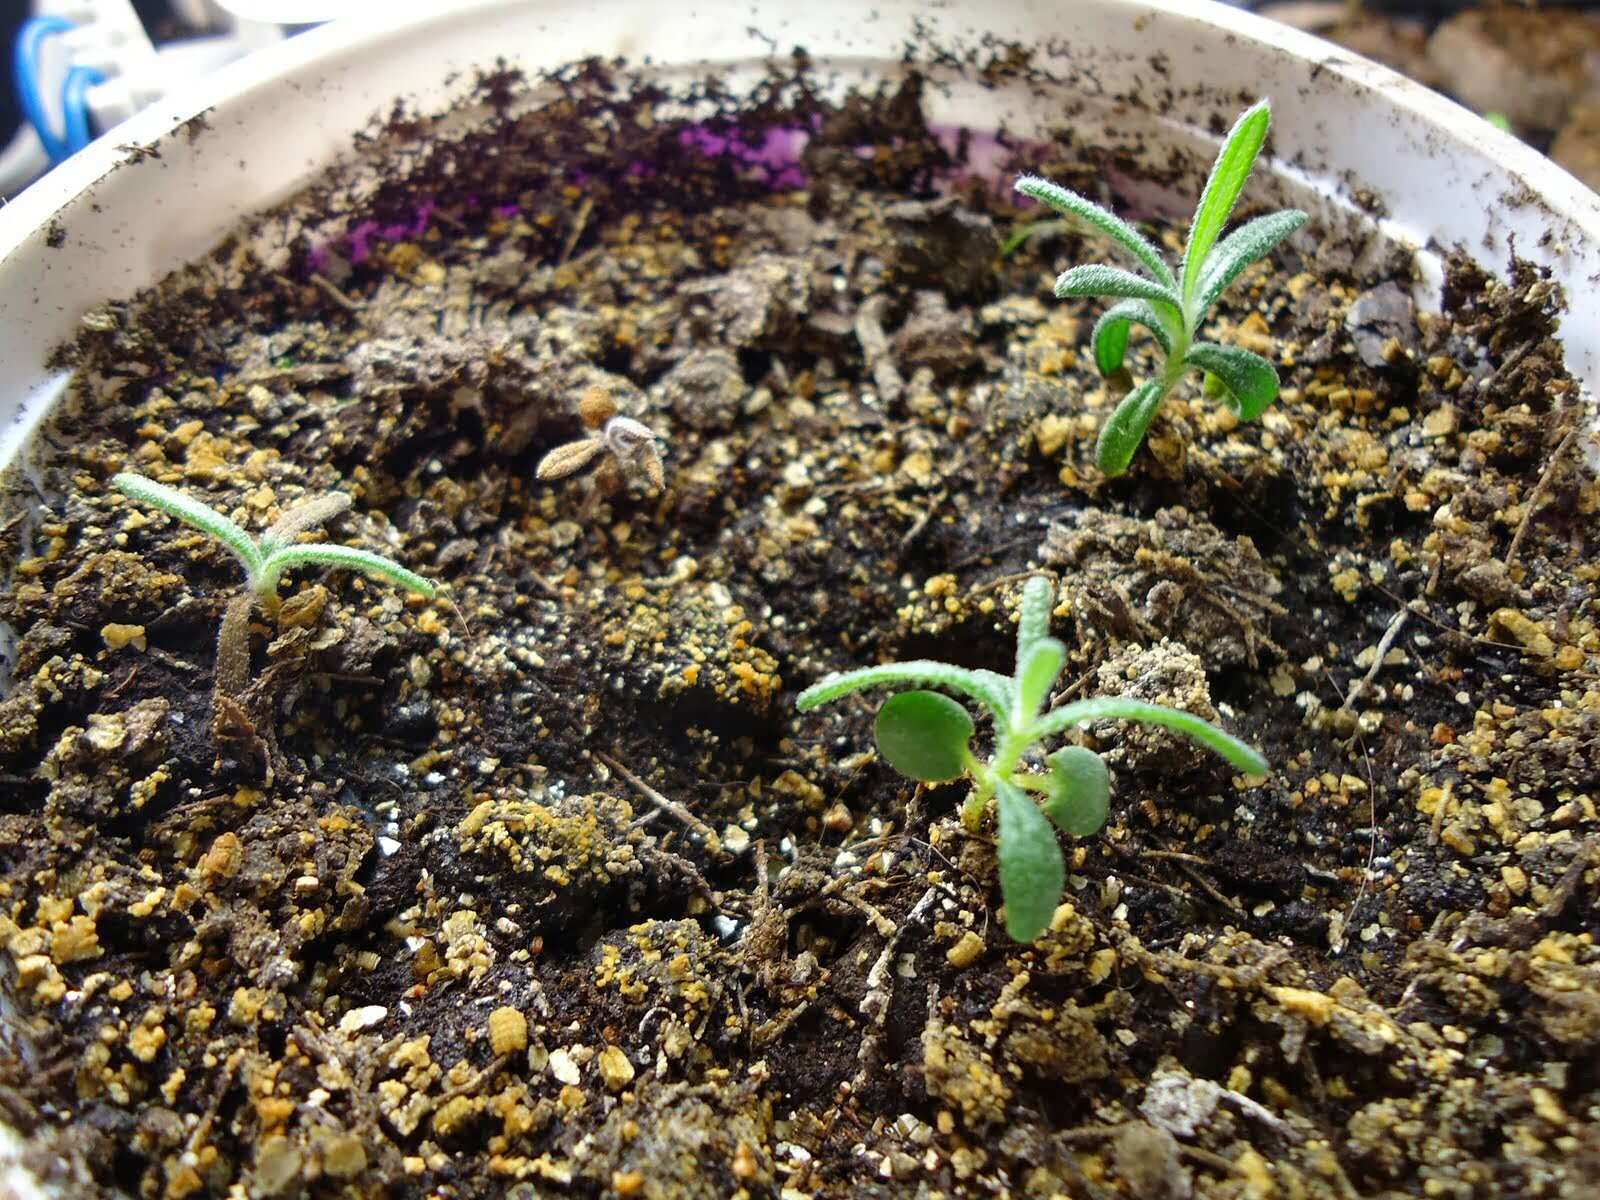
Fertilizing Spinach Seedlings
Fertilizing your spinach seedlings is a key aspect of ensuring healthy growth and a bountiful harvest. While spinach is generally a nutrient-efficient crop, providing some supplemental fertilization can boost its growth and overall vigor. Here’s how to properly fertilize your spinach seedlings:
- Choose the Right Fertilizer: Select a balanced fertilizer with equal or near-equal amounts of nitrogen (N), phosphorus (P), and potassium (K). A general-purpose granular fertilizer with an N-P-K ratio of 10-10-10 or 6-6-6 is suitable for spinach. Alternatively, you can opt for organic fertilizers such as compost or well-rotted manure.
- Add Fertilizer at the Right Time: Apply fertilizer to your spinach seedlings when they have grown to about 2-3 inches (5-7.5 cm) tall and have developed their first couple of true leaves. Applying fertilizer too early can burn the tender seedlings, so it’s important to wait until they are a bit more established.
- Follow Package Instructions: Read and follow the package instructions for the fertilizer you are using to determine the recommended application rate. The recommended amount will depend on the specific brand and the size of your garden bed.
- Apply Fertilizer Evenly: Scatter the fertilizer evenly around the base of the seedlings, keeping it about 2-3 inches (5-7.5 cm) away from the stems to avoid burning them. Avoid piling the fertilizer in one spot, as this can lead to uneven nutrient distribution and potential damage to the roots.
- Water After Fertilizing: After applying the fertilizer, water the soil thoroughly. This helps dissolve and distribute the nutrients evenly, ensuring that the seedlings can take up the fertilizers effectively. Make sure not to overwater or saturate the soil, as excess moisture can lead to nutrient leaching.
- Monitor Plant Response: Observe the response of your spinach seedlings after fertilization. Vigorous growth and healthy green foliage are indicators that the fertilizers are being well-utilized. If, on the other hand, you notice excessive leafy growth with delayed or stunted development, reduce the fertilizer application or consider adjusting the nutrient balance.
- Additional Fertilization: Depending on the overall health and performance of your spinach plants, you may need to provide additional fertilization later in the growing season. Side-dressing with a nitrogen-rich fertilizer can help promote continued growth and ensure a good yield. Again, follow the package instructions for rates and timings.
By following these fertilizer guidelines, you can provide your spinach seedlings with the necessary nutrients for robust growth and cultivation. Remember to monitor the plants’ response, adjust fertilization as needed, and always follow the recommended rates and instructions for the specific fertilizer you are using. With proper fertilization, your spinach seedlings will thrive and reward you with a delicious and nutritious harvest.
Read more: How Long To Grow Cantaloupe From Seed
Protecting Spinach Seedlings from Pests
Just like any other garden plants, spinach seedlings are susceptible to various pests that can cause damage and hinder their growth. Taking proactive measures to protect your spinach seedlings from pests can help ensure their health and maximize your harvest. Here’s how to prevent common pests from damaging your spinach seedlings:
- Aphids: Aphids are small, soft-bodied insects that feed on the sap of plants. To deter aphids from attacking your spinach seedlings, regularly inspect the plants for signs of infestation, such as curling leaves or sticky residue (honeydew) on the leaves. If aphids are present, spray the plants with a strong stream of water or apply an insecticidal soap solution to eliminate them.
- Slugs and Snails: Slugs and snails are common garden pests that can chew on the leaves of your spinach seedlings. To deter them, create physical barriers like copper tape or use organic slug pellets around the plants. You can also handpick slugs and snails in the evening when they are most active, or set up beer traps to attract and drown them.
- Cabbage Worms: Cabbage worms are the larvae of butterflies and can quickly damage spinach leaves. Inspect the foliage regularly for signs of these green caterpillars and manually remove them from the plants. You can also use row covers to prevent adult butterflies from laying their eggs on the plants.
- Leaf Miners: Leaf miners are tiny larvae that create tunnels inside spinach leaves, leaving noticeable trails. Insecticidal sprays or nematodes can be used to control leaf miners. Prune and destroy any affected leaves to prevent the infestation from spreading.
- Rodents: Rodents like mice and rats can nibble on spinach seedlings and cause significant damage. Place physical barriers such as wire mesh or hardware cloth around your garden beds to prevent rodents from accessing the plants. Traps or natural repellents can also be effective in deterring them.
- Protective Companion Plants: Planting companion plants with natural pest-repellent properties can help protect your spinach seedlings. Plants like marigolds, onions, and garlic can discourage pests with their natural odor or repel insects with their strong scent.
- Regular Pest Monitoring: It’s important to regularly check your spinach seedlings for any signs of pests. Early detection allows for prompt action and prevents pest populations from getting out of control. Inspect both the upper and lower surfaces of the leaves, as many pests hide on the undersides.
- Good Garden Hygiene: Practicing good garden hygiene can deter pests. Remove any debris, fallen leaves, or weeds that can harbor pests. Keep the area around your spinach seedlings clean and free from potential hiding places.
By implementing these pest prevention methods, you can protect your spinach seedlings from common pests and ensure their healthy growth. Regular monitoring and taking swift action when pests are detected will help maintain the health and productivity of your spinach plants throughout the growing season.
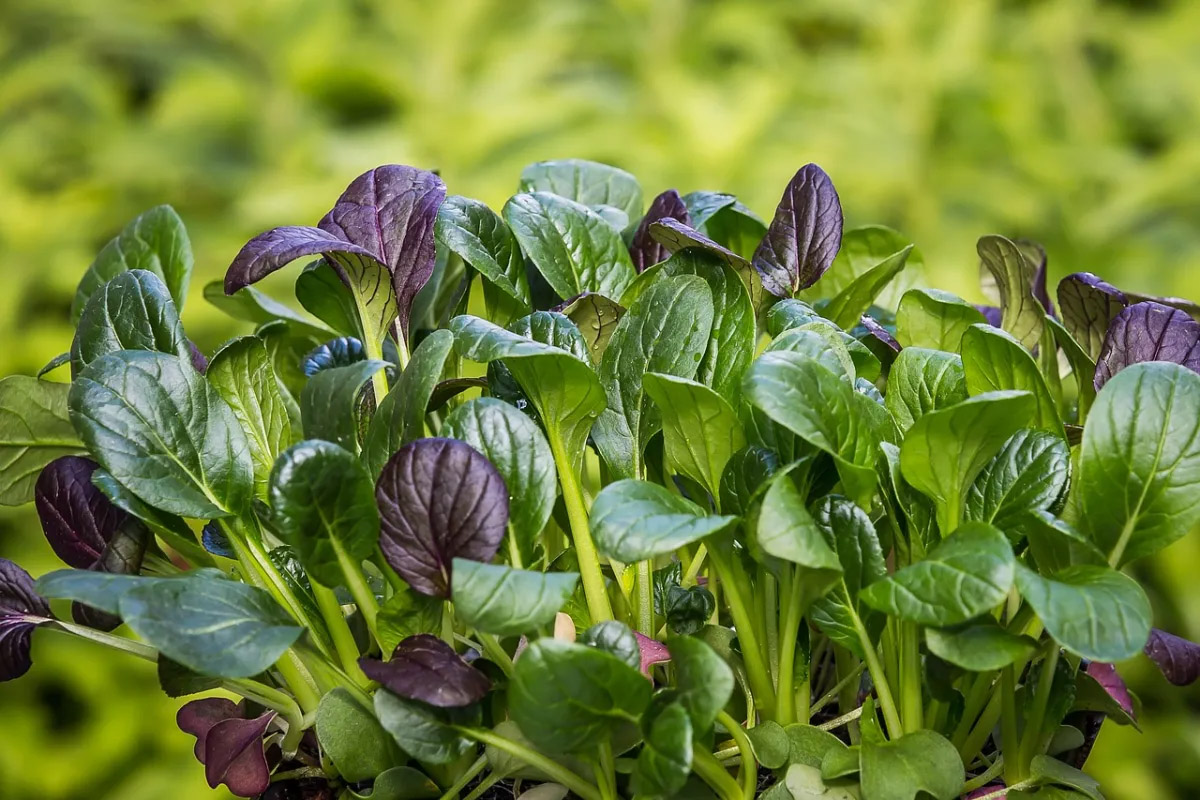
Harvesting Spinach Leaves
Harvesting spinach leaves at the right time is crucial for enjoying their optimal flavor and nutritional value. Spinach is typically ready for harvest when the leaves have reached a desirable size and texture. Here’s how to properly harvest spinach leaves:
- Timing: Spinach leaves can be harvested when they are young and tender, usually around 35 to 50 days after planting, depending on the variety. Harvesting too early will result in small leaves, while waiting too long can lead to tougher and more bitter leaves.
- Leaf Size: Harvest individual spinach leaves when they reach a size of about 3-4 inches (7.5-10 cm) in length. At this stage, the leaves are mature enough for consumption, and picking them will encourage the plant to produce new growth.
- Outer Leaves First: When harvesting spinach, start by plucking the outermost leaves first. Use your fingers or sharp garden scissors to cut the leaves at the base, near the crown of the plant. Be careful not to damage the crown or central growing point, as this will allow the plant to continue producing new leaves.
- Selective Harvesting: For a continuous supply of fresh spinach, selectively harvest the mature leaves, leaving the inner, younger leaves intact. This will allow the plant to continue growing and producing new foliage. Harvesting this way also promotes airflow and reduces the risk of disease or pest infestations.
- Harvest in the Morning: It’s best to harvest spinach leaves in the morning when they are crisp and full of moisture. This ensures a higher water content and better overall quality. Avoid harvesting in the heat of the day, as the leaves may wilt and lose some of their texture and flavor.
- Wash and Store Properly: After harvesting, gently rinse the spinach leaves with cool water to remove any dirt or debris. Pat them dry or use a salad spinner to remove excess moisture. Store the leaves in a plastic bag or airtight container in the refrigerator. Freshly harvested spinach can be stored for up to a week.
- Successive Harvests: If your spinach plants continue to produce new growth after the initial harvest, you can enjoy successive harvests. Wait for new leaves to reach a suitable size, typically within a few weeks, and repeat the harvesting process.
By following these guidelines for harvesting spinach leaves, you can enjoy a steady supply of fresh and nutritious greens. Regular harvesting encourages the plants to produce more leaves, ensuring a continuous harvest throughout the growing season. So, get ready to savor the taste of your homegrown spinach!
Conclusion
Growing spinach from seed can be a rewarding and satisfying endeavor, allowing you to enjoy the freshness and nutritional benefits of homegrown greens. By following the proper techniques and practices, you can ensure successful germination, healthy growth, and a bountiful harvest of delicious spinach leaves.
From selecting the right spinach seeds to preparing the soil, providing sunlight, and maintaining the ideal temperature, each step is essential for the optimal development of your spinach seedlings. Thinning the seedlings, fertilizing appropriately, and protecting them from pests are important tasks that contribute to the overall health and vigor of the plants.
Knowing when and how to harvest spinach leaves is crucial to enjoying their peak flavor and tenderness. Selective harvesting and proper storage ensure a continuous supply of fresh spinach for your meals. Remember, the key is to harvest the leaves at the right time, allowing the plants to continue producing new growth.
By taking the time to learn and implement these techniques, you can cultivate a thriving spinach garden and take pride in the wholesome greens you’ve grown. Whether you have a large garden, a small balcony, or even just a sunny windowsill, you can successfully grow spinach and reap the benefits of this nutritious and versatile vegetable.
So, roll up your sleeves, grab some spinach seeds, and put your gardening skills to work. With patience, care, and a little bit of effort, you’ll soon be enjoying the delectable taste of homegrown spinach right at your fingertips.
Frequently Asked Questions about How Long To Grow Spinach From Seed
Was this page helpful?
At Storables.com, we guarantee accurate and reliable information. Our content, validated by Expert Board Contributors, is crafted following stringent Editorial Policies. We're committed to providing you with well-researched, expert-backed insights for all your informational needs.


0 thoughts on “How Long To Grow Spinach From Seed”