Home>Garden Essentials>How To Get Infill Out Of Turf
Garden Essentials
How To Get Infill Out Of Turf
Modified: October 19, 2024
Discover effective methods to remove infill from your garden turf with expert tips and techniques. Enhance the appearance of your garden with these easy-to-follow steps.
(Many of the links in this article redirect to a specific reviewed product. Your purchase of these products through affiliate links helps to generate commission for Storables.com, at no extra cost. Learn more)
Introduction
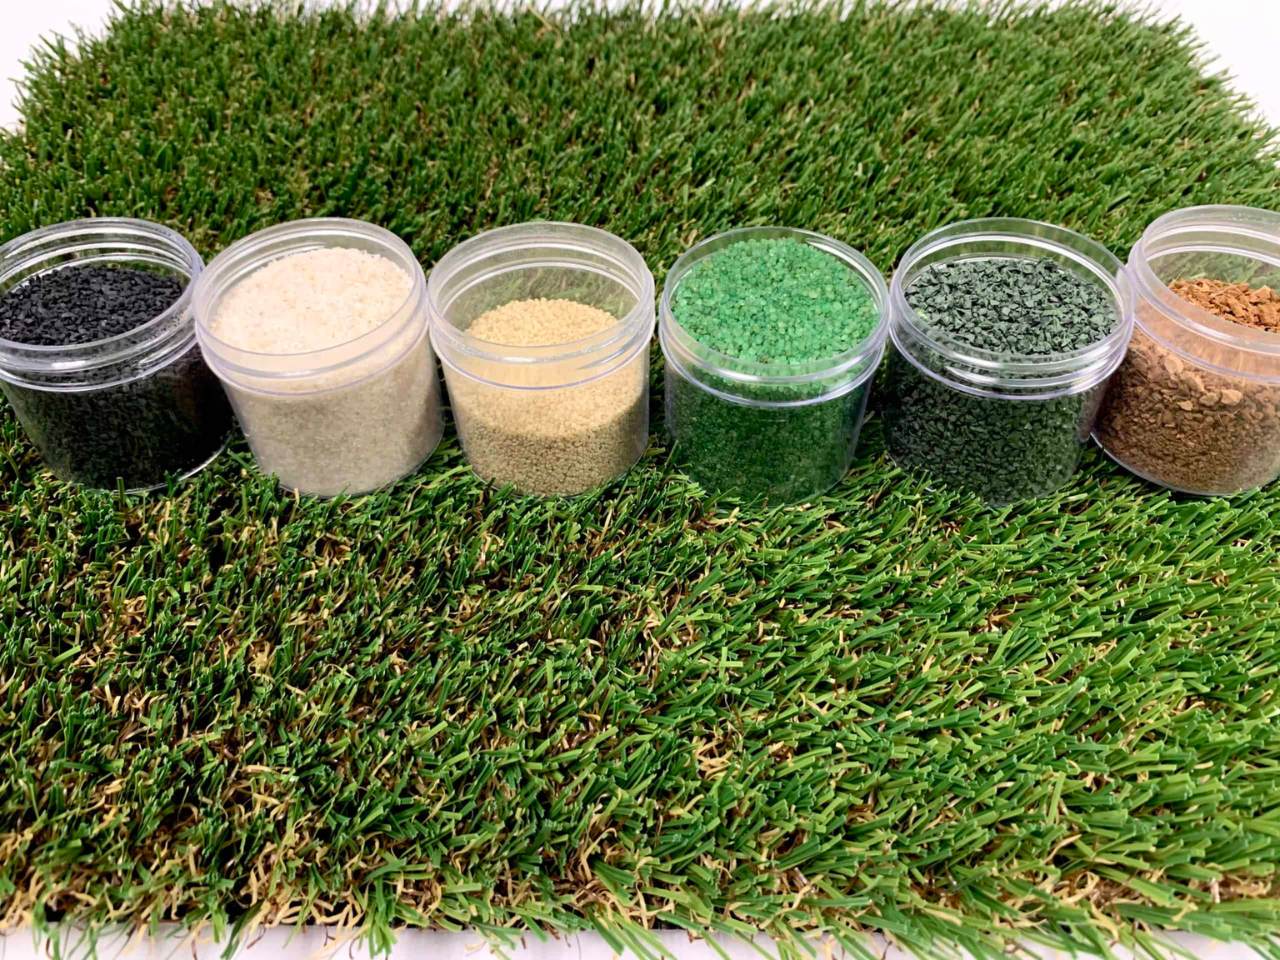
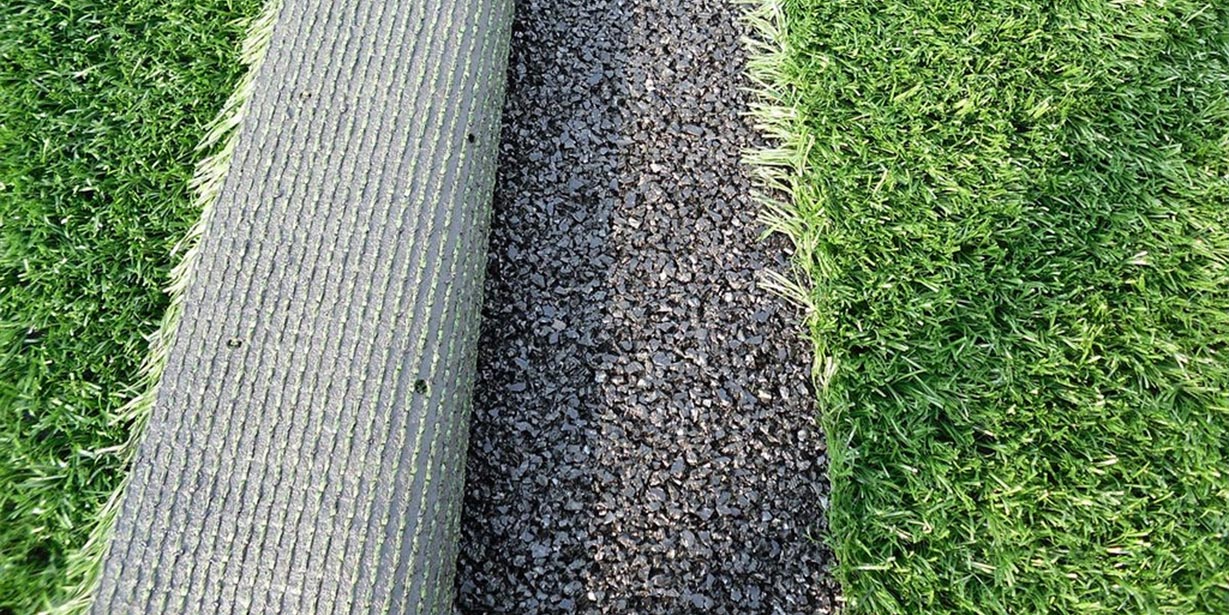
Welcome to the ultimate guide on how to get infill out of turf! If you have an artificial turf lawn or sports field, you are probably familiar with the infill material that is spread throughout the blades of grass. Infill serves multiple purposes, such as providing cushioning, enhancing the turf’s durability, and improving its overall performance. However, over time, infill can become compacted, dirty, or unevenly distributed, resulting in a less-than-optimal playing or aesthetic experience. Luckily, with the right tools and techniques, you can effectively remove infill and restore the beauty and functionality of your turf.
Before we dive into the step-by-step process of removing infill, let’s take a moment to gather all the necessary tools and materials you’ll need:
Read more: How To Add Infill To Turf
Tools and Materials Needed:
- Gloves
- Broom or firm-bristle brush
- Leaf blower or vacuum cleaner
- Rake
- Replacement infill material
Now that you have everything ready, let’s proceed with the first step!
Key Takeaways:
- Keep your artificial turf clean and high-performing by removing infill using simple tools like a broom, rake, and leaf blower. Regular maintenance ensures a beautiful and durable turf surface for all activities.
- Replenish and level the infill after cleaning to maintain the cushioning, stability, and performance of your artificial turf. Follow the step-by-step process for a clean, visually appealing, and long-lasting turf.
Tools and Materials Needed
Before you can begin the process of removing infill from your turf, it’s important to gather all the necessary tools and materials. Having these items on hand will make the task easier, more efficient, and ensure that you achieve the best results. Here’s what you’ll need:
- Gloves: Wearing gloves will protect your hands and prevent any cuts or scrapes while handling the infill and tools.
- Broom or firm-bristle brush: A broom or firm-bristle brush will be used to loosen and dislodge the compacted infill from the blades of turf. Choose a brush with stiff bristles to effectively agitate and remove the infill material.
- Leaf blower or vacuum cleaner: A leaf blower or vacuum cleaner is essential for removing loose infill, debris, and dust from the surface of the turf. Opt for a high-powered leaf blower or a vacuum cleaner with a strong suction capability to ensure thorough cleaning.
- Rake: A rake will come in handy for leveling the infill and ensuring an even distribution throughout the turf. Choose a rake with sturdy tines that can easily penetrate the turf without causing damage.
- Replacement infill material: Depending on the condition of your turf, you may need to replenish the infill after removal. Have a sufficient amount of replacement infill material on hand to restore the desired characteristics and performance of your turf.
By having these tools and materials prepared, you’ll be well-equipped to tackle the infill removal process. Now that you’re ready, let’s move on to the step-by-step instructions on how to effectively get infill out of your turf.
Step 1: Removing Loose Infill
The first step in removing infill from your turf is to address any loose infill that may be sitting on the surface. Loose infill particles can contribute to an uneven distribution and decrease the overall performance of your turf. Follow these steps to effectively remove loose infill:
- Put on your gloves to protect your hands.
- Using a broom or a firm-bristle brush, gently sweep the surface of the turf to dislodge any loose infill. Start from one end and work your way across the entire area, ensuring that you cover all parts of the turf.
- Be gentle during this process to avoid damaging the turf or causing excessive wear on the blades. Use light strokes and allow the bristles to penetrate the turf and reach the infill material.
- As you sweep, pay attention to any areas that may have a higher accumulation of loose infill. Focus on those spots and give them extra attention to ensure they are thoroughly cleaned.
- Once you have completed sweeping the entire turf, gather the loose infill that has been dislodged. You can either use a rake or a dustpan and brush to collect the infill and place it in a container for later disposal or reuse.
By removing the loose infill from the surface of your turf, you are taking the first step towards achieving a cleaner and better-performing artificial lawn or sports field. Now that you have successfully addressed the loose infill, let’s move on to the next step: applying a firm brushing technique to further remove the compacted infill.
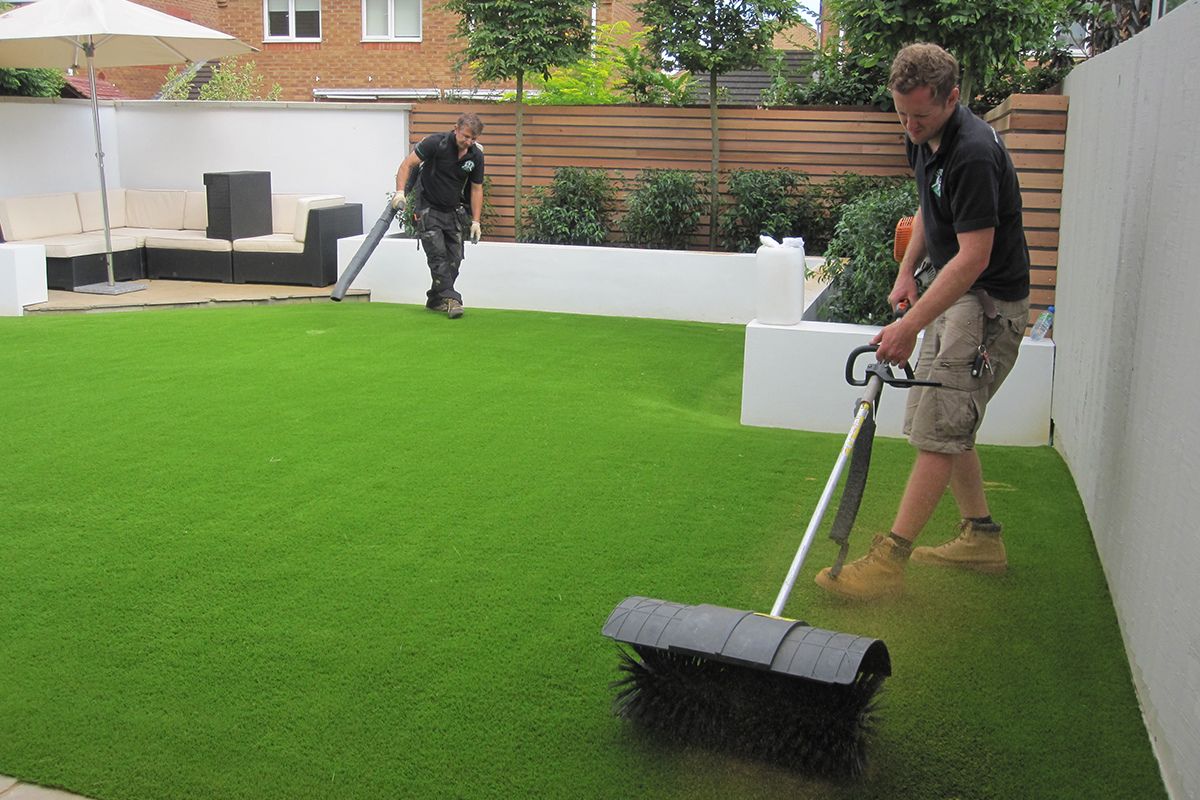
Step 2: Applying a Firm Brushing Technique
After removing the loose infill from the surface of your turf, it’s time to tackle the more stubborn and compacted infill that may be embedded within the blades. Applying a firm brushing technique will help agitate and dislodge the infill, allowing it to be easily removed. Follow these steps to effectively brush your turf:
- Once again, put on your gloves to protect your hands.
- Grab your firm-bristle brush or broom and begin brushing the turf in a back-and-forth motion. Apply moderate pressure to ensure that the bristles penetrate the turf and reach the infill.
- Focus on specific areas where there is noticeable infill compaction or uneven distribution. Use concentrated brushing motions in these areas to break up the compacted infill and distribute it more evenly.
- Continue brushing the entire turf, covering all areas in a methodical manner. Pay special attention to high-traffic areas, as they are more likely to have compacted infill.
- As you brush, periodically check your progress by running your hands over the turf. If you feel any clumps or areas of excess infill, continue brushing until they are adequately dispersed.
The firm brushing technique helps to loosen and dislodge the compacted infill from the blades of the turf, making it easier to remove in the later steps. By applying consistent pressure and thoroughly brushing the entire turf, you will ensure a more even distribution of the infill material. Now that you have effectively brushed your turf, let’s move on to Step 3: using a leaf blower to remove any remaining loose particles.
Read more: What Is Zeolite Turf Infill
Step 3: Using a Leaf Blower
Once you have applied a firm brushing technique to dislodge the compacted infill from your turf, it’s time to remove any remaining loose particles. A leaf blower is a highly effective tool for this task, as it can efficiently blow away debris, dust, and loose infill from the surface of the turf. Follow these steps to effectively use a leaf blower:
- Ensure that you have a leaf blower with sufficient power to effectively remove the loose particles. Adjust the blower settings to a high setting for maximum airflow.
- With the leaf blower in hand, start from one end of the turf and work your way across, moving in a systematic pattern. Direct the airflow towards the infill, blowing it off the surface of the turf.
- Pay special attention to corners, edges, and hard-to-reach areas, as loose particles tend to accumulate in these spots. Angle the blower nozzle to reach these areas and remove any remaining infill.
- Continue using the leaf blower until you are satisfied with the cleanliness of the turf. Periodically check for any missed spots by running your hands over the turf and inspecting for loose particles.
The leaf blower will effectively remove any loose particles, dust, or debris that may be lingering on the surface of the turf. It is crucial to thoroughly clean the turf in this step to ensure a clean and pristine playing or aesthetic surface. Now that you have successfully used the leaf blower, let’s move on to Step 4: sweeping and raking the infill.
Use a power broom or stiff brush to agitate the infill and then vacuum it out. Repeat the process until the infill is removed from the turf.
Step 4: Sweeping and Raking
After using the leaf blower to remove loose particles from the surface of your turf, it’s time to further refine the infill removal process by sweeping and raking. This step helps to ensure an even distribution of the infill and eliminates any remaining debris. Follow these steps to effectively sweep and rake your turf:
- Start by using a sturdy broom or rake to gently sweep the turf in a back-and-forth motion. This sweeping motion will help to distribute the remaining infill more evenly across the surface.
- Pay attention to any low spots or areas with excess infill. Use the rake to level out these areas and achieve a consistent infill depth throughout the turf.
- Continue sweeping and raking the entire turf, focusing on achieving a smooth and uniform appearance. Take your time and be thorough in this process to ensure optimal results.
- As you sweep and rake, be mindful of any debris or foreign objects that may have accumulated on the turf. Remove them promptly to keep the surface clean and free from potential hazards.
Sweeping and raking the infill helps to further distribute it evenly across the turf and create a visually pleasing appearance. It also allows for any remaining debris to be removed, enhancing the overall cleanliness of the surface. Now that you have successfully swept and raked your turf, let’s move on to Step 5: vacuuming the infill for a thorough cleaning.
Step 5: Vacuuming the Infill
Once you have swept and raked the infill to achieve an even distribution on your turf, it’s time to take the cleaning process to the next level by using a vacuum cleaner. Vacuuming the infill will help remove any remaining debris, dust, or small particles that may have been missed during previous steps. Follow these steps to effectively vacuum the infill:
- Ensure that you have a vacuum cleaner equipped with a powerful suction capability. A shop vac or a vacuum cleaner with a specific attachment for outdoor cleaning is recommended.
- Start by setting the vacuum cleaner to a high suction power to effectively collect the infill. If your vacuum cleaner has adjustable settings, adjust it to a level that is suitable for outdoor use and capable of capturing fine particles.
- With the vacuum cleaner in hand, carefully move across the turf, directing the nozzle over the infill. Use slow, deliberate motions to thoroughly vacuum the entire surface.
- Pay special attention to high-traffic areas, as they tend to accumulate more debris. Spend extra time vacuuming these areas to ensure they are thoroughly cleaned.
- Continue vacuuming until you are confident that all debris, dust, and small particles have been effectively removed from the infill. Periodically check the vacuum’s collection container to monitor the amount of infill being collected.
Vacuuming the infill is the final step in achieving a thorough cleaning of your turf. It helps to remove any remaining debris and fine particles, leaving you with a clean and pristine surface. Now that you have successfully vacuumed the infill, let’s move on to the last step: replenishing and leveling the infill to restore its functionality.
Step 6: Replenishing and Leveling the Infill
After thoroughly cleaning and removing infill from your turf, it’s important to replenish and level the infill to restore its functionality and aesthetics. Replenishing the infill will help maintain the desired cushioning, stability, and performance of your turf, while leveling ensures an even surface for optimal play and appearance. Follow these steps to effectively replenish and level the infill:
- Refer to the manufacturer’s guidelines or consult with a turf professional to determine the appropriate type and quantity of replacement infill material needed for your specific turf.
- Using a spreader or your hands, distribute the replacement infill material evenly across the turf. Start from one end and work your way across, ensuring that the infill is distributed consistently.
- Once the replacement infill is spread, use a rake or broom to carefully brush the infill into the grass blades. This helps to ensure that the infill material penetrates between the blades and provides the necessary support and cushioning.
- Pay attention to any uneven areas or low spots where additional infill may be needed. Add more infill to these areas and use the rake to level and distribute it evenly.
- Take a step back and visually inspect the turf to ensure that the infill is evenly distributed and the surface is level. Make any necessary adjustments by redistributing or adding infill as needed.
Replenishing and leveling the infill is the final step in the process of removing and maintaining your turf. It ensures that your turf is in optimal condition and ready for use. By following these steps, you can enjoy a beautiful, clean, and high-performing artificial lawn or sports field for years to come.
Now that you have successfully replenished and leveled the infill, your turf is ready to be enjoyed. By regularly implementing these steps, you can keep your turf in excellent condition and maximize its lifespan.
Conclusion
Congratulations! You have reached the end of the ultimate guide on how to get infill out of turf. By following the step-by-step process outlined in this article, you can effectively remove infill from your artificial lawn or sports field, ensuring its cleanliness, performance, and longevity.
Throughout the guide, we discussed the tools and materials you need, including gloves, a broom or firm-bristle brush, a leaf blower or vacuum cleaner, a rake, and replacement infill material. These items are essential for successfully completing each step of the infill removal process.
We covered every step in detail, from removing loose infill to applying a firm brushing technique, using a leaf blower, sweeping and raking the infill, vacuuming the surface, and replenishing and leveling the infill. By carefully following these steps, you can achieve a clean, evenly distributed, and visually appealing turf surface.
Remember, maintaining your turf regularly is key to its longevity and performance. Consider implementing these infill removal steps as part of your routine maintenance to keep your turf in top condition throughout the year.
With a clean, well-maintained turf, you can enjoy the benefits of a lush, green lawn or a high-performance sports field that is durable, safe, and visually pleasing. Whether you use your turf for recreational activities, sports, or simply as a beautiful outdoor space, following these steps will ensure that you get the most out of your artificial turf investment.
We hope this guide has been helpful and informative, providing you with the knowledge and confidence to effectively get infill out of your turf. Remember to consult the manufacturer’s guidelines and seek professional advice when necessary to ensure the best care and maintenance practices for your specific turf.
Thank you for reading, and happy turf maintenance!
Frequently Asked Questions about How To Get Infill Out Of Turf
Was this page helpful?
At Storables.com, we guarantee accurate and reliable information. Our content, validated by Expert Board Contributors, is crafted following stringent Editorial Policies. We're committed to providing you with well-researched, expert-backed insights for all your informational needs.


0 thoughts on “How To Get Infill Out Of Turf”