Home>Garden Essentials>How To Trim Juniper Ground Cover
Garden Essentials
How To Trim Juniper Ground Cover
Modified: March 7, 2024
Learn how to trim and maintain your juniper ground cover in your garden for a clean and polished look. Expert tips and step-by-step instructions provided.
(Many of the links in this article redirect to a specific reviewed product. Your purchase of these products through affiliate links helps to generate commission for Storables.com, at no extra cost. Learn more)
Introduction
Welcome to the world of gardening and the wonderful journey of maintaining a beautiful garden. If you have juniper ground cover in your garden, you’ve made a fantastic choice. Juniper ground cover is a versatile and low-maintenance option for many gardeners. Not only does it provide an attractive carpet-like appearance, but it also serves as excellent erosion control and weed suppression.
However, like any plant, juniper ground cover requires regular maintenance to keep it looking its best. One essential aspect of juniper ground cover maintenance is trimming. Trimming helps to promote healthy growth, maintain the desired shape, and prevent overgrowth that can take away from the overall aesthetic appeal of your garden.
In this article, we will guide you through the process of trimming juniper ground cover step by step. But before we dive into the practical aspects, let’s take a moment to understand more about juniper ground cover and why trimming is necessary.
Key Takeaways:
- Keep your juniper ground cover healthy and beautiful by trimming dead branches, shaping overgrown areas, and maintaining its desired shape. Regular monitoring and care will ensure long-term vitality.
- Properly prepare, inspect, and trim your juniper ground cover to maintain its year-round beauty and low-maintenance nature. Remember to clean up and monitor for healthy regrowth.
Read more: How To Get Rid Of Juniper Ground Cover
Understanding Juniper Ground Cover
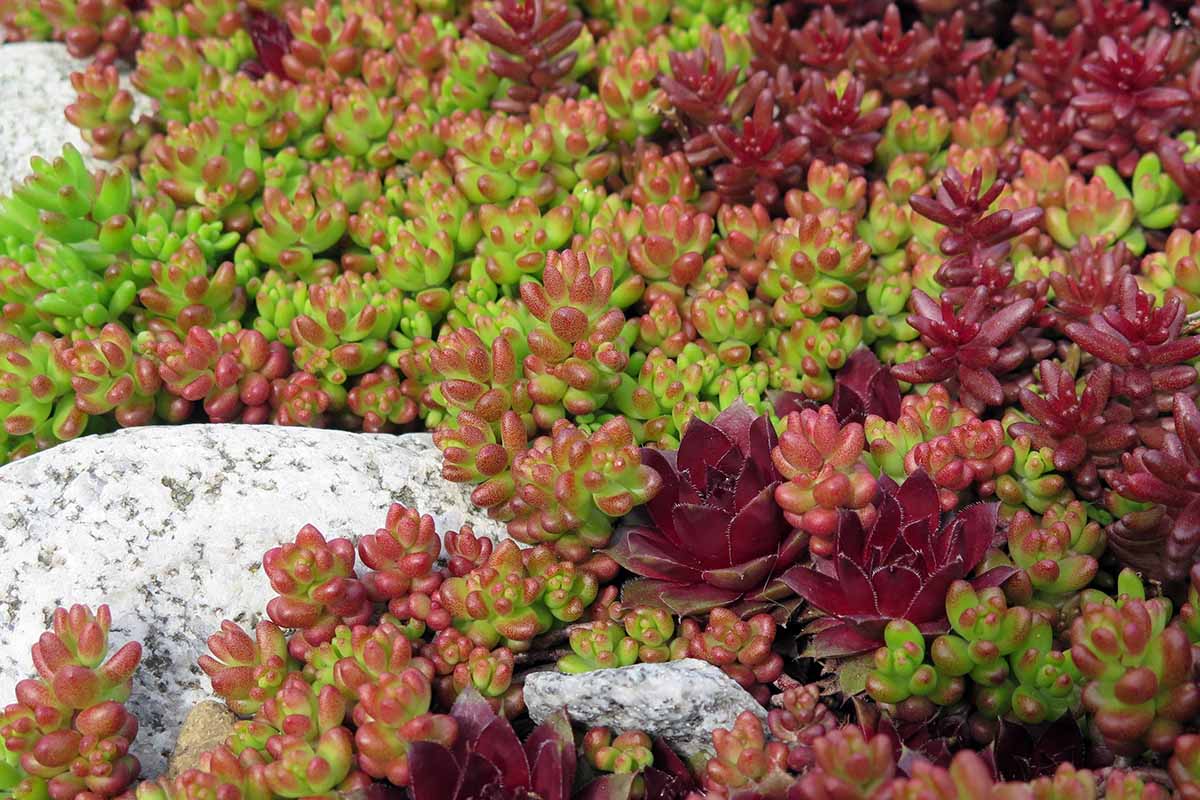
Juniper ground cover, also known as Juniperus horizontalis, is a popular choice for gardens and landscapes. It is a low-growing, evergreen shrub that spreads wide instead of growing tall, making it an excellent option for ground cover that can effectively fill in empty spaces with its lush foliage.
Juniper ground cover is prized for its durability, adaptability, and ability to thrive in various climates and soil conditions. Its dense foliage provides excellent coverage and acts as a natural barrier against weeds, making it a popular choice for those looking for low-maintenance landscaping options.
One of the key benefits of having juniper ground cover is its year-round beauty. Its needle-like leaves come in different shades of green, ranging from deep green to bluish-gray, and some varieties even feature attractive variegation. This wide range of colors allows gardeners to create visually appealing landscapes with contrasting shades of foliage.
Additionally, juniper ground cover produces small, berry-like cones that add a touch of interest and visual appeal to the plant. These cones typically mature to a reddish-brown color and can persist on the plant for a long time.
While juniper ground cover is known for being low-maintenance, it still requires regular care and trimming to keep it looking its best. Trimming is necessary to maintain the desired shape, prevent overgrowth, and promote healthy growth. By trimming regularly, you can ensure that your juniper ground cover remains an attractive feature in your garden for years to come.
When to Trim Juniper Ground Cover
Timing is key when it comes to trimming juniper ground cover. Knowing the right time to trim will ensure optimal results and the least amount of stress on the plant. While juniper ground cover can tolerate trimming throughout the year, it is best to do it during specific times to promote healthy growth and minimize any potential damage.
The ideal time to trim juniper ground cover is during the late winter or early spring. This period, often referred to as the dormant season, is when the plant is not actively growing. Trimming during this time allows the juniper to recover and regenerate before the growing season begins.
The dormant season is a great time to assess the overall health and growth of your juniper ground cover. Take this opportunity to inspect the plant for any damaged or dead branches. Trim them back to the main stem to encourage new growth and prevent the spread of disease or pests.
Another key consideration when deciding when to trim is to avoid trimming during extreme weather conditions. Extreme heat or cold can add stress to the plant, making it more susceptible to damage. Aim to trim on a calm and mild day to ensure the best results.
It’s essential to recognize that not all juniper ground cover varieties have the same growth rate or need for trimming. Some varieties grow faster and require more frequent trimming, while others have a slower growth rate and need less maintenance.
To determine the specific trimming needs of your juniper ground cover, observe its growth patterns. If you notice excessive overgrowth or branches extending beyond the desired shape, it’s a good indication that it’s time for a trim.
Remember, regular trimming during the appropriate times will keep your juniper ground cover looking neat, healthy, and vibrant throughout the year.
Tools and Materials Needed
Before you embark on trimming your juniper ground cover, it’s essential to gather the necessary tools and materials. Having the right equipment will make the task easier and more efficient, ensuring that you achieve the desired results. Here are the tools and materials you’ll need:
- Gloves: Ensure you have a pair of sturdy gardening gloves to protect your hands from scratches and potential irritants.
- Pruning Shears: Invest in a good pair of pruning shears specifically designed for trimming shrubs. Choose ones with sharp blades and comfortable handles for ease of use.
- Loppers: For thicker branches or areas that require more cutting power, loppers are essential. Look for loppers with long handles for better reach and leverage.
- Hand Pruners: Hand pruners, also known as secateurs, are useful for trimming smaller branches and making more precise cuts. Opt for a pair with a bypass cutting mechanism for clean cuts.
- Hand Saw: If you encounter larger branches that cannot be easily pruned with shears or loppers, a hand saw will come in handy. Choose a saw with a sharp blade and a comfortable grip.
- Protective Eyewear: While not always necessary, wearing protective eyewear is advisable, especially when using pruning tools that can cause debris to fly.
- Ladder or Step Stool: Depending on the height of your juniper ground cover, you may need a ladder or step stool to reach higher branches safely.
- Trash Bags or Container: Prepare a trash bag or container nearby to collect the trimmed branches and other garden waste for easy disposal.
By having these tools and materials ready beforehand, you’ll be well-prepared to tackle the trimming process and ensure a smooth and efficient experience.
Step 1: Inspect the Juniper Ground Cover
Before you begin trimming your juniper ground cover, it’s crucial to inspect the plant thoroughly. This step will help you identify any damaged or dead branches that need to be pruned and determine the overall health of the ground cover. Here’s how to inspect your juniper ground cover:
- Walk around the plant: Take a slow walk around your juniper ground cover, closely observing its branches and foliage. Look for any branches that appear dried out, discolored, or have no signs of new growth. These are likely dead branches and should be pruned.
- Check for disease or pest infestation: Look for any signs of disease or pest infestation, such as discoloration, unusual growths, or presence of pests on the branches. If you notice any of these signs, it’s important to address the issue before proceeding with trimming.
- Evaluate overgrown areas: Pay attention to any areas where the juniper ground cover has become overgrown or is extending beyond its desired shape. These areas may require more extensive trimming to maintain a tidy appearance.
- Consider the overall shape: Assess the overall shape of your juniper ground cover and determine if it matches your desired aesthetic. If certain areas are uneven or straying from the intended shape, you can make note of it and address it during the trimming process.
Inspecting the juniper ground cover before trimming allows you to have a clear understanding of its condition and what needs to be addressed. By identifying any potential issues or areas for improvement, you can proceed with confidence to the next steps in the trimming process.
Read more: How To Plant Juniper Ground Cover
Step 2: Prepare for Trimming
Once you have inspected your juniper ground cover and identified the branches that need to be trimmed, it’s time to prepare for the trimming process. Proper preparation will ensure that the task goes smoothly and that you have everything you need at hand. Here’s how to prepare for trimming your juniper ground cover:
- Gather your tools: Collect all the necessary tools mentioned earlier, including pruning shears, loppers, hand pruners, hand saw, gloves, protective eyewear, and a ladder or step stool if needed. Having your tools within reach will save you time and effort during the trimming process.
- Put on protective gear: Before you start trimming, remember to put on your gardening gloves and protective eyewear. This will protect you from scratches, debris, and potential eye injuries.
- Plan your trimming strategy: Take a moment to plan your trimming strategy. Decide which branches you will prune first and in what order. Having a plan will help you stay organized and ensure that you don’t overlook any areas that need attention.
- Prepare a clean work area: Clear the area around the juniper ground cover, removing any obstacles or debris that could hinder your movement or cause accidents. Creating a clean and safe work area will allow you to focus on the trimming process without any distractions.
- Consider using a tarp or drop cloth: If you’re trimming a larger area of your juniper ground cover, consider placing a tarp or drop cloth on the ground to catch any trimmed branches and debris. This will make cleanup easier once you have finished trimming.
- Stay hydrated: Trimming can be physically demanding, so be sure to have a bottle of water nearby to keep yourself hydrated throughout the process.
By preparing adequately before you begin trimming, you will create a conducive environment for a successful trimming session. With your tools ready, protective gear on, and a clear plan in mind, you’re now set to tackle the next steps and bring your juniper ground cover back to its optimal shape and health.
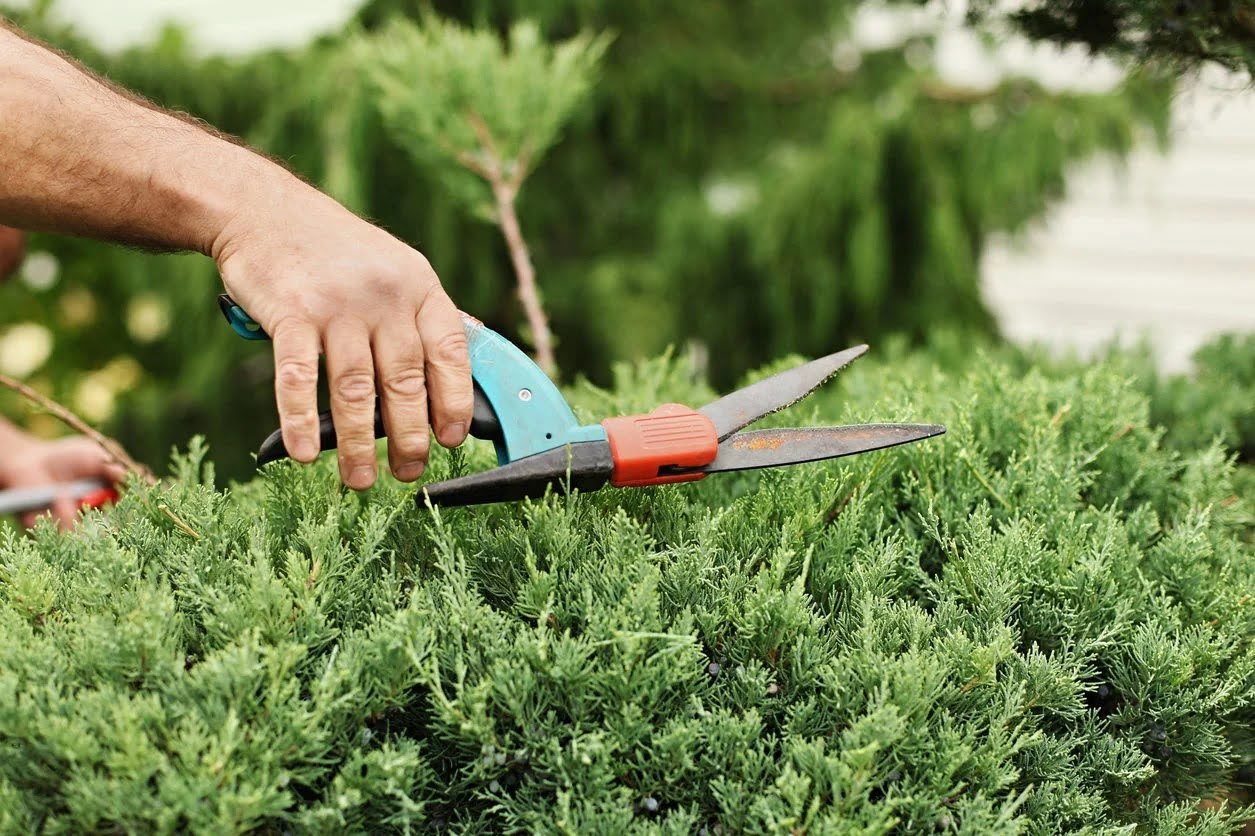
Step 3: Prune Dead or Damaged Branches
Now that you’re prepared, it’s time to start trimming your juniper ground cover. The first step in the actual trimming process is to prune any dead or damaged branches. Removing these branches will help improve the overall health and appearance of your juniper ground cover. Here’s how to prune dead or damaged branches:
- Identify dead or damaged branches: Look for branches that are brown, brittle, or lack any signs of new growth. These are likely dead branches and should be pruned. Additionally, check for branches with obvious damage, such as breakage or disease symptoms, and mark them for pruning.
- Prepare your pruning shears or hand pruners: Choose the appropriate tool for the size of the branches you’re pruning. Use pruning shears for smaller branches and hand pruners for more precise cuts. Ensure that your tools are clean and sharp for effective pruning.
- Make clean cuts: Position your pruning tool just above the branch collar (the swollen area where the branch joins the main stem). Make a clean cut, angling it away from the main stem to promote healing and discourage disease entry.
- Continue pruning all dead or damaged branches: Work your way around the juniper ground cover, pruning all the marked dead or damaged branches. Take your time and pay attention to each cut, ensuring that you remove the entire branch without leaving any stubs.
- Inspect your work: After pruning dead or damaged branches, step back and inspect the juniper ground cover. Take note of any missed branches or ones that may still require further pruning. Make any additional cuts as needed to achieve a cleaner and healthier appearance.
By pruning dead or damaged branches, you’re removing potential sources of disease or pests and allowing the juniper ground cover to focus its energy on the healthy parts. This step sets the foundation for a successful trimming session and ensures that your juniper ground cover will thrive and flourish.
Step 4: Trim Overgrown Areas
After cleaning up any dead or damaged branches, it’s time to tackle the overgrown areas of your juniper ground cover. Trimming these areas will help maintain the desired shape and prevent the plant from becoming unruly or out of control. Here’s how to trim overgrown areas of your juniper ground cover:
- Identify overgrown sections: Take a close look at your juniper ground cover and identify areas where the growth has become excessive or extended beyond its intended boundaries. These are the sections that need to be trimmed back to maintain a neat and compact appearance.
- Choose the appropriate tool: Depending on the thickness of the branches, select the appropriate pruning tool. For smaller and thinner branches, pruning shears or hand pruners will suffice. For thicker branches, you may need to use loppers or a hand saw.
- Trim back the overgrowth: Carefully trim back the overgrown branches by making clean cuts just above a junction with another branch or the main stem. Avoid cutting too close to the main stem, as this can result in damage or stunted growth.
- Step back and evaluate: Regularly step back and assess your trimming progress to ensure that you’re achieving the desired shape and balance. Trim the branches as necessary to create an even and aesthetically pleasing appearance.
- Take your time: Take your time during this step, as precision is key. Trim one branch at a time, making deliberate cuts and stepping back to observe the results. This patient approach will ensure that you achieve the desired shape without overdoing it.
Trimming overgrown areas helps maintain the overall shape and density of your juniper ground cover. By removing excessive growth, you allow more light and air circulation to reach the inner parts of the plant, promoting healthy growth and preventing any potential issues.
Quick Tip:
If you’re unsure about the extent of trimming needed for overgrown areas, consider trimming gradually. Trim a little at a time, assess the results, and continue as necessary. It’s always better to trim conservatively and make additional cuts if needed, rather than removing too much at once and potentially harming the plant.
When trimming juniper ground cover, use sharp, clean shears to remove dead or overgrown branches. Trim back no more than one-third of the plant at a time to avoid stress. Always trim in the spring or early summer for best results.
Read more: How To Trim Ivy Ground Cover
Step 5: Shape and Thin Out the Ground Cover
Now that you have trimmed the dead branches and overgrown areas of your juniper ground cover, it’s time to focus on shaping and thinning out the plant. Shaping helps maintain a uniform appearance, while thinning out reduces overcrowding and promotes better airflow. Follow these steps to shape and thin out your juniper ground cover:
- Visualize the desired shape: Before you start shaping, take a moment to visualize the desired shape and size of your juniper ground cover. Determine whether you want a more rounded, rectangular, or natural shape. This will serve as your guide during the shaping process.
- Choose the appropriate tool: Depending on the thickness of the branches, select the appropriate pruning tool. Pruning shears or hand pruners are suitable for smaller branches, while loppers may be necessary for thicker ones.
- Begin shaping: Start shaping by trimming the branches that extend beyond the desired boundaries. Make clean and precise cuts just above a junction with another branch or the main stem. Follow the natural shape you visualized, moving around the plant and consistently assessing your progress.
- Thin out overcrowded areas: Identify areas where the juniper ground cover has become too dense and overcrowded. To thin out these areas, selectively remove some of the branches by cutting them back to a junction with another branch or the main stem. This opens up the plant and allows for better airflow and light penetration.
- Step back and evaluate: Regularly step back and evaluate your shaping and thinning progress. Ensure that you’re achieving the desired shape and that the density is consistent throughout the plant. Make any additional cuts as needed to achieve balance and symmetry.
Shaping and thinning out your juniper ground cover not only enhances its visual appeal but also promotes healthier growth. By removing excess branches and maintaining an even density, you create an environment for better airflow and light distribution, which are vital for overall plant health.
Quick Tip:
When shaping and thinning out your juniper ground cover, keep in mind that it’s better to err on the side of caution and make conservative cuts. You can always make additional cuts if needed. Avoid over-pruning, as it can lead to an unbalanced appearance and potential stress on the plant.
Step 6: Clean Up and Dispose of Trimmed Materials
After completing the trimming process, it’s important to clean up and dispose of the trimmed materials properly. This ensures the tidiness and overall neatness of your garden. Follow these steps to clean up and dispose of the trimmed materials from your juniper ground cover:
- Collect the trimmed branches: Gather all the trimmed branches and place them in a designated area. Use a tarp or drop cloth to easily collect and contain the trimmed materials. This reduces clutter and makes cleanup more efficient.
- Prepare bags or containers: Get trash bags or containers ready to dispose of the trimmed materials. Make sure they are sturdy enough to hold the branches and other garden waste.
- Break down larger branches: If you have trimmed larger branches that won’t fit into the bags or containers, break them down into smaller sections. Use your hand pruners or saw to cut them into manageable pieces.
- Fill the bags or containers: Start filling the bags or containers with the trimmed branches and other garden waste. Compact the materials carefully to make space for more, ensuring that the bags or containers are not overloaded.
- Seal and dispose: Once the bags or containers are full, securely seal them to prevent any accidental spills or scattering of the trimmed materials. Dispose of them according to your local waste disposal regulations. Check if there are any specific guidelines for yard waste or if it can be composted.
- Clean up the work area: Lastly, clean up the work area by removing any remaining debris or fallen leaves. Use a rake or broom to sweep the area and leave it tidy.
Properly cleaning up and disposing of the trimmed materials helps maintain the overall aesthetics of your garden. It also reduces the risk of pest infestations and potential hazards. By following these steps, you ensure a clean and well-organized garden space.
Step 7: Monitor and Maintain the Trimming Results
Once you have completed the trimming process for your juniper ground cover, it’s essential to monitor and maintain the results to ensure long-term success. Regular monitoring and care will help keep your juniper ground cover healthy and looking its best. Follow these steps to monitor and maintain the trimming results:
- Keep an eye on regrowth: After trimming, closely observe the regrowth of your juniper ground cover. Look for any branches that may be growing faster or unevenly compared to the rest of the plant. Trim these branches as necessary to maintain a balanced and uniform appearance.
- Water and fertilize appropriately: Provide adequate water and fertilization to support the regrowth and overall health of your juniper ground cover. Follow the specific care requirements of your juniper variety, considering factors such as soil type, sunlight, and climate conditions.
- Check for pests and diseases: Regularly inspect your juniper ground cover for any signs of pest infestation or disease. Look for symptoms such as discolored foliage, unusual growths, or presence of pests. Address any issues promptly to prevent further damage to the plant.
- Prune as needed: As your juniper ground cover continues to grow, you may need to perform maintenance pruning to keep it in shape. Keep an eye on the plant’s size and shape, and trim any branches that extend beyond the desired boundaries or disrupt the overall appearance.
- Keep the area weed-free: Proactively manage weeds around your juniper ground cover to prevent them from competing for resources and hampering its growth. Regularly remove any weeds that appear and consider applying a layer of mulch to suppress weed growth.
- Monitor for environmental stress: Monitor your juniper ground cover for any signs of environmental stress, such as drought, extreme heat, or frost damage. Take appropriate measures to protect the plant, such as providing extra water during dry periods or covering it during extreme weather conditions.
By regularly monitoring and maintaining your juniper ground cover, you can ensure that the results of your trimming efforts last. Consistent care will help promote healthy growth, maintain the desired shape, and keep your garden looking vibrant and beautiful year-round.
Quick Tip:
Take before and after photos of your juniper ground cover to capture the transformation and track the changes over time. This will not only serve as a visual record but also help you assess the effectiveness of your trimming techniques and make any necessary adjustments in the future.
Conclusion
Trimming your juniper ground cover is a crucial part of maintaining its health, appearance, and overall vitality. By following the step-by-step guide outlined in this article, you have learned how to effectively trim your juniper ground cover to promote healthy growth and maintain its desired shape.
Understanding the characteristics of juniper ground cover, such as its low-maintenance nature and year-round beauty, provides a great foundation for successful trimming. Knowing when to trim, gathering the necessary tools and materials, and properly inspecting the plant before starting the trimming process are vital aspects of achieving desirable results.
The step-by-step approach covered various stages, including pruning dead or damaged branches, trimming overgrown areas, shaping and thinning out the ground cover, cleaning up after the trimming process, and monitoring and maintaining the results. Each step was designed to guide you through the process seamlessly and ensure that your juniper ground cover thrives.
Remember to take your time, make deliberate cuts, and regularly evaluate your progress. Be mindful of the plant’s overall shape and balance, and always prioritize its health and well-being. Regular monitoring and care, such as watering, fertilization, weed control, and inspecting for pests and diseases, are key to maintaining the results of your trimming efforts in the long term.
By dedicating time and effort to trimming your juniper ground cover, you will be rewarded with a stunning garden feature that enhances the beauty and appeal of your outdoor space. So go ahead, put your newfound knowledge into practice, and enjoy the rejuvenated and vibrant appearance of your juniper ground cover.
Frequently Asked Questions about How To Trim Juniper Ground Cover
Was this page helpful?
At Storables.com, we guarantee accurate and reliable information. Our content, validated by Expert Board Contributors, is crafted following stringent Editorial Policies. We're committed to providing you with well-researched, expert-backed insights for all your informational needs.


0 thoughts on “How To Trim Juniper Ground Cover”