Home>Garden Essentials>Garden Storage>How To Build Armoire Wardrobe
Garden Storage
How To Build Armoire Wardrobe
Modified: August 24, 2024
Learn how to build your own armoire wardrobe with ample storage space. Create a stylish and functional storage solution for your bedroom or any room in your home.
(Many of the links in this article redirect to a specific reviewed product. Your purchase of these products through affiliate links helps to generate commission for Storables.com, at no extra cost. Learn more)
Introduction
Are you tired of digging through a disorganized closet? Do you long for a stylish and functional solution to store your clothes and accessories? Look no further than the armoire wardrobe! This versatile piece of furniture offers ample storage space and adds a touch of elegance to any room.
Building your own armoire wardrobe allows you to customize every aspect, from the size and layout to the material and finish. It may seem like a daunting project, but with the right tools, materials, and a little guidance, you can create a stunning piece that meets your storage needs and complements your decor.
In this step-by-step guide, we will walk you through the process of building an armoire wardrobe from scratch. Whether you are a seasoned DIY enthusiast or a beginner looking to take on a new project, we have you covered. So roll up your sleeves, grab your tools, and let’s get started!
Before we dive into the construction process, let’s briefly go over the materials and tools you will need to complete this project:
- Wood boards
- Screws
- Wood glue
- Measuring tape
- Saw
- Drill
- Screwdriver
- Sandpaper
- Paint or stain
- Paintbrush
- Knobs or handles
Now that you have a general idea of what you’ll need, let’s move on to the first step of building your armoire wardrobe: gathering materials and tools.
Key Takeaways:
- Building your own armoire wardrobe allows you to create a customized storage solution that fits your needs and complements your style. From gathering materials to organizing the interior space, this DIY project offers both utility and creativity.
- By following the step-by-step process outlined in this guide, you can construct a functional and aesthetically pleasing piece of furniture that will serve you for years to come. Embrace the joy of woodworking and embark on this rewarding endeavor.
Read also: 11 Unbelievable Armoire Wardrobe for 2025
Step 1: Gather Materials and Tools
Before you can embark on your armoire wardrobe building journey, you’ll need to gather all the necessary materials and tools. Here’s a breakdown of what you’ll need:
Materials:
- Wood boards: Choose high-quality boards that are sturdy and durable. The type of wood is up to your preference, but popular choices include pine, oak, or plywood.
- Screws: Opt for screws that are appropriate for the thickness of your wood boards. Make sure to have a variety of lengths on hand to accommodate different parts of the wardrobe.
- Wood glue: This will help reinforce joints and ensure a strong bond between the pieces of wood.
- Measuring tape: Essential for accurate measurements during the planning and construction phases.
- Saw: You’ll need a saw to cut your wood boards to the desired dimensions. A circular saw or a miter saw will work well for this project.
- Drill: A drill will be used to create holes for screws and attach hardware to the wardrobe.
- Screwdriver: A screwdriver will be necessary to drive in screws and secure the different components together.
- Sandpaper: Prepare different grits of sandpaper to smooth the surfaces of the wood and ensure a professional finish.
- Paint or stain: Choose a paint or stain that matches your desired aesthetic. Consider using a primer for better paint adhesion.
- Paintbrush: Use a high-quality paintbrush to apply the paint or stain evenly on the wardrobe.
- Knobs or handles: Select hardware that complements the style of your armoire wardrobe. This includes knobs or handles for the doors and drawers.
Tools:
- Measuring tape: essential for accurate measurements during the planning and construction phases of your wardrobe.
- Saw: You’ll need a saw to cut your wood boards to the desired dimensions. A circular saw or a miter saw will work well for this project.
- Drill: A drill will be used to create holes for screws and attach hardware to the wardrobe.
- Screwdriver: A screwdriver will be necessary to drive in screws and secure the different components together.
- Sandpaper: Prepare different grits of sandpaper to smooth the surfaces of the wood and ensure a professional finish.
- Paintbrush: Use a high-quality paintbrush to apply the paint or stain evenly on the wardrobe.
Once you have gathered all the necessary materials and tools, you’ll be one step closer to building your very own armoire wardrobe. In the next step, we will focus on measuring and planning the design of your wardrobe.
Step 2: Measure and Plan
With all the materials and tools ready, it’s time to move on to the crucial step of measuring and planning your armoire wardrobe. Proper measurements are essential to ensure a well-fitted and functional piece of furniture. Here’s what you need to do:
1. Determine the Dimensions:
Start by considering the space where you intend to place your armoire wardrobe. Measure the height, width, and depth of that area. These measurements will serve as a guideline for determining the overall dimensions of your wardrobe.
2. Sketch the Design:
Using graph paper or a design software, create a rough sketch of your desired wardrobe design. Include details such as the number of doors, drawers, shelves, and any other specific features you want to incorporate. This sketch will help you visualize the final product and make any necessary adjustments before starting the construction process.
3. Plan the Interior Layout:
Consider how you want to organize the interior space of your armoire wardrobe. Think about the specific storage needs you have, such as hanging space for clothes, compartments for shoes, or adjustable shelves for accessories. Design the interior layout according to your requirements, ensuring that it is both aesthetically pleasing and functional.
4. Calculate Materials:
Based on your design and measurements, calculate the amount of wood and other materials needed for the construction of your wardrobe. This will help you create a detailed shopping list and avoid any unnecessary trips to the store.
5. Consider Accessibility:
Think about how you will access the contents of your wardrobe. Plan for features like doors, drawers, and hardware that make it convenient to use and retrieve items. Also, consider the available space for opening doors and drawers without obstruction.
6. Take Safety Precautions:
When designing your armoire wardrobe, keep safety in mind. Ensure that it is stable, sturdy, and won’t tip over easily. Consider anchoring it to the wall for added security, especially if you have children or pets in your home.
By taking the time to measure and plan your armoire wardrobe, you’ll have a clear roadmap for the construction process. In the next step, we will guide you through building the frame of your wardrobe.
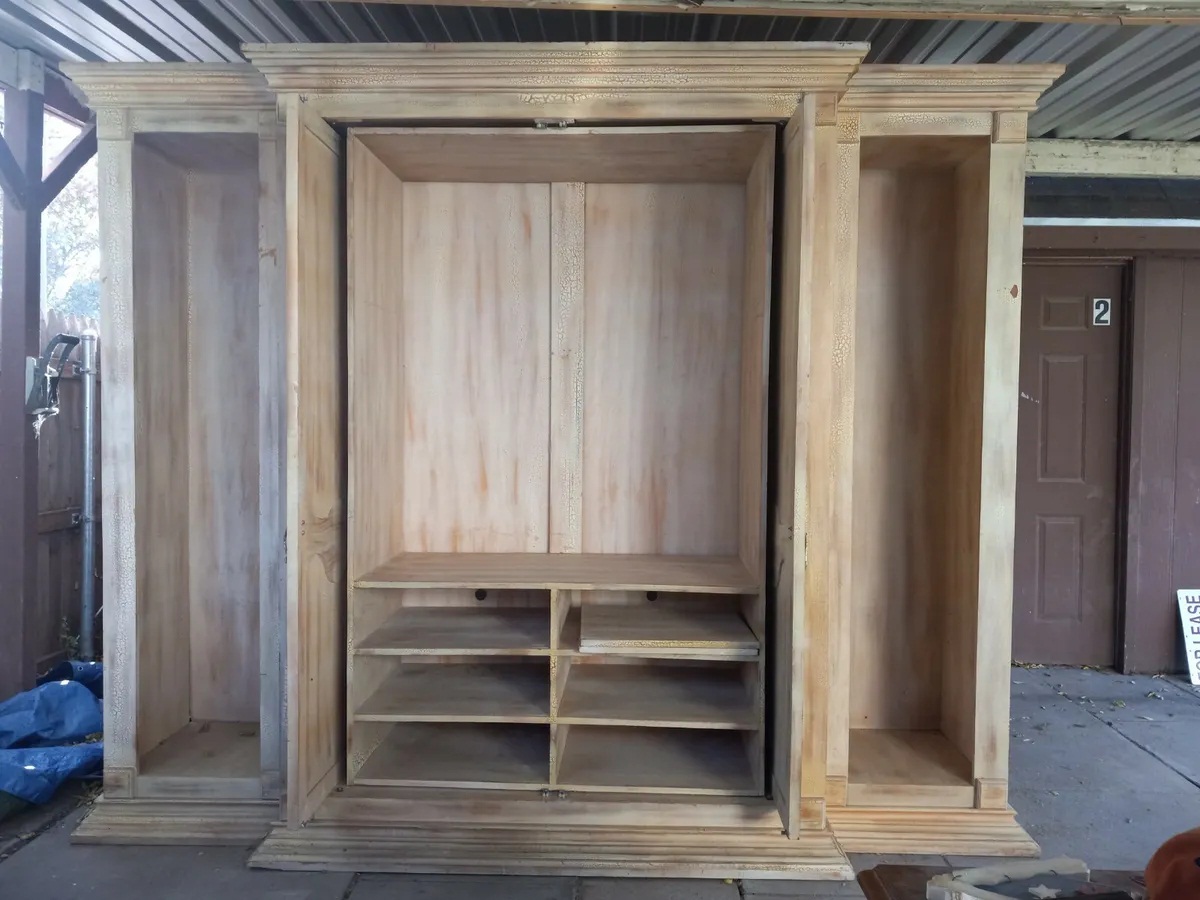
Step 3: Build the Frame
Now that you have measured and planned your armoire wardrobe, it’s time to start building the frame. The frame is the skeleton of your wardrobe and provides the structure and stability for the rest of the components. Follow these steps to construct the frame:
1. Cut the Side Panels:
Using your saw, cut two identical pieces for the side panels of your wardrobe. Make sure they are the desired height and width, according to your measurements and design plan.
2. Cut the Top and Bottom Panels:
Similarly, cut two pieces for the top and bottom panels of the frame. Ensure that the measurements match the width and depth of your wardrobe, taking into account the thickness of the side panels.
3. Assemble the Frame:
Using wood glue and screws, attach the top and bottom panels to the side panels. Make sure the corners are square and the panels are flush. You can use clamps to hold the pieces together while you secure them with screws.
4. Install Support Beams:
To reinforce the frame, add support beams inside the wardrobe. Measure and cut pieces of wood to fit vertically between the top and bottom panels. Attach them securely using wood glue and screws.
5. Add Divider Panels:
If you plan on having different sections in your wardrobe, cut and install divider panels accordingly. Measure and cut these panels to fit between the side panels and attach them securely to the top, bottom, and support beams.
6. Check for Stability:
Once the frame is assembled, check for stability by gently shaking it. Make any necessary adjustments to ensure that it is level and firmly constructed. This step is crucial to ensure the overall structural integrity of your armoire wardrobe.
7. Allow for Drying Time:
If you used wood glue during the assembly process, allow it to dry according to the manufacturer’s instructions before moving on to the next steps. This will ensure that the frame is secure and ready for further construction.
By building the frame of your armoire wardrobe, you have laid the foundation for the rest of the construction process. In the next step, we will guide you through attaching the back panel to the frame.
Step 4: Attach the Back Panel
Now that you have constructed the frame of your armoire wardrobe, it’s time to attach the back panel. The back panel not only provides structural support but also adds stability and a finished look to your wardrobe. Follow these steps to attach the back panel:
1. Measure and Cut the Back Panel:
Measure the dimensions of the open back of your wardrobe frame. Using a saw, cut a piece of plywood or any other desired material to fit these measurements. Ensure that the back panel is the same height and width as the frame.
2. Position the Back Panel:
Place the cut back panel against the back of the armoire wardrobe frame. Make sure it is flush with the sides, top, and bottom of the frame. Double-check the alignment and adjust if necessary.
3. Attach the Back Panel:
Using screws or nails, secure the back panel to the frame. Start with the corners and then work your way along the edges. Space the screws or nails evenly to ensure a secure attachment. Make sure they are driven in flush with the surface of the back panel.
4. Reinforce the Back Panel:
To add additional strength and stability, you can reinforce the back panel by attaching wooden support pieces across the width of the wardrobe. Measure and cut these support pieces to fit snugly within the frame and attach them using screws or nails.
5. Finish and Sand:
If desired, you can now finish the back panel. Sand the surface to remove any rough edges or imperfections. Apply paint, stain, or any other finish of your choice to match the aesthetic of your wardrobe.
6. Allow for Drying Time:
If you applied a finish to the back panel, allow it to dry completely before proceeding to the next steps. This will ensure a durable and professional-looking final product.
By attaching the back panel to your armoire wardrobe, you are one step closer to completing your project. In the next step, we will guide you through adding shelves and dividers to effectively organize the interior space of your wardrobe.
When building an armoire wardrobe, make sure to carefully measure the space where it will be placed to ensure it fits properly. Also, consider adding adjustable shelves and drawers for maximum versatility.
Read more: How To Build A Wardrobe
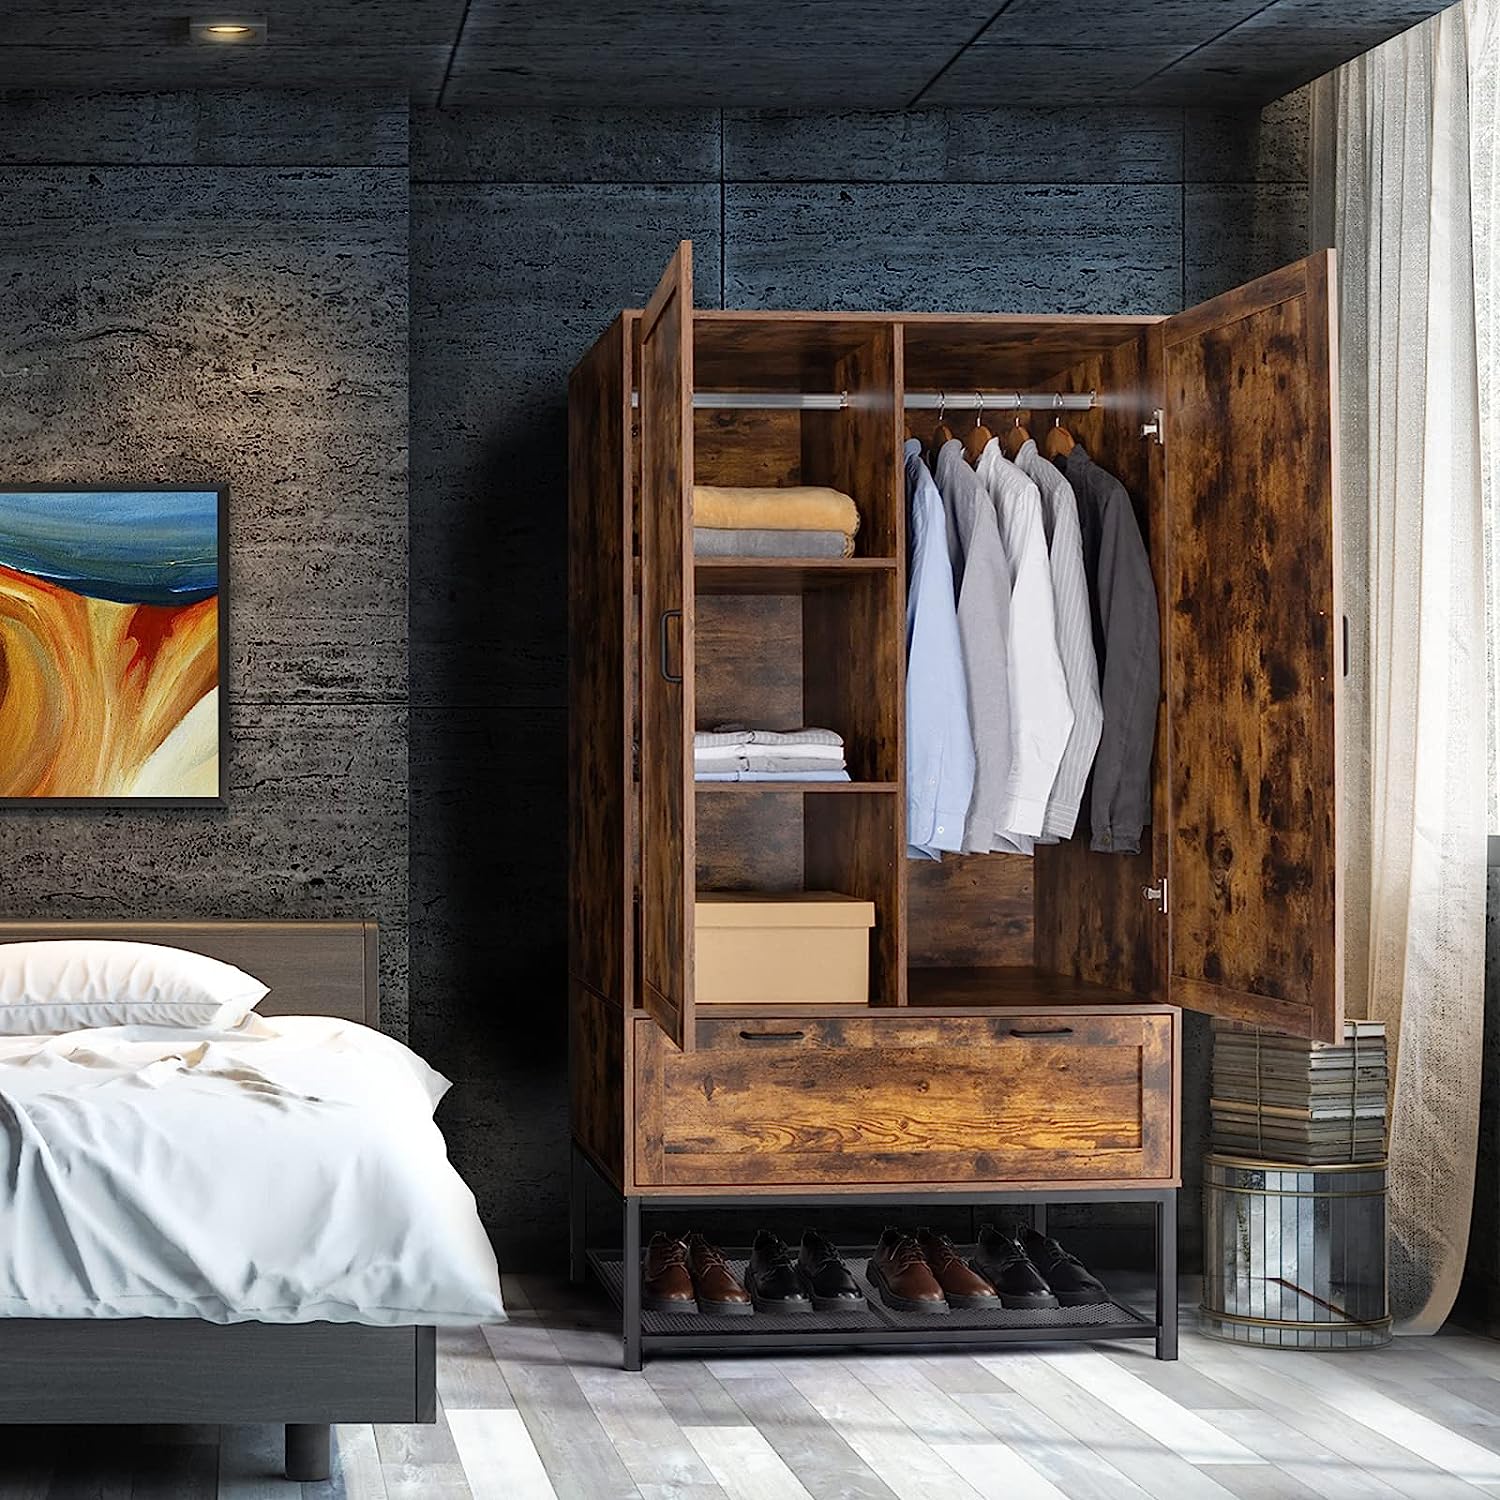
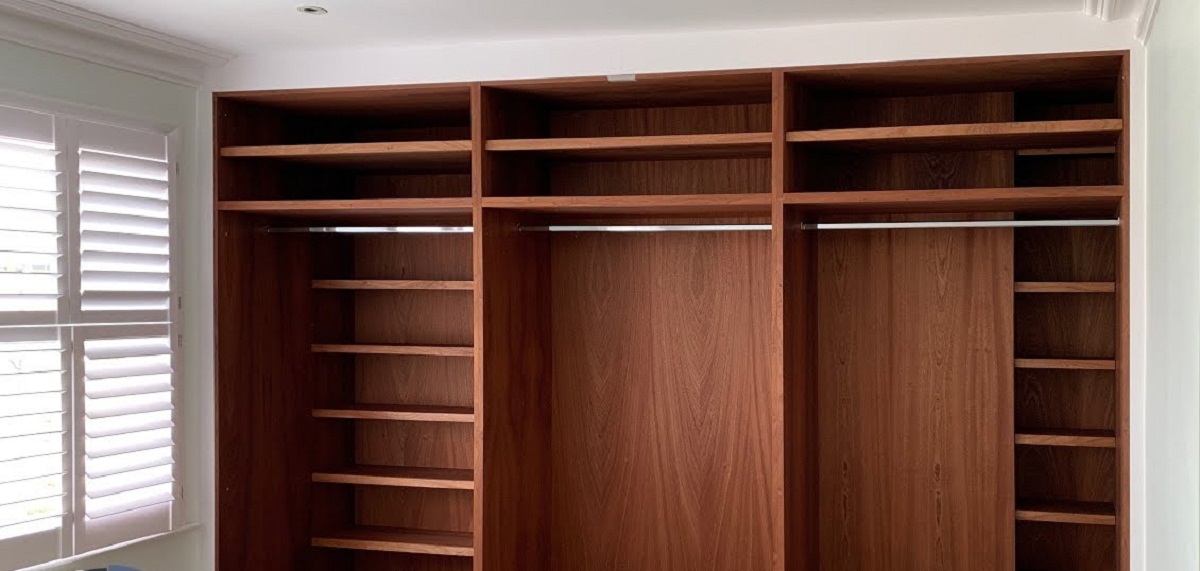
Step 5: Add Shelves and Dividers
Now that you have a sturdy frame with a attached back panel, it’s time to add shelves and dividers to maximize the storage potential and organization of your armoire wardrobe. Follow these steps to incorporate shelves and dividers:
1. Measure and Plan:
Start by determining the desired placement and dimensions of your shelves and dividers based on the contents you plan to store. Measure the interior height and width of your wardrobe frame and mark the locations for the shelves and dividers accordingly.
2. Cut the Shelves:
Using your saw, cut pieces of wood to match the width of your wardrobe frame for the shelves. Ensure that the depth fits comfortably within the frame without obstructing the door or drawer openings.
3. Attach the Shelves:
Place the shelves on the support beams or use shelf support brackets to secure them in place. Make sure they are level and flush with the sides of the frame. Attach the shelves with screws, making sure they are securely fastened.
4. Measure and Cut the Dividers:
If you plan to have compartments within your wardrobe, measure and cut additional pieces of wood to create dividers. These dividers will help keep your belongings organized and separate.
5. Attach the Dividers:
Place the dividers vertically between the shelves or along the sides of the frame. Attach them securely with screws or use wood glue for a seamless appearance. Make sure the dividers are level and sturdy.
6. Sand and Finish:
Sand the surfaces of the shelves and dividers to smooth out any rough edges. Apply a finish or paint of your choice to protect the wood and enhance the appearance of your wardrobe.
By adding shelves and dividers, you have created functional compartments within your armoire wardrobe, allowing you to efficiently organize your belongings. In the next step, we will guide you through the process of installing the doors, which not only provide access but also contribute to the overall aesthetic of your wardrobe.
Step 6: Install the Doors
Now that you have built the interior structure of your armoire wardrobe, it’s time to install the doors. The doors not only serve as access points to your wardrobe but also contribute to the overall aesthetics and functionality. Follow these steps to install the doors:
1. Measure and Plan:
Start by measuring the dimensions of the opening where the doors will be installed. Take into account the height, width, and thickness of the doors you plan to use. Make sure to leave enough clearance for the doors to open and close smoothly without rubbing against the frame.
2. Choose the Door Style:
Consider the style and material of the doors that would suit your armoire wardrobe. You may opt for solid wood doors, glass-insert doors, or a combination of both. Choose a style that matches your overall design aesthetic.
3. Purchase or Build the Doors:
If you’re not building the doors from scratch, purchase pre-made doors that match your measurements. Alternatively, you can build the doors to your desired specifications using wood boards, glass panels, or any other materials of your choice.
4. Install Hinges:
Attach the hinges to the side of the wardrobe frame and the corresponding edges of the doors. Make sure the hinges are aligned properly, and the doors swing freely without any resistance. Use a drill and screws to secure the hinges in place.
5. Hang the Doors:
With the hinges securely in place, carefully hang the doors on the hinges. Check that they are level, straight, and properly aligned with the frame. Adjust the position if necessary.
6. Install Door Handles or Knobs:
Choose handles or knobs that complement the style of your armoire wardrobe. Measure and mark the desired location for the hardware. Use a drill to create holes for the screws, then attach the handles or knobs firmly.
7. Test the Doors:
Open and close the doors to ensure they operate smoothly and without any obstructions. Make any necessary adjustments to the hinges or hardware if needed.
By installing the doors, you have completed an important step in the construction of your armoire wardrobe. In the next step, we will guide you through the process of finishing and painting your wardrobe, adding the final touches to make it truly stand out.
Step 7: Finish and Paint
As you near the final stages of building your armoire wardrobe, it’s time to give it a beautiful finish and paint that will enhance its appearance and protect the wood. Follow these steps to finish and paint your wardrobe:
1. Sand the Surfaces:
Before applying any finish or paint, sand the surfaces of the wardrobe to create a smooth and even texture. Start with a coarse-grit sandpaper and gradually move to a finer grit for a polished finish. Remove any dust or debris after sanding.
2. Select the Finish:
Consider the natural color and grain pattern of your wood and decide whether you want to showcase it with a clear finish or add color with a stain or paint. Choose a finish that suits your aesthetic preferences and complements your room’s decor.
3. Apply the Finish:
If you’ve chosen a clear finish, apply it evenly with a brush, rag, or roller, following the manufacturer’s instructions. Allow each coat to dry fully before applying the next. If you’ve opted for a stain or paint, follow the specific instructions for the product and apply multiple coats as needed for the desired color and coverage.
4. Consider Faux Finishes or Techniques:
If you want to add a unique touch to your armoire wardrobe, consider using faux finishes or decorative painting techniques. For example, you can create a distressed or weathered look, add texture or patterns, or even apply a faux wood grain effect for a more traditional or rustic aesthetic.
5. Allow for Drying Time:
After applying the finish or paint, allow ample drying time to ensure a durable and professional-looking result. Make sure to follow the manufacturer’s instructions for the recommended drying time before moving on to the next steps.
6. Apply a Protective Topcoat:
For added durability and protection, consider applying a clear topcoat over the finish or paint. This will help guard against scratches, moisture, and everyday wear and tear. Choose a topcoat specifically designed for wood and follow the instructions for application.
7. Reinstall Hardware:
If you removed any hardware, such as knobs or handles, during the finishing and painting process, now is the time to reinstall them. Ensure they are properly aligned and securely attached.
By finishing and painting your armoire wardrobe, you not only enhance its visual appeal but also preserve the wood and protect it from damage. In the next step, we will guide you through organizing the interior space of your newly built wardrobe.
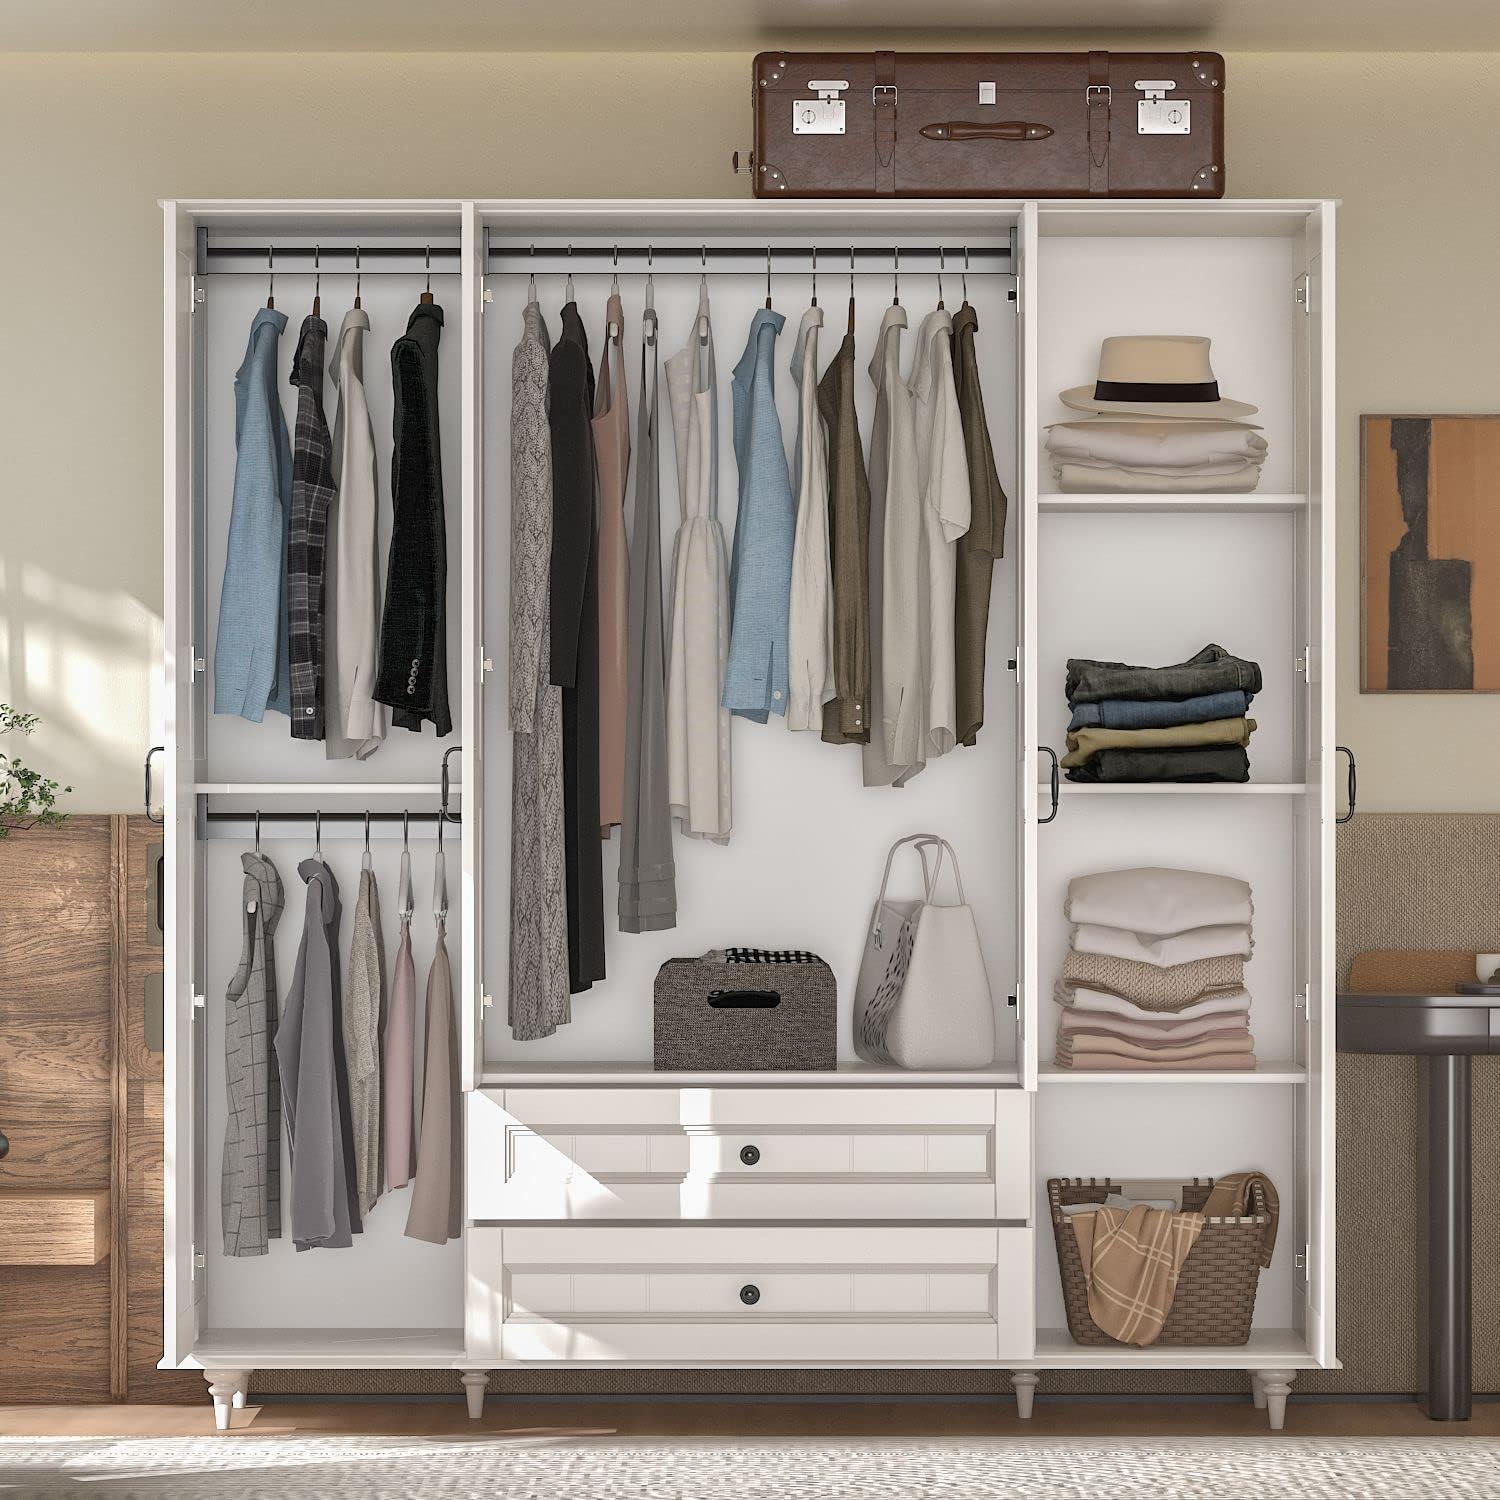
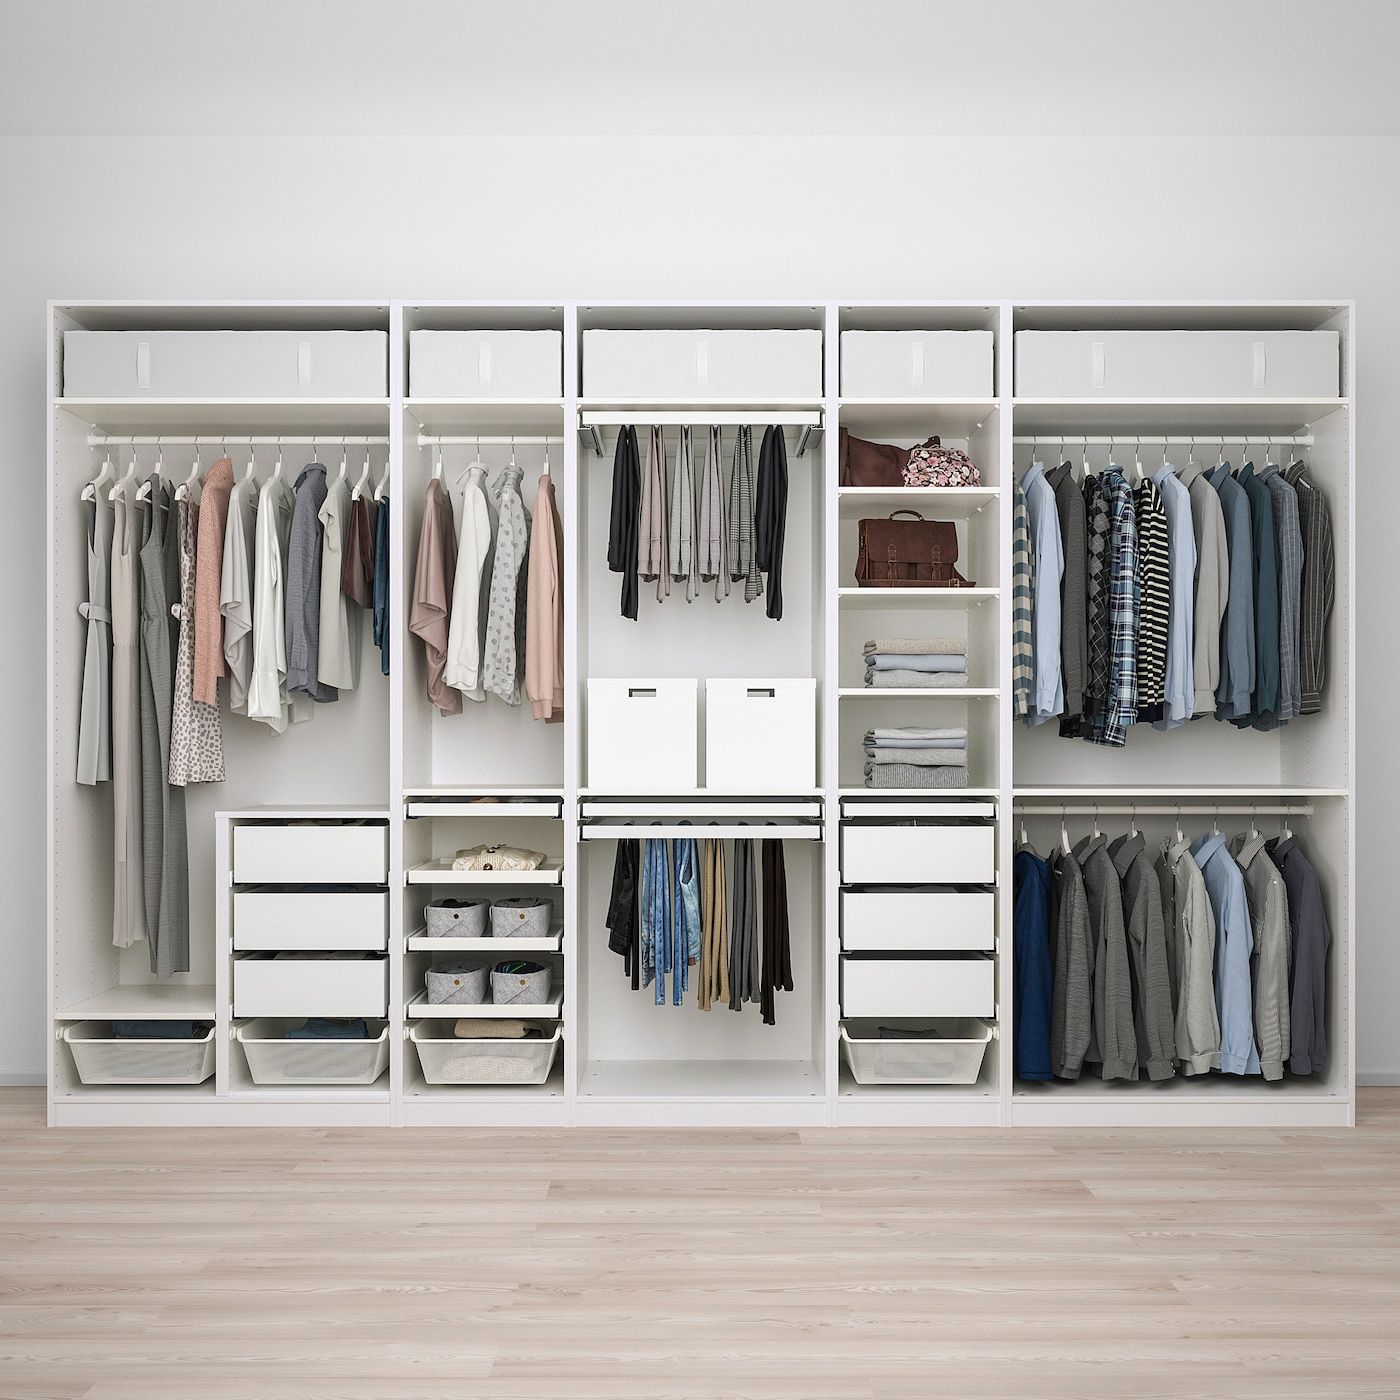
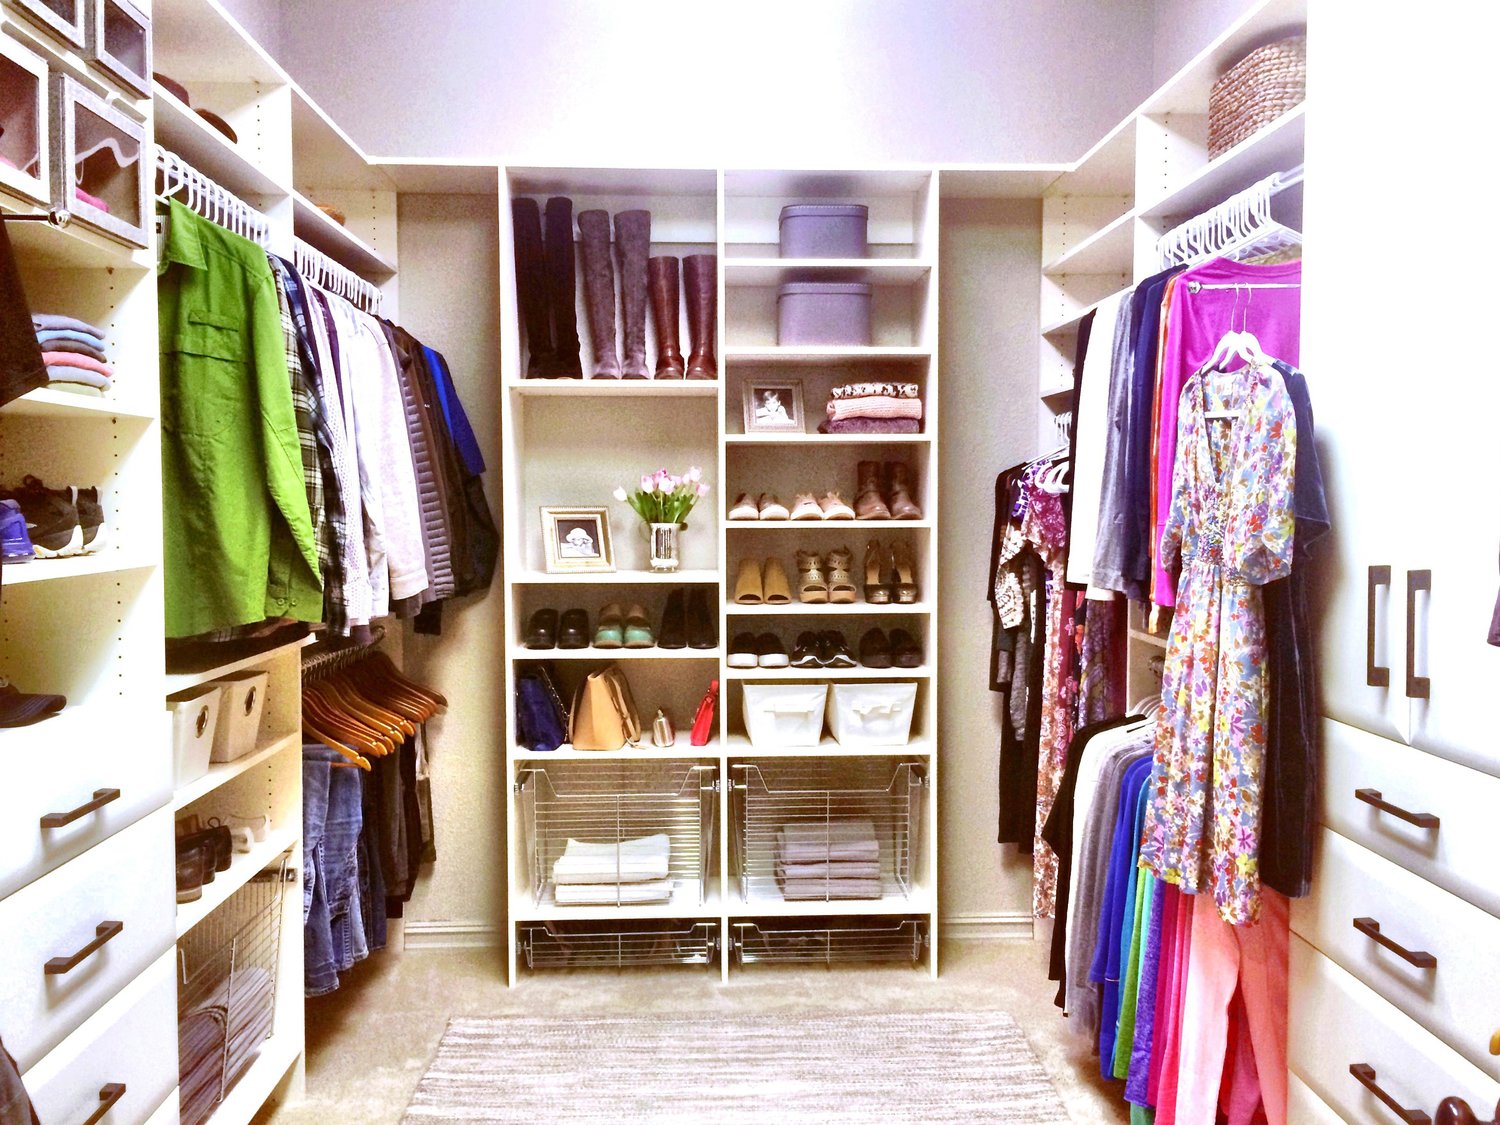
Step 8: Organize the Wardrobe
Now that your armoire wardrobe is complete and beautifully finished, it’s time to organize the interior space to make the most of its storage capabilities. Follow these steps to effectively organize your wardrobe:
1. Evaluate Your Storage Needs:
Consider the types of items you plan to store in your wardrobe, such as clothing, shoes, accessories, or other personal belongings. Assess your storage needs and determine the best way to allocate space for each category.
2. Utilize Vertical Space:
Make use of the vertical space in your wardrobe by installing additional shelves or utilizing hanging rods for items like dresses, coats, or shirts. This maximizes storage capacity and keeps the contents organized and easily accessible.
3. Sort and Categorize:
Sort your items into categories such as tops, bottoms, dresses, shoes, and accessories. This will make it easier to organize and find specific items when you need them. Consider using storage bins or dividers to further separate and group similar items.
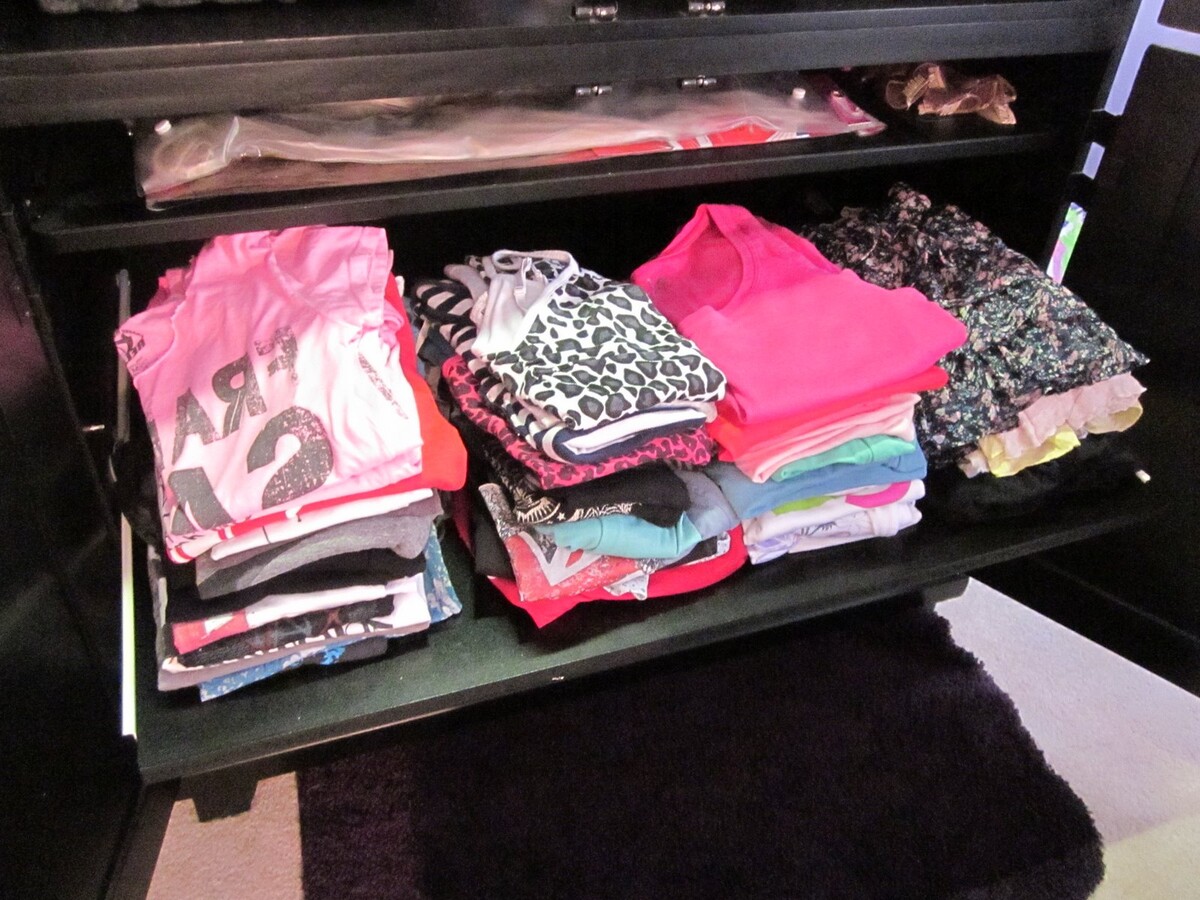
4. Fold and Stack:
If you have limited hanging space, learn how to fold and stack your clothes properly to optimize the available area. Utilize techniques like the KonMari method or Marie Kondo’s folding method to save space and keep your clothing neat and tidy.
5. Utilize Drawers and Shelves:
Assign specific drawers and shelves for different categories of items. For example, dedicate one drawer for socks, another for underwear, and a shelf for folded sweaters or accessories. Use dividers or storage bins to keep smaller items organized and prevent them from getting lost or tangled.
6. Label and Arrange:
Consider labeling the shelves, drawers, or storage bins to help you quickly locate items and maintain a systematic organization system. Arrange items based on frequency of use or personal preference, keeping frequently accessed items at eye level or within easy reach.
7. Maintain and Declutter:
Periodically assess the contents of your wardrobe and declutter items that you no longer need or use. Donate or sell items that are in good condition but no longer serve you. Regularly maintain the organization of your wardrobe by tidying up and returning items to their designated places.
By effectively organizing your wardrobe, you’ll be able to enjoy a clutter-free and well-structured space that makes it easy to find and access your belongings. With the completion of Step 8, you have successfully built, finished, and organized your armoire wardrobe.
To conclude, building your own armoire wardrobe allows you to create a customized storage solution that fits your needs and complements your style. By following the step-by-step process outlined in this guide, you can construct a functional and aesthetically pleasing piece of furniture that will serve you for years to come. Happy organizing!
Conclusion
Building an armoire wardrobe from scratch is a rewarding and fulfilling project that allows you to create a customized storage solution tailored to your needs. Throughout the step-by-step process, you have learned how to gather materials and tools, measure and plan, construct the frame, attach the back panel, add shelves and dividers, install the doors, finish and paint, and organize the interior space. By following these steps, you have successfully transformed raw materials into a functional and stylish piece of furniture.
Not only does building your own armoire wardrobe save you money compared to purchasing a pre-made one, but it also provides a sense of pride and accomplishment. You have the freedom to choose the materials, design, and finishes that best reflect your personal style and complement your home decor.
With your finished armoire wardrobe, you now have a dedicated and organized space to store your clothing, shoes, accessories, and more. The shelves, dividers, and hanging rods provide efficient storage solutions, allowing you to keep things neat, easily accessible, and in excellent condition. By implementing organization techniques and regularly decluttering, you can maintain a well-organized wardrobe that simplifies your daily routine and reduces stress.
Remember to personalize your armoire wardrobe with decorative hardware, such as knobs or handles, to add the final touch and enhance its visual appeal. Experiment with different finishes, paint colors, or faux techniques to match your style and create a unique piece that stands out.
Whether you’re an experienced DIY enthusiast or a beginner, building an armoire wardrobe is an achievable project that offers both utility and creativity. It allows you to showcase your craftsmanship while fulfilling your storage needs. So, gather your materials, embrace the joy of woodworking, and embark on this rewarding endeavor. The end result will be a beautiful and functional armoire wardrobe that you can proudly call your own.
Frequently Asked Questions about How To Build Armoire Wardrobe
Was this page helpful?
At Storables.com, we guarantee accurate and reliable information. Our content, validated by Expert Board Contributors, is crafted following stringent Editorial Policies. We're committed to providing you with well-researched, expert-backed insights for all your informational needs.


0 thoughts on “How To Build Armoire Wardrobe”