Home>Gardening & Outdoor>Outdoor Recreation & Activities>How Long Does It Take To Assemble A Trampoline
Outdoor Recreation & Activities
How Long Does It Take To Assemble A Trampoline
Modified: October 20, 2024
Discover how long it takes to assemble a trampoline and get ready for outdoor recreation and activities in no time. Find out the best tips for quick assembly!
(Many of the links in this article redirect to a specific reviewed product. Your purchase of these products through affiliate links helps to generate commission for Storables.com, at no extra cost. Learn more)
**
Introduction
**
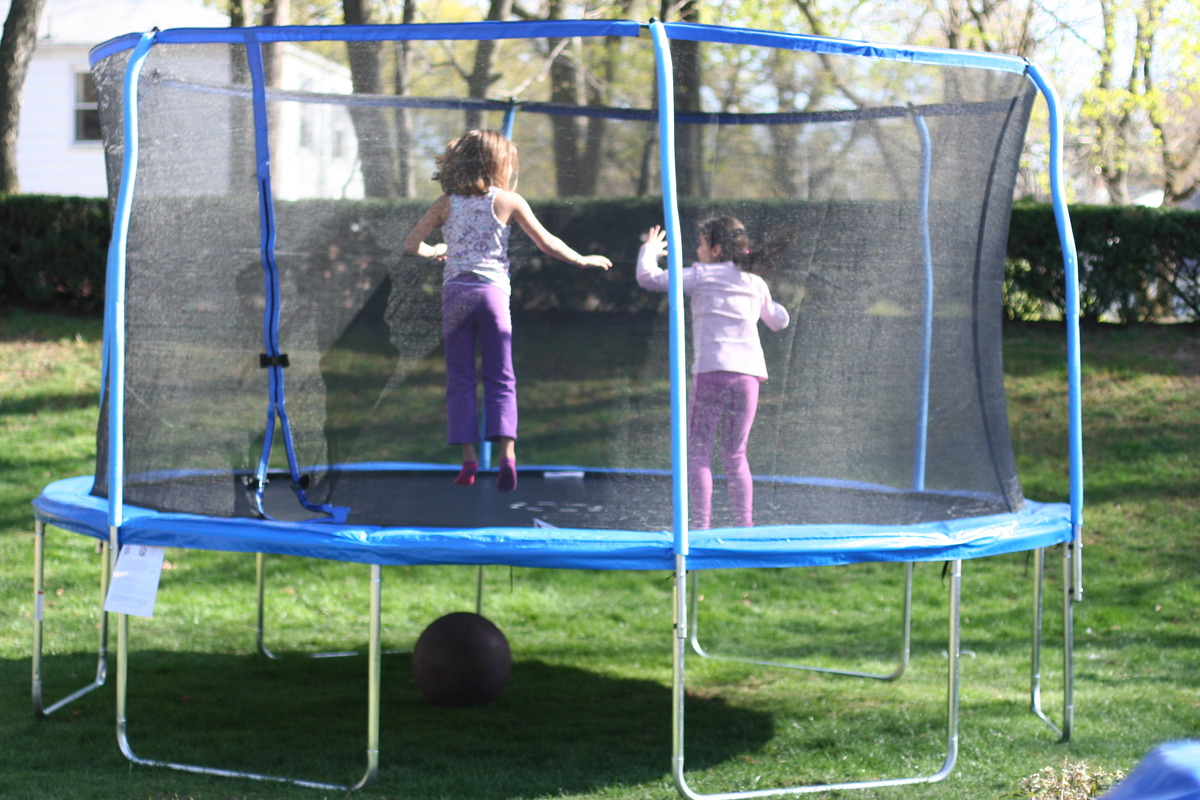
Assembling a trampoline is an exciting yet challenging task that requires careful attention to detail and a bit of physical effort. Whether you're a first-time trampoline owner or a seasoned enthusiast, the time it takes to assemble a trampoline can vary based on several factors. In this article, we'll explore the key elements that influence the assembly duration, the essential tools and equipment needed, a step-by-step assembly process, and valuable tips for efficient assembly. By the end, you'll have a comprehensive understanding of how to approach trampoline assembly, making the process smoother and more enjoyable. Let's dive in and unravel the mysteries of trampoline assembly!
Key Takeaways:
- Assembling a trampoline’s duration depends on size, experience, assistance, instructions, tools, and weather. Preparation and organization are key for efficient assembly.
- Gathering the right tools, following step-by-step instructions, and enlisting assistance can make trampoline assembly a smooth and enjoyable process. Safety and patience are crucial for success.
Factors Affecting Assembly Time
Several factors can influence the time required to assemble a trampoline. Understanding these factors can help you better estimate the assembly duration and plan accordingly.
1. Trampoline Size and Type:
The size and type of trampoline significantly impact assembly time. Larger trampolines with more complex designs and additional features, such as safety enclosures or specialized frames, generally take longer to assemble than smaller, basic models.
2. Experience and Expertise:
Individual experience and familiarity with trampoline assembly play a crucial role. First-time assemblers may take longer to understand the instructions and components, while experienced individuals can often complete the process more efficiently.
3. Assistance Available:
Having one or more people to assist with the assembly can greatly reduce the time required. Some steps, such as attaching the springs or securing the safety net, may be easier and faster with extra hands.
4. Instructions Clarity:
The clarity and comprehensiveness of the assembly instructions provided by the manufacturer can significantly impact the assembly time. Clear, detailed instructions can expedite the process, while vague or confusing guidance may lead to delays and mistakes.
5. Tools and Workspace Preparation:
Ensuring that all necessary tools and equipment are readily available and having a well-organized workspace can streamline the assembly process. Adequate preparation can minimize interruptions and the time spent searching for tools.
6. Weather Conditions:
Outdoor assembly may be affected by weather conditions. Wind, rain, or extreme temperatures can impede progress, potentially prolonging the overall assembly time.
By considering these factors, you can better gauge the time needed to assemble a trampoline and make the necessary preparations for a smooth and efficient assembly process. Now, let's explore the essential tools and equipment required for trampoline assembly.
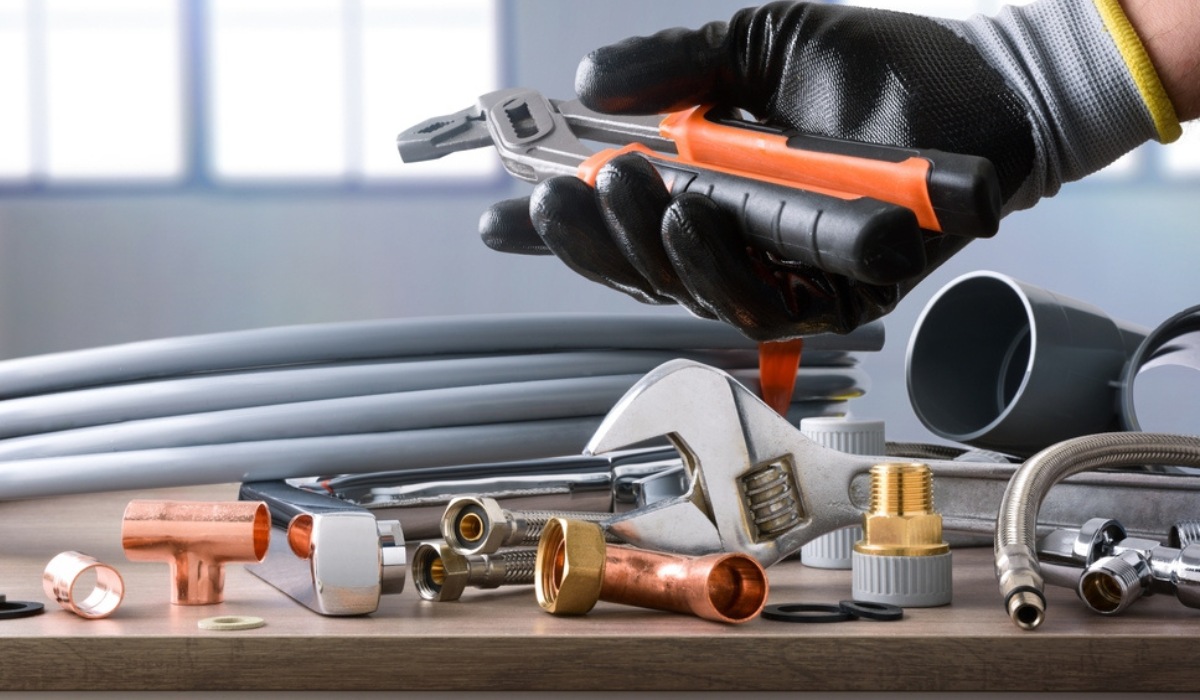
Tools and Equipment Required
Before embarking on the trampoline assembly journey, it’s essential to gather the necessary tools and equipment to ensure a seamless process. Here’s a comprehensive list of the items you’ll need:
1. Socket Wrench: A socket wrench, preferably with interchangeable sockets, is crucial for tightening bolts and nuts securely.
2. Screwdriver Set: A set of screwdrivers, including both flathead and Phillips head varieties, will be indispensable for various assembly tasks.
3. Rubber Mallet: A rubber mallet is useful for gently tapping components into place without causing damage.
4. Spring Pulling Tool: For trampolines with springs, a spring pulling tool can make the installation process significantly easier and safer.
5. Ladder: Depending on the trampoline’s height, a sturdy ladder may be necessary to reach certain areas during assembly.
6. Level: Ensuring the trampoline is assembled on a level surface is crucial for safety and optimal performance. A level tool will help you achieve this.
7. Safety Gloves: It’s advisable to wear safety gloves to protect your hands during assembly, especially when handling metal components or springs.
8. Safety Goggles: To safeguard your eyes from any potential debris or small particles during assembly, safety goggles are recommended.
9. Assembly Instructions: Last but not least, ensure you have the manufacturer’s assembly instructions readily available for reference throughout the process.
Gathering these tools and equipment before starting the assembly will streamline the process and minimize interruptions. Now that you’re equipped with the necessary tools, let’s delve into the step-by-step assembly process for your trampoline.
It typically takes 1-2 hours to assemble a trampoline, but this can vary based on the size and complexity of the trampoline. Make sure to carefully follow the instructions and have a friend help for easier assembly.
Step-by-Step Assembly Process
Embarking on the trampoline assembly process requires a systematic approach to ensure a safe and sturdy final product. Here’s a step-by-step guide to help you navigate the assembly process:
- Prepare the Assembly Area: Clear the designated assembly area of any debris and ensure it is level to provide a stable foundation for the trampoline.
- Identify and Organize Components: Lay out all the components and organize them according to the assembly instructions. This will streamline the process and minimize confusion during assembly.
- Begin with the Frame: Assemble the frame according to the manufacturer’s instructions, ensuring that all connections are secure and aligned properly.
- Attach the Springs: If your trampoline includes springs, carefully attach them to the frame and the jumping mat. A spring pulling tool can be invaluable for this step.
- Install the Jumping Mat: Position the jumping mat onto the frame, ensuring it is evenly aligned and securely attached to the springs.
- Secure the Safety Enclosure (if applicable): If your trampoline features a safety enclosure, follow the instructions to install it securely, ensuring that it provides a safe and enclosed jumping area.
- Double-Check and Tighten: Once all components are in place, double-check all connections and tighten any bolts or nuts as needed to ensure the trampoline is stable and secure.
- Test the Trampoline: Before allowing anyone to use the trampoline, perform a thorough safety check and test the stability of the assembled trampoline. Ensure that all components are properly secured and functioning as intended.
Following these steps diligently will help you assemble your trampoline efficiently and safely. However, it’s essential to remain patient and attentive throughout the process to ensure the best possible outcome. Now, let’s explore some valuable tips for optimizing the assembly process.
Tips for Efficient Assembly
As you embark on the trampoline assembly journey, incorporating these tips can streamline the process and enhance the overall efficiency of the assembly:
- Read the Instructions Thoroughly: Before starting the assembly, carefully read through the manufacturer’s instructions to familiarize yourself with the process and potential challenges.
- Organize Components Beforehand: Lay out all the components in an organized manner, matching them with the corresponding assembly steps to minimize confusion and save time during the process.
- Enlist Assistance: Having a second set of hands can significantly expedite the assembly process, especially during steps that require lifting or securing larger components.
- Use the Right Tools: Ensure you have all the necessary tools and equipment at hand before starting the assembly to avoid interruptions and delays.
- Check and Double-Check: Periodically review your work as you progress through the assembly to catch any potential mistakes early and ensure that all components are securely installed.
- Follow Safety Guidelines: Prioritize safety by wearing appropriate protective gear, such as gloves and safety goggles, especially when handling springs or metal components.
- Consider Weather Conditions: If assembling the trampoline outdoors, choose a day with favorable weather to minimize potential interruptions and ensure a comfortable assembly experience.
- Take Breaks When Needed: If the assembly process becomes lengthy, don’t hesitate to take short breaks to maintain focus and prevent fatigue, especially during physically demanding steps.
By implementing these tips, you can navigate the trampoline assembly process with greater ease and efficiency, leading to a well-assembled and safe trampoline for enjoyable outdoor recreation. As you approach the completion of the assembly, it’s important to reflect on the journey and the valuable skills and knowledge gained throughout the process.
Read more: How To Assemble A Springfree Trampoline
Conclusion
Assembling a trampoline is a rewarding endeavor that combines practical skills with the anticipation of enjoying outdoor recreation. By understanding the factors that influence assembly time, gathering the necessary tools and equipment, following a systematic assembly process, and implementing efficiency-boosting tips, you can confidently tackle the assembly process and create a safe and enjoyable trampoline for family and friends to enjoy.
Throughout the assembly journey, you may encounter challenges and moments of satisfaction as each component comes together to form a complete trampoline. Whether it’s the careful attachment of springs, the precise alignment of the jumping mat, or the installation of a safety enclosure, each step contributes to the creation of a fun and secure outdoor play area.
Remember that patience, attention to detail, and a focus on safety are paramount during the assembly process. By investing the time and effort to assemble the trampoline correctly, you are ensuring countless hours of entertainment and physical activity for everyone who will use it.
As you stand back and admire the fully assembled trampoline, take pride in the accomplishment and the valuable skills you’ve honed throughout the process. Whether it’s your first trampoline assembly or a routine task, each experience contributes to your expertise and confidence in handling similar projects in the future.
With a well-assembled trampoline in your outdoor space, you’ve created a hub for active play, laughter, and memorable moments. Now, it’s time to enjoy the fruits of your labor and witness the joy that your carefully assembled trampoline brings to those who use it.
So, whether it’s a sunny day or a starlit evening, the trampoline you’ve assembled stands ready to provide endless entertainment and outdoor fun for all. Embrace the satisfaction of a job well done and the anticipation of the delightful experiences that await on your newly assembled trampoline!
Frequently Asked Questions about How Long Does It Take To Assemble A Trampoline
Was this page helpful?
At Storables.com, we guarantee accurate and reliable information. Our content, validated by Expert Board Contributors, is crafted following stringent Editorial Policies. We're committed to providing you with well-researched, expert-backed insights for all your informational needs.


0 thoughts on “How Long Does It Take To Assemble A Trampoline”