Home>Gardening & Outdoor>Outdoor Recreation & Activities>How To Assemble A Springfree Trampoline
Outdoor Recreation & Activities
How To Assemble A Springfree Trampoline
Modified: October 21, 2024
Learn how to assemble a Springfree trampoline for safe and fun outdoor recreation and activities. Follow our step-by-step guide for easy setup.
(Many of the links in this article redirect to a specific reviewed product. Your purchase of these products through affiliate links helps to generate commission for Storables.com, at no extra cost. Learn more)
Introduction
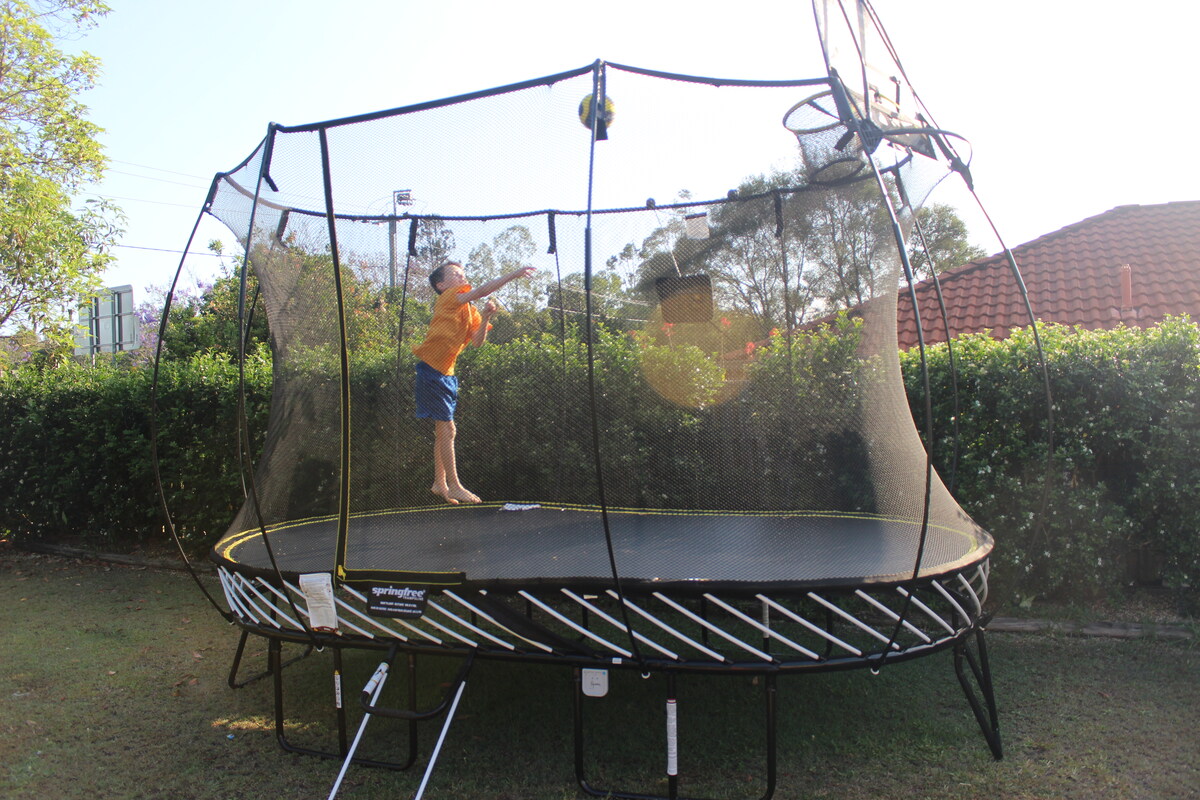
So, you've decided to bring home a Springfree Trampoline, the ultimate source of outdoor fun and fitness for the whole family. Assembling a Springfree Trampoline may seem like a daunting task at first, but fear not! With the right guidance and a bit of patience, you'll have it set up and ready for bouncing in no time.
In this comprehensive guide, we'll walk you through the step-by-step process of assembling your Springfree Trampoline. From unpacking the components to conducting a final safety check, we've got you covered. By following these instructions, you'll ensure that your trampoline is not only properly assembled but also safe for everyone to enjoy.
So, let's dive in and get ready to embark on this exciting trampoline assembly journey. Get ready to create a source of endless joy and entertainment right in your own backyard!
Key Takeaways:
- Assembling a Springfree Trampoline is a fun and rewarding process that requires careful organization, attention to detail, and a focus on safety to create a secure and enjoyable bouncing experience for the whole family.
- By following the step-by-step instructions and conducting a final safety check, you can transform a collection of trampoline components into a safe and exhilarating source of outdoor entertainment, ready to deliver countless moments of joy and laughter for years to come.
Step 1: Unpack the Trampoline
Before you begin assembling your Springfree Trampoline, it’s crucial to unpack all the components and lay them out in an organized manner. This initial step sets the stage for a smooth and efficient assembly process. Here’s how to go about it:
- Check the Package: Upon delivery, carefully inspect the package for any signs of damage. If you notice any significant damage to the box, it’s important to contact the supplier or delivery service to address the issue.
- Clear the Assembly Area: Choose a spacious and level area in your yard to unpack and assemble the trampoline. Clear any debris or obstacles from the designated spot to create a safe and unobstructed workspace.
- Organize the Components: Lay out all the components of the trampoline in an organized manner. Group similar parts together to make it easier to locate them during the assembly process. This includes the frame sections, mat, FlexiNet, rods, and other accessories.
- Refer to the Manual: Take a moment to review the assembly manual provided by Springfree Trampoline. Familiarize yourself with the various components and their corresponding labels to gain a clear understanding of the assembly process.
By carefully unpacking and organizing the trampoline components, you’ll set the stage for a successful and efficient assembly process. This preparatory step lays the foundation for a smooth transition into the subsequent stages of assembling your Springfree Trampoline.
Step 2: Assemble the Frame
Assembling the frame of your Springfree Trampoline is a critical step that forms the structural foundation for the entire setup. Follow these detailed instructions to ensure a sturdy and secure frame assembly:
- Identify Frame Sections: Lay out the frame sections according to the assembly manual. Each section is typically labeled for easy identification. Ensure that the sections are positioned correctly, with the pre-drilled holes aligned for the next step.
- Connect Frame Sections: Begin by connecting the frame sections as per the manufacturer’s instructions. This often involves inserting the provided bolts through the pre-drilled holes and securing them with the corresponding nuts. Use the recommended tools to tighten the bolts, ensuring a snug fit without over-tightening.
- Verify Alignment: As you assemble the frame sections, periodically check the alignment to ensure that the structure is taking shape as intended. This step is crucial for maintaining the trampoline’s integrity and stability.
- Attach Frame Legs: Once the main frame sections are connected, it’s time to attach the frame legs. Secure the legs to the frame using the designated hardware, following the guidelines provided in the assembly manual. Pay close attention to the orientation and positioning of the legs to ensure proper stability.
- Double-Check Connections: Before proceeding to the next assembly phase, double-check all the frame connections to confirm that they are secure and properly aligned. This precautionary measure helps prevent potential issues down the line.
By meticulously following these steps, you’ll successfully assemble the frame of your Springfree Trampoline, laying the groundwork for the subsequent stages of the assembly process. A well-constructed frame is essential for the overall safety and performance of the trampoline, providing a solid base for the remaining components.
Step 3: Attach the Mat
With the frame securely assembled, the next step in setting up your Springfree Trampoline is to attach the mat. This component forms the jumping surface and is integral to the trampoline’s functionality. Follow these detailed instructions to ensure a proper and secure attachment of the mat:
- Lay Out the Mat: Unfold the trampoline mat and position it within the designated area on the assembled frame. Ensure that the mat is spread out evenly, with the edges aligned with the frame’s circumference.
- Secure the Mat Hooks: The Springfree Trampoline mat is equipped with hooks that attach to the corresponding loops on the frame. Starting from one side, carefully secure the mat hooks to the frame loops, ensuring a firm connection at each point.
- Check Tension and Alignment: As you progress with attaching the mat, periodically check the tension and alignment to ensure that the mat is evenly positioned and free of any slack or wrinkles. This step is crucial for optimizing the trampoline’s performance and safety.
- Verify Secure Attachment: Once all the mat hooks are connected to the frame loops, perform a thorough inspection to verify that the mat is securely attached from all sides. Confirm that the connections are tight and that the mat is properly centered within the frame.
- Smooth Out Any Wrinkles: If you notice any wrinkles or uneven areas on the mat, carefully smooth them out to create a uniform surface. This step contributes to a consistent and enjoyable bouncing experience.
By diligently following these steps, you’ll successfully attach the mat to your Springfree Trampoline, bringing it one step closer to being fully assembled and ready for use. The proper installation of the mat is essential for ensuring a safe and enjoyable bouncing experience for trampoline enthusiasts of all ages.
Step 4: Install the FlexiNet
Installing the FlexiNet is a crucial step in assembling your Springfree Trampoline, as it provides a secure enclosure for safe bouncing. Follow these detailed instructions to ensure a proper and effective installation of the FlexiNet:
- Unroll the FlexiNet: Carefully unroll the FlexiNet and position it around the perimeter of the trampoline frame. Ensure that the net is oriented correctly, with the entrance aligned as per the manufacturer’s instructions.
- Attach the FlexiNet Poles: The FlexiNet is supported by flexible poles that are designed to arch over the trampoline. Begin attaching the poles to the designated slots on the trampoline frame, following the recommended sequence to ensure proper alignment.
- Secure the FlexiNet: As you attach the FlexiNet poles, ensure that the netting is taut and free of any sagging or slack. This step is essential for creating a secure enclosure that effectively contains bouncers within the trampoline area.
- Verify Pole Connections: Double-check the connections between the FlexiNet poles and the trampoline frame to confirm that they are securely fastened. This precautionary measure helps prevent any potential issues during use.
- Test the FlexiNet Enclosure: Once the FlexiNet is installed, gently test the enclosure by applying light pressure to the netting from various points. This test ensures that the FlexiNet is properly installed and capable of safely containing users during bouncing activities.
By meticulously following these steps, you’ll successfully install the FlexiNet on your Springfree Trampoline, creating a secure and enclosed environment for enjoyable and safe bouncing experiences. The FlexiNet plays a pivotal role in enhancing the safety and overall experience of using the trampoline.
When assembling a Springfree trampoline, make sure to carefully follow the instructions provided in the manual. Take your time and double-check each step to ensure the trampoline is assembled safely and securely.
Step 5: Add the Rods and Net Rods
Adding the rods and net rods to your Springfree Trampoline is a critical step that contributes to the overall safety and functionality of the enclosure system. Follow these detailed instructions to ensure a proper and secure installation of the rods and net rods:
- Identify the Rods and Net Rods: Lay out the rods and net rods according to the assembly manual, ensuring that they are easily accessible for installation. Verify that the components are labeled for easy identification.
- Attach the Rods: Begin by attaching the rods to the designated locations on the trampoline frame, following the manufacturer’s guidelines. Secure the rods in place, ensuring that they are firmly connected to the frame to provide structural support for the netting.
- Install the Net Rods: Similarly, install the net rods by attaching them to the corresponding slots or hooks on the trampoline frame. Ensure that the net rods are evenly spaced around the perimeter to facilitate the proper attachment of the netting.
- Verify Alignment and Tension: As you add the rods and net rods, periodically check the alignment and tension to ensure that they are positioned correctly and securely fastened. Proper alignment and tension contribute to the stability and effectiveness of the enclosure system.
- Double-Check Connections: Before proceeding to the next assembly phase, double-check all the rod and net rod connections to confirm that they are secure and properly aligned. This precautionary measure helps ensure the integrity of the enclosure system.
By conscientiously following these steps, you’ll successfully add the rods and net rods to your Springfree Trampoline, enhancing the structural support and functionality of the enclosure system. These components play a pivotal role in maintaining the integrity and safety of the trampoline’s enclosure.
Step 6: Secure the Net
Securing the net of your Springfree Trampoline is a crucial step in ensuring a safe and contained bouncing environment. Follow these detailed instructions to properly secure the net, providing added safety for trampoline users:
- Attach the Net to the Rods: Begin by attaching the netting to the installed rods and net rods around the perimeter of the trampoline. Ensure that the net is evenly distributed and securely fastened to create a reliable enclosure.
- Check for Tautness: As you secure the net, verify that it is taut and free of any sagging or slack. Proper tension in the netting is essential for creating a secure containment area within the trampoline.
- Zipper and Entrance Closure: If your Springfree Trampoline is equipped with a zipper and entrance, ensure that the closure mechanism is functional and securely fastened. This feature provides added security to prevent accidental exits during bouncing activities.
- Inspect the Net Connections: Thoroughly inspect the connections between the netting and the rods/net rods to confirm that they are securely fastened. This inspection ensures that the net is properly installed and capable of containing users within the trampoline area.
- Test the Net Enclosure: Once the net is secured, conduct a gentle test by applying light pressure to various points on the netting. This test ensures that the net enclosure is effectively containing users and is ready for safe bouncing activities.
By diligently following these steps, you’ll successfully secure the net of your Springfree Trampoline, creating a reliable and safe enclosure for users to enjoy bouncing with peace of mind. The proper installation and tautness of the net contribute significantly to the overall safety and functionality of the trampoline’s enclosure system.
Step 7: Final Safety Check
Before unleashing the excitement of bouncing on your newly assembled Springfree Trampoline, it’s essential to conduct a thorough final safety check to ensure that the setup is secure and ready for use. Follow these comprehensive guidelines to perform a final safety assessment:
- Frame and Mat Inspection: Begin by inspecting the frame and mat for any signs of damage, loose components, or irregularities. Ensure that all connections are secure, and the mat is properly attached and free of wrinkles or slack.
- FlexiNet and Enclosure Evaluation: Verify the installation of the FlexiNet and its enclosure system, ensuring that it is securely fastened, taut, and free of any tears or openings that could compromise safety.
- Rod and Net Rod Assessment: Double-check the installation of the rods and net rods, ensuring that they are firmly attached to the frame and capable of providing structural support for the netting.
- Net Security Confirmation: Confirm that the netting is securely attached to the rods and net rods, with proper tension and no signs of sagging or slack that could pose a safety risk.
- Entrance and Closure Functionality: If your trampoline is equipped with an entrance and closure mechanism, test its functionality to ensure that it securely contains users within the trampoline area during bouncing activities.
- Overall Stability and Alignment: Conduct a visual assessment of the entire trampoline setup, verifying its stability, alignment, and overall integrity. Ensure that the trampoline is positioned on a level surface and free of any potential hazards in its vicinity.
By meticulously performing this final safety check, you’ll ensure that your Springfree Trampoline is properly assembled and meets the necessary safety standards for enjoyable and secure bouncing experiences. This comprehensive assessment sets the stage for worry-free fun and fitness on your trampoline.
Conclusion
Congratulations on successfully assembling your Springfree Trampoline! By following the step-by-step instructions outlined in this guide, you’ve transformed a collection of components into a safe and exhilarating source of outdoor entertainment. As you stand back and admire your handiwork, it’s time to celebrate the accomplishment and look forward to the countless moments of joy and laughter that await you and your family.
As you reflect on the assembly process, you’ve not only built a trampoline but also created a hub for active play, fitness, and bonding. Your dedication to ensuring a thorough and precise assembly has laid the foundation for a trampoline that prioritizes safety without compromising on the fun factor.
With the trampoline now standing proudly in your yard, it’s poised to become a centerpiece of outdoor enjoyment. Whether it’s the laughter of children, the thrill of aerial tricks, or the satisfaction of a rejuvenating workout, your Springfree Trampoline is ready to deliver an array of memorable experiences for years to come.
As you prepare to introduce the trampoline to its inaugural bouncers, take a moment to appreciate the craftsmanship and attention to detail that have gone into its assembly. Your commitment to creating a secure and inviting bouncing environment will undoubtedly enhance every moment spent on the trampoline.
So, step onto the trampoline, feel the exhilarating bounce, and revel in the knowledge that you’ve not only assembled a trampoline but also crafted a space for cherished memories and endless outdoor fun. Embrace the boundless possibilities that await, and let the adventures begin!
Frequently Asked Questions about How To Assemble A Springfree Trampoline
Was this page helpful?
At Storables.com, we guarantee accurate and reliable information. Our content, validated by Expert Board Contributors, is crafted following stringent Editorial Policies. We're committed to providing you with well-researched, expert-backed insights for all your informational needs.


0 thoughts on “How To Assemble A Springfree Trampoline”