Home>Gardening & Outdoor>Outdoor Recreation & Activities>How To Remove Trampoline Springs
Outdoor Recreation & Activities
How To Remove Trampoline Springs
Modified: August 17, 2024
Learn the best techniques for removing trampoline springs with our comprehensive guide. Keep your outdoor recreation and activities equipment in top shape.
(Many of the links in this article redirect to a specific reviewed product. Your purchase of these products through affiliate links helps to generate commission for Storables.com, at no extra cost. Learn more)
Introduction
Welcome to the ultimate guide on how to remove trampoline springs! Whether you're replacing old springs, conducting maintenance, or simply exploring the inner workings of your trampoline, this step-by-step tutorial will equip you with the knowledge and confidence to tackle this task like a pro.
Trampolines are a source of endless fun and enjoyment for both children and adults. However, over time, the springs may wear out or become damaged due to exposure to the elements and regular use. Knowing how to safely and effectively remove trampoline springs is an essential skill for any trampoline owner.
By following the instructions in this guide, you'll be able to disassemble your trampoline, remove the springs, and prepare for any necessary maintenance or repairs. Whether you're a seasoned trampoline enthusiast or a novice looking to learn more about trampoline maintenance, this guide is designed to provide clear, concise, and easy-to-follow instructions.
So, grab your tools, put on your work gloves, and let's dive into the step-by-step process of removing trampoline springs. With a little bit of effort and the right know-how, you'll have your trampoline springs removed in no time!
Key Takeaways:
- Removing trampoline springs requires the right tools, careful detachment of the trampoline mat, and systematic disengagement of each spring from the frame. It’s a crucial part of trampoline maintenance for safety and longevity.
- After removing and inspecting the springs, installing new ones, if needed, ensures a safe and enjoyable trampoline experience. Regular maintenance, including spring replacement, is essential for a secure and reliable jumping surface.
Read more: How To Measure A Trampoline Spring
Step 1: Gather the Necessary Tools
Before you begin the process of removing trampoline springs, it’s essential to gather all the necessary tools and equipment. Having the right tools at your disposal will not only make the job easier but also ensure that you can safely and efficiently remove the springs without causing damage to your trampoline or risking injury.
Here’s a list of the tools you’ll need:
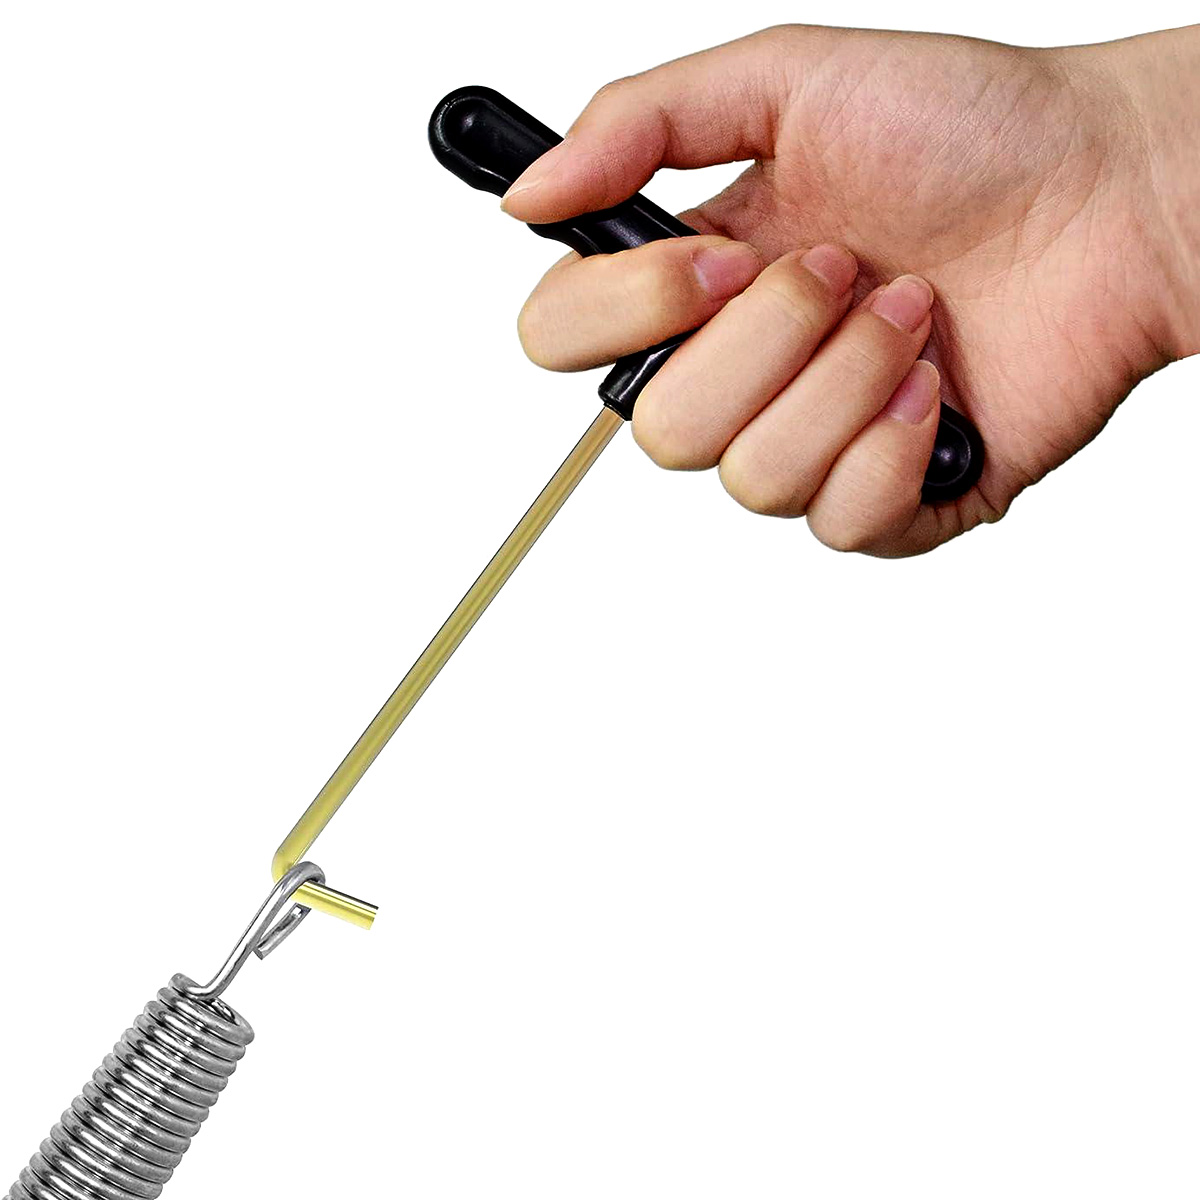
- Spring Pulling Tool: This specialized tool is designed to help you safely remove trampoline springs without putting excessive strain on your hands or fingers. It provides a secure grip on the spring, making the removal process more manageable.
- Work Gloves: Protect your hands with a sturdy pair of work gloves to shield them from sharp edges and potential pinching during the spring removal process.
- Safety Goggles: It’s crucial to safeguard your eyes from any potential debris or spring-related accidents. Safety goggles will provide an extra layer of protection as you work on removing the springs.
- Step Ladder: Depending on the size of your trampoline, a step ladder may be necessary to reach the springs safely. Choose a stable and secure ladder that allows you to access the springs without overreaching.
- Assistance: While not a tool in the traditional sense, having a helping hand can significantly ease the process of removing trampoline springs. Enlist the assistance of a friend or family member to provide support and ensure safety during the spring removal.
By gathering these essential tools and enlisting the help of a friend, you’ll be well-prepared to embark on the task of removing your trampoline springs. With safety as a top priority, these tools will enable you to approach the process with confidence and precision.
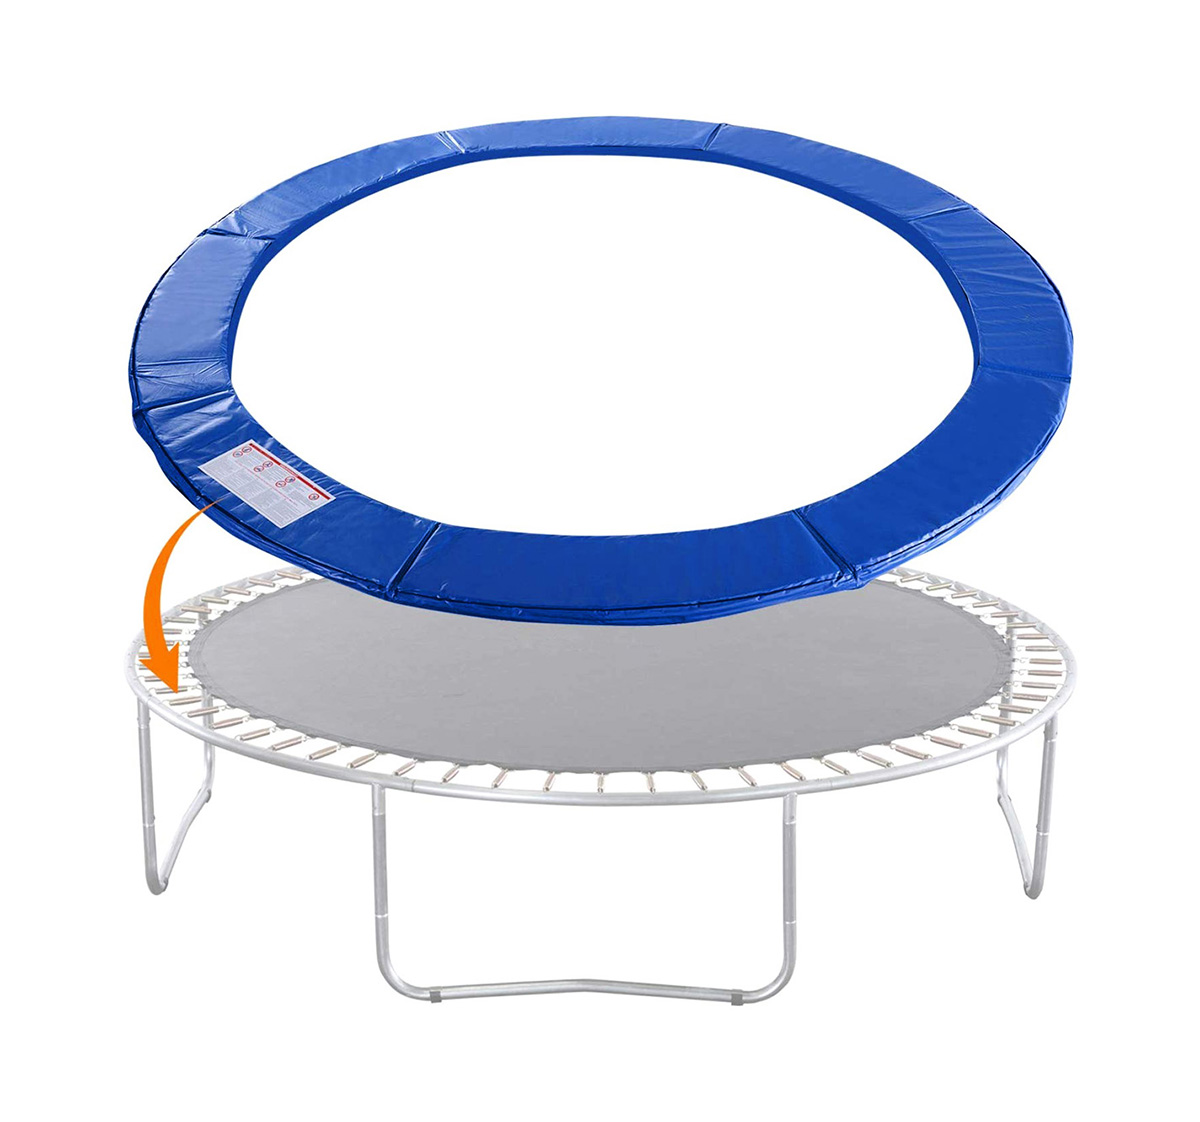
Step 2: Remove the Trampoline Mat
Before you can access the trampoline springs, it’s necessary to remove the trampoline mat to expose the springs and the frame. This step is crucial for ensuring a clear and unobstructed view of the springs, allowing for safe and efficient removal.
Here’s a step-by-step guide to removing the trampoline mat:
- Clear the Area: Begin by ensuring that the area around the trampoline is clear of any obstructions. This includes removing any toys, debris, or objects that may hinder the mat removal process.
- Secure the Trampoline: If your trampoline has a safety enclosure, ensure that it is securely fastened and that the entrance is closed. This will prevent any accidental falls or interference during the mat removal.
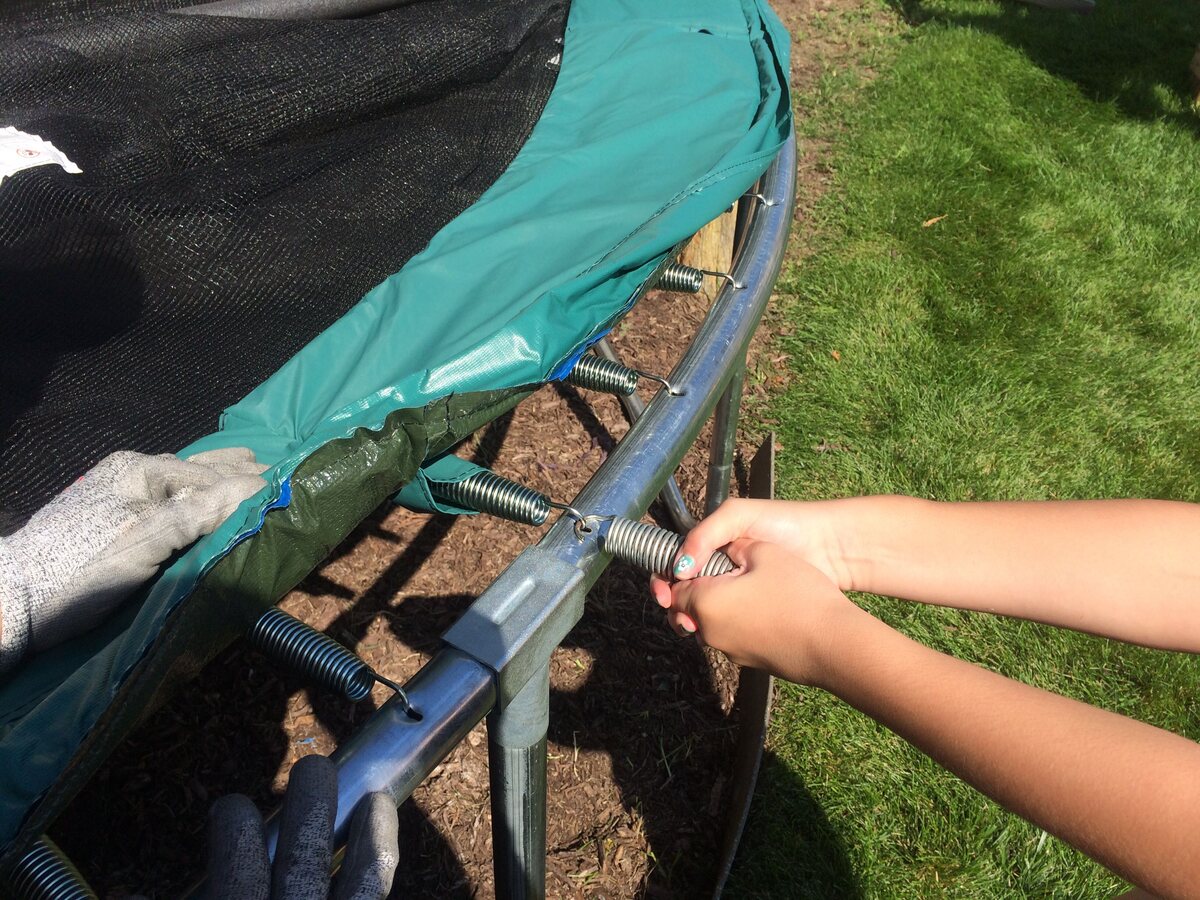
- Detach the Springs: Carefully detach the springs from the trampoline frame. Start from one side and work your way around, unhooking the springs from their respective attachment points on the frame.
- Remove the Mat: With the springs detached, carefully lift the trampoline mat from the frame. Enlist the help of a friend if the mat is large or heavy to ensure safe and proper removal.
- Inspect the Mat: While the mat is removed, take the opportunity to inspect it for any signs of wear, tear, or damage. This is also an ideal time to clean the mat if necessary, ensuring that it’s in good condition for reinstallation.
By following these steps, you’ll successfully remove the trampoline mat, providing clear access to the trampoline springs and the frame. With the mat safely removed, you’re now ready to proceed to the next stage of the trampoline spring removal process.
Step 3: Locate and Remove the Springs
With the trampoline mat removed, you’ll now have a clear view of the springs and the attachment points on the trampoline frame. It’s time to locate and remove the springs, a critical step in the process of disassembling the trampoline.
Follow these steps to locate and remove the springs:
- Inspect the Spring Configuration: Take a moment to observe the arrangement of the springs and their attachment points on the trampoline frame. This visual inspection will help you understand the layout and plan your approach for spring removal.
- Identify the Tool Attachment Point: Each spring will have a designated attachment point on the frame. Using your spring pulling tool, locate the first spring you intend to remove and position the tool securely onto the attachment point.
- Securely Grip the Spring: With the spring pulling tool in place, grip the spring firmly and prepare to apply tension to release it from the frame. Ensure that the tool provides a secure hold on the spring to prevent slippage during the removal process.
- Apply Tension and Release: Using the spring pulling tool, apply steady tension to the spring, gradually releasing it from the attachment point on the trampoline frame. Exercise caution and control to prevent the spring from releasing suddenly or causing injury.
- Repeat for Each Spring: Proceed to remove each spring from its attachment point using the same method. Work systematically around the trampoline, ensuring that each spring is safely removed before moving on to the next one.
By carefully following these steps, you’ll successfully locate and remove the trampoline springs, preparing the frame for further disassembly and maintenance. With the springs safely removed, you’re now ready to advance to the next stage of the trampoline spring removal process.
When removing trampoline springs, use a spring puller tool to safely and easily detach the springs from the frame and mat. This will prevent any potential injuries or damage to the trampoline.
Step 4: Remove the Springs from the Trampoline Frame
Now that the springs have been detached from their respective attachment points, the next step is to remove them from the trampoline frame. This process involves carefully disengaging each spring from the frame, ensuring that they are safely and securely released.
Follow these steps to remove the springs from the trampoline frame:
- Clear the Work Area: Ensure that the area around the trampoline frame is clear of any obstacles or debris. This will provide you with ample space to maneuver and safely remove the springs.
- Secure Grip and Positioning: With the spring pulling tool, securely grip the first spring that you’ll be removing from the frame. Position yourself in a stable and comfortable stance to apply controlled force during the removal process.
- Apply Tension and Release: Using the spring pulling tool, apply steady tension to the spring, gradually disengaging it from the frame. Exercise caution and control to prevent any sudden release of tension that may cause the spring to recoil or create a safety hazard.
- Repeat for Each Spring: Proceed to remove each spring from the trampoline frame using the same method. Work methodically and ensure that each spring is safely disengaged before moving on to the next one.
- Inspect the Frame: As each spring is removed, take the opportunity to inspect the trampoline frame for any signs of wear, damage, or rust. Address any maintenance or repair needs before reattaching new springs for optimal safety and performance.
By carefully following these steps, you’ll successfully remove the springs from the trampoline frame, completing a crucial stage in the process of trampoline spring removal. With the springs safely disengaged, you’re now prepared to progress to the next phase of the trampoline maintenance or repair process.
Read more: How Many Springs Are On A Trampoline
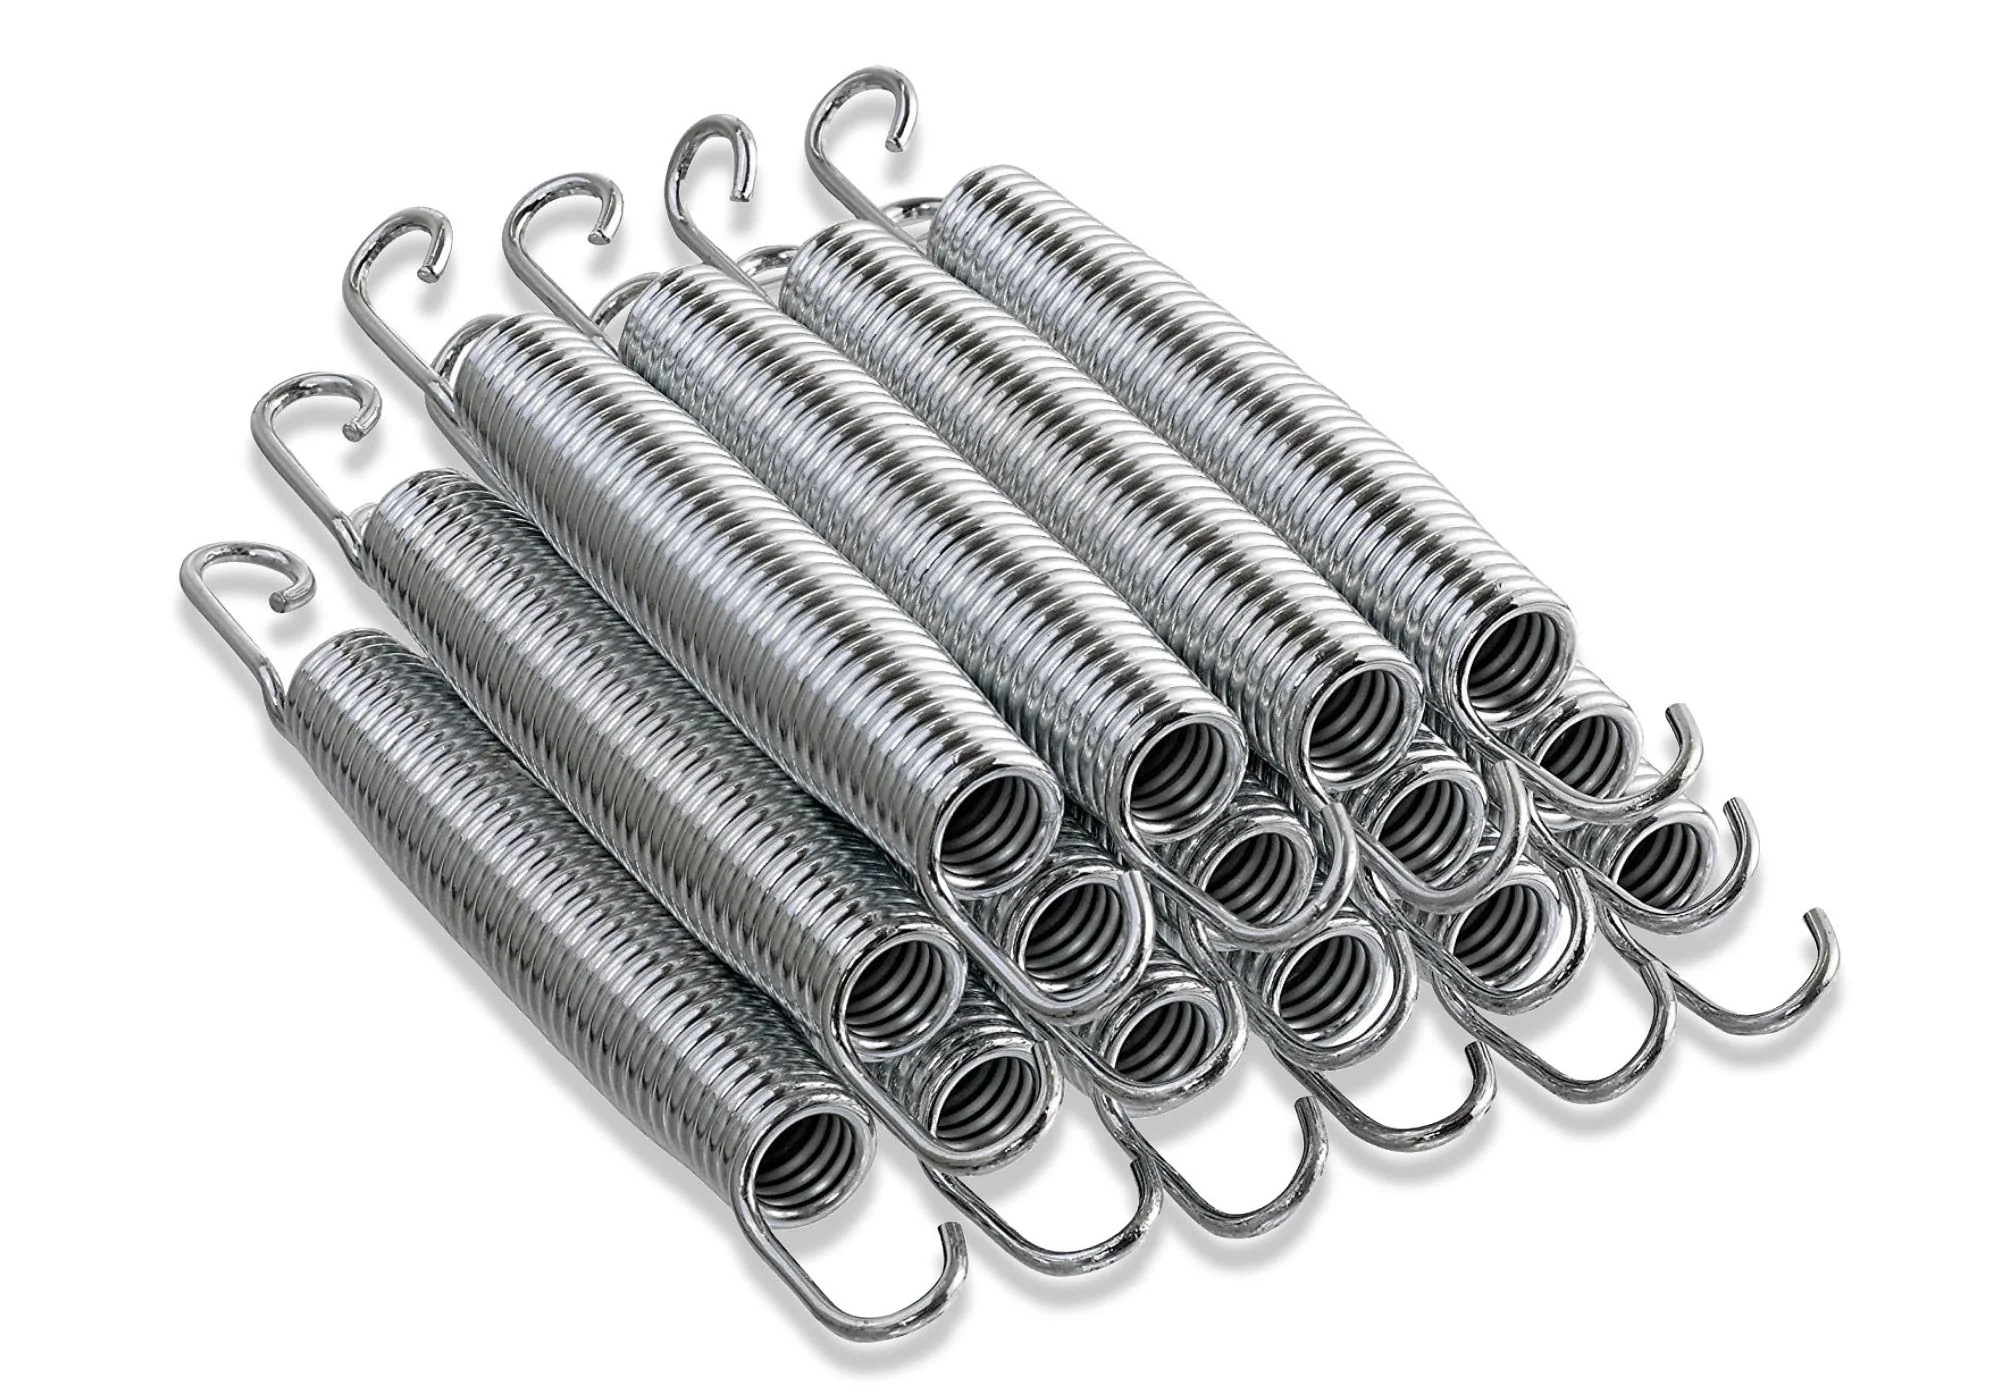
Step 5: Clean and Inspect the Springs
After removing the springs from the trampoline frame, it’s essential to thoroughly clean and inspect them to ensure their condition and performance. Cleaning and inspecting the springs will help identify any signs of wear, damage, or corrosion, allowing you to address maintenance needs and ensure the safety and longevity of your trampoline.
Follow these steps to clean and inspect the trampoline springs:
- Clean the Springs: Use a mild detergent and water solution to clean the springs, removing any dirt, debris, or surface contaminants. A soft-bristled brush can be used to gently scrub the springs and ensure they are free from buildup.
- Rinse and Dry: Thoroughly rinse the springs with clean water to remove any remaining detergent. Once rinsed, allow the springs to air dry completely before proceeding to the inspection phase.
- Inspect for Wear and Damage: Carefully examine each spring for signs of wear, such as stretching, deformation, or corrosion. Pay close attention to the integrity of the coils and the attachment hooks to identify any potential issues that may affect performance.
- Check for Rust or Corrosion: Inspect the springs for any signs of rust or corrosion, especially in areas where the protective coating may have worn off. Address any rust spots promptly to prevent further deterioration and maintain the structural integrity of the springs.
- Measure Spring Tension: If possible, use a spring tension gauge to measure the tension of each spring. This will provide valuable insight into the condition and performance capabilities of the springs, helping you determine if replacements are necessary.
By meticulously cleaning and inspecting the trampoline springs, you’ll be able to assess their condition and identify any maintenance or replacement needs. This proactive approach to spring maintenance ensures that your trampoline remains safe, reliable, and ready for future use.
Step 6: Install the New Springs (if applicable)
If you’ve determined that new springs are necessary based on the inspection and assessment conducted in the previous steps, it’s time to proceed with installing the replacements. Installing new springs is a crucial aspect of trampoline maintenance, and it ensures that your trampoline continues to provide a safe and enjoyable experience for users.
Follow these steps to install the new springs on your trampoline:
- Select the Correct Replacement Springs: Ensure that the replacement springs you’ve acquired are the correct size, length, and tension rating for your specific trampoline model. Using the wrong springs can compromise the safety and performance of the trampoline.
- Position the Trampoline Frame: If the trampoline frame was disassembled for spring removal and inspection, position it in a stable and level location to facilitate the installation of the new springs.
- Attach the New Springs: Starting from one side of the trampoline, begin attaching the new springs to their respective attachment points on the frame. Use a spring pulling tool to apply tension and secure each spring in place, ensuring a snug and stable fit.
- Distribute Tension Evenly: As you attach the new springs, distribute the tension evenly around the trampoline to maintain balance and stability. This ensures that the mat is properly tensioned and provides a consistent and safe jumping surface.
- Double-Check Attachment Points: After attaching all the new springs, double-check each attachment point to confirm that the springs are securely fastened and properly aligned. This step is crucial for preventing potential issues during trampoline use.
- Test the Mat Tension: Once the new springs are installed, test the tension of the trampoline mat by applying gentle pressure. The mat should feel taut and evenly tensioned, indicating that the new springs are properly installed and providing the necessary support.
By following these steps, you’ll successfully install the new springs on your trampoline, ensuring that it is restored to optimal safety and functionality. With the new springs in place, your trampoline is ready to provide countless hours of enjoyment for users of all ages.
Conclusion
Congratulations! You’ve successfully navigated the process of removing trampoline springs, an essential task for trampoline maintenance and repair. By following the step-by-step instructions outlined in this guide, you’ve gained the knowledge and confidence to tackle this project with ease and precision.
Throughout the process, you’ve learned how to gather the necessary tools, remove the trampoline mat, locate and remove the springs, disengage the springs from the trampoline frame, and clean and inspect the springs for wear and damage. If applicable, you’ve also mastered the art of installing new springs, ensuring that your trampoline is in optimal condition for safe and enjoyable use.
Remember, trampoline maintenance is a key aspect of ensuring the safety and longevity of your trampoline. Regular inspections, cleaning, and, if necessary, spring replacements are vital for maintaining a secure and reliable jumping surface. By investing the time and effort into trampoline maintenance, you’re not only enhancing the safety of the equipment but also extending its lifespan for continued enjoyment.
As you reflect on your accomplishment, take pride in the knowledge and skills you’ve acquired. Whether you’re a trampoline enthusiast, a concerned parent, or someone looking to expand their DIY expertise, mastering the art of trampoline spring removal is a valuable addition to your skill set.
So, as you gaze upon your trampoline, knowing that its springs are in optimal condition, take a moment to appreciate the effort you’ve invested in its maintenance. With this newfound expertise, you’re well-equipped to ensure that your trampoline remains a source of joy and entertainment for years to come.
Frequently Asked Questions about How To Remove Trampoline Springs
Was this page helpful?
At Storables.com, we guarantee accurate and reliable information. Our content, validated by Expert Board Contributors, is crafted following stringent Editorial Policies. We're committed to providing you with well-researched, expert-backed insights for all your informational needs.


0 thoughts on “How To Remove Trampoline Springs”