Home>Gardening & Outdoor>Outdoor Recreation & Activities>How To Repair A Trampoline Pole
Outdoor Recreation & Activities
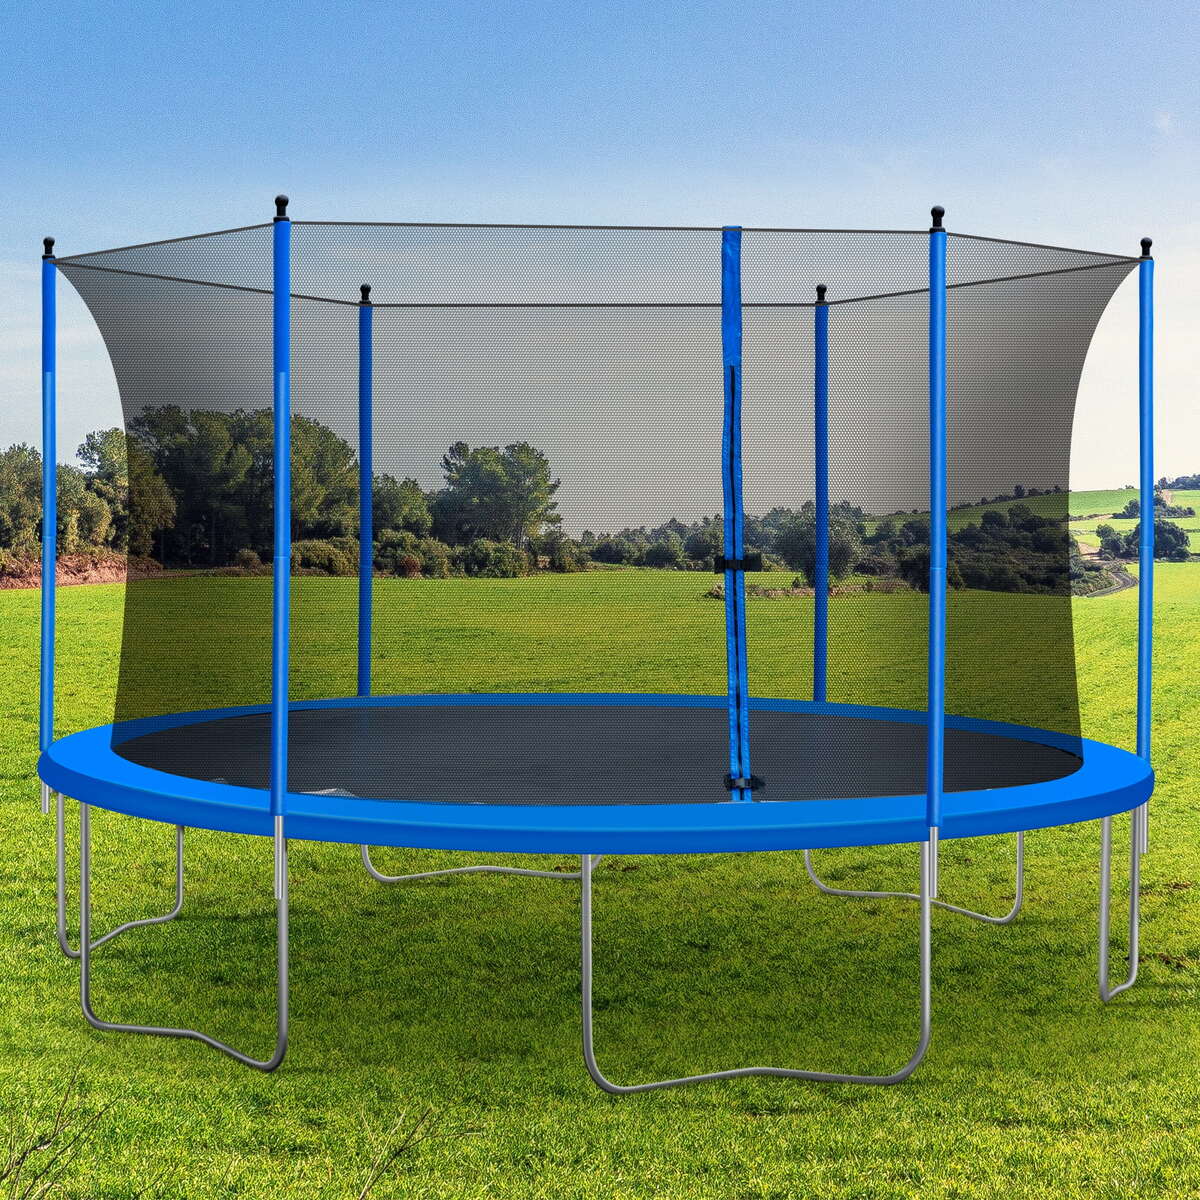
How To Repair A Trampoline Pole
Modified: January 9, 2024
Learn how to repair a trampoline pole and ensure the safety of your outdoor recreation and activities. Follow our expert tips for a sturdy and secure trampoline.
(Many of the links in this article redirect to a specific reviewed product. Your purchase of these products through affiliate links helps to generate commission for Storables.com, at no extra cost. Learn more)
Introduction
So, you've noticed that one of the poles supporting your trampoline has seen better days. Don't worry – it's not the end of the world! With a bit of know-how and some elbow grease, you can get that trampoline back in tip-top shape in no time. In this guide, we'll walk you through the process of repairing a trampoline pole, from assessing the damage to testing the trampoline once the repair is complete.
Whether the pole has become bent, cracked, or damaged in some other way, it's crucial to address the issue promptly to ensure the safety of anyone using the trampoline. By following the steps outlined in this guide, you'll not only restore the functionality of your trampoline but also provide peace of mind knowing that it's in top condition.
So, grab your tools, roll up your sleeves, and let's get to work on repairing that trampoline pole!
Key Takeaways:
- Repairing a trampoline pole is a manageable task that ensures safety and fun. Assess damage carefully and gather the right tools before removing and installing the new pole.
- After repairing or replacing the trampoline pole, conduct a thorough test to ensure safety and functionality. Regular maintenance and safety guidelines contribute to a secure trampolining experience.
Assessing the Damage
Before diving into the repair process, it's essential to thoroughly assess the extent of the damage to the trampoline pole. Start by visually inspecting the pole for any visible signs of damage, such as bends, cracks, or other structural issues. Additionally, gently press and manipulate the pole to check for any unusual flexibility or instability.
Next, examine the surrounding components, such as the trampoline net, enclosure, and other poles, to ensure that the damage is isolated to the specific pole in question. It's crucial to rule out any secondary damage that may have occurred as a result of the compromised pole.
If the damage is minor, such as a slight bend or dent, it may be possible to repair the pole using specialized tools and techniques. However, if the damage is severe, such as a significant crack or break, it's likely that the pole will need to be replaced entirely to ensure the structural integrity of the trampoline.
By taking the time to assess the damage thoroughly, you can make an informed decision regarding the appropriate course of action for repairing or replacing the trampoline pole. Remember, safety should always be the top priority when dealing with trampoline repairs, so if there is any uncertainty about the extent of the damage, it's best to err on the side of caution and opt for a replacement.
Gathering the Necessary Tools and Materials
Before embarking on the trampoline pole repair journey, it’s crucial to gather all the essential tools and materials. Having the right equipment at your disposal will streamline the repair process and ensure that you can tackle the task efficiently. Here’s a comprehensive list of the items you’ll need:
- Replacement Pole: If the damage to the existing pole is beyond repair, you’ll need to acquire a suitable replacement. Ensure that the new pole is compatible with your trampoline model and meets the necessary safety standards.
- Socket Wrench Set: A socket wrench set will be indispensable for loosening and tightening bolts and nuts during the pole replacement process.
- Adjustable Wrench: An adjustable wrench is essential for tasks that require turning hexagonal or square nuts and bolts.
- Protective Gear: Safety should always be a priority. Ensure you have gloves and safety goggles to protect your hands and eyes during the repair process.
- Ladder: Depending on the height of your trampoline, a sturdy ladder may be necessary to access the top of the enclosure and reach the pole safely.
- Replacement Hardware: If the existing bolts, nuts, or brackets are damaged or worn, it’s advisable to have replacement hardware on hand to ensure a secure installation.
- Rubber Mallet: A rubber mallet can be useful for gently tapping the pole and components into place without causing damage.
- Level: To ensure the new pole is installed vertically and straight, a level will aid in achieving the proper alignment.
- Assistance: Enlist the help of a friend or family member to assist with holding components in place and providing an extra pair of hands during the repair process.
By gathering these tools and materials ahead of time, you’ll be well-prepared to tackle the trampoline pole repair with confidence. Additionally, having everything at your disposal will minimize interruptions during the repair process, allowing you to focus on restoring the trampoline to its optimal condition.
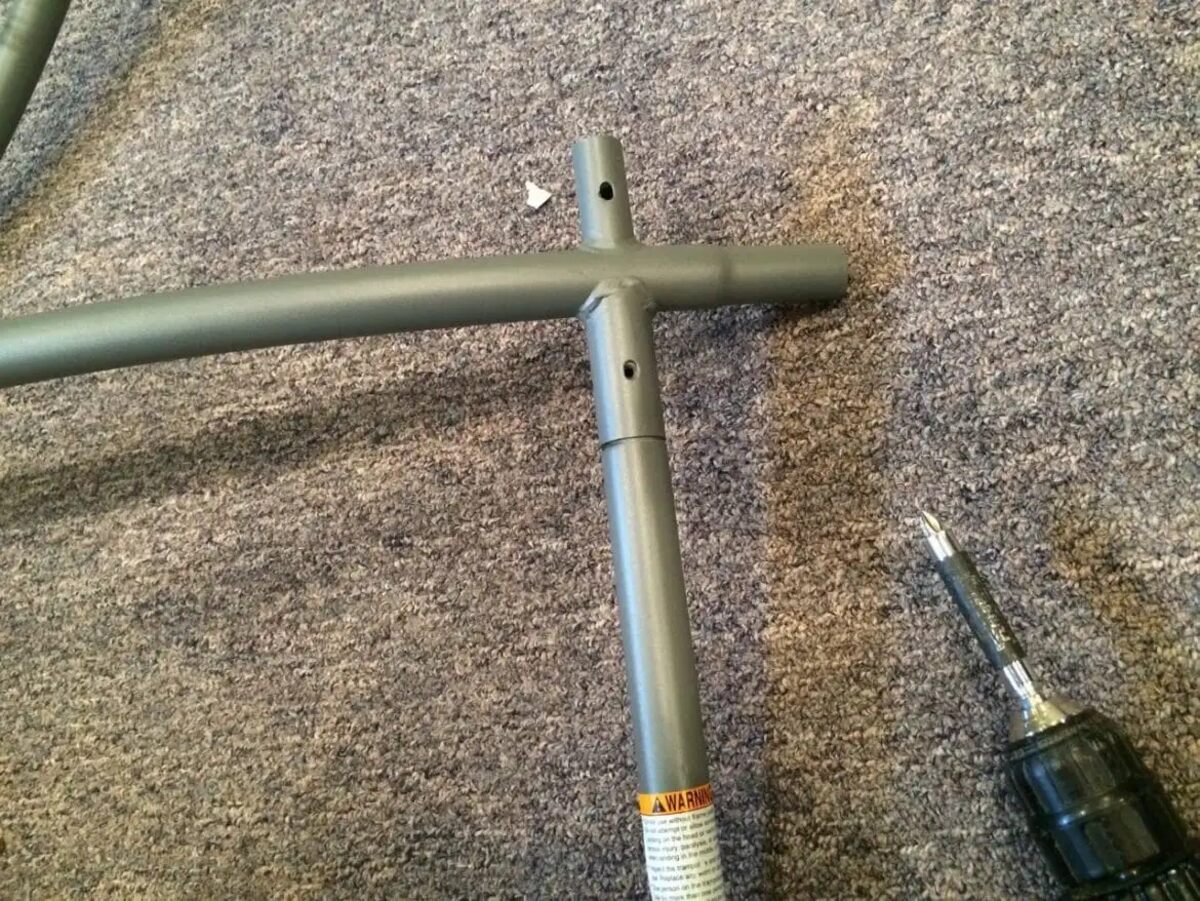
Removing the Damaged Pole
Now that you’ve assessed the damage and gathered the necessary tools and materials, it’s time to roll up your sleeves and begin the process of removing the damaged trampoline pole. Follow these step-by-step instructions to ensure a safe and effective removal:
- Secure the Trampoline: Before starting the removal process, ensure that the trampoline is on a level surface and that the jumping mat is clear of any obstructions. This will provide a safe working environment and prevent any accidental injuries during the pole removal.
- Disassemble the Enclosure: If the damaged pole is part of the trampoline enclosure, carefully detach the netting and any associated components from the pole. This may involve removing brackets, clamps, or fasteners that secure the enclosure to the pole.
- Loosen the Bolts and Nuts: Using the appropriate socket wrench and adjustable wrench, carefully loosen and remove the bolts and nuts that secure the damaged pole to the trampoline frame. It’s essential to support the weight of the pole as you remove the final fasteners to prevent it from falling unexpectedly.
- Remove the Pole: With the bolts and nuts removed, carefully lift the damaged pole out of its position. If the pole is bent or misshapen, take care to maneuver it out without causing further damage to the trampoline frame or surrounding components.
- Inspect the Area: Once the damaged pole has been removed, take a moment to inspect the trampoline frame and surrounding components for any signs of damage or wear. Address any issues promptly to ensure the structural integrity of the trampoline.
By following these steps, you can safely and methodically remove the damaged trampoline pole, paving the way for the installation of a new, structurally sound pole. Remember to handle the damaged pole with care to avoid any accidental injuries or additional damage to the trampoline or surrounding area.
When repairing a trampoline pole, make sure to use the correct size and type of replacement part. Check for any damage to the surrounding area and make sure the pole is securely attached before use.
Installing the New Pole
With the damaged pole successfully removed, it’s time to embark on the exciting phase of installing a new, sturdy pole to restore the trampoline to its optimal condition. Follow these step-by-step instructions to ensure a smooth and effective installation process:
- Prepare the Replacement Pole: Before positioning the new pole, ensure that it is the correct length and compatible with your trampoline model. If necessary, attach any brackets, caps, or fittings to the pole as per the manufacturer’s instructions.
- Position the Pole: Carefully position the new pole in place, aligning it with the designated mounting points on the trampoline frame. If the pole is part of the enclosure, ensure that it is appropriately oriented to support the netting and associated components.
- Secure the Pole: Using the replacement hardware and the appropriate tools, secure the new pole to the trampoline frame. Ensure that the bolts and nuts are tightened securely to provide a stable and reliable attachment.
- Reassemble the Enclosure: If the new pole is part of the trampoline enclosure, reattach the netting and associated components, ensuring that they are securely fastened to the pole and other relevant parts of the trampoline frame.
- Check Alignment: Utilize a level to confirm that the new pole is installed vertically and aligned correctly. Making any necessary adjustments at this stage will ensure that the trampoline is structurally sound and safe for use.
By following these steps, you can successfully install a new pole, restoring the stability and functionality of your trampoline. Ensure that the pole is securely fastened and aligned correctly to guarantee a safe and enjoyable trampolining experience for all users.
Securing the Pole in Place
Ensuring that the newly installed trampoline pole is securely fastened in place is paramount to the safety and stability of the entire trampoline structure. Follow these essential steps to guarantee that the pole is firmly secured and ready for use:
- Double-Check the Fasteners: Take a moment to verify that all bolts and nuts securing the pole to the trampoline frame are tightened to the manufacturer’s specifications. This will prevent any potential loosening over time and maintain the integrity of the installation.
- Inspect the Connections: Examine the points where the pole interfaces with the trampoline frame or enclosure. Ensure that any brackets, clamps, or fittings are securely attached and aligned with the pole to provide additional support and stability.
- Test for Stability: Gently apply pressure to the newly installed pole to assess its stability. There should be minimal to no movement, indicating that the pole is firmly anchored and capable of withstanding the forces exerted during trampolining activities.
- Address Any Issues: If you notice any unexpected movement or instability, promptly identify and address the underlying causes. This may involve re-tightening fasteners, adjusting the alignment, or reinforcing connections to ensure the pole’s steadfastness.
By meticulously securing the pole in place and conducting a thorough inspection, you can instill confidence in the structural integrity of the trampoline. This proactive approach to installation and security measures will contribute to a safe and enjoyable trampolining experience for all users.
Testing the Trampoline
With the trampoline pole successfully repaired or replaced and securely in place, it’s time to conduct a comprehensive test to ensure that the trampoline is fully operational and safe for use. Follow these essential steps to conduct a thorough assessment of the trampoline’s functionality:
- Visual Inspection: Conduct a visual examination of the entire trampoline, paying particular attention to the repaired or replaced pole, the surrounding enclosure, and the jumping mat. Look for any signs of damage, misalignment, or instability that may have arisen during the repair process.
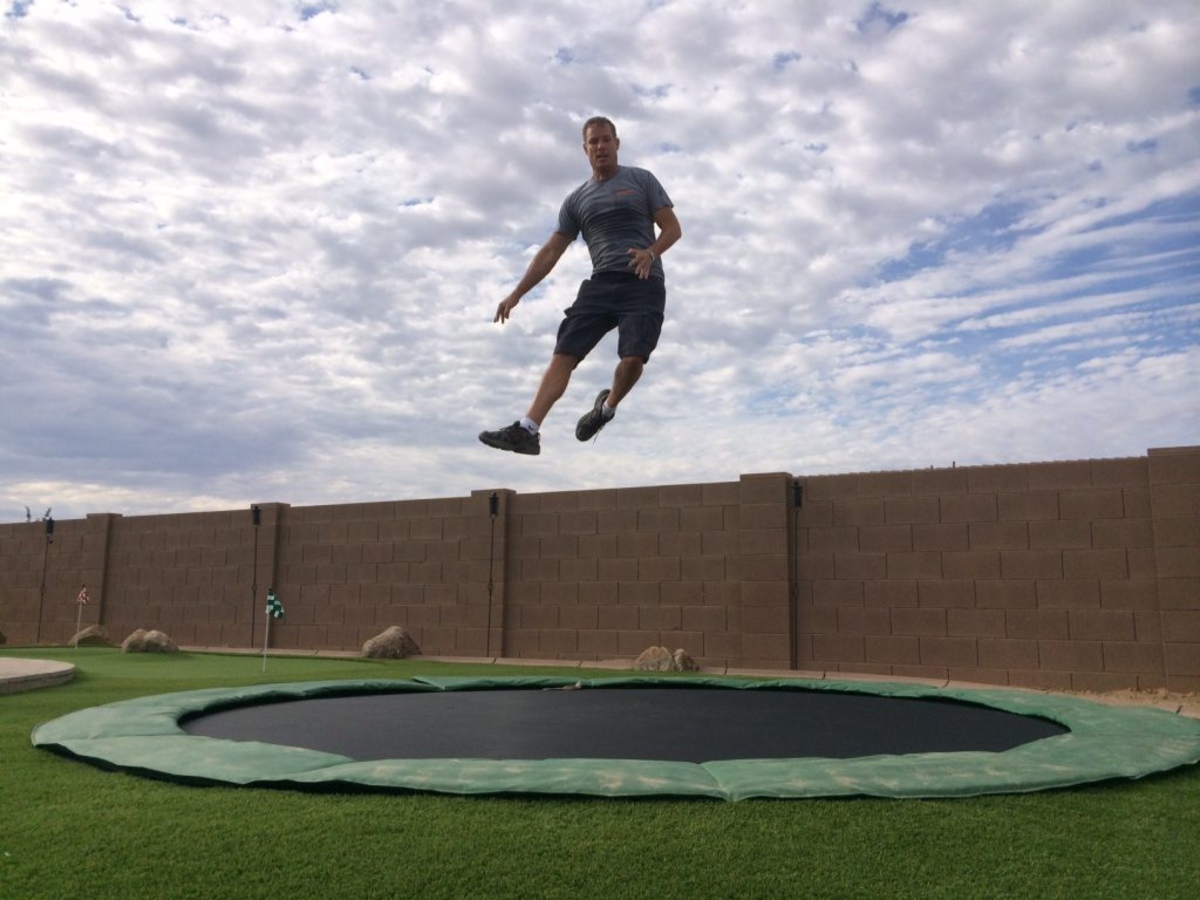
- Encourage a Test Bounce: Invite a willing participant to perform a few test bounces on the trampoline. Observe the behavior of the trampoline, paying attention to any unusual sounds, movements, or indications of instability that may require further attention.
- Assess the Enclosure: If the trampoline is equipped with an enclosure, verify that it is securely fastened and provides adequate protection for users. Confirm that the netting is intact and free from any tears or damage that could compromise its safety features.
- Check for Even Tension: Ensure that the jumping mat is evenly tensioned and free from any sagging or irregularities. A properly tensioned mat contributes to a consistent and enjoyable bouncing experience while minimizing the risk of accidents or injuries.
- Verify Stability: Encourage users to perform various bouncing and jumping movements to assess the stability and responsiveness of the trampoline. Look for any indications of wobbling, shifting, or other irregular behaviors that may signal underlying issues.
By conducting a thorough testing process, you can confidently verify that the trampoline is in optimal condition and ready for safe and enjoyable use. Address any unexpected findings promptly to ensure that the trampoline continues to provide a secure and entertaining recreational outlet for all users.
Conclusion
Congratulations on successfully repairing or replacing the trampoline pole! By following the comprehensive steps outlined in this guide, you’ve taken a proactive approach to restoring the functionality and safety of your trampoline. Whether you addressed a minor bend or undertook the installation of a new pole, your efforts have contributed to creating a secure and enjoyable trampolining environment for all users.
Remember, regular maintenance and periodic inspections are essential to prolonging the lifespan of your trampoline and ensuring the ongoing safety of its users. By remaining attentive to any signs of wear, damage, or instability, you can address potential issues promptly and maintain the trampoline in top condition.
Furthermore, safety should always be a top priority when using a trampoline. Encourage users to adhere to safety guidelines, such as limiting the number of individuals on the trampoline at one time, refraining from performing risky maneuvers, and ensuring that the trampoline is situated on a level surface free from obstructions.
Lastly, if you encounter any challenges during the repair process or have concerns about the condition of your trampoline, don’t hesitate to seek professional assistance. Trained professionals can offer valuable insights and expertise to address any complex issues and provide guidance on maintaining a safe and reliable trampoline.
With your trampoline now in prime condition, it’s time to enjoy the exhilarating and healthful benefits of trampolining with confidence and peace of mind. So, bounce away and savor the boundless fun that your revitalized trampoline brings to you and your family!
Frequently Asked Questions about How To Repair A Trampoline Pole
Was this page helpful?
At Storables.com, we guarantee accurate and reliable information. Our content, validated by Expert Board Contributors, is crafted following stringent Editorial Policies. We're committed to providing you with well-researched, expert-backed insights for all your informational needs.


0 thoughts on “How To Repair A Trampoline Pole”