Home>Gardening & Outdoor>Outdoor Recreation & Activities>How To Repair Swimming Pool Steps
Outdoor Recreation & Activities
How To Repair Swimming Pool Steps
Modified: November 1, 2024
Learn how to repair swimming pool steps and ensure safe outdoor recreation and activities. Get expert tips and guidance for maintaining your pool steps.
(Many of the links in this article redirect to a specific reviewed product. Your purchase of these products through affiliate links helps to generate commission for Storables.com, at no extra cost. Learn more)
Introduction
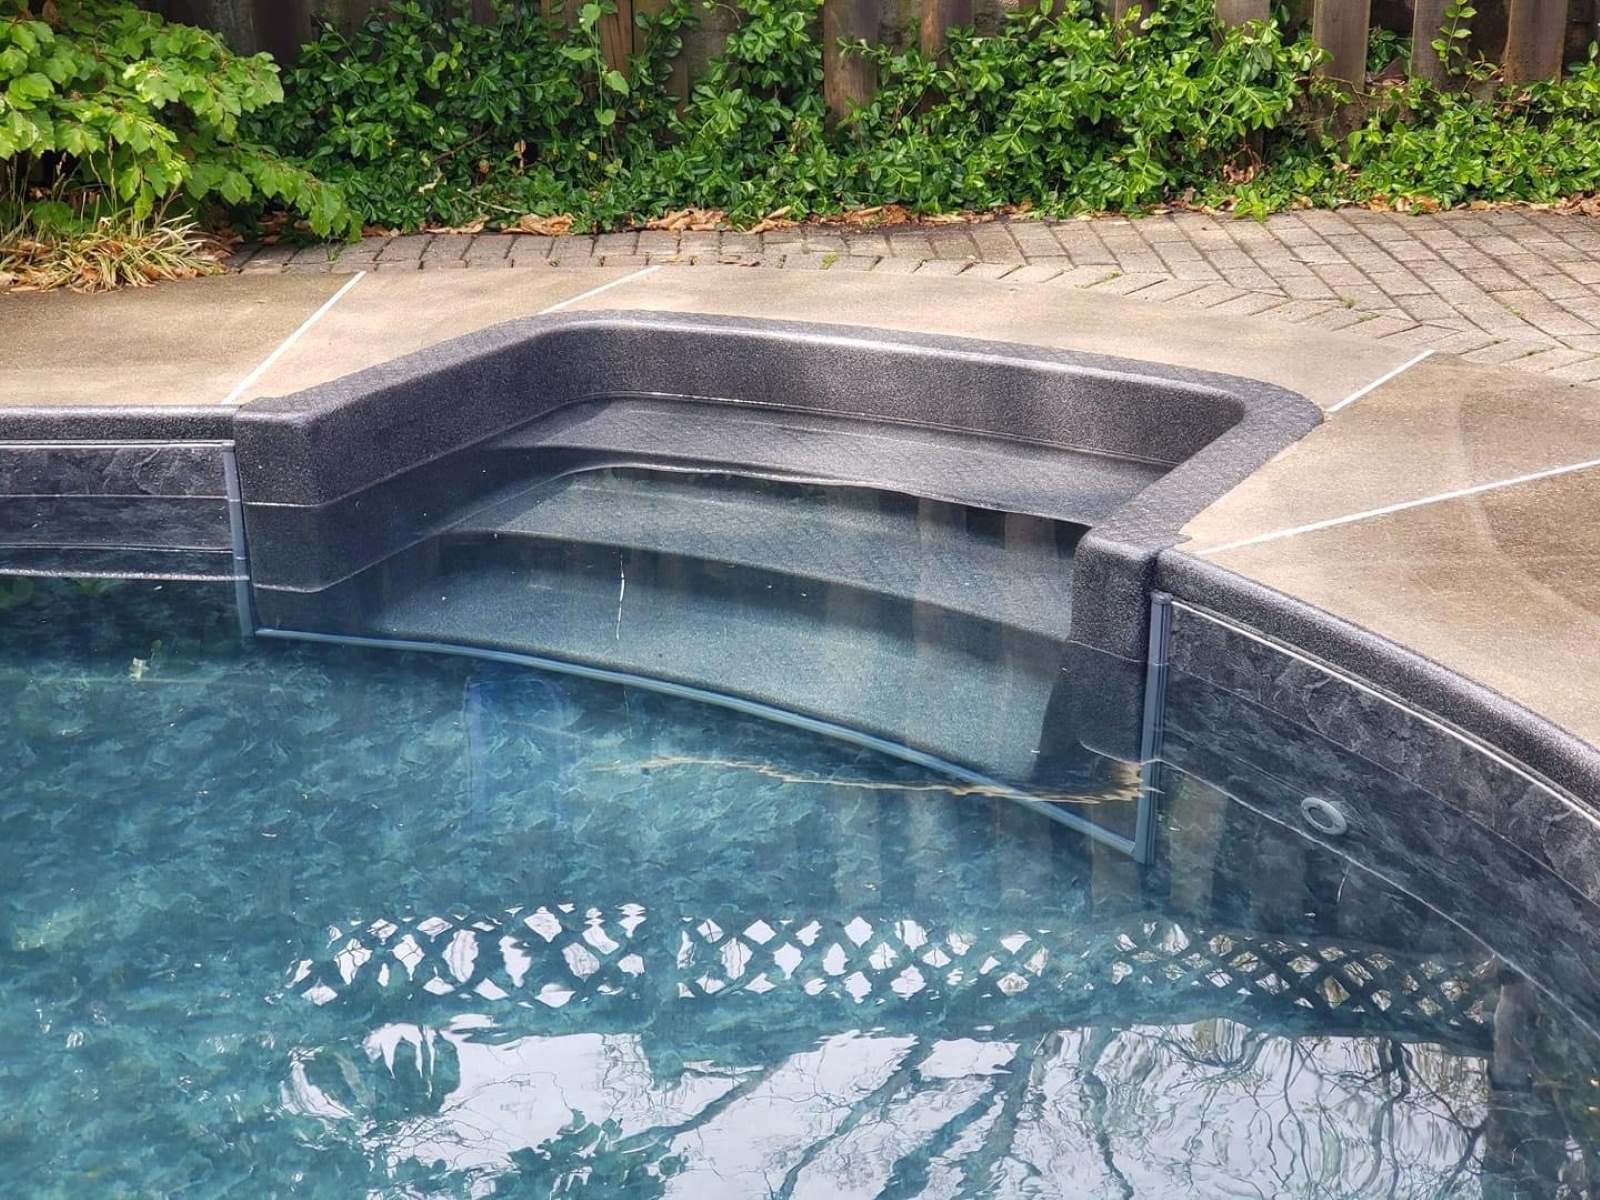
Repairing swimming pool steps is a crucial aspect of pool maintenance and safety. Over time, pool steps can deteriorate due to exposure to water, chemicals, and regular use. Cracks, chips, and loose tiles not only detract from the pool's aesthetic appeal but also pose safety hazards for swimmers. Therefore, knowing how to effectively repair swimming pool steps is essential for pool owners and maintenance professionals.
In this comprehensive guide, we will explore the step-by-step process of repairing swimming pool steps, from assessing the damage to applying the finishing touches. By following these instructions, you can restore the functionality and visual appeal of your pool steps, ensuring a safe and enjoyable swimming experience for all.
Whether you are a seasoned pool maintenance expert or a DIY enthusiast, this guide will equip you with the knowledge and techniques necessary to address common issues associated with swimming pool steps. From repairing cracks and chips to replacing broken tiles and applying a professional finish, this article will provide valuable insights and practical tips for achieving successful pool step repairs.
By understanding the importance of maintaining safe and structurally sound pool steps, you can prolong the lifespan of your pool and create a welcoming environment for swimmers. With the right tools, materials, and techniques, you can tackle pool step repairs with confidence and precision, ultimately enhancing the overall appeal and functionality of your swimming pool.
Now, let's delve into the detailed process of assessing and repairing swimming pool steps, empowering you to take proactive steps in preserving the beauty and safety of your pool area.
Key Takeaways:
- Keep your swimming pool steps safe and visually appealing by assessing and repairing damage promptly. Thoroughly inspect for cracks, chips, and safety hazards to ensure a secure and inviting environment for swimmers.
- Gather the necessary tools and materials for a successful pool step repair project. Prioritize safety, use the right equipment, and select high-quality patching compounds, adhesives, grout, and sealants to achieve durable and visually appealing repairs.
Read more: How To Cover A Swimming Pool
Assessing the Damage
Before embarking on the repair process, it is crucial to thoroughly assess the extent of damage to the swimming pool steps. This initial step lays the foundation for a successful repair project, allowing you to identify and address specific issues with precision. Here's how to effectively assess the damage:
-
Visual Inspection: Begin by visually examining the pool steps for any visible signs of damage. Look for cracks, chips, or areas where the tiles may be loose or missing. Take note of the location and severity of each issue, as this will guide your repair approach.
-
Structural Integrity: Assess the structural integrity of the steps by checking for any signs of shifting, sinking, or instability. Use a level to ensure that the steps are even and properly aligned. Any deviations from the level surface indicate potential structural issues that need to be addressed during the repair process.
-
Water Leakage: Inspect the areas around the pool steps for evidence of water leakage. Prolonged water exposure can weaken the steps and surrounding surfaces, leading to further damage over time. Look for moisture, discoloration, or efflorescence, which may indicate water seepage and underlying structural concerns.
-
Tile Condition: Evaluate the condition of the tiles on the pool steps. Check for cracks, chips, or missing tiles, as these can compromise the safety and aesthetics of the steps. Additionally, assess the grout lines for any signs of deterioration or separation, as these issues can contribute to water infiltration and further damage.
-
Safety Hazards: Identify any potential safety hazards posed by the damaged steps. Sharp edges, protruding fragments, or uneven surfaces can pose risks to swimmers and should be prioritized for immediate repair.
By conducting a thorough assessment of the damage, you can gain a comprehensive understanding of the repair requirements and formulate a targeted plan to restore the pool steps to their optimal condition. This proactive approach sets the stage for efficient and effective repairs, ensuring that the swimming pool remains a safe and inviting space for leisure and recreation.
Gathering the Necessary Tools and Materials
Before initiating the repair process for swimming pool steps, it is essential to gather the necessary tools and materials to ensure a smooth and efficient workflow. Having the right equipment at hand will enable you to address the specific repair needs of the pool steps with precision and effectiveness. Here's a detailed list of the essential tools and materials required for repairing swimming pool steps:
Tools:
- Safety Equipment: Prioritize safety by wearing protective gear, including goggles, gloves, and a dust mask, to shield yourself from potential hazards during the repair process.
- Hammer and Chisel: These tools are essential for removing loose or damaged tiles and preparing the surface for repairs.
- Grout Saw: Use a grout saw to remove deteriorated grout from the tile joints, allowing for the application of fresh grout during the repair process.
- Putty Knife: A putty knife is useful for applying patching compounds and smoothing surfaces during the repair of cracks and chips.
- Tile Adhesive Trowel: Select a trowel suitable for applying tile adhesive when replacing broken or loose tiles on the pool steps.
- Rubber Mallet: This tool facilitates the proper placement and alignment of tiles without causing damage during installation.
- Level: Ensure the steps are even and properly aligned by using a level to assess and adjust the surface as needed.
- Wire Brush: Use a wire brush to clean and prepare the damaged areas before applying patching compounds or sealants.
- Sponge and Bucket: These items are essential for cleaning the repair area and maintaining a tidy workspace throughout the process.
Materials:
- Patching Compound: Select a high-quality patching compound suitable for repairing cracks, chips, and surface imperfections on the pool steps.
- Tile Adhesive: Choose a waterproof tile adhesive designed for outdoor use to secure replacement tiles onto the steps securely.
- Grout: Opt for a durable and waterproof grout to fill the joints between tiles, ensuring a secure and long-lasting bond.
- Sealant: Select a premium sealant suitable for outdoor applications to protect the repaired areas from water infiltration and environmental elements.
- Replacement Tiles: Acquire replacement tiles that match the size, style, and color of the existing tiles on the pool steps to maintain a cohesive and uniform appearance.
- Protective Coating: Consider applying a protective coating or sealant specifically formulated for pool surfaces to enhance durability and resistance to chemical exposure and abrasion.
By gathering these essential tools and materials, you can prepare for a successful pool step repair project, ensuring that you have everything needed to address the specific issues and restore the functionality and aesthetic appeal of the swimming pool steps. This proactive approach sets the stage for efficient and effective repairs, ultimately contributing to the safety and longevity of the pool steps.
Read more: How To Empty A Swimming Pool
Repairing Cracks and Chips
Repairing cracks and chips in swimming pool steps is a critical step in maintaining the structural integrity and safety of the pool area. Cracks and chips not only compromise the visual appeal of the steps but also create potential hazards for swimmers. By addressing these issues promptly and effectively, you can ensure a safe and inviting environment for pool users. Here's a detailed guide on how to repair cracks and chips in swimming pool steps:
Step 1: Prepare the Surface
Begin by thoroughly cleaning the damaged areas using a wire brush to remove any debris, loose particles, and contaminants. Ensure that the surface is clean and free from any substances that may hinder the adhesion of the patching compound.
Step 2: Apply Patching Compound
Select a high-quality patching compound suitable for outdoor use and specifically designed for repairing concrete or masonry surfaces. Using a putty knife, carefully apply the patching compound to fill the cracks and chips, ensuring that the material is level with the surrounding surface. Smooth out the patching compound to create a seamless finish that blends with the existing structure.
Step 3: Allow for Proper Curing
Follow the manufacturer's instructions regarding the curing time for the patching compound. It is essential to allow sufficient time for the compound to cure and harden effectively, ensuring a durable and long-lasting repair.
Read more: How To Design A Swimming Pool
Step 4: Sand and Smooth the Surface
Once the patching compound has fully cured, use fine-grit sandpaper to gently sand the repaired areas, creating a smooth and even surface. This step helps to blend the repaired sections with the surrounding structure, achieving a uniform and aesthetically pleasing result.
Step 5: Apply Protective Sealant
To enhance the durability and resistance of the repaired areas, apply a high-quality sealant designed for outdoor use. The sealant acts as a protective barrier, safeguarding the repaired cracks and chips from water infiltration, chemical exposure, and environmental elements.
By following these steps, you can effectively repair cracks and chips in swimming pool steps, restoring the structural integrity and visual appeal of the pool area. This proactive approach not only contributes to the safety of the pool environment but also prolongs the lifespan of the steps, ensuring long-term enjoyment for swimmers and pool enthusiasts.
Replacing Broken or Loose Tiles
When broken or loose tiles are identified on swimming pool steps, prompt replacement is essential to maintain the safety and aesthetics of the pool area. Damaged tiles not only detract from the visual appeal of the steps but also pose potential hazards to swimmers. By addressing this issue with precision and care, you can ensure a secure and inviting environment for pool users. Here's a detailed guide on how to replace broken or loose tiles on swimming pool steps:
Step 1: Remove Damaged Tiles
Using a hammer and chisel, carefully remove the broken or loose tiles from the pool steps. Exercise caution to avoid causing further damage to the surrounding tiles and the underlying substrate. Thoroughly clean the area to remove any residual adhesive, grout, or debris, ensuring a clean and level surface for the replacement tiles.
Read more: How Long Is A Swimming Pool
Step 2: Prepare the Surface
Inspect the substrate beneath the removed tiles to ensure it is structurally sound and free from any damage. Apply a suitable outdoor tile adhesive to the back of the replacement tile, using a trowel to create an even and consistent layer. Position the tile carefully, ensuring proper alignment and spacing in relation to the surrounding tiles.
Step 3: Secure the Replacement Tiles
Gently tap the replacement tile into place using a rubber mallet, ensuring a secure and level fit. Verify that the tile is flush with the surrounding tiles and that the grout lines align seamlessly. Allow the adhesive to cure according to the manufacturer's instructions, ensuring a strong and durable bond.
Step 4: Apply Grout
Once the adhesive has fully cured, apply a waterproof grout to fill the joints between the replacement tile and the surrounding tiles. Use a grout float to press the grout firmly into the joints, ensuring a tight and uniform fill. Wipe away any excess grout using a damp sponge, creating a clean and polished finish.
Step 5: Clean and Seal
After the grout has set, clean the surface of the tiles using a damp sponge to remove any grout residue. Once the surface is dry, apply a high-quality sealant specifically formulated for outdoor use to protect the newly replaced tiles. The sealant enhances the durability and resistance of the tiles, safeguarding them from water infiltration and environmental elements.
By following these steps, you can effectively replace broken or loose tiles on swimming pool steps, restoring the structural integrity and visual appeal of the pool area. This proactive approach not only contributes to the safety of the pool environment but also ensures a long-lasting and aesthetically pleasing swimming experience for all.
Read more: How To Paint A Swimming Pool
Patching and Resurfacing
Patching and resurfacing are essential steps in the maintenance and restoration of swimming pool steps, particularly when dealing with surface imperfections, wear, and minor structural issues. By addressing these concerns through meticulous patching and resurfacing techniques, you can rejuvenate the appearance and functionality of the pool steps, ensuring a safe and inviting environment for swimmers. Here's a detailed guide on how to effectively patch and resurface swimming pool steps:
Step 1: Surface Preparation
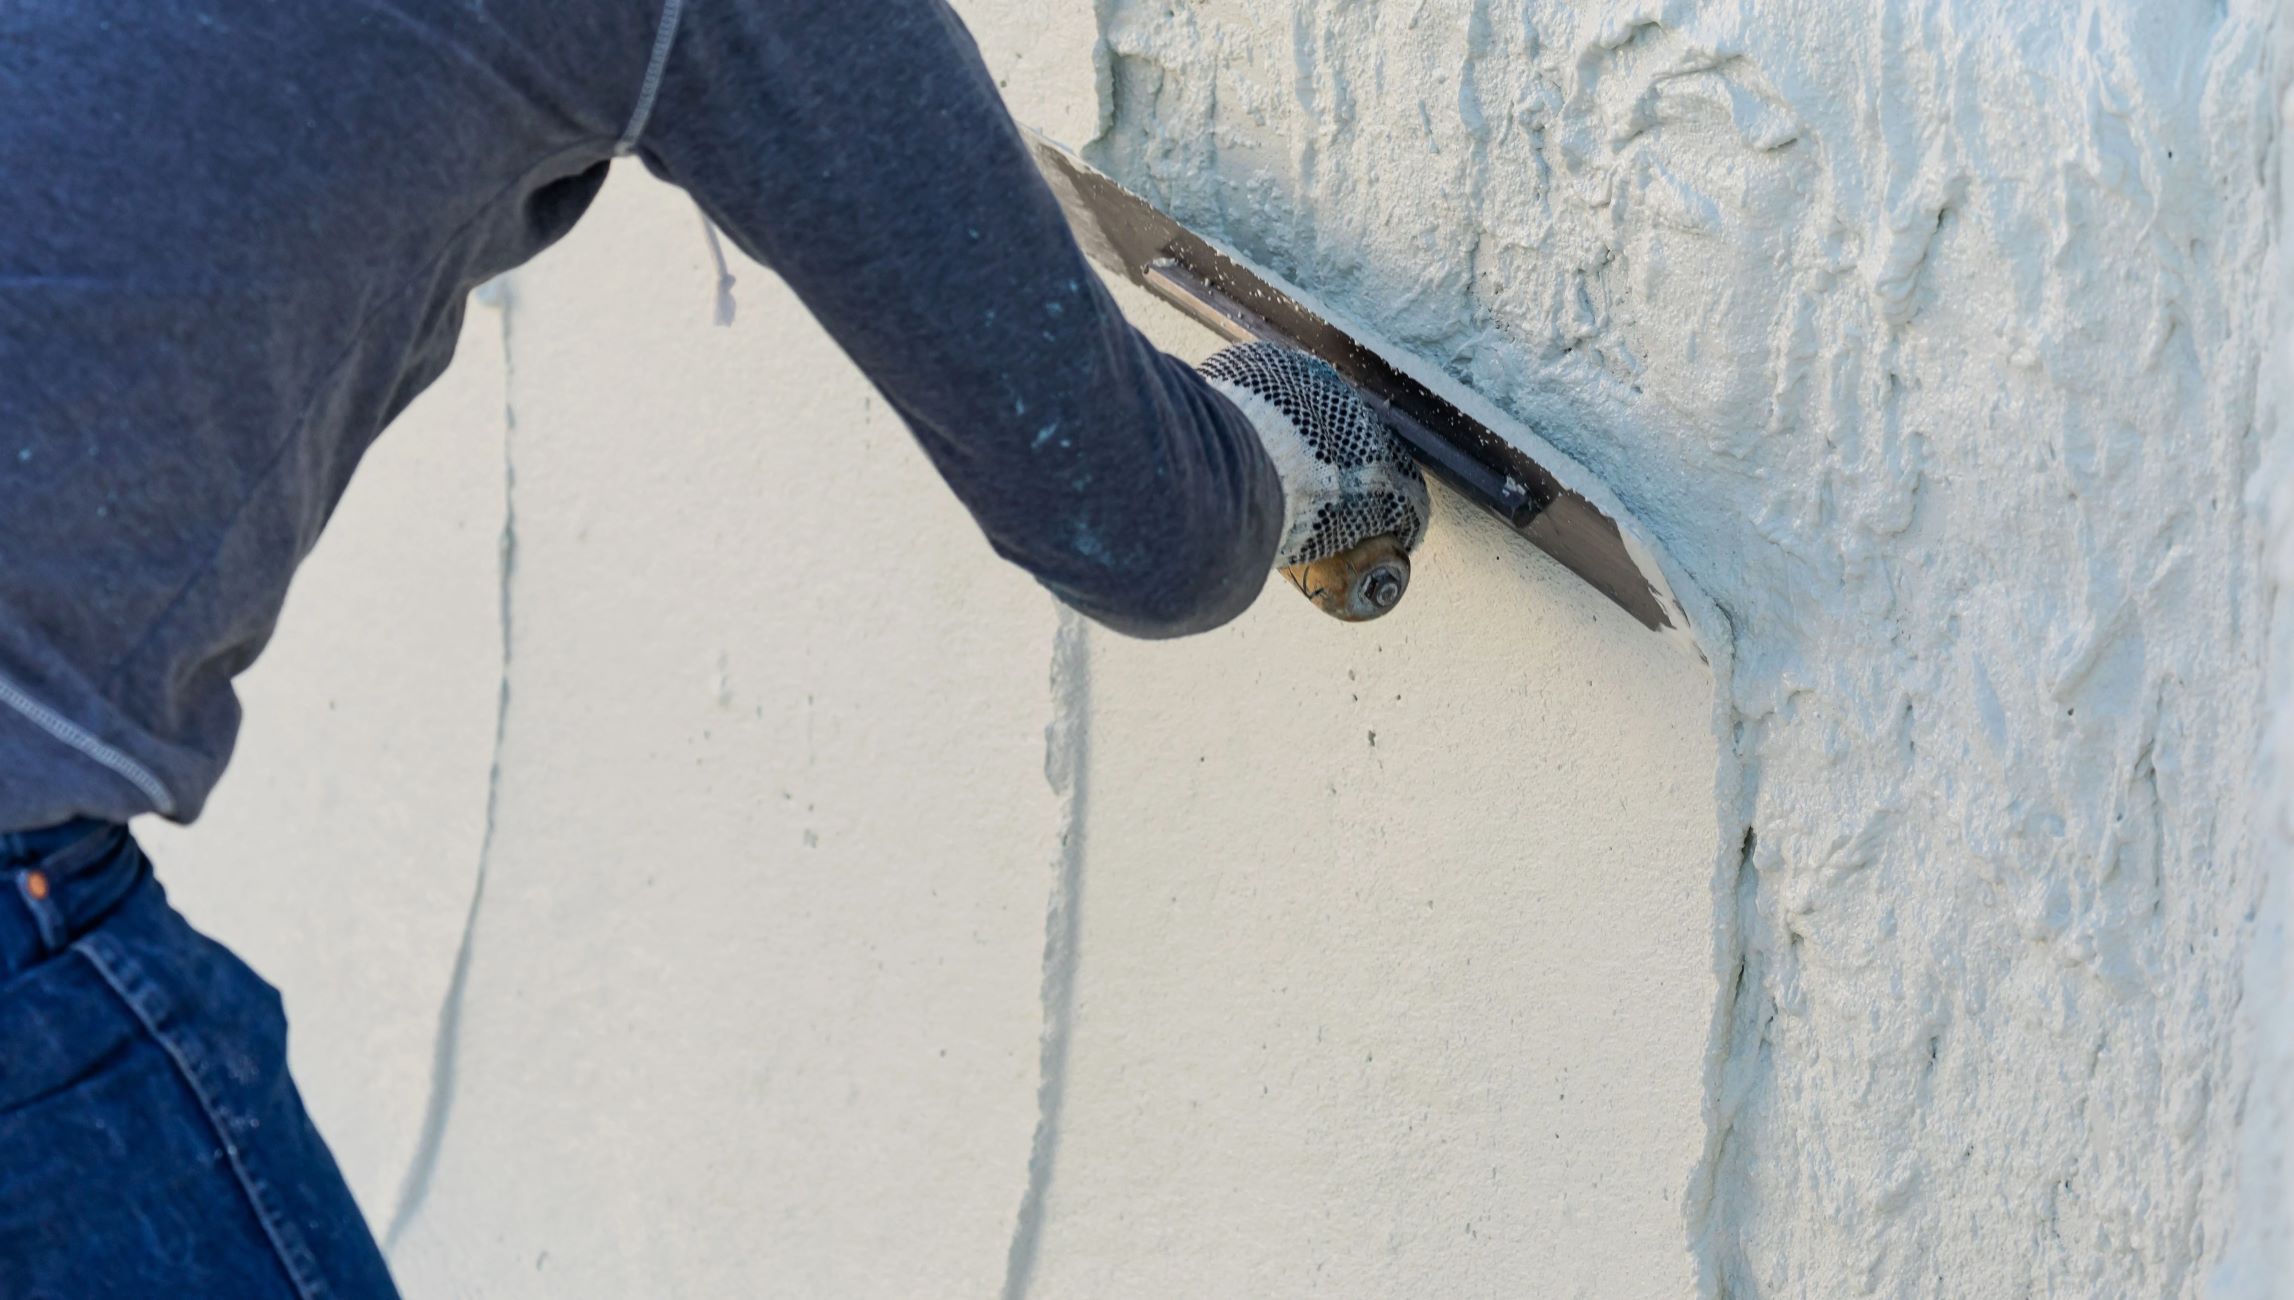
Begin by thoroughly cleaning the surface of the pool steps to remove any dirt, debris, or contaminants. Use a wire brush to eliminate loose particles and ensure a clean, uniform surface for the patching and resurfacing materials. Additionally, inspect the steps for any signs of deterioration, such as spalling or surface irregularities, and address these areas as needed to create a smooth and even substrate for the subsequent steps.
Step 2: Patching Imperfections
Identify any surface imperfections, such as small cracks, pits, or blemishes, and apply a high-quality patching compound specifically formulated for concrete or masonry surfaces. Using a putty knife, carefully fill the imperfections with the patching compound, ensuring a level and uniform application. Smooth out the patched areas to create a seamless transition with the surrounding surface, effectively concealing the imperfections and creating a visually appealing finish.
Step 3: Resurfacing the Steps
Once the patched areas have cured, proceed with the resurfacing process to restore the overall appearance and texture of the pool steps. Select a durable and weather-resistant resurfacing material suitable for outdoor use, such as a concrete overlay or a specialized pool deck coating. Apply the resurfacing material evenly across the entire surface of the pool steps, using a trowel or a suitable application tool to achieve a consistent thickness and texture.
Read more: How To Draw A Swimming Pool
Step 4: Texture and Finish
During the resurfacing application, consider incorporating a textured finish to enhance traction and slip resistance on the pool steps. Various texture options, such as broom finishing or stamped patterns, can be utilized to create a visually appealing and functional surface. Additionally, select a finish that complements the overall aesthetic of the pool area, whether it's a smooth, polished surface or a textured, aggregate-based finish.
Step 5: Curing and Sealing
Allow the resurfacing material to cure thoroughly according to the manufacturer's recommendations, ensuring a strong and durable bond with the underlying substrate. Once the resurfaced steps have fully cured, apply a premium sealant specifically designed for pool surfaces to enhance durability and protect the newly resurfaced areas from water infiltration, UV exposure, and chemical damage. The sealant acts as a protective barrier, preserving the integrity and appearance of the resurfaced pool steps for an extended period.
By following these steps, you can effectively patch and resurface swimming pool steps, revitalizing their appearance and functionality. This proactive approach not only contributes to the safety and longevity of the pool environment but also enhances the overall aesthetic appeal, creating an inviting and visually stunning space for swimmers and pool enthusiasts.
Sealing and Finishing Touches
Sealing and applying finishing touches to the repaired and restored swimming pool steps is the final crucial step in the comprehensive repair process. This stage not only enhances the aesthetic appeal of the steps but also ensures long-term durability and resistance to environmental elements. By following the appropriate sealing and finishing techniques, you can safeguard the repaired areas and create a polished, professional appearance for the pool steps.
Step 1: Clean and Prepare the Surface
Before applying the sealant, it is essential to clean the entire surface of the pool steps thoroughly. Remove any dust, debris, or residues resulting from the repair and restoration processes. Use a damp sponge or cloth to wipe down the surface, ensuring that it is free from any contaminants that may interfere with the adhesion of the sealant.
Read more: How To Shock A Swimming Pool
Step 2: Select a High-Quality Sealant
Choose a premium-quality sealant specifically formulated for outdoor use and designed for pool surfaces. Opt for a sealant that offers excellent waterproofing properties, UV resistance, and durability. Consider the specific material of the pool steps, whether concrete, masonry, or tiled, and select a sealant that is compatible with the surface material for optimal performance.
Step 3: Apply the Sealant
Using a paintbrush, roller, or sprayer, apply the sealant evenly across the entire surface of the pool steps. Ensure thorough coverage, paying particular attention to the repaired areas, cracks, and grout lines. Work methodically to avoid overlaps and streaks, creating a uniform application of the sealant.
Step 4: Allow for Proper Curing
After applying the sealant, allow sufficient time for it to cure and form a protective barrier over the pool steps. Follow the manufacturer's guidelines regarding the curing time and environmental conditions for optimal results. Adequate curing is essential to ensure that the sealant effectively seals the surface, providing long-lasting protection against water infiltration, chemical exposure, and UV degradation.
Step 5: Final Inspections and Touch-Ups
Once the sealant has cured, conduct a final inspection of the pool steps to ensure that the sealant has been applied uniformly and that all areas have been adequately sealed. Address any missed spots or uneven application by applying additional sealant as needed. This meticulous approach ensures comprehensive protection and a flawless finish for the pool steps.
By completing the sealing and finishing touches with precision and care, you can elevate the overall appearance and resilience of the swimming pool steps. The sealant acts as a shield, preserving the integrity of the repairs and enhancing the longevity of the steps, ultimately contributing to a safe, visually appealing, and inviting pool environment for all to enjoy.
Read more: How To Float In A Swimming Pool
Conclusion
In conclusion, the process of repairing swimming pool steps is a vital aspect of pool maintenance, ensuring both the safety and visual appeal of the pool environment. By following the comprehensive steps outlined in this guide, pool owners and maintenance professionals can effectively address common issues such as cracks, chips, and damaged tiles, ultimately prolonging the lifespan of the pool steps and creating a secure and inviting space for swimmers.
The initial assessment of the damage sets the stage for targeted and precise repairs, allowing individuals to identify specific issues and formulate a strategic plan for restoration. By thoroughly evaluating the structural integrity, tile condition, and safety hazards associated with the pool steps, proactive measures can be taken to address the identified concerns with confidence and efficiency.
Gathering the necessary tools and materials is a crucial preparatory step that ensures a seamless repair process. By acquiring the essential equipment and high-quality materials, individuals can approach the repair project with readiness and precision, ultimately contributing to the successful restoration of the pool steps.
Whether it involves repairing cracks and chips, replacing broken or loose tiles, patching and resurfacing, or applying the final sealing and finishing touches, each step plays a significant role in revitalizing the pool steps. Through meticulous application of patching compounds, adhesives, grout, and sealants, individuals can achieve durable and visually appealing repairs, enhancing the overall functionality and aesthetics of the pool steps.
The sealing and finishing touches serve as the final layer of protection, safeguarding the repaired areas and ensuring long-term resilience against environmental elements. By applying a high-quality sealant and conducting thorough inspections, individuals can create a polished and professional finish, elevating the durability and visual appeal of the pool steps.
In essence, the process of repairing swimming pool steps is a proactive and essential endeavor that contributes to the safety, longevity, and overall enjoyment of the pool environment. By embracing the techniques and insights presented in this guide, individuals can embark on successful pool step repairs, fostering a welcoming and secure space for leisure and recreation.
Frequently Asked Questions about How To Repair Swimming Pool Steps
Was this page helpful?
At Storables.com, we guarantee accurate and reliable information. Our content, validated by Expert Board Contributors, is crafted following stringent Editorial Policies. We're committed to providing you with well-researched, expert-backed insights for all your informational needs.


0 thoughts on “How To Repair Swimming Pool Steps”