Home>Gardening & Outdoor>Outdoor Structures>How To Get Rid Of A Shed
Outdoor Structures
How To Get Rid Of A Shed
Modified: February 18, 2024
Learn effective tips and techniques for removing outdoor structures such as sheds. Discover the best ways to get rid of a shed safely and efficiently.
(Many of the links in this article redirect to a specific reviewed product. Your purchase of these products through affiliate links helps to generate commission for Storables.com, at no extra cost. Learn more)
Introduction
So, you’ve decided it’s time to bid farewell to your old shed. Whether it’s become an eyesore, is no longer serving its purpose, or is simply taking up valuable space, getting rid of a shed can be a liberating experience. However, this task requires careful planning and execution to ensure a smooth and efficient process. In this guide, we’ll walk you through the essential steps for dismantling and removing a shed, from initial assessment to final cleanup.
Taking down a shed is a significant undertaking that involves various considerations, such as the shed’s size, construction materials, and the presence of any hazardous substances. From clearing out the shed’s contents to safely disposing of the materials, each step demands attention to detail and a methodical approach. By following this comprehensive guide, you’ll be well-equipped to tackle the shed removal process with confidence and ease.
Let’s dive into the step-by-step process of bidding adieu to your old shed and reclaiming the space it once occupied. Whether you’re preparing to install a new structure, create a garden oasis, or simply open up the area for a fresh purpose, the journey of shedding the old to make way for the new begins here.
Key Takeaways:
- Shed removal involves careful assessment, systematic dismantling, responsible disposal, and thorough cleaning. It transforms unused space into a canvas for future outdoor projects, promoting environmental stewardship and creativity.
- Shed removal marks the beginning of an exciting chapter in outdoor endeavors, offering opportunities for decluttering, envisioning new uses for the space, and embracing the potential of a revitalized outdoor environment.
Read more: How To Get Rid Of A Wasp Nest In A Shed
Step 1: Assessing the Shed
Before embarking on the shed removal journey, it’s crucial to assess the structure and its surroundings. Start by carefully examining the shed’s condition, identifying any potential hazards, and evaluating the best approach for dismantling and removing it.
Surveying the Shed: Begin by inspecting the overall condition of the shed. Look for signs of deterioration, such as rotting wood, rusted metal, or damaged roofing materials. Assess the structural integrity of the shed, paying close attention to any areas of weakness or instability.
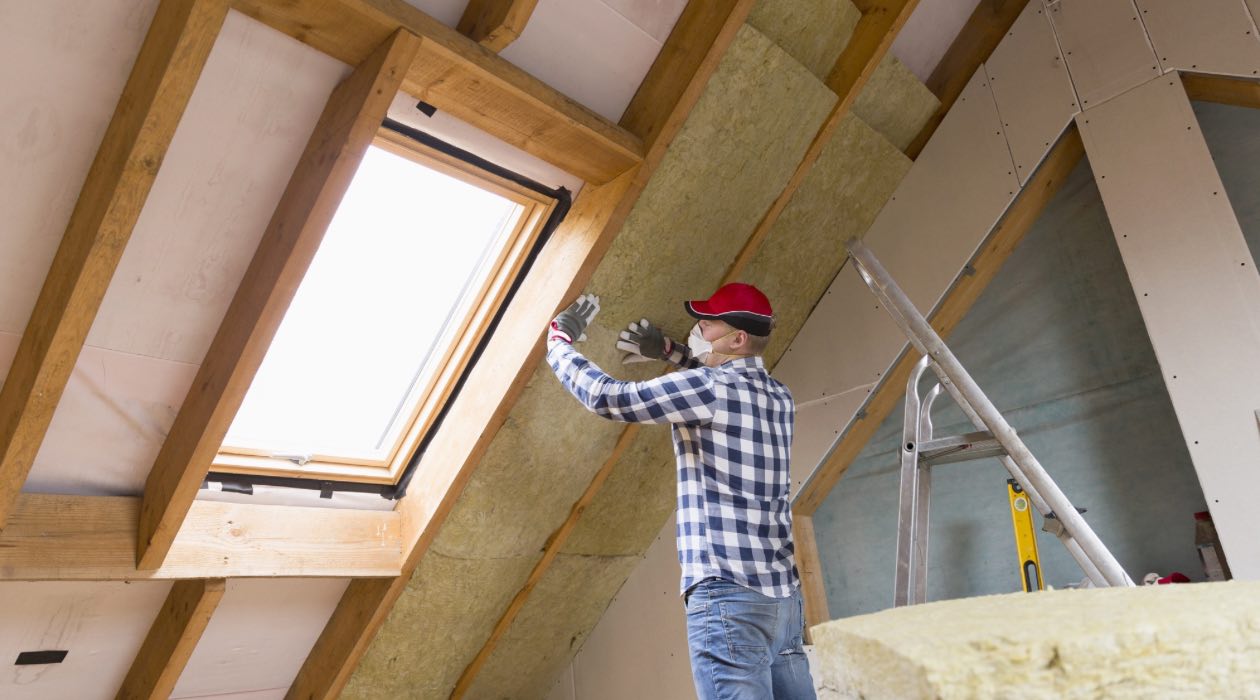
Checking for Hazards: It’s essential to determine if the shed contains any hazardous materials, such as asbestos, lead-based paint, or chemical substances. If the shed was constructed several decades ago, there’s a possibility that it may contain materials that are now recognized as hazardous. In such cases, it’s advisable to seek professional assistance for safe removal and disposal.
Assessing Accessibility: Consider the shed’s location and accessibility. Determine whether there are any obstacles, such as overgrown vegetation or nearby structures, that may impede the removal process. Assess the pathways and clearance needed for transporting dismantled materials out of the area.
Documenting the Surroundings: Take note of the surrounding environment, including nearby trees, landscaping features, and any utilities in close proximity to the shed. Understanding the layout of the area will help in planning the safe and efficient removal of the shed without causing damage to the surroundings.
By thoroughly assessing the shed and its surroundings, you’ll gain valuable insights that will inform your approach to the removal process. This initial step sets the stage for a well-informed and organized shed removal endeavor, ensuring that subsequent tasks are approached with clarity and foresight.
Step 2: Clearing Out the Shed
With a clear understanding of the shed’s condition and surroundings, it’s time to begin the process of clearing out its contents. This step involves decluttering the interior, safely removing any items stored within the shed, and organizing materials for disposal or relocation. Whether the shed is filled with gardening tools, outdoor equipment, or miscellaneous items, a systematic approach to clearing out the space is essential.
Organizing the Contents: Start by categorizing the items within the shed. Separate tools, equipment, and other belongings into distinct groups to facilitate the clearing-out process. Consider creating designated areas for items that will be discarded, recycled, or relocated to a new storage space.
Safe Handling of Items: Exercise caution when handling items within the shed. Use appropriate lifting techniques for heavy objects, and be mindful of sharp or hazardous materials. If the shed has been unused for an extended period, be prepared to encounter pests or debris that may have accumulated over time.
Sorting and Discarding: Evaluate the condition and utility of each item as you sort through the contents. Identify damaged or obsolete items that are no longer of use and set them aside for disposal. Consider donating items that are in good condition but no longer needed, contributing to sustainability and minimizing waste.
Temporary Storage Solutions: If the shed’s contents need to be temporarily relocated during the removal process, consider alternative storage options. Utilize storage containers, garage space, or other suitable areas to store items until the shed removal is complete.
By systematically clearing out the shed, you’ll create a clear workspace for the subsequent dismantling and removal stages. This step not only streamlines the shed removal process but also presents an opportunity to declutter and reorganize your outdoor belongings, setting the stage for a refreshed and organized outdoor space.
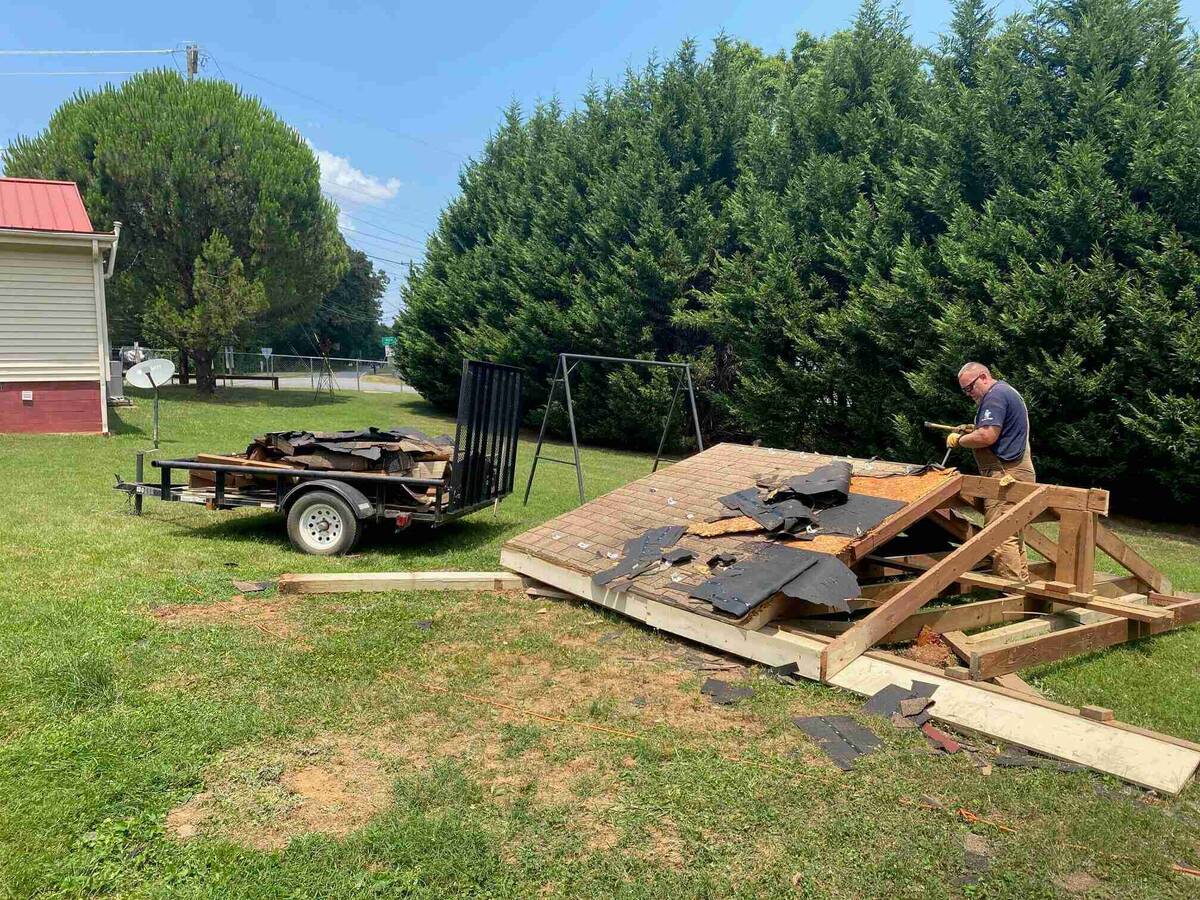
Step 3: Dismantling the Shed
As you transition from clearing out the shed to the dismantling phase, meticulous planning and careful execution are paramount. Dismantling a shed involves disassembling its structural components, such as walls, roofing, and flooring, in a methodical manner to ensure safety and efficiency. Whether the shed is made of wood, metal, or another material, the dismantling process requires attention to detail and adherence to safety protocols.
Developing a Dismantling Strategy: Before initiating the dismantling process, devise a strategic plan for disassembling the shed. Consider the sequence in which components will be removed, the tools and equipment needed, and the allocation of manpower for the task. Having a clear plan in place minimizes the risk of accidents and streamlines the dismantling process.
Removing Roofing Materials: If the shed has a roof, begin by removing the roofing materials, such as shingles or metal panels. Exercise caution when working at heights, and use appropriate safety gear, such as harnesses and sturdy ladders, to prevent falls or injuries.
Disassembling Walls and Supports: Proceed to disassemble the walls and structural supports of the shed. Depending on the construction method, this may involve unscrewing fasteners, detaching panels, or dismantling framing components. Take care to avoid damaging reusable materials during the disassembly process.
Handling Hazardous Materials: If the shed contains materials that are potentially hazardous, such as treated wood or asbestos-containing products, follow recommended safety practices for their removal. Use protective gear, such as gloves and masks, and adhere to local regulations for the disposal of hazardous materials.
Disposal of Dismantled Materials: As components are removed, organize and prepare the dismantled materials for disposal. Separate recyclable materials, such as metal and lumber, from non-recyclable waste. Consider donating salvageable materials to organizations or individuals who can repurpose them.
By approaching the dismantling process with a methodical mindset and a focus on safety, you’ll effectively disassemble the shed while minimizing potential risks and waste. This step paves the way for the final stages of shed removal, bringing you closer to reclaiming the space for new possibilities.
To get rid of a shed, start by removing any items inside and disconnecting any utilities. Then, dismantle the shed carefully, starting from the roof and working your way down. Dispose of the materials responsibly, either by recycling or taking them to a landfill.
Step 4: Disposing of the Shed Materials
Once the shed has been dismantled, the next crucial phase involves the responsible disposal of the materials. Proper disposal methods not only contribute to environmental sustainability but also ensure compliance with local regulations regarding waste management. Whether it’s recycling salvageable materials or arranging for the removal of non-recyclable waste, the disposal stage is pivotal in completing the shed removal process.
Recycling Salvageable Materials: Assess the dismantled materials to identify items that can be recycled or repurposed. Metal components, such as roofing materials and fasteners, can often be recycled, contributing to resource conservation and waste reduction. Wooden materials may also be suitable for repurposing in various DIY projects or as fuel for biomass energy.
Arranging for Waste Removal: For non-recyclable and non-reusable materials, such as damaged lumber or deteriorated components, arrange for their proper disposal. Contact local waste management services or dumpster rental companies to facilitate the removal of waste materials from the dismantled shed. Ensure compliance with waste disposal regulations and guidelines.
Disposing of Hazardous Materials: If the shed contained hazardous materials, such as treated wood, asbestos, or chemical products, it’s essential to adhere to specialized disposal protocols. Engage certified professionals or waste management services equipped to handle hazardous waste in accordance with environmental regulations.
Environmental Considerations: Throughout the disposal process, prioritize environmental considerations by minimizing the impact of shed materials on the surrounding ecosystem. Avoid improper dumping or disposal practices that may harm the environment, and seek eco-friendly disposal options whenever feasible.
Final Site Cleanup: Once the shed materials have been responsibly disposed of, conduct a thorough cleanup of the site. Remove any remaining debris, nails, or small fragments to ensure the area is safe and clear of obstructions. Consider landscaping or repurposing the space to align with your future plans for the area.
By approaching the disposal of shed materials with a focus on sustainability and compliance, you’ll not only complete the shed removal process effectively but also contribute to environmental stewardship. This phase marks the culmination of the shed removal endeavor, setting the stage for a renewed outdoor space and fresh opportunities.
Read more: How To Get Rid Of Rats Under A Shed
Step 5: Cleaning the Area
With the shed materials properly disposed of, the final step in the shed removal process involves thorough cleaning and restoration of the area. This phase is essential for reclaiming the space, ensuring safety, and preparing the site for future use or development. From removing residual debris to addressing any lingering traces of the shed’s presence, a meticulous approach to cleaning the area is paramount.
Clearing Debris and Residues: Begin by clearing the area of any remaining debris, such as small fragments of wood, nails, or fasteners. Conduct a comprehensive sweep of the site to eliminate potential tripping hazards and create a clean, unobstructed space.
Addressing Ground Disturbance: If the shed’s installation and removal have resulted in ground disturbance or damage to the landscaping, take steps to restore the site. Level uneven ground, reseed bare patches, and address any soil compaction to promote the rejuvenation of the area.
Inspecting for Contaminants: Assess the area for any potential contaminants that may have been left behind during the shed removal process. Look for spilled chemicals, oil stains, or other substances that require remediation to ensure environmental safety.
Enhancing Aesthetic Appeal: Consider landscaping enhancements to rejuvenate the area and enhance its visual appeal. Planting grass, flowers, or shrubs can contribute to the revitalization of the space, transforming it into a welcoming and aesthetically pleasing environment.
Future Planning and Utilization: As you clean and restore the area, envision the future purpose of the space. Whether it’s creating a new outdoor seating area, installing a garden feature, or leaving the area open for versatile use, align the cleaning efforts with your vision for the site’s future role.
By meticulously cleaning the area and attending to its restoration, you’ll complete the shed removal process with a renewed and rejuvenated outdoor space. This final step marks the transition from shed removal to the exciting potential of a fresh canvas for outdoor activities, landscaping projects, or new structural installations.
Conclusion
Congratulations on successfully navigating the shed removal process, reclaiming valuable outdoor space, and setting the stage for new possibilities. The journey of bidding farewell to the old shed and embracing the potential of a revitalized outdoor environment is a significant accomplishment. Through careful assessment, systematic dismantling, responsible disposal, and thorough cleaning, you’ve transformed a space burdened by an unused structure into a canvas for future projects and enjoyment.
As you reflect on the shed removal journey, consider the valuable lessons and experiences gained along the way. The process of shedding the old has not only cleared physical space but also presented opportunities for decluttering, environmental stewardship, and envisioning the future use of the area. Whether you’re planning to create a new outdoor oasis, install a modern storage solution, or simply open up the space for versatile use, the completion of the shed removal process marks the beginning of an exciting chapter in your outdoor endeavors.
Remember to celebrate the achievement of reclaiming the space and take pride in the transformation accomplished through your dedication and careful attention to detail. The revitalized area now stands ready to accommodate your vision, whether it involves landscaping enhancements, functional installations, or the creation of a serene retreat.
As you embark on future outdoor projects, the experience gained from the shed removal journey will serve as a valuable foundation, guiding your approach to planning, execution, and environmental mindfulness. Embrace the newfound potential of the space and let your creativity flourish as you embark on the next phase of outdoor transformation.
With the shed removal journey now behind you, the horizon is open to a world of outdoor possibilities, inviting you to craft a space that reflects your aspirations, style, and appreciation for the natural environment. The journey of shedding the old shed has not only cleared physical space but also set the stage for a fresh, inspiring outdoor narrative.
Frequently Asked Questions about How To Get Rid Of A Shed
Was this page helpful?
At Storables.com, we guarantee accurate and reliable information. Our content, validated by Expert Board Contributors, is crafted following stringent Editorial Policies. We're committed to providing you with well-researched, expert-backed insights for all your informational needs.


0 thoughts on “How To Get Rid Of A Shed”