Home>Gardening & Outdoor>Plant Care & Gardening Tips>How To Plant Mums In The Ground
Plant Care & Gardening Tips
How To Plant Mums In The Ground
Modified: October 20, 2024
Learn the best plant care and gardening tips for planting mums in the ground. Discover step-by-step instructions for a successful and beautiful garden.
(Many of the links in this article redirect to a specific reviewed product. Your purchase of these products through affiliate links helps to generate commission for Storables.com, at no extra cost. Learn more)
Introduction
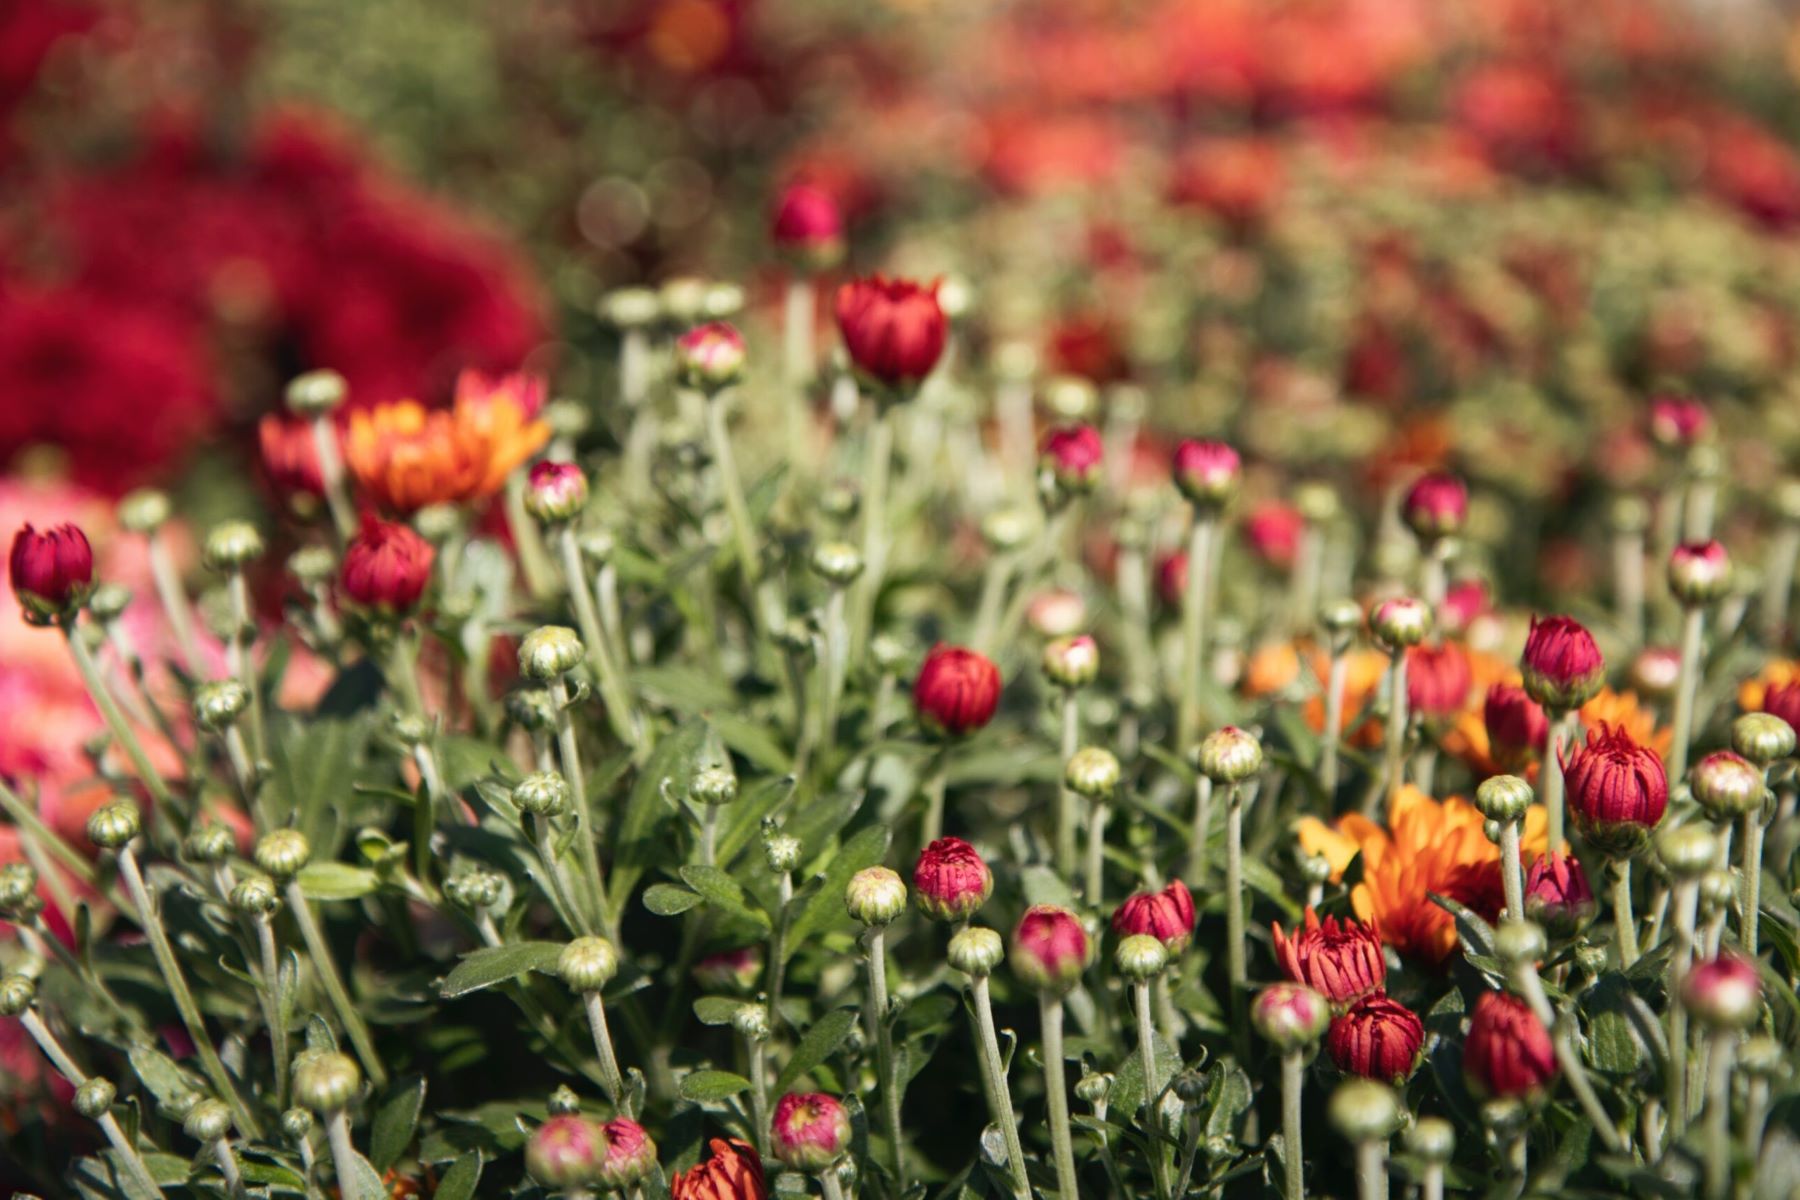
Planting mums, also known as chrysanthemums, in the ground is a delightful way to add vibrant colors and a touch of autumn charm to your garden. These resilient and stunning flowers are a popular choice for many gardeners due to their ability to thrive in various climates and their impressive array of colors, including shades of red, yellow, orange, and purple. Whether you're a seasoned gardener or just starting, planting mums in the ground can be a rewarding and enjoyable experience.
Mums are known for their ability to bloom in the fall, adding a burst of color to your outdoor space when many other plants are fading. Their cheerful and abundant blooms make them a favorite choice for garden beds, borders, and containers. By following a few simple steps, you can ensure that your mums thrive and continue to bring joy to your garden for years to come.
In this comprehensive guide, we will walk you through the process of planting mums in the ground, from choosing the right location to providing the necessary care for these beautiful flowers. Whether you're looking to enhance your garden's visual appeal or simply enjoy the therapeutic benefits of gardening, planting mums is a wonderful way to connect with nature and create a welcoming outdoor sanctuary.
So, roll up your sleeves, grab your gardening tools, and let's embark on a journey to discover the art of planting mums in the ground. With the right knowledge and a touch of creativity, you can transform your garden into a breathtaking display of autumn beauty.
Key Takeaways:
- Choose a sunny, well-drained spot with good soil for planting mums. Proper spacing and soil preparation are key for vibrant, healthy blooms.
- After planting, water mums thoroughly, apply organic mulch, and provide ongoing care. Deadhead, fertilize, and protect from pests for beautiful, long-lasting mums.
Read more: When To Plant Mums In Ohio
Step 1: Choose the Right Location
Selecting the ideal location for planting mums is crucial for their overall health and vitality. Mums thrive in areas that receive ample sunlight, typically around six hours per day. When choosing a location, look for spots in your garden that are well-drained and receive plenty of natural light. Avoid areas with excessive shade or locations that are prone to waterlogging, as these conditions can hinder the growth and blooming of mums.
It's important to consider the surrounding environment when selecting a location for your mums. Choose a spot that is sheltered from strong winds, as excessive wind can damage the delicate blooms and stems of the plants. Additionally, consider the aesthetic appeal of the chosen location, as mums can serve as eye-catching focal points in your garden landscape.
When planting mums, it's beneficial to assess the soil quality in the chosen location. Mums thrive in well-drained soil with a slightly acidic pH level. Conduct a soil test to determine the pH level and nutrient content of the soil. If necessary, amend the soil with organic matter, such as compost or well-rotted manure, to improve its texture and fertility. This preparation ensures that the mums have access to the necessary nutrients for healthy growth and abundant flowering.
Furthermore, consider the spacing between mums when choosing the planting location. Adequate spacing allows for proper air circulation around the plants, reducing the risk of diseases and promoting optimal growth. Typically, mums should be spaced approximately 18 to 24 inches apart, depending on the specific variety and growth habits of the plants.
In summary, selecting the right location for planting mums sets the stage for their long-term success in your garden. By considering factors such as sunlight exposure, soil quality, wind protection, and spacing, you can create an environment that is conducive to the healthy growth and vibrant blooming of these beautiful flowers. With the perfect location secured, you are one step closer to creating a stunning display of mums in your outdoor space.
Step 2: Prepare the Soil
Preparing the soil is a crucial step in ensuring the successful growth and blooming of mums in your garden. Mums thrive in well-drained soil with a slightly acidic pH level, and preparing the soil to meet these requirements is essential for their overall health and vitality.
To begin, conduct a soil test to assess the pH level and nutrient content of the soil in the chosen planting area. Soil testing kits are readily available at garden centers and provide valuable insights into the specific needs of your garden soil. The ideal pH level for mums ranges between 6.5 and 6.8, indicating a slightly acidic environment. If the soil test reveals a pH level outside of this range, it may be necessary to adjust the acidity of the soil to create a favorable growing environment for the mums.
One effective method to lower the pH level and increase soil acidity is by incorporating organic matter, such as compost, peat moss, or well-rotted manure, into the soil. These organic materials not only enhance the texture and structure of the soil but also contribute to its acidity, creating an optimal growing medium for mums. Additionally, organic matter improves the soil's ability to retain moisture and nutrients, promoting healthy root development and overall plant growth.
Incorporating a balanced fertilizer into the soil is another essential aspect of soil preparation for mums. Choose a fertilizer specifically formulated for flowering plants, with a balanced ratio of essential nutrients such as nitrogen, phosphorus, and potassium. Mixing the fertilizer into the soil according to the manufacturer's instructions ensures that the mums receive the necessary nutrients to support robust growth and prolific blooming.
Furthermore, consider the importance of soil drainage in preparing the planting area for mums. To enhance soil drainage, amend heavy or compacted soil with coarse sand or perlite, which helps to improve aeration and prevent waterlogging. Well-drained soil is vital for the health of mums, as it reduces the risk of root rot and other moisture-related issues.
By taking the time to prepare the soil adequately, you are laying the foundation for the successful growth and blooming of mums in your garden. A well-prepared planting area provides mums with the essential nutrients, proper pH levels, and optimal drainage, setting the stage for a spectacular display of vibrant blooms and healthy foliage. With the soil meticulously prepared, your mums are poised to thrive and bring joy to your garden for seasons to come.
Step 3: Planting the Mums
Planting mums is an exciting and pivotal step in bringing these vibrant flowers to life in your garden. As you embark on this journey, it's essential to approach the planting process with care and attention to detail, ensuring that the mums are positioned for optimal growth and blooming.
Begin by carefully removing the mums from their containers or packaging, taking care not to disturb the roots excessively. Gently loosen the root ball to encourage outward growth and place the mum in the prepared planting hole. The depth of the planting hole should be equivalent to the height of the root ball, allowing the top of the root ball to align with the surrounding soil level.
When positioning the mums in the planting hole, ensure that they are spaced appropriately, typically 18 to 24 inches apart, depending on the specific variety and growth habits of the plants. This spacing allows for adequate air circulation around the mums, reducing the risk of diseases and promoting healthy growth.
Once the mums are in place, backfill the planting hole with the amended soil, gently firming it around the base of the plants. Water the newly planted mums thoroughly to settle the soil and provide essential moisture to the roots. Proper watering immediately after planting helps to eliminate air pockets in the soil and establishes good root-to-soil contact, facilitating the mums' acclimation to their new environment.
After planting, consider applying a layer of organic mulch around the mums to conserve soil moisture, suppress weed growth, and regulate soil temperature. Organic mulches, such as shredded bark or compost, provide numerous benefits to the mums and contribute to the overall health of the planting area.
As you complete the planting process, take a moment to admire the mums in their new home, envisioning the colorful blooms and lush foliage that will grace your garden in the coming months. With the mums securely planted and nurtured in their designated space, you have taken a significant step toward creating a captivating display of autumn beauty in your outdoor sanctuary.
In summary, planting mums involves delicately positioning the plants in the prepared soil, ensuring proper spacing, and providing essential care to promote their establishment and growth. By approaching the planting process with attentiveness and a nurturing touch, you set the stage for the mums to flourish and thrive, enriching your garden with their vibrant hues and natural elegance.
Step 4: Watering and Mulching
Proper watering and mulching are essential components of caring for newly planted mums, ensuring their continued health and vitality as they establish themselves in the garden. By providing adequate moisture and implementing a protective mulching layer, you can create an optimal environment for the mums to thrive and produce an abundance of vibrant blooms.
Read more: How Far Apart Should Mums Be Planted
Watering
After planting the mums, it is crucial to establish a consistent watering routine to support their initial growth and root development. Water the newly planted mums thoroughly immediately after planting to settle the soil and provide essential moisture to the roots. This initial watering helps to eliminate air pockets in the soil and encourages the mums to acclimate to their new surroundings.
Throughout the first growing season, monitor the moisture levels in the soil, particularly during periods of limited rainfall or high temperatures. Mums benefit from regular watering, especially during dry spells, to maintain adequate soil moisture. When watering, aim to keep the soil consistently moist but not waterlogged, as excessive moisture can lead to root rot and other issues.
To determine when to water, perform a simple soil moisture test by inserting your finger into the soil near the mums. If the soil feels dry to the touch, it is time to water. Water the mums at the base of the plants, avoiding wetting the foliage, which can contribute to disease development. Consider using a soaker hose or drip irrigation system to deliver water directly to the root zone, promoting efficient and targeted hydration for the mums.
Mulching
Mulching serves as a valuable practice in maintaining soil moisture, regulating temperature, and suppressing weed growth around the mums. Apply a layer of organic mulch, such as shredded bark, compost, or straw, around the base of the mums, ensuring that the mulch does not directly touch the stems of the plants. The mulch layer should be approximately 2 to 3 inches thick, providing effective coverage while allowing air and water to penetrate the soil.
Organic mulch acts as a protective barrier, reducing moisture evaporation from the soil and minimizing temperature fluctuations, which can be particularly beneficial during hot and dry periods. Additionally, mulch helps to inhibit weed growth, preventing unwanted competition for nutrients and moisture. As the mulch gradually breaks down, it contributes organic matter to the soil, enriching its fertility and structure over time.
By implementing a consistent watering regimen and applying a protective mulching layer, you can nurture the newly planted mums and create an environment that supports their growth and blooming. These simple yet impactful practices contribute to the overall well-being of the mums, ensuring that they receive the essential care needed to flourish and grace your garden with their captivating beauty.
Step 5: Maintenance and Care
Once the mums are planted and established in your garden, ongoing maintenance and care are essential to ensure their continued health, vigor, and prolific blooming. By implementing regular maintenance practices and providing attentive care, you can support the mums' growth and longevity, allowing them to thrive and adorn your outdoor space with their vibrant colors and natural elegance.
Deadheading and Pruning
Deadheading, the process of removing spent flowers, is a key maintenance practice that encourages continuous blooming and prevents the mums from expending energy on seed production. As the blooms fade, simply pinch or snip them off just above a set of healthy leaves or buds. This encourages the mums to redirect their energy into producing new blooms, prolonging the flowering period and enhancing the overall visual appeal of the plants.
In addition to deadheading, periodic pruning helps maintain the mums' shape and encourages bushier growth. Lightly trim the stems and foliage in early summer to promote branching and a more compact form. Avoid heavy pruning in late summer, as this can interfere with the mums' ability to set buds for fall blooming.
Read more: How To Plant Sedum Ground Cover
Fertilization
Regular fertilization is crucial for supporting the mums' growth and blooming. Apply a balanced, slow-release fertilizer formulated for flowering plants in early spring, following the manufacturer's recommendations. This provides the mums with the essential nutrients they need to develop strong roots, lush foliage, and abundant blooms. Avoid over-fertilization, as excessive nitrogen can lead to excessive foliage growth at the expense of blooming.
Pest and Disease Management
Vigilant pest and disease management is vital for maintaining the mums' health and preventing potential issues. Keep an eye out for common pests such as aphids, spider mites, and leafhoppers, and address any infestations promptly using organic pest control methods. Additionally, monitor the mums for signs of diseases such as powdery mildew or leaf spot, and take preventive measures such as providing adequate air circulation and avoiding overhead watering to minimize the risk of disease development.
Winter Protection
As the growing season comes to a close, prepare the mums for the winter months by providing adequate protection. In regions with harsh winters, apply a layer of mulch around the base of the mums to insulate the roots and protect them from freezing temperatures. Alternatively, consider covering the mums with a layer of straw or pine boughs to shield them from extreme cold. Proper winter protection helps the mums survive the colder months and ensures their return in the following spring.
By incorporating these maintenance and care practices into your gardening routine, you can nurture the mums and create an environment that supports their long-term health and blooming. With attentive care and a proactive approach to maintenance, you can enjoy the beauty of mums in your garden year after year, creating a captivating display of autumn splendor that delights both you and your visitors.
Conclusion
In conclusion, the process of planting mums in the ground encompasses a journey of nurturing, creativity, and the joy of witnessing nature's vibrant beauty unfold in your garden. From carefully selecting the ideal location to providing ongoing care and maintenance, each step contributes to the overall success and longevity of these stunning flowers.
As you embark on the endeavor of planting mums, you are not only creating a visually captivating display but also fostering a deeper connection with the natural world. The act of tending to the mums, preparing the soil, and delicately planting them in their designated space is a testament to the nurturing spirit of gardening. It is a journey that invites you to slow down, observe the intricacies of plant life, and appreciate the transformative power of nature's artistry.
The choice of the planting location sets the stage for the mums' growth and blooming, emphasizing the importance of sunlight, soil quality, and environmental considerations. By carefully assessing these factors, you create an environment that supports the mums' vitality and resilience, allowing them to thrive and grace your garden with their radiant hues.
The meticulous preparation of the soil, including soil testing, pH adjustment, and nutrient enrichment, lays the groundwork for the mums' long-term health and vigor. It is a testament to the dedication and foresight of the gardener, ensuring that the mums have access to the essential elements needed for robust growth and abundant flowering.
The act of planting the mums, delicately positioning them in the soil and providing essential care, marks the beginning of a beautiful journey. It is a moment of anticipation and hope, envisioning the colorful blooms and lush foliage that will adorn your garden in the seasons to come.
The ongoing maintenance and care practices, including deadheading, pruning, fertilization, and pest management, reflect a commitment to nurturing the mums and creating an environment that supports their well-being. It is a testament to the gardener's dedication and attentiveness, ensuring that the mums continue to thrive and enchant with their natural elegance.
In essence, the process of planting mums in the ground transcends the act of gardening; it is a celebration of nature's resilience, beauty, and the transformative power of nurturing. As the mums flourish in your garden, they become a living canvas of autumn splendor, a testament to the harmonious relationship between the gardener and the natural world. With each bloom, the mums offer a reminder of the beauty that unfolds when we embrace the art of planting and nurturing life in our outdoor sanctuaries.
Frequently Asked Questions about How To Plant Mums In The Ground
Was this page helpful?
At Storables.com, we guarantee accurate and reliable information. Our content, validated by Expert Board Contributors, is crafted following stringent Editorial Policies. We're committed to providing you with well-researched, expert-backed insights for all your informational needs.


0 thoughts on “How To Plant Mums In The Ground”