Home>Gardening & Outdoor>Pool & Spa Care>How To Fix A Leaking Hot Tub Jet

Pool & Spa Care
How To Fix A Leaking Hot Tub Jet
Modified: August 16, 2024
Learn how to effectively fix a leaking hot tub jet with our expert pool and spa care tips. Keep your hot tub in top condition with our easy-to-follow advice.
(Many of the links in this article redirect to a specific reviewed product. Your purchase of these products through affiliate links helps to generate commission for Storables.com, at no extra cost. Learn more)
Introduction
Welcome to the wonderful world of hot tub maintenance! As a proud hot tub owner, you understand the joy and relaxation that comes with soaking in your personal oasis. However, like any cherished possession, your hot tub requires regular care and attention to ensure it remains in pristine condition. One common issue that hot tub owners may encounter is a leaking jet. A leaking jet not only disrupts the tranquil experience of your soak but can also lead to potential damage if left unattended.
Fortunately, addressing a leaking hot tub jet is a manageable task that can be accomplished with a bit of know-how and the right approach. In this comprehensive guide, we will walk you through the step-by-step process of identifying, addressing, and fixing a leaking hot tub jet. By following these instructions, you can restore your hot tub to its leak-free glory and continue enjoying soothing hydrotherapy sessions without any unwelcome surprises.
So, if you've noticed water seeping from one of your hot tub jets, fear not! With a little guidance and a willingness to get your hands wet, you can tackle this issue with confidence. Let's dive in and learn how to fix a leaking hot tub jet, ensuring that your relaxation time remains uninterrupted.
Key Takeaways:
- Identify the leaking jet by observing water flow and conducting a thorough inspection. Turn off the hot tub, remove the leaking jet, and replace the O-ring or gasket to fix the leak.
- Reinstall the jet and conduct a thorough test to ensure the repair is successful. Regular maintenance and timely repairs are essential for preserving your hot tub’s functionality and enjoyment.
Read more: How To Fix Hot Tub Plumbing Leak
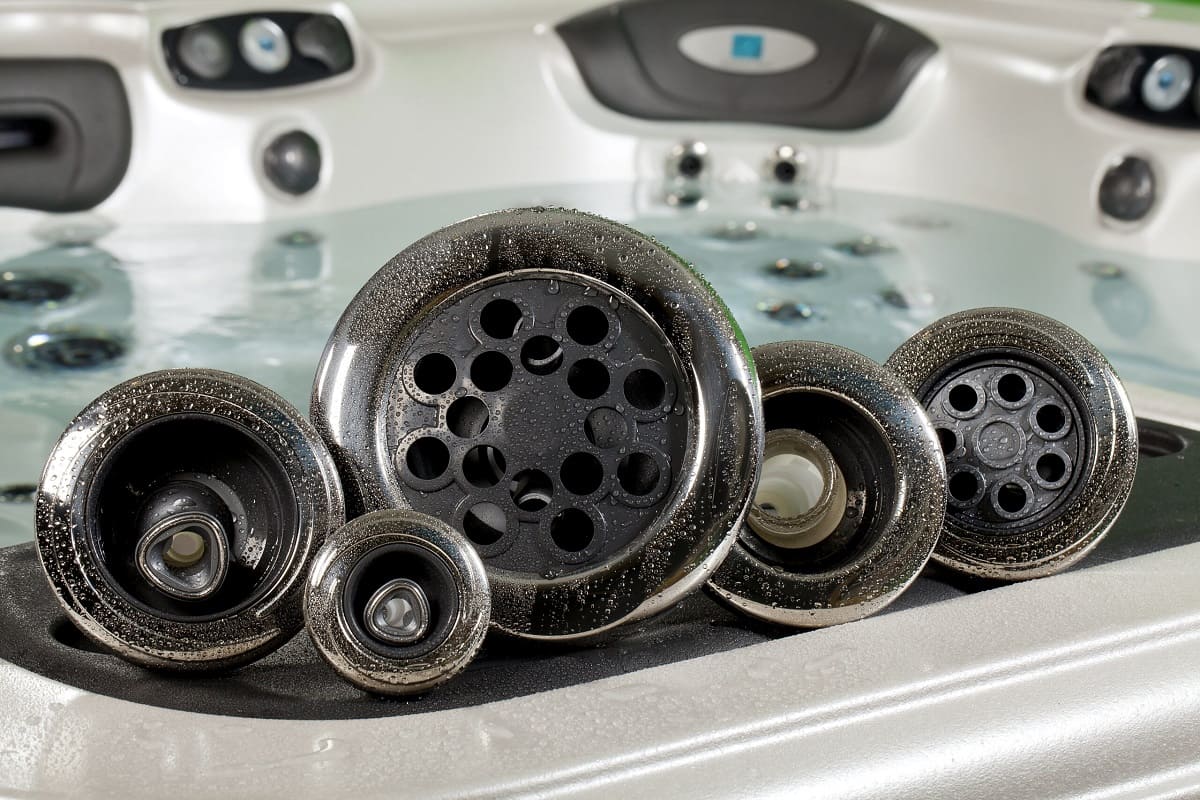
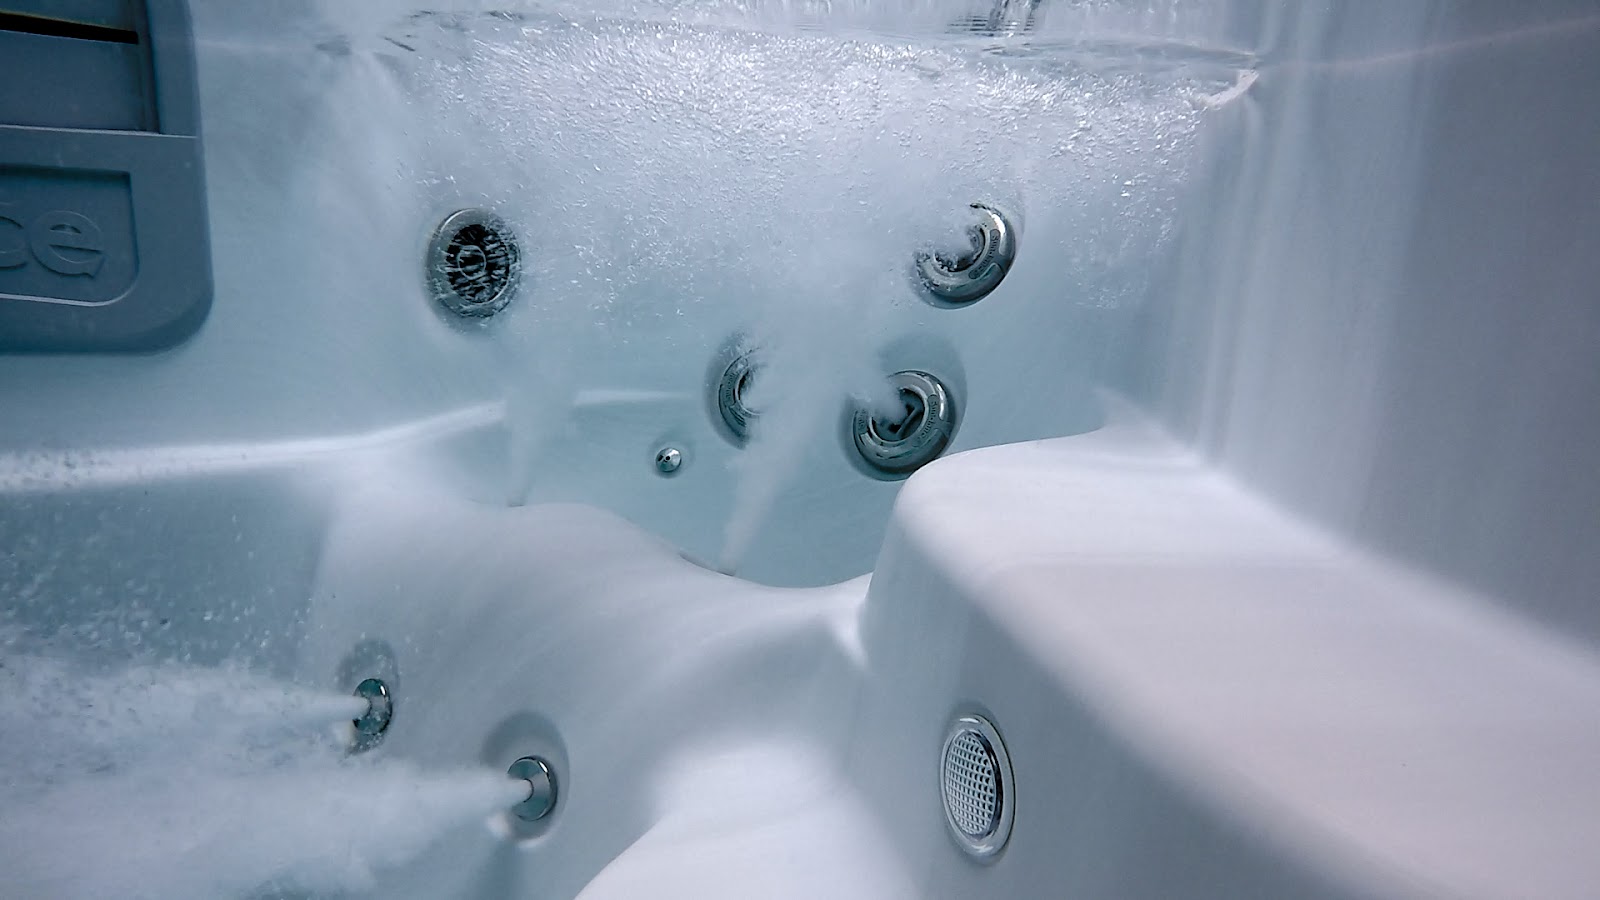
Identify the Leaking Jet
Before you can begin fixing a leaking hot tub jet, it’s crucial to identify the specific jet that is causing the issue. In some cases, the location of the leak may be visibly apparent, with water seeping around the jet’s housing. However, if the leak isn’t immediately noticeable, there are a few steps you can take to pinpoint the problematic jet.
Start by observing the hot tub while it’s running. Look for any jets that are releasing an excessive amount of water or causing unusual turbulence in the tub. Alternatively, you can use a dry tissue or paper towel to gently blot around the jets while the hot tub is operational. This method can help detect any moisture or water droplets, indicating a leaking jet.
If the leak remains elusive, you may need to conduct a more thorough inspection. Turn off the hot tub and allow it to drain completely. Once the water has been drained, examine each jet carefully, feeling around the housing for any signs of moisture or water accumulation. It’s essential to be diligent during this process, as some leaks may be subtle and require close attention to detect.
By identifying the specific jet that is leaking, you can focus your efforts on addressing the problem directly, saving time and ensuring a precise repair. With the leaking jet in your sights, it’s time to move on to the next step: turning off the hot tub to prepare for the repair process.
Turn Off the Hot Tub
Once you’ve pinpointed the leaking jet, the next step in fixing the issue is to turn off the hot tub to prepare for the repair process. Safety is paramount when working on any aspect of your hot tub, and this step ensures that you can address the leaking jet without the risk of injury or further damage.
Before shutting off the hot tub, it’s important to inform any fellow hot tub enthusiasts that the tub will be temporarily out of commission. This prevents any accidental attempts to use the hot tub while it’s undergoing repairs, which could lead to complications or safety hazards.
To turn off the hot tub, locate the power source and follow the manufacturer’s instructions for safely powering down the unit. In most cases, this will involve switching off the circuit breaker that supplies electricity to the hot tub. It’s crucial to adhere to the specific guidelines provided by the manufacturer to ensure a safe and proper shutdown procedure.
After the hot tub has been powered down, it’s advisable to disconnect the power source entirely to eliminate the risk of electrical accidents. If your hot tub has a dedicated disconnect box, use this to completely cut off power to the unit. Taking these precautions helps create a secure working environment as you proceed with addressing the leaking jet.
With the hot tub safely turned off and disconnected from its power source, you’re ready to move on to the next phase of the repair process: removing the leaking jet from the hot tub’s structure. By following these steps diligently, you can ensure a safe and controlled environment for conducting the necessary repairs, setting the stage for a successful resolution to the leaking jet issue.
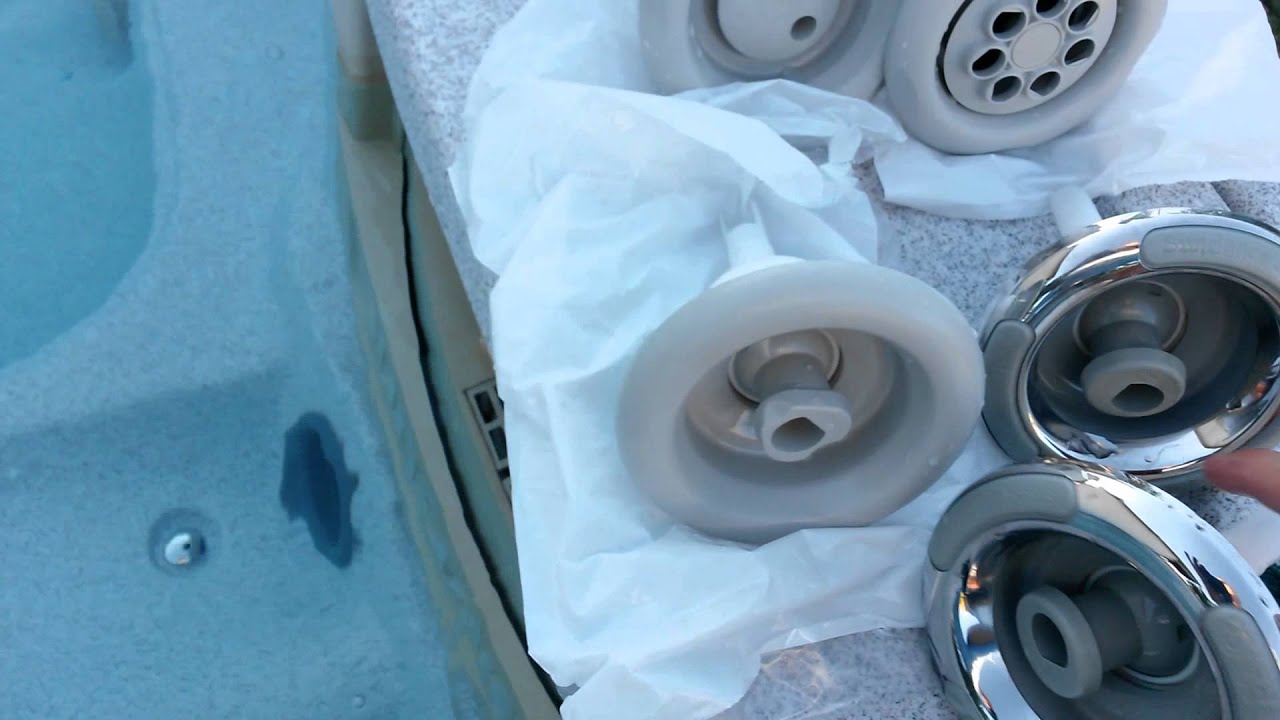
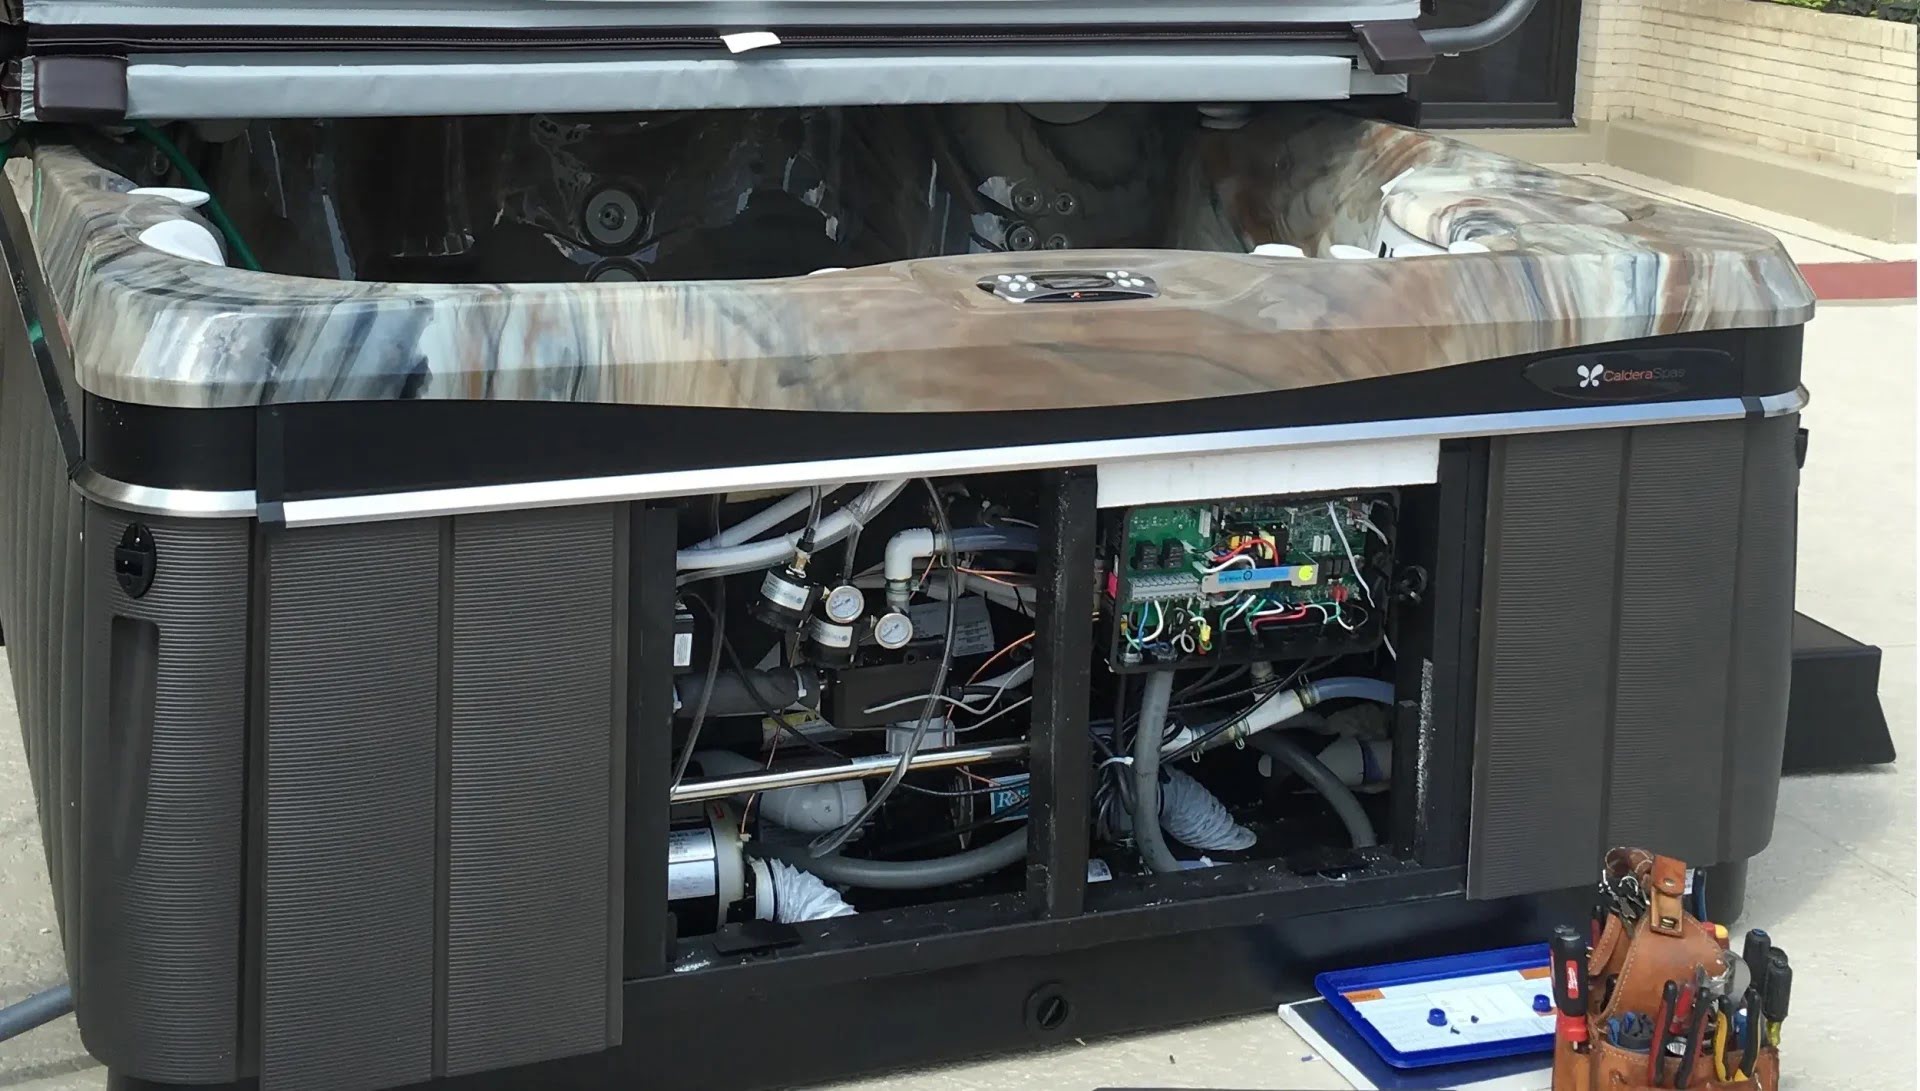
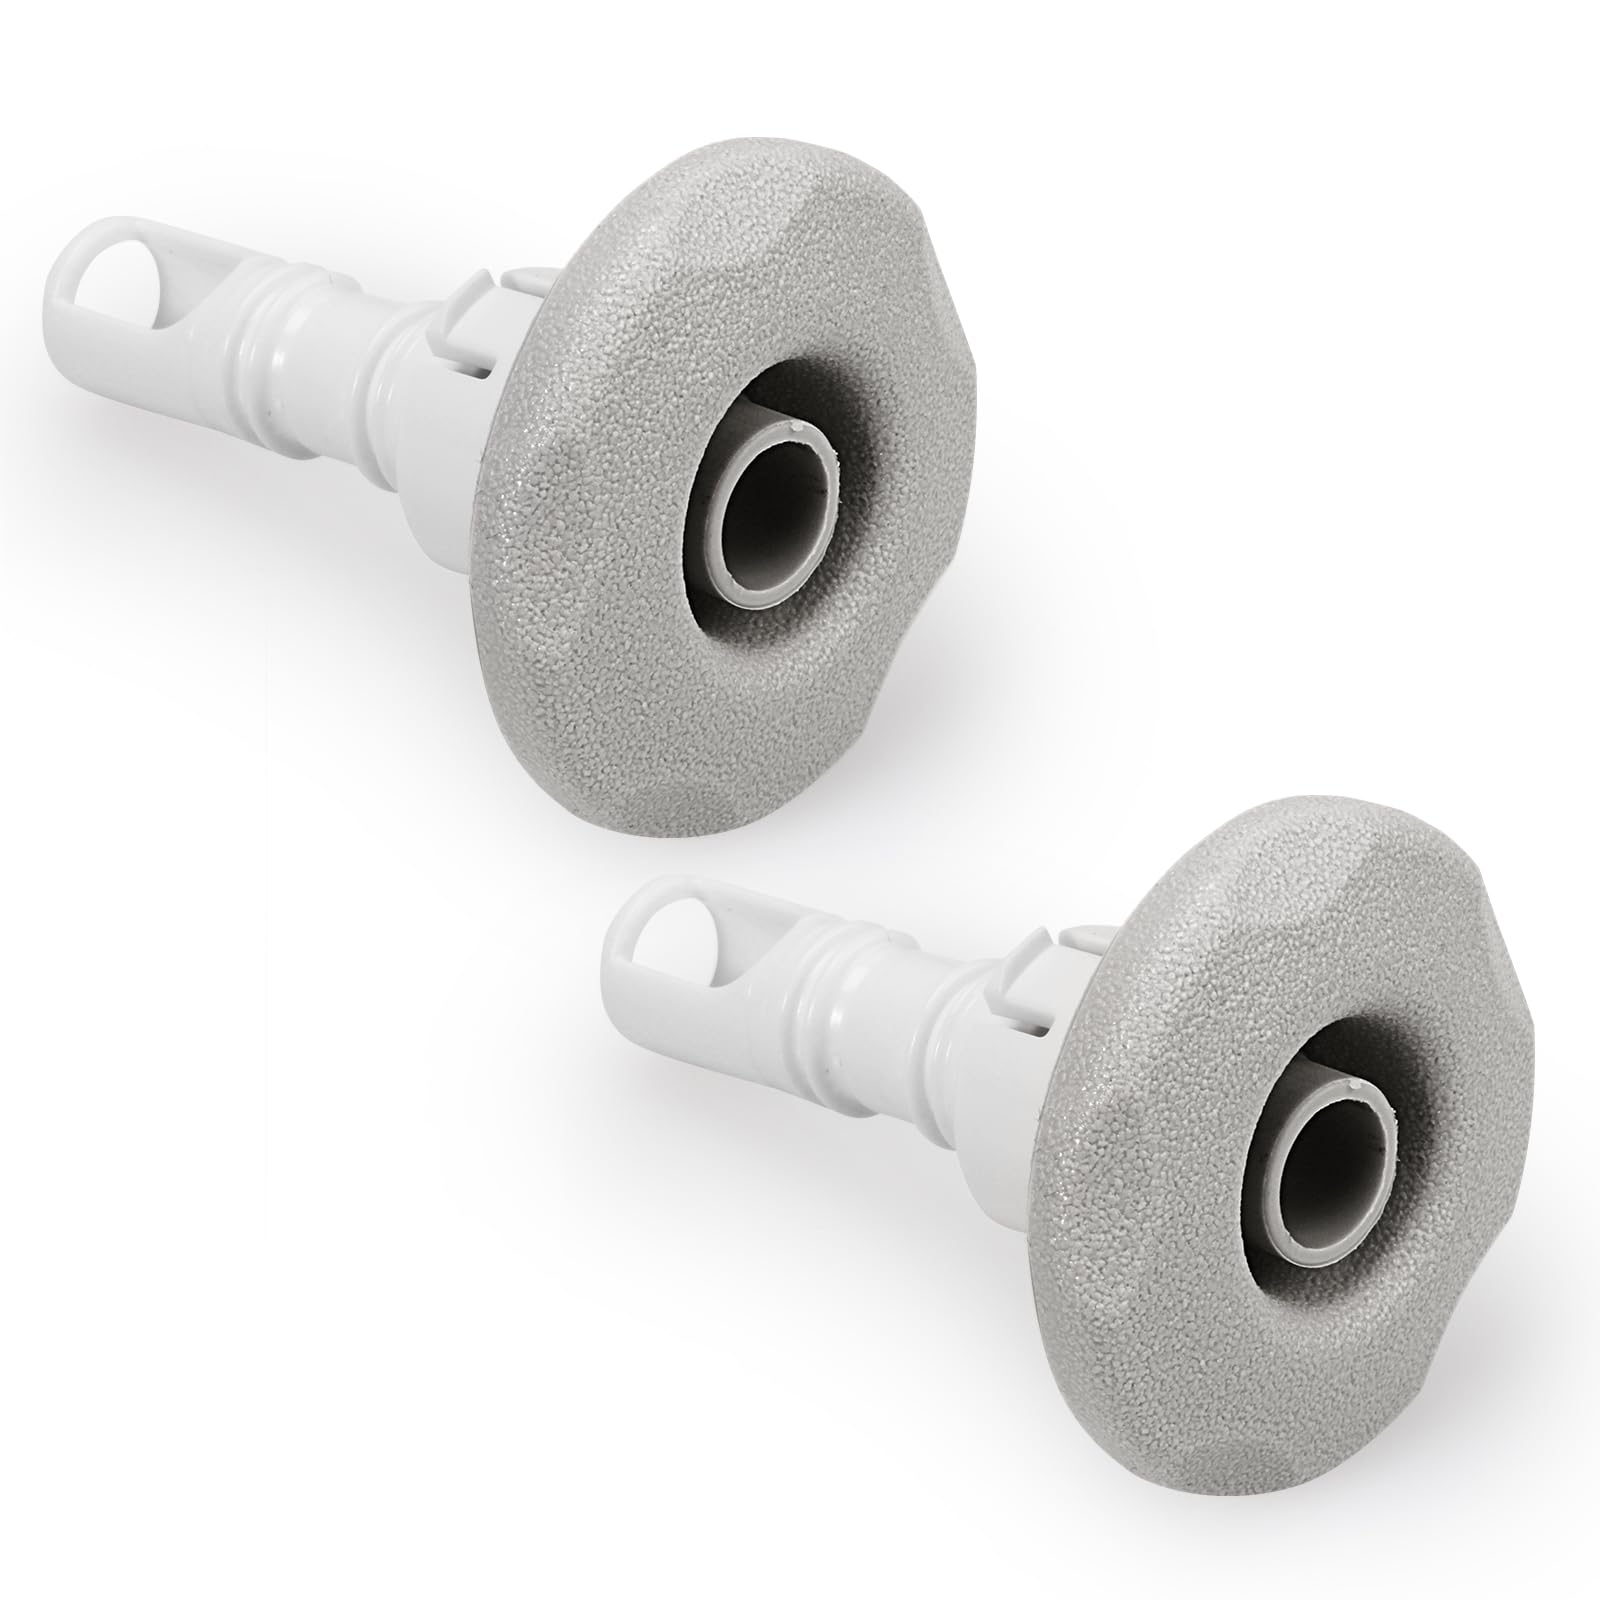
Remove the Leaking Jet
With the hot tub safely turned off and the leaking jet identified, the next step in addressing the issue is to remove the problematic jet from the hot tub’s structure. This process allows for a closer inspection of the jet and its components, facilitating the necessary repairs to resolve the leak.
Begin by determining the type of jet assembly in your hot tub. Some jets are secured with a twist-lock mechanism, while others may feature a threaded design. Refer to your hot tub’s manual or consult the manufacturer’s guidelines to understand the specific method for removing the jets from your model.
Using the appropriate tool, such as a jet wrench or adjustable pliers, carefully loosen and remove the leaking jet from its housing. It’s crucial to exercise caution during this step to avoid causing any damage to the surrounding components or the jet itself. If the jet proves difficult to remove, applying a gentle amount of lubricant may aid in loosening it from its position.
As you extract the leaking jet, take note of any visible damage or deterioration, such as cracks in the housing or worn seals. These observations can provide valuable insights into the root cause of the leak and inform the subsequent repair steps. Additionally, inspect the interior of the jet housing for any debris or buildup that may have contributed to the leak.
Once the leaking jet has been successfully removed, set it aside in a safe and accessible location. This allows for a thorough examination of the jet and its seal, paving the way for the subsequent repair procedures. With the leaking jet in hand, it’s time to move on to the next phase of the repair process: inspecting the jet and its seal to identify the source of the leak.
By carefully removing the leaking jet from the hot tub, you’ve taken a significant step toward addressing the issue and restoring your hot tub to its leak-free state. With the jet in your possession, you’re now poised to delve into the inspection process and determine the necessary repairs to resolve the leak once and for all.
Inspect the Jet and Seal
Now that you have removed the leaking jet from the hot tub, the next crucial step in the repair process is to thoroughly inspect the jet and its seal. This careful examination will help identify the source of the leak and guide you in determining the necessary repairs to rectify the issue.
Start by closely examining the removed jet, paying particular attention to the housing, nozzle, and any associated components. Look for signs of damage, such as cracks, fractures, or wear that could be contributing to the leak. Additionally, inspect the seal surrounding the jet to assess its condition and integrity.
If the seal appears deteriorated or compromised, it may be the primary culprit behind the leaking jet. In some cases, the seal may have become brittle over time, allowing water to escape from the jet assembly. Identifying any issues with the seal is crucial, as it will inform the subsequent repair steps to address the leak effectively.
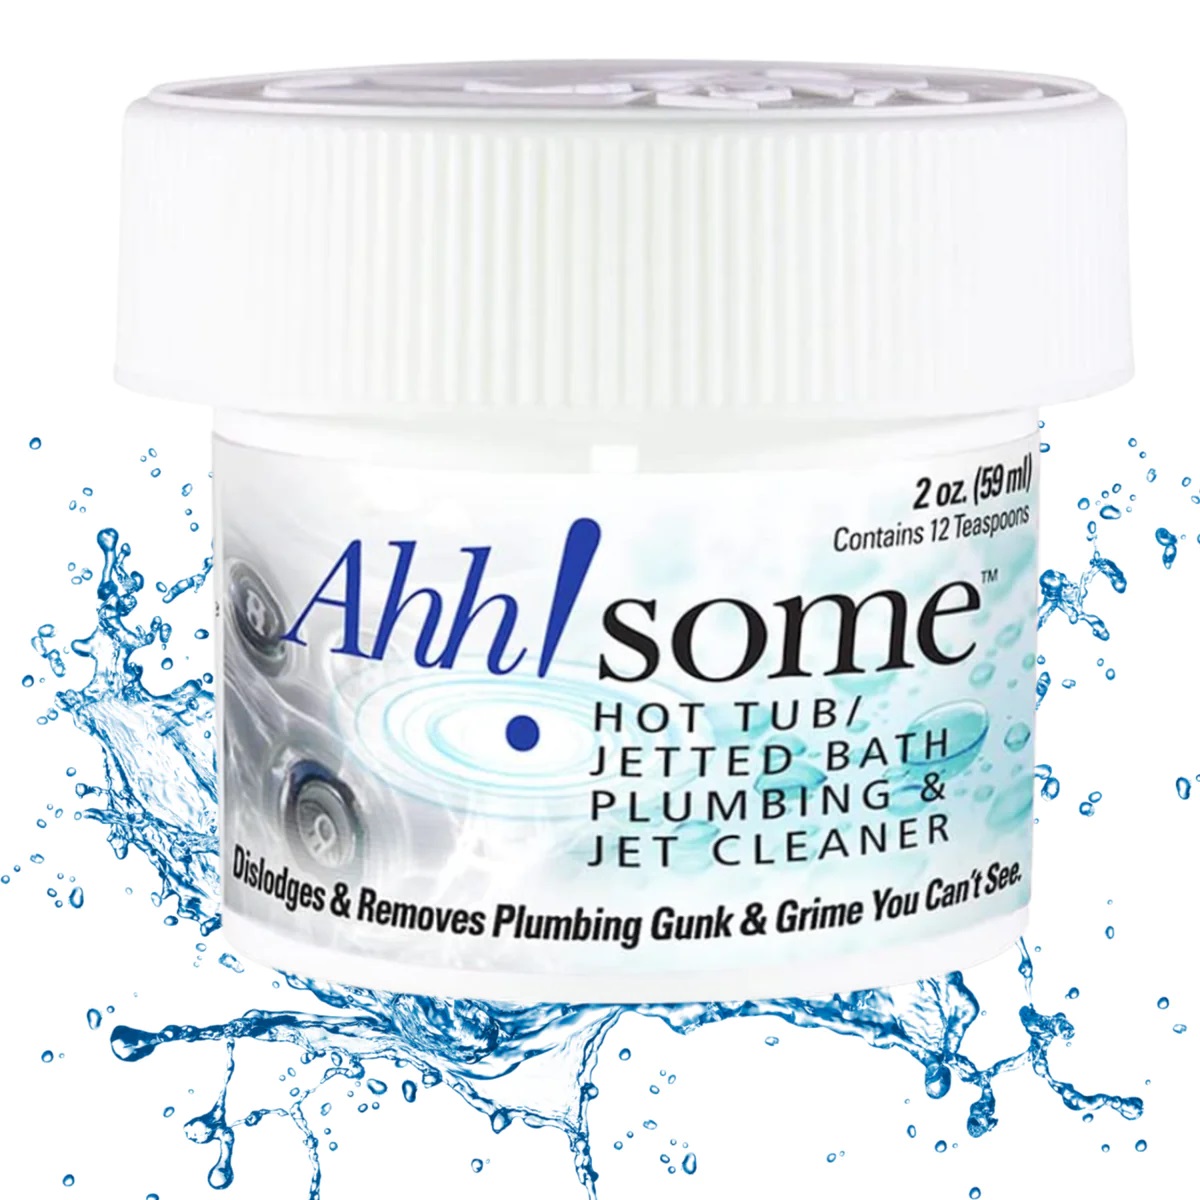
Furthermore, check the interior of the jet housing for any debris, mineral buildup, or obstructions that could impede the proper functioning of the jet. Accumulated debris can disrupt the seal and lead to leaks, making it essential to thoroughly clean and clear the jet housing during the inspection process.
As you assess the jet and its seal, take note of any findings or observations that may be relevant to the repair. Documenting the condition of the jet and seal will aid in formulating a targeted plan to rectify the leak, ensuring that the necessary repairs are carried out with precision and effectiveness.
By conducting a thorough inspection of the jet and its seal, you’re taking proactive steps to identify the root cause of the leak and pave the way for a successful repair. With a clear understanding of the condition of the jet assembly, you’re now ready to proceed with the next phase of the repair process: addressing and replacing the O-ring or gasket to resolve the leaking jet issue.
With the inspection complete, you have gained valuable insights into the condition of the jet and its seal, setting the stage for targeted repairs that will restore your hot tub to its leak-free state.
Check the jet gasket for wear or damage. If it’s worn out, replace it with a new one to create a proper seal and stop the leak.
Read more: How To Replace Hot Tub Jets
Replace the O-Ring or Gasket
After inspecting the jet and its seal, you may have identified the O-ring or gasket as the source of the leaking jet. These essential components play a critical role in maintaining a watertight seal within the jet assembly, and over time, they may deteriorate, leading to leaks. To address the issue effectively, it’s crucial to replace the O-ring or gasket with a new, properly fitting component.
Start by acquiring a replacement O-ring or gasket that matches the specifications of your hot tub’s jet assembly. Refer to your hot tub’s manual or consult the manufacturer’s guidelines to ensure that you obtain the correct replacement part. It’s essential to use a high-quality, compatible O-ring or gasket to guarantee a secure and durable seal within the jet assembly.
With the replacement O-ring or gasket in hand, carefully remove the old, compromised component from the jet assembly. Ensure that any residue or debris from the previous seal is thoroughly cleaned from the assembly, providing a clean surface for the new O-ring or gasket to be installed.
Take care to position the new O-ring or gasket securely within the jet assembly, ensuring a snug fit that creates a watertight seal. Proper alignment and placement of the replacement component are crucial to preventing future leaks and maintaining the optimal functioning of the jet.
As you install the new O-ring or gasket, verify that it sits flush and evenly within the jet assembly, with no twists or gaps that could compromise its sealing capabilities. This meticulous approach will help guarantee a reliable and long-lasting solution to the leaking jet issue.
Once the replacement O-ring or gasket has been successfully installed, conduct a final inspection to confirm that the component is securely in place and that the jet assembly is free from any residual debris or obstructions. This thorough assessment ensures that the repair has been carried out with precision and attention to detail.
By replacing the O-ring or gasket within the jet assembly, you’ve taken a significant step toward resolving the leaking jet issue and restoring your hot tub to its leak-free state. With the new component in place, you’re now ready to proceed with reinstalling the jet and conducting a thorough test to confirm the successful resolution of the leak.
Reinstall the Jet
With the replacement O-ring or gasket securely in place within the jet assembly, the next crucial step in resolving the leaking jet issue is to reinstall the jet into the hot tub’s structure. This careful process ensures that the jet is properly positioned and sealed, allowing for a successful resolution to the leak.
Begin by carefully aligning the jet with its housing in the hot tub, taking care to position it correctly to facilitate a secure and watertight fit. If the jet features a twist-lock mechanism, follow the manufacturer’s guidelines to engage the locking mechanism securely. Alternatively, if the jet is threaded, use the appropriate tool to thread it back into place, ensuring a snug and stable fit.
As you reinstall the jet, pay close attention to the alignment and positioning of the component, ensuring that it sits flush and even within the hot tub’s structure. This meticulous approach helps guarantee that the jet is securely in place and ready to provide reliable hydrotherapy without any leaks or issues.
Once the jet is firmly reinstalled, conduct a visual inspection to verify that it is seated correctly and that the surrounding area is free from any debris or obstructions. This final assessment ensures that the jet is ready for testing and that the repair process has been carried out with precision and attention to detail.
After successfully reinstalling the jet, you’re now prepared to move on to the next phase of the repair process: conducting a thorough test to confirm that the leaking jet issue has been effectively resolved. By following these steps diligently, you can ensure that your hot tub is restored to its leak-free state, ready to provide you with uninterrupted relaxation and enjoyment.
With the jet securely back in place, you’ve taken a significant step toward resolving the leaking jet issue and restoring your hot tub to its optimal condition. Now, it’s time to proceed with testing the jet to confirm that the repair has been successful, allowing you to enjoy your hot tub without the inconvenience of a leaky jet.
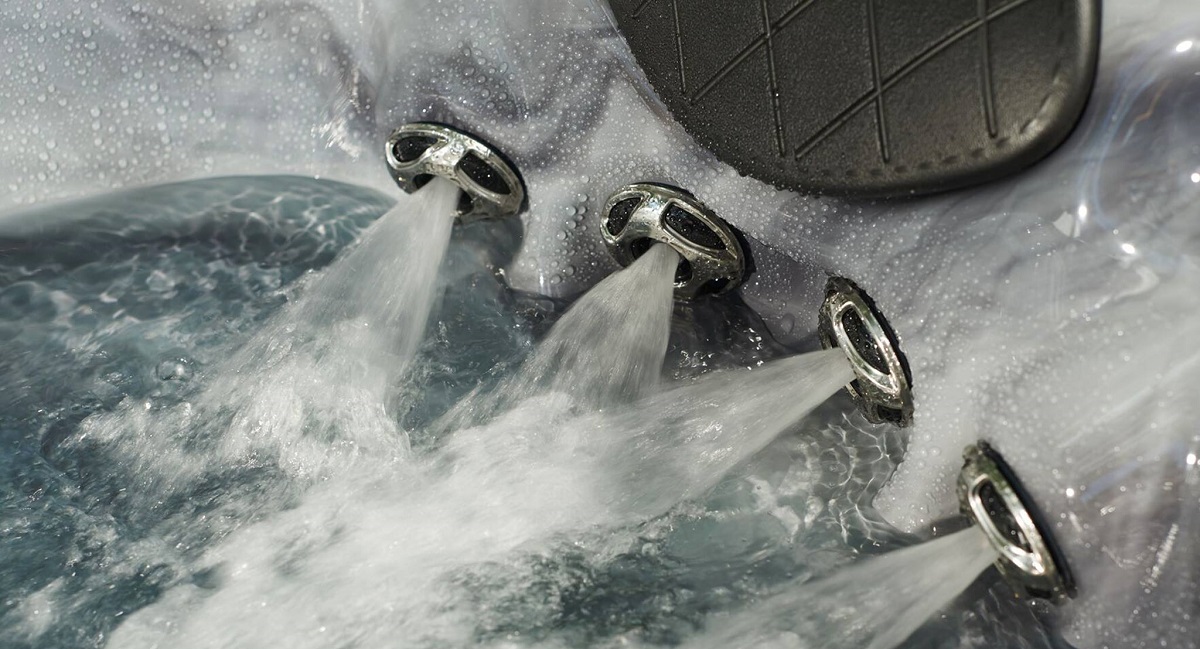
Test the Jet
After reinstalling the jet and completing the repair process, the final crucial step in addressing the leaking jet issue is to conduct a thorough test to confirm that the repair has been successful. This comprehensive assessment ensures that the jet is functioning properly and that the leak has been effectively resolved, allowing you to enjoy your hot tub without any unwelcome surprises.
Start by powering on the hot tub and activating the jets to test the repaired jet assembly. Observe the jet closely as the hot tub operates, looking for any signs of water leakage or seepage around the jet housing. Additionally, pay attention to the water pressure and flow from the jet, ensuring that it delivers the desired hydrotherapy experience without any irregularities.
If the repaired jet operates without any signs of leakage and provides a steady, consistent flow of water, it indicates that the repair has been successful in resolving the leaking jet issue. This positive outcome signifies that your hot tub is once again ready to provide you with soothing hydrotherapy sessions without any disruptions.
However, if you notice any persistent leaks or irregularities in the jet’s performance during the test, it may indicate that further adjustments or repairs are necessary. In this scenario, it’s advisable to revisit the jet assembly, conduct a more thorough inspection, and address any underlying issues that may be contributing to the leak.
Throughout the testing process, it’s essential to be attentive and observant, ensuring that the repaired jet meets the expected performance standards and operates without any signs of leakage. This meticulous approach guarantees that the repair has been carried out with precision and thoroughness, setting the stage for a reliable and leak-free hot tub experience.
By conducting a comprehensive test of the repaired jet, you can confirm that the leaking jet issue has been effectively resolved and that your hot tub is ready to provide you with uninterrupted relaxation and enjoyment. With the successful completion of the testing phase, you can look forward to indulging in soothing hydrotherapy sessions without any concerns about a leaky jet.
Conclusion
Congratulations! By following the step-by-step process outlined in this guide, you’ve successfully learned how to address and resolve a leaking hot tub jet. Your dedication to maintaining your hot tub in optimal condition has paid off, and you can now look forward to enjoying uninterrupted relaxation and soothing hydrotherapy sessions without the inconvenience of a leaky jet.
Throughout this repair journey, you’ve demonstrated patience, precision, and a proactive approach to hot tub maintenance. By identifying the leaking jet, turning off the hot tub, removing the jet, inspecting the jet and seal, replacing the O-ring or gasket, reinstalling the jet, and conducting a thorough test, you’ve effectively tackled the issue and restored your hot tub to its leak-free state.
It’s important to recognize the value of regular maintenance and attentive care when it comes to preserving the functionality and enjoyment of your hot tub. By addressing issues promptly and following proper repair procedures, you can ensure that your hot tub remains a source of relaxation and rejuvenation for years to come.
Remember, in the world of hot tub ownership, proactive maintenance and timely repairs are key to preserving the integrity of your beloved relaxation haven. Whether it’s addressing a leaking jet, maintaining water chemistry, or conducting routine inspections, your commitment to hot tub care is essential in upholding the performance and longevity of your investment.
As you embark on your continued hot tub ownership journey, armed with the knowledge and skills gained from resolving the leaking jet issue, you can approach future maintenance tasks with confidence and expertise. Your dedication to maintaining a leak-free, pristine hot tub environment ensures that you and your fellow hot tub enthusiasts can indulge in the restorative benefits of hydrotherapy without any disruptions.
With this repair journey behind you, take a moment to appreciate your diligence and commitment to hot tub care. Your efforts have not only resolved a specific issue but have also contributed to the overall well-being and enjoyment of your hot tub oasis. Here’s to many more blissful moments of relaxation and rejuvenation in your impeccably maintained hot tub!
Frequently Asked Questions about How To Fix A Leaking Hot Tub Jet
Was this page helpful?
At Storables.com, we guarantee accurate and reliable information. Our content, validated by Expert Board Contributors, is crafted following stringent Editorial Policies. We're committed to providing you with well-researched, expert-backed insights for all your informational needs.


0 thoughts on “How To Fix A Leaking Hot Tub Jet”