Home>Gardening & Outdoor>Pool & Spa Care>How To Replace A Hot Tub Heater
Pool & Spa Care
How To Replace A Hot Tub Heater
Modified: August 28, 2024
Learn how to replace a hot tub heater with our comprehensive guide. Get expert tips for pool and spa care to keep your hot tub running smoothly.
(Many of the links in this article redirect to a specific reviewed product. Your purchase of these products through affiliate links helps to generate commission for Storables.com, at no extra cost. Learn more)
Introduction
Welcome to the world of hot tub maintenance! A crucial component of keeping your hot tub in top-notch condition is ensuring that the heater is functioning optimally. Over time, wear and tear can take a toll on the heater, leading to decreased efficiency or complete failure. When this happens, it’s essential to know how to replace the hot tub heater to restore your tub’s soothing warmth.
In this guide, we’ll walk you through the process of replacing a hot tub heater, from safety precautions to testing the new heater. By following these steps, you can tackle this task with confidence and ensure that your hot tub continues to provide the relaxation and rejuvenation you deserve.
Before diving into the replacement process, it’s important to emphasize the significance of safety precautions. Working with electricity and hot tub components requires careful attention to safety guidelines to prevent accidents and injuries. With the right tools, materials, and a methodical approach, you can successfully replace your hot tub heater and get back to enjoying its therapeutic benefits.
Key Takeaways:
- Stay safe when replacing your hot tub heater by following crucial safety precautions, such as turning off the power, using PPE, and adhering to manufacturer guidelines. Prioritize safety to enjoy a relaxing and worry-free hot tub experience.
- Gather the right tools and materials, like screwdrivers, sealant, and replacement gaskets, before replacing your hot tub heater. Having everything you need on hand will make the process smoother and more efficient, ensuring a successful heater replacement.
Read more: How To Turn On A Hot Tub Heater
Safety Precautions
Before embarking on the hot tub heater replacement process, it’s crucial to prioritize safety. The combination of electrical components, water, and confined spaces necessitates a vigilant approach to minimize risks and ensure a secure working environment. Here are essential safety precautions to adhere to:
- Power Off: Begin by turning off the power supply to the hot tub at the circuit breaker. This step is non-negotiable and serves as the first line of defense against electrical hazards.
- Drain the Tub: To eliminate the risk of electric shock, drain the hot tub completely before initiating any work on the heater. Ensure that the tub is entirely empty before proceeding.
- Personal Protective Equipment (PPE): Equip yourself with appropriate PPE, including insulated gloves and safety goggles, to safeguard against potential electrical contact and debris during the replacement process.
- Knowledge of Electrical Systems: Familiarize yourself with the hot tub’s electrical system and components. If you’re uncertain about any aspect, consult the hot tub manual or seek professional assistance.
- Stable Working Platform: Work on a stable and dry platform to minimize the risk of slips, falls, or accidental contact with water during the replacement procedure.
- Follow Manufacturer Guidelines: Adhere to the manufacturer’s guidelines and specifications for the hot tub and the replacement heater. Deviating from these recommendations can compromise safety and functionality.
- Buddy System: Whenever possible, have a companion present during the replacement process. In the event of an emergency, having someone nearby can be invaluable.
- Quality Replacement Parts: Use high-quality replacement parts that are compatible with your hot tub model to ensure reliability and safety.
By prioritizing safety precautions and meticulously following the recommended steps, you can mitigate potential hazards and execute the hot tub heater replacement with confidence and peace of mind.
Tools and Materials Needed
Before commencing the hot tub heater replacement, it’s essential to gather the necessary tools and materials to facilitate a smooth and efficient process. Here’s a comprehensive list of what you’ll need:
Tools:
- Screwdriver Set: A set of screwdrivers, including Phillips and flat-head varieties, for removing panels and accessing components.
- Adjustable Wrench: To loosen and tighten fittings and connections securely.
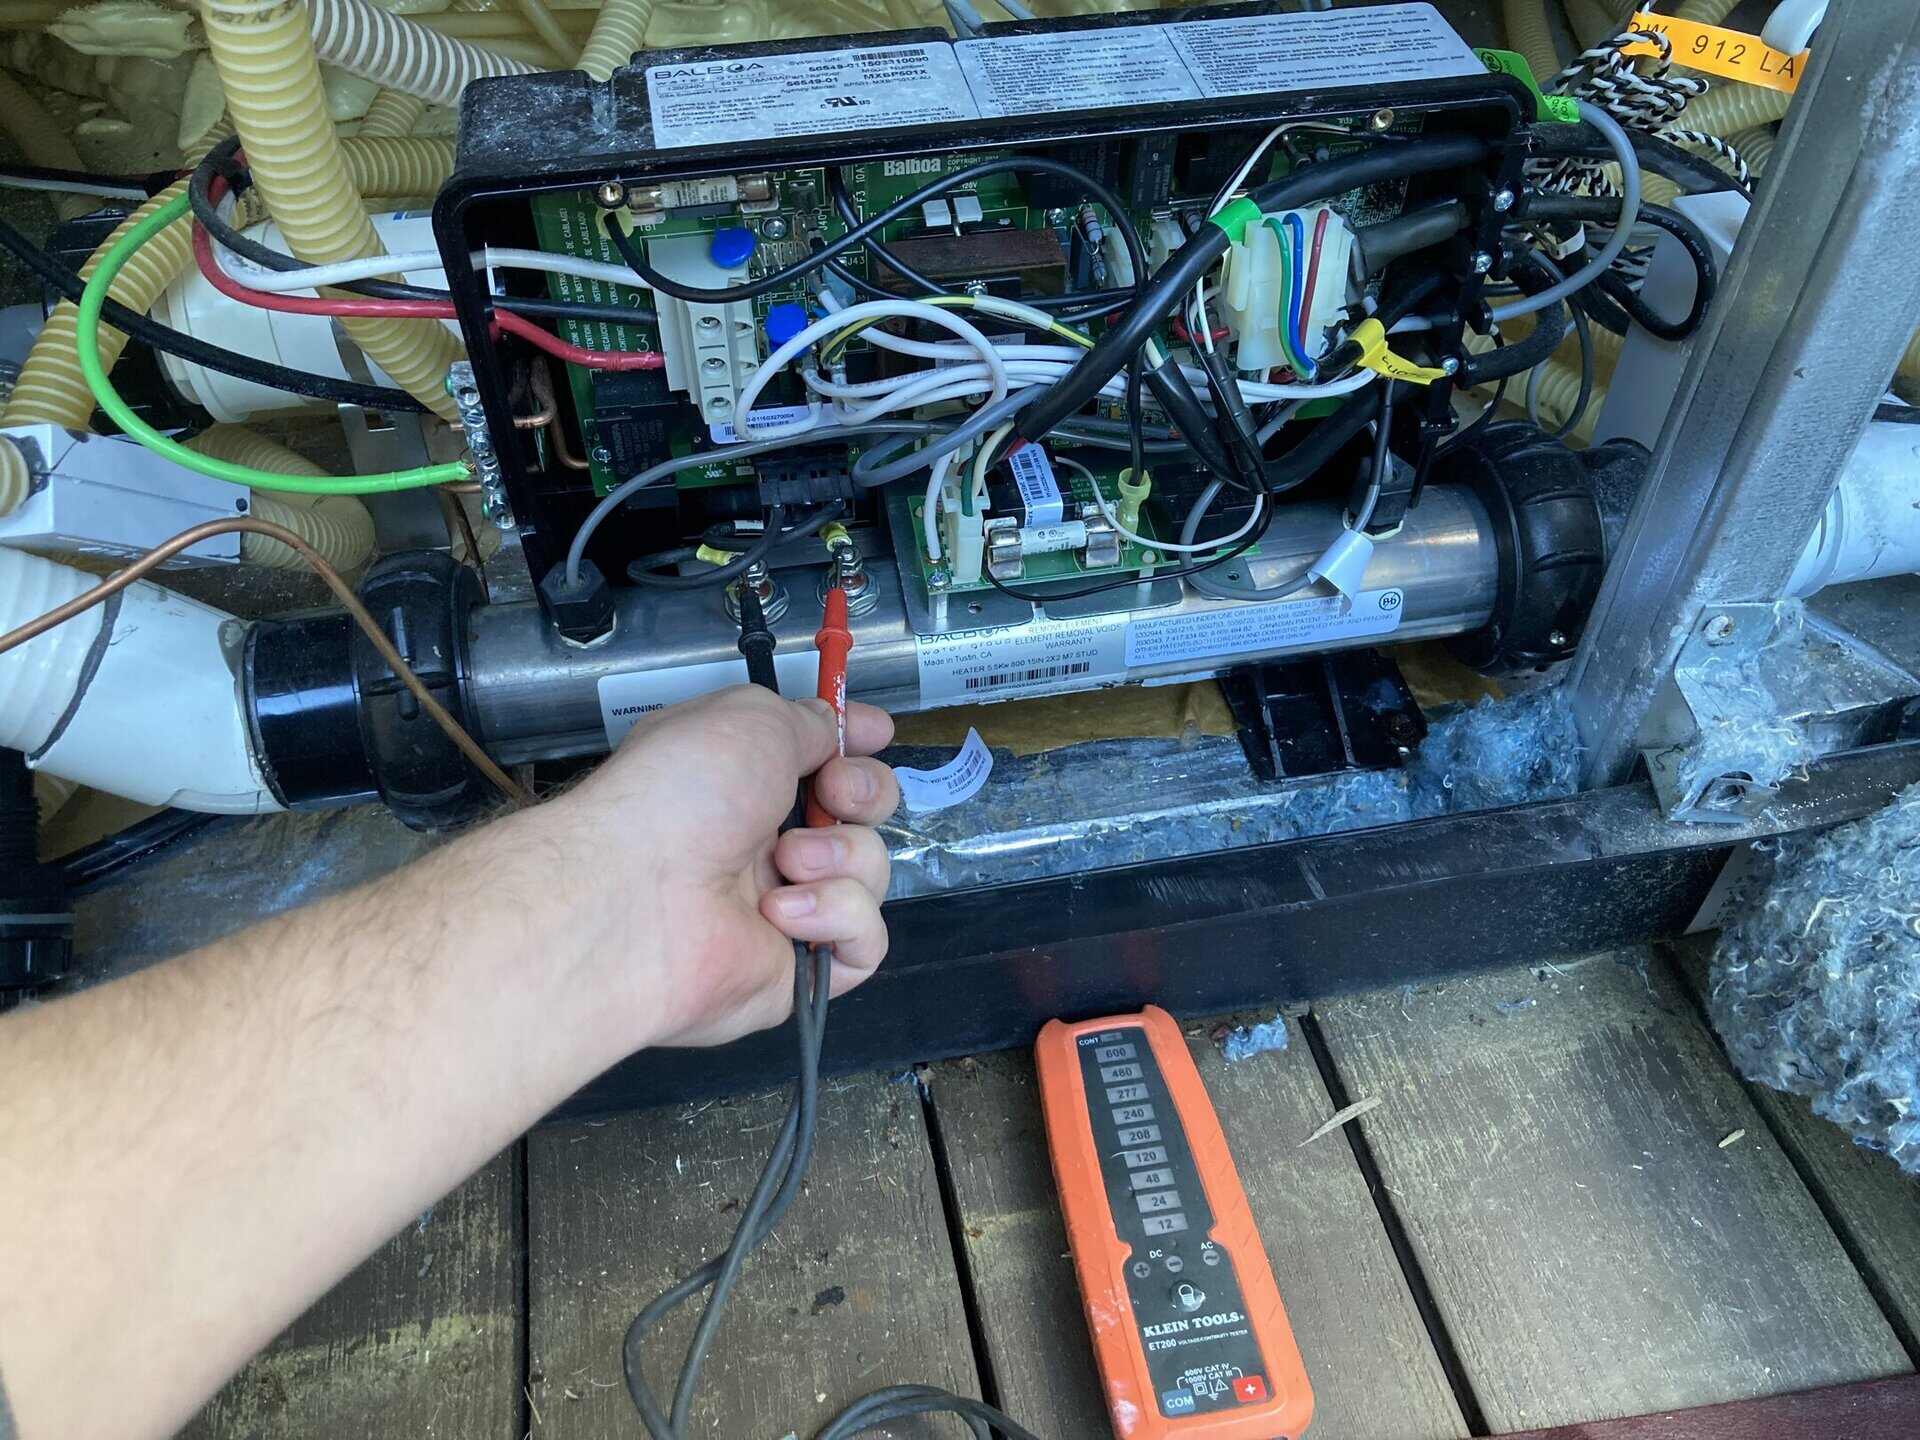
- Voltage Tester: For verifying that the power supply is indeed switched off before initiating any electrical work.
- Wire Cutters/Strippers: Essential for handling electrical wiring and making precise cuts or terminations.
- Cordless Drill: If applicable, a cordless drill can expedite the removal and installation of certain components.
- Pipe Cutter or Hacksaw: For cutting and modifying plumbing pipes if required during the replacement process.
- Socket Set: A set of sockets and a ratchet for accessing and securing fittings and fasteners.
Materials:
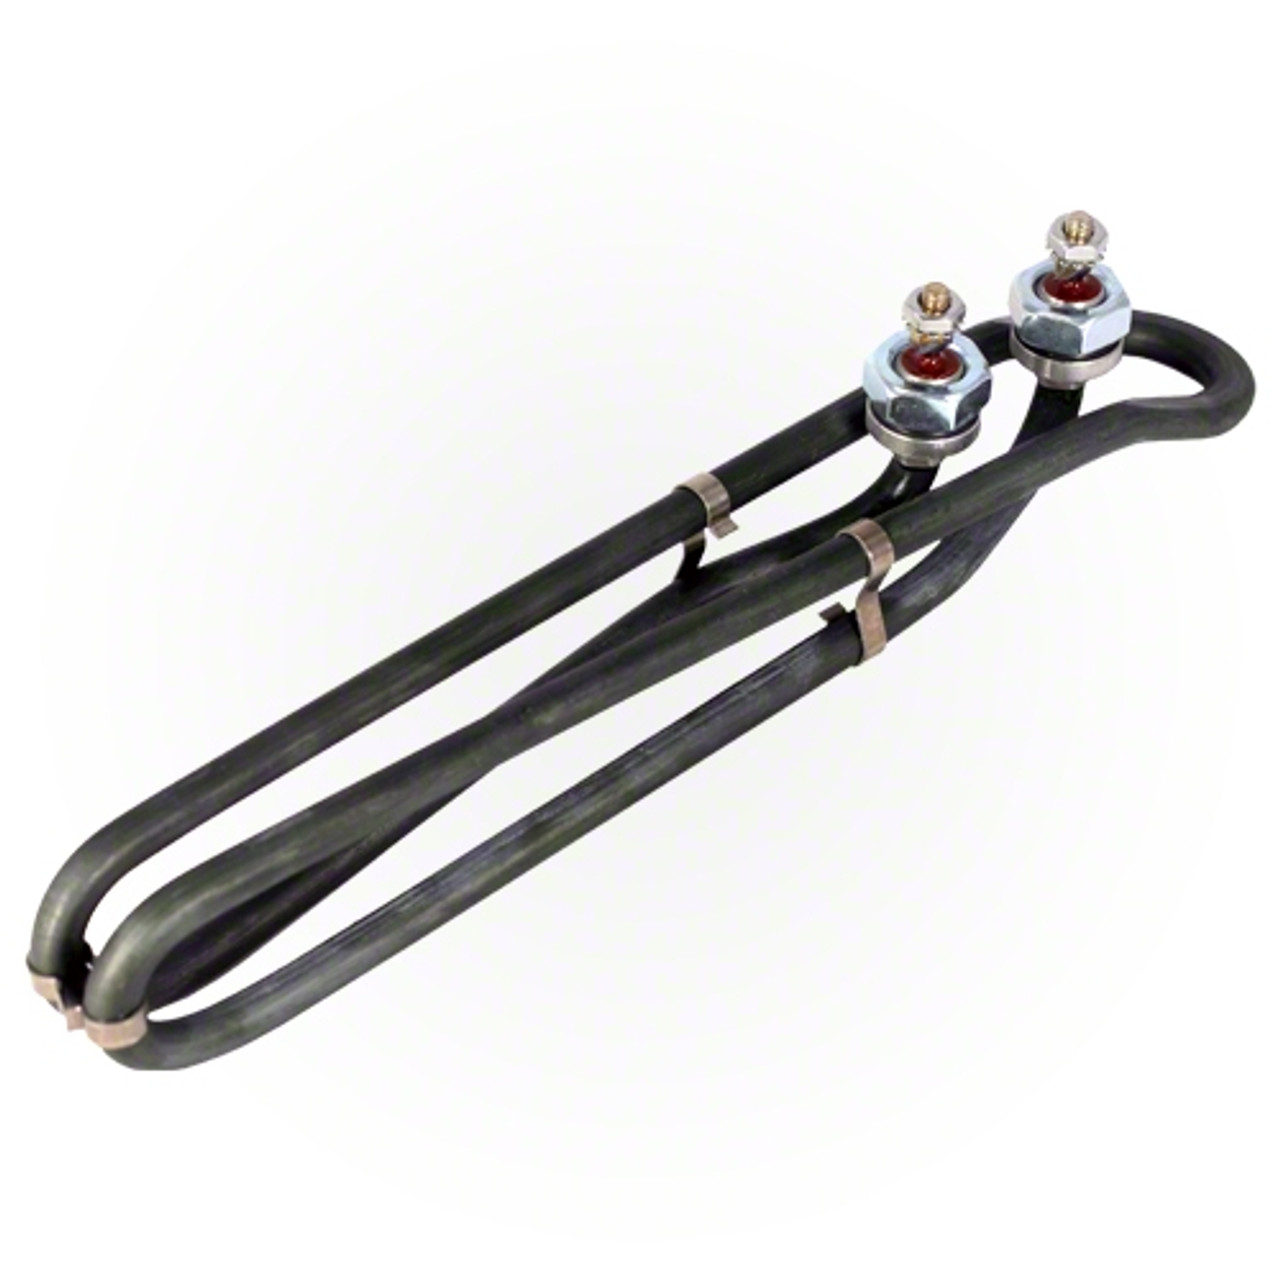
- Replacement Heater: Ensure that the replacement heater is compatible with your hot tub model and meets the necessary specifications.
- Sealant: High-temperature silicone sealant for resealing connections and preventing leaks.
- Teflon Tape: To seal threaded connections and prevent water leaks in plumbing fittings.
- Replacement Gaskets/O-Rings: If applicable, acquire replacement gaskets or O-rings for the heater and plumbing connections to ensure a watertight seal.
- Electrical Wire: If the existing wiring needs replacement or repair, ensure you have the appropriate gauge and type of electrical wire for the task.
- Plumbing Fittings: Any necessary plumbing fittings or adapters required for the new heater installation.
- Owner's Manual: Have the hot tub's owner's manual readily accessible for reference and guidance throughout the replacement process.
By ensuring that you have the requisite tools and materials on hand, you can streamline the hot tub heater replacement and address any unforeseen challenges effectively.
Read more: How To Replace Hot Tub Pump
Disconnecting the Power Supply
Before initiating any work on the hot tub heater, it is imperative to disconnect the power supply to ensure a safe working environment. Follow these steps to properly disconnect the power:
- Locate the Circuit Breaker: Identify the circuit breaker that controls the power supply to the hot tub. It is crucial to know the exact breaker to prevent any accidental power surges during the disconnection process.
- Switch Off the Power: Turn off the circuit breaker that supplies power to the hot tub. Verify that the power is completely switched off by using a voltage tester to ensure that no electrical current is present.
- Label the Breaker: Consider labeling the circuit breaker dedicated to the hot tub to provide clear identification for future maintenance or emergency situations.
- Lockout/Tagout: For an added layer of safety, consider implementing a lockout/tagout procedure to prevent the accidental reactivation of the power supply while you work on the heater.
Once the power supply is safely disconnected, you can proceed with confidence, knowing that the risk of electrical shocks or malfunctions is significantly reduced. It is crucial to exercise caution and attentiveness during this phase of the replacement process to mitigate potential hazards.
Removing the Old Heater
With the power supply safely disconnected, you can now focus on removing the old hot tub heater. This process involves careful disassembly and attention to detail to ensure a smooth transition to the new heater. Follow these steps to effectively remove the old heater:
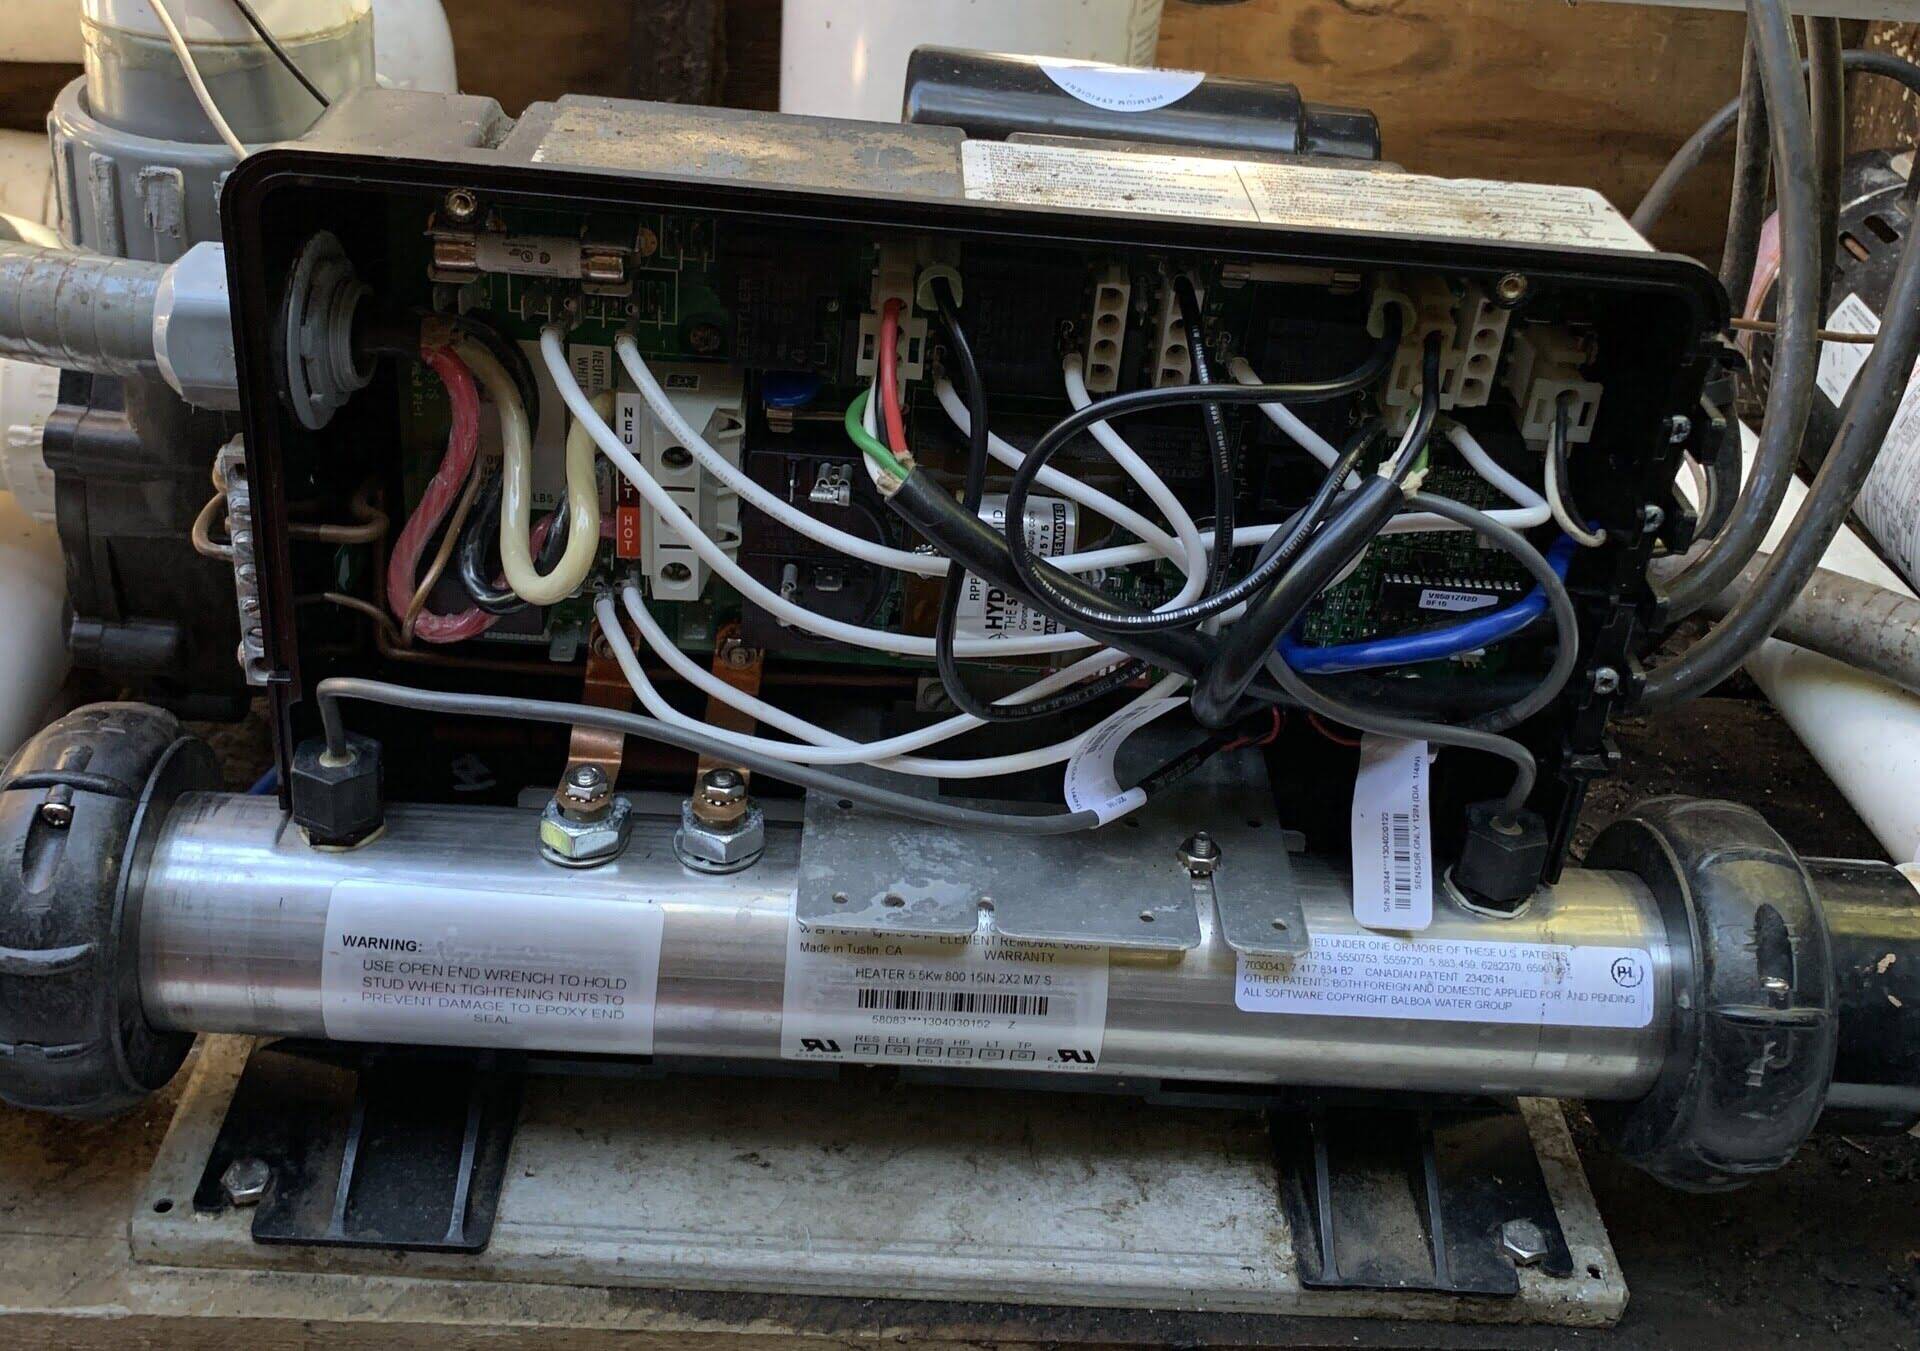
- Access the Heater Compartment: Depending on your hot tub model, access the compartment housing the heater. This may require removing panels or accessing the heater from underneath the tub.
- Disconnect Electrical Wiring: Carefully disconnect the electrical wiring connected to the old heater. Take note of the wiring configuration or take a photo for reference during the installation of the new heater.
- Turn Off Water Supply: If the heater is plumbed in-line with the hot tub’s water circulation system, ensure that the water supply is turned off to prevent leaks or water spillage during the removal process.
- Disconnect Plumbing Connections: Loosen and disconnect the plumbing connections leading to and from the old heater. Use appropriate tools to loosen fittings and ensure a smooth disconnection process.
- Remove the Heater: Once all electrical and plumbing connections are detached, carefully remove the old heater from its position. Exercise caution to avoid damaging surrounding components or creating unnecessary strain on the hot tub’s structure.
- Inspect for Damage: Take this opportunity to inspect the area around the old heater for any signs of corrosion, leaks, or damage that may require attention before installing the new heater.
By methodically following these steps, you can safely and effectively remove the old hot tub heater, paving the way for the installation of the new heater. Prioritize attention to detail and caution to ensure a seamless transition between the old and new components.
Installing the New Heater
With the old heater successfully removed, it’s time to proceed with the installation of the new hot tub heater. This phase of the replacement process requires precision and attention to detail to ensure the seamless integration of the new component. Follow these steps to effectively install the new heater:
- Prepare the Installation Area: Ensure that the area where the new heater will be installed is clean, dry, and free from any debris or obstructions. This provides a conducive environment for the installation process.
- Inspect New Heater: Thoroughly inspect the new heater to verify that it matches the specifications of your hot tub and is free from any defects or damage incurred during transportation or storage.
- Position the Heater: Carefully position the new heater in the designated space, ensuring that it aligns correctly with the electrical and plumbing connections. Take care to avoid any undue strain on the heater or surrounding components.
- Connect Plumbing: Reconnect the plumbing connections to the new heater, ensuring a secure and watertight fit. Use Teflon tape or appropriate sealants as needed to prevent leaks at the threaded connections.
- Reconnect Electrical Wiring: Methodically reconnect the electrical wiring to the new heater, following the configuration noted during the disconnection of the old heater. Verify that the connections are secure and properly insulated.
- Seal Connections: Apply high-temperature silicone sealant to the electrical and plumbing connections to create a secure seal and prevent water ingress or leaks.
- Test for Leaks: Once the new heater is installed and connected, perform a visual inspection and run a brief water circulation test to check for any leaks or irregularities in the connections.
By meticulously following these steps, you can ensure that the new hot tub heater is installed correctly and securely, setting the stage for the final phase of the replacement process: reconnecting the power supply and testing the heater.
Before replacing a hot tub heater, make sure to turn off the power and drain the water. Disconnect the old heater and carefully install the new one following the manufacturer’s instructions. Double-check all connections before refilling the hot tub.
Reconnecting the Power Supply
As the installation of the new hot tub heater nears completion, the next crucial step is to reconnect the power supply to the hot tub. This phase demands meticulous attention to safety protocols and a methodical approach to ensure a secure and functional power restoration. Follow these steps to effectively reconnect the power supply:
- Verify Connections: Double-check all electrical connections to the new heater to ensure that they are properly secured and insulated. Confirm that no wires are exposed or at risk of contact with water or other components.
- Turn On the Circuit Breaker: Return to the circuit breaker panel and switch the dedicated breaker for the hot tub back to the “on” position. Take note of any unusual sounds or indications of electrical issues upon reactivation.
- Monitor Initial Operation: As the power supply is restored, observe the initial operation of the new heater and the hot tub’s electrical components. Look for any signs of abnormal behavior or malfunctions that may indicate a wiring or connection issue.
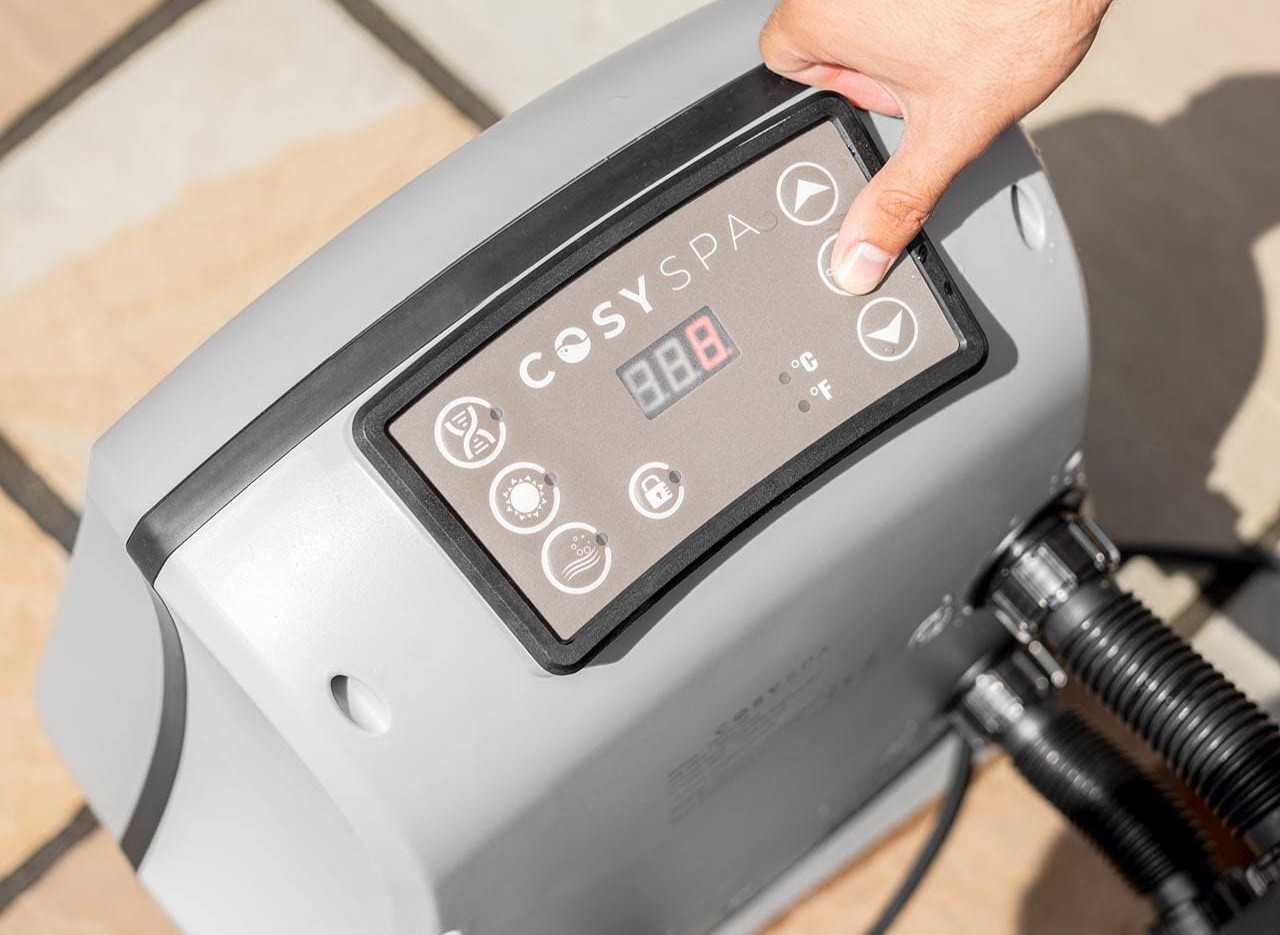
- Perform Functionality Test: If the hot tub features a control panel for the heater, perform a functionality test to ensure that the new heater responds appropriately to temperature adjustments and commands.
- Check for Proper Heating: Monitor the hot tub’s temperature to verify that the new heater is effectively heating the water to the desired level. This step provides assurance that the replacement heater is functioning as intended.
By diligently following these steps and exercising caution during the power reconnection process, you can effectively restore the hot tub’s electrical functionality and prepare for the final phase of the replacement procedure: testing the new heater to ensure optimal performance.
Read more: How To Replace Hot Tub Jets
Testing the Heater
With the power supply reconnected and the new heater installed, it’s time to conduct thorough testing to ensure that the hot tub’s heating system is functioning optimally. Proper testing is essential to validate the successful replacement of the heater and address any potential issues before returning the hot tub to regular use. Follow these steps to effectively test the heater:
- Monitor Heating Cycle: Turn on the hot tub’s heating function and monitor the heating cycle to ensure that the new heater activates as expected and steadily increases the water temperature.
- Verify Temperature Settings: Adjust the temperature settings on the hot tub’s control panel, if applicable, and observe how the new heater responds to these adjustments. Ensure that it maintains the desired temperature accurately.
- Check for Leaks: Inspect all plumbing connections and the area surrounding the new heater for any signs of leaks or water seepage. Address any leaks promptly to prevent damage to the hot tub and its components.
- Observe for Abnormal Noises or Odors: Listen for any unusual noises emanating from the heater or detect any unusual odors, which could indicate operational issues or the presence of foreign substances in the heating element.
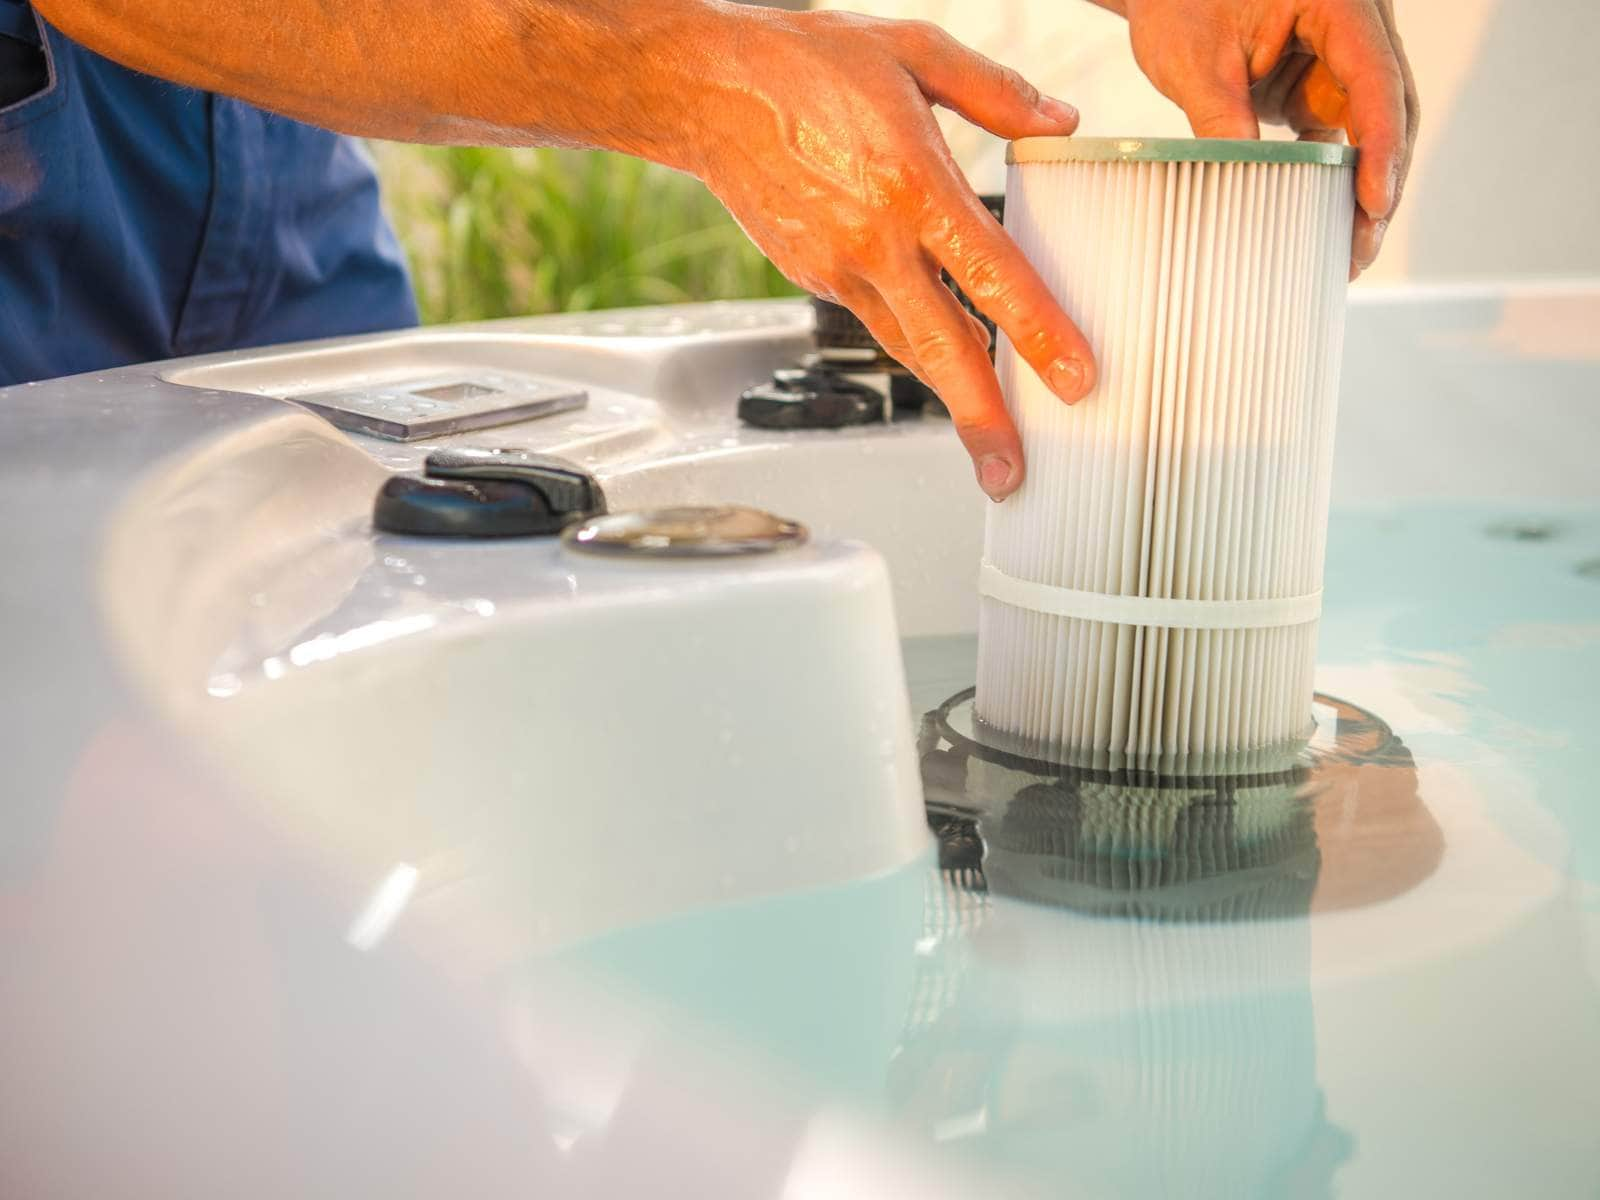
- Perform Water Quality Check: Test the water quality to ensure that the new heater is not adversely affecting the chemical balance or clarity of the hot tub water. Adjust water chemistry as needed to maintain optimal conditions.
- Record Performance Data: Keep a record of the new heater’s performance, including temperature adjustments, heating duration, and any observed irregularities. This documentation can guide future maintenance and troubleshooting efforts.
By meticulously conducting these tests and observations, you can ascertain the functionality and reliability of the new heater, providing the assurance that your hot tub’s heating system is fully operational. This thorough testing phase sets the stage for the seamless resumption of enjoying your hot tub’s comforting warmth and relaxation benefits.
Conclusion
Congratulations on successfully replacing your hot tub heater! By following the comprehensive steps outlined in this guide, you’ve demonstrated a commendable commitment to maintaining and enhancing the functionality of your hot tub. The meticulous attention to safety precautions, precise execution of the replacement process, and thorough testing reflect your dedication to ensuring a reliable and enjoyable hot tub experience.
It’s important to recognize that the successful replacement of the hot tub heater not only restores the warmth and comfort of your hot tub but also contributes to its longevity and continued performance. By addressing the heater’s functionality, you’ve taken a proactive step in preserving the overall integrity of your hot tub and optimizing its therapeutic benefits.
As you bask in the rejuvenating embrace of your hot tub, take pride in your accomplishment and the knowledge that your diligent maintenance efforts have contributed to the seamless operation of this cherished relaxation haven. Whether it’s unwinding after a long day or hosting enjoyable gatherings with friends and family, your revitalized hot tub stands ready to provide countless moments of tranquility and delight.
Remember to keep the maintenance and care of your hot tub on your regular radar, as proactive attention to its components and systems can prevent potential issues and prolong its functionality. Regular inspections, adherence to maintenance schedules, and prompt resolution of any arising concerns will further enhance the longevity and performance of your hot tub.
As you relish the soothing embrace of your hot tub, let the successful replacement of the heater serve as a testament to your commitment to maintaining a welcoming oasis of relaxation and well-being in your home.
Frequently Asked Questions about How To Replace A Hot Tub Heater
Was this page helpful?
At Storables.com, we guarantee accurate and reliable information. Our content, validated by Expert Board Contributors, is crafted following stringent Editorial Policies. We're committed to providing you with well-researched, expert-backed insights for all your informational needs.

0 thoughts on “How To Replace A Hot Tub Heater”