Home>Home Appliances>Home Automation Appliances>How To Use An Old Thermostat
Home Automation Appliances
How To Use An Old Thermostat
Modified: January 4, 2024
Learn how to effectively use an old thermostat for your home automation appliances. Find out the best tips and tricks to optimize its functionality.
(Many of the links in this article redirect to a specific reviewed product. Your purchase of these products through affiliate links helps to generate commission for Storables.com, at no extra cost. Learn more)
Introduction
So, you've got an old thermostat that's seen better days, and you're considering an upgrade. That's a fantastic idea! Upgrading your thermostat can bring a host of benefits, including increased energy efficiency, improved comfort, and the latest smart features. However, before you can revel in the convenience and cost savings of a new thermostat, you'll need to bid adieu to your old one.
In this comprehensive guide, we'll walk you through the process of replacing your old thermostat with a new, more advanced model. From understanding the ins and outs of your old thermostat to seamlessly installing and programming the new one, we've got you covered every step of the way. By the time you finish reading, you'll be equipped with the knowledge and confidence to tackle this project like a seasoned pro.
So, without further ado, let's dive into the fascinating world of thermostats and embark on this transformative journey together!
Key Takeaways:
- Upgrade to a new thermostat for increased energy efficiency, comfort, and smart features. Understand, remove, install, program, and troubleshoot for a seamless transition and optimal performance.
- Embrace the journey of modernizing your home’s climate control system with a new thermostat. Enjoy personalized comfort, energy savings, and smart features while contributing to environmental sustainability.
Read more: How To Change Old Thermostat To Digital
Understanding Your Old Thermostat
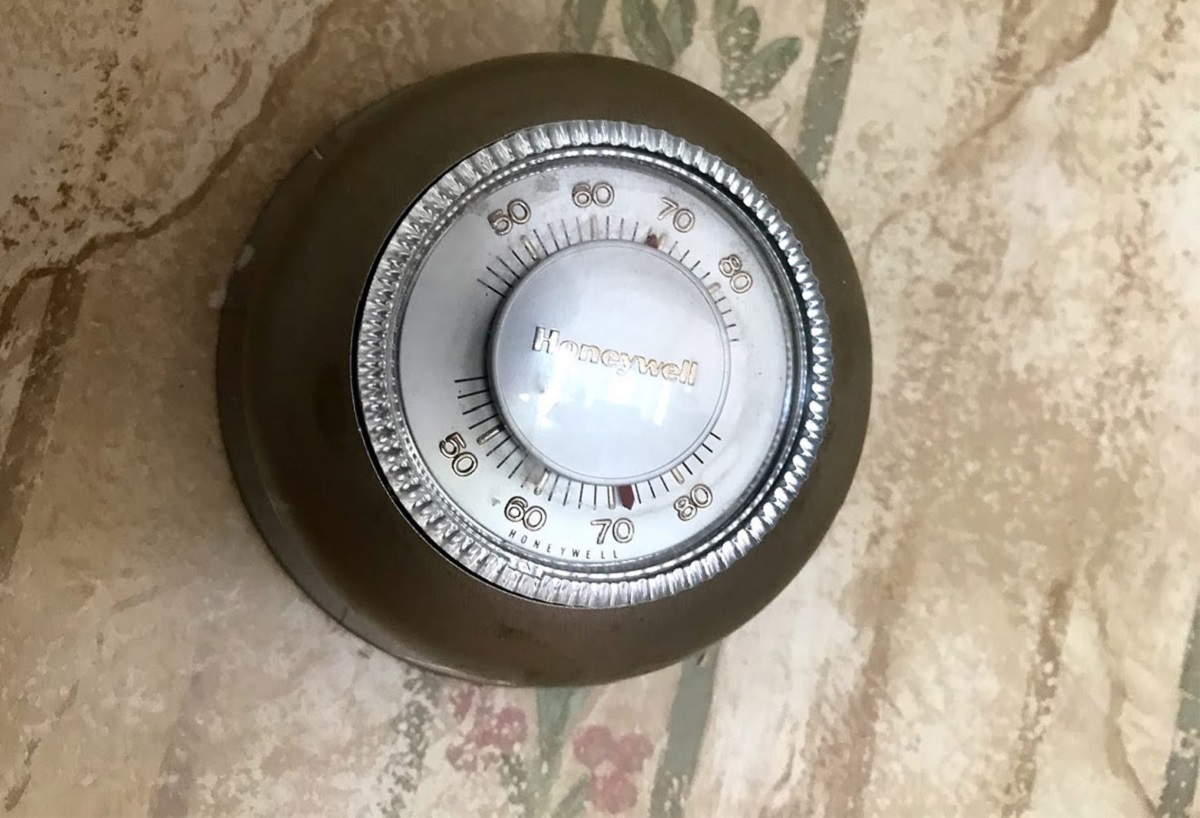
Your old thermostat may seem like a simple device, but it holds the key to regulating the comfort of your home. Before you can bid it farewell, it’s essential to understand its functionality and wiring. Most old thermostats fall into one of two categories: mechanical or digital.
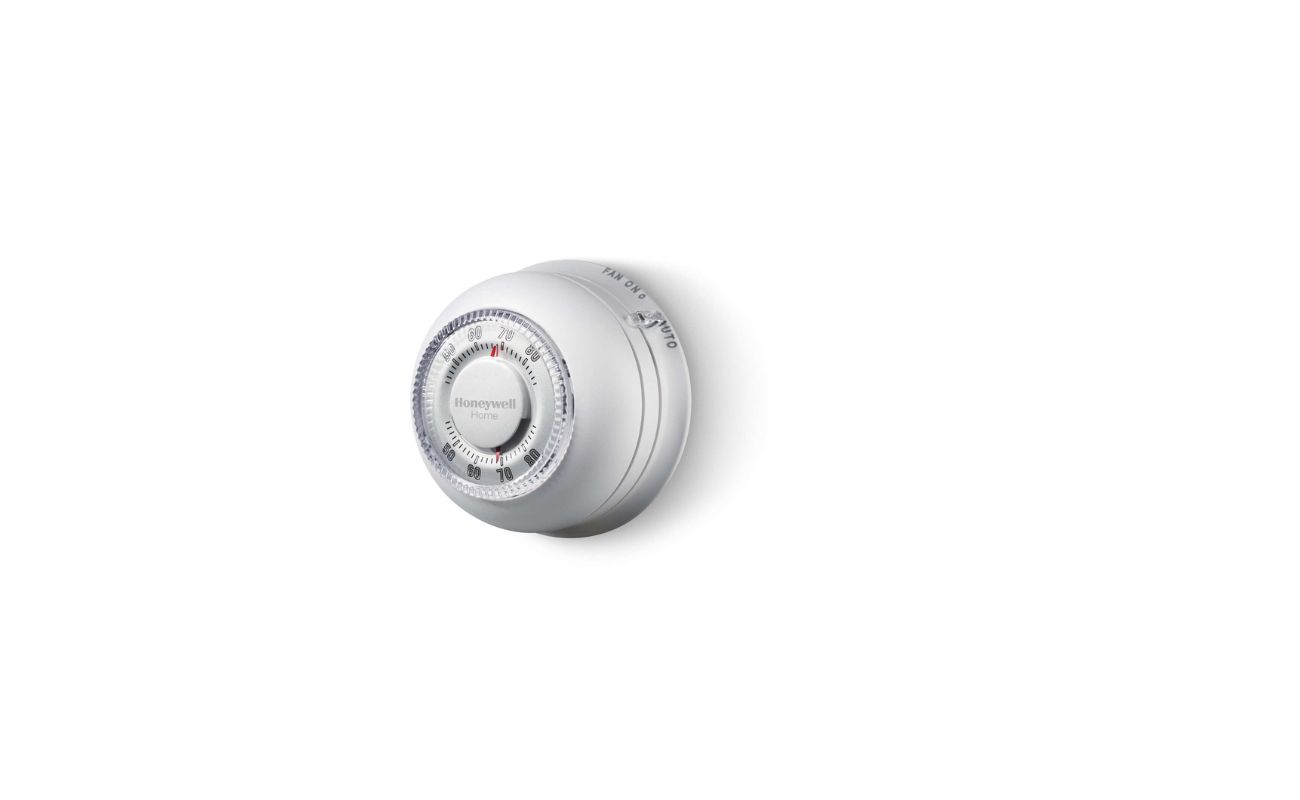
Mechanical Thermostats: These traditional thermostats feature a simple dial or lever for temperature adjustment. They operate using a bimetallic coil that expands and contracts in response to temperature changes, triggering the heating or cooling system accordingly. While reliable, mechanical thermostats lack the advanced features and precise control offered by modern digital models.
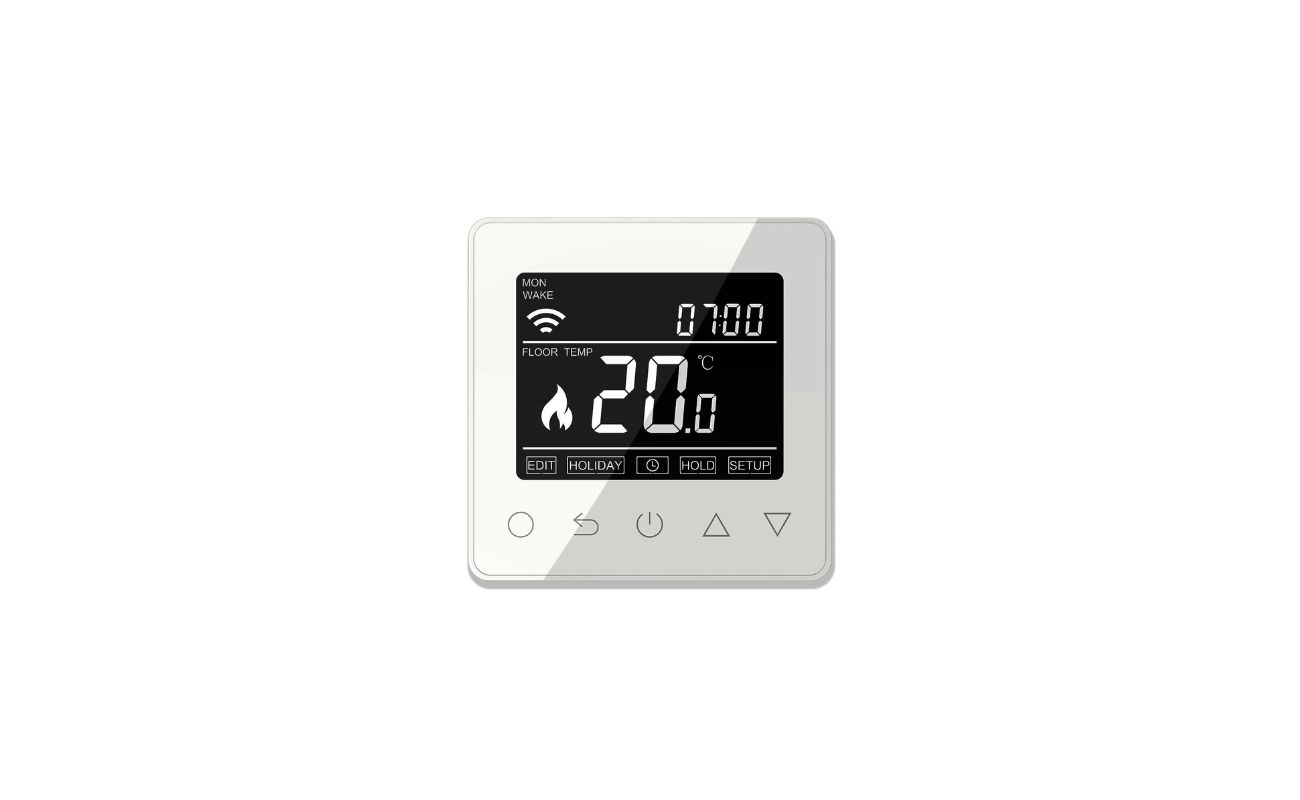
Digital Thermostats: If your old thermostat is digital, it likely provides more accurate temperature control and may include programmable settings for different times of the day. Digital thermostats use electronic temperature sensors to monitor and adjust the indoor climate, offering greater precision and energy efficiency compared to their mechanical counterparts.
Regardless of the type, it’s crucial to take note of the existing wiring connections on your old thermostat. These wires, typically labeled with letters such as R, W, Y, G, and C, play a vital role in connecting the thermostat to your heating and cooling system. Understanding the wiring configuration will be instrumental when it comes time to install the new thermostat.
Before proceeding, it’s wise to turn off the power to your heating and cooling system at the circuit breaker to ensure safety during the transition. With a firm grasp of your old thermostat’s operation and wiring, you’re now ready to bid it a fond farewell and usher in the dawn of a new era with a modern, feature-rich thermostat.
Removing the Old Thermostat
Removing your old thermostat is the pivotal first step in the transition to a new, advanced model. Before you embark on this endeavor, it’s crucial to gather the necessary tools and exercise caution to ensure a smooth and safe removal process.
Tools and Precautions: To begin, gather a few essential tools, including a screwdriver, masking tape, and a marker. Additionally, turning off the power to your heating and cooling system at the circuit breaker is paramount for safety during the removal process. Once the power is off, you can proceed with confidence, knowing that you’ve taken the necessary precautions.
Identifying and Labeling Wires: As you prepare to remove the old thermostat from the wall, take note of the wires connected to it. Each wire serves a specific function, such as controlling heating, cooling, or the fan. Using masking tape and a marker, label each wire according to its designated terminal on the thermostat. This meticulous approach will simplify the installation of the new thermostat later on.
Removing the Thermostat: With the wires labeled and the power off, carefully detach the old thermostat from the wall. Most thermostats are secured with screws, so using the screwdriver, loosen and remove these screws to release the thermostat from its mounting plate. As you detach the thermostat, be mindful of the wires to prevent any accidental damage or disconnection.
Inspecting the Wiring: Once the old thermostat is removed, take a moment to inspect the exposed wiring and terminals. Ensure that the wires are in good condition and that there are no signs of wear or damage. If any issues are detected, it’s advisable to address them before proceeding with the installation of the new thermostat.
With the old thermostat gracefully retired from its role, you’ve successfully completed the crucial step of removing it from the wall. The next phase of the journey entails welcoming the new thermostat and configuring it to seamlessly integrate with your home’s heating and cooling system.
Installing a New Thermostat
With the old thermostat bid adieu, it’s time to usher in the new, advanced model that will revolutionize the way you control the climate in your home. Installing a new thermostat may seem daunting, but armed with the right knowledge and a touch of confidence, you’ll navigate this process with ease and finesse.
Selecting the Ideal Location: Before mounting the new thermostat, carefully choose its location. Opt for a spot where the thermostat can effectively sense the average temperature of the room without being influenced by external factors such as direct sunlight, drafts, or appliances. Ideally, the location should also allow for easy access to the wiring and provide a clear view of the thermostat’s display.
Mounting the Thermostat Base: Start by mounting the base of the new thermostat to the wall. Most thermostats come with a mounting plate that requires securing with screws. Ensure the base is level and firmly attached to the wall, providing a stable foundation for the thermostat.
Connecting the Wires: Refer to the labels you created during the removal of the old thermostat to guide you in connecting the wires to the corresponding terminals on the new thermostat. Carefully insert each wire into its designated terminal, ensuring a snug and secure connection. Double-check the wiring to confirm that each wire is correctly seated, as this is crucial for the proper functioning of the new thermostat.
Attaching the Thermostat: Once the wires are connected, carefully align the new thermostat with its base and secure it in place. Depending on the model, the thermostat may snap into the base or require screws to hold it firmly. Exercise care during this step to prevent any accidental damage to the wires or the thermostat itself.
Powering Up: With the new thermostat securely installed, it’s time to restore power to your heating and cooling system at the circuit breaker. As the system powers up, take a moment to admire your handiwork and anticipate the enhanced comfort and energy efficiency that your new thermostat will bring to your home.
By successfully installing the new thermostat, you’ve taken a significant stride toward modernizing your home’s climate control system. The next phase involves programming the thermostat to suit your lifestyle and preferences, unleashing its full potential to optimize comfort and energy savings.
Make sure to turn off the power to your heating or cooling system before attempting to install an old thermostat. This will prevent any electrical accidents and ensure your safety.
Programming Your New Thermostat
Now that your new thermostat is securely in place, it’s time to unlock its full potential by programming it to cater to your unique schedule and comfort preferences. Whether you opt for a programmable or smart thermostat, harnessing its features to create personalized heating and cooling schedules will elevate your home’s comfort and energy efficiency.
Understanding Thermostat Modes: Most modern thermostats offer a range of modes, including heating, cooling, and fan settings. Familiarize yourself with these modes to leverage them effectively based on your comfort needs and the changing seasons.
Setting a Schedule: If your thermostat is programmable, delve into its scheduling capabilities to create personalized temperature settings for different times of the day. For instance, you can program the thermostat to lower the temperature while you’re away at work and raise it just before you return, optimizing energy usage without compromising comfort.
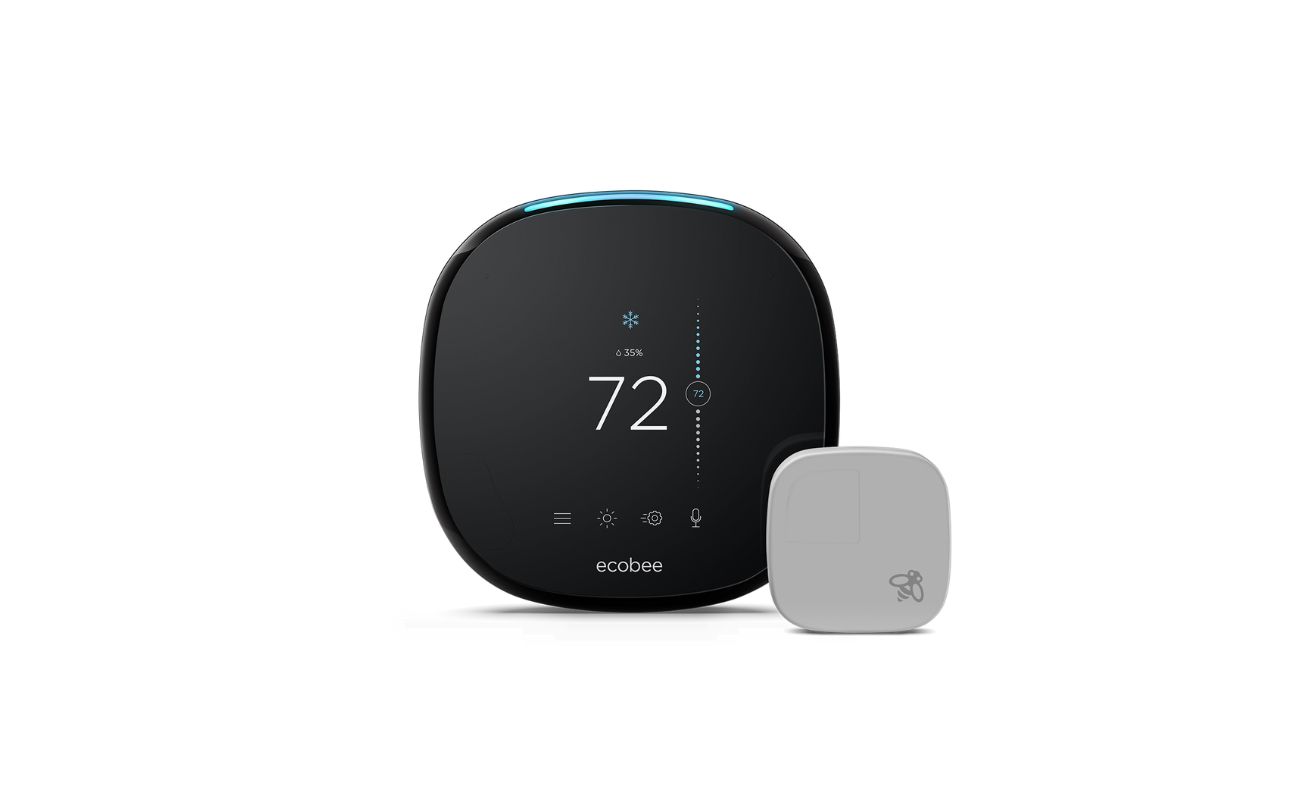
Utilizing Smart Features: Smart thermostats take convenience to the next level with features such as geofencing, learning algorithms, and remote access via smartphone apps. Explore these smart functionalities to tailor your thermostat’s operation to your lifestyle, allowing it to adapt to your routines and preferences effortlessly.
Optimizing Energy Efficiency: Leverage the energy-saving features of your thermostat to maximize efficiency without sacrificing comfort. This may include setting eco-friendly temperature ranges, utilizing adaptive learning capabilities, and receiving energy usage reports to make informed decisions about your home’s climate control.
Fine-Tuning Settings: As you program your thermostat, consider fine-tuning its settings to align with your comfort preferences. Whether it’s adjusting the temperature differentials, configuring fan circulation cycles, or enabling vacation mode, these personalized touches will ensure that your thermostat operates in harmony with your lifestyle.
Monitoring and Adjusting: Once your thermostat is programmed, periodically monitor its operation to ensure that it aligns with your expectations. Be open to making adjustments as needed, especially as you become more familiar with the thermostat’s features and its impact on your home’s comfort and energy consumption.
By delving into the programming capabilities of your new thermostat, you’ve unlocked a realm of customization and control that will revolutionize the way you experience comfort at home. With its smart features and tailored schedules, your thermostat is poised to elevate your living environment while contributing to energy savings and environmental sustainability.
Read more: How To Use A Friedrich Thermostat
Troubleshooting Common Issues
While modern thermostats are designed to operate seamlessly, occasional issues may arise that warrant troubleshooting to restore optimal functionality. By familiarizing yourself with common problems and their solutions, you’ll be well-equipped to address any hiccups that may affect your thermostat’s performance.
Inaccurate Temperature Readings: If your thermostat displays inaccurate temperature readings, it may lead to discomfort and energy inefficiency. Start by ensuring that the thermostat is not exposed to direct sunlight, drafts, or heat-emitting appliances, as these factors can skew its readings. Additionally, consider calibrating the thermostat or relocating it to a more suitable spot to improve its accuracy.
Unresponsive Controls: A thermostat that fails to respond to user input can be frustrating. Begin by checking the power source to ensure that the thermostat is receiving adequate power. If the controls remain unresponsive, resetting the thermostat or replacing its batteries, if applicable, may resolve the issue and restore its functionality.
Heating or Cooling System Malfunctions: If your heating or cooling system fails to activate in response to the thermostat’s commands, inspect the wiring connections to ensure they are secure and correctly configured. Additionally, check the circuit breaker to verify that power is reaching the system. If the issue persists, consulting a professional HVAC technician may be necessary to diagnose and address any underlying system malfunctions.
Wi-Fi Connectivity Problems: Smart thermostats rely on Wi-Fi connectivity for remote access and smart features. If you encounter connectivity issues, start by rebooting your home’s Wi-Fi router and ensuring that the thermostat is within range of a strong signal. Troubleshooting the thermostat’s Wi-Fi settings and ensuring that it is connected to the correct network can often resolve connectivity issues.
Erratic Behavior or Freezing: In some instances, a thermostat may exhibit erratic behavior, such as constantly cycling the heating or cooling system or freezing up. This may be indicative of a software glitch. In such cases, performing a factory reset or updating the thermostat’s firmware can often rectify these issues, restoring its smooth operation.
Professional Assistance: For complex issues or those related to the heating and cooling system itself, seeking the expertise of a qualified HVAC technician is advisable. Professional diagnosis and repairs can address underlying issues with the system and ensure that your thermostat operates in harmony with your home’s HVAC infrastructure.
By acquainting yourself with these common thermostat issues and their troubleshooting strategies, you’re empowered to swiftly address any challenges that may arise, restoring your thermostat to its optimal state and preserving the comfort and efficiency it brings to your home.
Conclusion
Congratulations on embarking on the journey to upgrade your thermostat and enhance the comfort and energy efficiency of your home. By navigating the process of understanding, removing, and installing a new thermostat, you’ve taken a significant step toward modernizing your home’s climate control system. Furthermore, delving into the programming and troubleshooting aspects has equipped you with the knowledge and skills to harness the full potential of your new thermostat.
As you bid farewell to your old thermostat and welcome the advanced features and convenience of the new model, take pride in the strides you’ve made toward optimizing your home’s comfort and energy usage. The transition to a new thermostat represents a transformative investment in your living environment, offering benefits that extend beyond mere temperature control.
With your new thermostat in place, programmed to suit your lifestyle and preferences, you’re poised to enjoy personalized comfort, energy savings, and the seamless integration of smart features into your home. The enhanced control and efficiency that your new thermostat brings will undoubtedly elevate your daily living experience, ensuring that your home remains a haven of comfort and sustainability.
As you revel in the convenience and benefits of your new thermostat, remember that periodic maintenance and attention to its operation will further optimize its performance. Keep an eye out for any signs of issues and leverage the troubleshooting strategies you’ve acquired to swiftly address them, ensuring that your thermostat continues to operate at its best.
By embracing the journey of upgrading your thermostat, you’ve not only modernized your home but also embarked on a path toward greater environmental responsibility and energy conservation. Your proactive approach to enhancing your home’s climate control system sets a commendable example of leveraging technology to create a more comfortable, efficient, and sustainable living space.
As you savor the benefits of your new thermostat, take pride in the positive impact it has on your home and the environment. Your commitment to optimizing energy usage and comfort through advanced thermostat technology is a testament to your dedication to creating a better, more sustainable world—one comfortable degree at a time.
Frequently Asked Questions about How To Use An Old Thermostat
Was this page helpful?
At Storables.com, we guarantee accurate and reliable information. Our content, validated by Expert Board Contributors, is crafted following stringent Editorial Policies. We're committed to providing you with well-researched, expert-backed insights for all your informational needs.


0 thoughts on “How To Use An Old Thermostat”