Home>Home Security and Surveillance>How To Waterproof A Security Camera

Home Security and Surveillance
How To Waterproof A Security Camera
Modified: March 6, 2024
Learn how to waterproof your home security and surveillance camera with these easy tips and tricks. Protect your investment and ensure uninterrupted monitoring even in the harshest weather conditions.
(Many of the links in this article redirect to a specific reviewed product. Your purchase of these products through affiliate links helps to generate commission for Storables.com, at no extra cost. Learn more)
Introduction
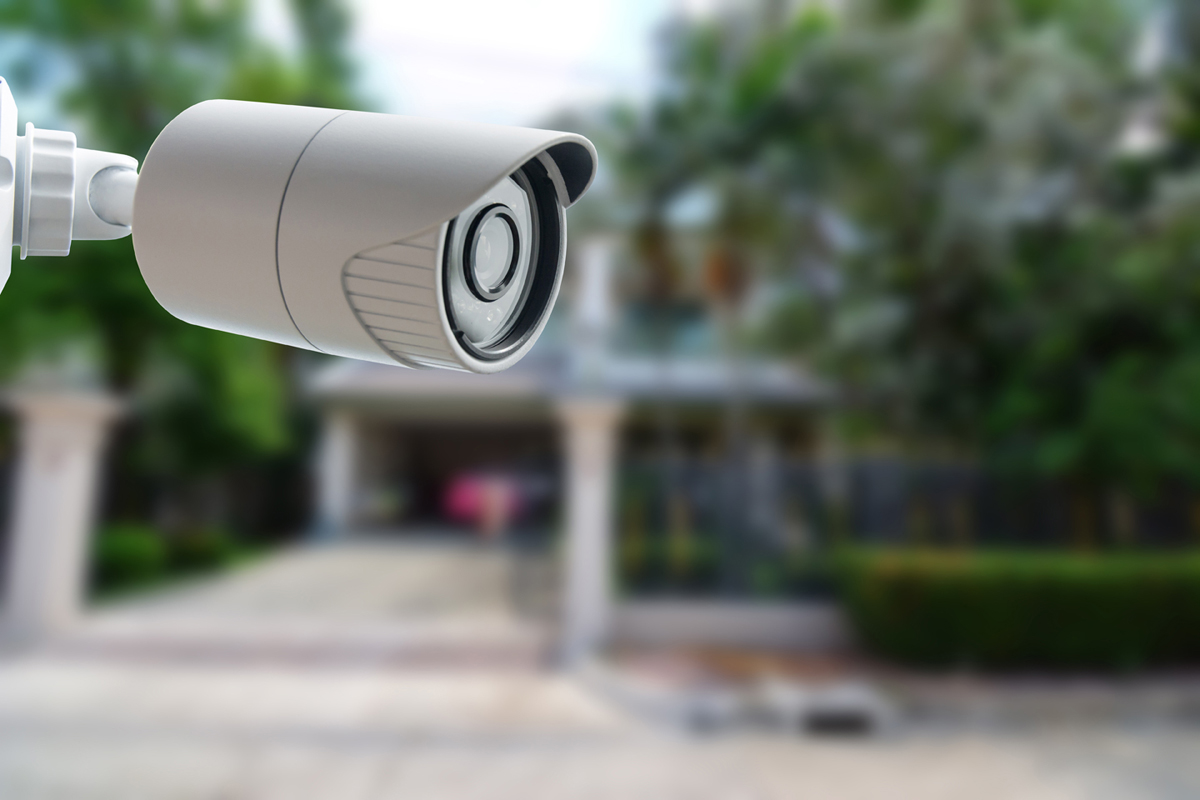
In the era of advanced technology, home security systems have become an essential part of protecting our homes and loved ones. Among the various components of a security system, security cameras play a crucial role in capturing and monitoring activities in and around our homes. These cameras provide peace of mind by acting as a deterrent to potential intruders and assisting in identifying any suspicious activity. However, one key aspect often overlooked is the need to protect security cameras from the elements, particularly water.
Water damage can have a detrimental impact on the functionality and longevity of security cameras. Rain, snow, humidity, and other environmental factors can cause corrosion, electrical malfunctions, and even outright failure of the camera system. This is especially true for outdoor cameras that are constantly exposed to the elements.
To ensure the effectiveness and longevity of your security camera system, it is essential to properly waterproof your cameras. This article will guide you through the steps of how to effectively waterproof your security cameras, enabling them to withstand various weather conditions and continue providing optimal surveillance.
By taking the time to waterproof your security cameras, you are not only protecting your investment but also ensuring that you have a reliable and robust surveillance system in place. So let’s delve into the importance of waterproofing and discover the steps you can take to safeguard your security cameras from water damage.
Key Takeaways:
- Protecting your security cameras from water damage is crucial for their longevity and reliability. By choosing a waterproof housing, sealing cable connections, and applying waterproofing spray, you can ensure your cameras withstand various weather conditions.
- Regular maintenance, proper mounting, and careful inspection are essential for keeping your security cameras in top condition. By following these steps, you can enjoy clear and uninterrupted surveillance, providing peace of mind for your home security.
Why Waterproofing is Important for Security Cameras
When it comes to security cameras, waterproofing is more than just an added bonus – it is a necessity. Here are a few key reasons why waterproofing is essential for security cameras:
1. Protection Against the Elements: Security cameras installed outdoors are exposed to various weather conditions, such as rain, snow, and extreme temperatures. Without proper waterproofing, these cameras are at risk of water damage, which can lead to malfunctioning or permanent damage. Waterproofing your security cameras ensures they can withstand these elements and continue to capture clear and reliable footage.
2. Longevity and Durability: Investing in a quality security camera system can be expensive. By waterproofing your cameras, you are safeguarding your investment and extending the lifespan of your equipment. Waterproofing protects the internal components of the camera from moisture, preventing corrosion and electrical damage. This ensures that your cameras will continue to function optimally for years to come.
3. Maintaining Image Clarity: Water droplets on the camera lens can significantly distort the captured images or videos. This can pose a challenge when it comes to identifying individuals or discerning important details. Waterproofing your cameras keeps the lens clear of water droplets, allowing them to capture crisp and clear footage even during rainy or snowy conditions.
4. Enhanced Reliability: Security cameras are meant to provide uninterrupted surveillance. However, water damage can disrupt this functionality and impact the reliability of your camera system. By waterproofing your cameras, you are minimizing the risk of malfunctions or failures, ensuring that your cameras are continuously operational and providing the protection you need.
5. Peace of Mind: Home security is all about peace of mind. Knowing that your security cameras are well-protected against water damage provides an additional layer of assurance. Whether you are away from home or sleeping soundly at night, you can have peace of mind knowing that your security cameras are functioning at their best and will capture any suspicious activity, regardless of the weather conditions.
By considering the importance of waterproofing your security cameras, you can enhance their performance, extend their lifespan, and ensure reliable surveillance. The next section will provide you with step-by-step instructions on how to effectively waterproof your security cameras, allowing you to enjoy the full benefits of your home surveillance system.
Steps to Waterproof a Security Camera
Properly waterproofing your security camera is a straightforward process that can be completed with a few simple steps. Follow these instructions to ensure that your cameras are protected from water damage:
1. Choose a Waterproof Camera Housing: The first step is to select a waterproof housing for your security camera. Look for a housing that is specifically designed to provide waterproof protection. Ensure that it is compatible with your camera model and offers a clear view of the camera lens. A quality waterproof housing will shield your camera from direct contact with water while maintaining functionality.
2. Seal All Cable Connections: Water can easily seep into the camera system through any exposed cable connections. To prevent this, thoroughly seal all cable connections using waterproof tape or silicone sealant. Make sure to cover the connections completely, leaving no gaps or exposed areas. This step is crucial in preventing water intrusion into the internal components of the camera.
3. Apply Waterproofing Spray or Silicone Sealant: To further enhance the waterproofing of your camera, consider applying a waterproofing spray or silicone sealant to the exterior of the camera housing. These products create a protective barrier that repels water and prevents it from seeping into the camera. Follow the manufacturer’s instructions for the proper application of the spray or sealant, ensuring that all necessary areas are covered.
4. Mount the Camera in a Suitable Location: When installing your security camera, choose a suitable location that minimizes its exposure to water. Mount the camera in a position where it is shielded from direct rainfall or snow. Avoid areas where water tends to pool or accumulate. By carefully selecting the installation location, you can reduce the risk of water damage to your camera.
5. Regular Maintenance and Inspection: Waterproofing is not a one-time process; it requires regular maintenance to ensure continued effectiveness. Regularly inspect your camera housing for any signs of wear, cracks, or damage. Check the cable connections and sealants for any signs of deterioration and reapply waterproofing products as needed. Additionally, clean the camera lens regularly to maintain clear and uninterrupted footage.
By following these steps, you can effectively waterproof your security camera system, protecting it from water damage and ensuring its reliability and longevity. Remember, investing time and effort into waterproofing your cameras will pay off in the form of uninterrupted surveillance and peace of mind.
Step 1: Choose a Waterproof Camera Housing
When it comes to waterproofing your security cameras, the first step is to choose a suitable waterproof camera housing. This housing will act as a protective shield, preventing water from directly coming into contact with your camera. Here are a few factors to consider when selecting a waterproof camera housing:
1. Compatibility with Your Camera: Ensure that the housing you choose is compatible with the specific model of your security camera. Manufacturers often provide specific recommendations for compatible housings, so refer to their guidelines or consult with a professional if needed. Using an incompatible housing may compromise the functionality and performance of your camera.
2. Quality and Durability: Opt for a housing that is made from high-quality materials and has proven durability. Look for features such as robust construction, sturdy seals, and corrosion-resistant materials. A reliable housing should be able to withstand various weather conditions and provide long-lasting protection for your camera.
3. Clear View of the Lens: The housing should provide a clear view of the camera lens. Ensure that the housing’s design does not obstruct or distort the camera’s field of view. A clean and unobstructed lens is essential for capturing clear and accurate footage.
4. Ease of Installation: Choose a housing that is easy to install and allows for convenient access to the camera for maintenance and adjustments. Look for features such as quick-release mechanisms or easy-to-use mounting brackets. This will make the installation process hassle-free and save you time and effort.
5. Additional Features: Consider any additional features that may be beneficial for your specific needs. Some waterproof camera housings may offer features like built-in heaters or fans to regulate temperature in extreme weather conditions. These features can help prevent condensation or overheating, ensuring consistent camera performance.
6. Budget Considerations: While it is important to invest in a quality housing, it is also essential to consider your budget. There are various options available at different price points, so determine your budget and find a housing that balances affordability with functionality and durability.
Once you have chosen a waterproof camera housing, carefully follow the manufacturer’s instructions for installation. Ensure that the housing is securely mounted and properly sealed to provide effective protection against water damage. Taking the time to select the right housing will go a long way in safeguarding your security camera and prolonging its lifespan.
Step 2: Seal All Cable Connections
Sealing the cable connections is a crucial step in waterproofing your security camera. Even with a waterproof housing, water can still find its way into the camera system through any exposed cable connections. Therefore, it is essential to thoroughly seal all cable connections to prevent water intrusion. Here’s how you can effectively seal the cable connections:
1. Gather the Necessary Materials: Before you start sealing the cable connections, gather the necessary materials. You will need waterproof tape or silicone sealant, a clean cloth, and possibly a cable management system like cable ties or clips.
2. Clean the Cable Connections: Before applying any sealant, ensure that the cable connections are clean and free from dirt, debris, or moisture. Use a clean cloth to wipe the connections and ensure they are dry.
3. Apply Waterproof Tape: One method to seal the cable connections is to use waterproof tape. Start by cutting off a piece of tape long enough to wrap around the connection. Hold the cable firmly in place and carefully wrap the tape around the connection, making sure to cover it completely. Press the tape firmly to ensure a secure seal. Repeat this process for each cable connection.
4. Use Silicone Sealant: Silicone sealant is another effective option for sealing cable connections. Apply a small amount of sealant around the cable connection, ensuring that it covers the entire connection. Use your finger or a small brush to spread the sealant evenly and fill any gaps or spaces. Allow the sealant to dry according to the manufacturer’s instructions before moving on to the next connection.
5. Utilize Cable Management: In addition to sealing the connections, it is also important to manage the cables properly. Use cable ties or clips to secure and organize the cables, keeping them away from potential water sources. This will help minimize the risk of water coming in contact with the cable connections.
6. Inspect the Sealed Connections: Once you have sealed all the cable connections, take the time to inspect each one to ensure there are no gaps or exposed areas. Make any necessary adjustments or reapply sealant if needed. Properly sealed cable connections are vital in preventing water from entering the camera system and causing damage.
By sealing all cable connections, you are adding an extra layer of protection to your security camera system. This step, combined with a waterproof camera housing, significantly reduces the risk of water damage and ensures the continued functionality of your cameras. Regularly inspect the sealed connections to ensure they remain intact, and reapply sealant as needed. With properly sealed cable connections, you can have peace of mind knowing that your security camera system is well-protected against water intrusion.
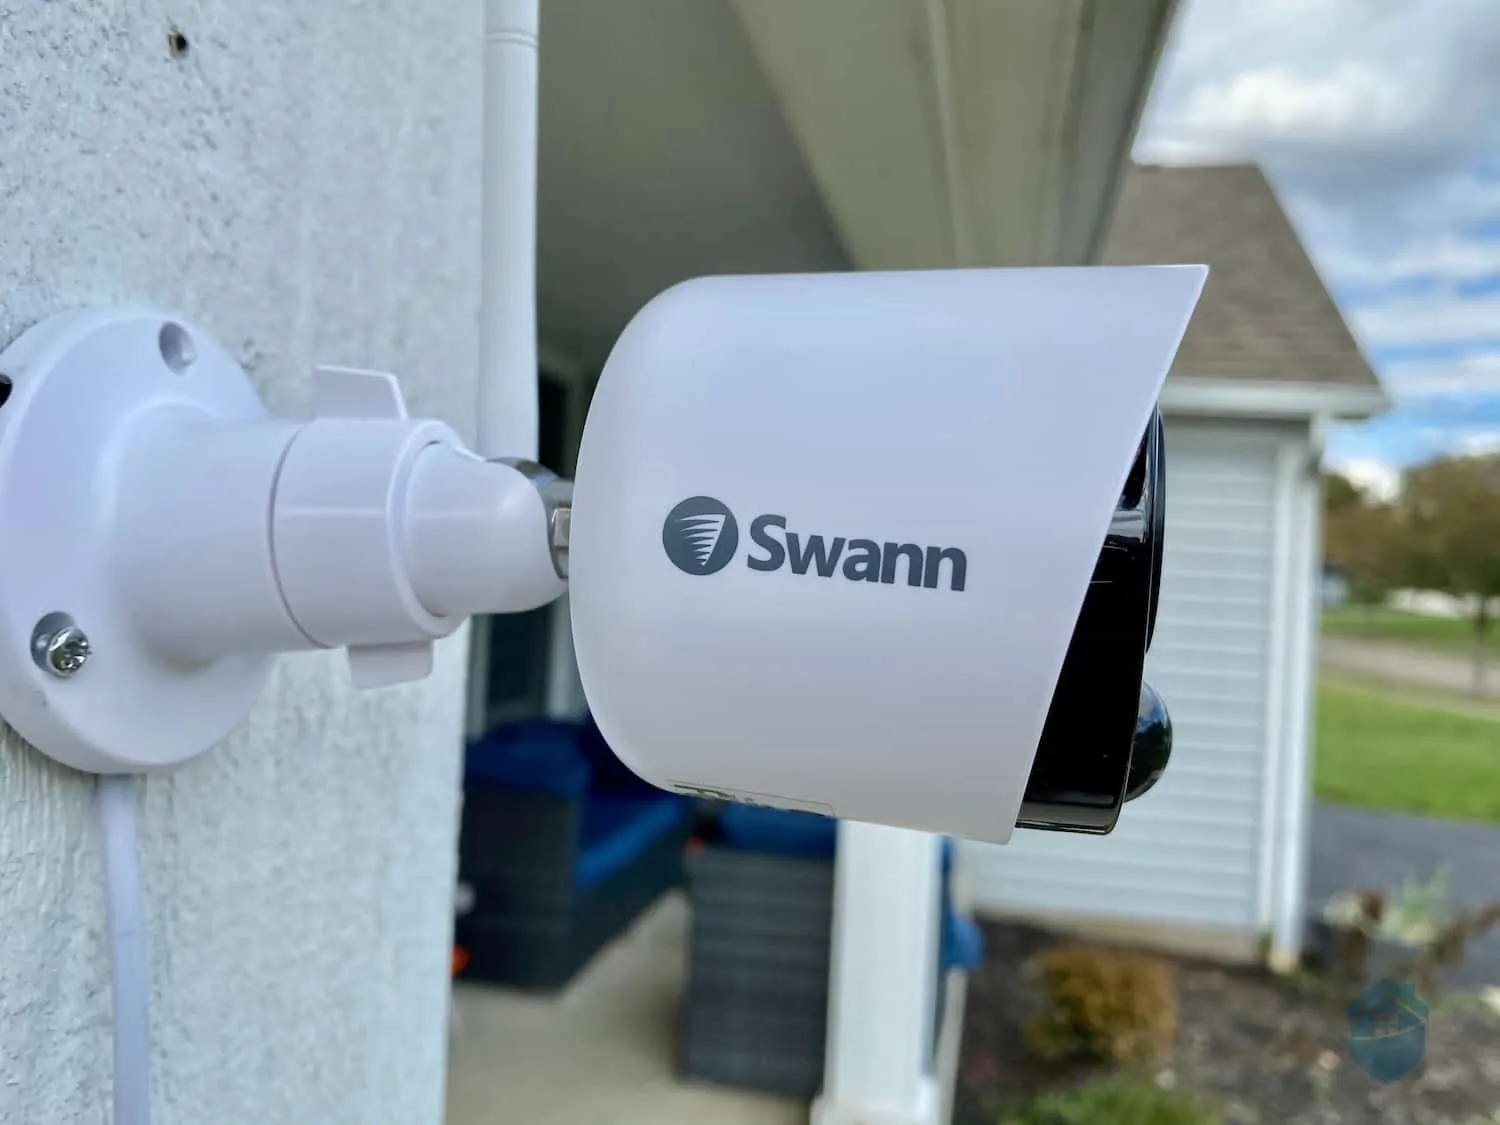
To waterproof a security camera, use a weatherproof housing or enclosure specifically designed for outdoor use. Make sure all cable connections are also waterproof to prevent water damage.
Step 3: Apply Waterproofing Spray or Silicone Sealant
In addition to choosing a waterproof camera housing and sealing cable connections, applying a waterproofing spray or silicone sealant can provide an extra layer of protection for your security camera. These products create a barrier that repels water and helps to prevent moisture from seeping into the camera. Here’s how you can apply waterproofing spray or silicone sealant effectively:
1. Choose the Right Product: Select a waterproofing spray or silicone sealant specifically designed for electronics or outdoor use. Look for products that are labeled as water-resistant, waterproof, or suitable for sealing electronics. Read the manufacturer’s instructions and ensure that the product is compatible with your camera and housing materials.
2. Clean and Dry the Camera: Before applying the waterproofing spray or sealant, clean the camera and make sure it is completely dry. Use a soft cloth or brush to remove any dust, dirt, or debris from the camera and its housing. Moisture present on the camera can interfere with the adhesion of the waterproofing product, so allow ample time for the camera to dry completely.
3. Apply a Thin and Even Coat: Follow the manufacturer’s instructions for applying the waterproofing spray or silicone sealant. If using a spray, hold the can approximately 6-8 inches away from the camera, and apply a thin and even coat. Be careful not to oversaturate the camera or allow the product to drip into any openings. If using a liquid sealant, use a brush or applicator to apply a thin layer, ensuring that all exposed surfaces of the camera are covered.
4. Pay Attention to Vulnerable Areas: Pay special attention to vulnerable areas such as buttons, switches, lens openings, and any exposed cables. Apply the waterproofing product generously to these areas to ensure complete coverage. Be cautious not to block or obstruct any sensors or openings that may affect the camera’s performance.
5. Allow Sufficient Drying Time: After applying the waterproofing spray or sealant, allow sufficient drying time as recommended by the manufacturer. This ensures that the product properly adheres to the camera and forms a protective barrier. Avoid touching or moving the camera during this time to prevent any disruptions to the drying process.
6. Reapply as Needed: Keep in mind that the effectiveness of the waterproofing spray or sealant may diminish over time, particularly with exposure to harsh weather conditions. It is a good practice to periodically inspect and reapply the waterproofing product as necessary. Follow the manufacturer’s guidelines for reapplication intervals and monitor the condition of the camera for any signs of water damage or wear.
By applying a waterproofing spray or silicone sealant, you add an additional layer of protection to your security camera, significantly reducing the risk of water damage. Regularly monitor the condition of the coating and reapply as needed to maintain effective waterproofing. With this step, you can ensure the long-term reliability and durability of your security camera system.
Step 4: Mount the Camera in a Suitable Location
After taking the necessary steps to waterproof your security camera, the next crucial step is to mount it in a suitable location. The placement of your camera plays a vital role in its protection against water damage. Here are some considerations to keep in mind when mounting your camera:
1. Sheltered from Direct Water Exposure: Choose a mounting location that is sheltered from direct exposure to rain, snow, or other sources of water. Look for areas that have overhead cover or eaves, or consider installing a rain guard or shield to provide additional protection. By avoiding direct water exposure, you minimize the risk of water reaching your camera and causing damage.
2. Avoid Areas Prone to Water Accumulation: Steer clear of areas where water tends to accumulate, such as spots prone to pooling or flooding. These areas pose a higher risk of water damage, even with proper waterproofing measures in place. Opt for elevated areas or install your camera on walls or poles to avoid water buildup.
3. Proper Angles and Views: Ensure that your camera is mounted at an appropriate angle and has a clear line of sight to capture the desired view. Consider the camera’s field of view, and position it to cover the intended surveillance area effectively. Adjust the camera’s position and angle as needed to avoid obstructed views or reflections that may impact image quality.
4. Secure Mounting Bracket: Use a robust and secure mounting bracket that can withstand various weather conditions. Make sure the bracket is tightly secured to prevent any movement or vibrations. A loose or unstable mount can compromise the effectiveness of the waterproofing and potentially expose your camera to water damage.
5. Cable Management: Take care of the cables coming from your camera and ensure they are properly managed during installation. Use cable clips or cable management systems to secure and route the cables away from water sources. Avoid leaving any loose or exposed cables that can act as entry points for water. Proper cable management not only protects against water damage but also provides a cleaner and tidier installation.
6. Regular Maintenance: Once your camera is mounted, establish a routine maintenance schedule to inspect and clean the camera housing and the surrounding area. Check for any signs of water damage, cracks, or wear in the housing, mounting bracket, or cables. Promptly address any issues to maintain the integrity of your camera’s waterproofing.
By mounting your camera in a suitable location, you reduce the risk of water damage and ensure the longevity of your security camera. Proper placement, along with the previous steps of waterproofing, contributes to a more reliable and durable surveillance system. Take the time to carefully consider the location and follow these guidelines to maximize the performance and protection of your security camera.
Step 5: Regular Maintenance and Inspection
Regular maintenance and inspection are essential to ensure the continued effectiveness and longevity of your waterproofed security camera. By implementing a routine maintenance schedule, you can identify and address any potential issues before they cause significant damage or compromise the performance of your camera system. Here are some key steps to consider for regular maintenance and inspection:
1. Cleaning the Camera and Housing: Regularly clean the camera lens, housing, and surrounding areas to remove any dust, dirt, or debris that may obstruct the camera’s view or accumulate on the waterproofing surface. Use a soft cloth or brush to gently clean these areas, avoiding harsh cleaning agents that may damage the camera or its components.
2. Check the Sealants and Waterproofing Coating: Inspect the seals, tape, or silicone sealant used to waterproof your camera. Look for any signs of wear, cracks, or deterioration. If you notice any issues, promptly reapply sealant or replace the waterproofing materials as needed. Ensure that all areas of the camera housing remain properly sealed to prevent water intrusion.
3. Inspect Cable Connections: Regularly check the sealed cable connections to ensure they remain intact and properly sealed. Look for any signs of corrosion, moisture, or loose connections. If you notice any issues, reseal the connections or replace any damaged cables as necessary. Loose or exposed cables can present a potential entry point for water, so proper maintenance of the cable connections is crucial.
4. Monitor Camera Performance: Keep an eye on the performance of your security camera. Check that it is capturing clear and high-quality footage, both during daylight and nighttime conditions. Review the camera’s field of view and adjust its position or angle if necessary. Pay attention to any unusual behavior or malfunctions, such as blurry images or distorted video, as they may indicate a problem with the camera or its waterproofing.
5. Consider Seasonal Maintenance: Different seasons may present unique challenges for your security camera system. For example, during the winter months, snow and ice may accumulate on the camera, affecting its view and potentially causing water damage as it melts. Regularly remove any snow, ice, or debris that may obstruct the camera’s performance and waterproofing.
6. Professional Maintenance: While regular maintenance can be done by homeowners, it is also beneficial to schedule periodic professional maintenance. Consider hiring a certified technician to inspect and service your security camera system. They can assess the effectiveness of the waterproofing and perform any necessary repairs or adjustments that are beyond the scope of regular maintenance.
By implementing a regular maintenance and inspection routine for your security camera, you can ensure its optimal performance and prolong its lifespan. Regular cleaning, monitoring of seals and cable connections, and professional assistance when needed will help maintain the waterproofing and protect your camera from potential water damage. With ongoing maintenance, you can rely on your security camera system to provide reliable surveillance and peace of mind.
Conclusion
Properly waterproofing your security cameras is vital for their longevity, reliability, and effectiveness. By taking the necessary steps outlined in this guide, you can safeguard your investment and ensure that your cameras can withstand various weather conditions. A well-protected security camera will continue to capture clear and uninterrupted footage, providing you with peace of mind and enhanced home security.
Choosing a suitable waterproof camera housing, sealing all cable connections, applying waterproofing spray or sealant, mounting the camera in a suitable location, and conducting regular maintenance and inspection are the key steps to effectively waterproofing your security cameras.
Remember to select a waterproof housing that is compatible with your camera, durable, and offers a clear view of the lens. Sealing all cable connections using waterproof tape or silicone sealant prevents water from entering the camera system through exposed areas. Applying a waterproofing spray or sealant adds an extra layer of protection, ensuring that water rolls off the camera’s surface.
Mounting the camera in a suitable location away from direct water exposure and avoiding areas prone to water accumulation is crucial. Proper cable management and regular inspection of the camera system will help identify any issues and allow for timely maintenance.
By implementing these steps and maintaining a proactive approach to the care of your security cameras, you can extend their lifespan and optimize their performance. Regular cleaning, monitoring of sealants and waterproofing coatings, and professional maintenance if needed will ensure that your cameras remain protected and provide reliable surveillance.
Protecting your security cameras from water damage is an investment in the long-term functionality and effectiveness of your home security system. By following the guidelines outlined in this article, you can confidently safeguard your cameras and enjoy reliable surveillance for years to come.
Frequently Asked Questions about How To Waterproof A Security Camera
Was this page helpful?
At Storables.com, we guarantee accurate and reliable information. Our content, validated by Expert Board Contributors, is crafted following stringent Editorial Policies. We're committed to providing you with well-researched, expert-backed insights for all your informational needs.