Home>Home Security and Surveillance>How To Power A Security Camera
Home Security and Surveillance
How To Power A Security Camera
Modified: March 6, 2024
Learn how to power your security camera at home with these simple steps. Ensure maximum home security and surveillance with our easy-to-follow guide.
(Many of the links in this article redirect to a specific reviewed product. Your purchase of these products through affiliate links helps to generate commission for Storables.com, at no extra cost. Learn more)
Introduction
When it comes to home security and surveillance, having a reliable power supply for your security cameras is essential. Without a proper power source, your cameras may not function effectively, leaving your property vulnerable to intruders and compromising the safety of your loved ones. In this article, we will explore different power supply options for security cameras and provide you with a step-by-step guide on how to power them.
Having a reliable power supply for your security cameras is crucial for continuous monitoring and recording. It ensures that your cameras are always operational and ready to capture any suspicious activities around your home. There are several power supply options available, and choosing the right one depends on various factors such as installation location, power requirements, and accessibility.
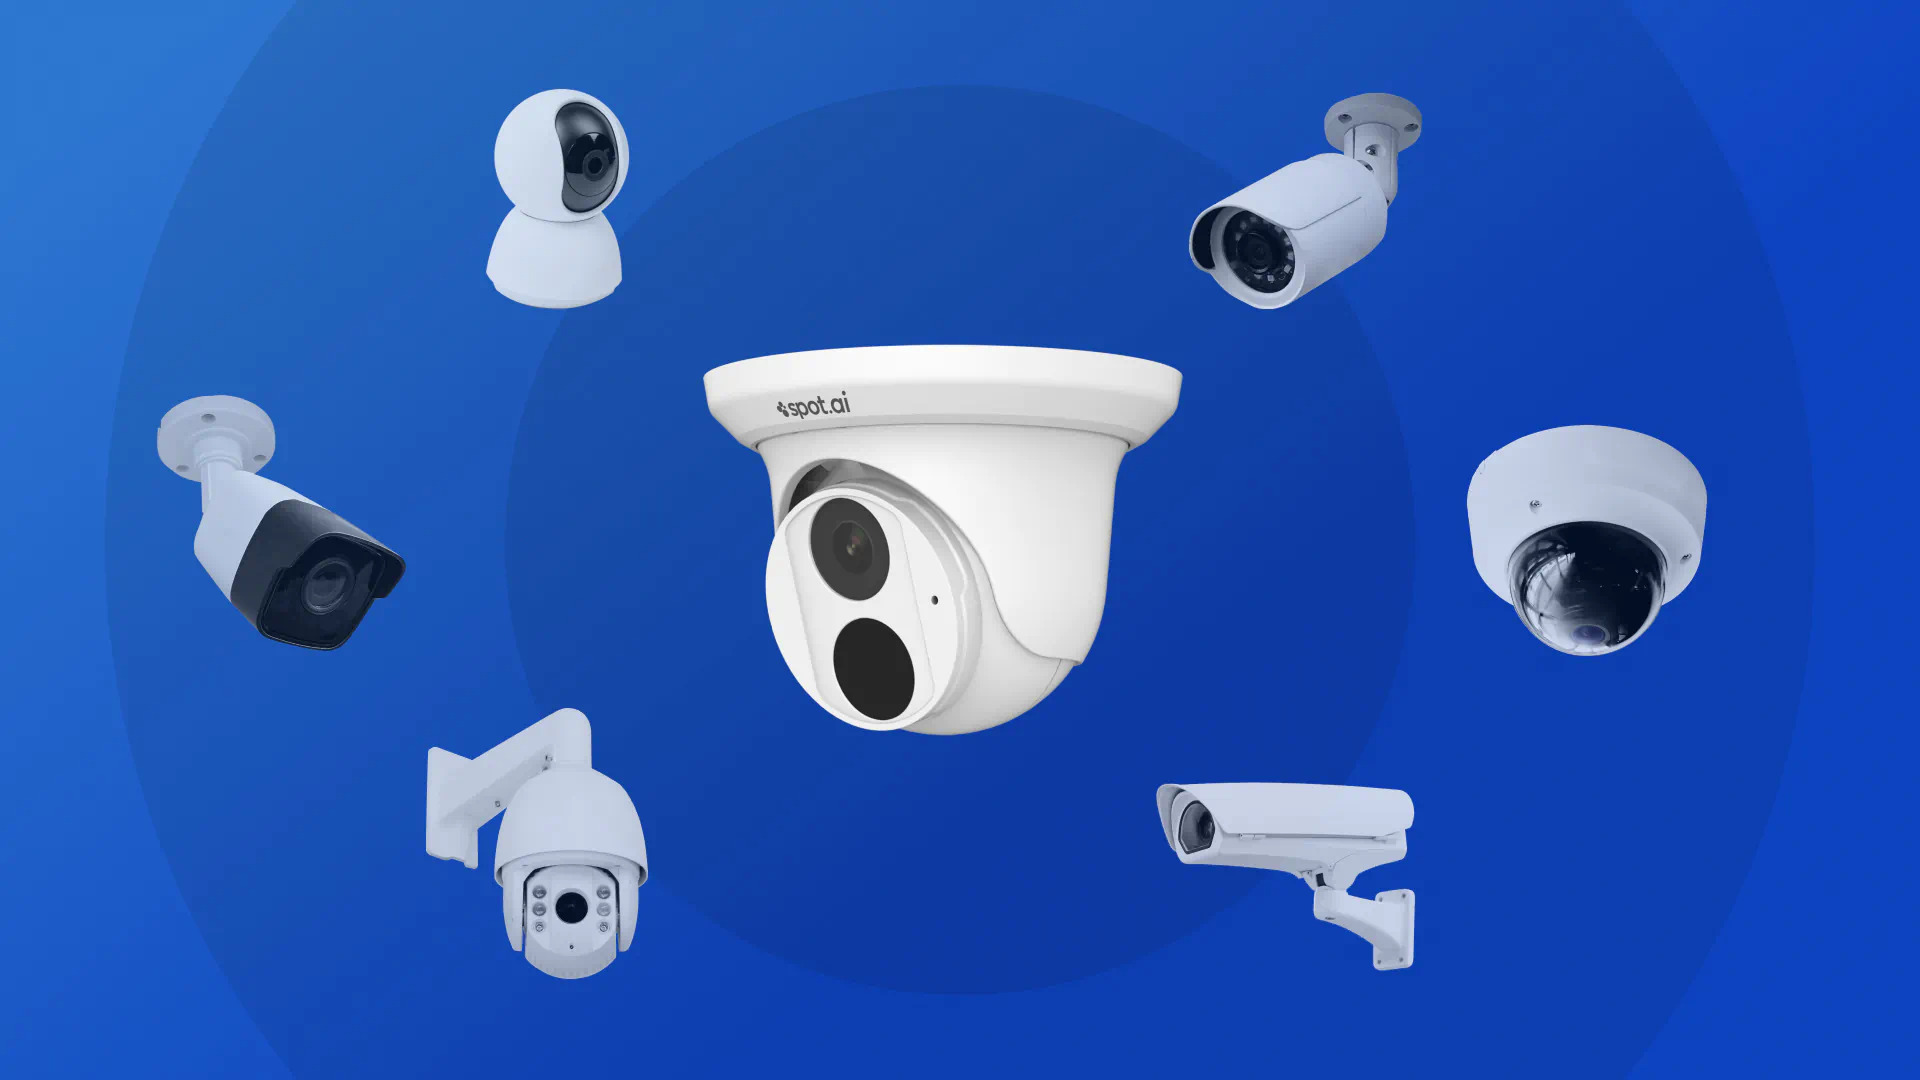
Before we dive into the different power supply options, let’s briefly discuss the types of security cameras commonly used in home surveillance systems. These cameras range from traditional wired cameras to modern wireless and battery-powered options. Each type has its own benefits and limitations when it comes to power supply.
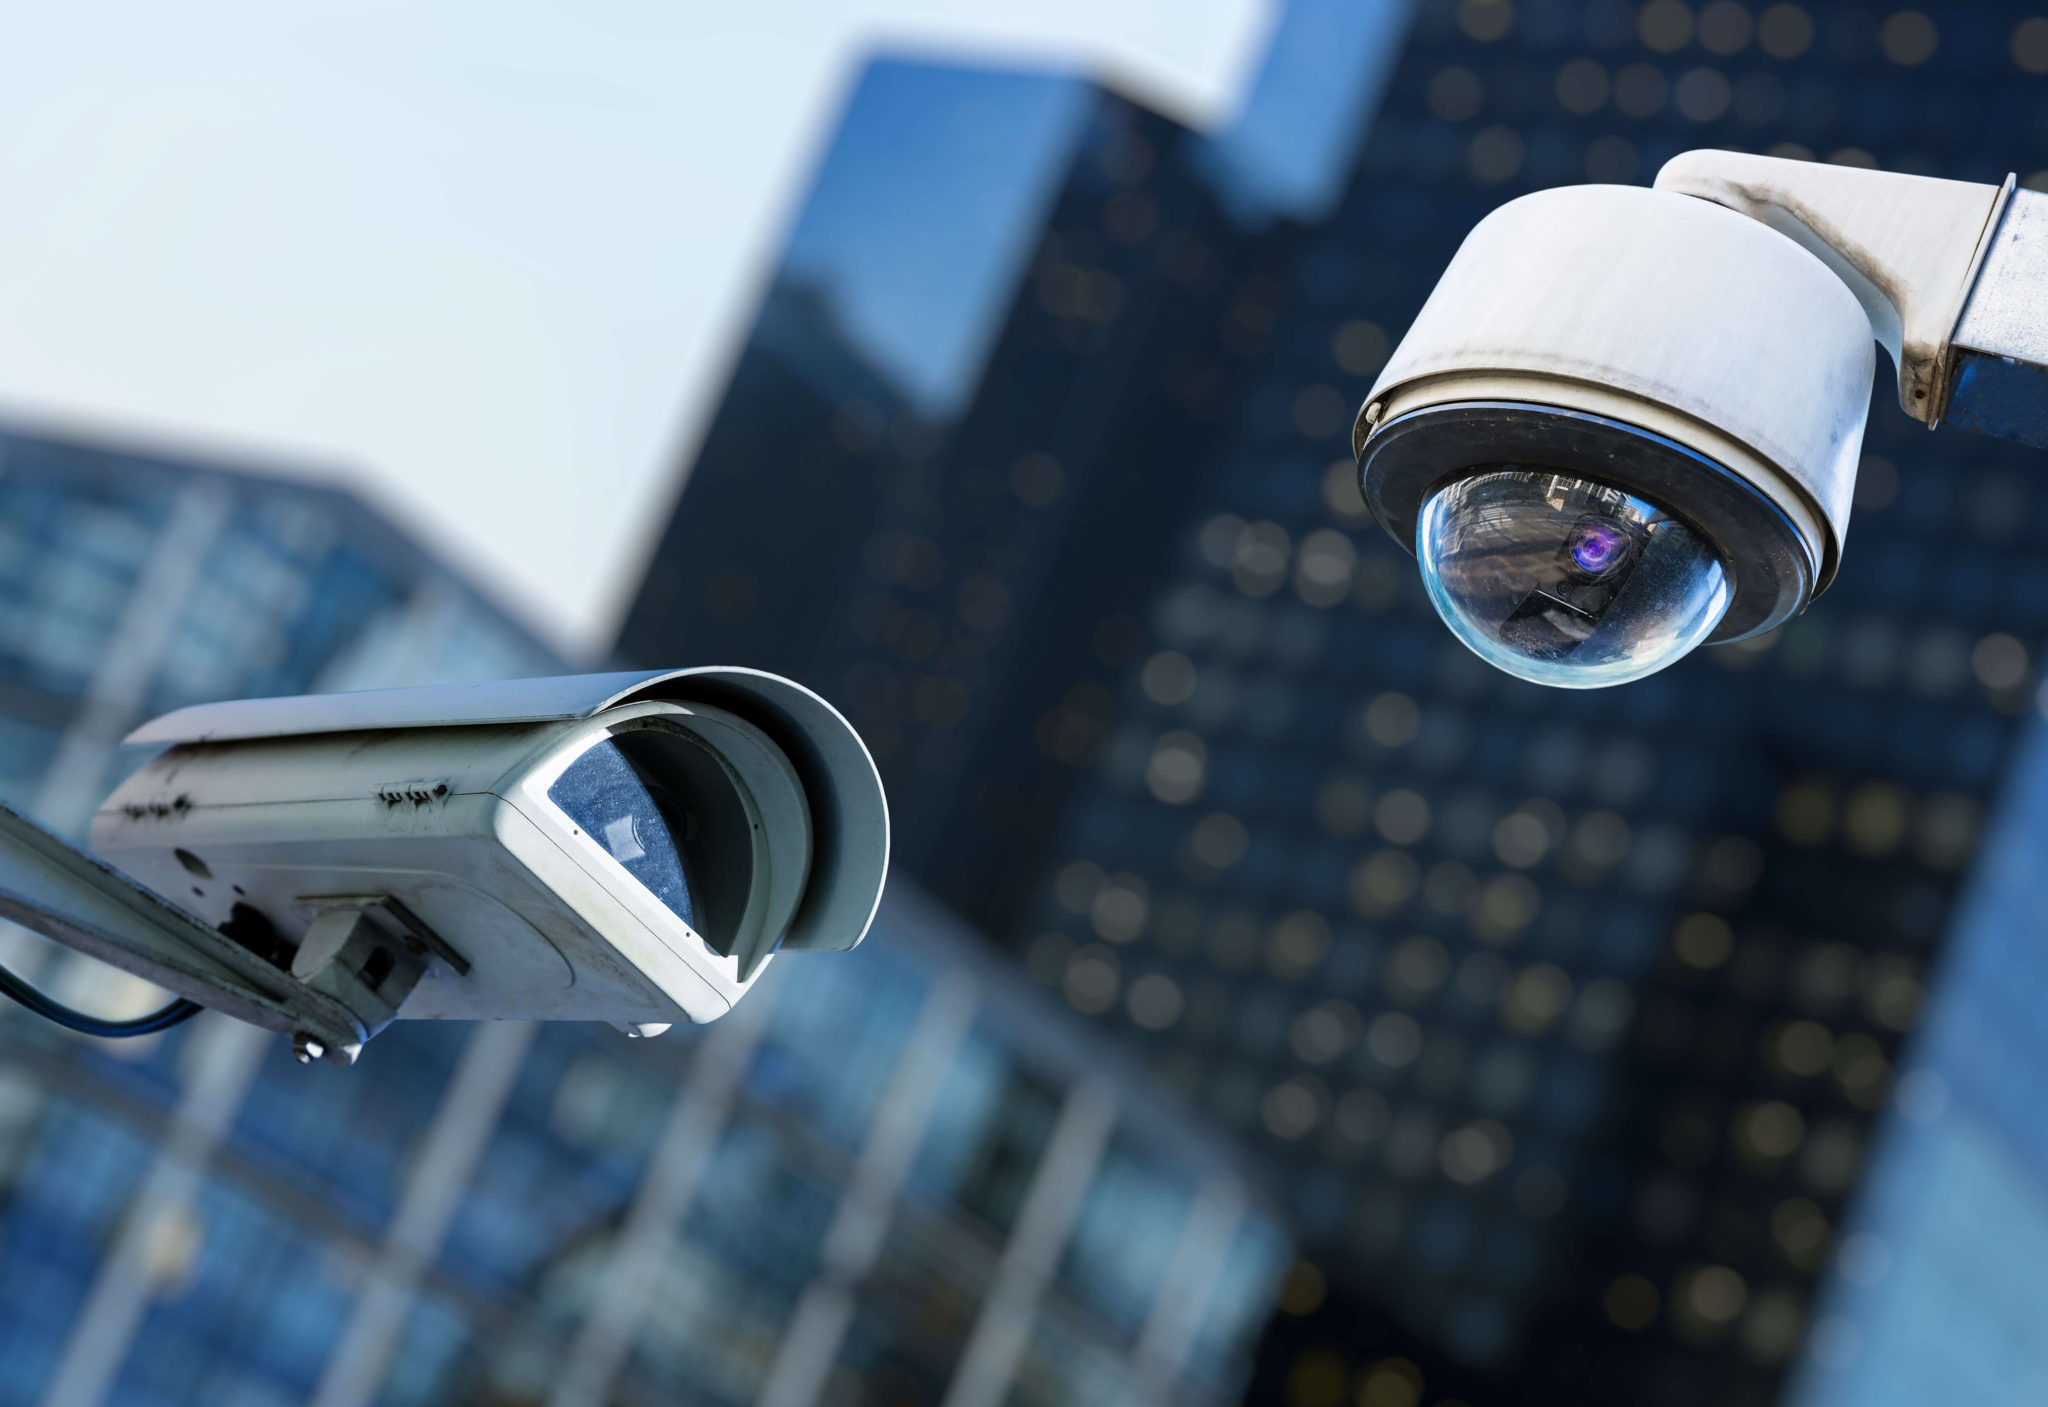
Wired cameras are the most traditional type of security cameras. They require a direct electrical connection to operate and are usually mounted near an electrical outlet. Power over Ethernet (PoE) is another popular option that allows both power and data transfer through a single Ethernet cable. This eliminates the need for separate power cables and simplifies the installation process.
Battery-powered cameras, on the other hand, operate on rechargeable batteries and can be placed anywhere without the need for a permanent power source. They offer more flexibility in terms of placement but require regular battery maintenance to ensure uninterrupted operation.
Now that we have briefly discussed the different types of security cameras, let’s explore the various power supply options in detail and help you choose the right one for your needs.
Key Takeaways:
- Choose the right power supply option for your security cameras based on factors like distance from power source, desired location, and camera power requirements to ensure reliable and uninterrupted surveillance.
- Follow step-by-step guides to install wired, PoE, or battery-powered cameras, and troubleshoot common power issues to maintain optimal functionality and reliability of your home security system.
Read more: How To Get Power To Outdoor Security Camera
Types of Power Supply Options
When it comes to powering your home security cameras, you have a few different options to choose from. Let’s take a closer look at each one:
- Wired Power Supply: This is the most traditional and commonly used option. Wired cameras require a direct electrical connection to an outlet. They are typically connected through a power adapter or a power supply box. The advantage of using a wired power supply is that it provides a constant and reliable source of power. However, the installation process can be more complex and may require professional assistance if you lack electrical knowledge.
- Power over Ethernet (PoE): PoE is a popular power supply option for IP cameras. It allows both power and data to be transmitted through a single Ethernet cable, simplifying the installation process. PoE cameras are connected to a PoE switch or injector, which provides power to the camera. This eliminates the need for a separate power cable and reduces installation costs. It’s important to note that PoE requires a compatible switch or injector, so check the specifications of your camera to ensure compatibility.
- Battery-Powered Cameras: Battery-powered cameras offer the utmost flexibility in terms of placement. These cameras operate on rechargeable batteries and can be installed anywhere without the need for a direct power source. This makes them ideal for areas where wiring may be difficult or impractical. Battery-powered cameras are typically equipped with motion sensors that conserve battery life by only activating the camera when motion is detected. However, regular battery maintenance is necessary to ensure uninterrupted operation.
Each power supply option has its own advantages and considerations. The right choice for you will depend on factors such as the distance from the power source, desired installation location, power requirements of the camera, and maintenance accessibility. Let’s delve deeper into these factors to help you make an informed decision on the best power supply option for your security cameras.
Wired Power Supply
Wired power supply is the traditional and widely used option for home security cameras. It involves connecting the cameras directly to an electrical outlet using power adapters or power supply boxes.
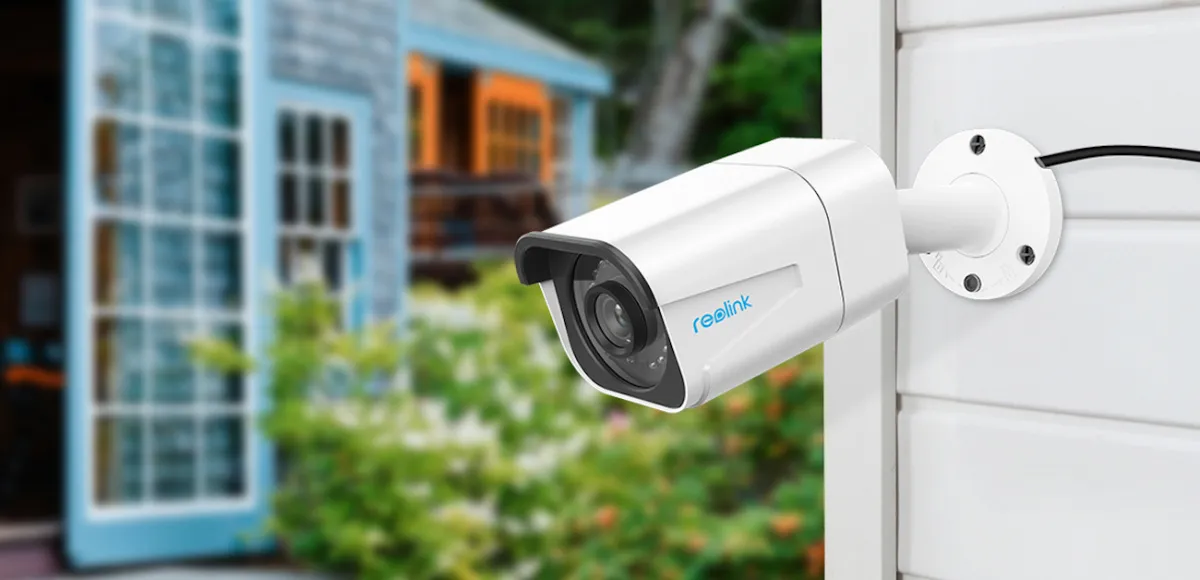
One of the main advantages of a wired power supply is its reliability. Since the cameras are directly connected to a power source, you can be assured of a constant and uninterrupted power supply. This is particularly crucial for outdoor cameras that need to operate in various weather conditions.
Before installing wired cameras, consider the distance between the camera and the power source. If the distance is significant, you may need to use extension cables or get professional assistance to ensure proper power transmission.
When it comes to installation, it’s important to make sure that the power cables are securely attached and concealed to avoid accidental disconnection or tampering. Additionally, make sure to use weatherproof cables and connectors for outdoor installations to protect against the elements.
Another consideration for wired power supply is the accessibility of the power source. Ensure that the power outlet is easily accessible for future maintenance or camera replacements. It’s also advisable to use surge protectors to protect the cameras from power surges and fluctuations.
Overall, a wired power supply offers a reliable and consistent source of power for your security cameras. While it may require more effort and professional assistance during installation, it provides peace of mind knowing that your cameras will continue to operate even during extended periods of surveillance.
Power over Ethernet (PoE)
Power over Ethernet (PoE) is a convenient and popular power supply option for IP cameras. It allows both power and data to be transmitted through a single Ethernet cable, simplifying the installation process and eliminating the need for separate power cables.
To use PoE, you will need a PoE switch or injector that provides power to the camera through the Ethernet cable. The PoE switch is connected to your network router, and the cameras can then be connected to the switch using Ethernet cables. Alternatively, if your network switch is not PoE capable, you can use a PoE injector to add power capabilities to your existing network setup.
One of the main advantages of PoE is its flexibility in camera placement. Since Power over Ethernet can transmit power and data over long distances, you can install cameras in areas far away from electrical outlets. This is especially beneficial for outdoor installations or locations where running power cables is challenging.
PoE also simplifies the setup process by reducing the number of cables required. With just a single Ethernet cable, you can provide both power and network connectivity to your cameras. This not only saves time during installation but also results in a cleaner and more organized setup.
It’s important to note that not all cameras support PoE. Before choosing PoE as your power supply option, ensure that your cameras are PoE compatible. It’s also essential to check the power requirements of your cameras to ensure that the PoE switch or injector can provide sufficient power.
One potential limitation of PoE is the maximum power capacity it can deliver. PoE switches have different power budgets, and they may not be able to provide enough power if you have multiple high-powered cameras or additional network equipment connected. In such cases, it may be necessary to use additional PoE switches or injectors to distribute the power load effectively.
Overall, Power over Ethernet is a convenient and efficient power supply option for security cameras. It simplifies the installation process, allows for flexible camera placement, and reduces the cable clutter associated with traditional wired power supplies.
Battery-Powered Cameras
Battery-powered cameras offer a high level of flexibility and convenience when it comes to powering your security cameras. These cameras operate on rechargeable batteries, eliminating the need for a direct power source and making them suitable for areas where wiring may be impractical or difficult.
The main advantage of battery-powered cameras is their versatility in terms of placement. You can install them anywhere, both indoors and outdoors, without worrying about the proximity to power outlets or the availability of electrical wiring. This flexibility allows you to position the cameras strategically to cover blind spots and areas of concern.
When choosing a battery-powered camera, consider the battery life and the ease of recharging. Look for cameras that offer long battery life to minimize the frequency of recharging. Some cameras come with rechargeable batteries that can last for several months, while others may require more frequent recharging. It’s also advisable to purchase spare batteries to ensure uninterrupted operation.
Another important consideration is the camera’s power management features. Many battery-powered cameras are equipped with motion sensors, which activate the camera only when motion is detected. This helps conserve battery life and ensures that the camera is only capturing relevant footage. Additionally, some cameras may offer the option to adjust the sensitivity of the motion sensor, allowing you to customize the camera’s behavior.
Regular battery maintenance is essential for the optimal performance of battery-powered cameras. Make sure to monitor the battery levels regularly and recharge or replace batteries as needed. Keep in mind that extreme temperatures can affect battery performance, so it’s necessary to position the cameras in areas where they won’t be exposed to excessive heat or cold.
When it comes to installation, battery-powered cameras are typically easy to set up. Many models are designed for DIY installation, allowing you to mount the cameras using adhesive strips or screws. Just ensure that the cameras are placed securely and protected from tampering or theft.
Overall, battery-powered cameras offer a convenient and flexible power supply option for your security needs. With no need for a direct power source or wiring, these cameras can be installed in various locations and easily repositioned as needed. However, it’s important to consider battery life and maintenance to ensure reliable continuous operation.
Choosing the Right Power Supply Option
When it comes to selecting the right power supply option for your home security cameras, there are several factors to consider. These factors will help you determine the most suitable option based on your specific needs and circumstances. Let’s explore these factors:
1. Distance from Power Source: Consider the distance between your cameras and the nearest power source. If you have a wired power supply or PoE option in mind, ensure that the cameras can be easily connected to the power source without the need for long and complicated wiring. If the distance is significant, battery-powered cameras may be a more suitable choice as they can be placed anywhere without the need for a direct power connection.
2. Desired Installation Location: Think about where you want to install your cameras. If you have specific areas in mind that are far away from electrical outlets or difficult to wire, wireless options such as PoE or battery-powered cameras may be the best choice. However, if you have existing wiring infrastructure or prefer a more traditional setup, wired power supply options will work well.
3. Power Requirements of the Camera: Different cameras have varying power requirements. Before finalizing your power supply option, ensure that the power source can provide enough power to sustain the camera’s operation. This is especially important for high-definition cameras or those with additional features that may consume more power. Consult the camera’s specifications for the power requirements and compare them with the capabilities of the power supply option you are considering.
4. Maintenance and Accessibility: Consider the level of maintenance and accessibility you require. Wired power supply options may require occasional checks and maintenance of the power cables, while battery-powered cameras will need regular battery monitoring and recharging. Ensure that you have easy access to the power source or batteries for maintenance purposes.
By considering these factors, you can make an informed decision on the most suitable power supply option for your security cameras. It’s important to strike a balance between convenience, reliability, and meeting your specific requirements.
Ultimately, the right power supply option will provide a steady and uninterrupted source of power to your security cameras, ensuring that they can function optimally and provide reliable surveillance for your home.
Factors to Consider
When it comes to choosing the right power supply option for your home security cameras, there are several factors that you should take into consideration. These factors will help you make an informed decision based on your specific needs and requirements. Let’s explore these factors in detail:
1. Distance from Power Source: Consider the distance between your cameras and the nearest power source. If the cameras are located far away from electrical outlets, wired power supply options may require extensive wiring or the use of extension cables. In such cases, Power over Ethernet (PoE) or battery-powered cameras may be more suitable as they eliminate the need for a direct power connection.
2. Desired Installation Location: Think about where you want to install your security cameras. If the desired location is near an electrical outlet or has existing wiring infrastructure, wired power supply options can be a convenient choice. On the other hand, if the installation location is in a remote area or lacks access to power outlets, battery-powered cameras offer the flexibility to be placed anywhere without the constraints of wiring.
3. Power Requirements of the Camera: Different security cameras have varying power requirements. Before selecting a power supply option, it’s essential to check the power specifications of your cameras. Make sure that the power source you choose can provide the necessary voltage and current to operate the camera effectively. It’s crucial to match the power requirements of the camera with the capabilities of the power supply option to ensure the smooth and uninterrupted operation of your security system.
4. Maintenance and Accessibility: Consider the maintenance requirements and accessibility of the power supply option. Wired power supply options may need occasional checks or repairs of the cables and connections. Battery-powered cameras require regular maintenance of the rechargeable batteries to ensure continuous operation. Evaluate the ease of accessing and maintaining the power supply option to avoid any disruptions in the functionality of your security cameras.
5. Budget and Cost: Another factor to consider is your budget. Wired power supply options generally have lower upfront costs but may require professional installation, which can incur additional expenses. PoE options may require a compatible switch or injector, which adds to the initial investment. Battery-powered cameras may have higher upfront costs due to the need for rechargeable batteries. Consider your budget and factor in the long-term maintenance and energy costs associated with each power supply option.
By carefully considering these factors, you can select the most appropriate power supply option for your home security cameras. The right choice will provide a reliable and efficient power source, ensuring that your cameras operate seamlessly and provide enhanced security and surveillance for your property.
Distance from Power Source
When choosing a power supply option for your home security cameras, one important factor to consider is the distance between your cameras and the nearest power source. The proximity of your cameras to the power source can impact the installation process and the overall effectiveness of your surveillance system.
If your cameras are located relatively close to an electrical outlet, a wired power supply option may be suitable. Wired power supply involves connecting the cameras directly to an electrical outlet using power adapters or power supply boxes. This option provides a reliable and consistent power source, ensuring uninterrupted operation of your cameras. However, it’s essential to consider the length of the power cables and any potential obstacles or limitations that may arise when connecting the cameras to the power source.
On the other hand, if your cameras are located far away from electrical outlets, a wired power supply may be more challenging to implement. You may need to use extension cables or consider professional assistance to ensure proper power transmission over longer distances. Keep in mind that longer cables can result in voltage drop, which may affect the performance and reliability of your cameras. In such cases, alternative power supply options like Power over Ethernet (PoE) or battery-powered cameras may be more suitable.
Power over Ethernet (PoE) is a popular option for IP cameras. It allows both power and data to be transmitted through a single Ethernet cable, simplifying the installation process and eliminating the need for separate power cables. PoE is especially beneficial when dealing with larger distances from the power source. You can use PoE switches or injectors to provide power to the cameras over longer cable runs, ensuring consistent and reliable power supply. The maximum distance that PoE can transmit power depends on various factors such as cable quality, power consumption of the cameras, and the specific PoE standard used.
If running cables from a power source is not feasible or practical, battery-powered cameras offer a convenient solution. These cameras operate on rechargeable batteries, eliminating the need for a direct power connection. You can install battery-powered cameras anywhere, regardless of the proximity to electrical outlets. This flexibility allows you to cover areas that may be difficult to reach with wired options. However, it’s important to consider the battery life and ensure regular maintenance to avoid interruptions in camera functionality.
When considering the distance from the power source, take into account any potential obstacles or environmental factors that may affect the power supply. It’s important to ensure that the power source can deliver sufficient and reliable power to the cameras, regardless of the power supply option chosen.
By carefully evaluating the distance from the power source, you can select the most appropriate power supply option for your home security cameras. Whether it’s wired power supply, Power over Ethernet, or battery-powered cameras, choosing the right option will ensure that your system operates effectively and your property remains well-protected.
Desired Installation Location
When deciding on a power supply option for your home security cameras, one crucial factor to consider is the desired installation location. Where you want to place your cameras can greatly influence the type of power supply option that is most suitable for your needs.
If your desired installation location is near an electrical outlet or has existing wiring infrastructure, a wired power supply option may be the most convenient choice. Wired power supply involves connecting the cameras directly to an electrical outlet using power adapters or power supply boxes. This option allows for a direct and reliable power connection, ensuring continuous operation of your cameras. Having an electrical outlet nearby minimizes the need for complicated wiring and reduces the risk of power interruptions.
On the other hand, if your desired installation location is in a remote area or lacks convenient access to power outlets, wireless power supply options may be more suitable. Power over Ethernet (PoE) is a popular choice for IP cameras in such scenarios. PoE enables both power and data transmission over a single Ethernet cable, simplifying the installation process and eliminating the need for separate power cables. This option provides more flexibility in camera placement, allowing you to position your cameras in areas far away from electrical outlets.
Battery-powered cameras are another excellent option for installation in areas without access to a direct power source. These cameras operate using rechargeable batteries, offering complete freedom in camera placement. Whether you need to monitor a remote part of your property or want the flexibility to move your cameras around, battery-powered cameras can be placed virtually anywhere without the constraint of nearby power outlets.
Consider the specific requirements and challenges of your desired installation location. Is it indoors or outdoors? Is it easily accessible, or do you anticipate any difficulties in delivering power to that area? Evaluating these factors will help you determine the most practical power supply option.
It’s vital to ensure that the chosen power supply option aligns with the installation location’s conditions. For outdoor installations, make sure that the power supply option is weatherproof and durable to withstand environmental elements. Additionally, consider any potential risks of power cables being exposed, tampered with, or damaged, especially for outdoor installations.
By carefully considering your desired installation location, you can choose the power supply option that best aligns with your needs. Whether it’s a wired power supply near electrical outlets, the flexibility of Power over Ethernet, or the convenience of battery-powered cameras, the right choice will ensure optimal functionality and coverage for your home security cameras.
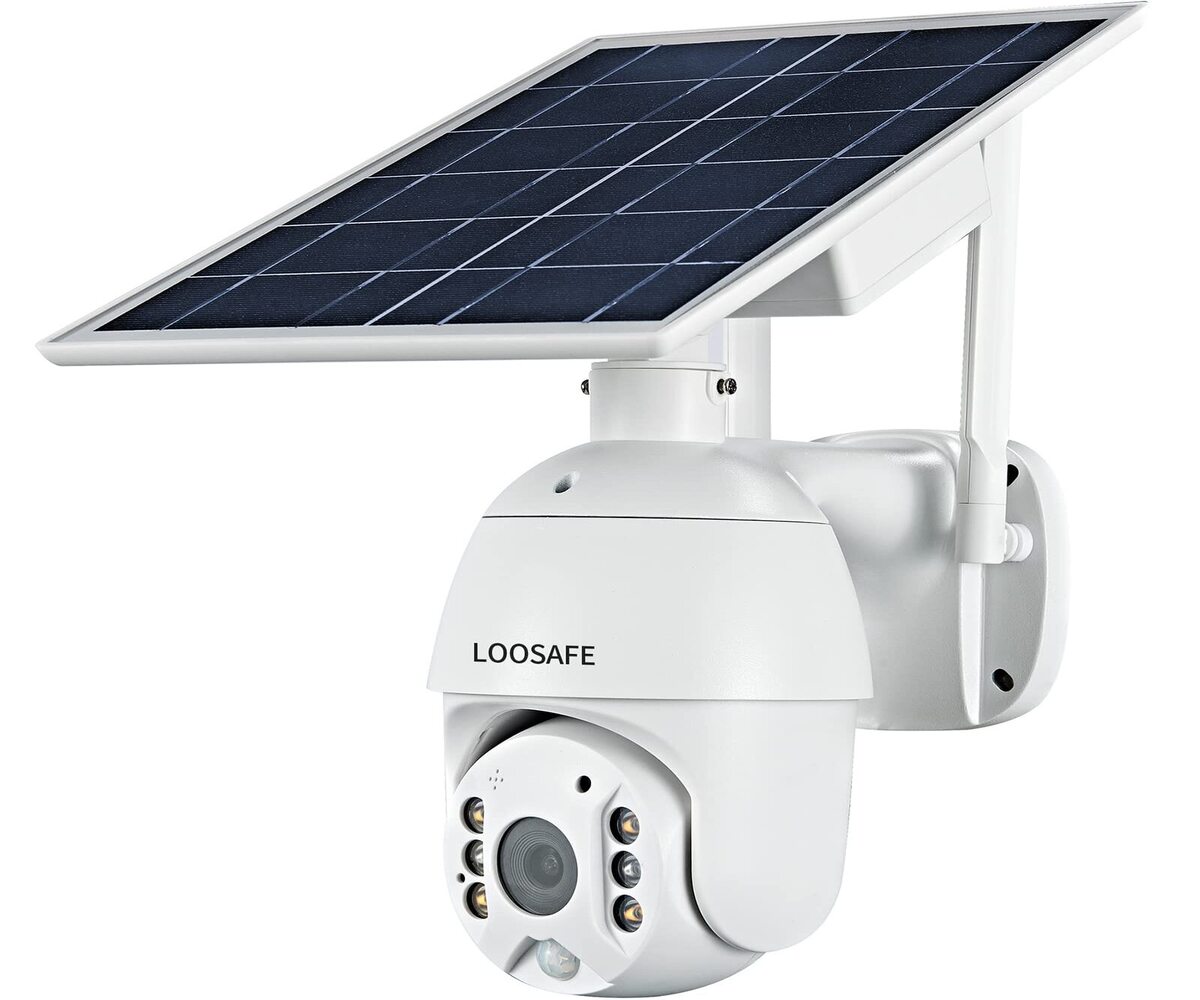
Consider using a Power over Ethernet (PoE) system to power your security camera. This allows you to transmit power and data through a single Ethernet cable, simplifying installation and reducing the need for additional power outlets.
Power Requirements of the Camera
When selecting a power supply option for your home security cameras, it’s essential to consider the power requirements of the cameras themselves. Understanding the power needs of your cameras ensures that you choose a power supply option that can effectively meet those requirements, resulting in reliable and uninterrupted camera performance.
Each camera model has specific power requirements, including voltage and current specifications. Before making a decision, consult the camera’s technical specifications or manufacturer’s documentation to determine its power requirements.
For wired power supply options, such as using a power adapter or power supply box, it’s important to ensure that the power source can deliver the necessary voltage and current required by the camera. Mismatching the power supply with the camera’s requirements can result in inadequate power, leading to poor camera performance or even damage to the camera itself.
If you plan on using Power over Ethernet (PoE), you’ll need to check if your cameras are PoE compatible and determine their PoE class. PoE switches or injectors come in different types, each with specific power capabilities. The camera’s PoE class, along with the specific PoE standard supported by the switch or injector, determines the maximum power that can be delivered to the camera. Ensuring that your camera’s power requirements align with the PoE capabilities of your chosen switch or injector is crucial for stable and efficient camera operation.
When considering battery-powered cameras, it’s important to evaluate the expected battery life and recharge or replacement requirements. Different cameras have varying battery capacities and consumption rates, which ultimately affect how often the batteries need to be recharged or replaced. Some cameras have energy-saving features, such as motion detection technology, which conserves battery power by only activating the camera when motion is detected. Understanding the power efficiency of the camera and its battery life is key to ensuring continuous and reliable operation.
It’s worth noting that advanced features like pan-tilt-zoom (PTZ) or infrared (IR) LEDs for night vision may have higher power requirements. Take these additional power needs into account when evaluating the power supply options for your cameras.
By thoroughly assessing the power requirements of your cameras, you can choose a power supply option that provides the necessary voltage, current, and capacity to meet those requirements. This ensures optimal camera performance, extends the lifespan of your equipment, and minimizes the risk of power-related issues that can compromise your home security system.
Maintenance and Accessibility
Maintenance and accessibility are important factors to consider when choosing a power supply option for your home security cameras. A power supply that is easy to maintain and provides convenient access can greatly enhance the overall functionality and reliability of your surveillance system.
For wired power supply options, such as using power adapters or power supply boxes, regular maintenance may involve periodically checking and securing the power cables and connectors. These components may become loose or damaged over time, leading to power interruptions or camera malfunction. Ensuring that the cables are securely attached and protected from environmental factors, such as moisture or tampering, is essential to maintain consistent power flow to your cameras.
Accessibility is another crucial aspect to consider. Make sure that the power source and its components are easily accessible for maintenance and camera replacement. This is especially important when dealing with outdoor installations, as you want to be able to quickly and conveniently address any power-related issues that may arise. Having proper access to the power supply option allows for efficient troubleshooting and ensures minimal downtime for your surveillance system.
Power over Ethernet (PoE) options also require consideration of accessibility. PoE switches or injectors should be located in an easily accessible area, preferably near your network equipment, to ensure hassle-free maintenance and power management. Furthermore, having spare PoE ports or additional PoE switches can provide scalability and flexibility in expanding your camera system as needed.
Battery-powered cameras require regular maintenance of their rechargeable batteries. Monitoring the battery levels and recharging or replacing them as necessary is essential to ensure uninterrupted camera operation. Consider the ease of accessing the camera’s battery compartment for maintenance purposes. Some cameras offer quick-release battery compartments or easily replaceable battery packs, simplifying the maintenance process.
When it comes to battery-powered cameras, it’s also important to consider the availability of spare batteries. Having additional batteries on hand allows for seamless battery replacement without interrupting camera coverage. It’s a good practice to establish a routine maintenance schedule to regularly check the battery levels and test the performance of the batteries to minimize the risk of unexpected power failures.
Lastly, consider using surge protectors or uninterruptible power supplies (UPS) to safeguard your cameras and other equipment from power surges, fluctuations, or outages. These devices can provide an additional layer of protection and ensure continuous operation during unforeseen power events.
By selecting a power supply option that is easy to maintain and provides convenient accessibility, you can ensure the longevity and reliability of your home security cameras. Regular maintenance and quick resolution of any power-related issues will help maintain optimal performance and provide peace of mind knowing that your surveillance system is functioning effectively.
How to Power a Security Camera: Step-by-Step Guide
Powering your security cameras correctly is crucial for effective surveillance and protection of your home. Here is a step-by-step guide to help you power your security cameras:
Step 1: Determine the Power Supply Option: Assess the distance from the power source, desired installation location, power requirements of the cameras, and maintenance accessibility to determine the most suitable power supply option for your needs (wired, PoE, or battery-powered).
Step 2: Prepare the Necessary Equipment: Depending on the chosen power supply option, gather the required equipment such as power adapters, power supply boxes, Ethernet cables, PoE switches or injectors, or rechargeable batteries.
Step 3: Plan the Camera Placement: Identify the optimal positions for your cameras to ensure maximum coverage and visibility of the desired areas. Consider factors such as blind spots, entry points, and vulnerable areas.
Step 4: Install Wired Cameras: For wired cameras, mount the cameras in the desired locations and carefully run the power cables from the cameras to the nearest electrical outlets or power supply boxes. Conceal the cables as much as possible to prevent tampering and protect them from the elements if installing outdoors.
Step 5: Set Up Power over Ethernet (PoE): If using PoE, connect the PoE switch to your network router and connect the cameras to the PoE switch using Ethernet cables. Ensure that the cameras are PoE compatible and that the PoE switch can provide sufficient power based on the camera’s power requirements.
Step 6: Install Battery-Powered Cameras: For battery-powered cameras, mount the cameras in the desired locations. Insert and secure the rechargeable batteries according to the manufacturer’s instructions. Make sure the batteries are fully charged before installation.
Step 7: Test the Power Connection: Connect the cameras to the power source or fully charged batteries. Ensure that the cameras are receiving power and functioning correctly. Check the live feed or recording to ensure proper operation.
Step 8: Regular Maintenance: Implement and maintain a regular maintenance routine to ensure continuous power supply. Check the power cables, connectors, and batteries periodically to identify any issues or deterioration. Replace or repair any faulty components to maintain the optimal performance of your security cameras.
Step 9: Monitor the Power Supply: Keep an eye on the power supply status of your cameras. Monitor the battery levels of battery-powered cameras and recharge or replace the batteries as needed. Monitor the functionality of wired or PoE connections and address any power-related issues promptly.
Following these steps will allow you to power your security cameras properly, ensuring they operate reliably and provide effective surveillance for your home. Regular maintenance and monitoring will help to prevent any power-related interruptions and keep your security system functioning at its best.
Wired Power Supply Installation
Installing a wired power supply for your security cameras requires careful planning and attention to detail to ensure a reliable and efficient power connection. Here is a step-by-step guide on how to install a wired power supply for your cameras:
Step 1: Gather the Necessary Tools and Equipment: Before starting the installation process, gather the required tools and equipment, including power adapters or power supply boxes, power cables, screws, and a drill if needed.
Step 2: Determine the Camera Placement: Decide on the optimal locations for your cameras, considering the areas you want to monitor and any potential obstacles or blind spots. Take note of nearby electrical outlets or suitable locations for power supply boxes.
Step 3: Mount the Cameras: Use the appropriate mounting brackets or hardware to securely mount the cameras in the desired locations. Ensure that the camera placement provides an optimal view of the area to be monitored.
Step 4: Run the Power Cables: Carefully plan the path for running the power cables from the cameras to the nearest electrical outlets or power supply boxes. Use appropriate cable clips or conduits to secure and protect the cables along the way. For outdoor installations, consider using weatherproof cables for added protection.
Step 5: Connect the Power Cables: Connect the power cables to the cameras’ power input ports. Ensure a secure and tight connection, as loose connections can lead to intermittent power supply or camera malfunctions.
Step 6: Secure the Cables: Use cable clips or adhesive tape to secure the power cables along their route. Make sure the cables are out of sight, well-protected, and not easily accessible to prevent tampering or damage.
Step 7: Connect to Power Source: Plug the power cables into the nearest electrical outlets or power supply boxes. Ensure that the power source is functioning correctly before proceeding.
Step 8: Test the Power Connection: Turn on the cameras and verify that they are receiving power and functioning correctly. Check the live feed or recording to ensure proper operation. If any issues arise, double-check the power connections and troubleshoot as needed.
Step 9: Conceal and Secure the Cables: Conceal the power cables as much as possible using cable covers or by running them through walls or ceilings. Ensure that the cables are not exposed or vulnerable to damage. Use screws or cable clips to secure the cables in place.
Step 10: Regular Maintenance: Implement a regular maintenance routine to check the power cables, connectors, and outlet/power supply box, ensuring they are clean and free from any debris or deterioration. Replace any damaged or faulty components promptly to maintain a consistent power supply.
Following these steps will help you effectively install a wired power supply for your security cameras, ensuring a reliable source of power for continuous operation. Proper cable management and regular maintenance will contribute to the longevity and optimal performance of your security system.
Power over Ethernet (PoE) Setup
Setting up Power over Ethernet (PoE) for your security cameras provides a convenient and streamlined power and data solution. Here is a step-by-step guide on how to set up PoE for your cameras:
Step 1: Check PoE Compatibility: Ensure that your security cameras are PoE compatible. Not all cameras support PoE, so check the specifications or consult the manufacturer’s documentation to verify compatibility.
Step 2: Gather the Required Equipment: To set up PoE, gather the necessary equipment, including a PoE switch, Ethernet cables, and PoE injectors if needed.
Step 3: Connect the PoE Switch: Connect the PoE switch to your network router using an Ethernet cable. Ensure that both the router and the switch are powered off before making any connections.
Step 4: Connect the Cameras to the PoE Switch: Use Ethernet cables to connect the PoE-enabled cameras to the PoE switch. The specific ports on the switch marked as PoE should be used for the camera connections.
Step 5: Power On the PoE Switch: Power on the PoE switch by connecting it to a power outlet. Ensure that the power supply to the switch is stable and properly grounded.
Step 6: Verify PoE Power Delivery: Check the PoE capabilities of the switch and the power requirements of the connected cameras to ensure that the switch can supply sufficient power to each camera. It’s important to note that different PoE switches have different power budgets, so be mindful of the available power and the power requirements of your cameras.
Step 7: Test the Power Connection: Turn on the cameras and verify that they are receiving power through the PoE connection. The cameras should power on and start transmitting data. Check the live feed or recording to ensure proper camera operation.
Step 8: Regular Monitoring and Maintenance: Regularly monitor the status of the PoE switch and cameras to ensure consistent power delivery. If any power-related issues arise, troubleshoot the connections and check for any loose or faulty cables or connectors.
Step 9: Expansion and Scalability: If you plan to expand your camera system in the future, ensure that the PoE switch has available ports for additional cameras. You can add more PoE switches or injectors if necessary to accommodate the increased number of cameras.
Step 10: Security Considerations: When setting up PoE, ensure that the PoE switch and the cameras are protected from unauthorized access and tampering. Configure the network settings and access control to secure your surveillance system.
Following these steps will enable you to effectively set up Power over Ethernet (PoE) for your security cameras. The PoE setup provides a simplified and efficient power and data solution, reducing cable clutter and simplifying installation and maintenance processes for your surveillance system.
Battery-Powered Camera Configuration
Configuring battery-powered cameras for your home security system is a straightforward process that ensures optimal performance and longevity of your cameras. Here is a step-by-step guide to help you configure your battery-powered cameras:
Step 1: Determine Camera Placement: Decide on the best locations to install your battery-powered cameras, considering the areas you want to monitor and any potential blind spots or vulnerable areas. Take note of the camera’s field of view to ensure maximum coverage.
Step 2: Install the Cameras: Mount the cameras in the desired locations using the appropriate mounting brackets or hardware. Ensure they are securely attached and positioned correctly for optimal monitoring angles.
Step 3: Insert Batteries: Open the battery compartment on each camera and insert the rechargeable batteries according to the manufacturer’s instructions. Make sure to orient the batteries correctly and securely close the battery compartment.
Step 4: Power On the Cameras: Turn on the battery-powered cameras using the power buttons or switches provided. Some cameras may automatically power on when the batteries are inserted. Allow the cameras to initialize and start up.
Step 5: Configure Camera Settings: Access the camera’s settings through its dedicated mobile app or web interface. Follow the manufacturer’s instructions to connect the cameras to your Wi-Fi network and configure any desired settings, such as motion detection sensitivity, video resolution, recording modes, or notification preferences.
Step 6: Test Camera Functionality: Once the cameras are successfully connected to your network and the settings are configured, verify their functionality by accessing the live feed or recording a test video. Use the mobile app or web interface to monitor the camera’s view and ensure that the footage is clear and satisfactory.
Step 7: Set Up Remote Viewing: If desired, enable remote viewing capabilities on your mobile devices or computers. Follow the manufacturer’s instructions to install the required apps or software and create an account to access your cameras remotely. This allows you to monitor your home from anywhere with an internet connection.
Step 8: Regular Battery Maintenance: Implement a periodic battery maintenance routine to ensure continuous camera operation. Monitor the battery levels using the camera’s app or interface. Recharge or replace the batteries as needed to avoid any interruptions in camera functionality.
Step 9: Optimize Camera Positioning: Assess the camera’s performance periodically and make any necessary adjustments to optimize its positioning. Consider factors such as lighting conditions, potential obstructions, or changes in the monitored area to ensure the best video capture and surveillance coverage.
Step 10: Regular Firmware Updates: Keep your battery-powered cameras up to date by checking for firmware updates from the manufacturer. Regularly install the latest updates to benefit from improved features, bug fixes, and security enhancements.
By following these steps, you can effectively configure your battery-powered cameras for your home security system. Regular maintenance, monitoring, and firmware updates will ensure that your cameras continue to operate reliably and provide the peace of mind of a well-functioning surveillance system.
Troubleshooting Common Power Issues
Power-related issues can occasionally occur with home security cameras. Here are some common power issues you may encounter and troubleshooting steps to help resolve them:
Issue 1: Camera Not Powering On: If your camera is not powering on, start by checking the power source. Verify that the power cable is securely connected to the camera and that the power source is functioning correctly. Also, check the power adapter or power supply box for any signs of damage or defects. If the camera is battery-powered, ensure that the batteries are fully charged and correctly inserted.
Troubleshooting Steps:
- Verify the outlet or power supply box is functioning by plugging in another device.
- Inspect the power cable for any signs of damage, such as fraying or exposed wires. If damaged, replace the cable with a new one.
- For battery-powered cameras, check the battery contacts for any dirt or corrosion. Clean the contacts if necessary and ensure proper battery installation.
- If the camera is receiving power but still not turning on, perform a hard reset according to the manufacturer’s instructions. This may involve pressing and holding a reset button on the camera for a specific duration.
- If the issue persists, contact the manufacturer’s customer support for further assistance or consider professional help.
Issue 2: Intermittent Power Supply: If your camera experiences frequent power disruptions or intermittent power supply, there may be an issue with the power cable or connection. It’s important to identify and address the root cause to ensure uninterrupted camera operation.
Troubleshooting Steps:
- Examine the power cable for any loose connections or damage. Ensure that the cable is securely plugged into both the camera and the power source. Consider replacing the power cable if it is damaged or not making a firm connection.
- If using Power over Ethernet (PoE), check the Ethernet cable connections between the camera and the PoE switch or injector. Make sure they are properly inserted and securely connected.
- If using a wired power supply, inspect the power supply box or power adapter for any loose connections, signs of damage, or overheating. Replace the power supply box or adapter if necessary.
- Verify the power source itself by plugging a different device into the outlet or power supply box to ensure it is delivering a consistent power supply.
- Consider using surge protectors or uninterruptible power supplies (UPS) to protect against power surges or fluctuations that may be causing intermittent power issues.
Issue 3: Short Battery Life: Battery-powered cameras may experience shorter-than-expected battery life, which can result in frequent recharging or replacement. This issue can be caused by various factors, including camera settings or inefficient battery usage.
Troubleshooting Steps:
- Review the camera’s power settings and adjust them to optimize battery life. For example, reducing the motion detection sensitivity or adjusting the recording duration can help conserve battery power.
- Ensure that the camera is not continuously recording or transmitting data when not in use. Some cameras have sleep or power-saving modes that can be enabled to conserve battery life during idle periods.
- Consider investing in higher-capacity rechargeable batteries or purchasing spare batteries to ensure uninterrupted operation.
- Monitor the battery levels regularly through the camera’s app or interface. Recharge or replace the batteries as needed to avoid unexpected power failures.
- If the battery life continues to be significantly shorter than expected, contact the camera manufacturer’s customer support for further assistance or consider professional help.
By following these troubleshooting steps, you can address common power issues associated with home security cameras. It’s essential to identify and resolve any power-related problems promptly to ensure the optimal functionality and reliability of your surveillance system.
Conclusion
Powering your home security cameras effectively is essential for maintaining a reliable and uninterrupted surveillance system. By considering factors such as the distance from the power source, desired installation location, power requirements of the cameras, and maintenance accessibility, you can choose the right power supply option that best fits your needs.
Wired power supply offers a reliable and direct connection to an electrical outlet, making it suitable for locations near power sources. Power over Ethernet (PoE) provides the flexibility to install cameras further away from power outlets, using a single Ethernet cable for both power and data transmission. Battery-powered cameras offer the ultimate flexibility in placement with no reliance on direct power sources, making them ideal for locations without convenient access to outlets.
Once you’ve chosen the appropriate power supply option, following step-by-step installation guides will ensure a seamless setup process. Regular maintenance, monitoring, and troubleshooting of power-related issues will help maintain optimal camera performance and minimize any disruptions in surveillance coverage.
Remember to periodically check power connections and cables, assess battery levels for battery-powered cameras, and update firmware when necessary. Troubleshooting common power issues, such as cameras not powering on or intermittent power supply, can help identify and resolve problems swiftly.
By diligently addressing power-related considerations and following proper installation and maintenance procedures, you can ensure a reliable and effective power supply for your home security cameras. This will provide you with peace of mind, knowing that your property and loved ones are protected by a robust and well-powered surveillance system.
Frequently Asked Questions about How To Power A Security Camera
Was this page helpful?
At Storables.com, we guarantee accurate and reliable information. Our content, validated by Expert Board Contributors, is crafted following stringent Editorial Policies. We're committed to providing you with well-researched, expert-backed insights for all your informational needs.