Home>Ideas and Tips>Building An Outdoor Reading Pavilion A DIY Guide

Ideas and Tips
Building An Outdoor Reading Pavilion A DIY Guide
Published: September 22, 2024
Create a cozy outdoor reading nook with our DIY guide. Learn step-by-step instructions to build a beautiful, functional pavilion in your backyard.
(Many of the links in this article redirect to a specific reviewed product. Your purchase of these products through affiliate links helps to generate commission for Storables.com, at no extra cost. Learn more)
Creating an outdoor reading pavilion is an excellent way to enhance your backyard and provide a cozy, inviting space for relaxation and reading. Whether you're looking to build a simple structure or a more elaborate design, this DIY guide will walk you through the process step by step. With the right materials and some basic construction skills, you can create a beautiful outdoor pavilion that becomes your favorite spot to unwind.
Why Build an Outdoor Reading Pavilion?
Building an outdoor reading pavilion is a fantastic idea for several reasons. First off, it enhances your outdoor living space. Adding a pavilion gives you more room to enjoy the outdoors, making it easier to spend time outside year-round. Imagine having a cozy nook where you can read, relax, or even entertain guests. It’s like adding an extra room to your house, but outside!
Another reason is the cozy reading nook it provides. A pavilion offers a sheltered area where you can curl up with a good book, away from the elements. Rain or shine, you’ll have a perfect spot to escape into your favorite stories. Plus, it’s a great place to unwind after a long day.
The versatility of an outdoor pavilion is another big plus. Beyond reading, you can use it for dining, entertaining, or just enjoying the fresh air. Think about hosting a small dinner party or having a quiet place to meditate. The possibilities are endless.
Lastly, a well-designed pavilion can enhance the aesthetic appeal of your backyard. It adds a touch of elegance and sophistication, making your outdoor space more inviting. Whether you go for a rustic look or a modern design, a pavilion can be a beautiful addition to your home.
Read more: DIY Guide To Building A Backyard Pergola
Planning Your Outdoor Reading Pavilion
Before you start building, planning your project carefully is essential. Here are some steps to help you get started:
-
Determine the Size: Decide on the size of your pavilion based on the space available in your backyard and how you plan to use it. A smaller structure might be perfect for a cozy reading nook, while a larger one could accommodate more activities.
-
Choose the Location: Select a spot that receives partial shade, especially if you live in an area with intense sunlight. Ensure the area is level and clear of any obstacles.
-
Consider the Design: Think about the style and design of your pavilion. You can opt for a simple, rustic design or something more modern and sleek. Consider adding features like windows, doors, or even a kitchenette if you plan to use it for dining or entertaining.
-
Check Local Regulations: Make sure to check with your local government for any building codes or regulations that may apply to your project.
Materials Needed
To build an outdoor reading pavilion, you'll need a variety of materials. Here’s a list of what you'll typically require:
-
Lumber:
- 4×4 posts (for the base)
- 2×6 beams (for the roof supports)
- 2×4 rafters (for the roof)
- 3/4-inch plywood or oriented strand board (OSB) for the roof
- 1×4 trim boards (for finishing)
- 1×2 boards (for additional support)
-
Roofing Materials:
- Tar paper
- Asphalt shingles
-
Fasteners & Hardware:
- Galvanized screws
- Nails
- Metal connectors
-
Tools:
- Hammer
- Tape measure
- Framing square
- Level
- Miter saw
- Drill machinery
- Screwdriver
- Sander
-
Finishing Touches:
- Paint or stain
- Wood putty
- Filler
Step-by-Step Instructions
Now that we have our materials and plan in place, let’s move on to the construction process.
Step 1: Layout the Posts
The first step in building your outdoor reading pavilion is to layout the posts. Use batter boards and string to mark out where the posts will go. Measure the diagonals of the square you've created and adjust them until they are perfectly equal. This ensures that your structure is square and symmetrical.
Top Tip: If you live in an area with heavy winters, consider increasing the slope of the roof to ensure water runs off more easily.
Read more: DIY Guide To Building A Backyard Fire Pit
Step 2: Cut and Assemble the Frame
Once you've marked out where your posts will go, cut them to size using a miter saw or circular saw. Assemble the frame by inserting galvanized screws into pre-drilled holes. Use a spirit level to ensure everything is plumb and aligned properly.
Here’s what you need for this step:
- 6 pieces of 4×4 lumber – 120 inches long (posts)
- 4 pieces of 2×6 lumber – 168 inches long (beams)
- 8 pieces of 4×4 lumber – 34 inches long (braces)
- 8 pieces of 2×6 lumber – 147 inches long (rafters)
Step 3: Add Roof Supports
Next, add the roof supports by placing the 2×6 beams across the top of your frame. These beams will provide additional support for your roof.
Here’s what you need for this step:
- 4 pieces of 2×6 lumber – 168 inches long (beams)
Step 4: Install Rafters
Install the rafters by placing them between the roof supports. Make sure they are evenly spaced and securely attached with galvanized screws.
Here’s what you need for this step:
- 16 pieces of 2×4 lumber – 96 inches long (rafters)
- 1 piece of 2×6 lumber – 168 inches long (top ridge)
Step 5: Add Roofing Materials
Cover your rafters with tar paper to protect them from moisture, then install asphalt shingles according to manufacturer instructions.
Here’s what you need for this step:
- 250 sq ft of tar paper
- 250 sq ft of asphalt shingles
Read more: DIY Guide To Building Custom Shelving Units
Step 6: Add Trims
Finally, add trims around the edges of your pavilion using 1×4 boards. This will give it a finished look and protect it from weathering.
Here’s what you need for this step:
- 2 pieces of 1×4 lumber – 168 inches long
- 4 pieces of 2×4 lumber – 37 inches long
Finishing Touches
After completing the structural part of your pavilion, it's time to add some finishing touches:
- Fill Holes: Fill any holes or gaps with wood putty and smooth out the surface with sandpaper.
- Paint or Stain: Cover your components with paint or stain to protect them from decay and enhance their appearance.
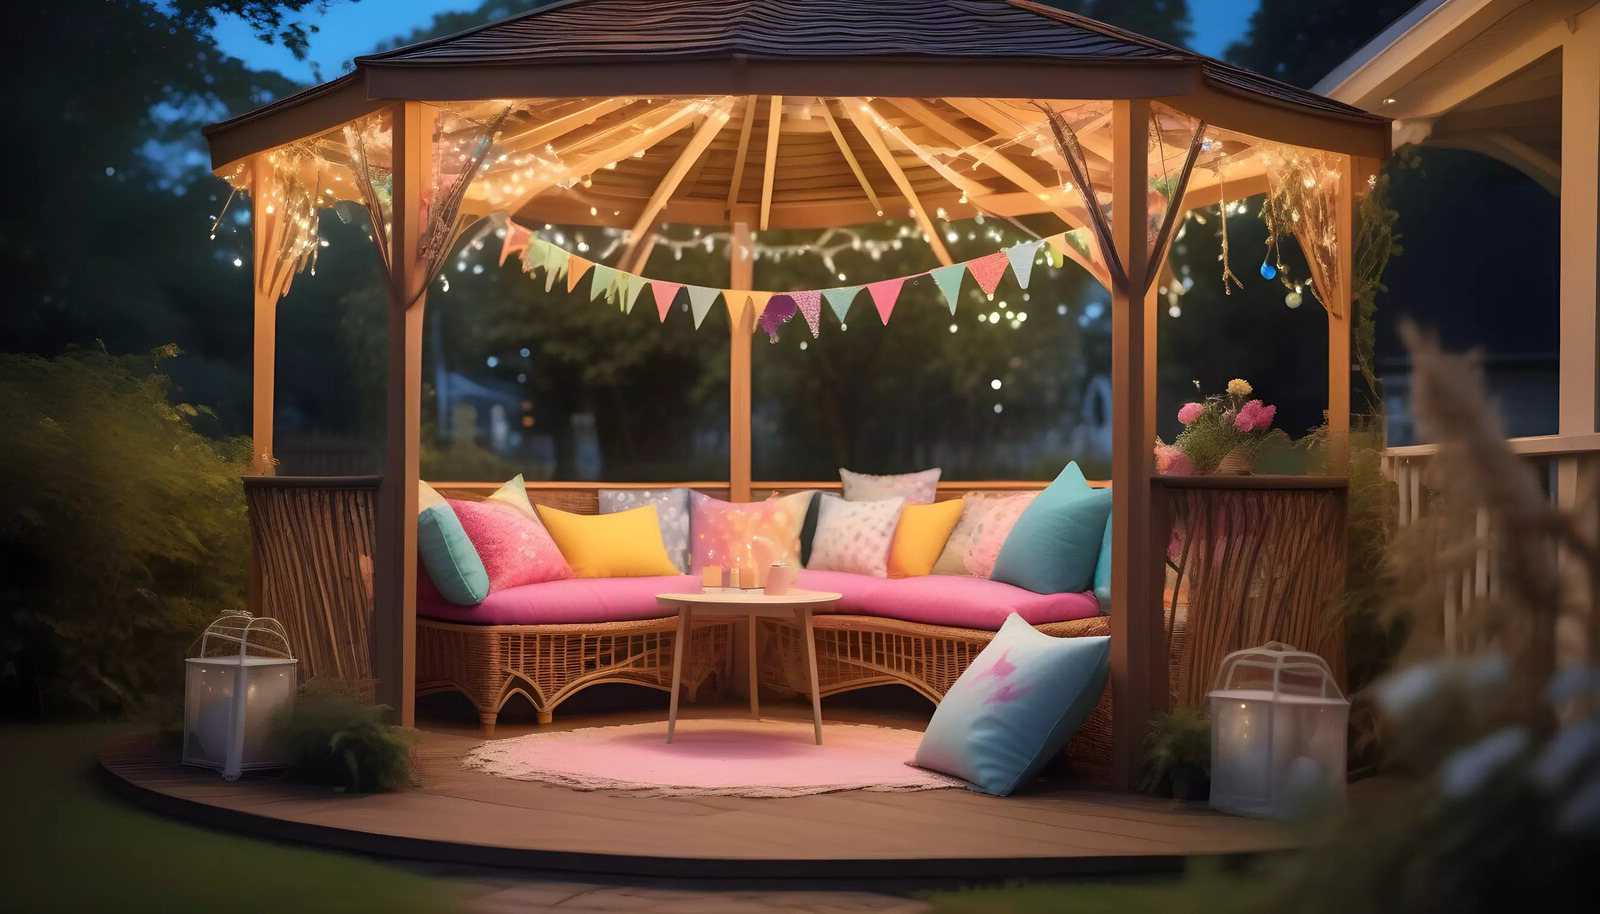
- Install Lighting: Consider adding outdoor lighting such as string lights or lanterns to create a cozy atmosphere.
- Add Decorations: Use outdoor curtains or build privacy walls on one or two sides of the pavilion if needed.
Additional Ideas for Your Outdoor Reading Pavilion
While building an outdoor reading pavilion is primarily about creating a cozy space for relaxation, there are many ways you can enhance its functionality and aesthetic appeal:
- Add Furniture: Incorporate comfortable seating like couches or chairs along with coffee tables or side tables.
- Plant Creeping Vines: Add extra shade and greenery by planting creeping vines around your pavilion.
- Use Soft String Lighting: Create a soothing atmosphere by using soft string lighting or lanterns.
- Create a Mini Library: Add baskets filled with books so they are always within reach.
- Build a Privacy Screen: Use lattice panels or solid wood fencing to create privacy screens around your pavilion.
DIY Tips and Tricks
If you're looking to save money on construction costs while still having control over the look and design of your pavilion, consider taking the DIY route:
- Use Blueprints and Prefab Kits: There are numerous blueprints and prefab kits available online that can guide you through the construction process.
- Choose Weather-Resistant Materials: Invest in weather-resistant materials like cedar or other durable woods that will pay off in the long run.
- Be Patient: Building an outdoor pavilion requires patience; don’t rush through any part of the process.
Read more: How To Build A Cozy Outdoor Reading Space
Conclusion
Building an outdoor reading pavilion is a rewarding DIY project that can transform your backyard into a cozy retreat. By following these steps and tips, you'll be able to create a beautiful structure that enhances both form and function in your outdoor living space. Whether you're looking to relax with a good book or entertain guests, an outdoor pavilion offers endless possibilities for enjoyment and relaxation.
Remember always to check local regulations before starting any construction project, ensure safety during building by using proper tools and techniques, and enjoy every moment of creating something special for yourself and loved ones
Was this page helpful?
At Storables.com, we guarantee accurate and reliable information. Our content, validated by Expert Board Contributors, is crafted following stringent Editorial Policies. We're committed to providing you with well-researched, expert-backed insights for all your informational needs.






0 thoughts on “Building An Outdoor Reading Pavilion A DIY Guide”