Home>Ideas and Tips>DIY Guide To Installing A Pallet Wall
Ideas and Tips
DIY Guide To Installing A Pallet Wall
Modified: September 2, 2024
Transform your space with a rustic pallet wall! Follow our DIY guide for step-by-step instructions, tools, and tips to create a stunning feature wall.
(Many of the links in this article redirect to a specific reviewed product. Your purchase of these products through affiliate links helps to generate commission for Storables.com, at no extra cost. Learn more)
Introduction
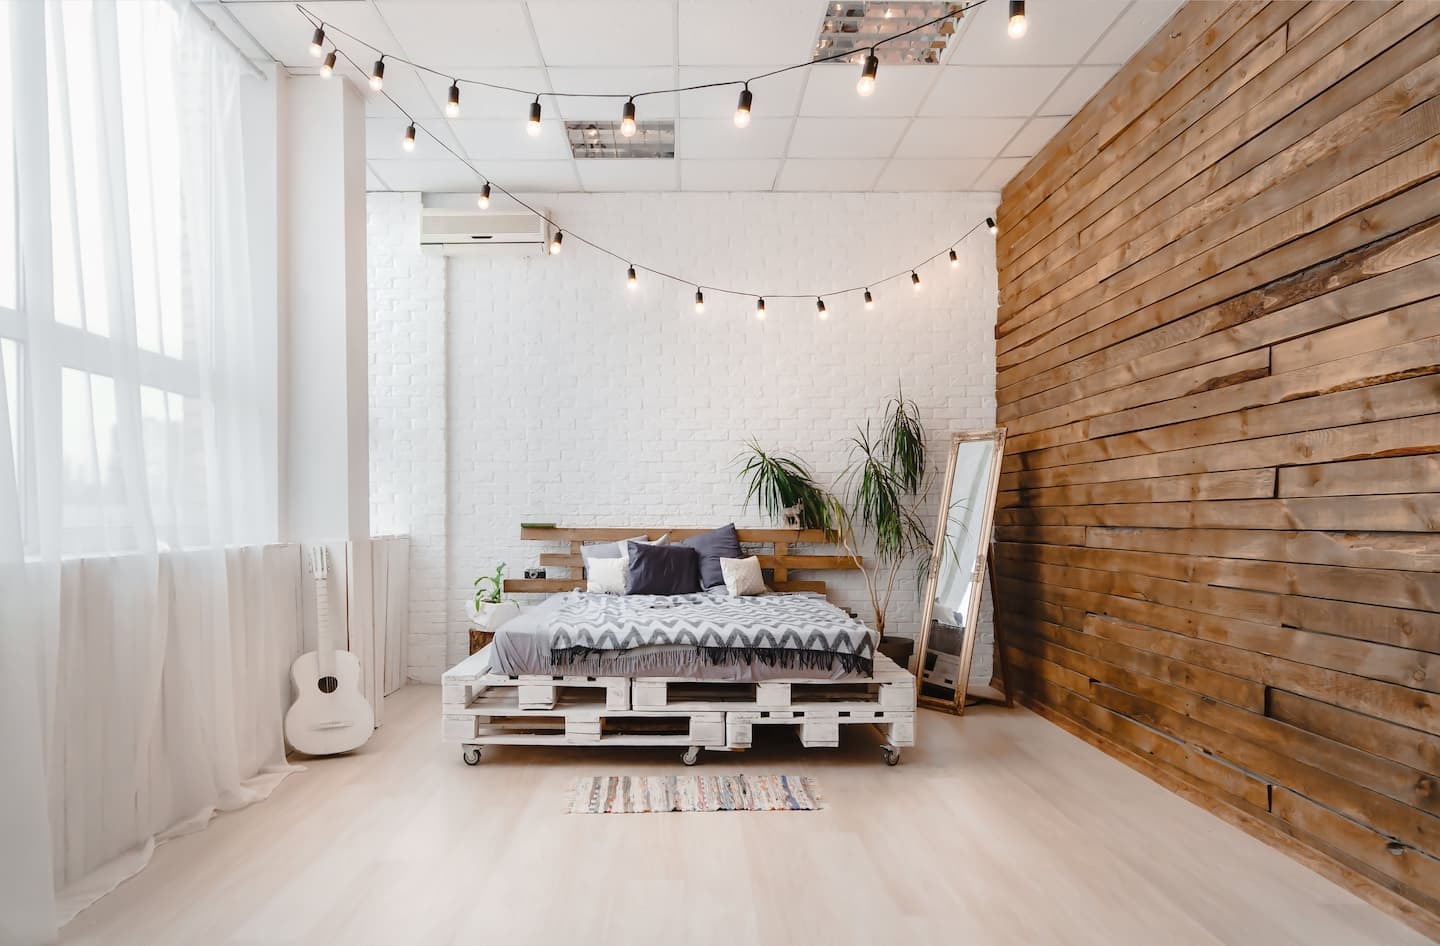
Installing a pallet wall is a fantastic way to add a rustic, unique touch to any room in your home. Pallet walls have become increasingly popular due to their affordability and the creative possibilities they offer. In this comprehensive guide, we will walk you through the steps required to build and install a pallet wall, highlighting the tools, materials, and techniques needed for a successful project.
Why Choose a Pallet Wall?
Pallet walls are not just aesthetically pleasing; they also offer a sustainable and eco-friendly way to reuse materials that would otherwise end up in landfills. The process involves deconstructing pallets, preparing the wall, and then installing the pallet slats. This guide will cover all aspects of the project, from finding pallets to finishing touches.
Why Choose a Pallet Wall?
- Cost-Effective: Pallets are often free or very inexpensive, making this project budget-friendly.
- Sustainable: Reusing pallets reduces waste and supports eco-friendly practices.
- Aesthetic Appeal: Pallet walls add a unique, rustic charm to any room.
- Versatile: You can stain or paint the pallets to match any color scheme or design style.
Gathering Materials and Tools
Before you start, it's essential to gather all the necessary materials and tools. Here’s a list of what you’ll need:
Materials:
- Pallets: You'll need a significant number of pallets, depending on the size of your wall. Typically, 15-30 pallets are required for an 8×10 foot wall.
- Plywood (Optional): If you're installing directly over drywall, it's recommended to use plywood as a backing material to ensure stability and hide any gaps.
- Paint or Stain: To match your desired color scheme, choose either paint or stain.
- Painter’s Tape: For painting and staining.
- Bleach: For cleaning pallets.
- Dishwashing Detergent: For cleaning pallets.
- Sandpaper: To smooth out the pallet slats.
- Nails: Brad nails or pin nails work best for securing pallet slats to plywood or studs.
- Plywood Screws: If you're using plywood as a backing material, these screws will be necessary.
Tools:
- Measuring Tape: For measuring and marking studs.
- Heavy-Duty Work Gloves: To protect your hands while handling pallets and tools.
- Circular Saw (Optional): Useful for cutting pallet slats if you need custom sizes.
- Paint Roller Brush: For applying paint or stain evenly.
- Paint Tray: For holding paint or stain.
- Hammer: For tapping nails into place.
- Pry Bar: For disassembling pallets.
- Pressure Washer or Garden Hose: For cleaning pallets thoroughly.
- Spray Bottle: For applying bleach solution to clean pallets.
- Sponge: For scrubbing off dirt and grime from pallets.
- Safety Goggles: To protect your eyes from debris and chemicals.
Read more: DIY Guide To Installing Wainscoting
Step 1: Finding Pallets
The first step in building a pallet wall is finding suitable pallets. Here are some tips on where to find them:
- Local Businesses: Many businesses such as grocery stores, warehouses, and construction sites often have pallets they are willing to give away for free or at a low cost.
- Online Classifieds: Websites like Craigslist or Facebook Marketplace often have people giving away pallets.
- Garage Sales and Flea Markets: You might find pallets at garage sales or flea markets.
- Friends and Family: Ask friends and family members if they have any pallets they no longer need.
Ensuring Pallet Safety
When collecting pallets, it's crucial to ensure they are safe to use:
- Check for Pests: Inspect the pallets for any signs of pests like termites or rodents.
- Cleanliness: Make sure the pallets are clean and free of dirt, grime, and chemicals.
Step 2: Deconstructing Pallets
Once you have collected your pallets, it's time to deconstruct them:
- Disassemble Pallets: Use a pry bar to disassemble each pallet into individual slats.
- Remove Nails: Carefully remove nails from each slat using pliers or a hammer.
- Cut Slats (Optional): If needed, use a circular saw to cut the slats into uniform lengths.
Tips for Deconstruction:
- Use Impact Absorbing Gloves: Protect your hands from splinters and sharp edges.
- Cut Between Nails: Use a reciprocating saw with a metal blade to cut between nails instead of using a crowbar which can crack and splinter boards.
- Be Patient: Deconstructing pallets can be time-consuming due to the number of nails holding them together.
Read more: DIY Guide To Installing Floating Shelves
Step 3: Preparing the Wall
Before installing your pallet slats, it's essential to prepare the wall:
- Clear the Area: Remove any furniture or obstructions from the area where you'll be working.
- Mark Studs: Use a stud finder to locate studs in your wall and mark them with a pencil.
- Sanding and Cleaning: Sand down any rough spots on the wall where you'll be attaching plywood or pallet slats.
- Pull Off Vents: Remove any vents or switch plates that might interfere with your installation process.
Importance of Backer Board:
Using plywood as a backer board is highly recommended because it provides stability and hides gaps between pallet slats:
- Paint Backer Board Dark: Paint the backer board with dark primer paint to conceal any gaps between pallet slats.
Step 4: Installing Plywood (Optional)
If you're using plywood as a backer board:
- Attach Plywood: Use brad nails or screws to attach plywood directly into studs.
- Ensure Level Baseboards: Make sure baseboards are level before proceeding with installation.
Step 5: Laying Out Pallet Slats
Now it's time to lay out your pallet slats:
- Start at Center: Place the first pallet slat at the top center of your wall.
- Stagger Pieces: Work from center outwards, staggering each piece of wood for a more natural look.
- Secure Slats: Use two to three screws per end of each slat into studs or plywood.
Read more: DIY Guide To Installing A Stair Runner
Tips for Laying Out Slats:
- Don’t Plan Too Much: Unlike some DIYers who meticulously plan every board placement, you can achieve great results without extensive planning.
- Stain Seams: If necessary, stain plywood behind seams before securing wood slats over them to disguise gaps.
Step 6: Finishing Touches
Once all slats are installed:
- Apply Finish: Use paint or stain according to your desired color scheme.
- Allow Drying Time: Let finish dry completely before applying additional coats if needed.
- Add End Caps: Use end caps around vents and switch plates for a clean finish.
Common Issues & Solutions:
- Gaps Between Slats: Use dark paint on backer board to hide gaps between slats.
- Uneven Boards: Stain plywood behind seams before securing wood slats over them.
Conclusion
Building a pallet wall is an achievable DIY project that requires patience but yields impressive results. By following these steps—finding pallets, deconstructing them, preparing the wall, installing plywood (if needed), laying out pallet slats, and applying finishes—you can create a unique feature wall in your home that adds both aesthetic appeal and sustainability.
Remember always prioritize safety during this process by wearing protective gear like gloves and safety goggles. With these guidelines, you'll be well on your way to transforming any room into a charming space filled with rustic charm courtesy of reclaimed pallets!
Read more: DIY Guide To Installing A Kitchen Island
Additional Resources:
For more detailed instructions or inspiration check out these resources:
- Project Nursery Guide: Provides detailed steps including tips on how to stain plywood behind seams.
- Instructables Guide: Offers step-by-step instructions along with tools needed for building a pallet wall.
- Lazy Guy DIY Guide: Shares personal experiences including tips on using dark paint on backer boards.
By following this comprehensive guide, you'll be able to create a beautiful pallet wall that enhances both functionality and style in any room
Was this page helpful?
At Storables.com, we guarantee accurate and reliable information. Our content, validated by Expert Board Contributors, is crafted following stringent Editorial Policies. We're committed to providing you with well-researched, expert-backed insights for all your informational needs.


0 thoughts on “DIY Guide To Installing A Pallet Wall”