Home>Ideas and Tips>DIY Guide To Installing A Pebble Tile Floor

Ideas and Tips
DIY Guide To Installing A Pebble Tile Floor
Published: September 19, 2024
Learn how to install a pebble tile floor with our comprehensive DIY guide. Follow our step-by-step instructions for a professional-looking finish.
(Many of the links in this article redirect to a specific reviewed product. Your purchase of these products through affiliate links helps to generate commission for Storables.com, at no extra cost. Learn more)
Installing a pebble tile floor can be a rewarding DIY project that adds a natural, elegant touch to any room. However, it requires careful planning and execution to ensure a professional-looking finish. In this guide, we will walk you through the steps involved in installing a pebble tile floor, including preparation, installation, grouting, and sealing.
Preparation
Before you start your project, it's essential to prepare the area where you will be working. Here are some key steps to take:
1. Inspect the Substrate
Ensure that the substrate (the surface on which you will be installing the tiles) is firmly fixed, flat, clean, dry, and free of contaminants. For wet areas like bathrooms or kitchens, it's crucial to use appropriate substrates such as concrete, compressed sheet, gib aqualine, or H3 treated plywood. Additionally, reinforced waterproof membranes should be used in these areas to prevent water from leaking through to the sub-floor framing and/or habitable spaces below.
2. Check for Deflection
The substrate should have minimal deflection. For walls or floors, deflection should not exceed 1/360th of the span. This ensures that the tiles are evenly distributed and do not crack under pressure.
3. Clean and Prepare the Area
Thoroughly clean the area where you will be working. Remove any old adhesive, grout, or debris from previous installations. If necessary, apply a bonding agent to the substrate to ensure better adhesion between the substrate and the adhesive.
Choosing Your Pebble Tiles
Pebble tiles come in various forms, including mesh-backed pebbles and individual pebbles. Here’s how to choose the right type for your project:
Read more: DIY Guide To Installing A Tile Floor
1. Mesh-Backed Pebbles
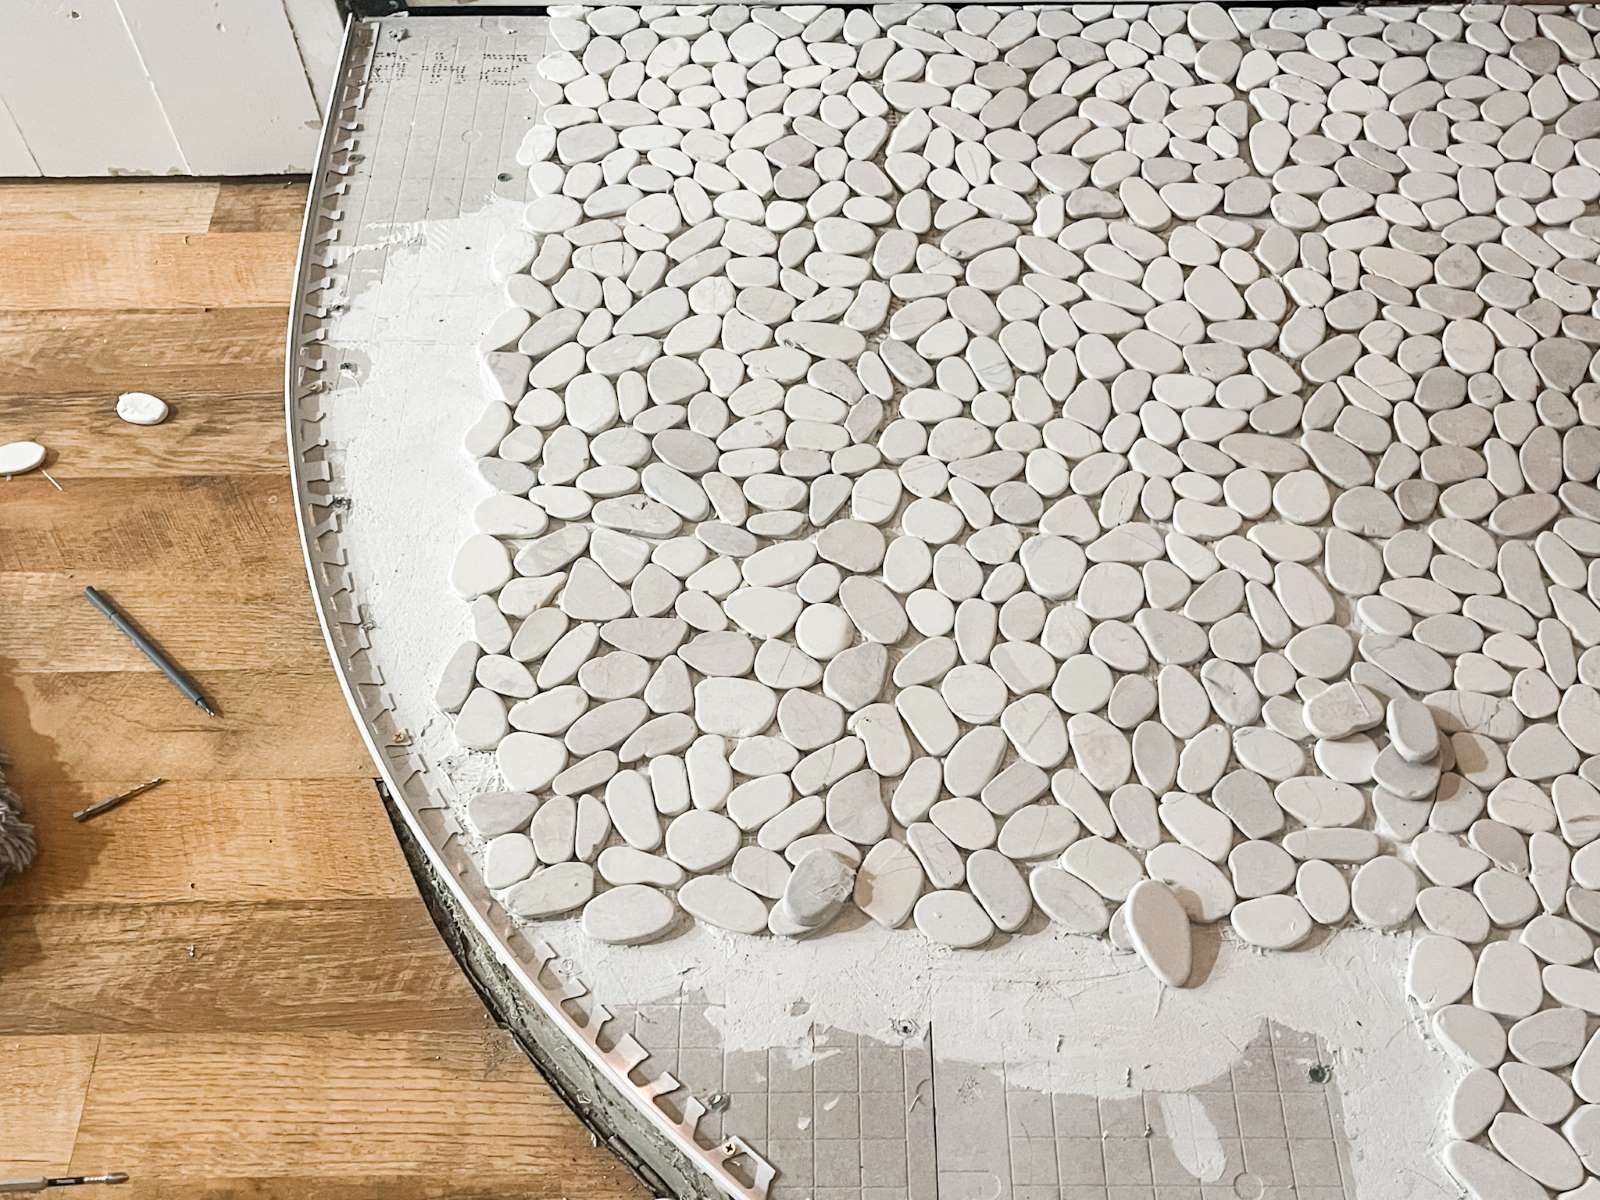
Mesh-backed pebbles are popular for their ease of installation and minimal grout lines. These tiles are designed to achieve a no-joint look by interlocking the pebbles together. However, it's important to inspect each piece of natural stone before installation to ensure that no blending is required. No claims will be accepted by the manufacturer after installation, so it’s crucial to use the product correctly.
2. Individual Pebbles
Individual pebbles offer more flexibility in terms of design but can be more time-consuming to install. They require spacing to ensure that the seams disappear, which can be achieved by keeping them spaced from other tiles about 2-4 inches apart.
Tools and Materials Needed
To complete your pebble tile installation, you will need the following tools and materials:
Tools:
- Notched Trowel: A 1/4" notched trowel is commonly used for applying adhesive to the substrate.
- Grout Float: A grout float is essential for spreading and smoothing out the grout.
- Grout Sponge: A grout sponge is used to clean excess grout from the surface of the tiles.
- Tile Saw: A tile saw may be necessary if you need to cut individual pebbles.
- Safety Gear: Always wear protective gear such as gloves, safety glasses, and a dust mask when working with power tools.
Materials:
- Pebble Tiles: Choose your desired type of pebble tiles (mesh-backed or individual).
- Adhesive: Cement-based adhesives (thin-set) are generally suitable for masonry substrates where no movement is anticipated. Modified cement adhesives should be used where slight movement could occur through thermal or pedestrian loads.
- Grout: Standard cement grout or high-performance cement grout like Prism, Permacolor, or Ultracolor are recommended for pebble tile flooring. Epoxy grouts such as Spectralock Pro Premium or Ardex WA can also be used but ensure compatibility with your specific tile type.
- Sealer: A quality impregnator sealer is recommended to protect the stone tiles from stains and water damage. A water-repelling sealer is particularly useful in wet areas like bathrooms.
Installation
1. Laying the Tiles
Begin by laying out your tiles to ensure they fit properly. For mesh-backed pebbles, it's recommended to butt tiles together without leaving traditional grout gaps. This will help achieve a seamless look. Before grouting, inspect each tile to ensure it is properly installed and remove any pebbles that may have been placed incorrectly.
2. Applying Adhesive
Mix your adhesive according to the manufacturer's instructions and apply it to the substrate using a 1/4" notched trowel. Spread the adhesive evenly but avoid applying too much, which can cause it to squeeze up through the grout joints.
3. Laying Individual Pebbles
If using individual pebbles, space them appropriately to ensure that the seams disappear. This can be achieved by keeping them spaced from other tiles about 2-4 inches apart. Use a tile saw to cut any pebbles that need to be trimmed to fit around edges or corners.
Grouting
Grouting is a critical step in the installation process as it fills in the gaps between the tiles and provides additional protection against water and stains.
1. Choosing the Right Grout
For pebble tile flooring, it's essential to use grout that is suitable for joints up to 1/2" wide. Water-mix grouts are generally used but may require a latex additive for flexibility in certain applications.
2. Applying Grout
Mix your grout according to the manufacturer's instructions and apply it using a grout float. Spread the grout evenly over the tiles, making sure to fill all gaps completely. Use a grout sponge to clean excess grout from the surface of the tiles.
Read more: DIY Guide To Installing A Subway Tile Shower
3. Allowing Grout to Set
Let the grout set for the recommended amount of time before cleaning it off with a damp sponge. Avoid walking on the pebble tiles until they are fully grouted to prevent damage.
Sealing
Sealing your pebble tile floor is crucial for maintaining its appearance and longevity.
1. Choosing a Sealer
Use a quality impregnator sealer that is suitable for natural stone. For wet areas like bathrooms, a water-repelling sealer is recommended to ensure longevity.
2. Applying Sealer
Apply the sealer according to the manufacturer's instructions. Make sure to follow all safety precautions when working with sealers, including wearing protective gear and ensuring good ventilation.
Additional Tips
Here are some additional tips to help you achieve a professional-looking finish:
1. Dry Fitting Sheets
Before installing mesh-backed pebbles, dry fit them over the substrate to ensure they fit properly and there are no gaps visible through the mesh.
2. Using White Thin-Set Mortar
Use white thin-set mortar to prevent stone discoloration during installation.
3. Cutting Pebbles
Cutting pebbles can be challenging but is often unnecessary if you choose the right size and combination of pebbles for your project. A 1/4×1/4 inch square notch trowel works well for most installations.
Read more: DIY Guide To Installing A Kitchen Tile Backsplash With Photocatalytic Self-Cleaning Tiles
Conclusion
Installing a pebble tile floor is a rewarding DIY project that requires careful planning and execution. By following these steps and tips, you can achieve a beautiful, professional-looking finish that enhances the aesthetic appeal of any room. Remember to inspect your substrate thoroughly, choose the right type of pebble tiles and adhesive, apply grout correctly, and seal your tiles to maintain their appearance over time.
References: Island Stone. (n.d.). Mesh Mounted Pebble and Marble Installation Guide. Retrieved from https://islandstone.com/blogs/tile-installation-care-and-education-resources/pebble-and-marble-meshed-installation-guide Tile Coach. (2017). Easy Pebble Tile Installation: Tile Coach Episode 10. Retrieved from https://www.youtube.com/watch?v=C7V6DUmtaTI DIY Tile Guy. (2015). Miserable Pebble Tile Flooring. Retrieved from https://www.diytileguy.com/pebble-tile-flooring/ Home Repair Tutor. (2018). Pebble Tile Shower Floor Tips (5 Key Concepts!). Retrieved from https://www.youtube.com/watch?v=TSHQUPOV3MU
Was this page helpful?
At Storables.com, we guarantee accurate and reliable information. Our content, validated by Expert Board Contributors, is crafted following stringent Editorial Policies. We're committed to providing you with well-researched, expert-backed insights for all your informational needs.



0 thoughts on “DIY Guide To Installing A Pebble Tile Floor”