
Articles
How To Lay Peel And Stick Tile Floors
Modified: September 1, 2024
Learn how to easily install peel and stick tile floors with our helpful articles. Transform your space with this simple DIY flooring solution.
(Many of the links in this article redirect to a specific reviewed product. Your purchase of these products through affiliate links helps to generate commission for Storables.com, at no extra cost. Learn more)
Introduction
Welcome to our comprehensive guide on how to lay peel and stick tile floors! If you’re looking to update the flooring in your home or give a fresh look to your kitchen, bathroom, or any other room, peel and stick tile floors can be a great option. Not only are they cost-effective and easy to install, but they also come in a wide variety of colors, styles, and patterns, allowing you to achieve the desired look for your space.
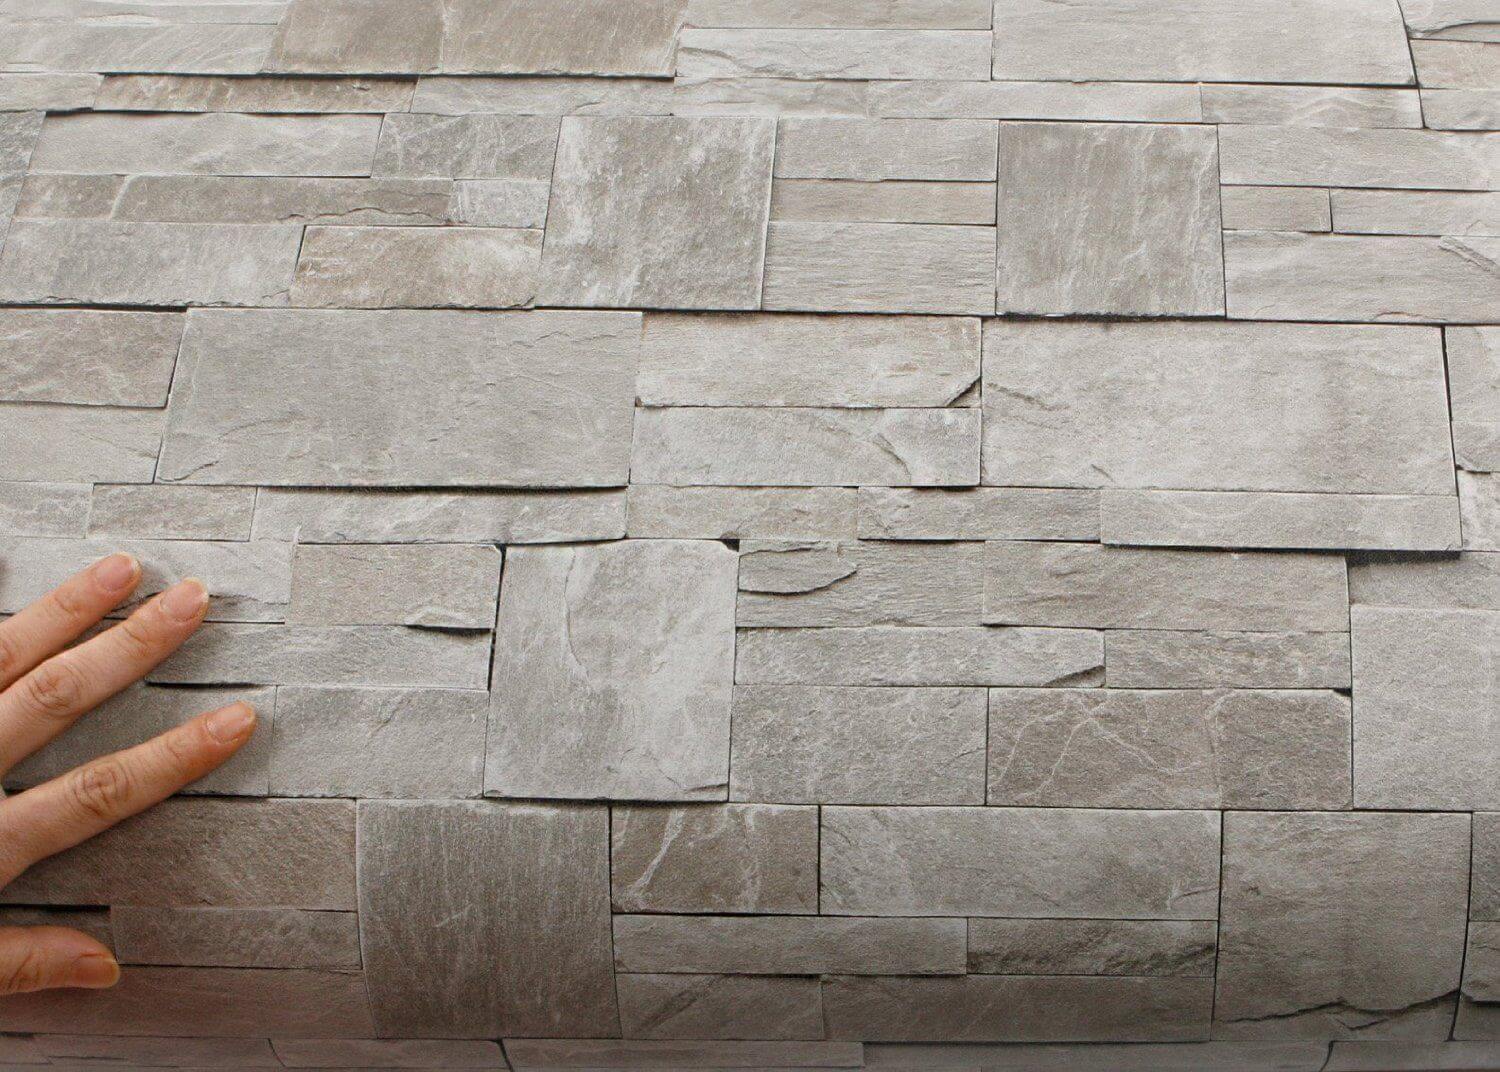
Peel and stick tile floors, also known as self-adhesive tiles, are a type of flooring that features an adhesive backing. This means that you don’t need to use any additional glue or adhesives during the installation process. All you have to do is peel off the backing and stick the tiles directly onto the prepared surface.
Whether you’re a seasoned DIY enthusiast or a beginner looking to tackle your first home improvement project, we’ll guide you through each step of the process to ensure a successful installation. From preparing the floor to cutting and trimming the tiles, we have you covered.
Before we dive into the nitty-gritty details, it’s important to note that proper preparation is crucial for a smooth and durable peel and stick tile floor. This includes cleaning and priming the surface, measuring and planning, and ensuring that you have all the necessary tools and materials.
So, let’s get started and transform your space with beautiful and hassle-free peel and stick tile floors!
Key Takeaways:
- Proper preparation, including floor cleaning, priming, and precise measurement and planning, is crucial for a successful peel and stick tile floor installation. Attention to detail during the installation process ensures a professional and seamless finish.
- Completing the installation with pressure application, allowing adhesive curing, and adding finishing touches like baseboards or molding, ensures a polished and complete look. Regular maintenance and cleaning will help preserve the beauty and longevity of the peel and stick tile floor.
Read more: How To Lay Peel And Stick Floor Tile
Step 1: Preparing the Floor
Before you begin the installation process, it’s essential to properly prepare the floor surface. Taking the time to prepare the floor will ensure a level and smooth base for the peel and stick tiles, resulting in a professional-looking finish.
The first step in preparing the floor is to remove any existing flooring, such as carpet, vinyl, or tiles. Use a pry bar, pliers, or a flooring scraper to carefully lift and remove the old flooring material. Make sure to clean up any debris or residue left behind.
Next, assess the condition of the subfloor. If there are any cracks, holes, or uneven areas, you will need to repair them before proceeding. Fill in any gaps with a floor leveling compound and smooth it out using a trowel or putty knife. Allow the compound to dry completely according to the manufacturer’s instructions.
Once the subfloor is in good condition, it’s time to clean it thoroughly. Remove any dust, dirt, or grease using a broom, vacuum cleaner, or mop. If the floor is particularly dirty or greasy, you may need to use a mild detergent or specialized cleaner for a deeper clean.
After cleaning, give the floor sufficient time to dry completely. Moisture can interfere with the adhesive backing on the peel and stick tiles, so it’s important to ensure that the subfloor is completely dry before moving forward.
If you’re installing the peel and stick tiles over a concrete subfloor, it’s advisable to test for moisture. Take a sheet of plastic, at least 2 feet by 2 feet in size, and tape it securely to the floor using duct tape. Leave it in place for 24 hours. If you notice any condensation or water droplets on the underside of the plastic, it indicates a moisture issue. In such cases, it’s recommended to address the moisture problem before proceeding with the installation.
Preparing the floor is a crucial step that sets the foundation for a successful peel and stick tile installation. By taking the time to remove old flooring, repair any damage, clean thoroughly, and ensure a dry subfloor, you’ll be one step closer to achieving a beautiful and long-lasting floor.
Step 2: Cleaning and Priming the Surface
Once you have prepared the floor by removing old flooring and ensuring a smooth subfloor, the next step in the installation process is to clean and prime the surface. Cleaning and priming are crucial to ensure proper adhesion of the peel and stick tiles and enhance the longevity of your new floor.
Start by thoroughly cleaning the subfloor using a mild detergent or specialized floor cleaner. Use a mop, sponge, or soft-bristled brush to scrub away any dirt, stains, or residue. Pay extra attention to any areas that might have stubborn stains or adhesive remnants from the previous flooring. Rinse the floor with clean water and allow it to dry completely.
Once the floor is dry, it’s time to apply a primer. A primer creates a smooth and adhesive-friendly surface for the peel and stick tiles. It helps to improve the bond between the subfloor and the tiles, ensuring a more secure installation.
Before applying the primer, make sure to read the manufacturer’s instructions carefully. Some primers may require dilution or specific preparation steps. Follow the instructions and mix the primer accordingly.
Using a paintbrush or roller, apply a thin and even coat of primer to the entire floor surface. Make sure to cover the entire area, including the corners and edges. Allow the primer to dry completely as per the manufacturer’s instructions. This usually takes around 2-3 hours, but it can vary depending on the type of primer and the ambient humidity.
While waiting for the primer to dry, ensure proper ventilation in the room by opening windows or using fans. This will speed up the drying process and help eliminate any fumes from the primer.
Priming the surface before installing the peel and stick tiles is an essential step to ensure a strong and durable bond. It not only enhances the adhesive properties but also helps to prevent moisture penetration from the subfloor. By taking the time to clean and prime the surface, you’ll be setting the stage for a successful and long-lasting peel and stick tile floor.
Step 3: Measuring and Planning
Measuring and planning are crucial steps in the installation process of peel and stick tile floors. Properly measuring your space and planning the layout of the tiles will help ensure a seamless and professional-looking installation.
Start by measuring the length and width of the room where you will be installing the peel and stick tiles. Use a tape measure to get accurate measurements. It’s important to measure the longest and widest points of the room to account for any irregularities or angles.
Once you have the measurements, it’s time to determine the square footage needed for your project. To calculate the square footage, simply multiply the length and width measurements together. For example, if the room measures 10 feet by 12 feet, the total square footage is 120 square feet.
When purchasing the peel and stick tiles, it’s advisable to purchase some extra tiles, usually around 10% more than the calculated square footage. This allows for any mistakes or waste during cutting and trimming. It’s always better to have a few extra tiles on hand in case of any future repairs or replacements.
After calculating the square footage and purchasing the necessary tiles, it’s time to plan the layout. Begin by deciding the direction in which you want the tiles to be installed. Consider the room’s dimensions, natural light sources, and any focal points or features you want to highlight. Most commonly, tiles are installed in a straight or diagonal pattern, but you can also explore other design options, such as a herringbone or chevron pattern.
Using a measuring tape, mark the center of each wall. This will serve as a starting point for your installation. From the center point, determine the layout of the tiles by dry-fitting them without removing the backing. This will help you visualize how the tiles will look and make any necessary adjustments before permanently sticking them down.
Consider the positioning of any obstructions, such as cabinets, appliances, or fixtures, and plan the tile layout accordingly. In some cases, you may need to cut the tiles to fit around these obstructions. It’s a good idea to have a tile cutter or a sharp utility knife on hand for this purpose.
Taking the time to measure your space accurately and plan the layout will ensure a smooth and aesthetically pleasing installation. By considering factors such as square footage, purchasing extra tiles, and visualizing the layout, you’ll be well-prepared to move on to the next step of applying the peel and stick tiles.
Step 4: Starting the Installation
Now that you have measured and planned the layout for your peel and stick tile floor, it’s time to start the installation process. This step will guide you through the initial steps of positioning the first tile and ensuring a straight and level foundation for the rest of the tiles.
Begin by identifying the starting point for your installation. This is usually in the center of the room, aligned with your layout plan. Measure and mark the center of the room and use a chalk line or straight edge to create a straight guideline from one wall to another.
Peel off the backing from the first tile, starting at one corner. Align the tile with the guideline you created and press it firmly onto the subfloor. Continue applying pressure to ensure proper adhesion. It’s important to place the tile as accurately as possible since it will set the foundation for the rest of the floor.
For the next few tiles, align them tightly against the first tile, ensuring a snug and seamless fit. Press each tile firmly onto the subfloor, working your way along the guideline. As you progress, periodically check the alignment and levelness of the tiles using a level or straight edge. This will help you maintain a uniform and professional look.
As you reach the walls or obstructions, you may need to cut the tiles to fit. Measure the space that needs to be filled and transfer the measurements onto the tiles. Use a tile cutter or a sharp utility knife to make precise cuts. Remember to leave a small gap between the tiles and the wall or obstruction to allow for expansion and contraction.
Continue laying the tiles, working in small sections at a time. Make sure to remove any air bubbles or wrinkles that may occur during the installation by pressing the tiles firmly onto the subfloor. If you make a mistake or need to readjust a tile, gently lift it and reposition it while the adhesive is still tacky.
As you progress with the installation, periodically step back and review your work. Check for any irregularities or misalignments and make any necessary adjustments. The first few rows of tiles are crucial for achieving a professional finish, so take your time and ensure that everything is straight and level.
Starting the installation correctly and maintaining proper alignment and levelness will set the stage for a successful peel and stick tile floor. By following these steps and paying attention to detail, you’ll be on your way to transforming your space with beautiful and durable flooring.
Make sure to thoroughly clean and dry the surface before laying peel and stick tiles to ensure a strong and long-lasting bond.
Read more: How To Lay Peel And Stick Tile In A Bathroom
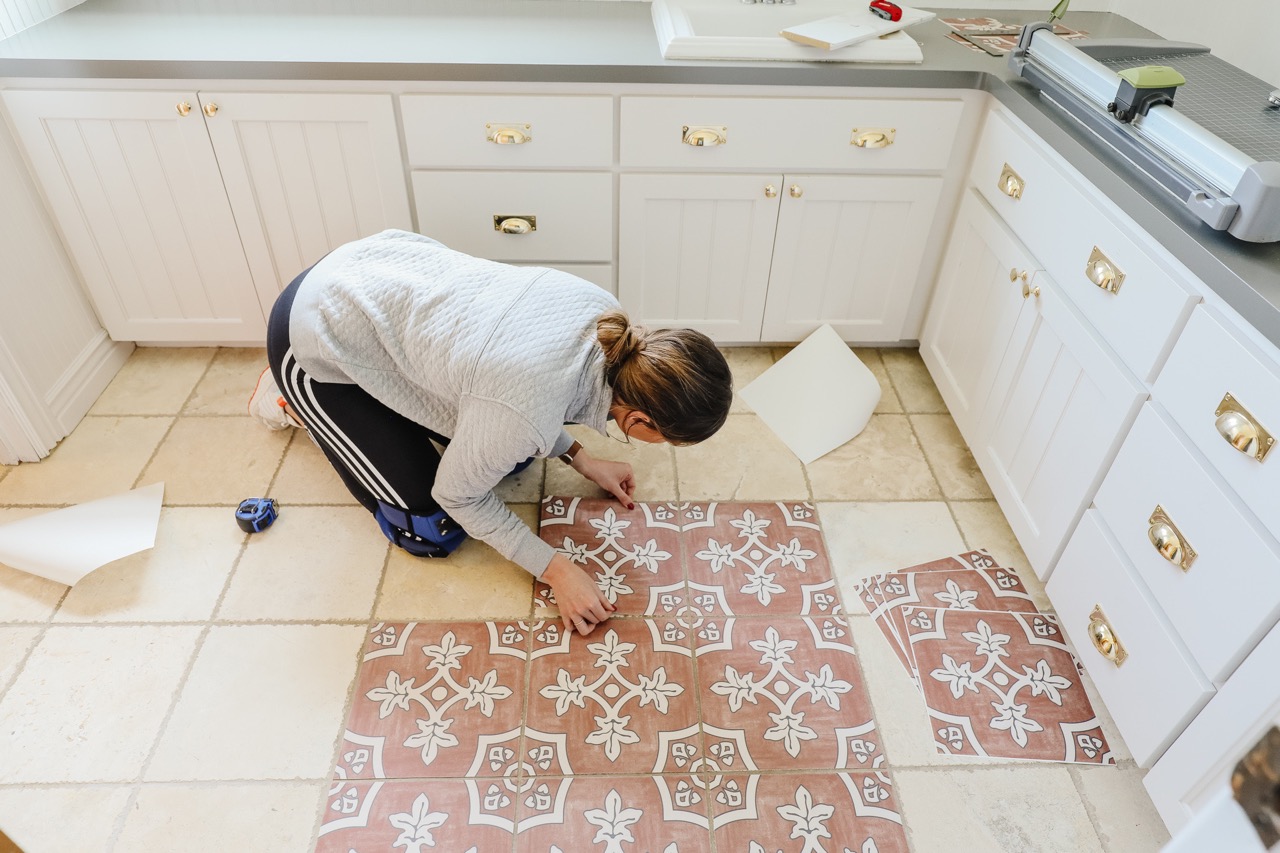
Step 5: Applying the Peel and Stick Tiles
With the initial positioning and alignment complete, it’s time to proceed to the next step: applying the peel and stick tiles. This step will guide you through the process of removing the backing, placing the tiles, and ensuring proper adhesion for a secure and long-lasting installation.
Start by peeling off the backing from the first tile, starting at one corner. It’s recommended to peel off a small portion at a time to prevent the adhesive from sticking to unwanted surfaces or itself. As you peel off the backing, carefully align the tile and press it firmly onto the subfloor, starting at the corner where you began.
Work your way across the row, applying one tile at a time. Align each tile tightly against the previous one, ensuring a smooth and seamless transition. Use a gentle downward pressure to bond the tile to the subfloor. It’s important to take your time and ensure proper adhesion to prevent any lifting or shifting of the tiles in the future.
Continue applying the tiles row by row, following your layout plan. As you reach the end of a row, you may need to cut the tiles to fit. Measure the space that requires a cut tile and mark the measurements onto the tile. Use a tile cutter or sharp utility knife to make precise cuts. Remember to leave a small gap between the tiles and walls or obstructions for expansion and contraction.
If you encounter any air bubbles or wrinkles during the installation, gently lift the tile and reposition it. Use a rolling pin or a tile roller to smooth out the tiles and ensure proper adhesion to the subfloor. This will help create a seamless and professional finish.
As you reach the end of the installation, carefully cut the final row of tiles to fit against the wall. Measure the space and make precise cuts to ensure a snug fit. Use a transition strip or molding to cover the gap between the tiles and the wall, providing a clean and finished look.
Throughout the installation process, periodically step back and review your work. Check for any misalignments, gaps, or lifting tiles. Make any necessary adjustments to maintain a consistent and visually appealing flooring surface.
Applying the peel and stick tiles requires attention to detail and proper alignment. By following these steps and taking your time during the installation, you’ll achieve a stunning and professional-looking floor that not only enhances the aesthetics of your space but also withstands daily wear and tear.
Step 6: Cutting and Trimming the Tiles
When installing peel and stick tiles, it’s common to encounter areas where the standard tile size doesn’t fit perfectly. In these cases, cutting and trimming the tiles becomes necessary to achieve a precise and polished finish. This step will guide you through the process of cutting and trimming the tiles to fit around walls, corners, and obstructions.
Before starting to cut the tiles, measure the area that needs to be trimmed. Use a measuring tape to determine the dimensions accurately. Mark the measurements on the tile using a straight edge and a pencil or marker.
There are several tools you can use to cut the tiles, depending on your preference and the complexity of the cuts required. A tile cutter is suitable for straight cuts and is commonly used for basic trimming. If you need to make more intricate cuts, such as rounded corners or curved edges, a sharp utility knife or a pair of scissors can be used.
For straight cuts, place the tile on a flat surface and align the straight edge with the marked line. Apply firm pressure and score along the line using a tile cutter or a sharp utility knife. Once the tile is scored, use your hands to apply even pressure on both sides of the score line, snapping the tile along the scored line.
If you need to make curved cuts, such as around pipes or irregular shapes, a sharp utility knife or a pair of scissors can be useful. Make small, precise cuts along the marked line until you achieve the desired shape. Take your time and be patient to ensure clean and accurate cuts.
When trimming tiles to fit around walls or corners, it’s important to leave a small gap between the tile and the obstruction. This gap allows for expansion and contraction, ensuring a more stable and durable installation. Use a spacer or a small piece of tile as a guide to maintain a consistent gap as you cut and trim the tiles.
As you cut and trim the tiles, periodically check their fit and make any necessary adjustments. Take your time and ensure that the trimmed tiles fit snugly and seamlessly with the surrounding tiles.
Remember to wear appropriate safety gear, such as safety glasses and gloves, when cutting the tiles to protect yourself from any potential injuries.
Trimming and cutting the tiles is an essential part of the installation process that allows you to achieve a professional and finished look. By carefully measuring, marking, and using the appropriate tools, you’ll be able to trim the tiles accurately to fit any area, ensuring a cohesive and visually appealing peel and stick tile floor.
Step 7: Completing the Installation
Congratulations! You’ve made it to the final step of installing your peel and stick tile floor. In this step, we’ll cover the remaining tasks to complete the installation, ensuring a flawless and finished look for your new flooring.
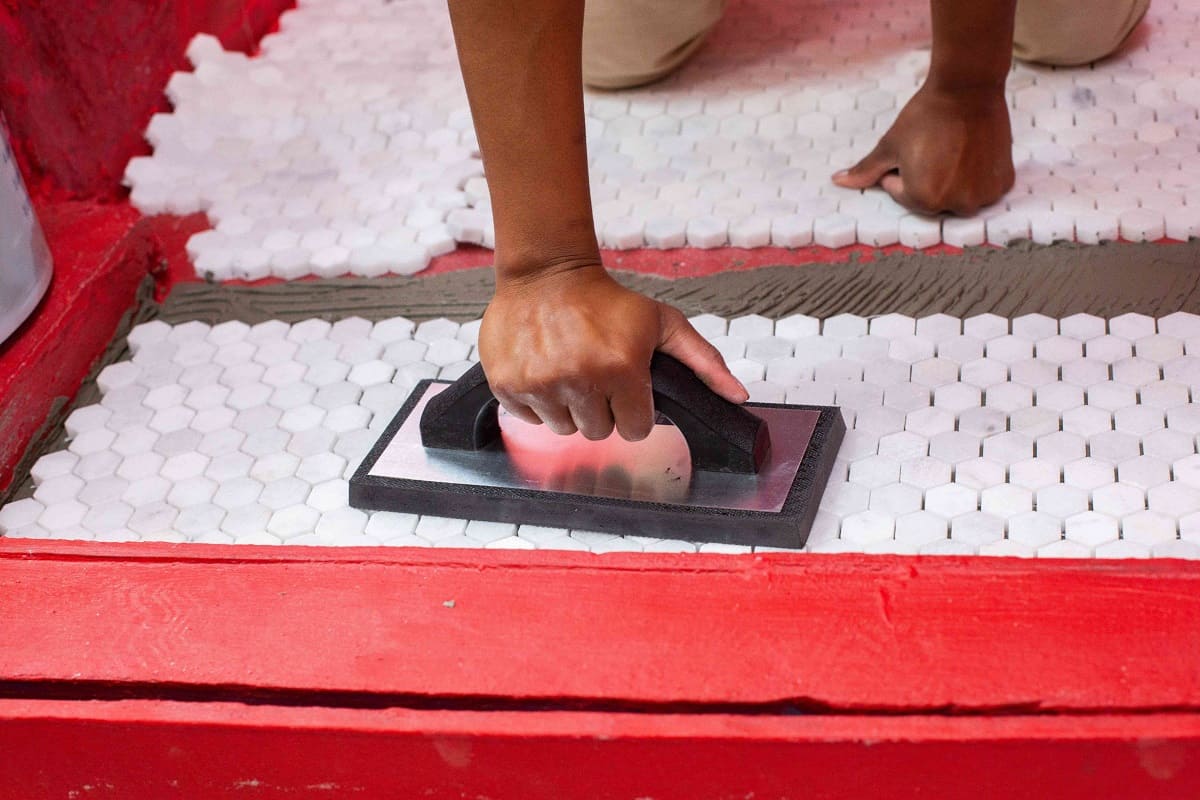
Once all the tiles have been laid and trimmed to fit, it’s time to apply pressure to ensure proper adhesive bonding. Use a tile roller or a rolling pin to go over the entire floor surface. Apply even pressure, working in different directions to ensure that the tiles are securely adhered to the subfloor. This step helps to eliminate any air pockets and ensures a durable installation.
After rolling the tiles, it’s essential to let the adhesive set and cure. Follow the manufacturer’s instructions for the recommended duration. Typically, you’ll need to wait at least 24 hours before allowing foot traffic on the newly installed floor. Avoid placing heavy furniture or applying stress to the tiles during this curing period.
Once the adhesive has fully cured, it’s time to add the finishing touches to your peel and stick tile floor. Install baseboards or shoe molding to cover the gaps between the tiles and the walls. This will give your flooring a polished and professional appearance. Use a nail gun or adhesive to secure the molding in place.
Inspect the entire floor for any loose or lifting tiles. If you notice any, use a heat gun or a blow dryer on a low heat setting to gently warm the tile and reactivate the adhesive. Apply pressure while the tile is warm to ensure it adheres firmly to the subfloor. Allow the tile to cool before walking on it or applying furniture.
Finally, give your newly installed peel and stick tile floor a thorough cleaning. Use a gentle floor cleaner specifically formulated for the type of tile you have installed. Avoid using abrasive cleaners or tools that may damage the surface of the tiles. Sweep or vacuum the floor to remove any loose debris, and then mop it with the cleaning solution following the manufacturer’s instructions.
Regular maintenance and cleaning will help preserve the beauty and longevity of your peel and stick tile floor. Follow the manufacturer’s recommendations for cleaning products and techniques to ensure the best results.
By completing these final steps, you’ll have successfully installed and completed your peel and stick tile floor. Enjoy the transformation of your space and take pride in the beautiful and functional flooring you’ve accomplished!
Step 8: Cleaning and Finishing Touches
Congratulations on successfully installing your peel and stick tile floor! In this final step, we’ll cover the essential tasks of cleaning and adding finishing touches to ensure your new floor looks its best and is well-maintained.
Start by thoroughly cleaning the newly installed floor. This will remove any dirt, debris, or residue left behind during the installation process. Sweep or vacuum the floor to remove loose particles, and then use a damp mop or cloth to clean the tiles. Avoid using harsh or abrasive cleaners that could damage the surface of the tiles. Instead, opt for a mild detergent or a pH-neutral cleaner specifically recommended for your type of tile.
As you clean the floor, pay close attention to any grout lines between the tiles. If you used grout during the installation process, ensure that it is clean and free of excess adhesive or debris. Use a grout cleaner or a mixture of baking soda and water to scrub away any stains or discoloration. Rinse the grout thoroughly and allow it to dry completely.
Once the floor is clean and dry, inspect the area for any loose tiles or areas where the adhesive may have lifted. If you notice any, gently lift the tile and reapply adhesive to the subfloor. Press the tile firmly in place, using a rolling pin or a tile roller to ensure proper adhesion.
To add a finishing touch to your peel and stick tile floor, consider using a grout sealer if applicable. Grout sealers help protect the grout lines from stains, dirt, and moisture, making them easier to clean and prolonging their lifespan. Follow the manufacturer’s instructions for the sealer application process, ensuring that the tiles are clean and dry before applying.
Finally, consider adding rugs or mats in high-traffic areas or places where water or dirt may be tracked in. This can help protect the floor and extend its longevity by minimizing wear and tear. Choose rugs or mats with non-slip backing to ensure they stay in place and prevent any accidents.
Regular maintenance and cleaning are key to keeping your peel and stick tile floor in optimal condition. Follow a regular cleaning routine and avoid using harsh chemicals or abrasive tools that could damage the tiles. Wipe up spills promptly and sweep or vacuum the floor regularly to remove dirt and debris.
By completing these cleaning tasks and adding the finishing touches, your peel and stick tile floor will not only look amazing but also be easier to maintain and enjoy for years to come.
Read more: How To Remove Peel And Stick Floor Tile
Conclusion
Congratulations! You have reached the end of our comprehensive guide on how to lay peel and stick tile floors. By following the steps outlined in this guide, you have learned how to prepare the floor, clean and prime the surface, measure and plan, start the installation, apply the tiles, cut and trim, complete the installation, and add the finishing touches.
Peel and stick tile floors offer a cost-effective and convenient solution for transforming your space with beautiful and durable flooring. With their wide range of colors, styles, and patterns, they allow you to create a personalized and visually appealing look that suits your taste and the style of your home.
Remember, proper preparation is key to a successful installation. Take the time to prepare the floor, clean and prime the surface, and measure and plan the layout. Attention to detail when starting the installation and applying the tiles is essential for achieving a professional and seamless finish.
During the cutting and trimming process, ensure accuracy and precision to achieve a perfect fit around walls, corners, and obstructions. Completing the installation by applying pressure, allowing the adhesive to cure, and adding finishing touches like baseboards or molding will give your new floor a polished and complete look.
Maintaining your peel and stick tile floor is straightforward. Regular cleaning, using appropriate cleaning solutions and techniques, will help keep your floor looking its best. Periodically inspect the floor for any loose tiles or areas that may need re-adhering. Enhance the longevity of your floor by taking preventive measures such as using rugs or mats in high-traffic areas.
We hope that this guide has provided you with the knowledge and confidence to embark on your peel and stick tile floor installation project. Remember to always follow the manufacturer’s instructions and guidelines for your specific product, as they may have their own recommendations and requirements.
Enjoy the beauty and functionality of your newly installed peel and stick tile floor. Whether it’s in your kitchen, bathroom, or any other room, this flooring option will undoubtedly enhance the overall aesthetic and value of your space.
Thank you for choosing our guide as your trusted resource, and best of luck with your peel and stick tile floor installation!
Frequently Asked Questions about How To Lay Peel And Stick Tile Floors
Was this page helpful?
At Storables.com, we guarantee accurate and reliable information. Our content, validated by Expert Board Contributors, is crafted following stringent Editorial Policies. We're committed to providing you with well-researched, expert-backed insights for all your informational needs.


0 thoughts on “How To Lay Peel And Stick Tile Floors”