Home>Ideas and Tips>DIY Guide To Installing Wainscoting

Ideas and Tips
DIY Guide To Installing Wainscoting
Modified: October 28, 2024
Learn how to install wainscoting with our step-by-step DIY guide. Enhance your home's elegance easily and affordably. Perfect for any room!
(Many of the links in this article redirect to a specific reviewed product. Your purchase of these products through affiliate links helps to generate commission for Storables.com, at no extra cost. Learn more)
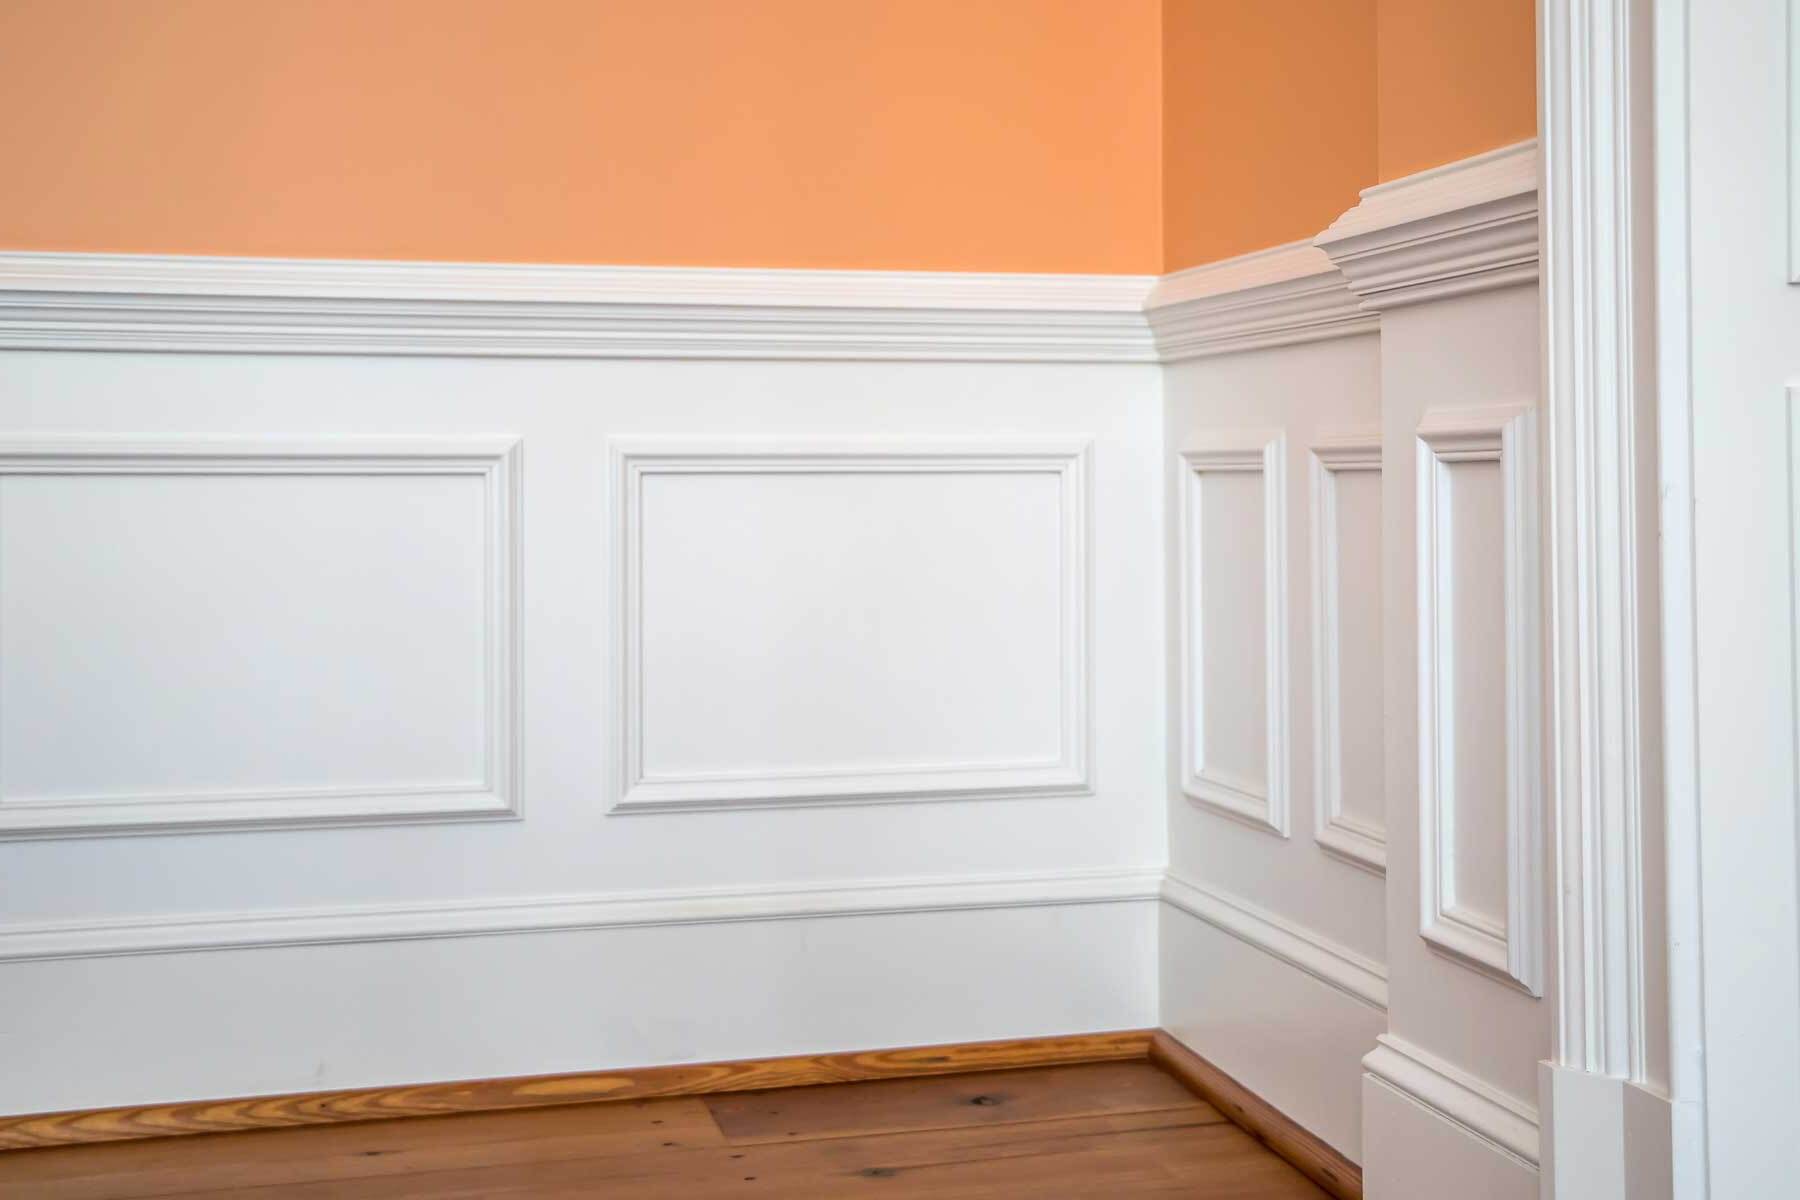
Wainscoting is a timeless and elegant form of decorative paneling that can add a touch of sophistication to any room in your home. It is not only aesthetically pleasing but also relatively inexpensive and easy to install, making it a perfect DIY project for homeowners who want to enhance their interior design without breaking the bank. In this comprehensive guide, we will walk you through the steps of installing wainscoting, from preparation to finishing touches, ensuring that your project turns out beautifully and professionally.
Tools and Materials Needed
Before you begin, it's essential to gather all the necessary tools and materials. Here’s a list of what you’ll need:
- Wainscoting Panels: You can choose between pre-finished panels or quarter-inch birch veneer plywood panels. Pre-finished panels are easier to work with, while plywood panels offer more flexibility in design.
- Baseboard Trim: One-by-six inch trim for the baseboards, one-by-three inch trim for the vertical styles, and one-by-four inch trim for the top rail.
- Adhesive: Construction adhesive for securing the baseboards and wainscoting panels.
- Nails: Finished nails for securing the baseboards and wainscoting panels to the studs.
- Stud Finder: To locate the studs in your walls.
- Painters Tape: For marking the location of studs on the wall.
- Miter Saw: For cutting the trim pieces at precise angles.
- Sandpaper: For smoothing out any rough edges or glue squeeze-out.
- Caulk: For sealing gaps between the wainscoting and the wall.
- Paintbrushes: For applying paint to the trim.
- Wood Filler: For filling any holes or gaps left by nails.
- Level: To ensure that each piece of trim is level and plumb.
Read more: DIY Guide To Installing Floating Shelves
Preparing for Installation
Acclimating the Panels
Wainscoting is a wood product that is subject to expansion and contraction due to temperature and humidity changes. It's crucial to allow the panels to acclimate in the room where they'll be installed for at least 48 hours before starting the installation process. This step helps prevent warping or cracking of the panels during installation.
Measuring the Space
- Determine the Length of Each Wall: Measure the length of each wall in your room.
- Subtract the Total Width of Vertical Stiles: Calculate the total width of all vertical stiles (the pieces that run up and down) and subtract this from the total length of the wall.
- Determine the Number of Panels Needed: Divide the remaining length by the width of each panel to determine how many panels you'll need for each wall.
Marking the Location of Studs
Use a stud finder to locate the studs in your walls. Mark their positions with painters tape so they are visible while installing your wainscoting. This ensures that you can secure the panels directly to the studs for added stability.
Read more: DIY Guide To Installing A Stair Runner
Installing the Baseboard
- Remove Wall Plates and Existing Trim: Take down any wall plates and existing trim to ensure a clean surface for installation.
- Measure and Cut the Baseboard: Measure the length of each wall and cut the baseboard trim to size using a miter saw.
- Apply Construction Adhesive: Apply a bead of construction adhesive to the back of the baseboard.
- Place the Baseboard: Position the baseboard along the longest wall, ensuring it is level and plumb. Use shims if necessary to achieve perfect alignment.
- Secure with Nails: Secure the baseboard into the studs with finished nails.
Installing the Wainscoting
Step-by-Step Installation
- Start with the Baseboard in Place: Begin installing the wainscoting by alternating styles and pounds. Measure and cut the vertical styles to size using a miter saw.
- Apply Adhesive to the Back of the Starter Piece: Apply adhesive to the back of your starter piece (the first panel that will be placed atop the baseboard).
- Position the Starter Piece: Place the starter piece atop the baseboard, ensuring it is flush against the wall and level. Press it firmly to the wall and secure with nails into the studs.
- Install Subsequent Panels: Continue this process, applying adhesive to the back of each panel and securing it to the wall with nails. Ensure that each panel is level and plumb before moving on to the next one.
- Cut Out for Outlets or Switch Plates: If a panel requires a cutout for an outlet or switch plate, measure and note the distance between the top edge of the baseboard and the center of the outlet. Transcribe these measurements onto the backside of your panel and sketch the cutout. Cut out the panel accordingly and secure it directly to the wall using adhesive and nails.
Ensuring Proper Spacing
To maintain even spacing between panels, use a spacer block or small piece of wood to ensure correct spacing. This part of the project is easier with a second person to help keep pieces level and spacing correct.
Read more: DIY Guide To Installing A Kitchen Island
Finishing Touches
Applying Caulk
Apply caulk to the inner edge and outer edge of the wainscoting for a smooth appearance. This helps seal any gaps between the panels and the wall.
Painting the Trim
After installing the wainscoting, apply paint to the trim using semi-gloss paint. This adds an extra sheen to the trim and helps it blend seamlessly with the surrounding wall paint. If you're using a different color for the trim, ensure that it complements the wall paint to maintain a cohesive look.
Filling Holes and Gaps
Use wood filler to fill any holes or gaps left by nails. Sand the filled areas smooth to ensure a seamless finish.
Read more: DIY Guide To Installing A French Door
Tips and Variations
Using Spacer Blocks
Using spacer blocks can help maintain even spacing between panels. Place a spacer block in a corner of the room and strike a line to represent the position of the wall frame's side. Remove the spacer block but keep it nearby to set the top edge of the wall frame.
Traditional vs. Easy DIY Wainscoting
Traditional wainscoting involves building frames from square stock around decorative panels, which can be time-consuming and expensive. An easier DIY method involves using base cap molding to create rectangular picture frames that are evenly spaced around the room. This method is less expensive and can be completed in a day.
Planning Your Design
Before starting your project, sketch out a plan for your wainscoting. Decide on the shape of your trim and whether you want to create a half wall, stack vertical boxes, or use the feature wall concept. Consider the spacing between boxes and from wall edge to ensure symmetry and professionalism.
Read more: DIY Guide To Installing Crown Molding
Conclusion
Installing wainscoting is a rewarding DIY project that can significantly enhance the look of any room. By following these steps and tips, you can achieve a professional-looking result without breaking the bank. Remember to acclimate your panels, measure carefully, and ensure proper spacing to maintain evenness throughout your installation. With patience and attention to detail, you'll be able to add timeless elegance to your home with wainscoting.
Additional Resources
For more detailed instructions and visual guides, consider checking out the following resources:
- Lowe's Guide: A comprehensive guide on how to install wainscoting, including tools and materials needed.
- The Home Depot Video: A step-by-step video tutorial on how to install easy DIY wainscoting.
- Jennifer Maune's Tutorial: A detailed DIY tutorial with dramatic before-and-after photos and tips on how to install wainscoting.
By following these resources and tips, you'll be well-equipped to tackle your wainscoting project with confidence. Happy DIY-ing
Was this page helpful?
At Storables.com, we guarantee accurate and reliable information. Our content, validated by Expert Board Contributors, is crafted following stringent Editorial Policies. We're committed to providing you with well-researched, expert-backed insights for all your informational needs.


0 thoughts on “DIY Guide To Installing Wainscoting”