Home>Articles>Your Step-by-Step Guide To Installing Cedar Shake Siding
Articles
Your Step-by-Step Guide To Installing Cedar Shake Siding
Modified: October 27, 2024
Learn how to install cedar shake siding with our comprehensive step-by-step guide. Get expert tips and advice in our informative articles.
(Many of the links in this article redirect to a specific reviewed product. Your purchase of these products through affiliate links helps to generate commission for Storables.com, at no extra cost. Learn more)
Introduction
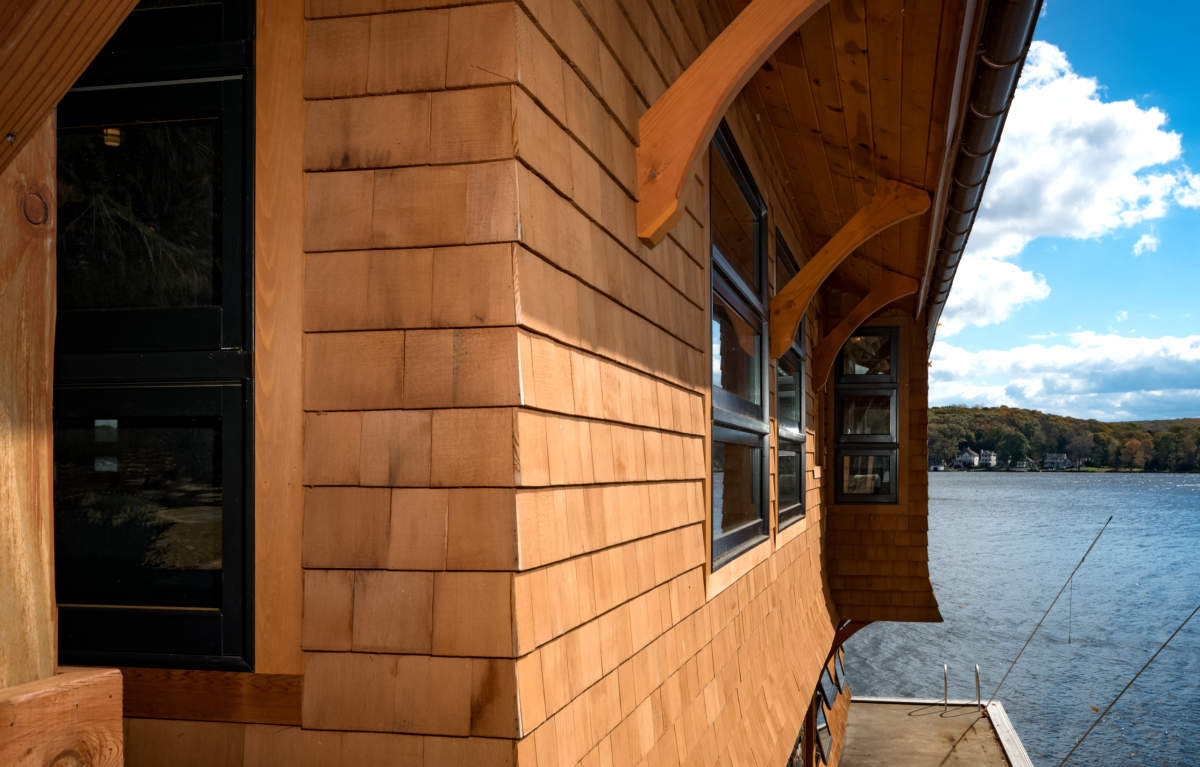
Welcome to our step-by-step guide on installing cedar shake siding. Whether you are a seasoned DIY enthusiast or a homeowner looking to tackle a new project, this guide will provide you with all the necessary information to successfully install cedar shake siding on your home. Cedar shake siding not only enhances the aesthetic appeal of your property but also offers durability and longevity. With proper installation and maintenance, cedar shake siding can protect your home from the elements while providing a natural and rustic charm.
Installing cedar shake siding may seem like a daunting task, but with the right preparation, tools, and guidance, you can achieve professional-looking results. Before diving into the installation process, it’s important to familiarize yourself with the steps involved and gather all the necessary materials. This guide will walk you through each step, from preparing the exterior to applying the finishing touches, ensuring a smooth and successful installation.
As you follow along, keep in mind that safety should be your top priority. Always wear the necessary protective gear, follow proper safety precautions, and consult with professionals if needed. Now, let’s dive into the step-by-step process of installing cedar shake siding and transform your home’s exterior into a stunning masterpiece.
Key Takeaways:
- Proper preparation, precise measurements, and attention to detail are crucial for successfully installing cedar shake siding. Following each step meticulously ensures a professional and visually appealing end result.
- Applying a protective finish is essential for preserving the natural beauty and longevity of cedar shake siding. Regular maintenance and care will help protect the wood from the elements and maintain its stunning appearance.
Read more: How To Install Vinyl Cedar Shake Siding
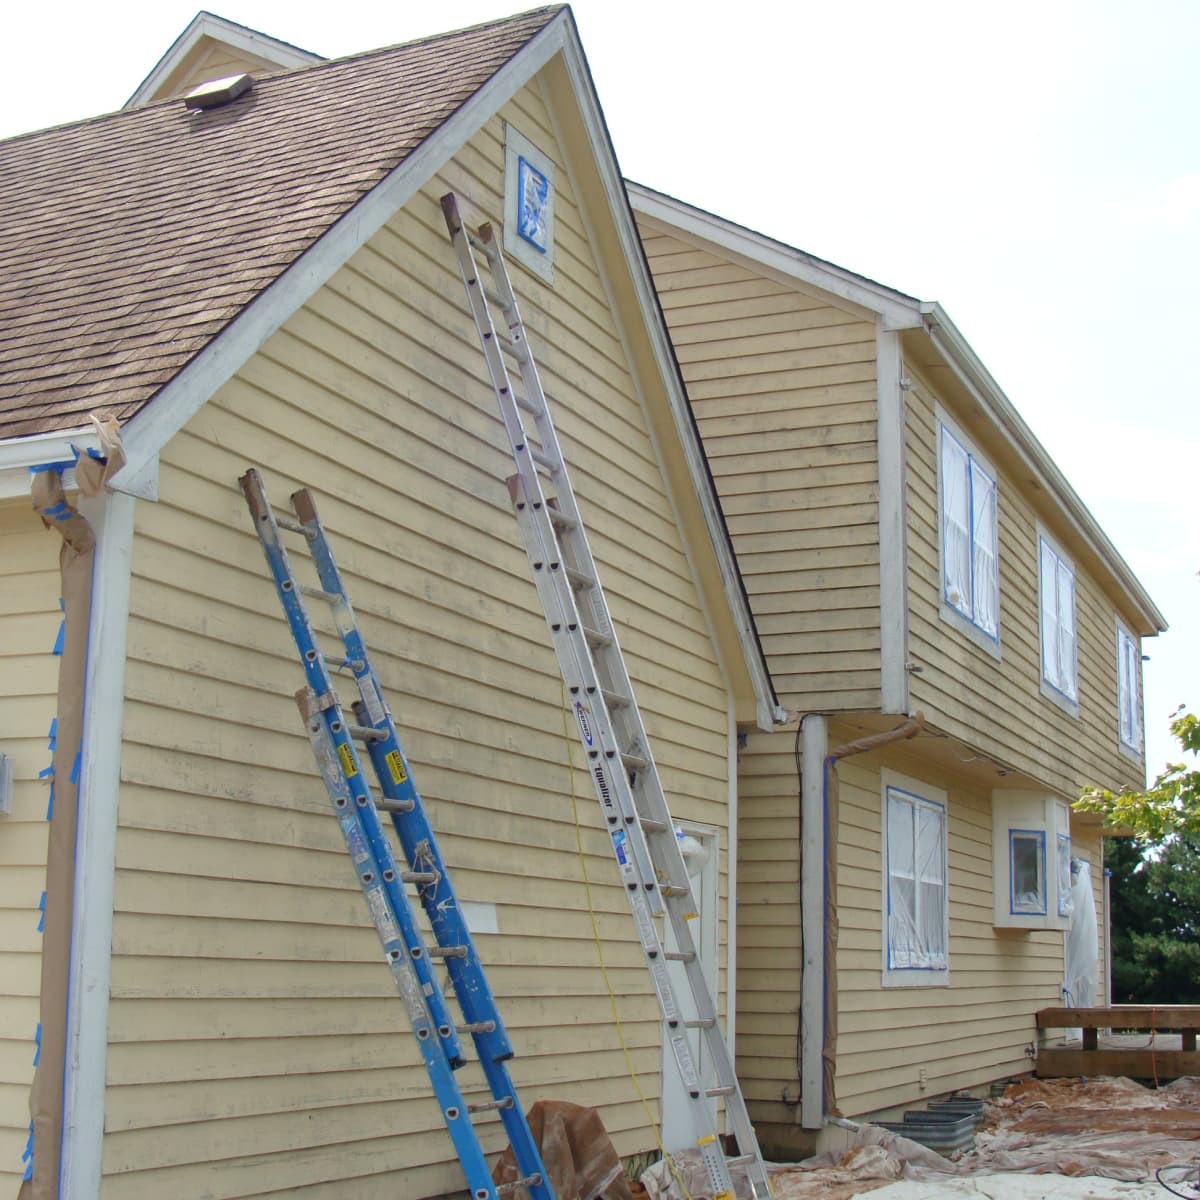
Step 1: Preparing the Exterior
Before you begin the installation process, it’s crucial to properly prepare the exterior of your home. Here are the key steps to follow:
- Clean the Surface: Start by thoroughly cleaning the existing siding or the bare exterior surface where the cedar shake siding will be installed. Remove any dirt, debris, and loose paint using a power washer or a hose with a scrub brush attachment.
- Inspect and Repair: Carefully inspect the exterior surface for any signs of damage. Check for rotting wood, cracks, or loose boards. Replace or repair any damaged areas before proceeding with the installation.
- Apply Waterproofing: To protect the underlying structure of your home, it’s important to apply a waterproofing barrier. Roll or spray on a high-quality waterproofing material, ensuring that all areas are thoroughly covered.
- Install Flashing: Flashing is a crucial component in preventing water damage. Install flashing around windows, doors, and any other openings. Make sure it is securely attached and properly sealed.
By taking the time to properly prepare the exterior, you are setting a solid foundation for the installation of cedar shake siding. This will help ensure a long-lasting and visually appealing finished result. Once you have completed these steps, you’re ready to move on to the next phase of the installation process: measuring and ordering cedar shake siding.
Step 2: Measuring and Ordering Cedar Shake Siding
Accurate measurements and proper calculation are essential when it comes to ordering cedar shake siding. This step will help you determine the quantity of siding required for your project. Here’s how to measure and order cedar shake siding:
- Measure the Walls: Start by measuring the height and width of each wall that will be covered with cedar shake siding. Measure from the bottom of the wall to the soffit or eaves for the height, and from one corner to another for the width. Multiply the height by the width to get the square footage of each wall.
- Account for Openings: Take into consideration any windows, doors, or other openings on each wall. Measure the height and width of each opening and subtract that from the overall square footage of the wall.
- Calculate the Total Square Footage: Add up the square footage of each wall to determine the total square footage of your project.
- Consider Overlap: Cedar shakes are typically installed with some overlap. Check the manufacturer’s guidelines to determine the recommended overlap percentage. Multiply the total square footage by the overlap percentage to calculate the additional square footage needed.
- Consult with a Supplier: Take your measurements and requirements to a reputable supplier or lumberyard that specializes in cedar shake siding. They will be able to assist you in determining the quantity and type of cedar shakes needed for your project.
- Place an Order: Once you have all the necessary information, place your order with the supplier. Make sure to double-check your measurements and specifications before finalizing the order.
Proper measurement and ordering of cedar shake siding will ensure that you have enough material to complete the installation. It’s always a good idea to order a little extra to account for any potential errors or future repairs. With the measurements and order in hand, you’re ready to move on to the next step: gathering the necessary tools and materials for the installation process.
Step 3: Gathering the Necessary Tools and Materials
Before you start installing cedar shake siding, it’s essential to gather all the necessary tools and materials. Having everything prepared and easily accessible will make the installation process smoother. Here’s a list of the tools and materials you’ll need:
- Cedar Shake Siding: Make sure you have the correct quantity of cedar shake siding based on your measurements and order.
- Hammer: A hammer with a curved claw is ideal for installing cedar shake siding.
- Nails: Stainless steel or galvanized nails are recommended for cedar shake siding installation, as they are resistant to rust and corrosion.
- Saw: Depending on the type of cedar shake siding, you may need a handsaw, circular saw, or miter saw for cutting the shakes to the required length.
- Level: A level is essential for ensuring that the cedar shakes are installed straight and even.
- Tape Measure: Accurate measurements are crucial during the installation process, so a tape measure is necessary.
- Safety Gear: Ensure you have safety goggles, gloves, a dust mask, and ear protection to keep yourself safe during the installation process.
- Caulking Gun: A caulking gun will be used to apply caulk in certain areas for added insulation and moisture protection.
- Ladder or Scaffolding: Depending on the height of your home, you may need a ladder or scaffolding to reach the areas where cedar shake siding needs to be installed.
- Other Materials: Depending on your specific project and the design of your home, you may need additional materials such as corner caps, trim, starter strips, and flashing.
By gathering all the necessary tools and materials before starting the installation, you’ll save time and ensure that you have everything you need at your fingertips. Now that you’re well-prepared, it’s time to move on to the next step: removing old siding (if applicable).
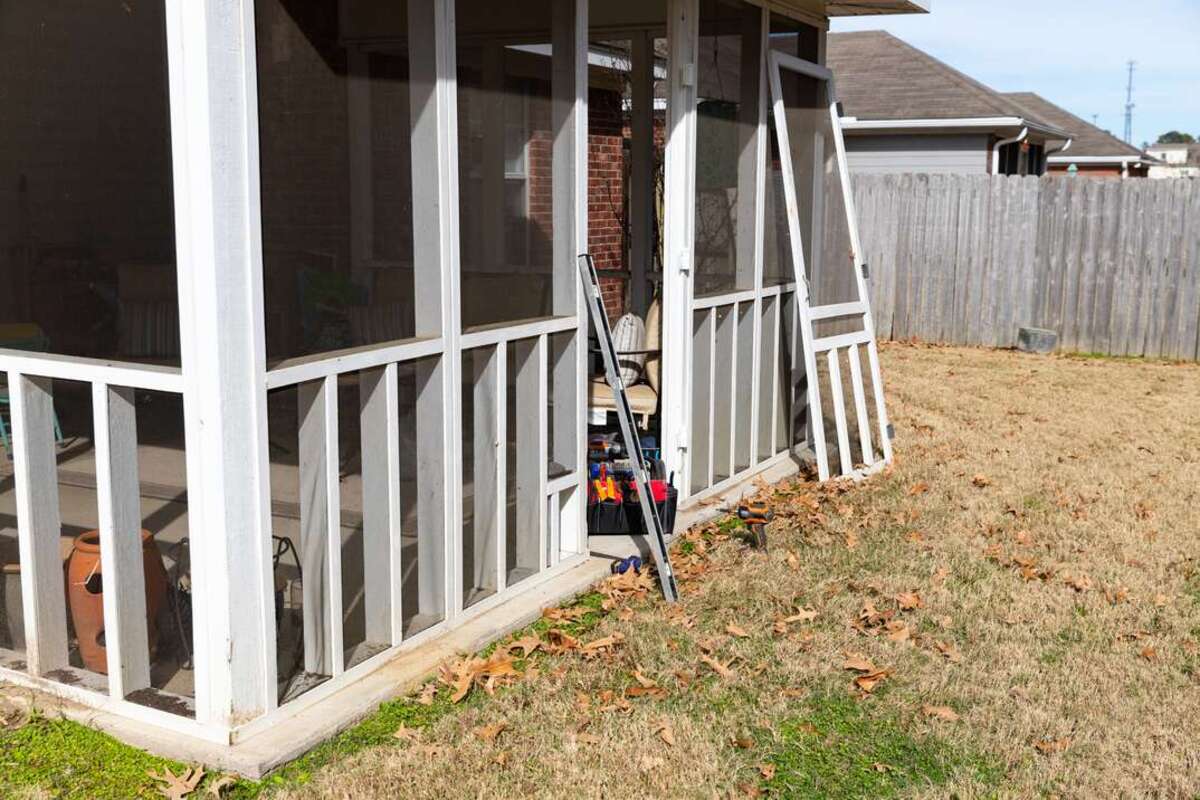
Step 4: Removing Old Siding (If Applicable)
If you have existing siding on your home that needs to be replaced or if you’re transitioning from a different type of siding to cedar shake siding, you’ll need to remove the old siding. Here’s how to proceed:
- Assess the Condition: Start by assessing the condition of the existing siding. Look for signs of rot, mold, or damage. If the siding is in poor condition, it’s best to remove it. However, if the existing siding is in good shape, you may be able to install the cedar shake siding over it.
- Prepare the Work Area: Clear the area around your home, ensuring there is a safe area for debris and easy access to dispose of the old siding. Place protective coverings on the ground to catch any falling debris.
- Start Removal: Begin removing the old siding from the top down. Use a pry bar and hammer to carefully pry off each piece of siding or panel. Work methodically to avoid damaging the underlying structure.
- Dispose of Old Siding: Dispose of the old siding responsibly by either taking it to a local recycling center or arranging for a waste disposal service to pick it up.
Removing old siding can be a time-consuming and labor-intensive process, but it’s essential for a proper and seamless installation of cedar shake siding. Once the old siding has been removed, you can move on to the next step: installing the corner caps.
Read more: What Is Cedar Shake Siding
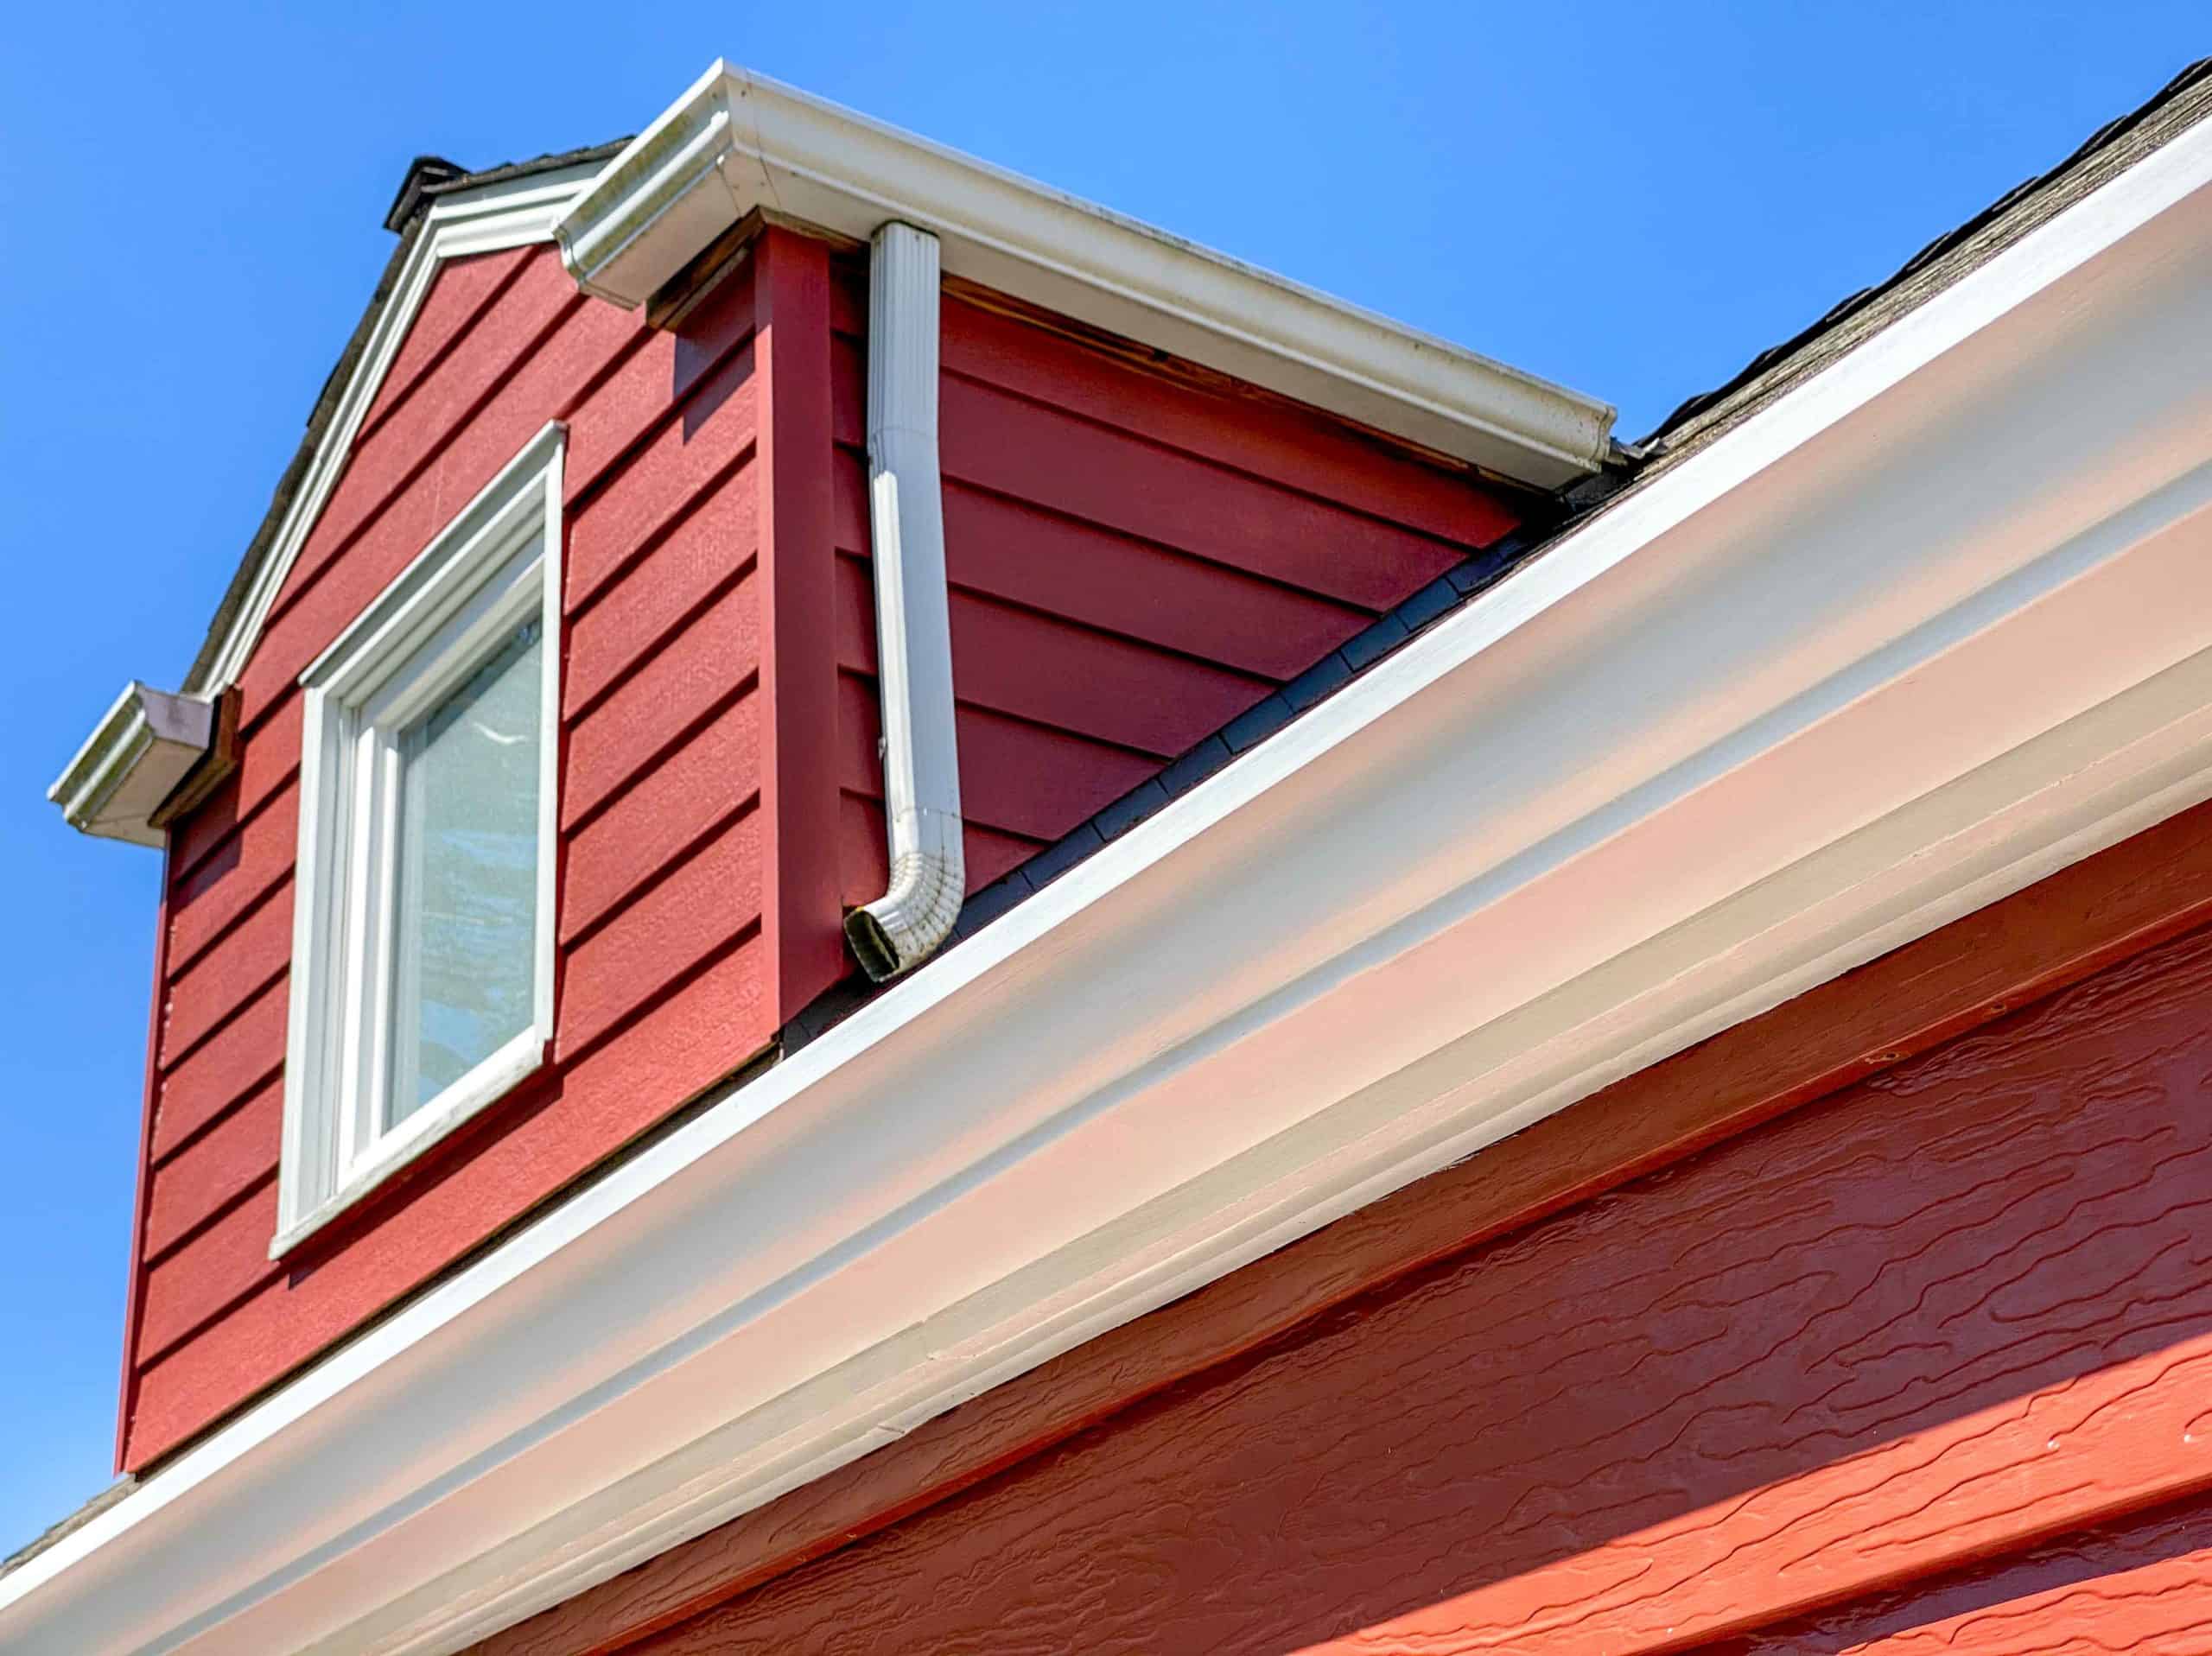
Step 5: Installing the Corner Caps
Corner caps are an important element in installing cedar shake siding, as they provide a finished and polished look while protecting the corners of your home. Here’s how to install the corner caps:
- Measure and Cut: Start by measuring the height of the corner where the cedar shake siding will be installed. Cut the corner caps to the appropriate length, ensuring a snug fit.
- Apply Adhesive: Apply a thin layer of construction adhesive to the backside of each corner cap. Make sure to use an adhesive that is compatible with the type of corner caps you have.
- Position the Corner Cap: Place the corner cap over the corner of your home, pressing it firmly against the surface. Make sure it is aligned straight and positioned securely.
- Nail it in Place: Use stainless steel or galvanized nails to secure the corner cap in place. Drive the nails through the corner cap and into the wall, ensuring it is securely attached.
- Repeat the Process: Repeat this process for each corner of your home, ensuring that all corner caps are installed securely and evenly.
Installing the corner caps not only adds a professional touch to your cedar shake siding installation but also provides extra protection to the corners of your home. Once the corner caps are installed, you’re ready to move on to the next step: installing the starter strip.
When installing cedar shake siding, make sure to properly prepare the surface by removing any old siding, repairing any damaged areas, and applying a weather-resistant barrier to protect against moisture.
Step 6: Installing the Starter Strip
The starter strip is a crucial component in the installation of cedar shake siding, as it provides a level and secure base for the first row of shakes. Here’s how to install the starter strip:
- Measure and Cut: Measure the length of the wall where the starter strip will be installed. Cut the starter strip to the appropriate length, ensuring a tight fit.
- Position the Starter Strip: Position the starter strip at the bottom of the wall, ensuring that it is level and aligned with the reference marks on the wall.
- Secure the Starter Strip: Use stainless steel or galvanized nails to secure the starter strip to the wall. Place nails every 12 to 16 inches, ensuring that the strip is firmly attached.
- Apply Caulk: Apply a bead of caulk along the top edge of the starter strip. This will provide additional protection against moisture and create a weather-resistant seal.
- Check for Level: Use a level to double-check that the starter strip is installed evenly and level across the length of the wall. Make any necessary adjustments before moving on.
Installing the starter strip is an important step in the cedar shake siding installation process, as it sets the foundation for the rest of the siding. Once the starter strip is securely installed, you’re ready to move on to the next step: applying the first row of cedar shakes.
Step 7: Applying the First Row of Cedar Shakes
Now that the starter strip is in place, it’s time to begin installing the cedar shakes. The first row of shakes serves as the foundation for the entire siding installation. Here’s how to apply the first row of cedar shakes:
- Measure and Cut: Measure the length of the wall and cut the first cedar shake to the appropriate size. It should align with the edge of the wall and slightly overlap the starter strip.
- Apply Adhesive: Apply a thin layer of construction adhesive to the backside of the cedar shake to ensure a secure bond.
- Position the Cedar Shake: Place the cedar shake onto the starter strip, ensuring it is level and aligned with the edge of the wall. Press it firmly against the surface.
- Nail it in Place: Use stainless steel or galvanized nails to secure the cedar shake to the wall. Place the nails near the top of the shake, avoiding the areas where the next row will overlap.
- Continue with Subsequent Shakes: Repeat the process, cutting each cedar shake to size, applying adhesive, positioning it on the wall, and securing it with nails. Ensure that each shake overlaps the previous one by the specified amount according to the manufacturer’s guidelines.
- Check for Level: Regularly use a level to ensure that the first row of shakes is installed straight and level across the length of the wall. Make any necessary adjustments as you proceed.
Installing the first row of cedar shakes sets the tone for the rest of the siding installation. Take your time to ensure each shake is properly aligned, level, and securely attached to the wall. Once the first row is complete, you’re ready to move on to the next step: installing subsequent rows of cedar shakes.
Step 8: Installing Subsequent Rows of Cedar Shakes
With the first row of cedar shakes in place, you can now proceed with installing the subsequent rows. This step will guide you through the process of installing each row of cedar shakes above the starter strip. Follow these steps:
- Measure and Cut: Measure the length of the wall, taking into account the overlap of the previous row. Cut the cedar shakes to the appropriate size, ensuring a proper fit.
- Apply Adhesive: Apply a thin layer of construction adhesive to the backside of each cedar shake, just like you did with the first row.
- Position the Cedar Shake: Place the cedar shake onto the wall, ensuring a proper overlap over the previous row. Press it firmly against the surface to create a secure bond.
- Nail it in Place: Use stainless steel or galvanized nails to secure the cedar shake to the wall. Place the nails near the top of the shake, avoiding the areas where the next row will overlap.
- Repeat the Process: Continue installing subsequent rows of cedar shakes, following the same steps of measuring, cutting, applying adhesive, positioning, and nailing. Make sure each row has the proper overlap and is securely attached to the wall.
- Check for Level: Regularly use a level to ensure that the rows of cedar shakes are installed straight and level across the length of the wall. Make any necessary adjustments as you proceed.
Taking your time and working with precision will ensure that each row of cedar shakes is properly aligned and securely installed. Keep a consistent overlap between rows to maintain a uniform and visually appealing appearance. Once you have completed the installation of all rows, you’re ready to move on to the next step: adding finishing touches and trimming.
Read more: How To Install Shake Siding
Step 9: Finishing Touches and Trimming
Once all the cedar shakes are installed, it’s time to add the finishing touches and complete the overall look of your cedar shake siding. This final step involves trimming and ensuring that everything is neat and secure. Follow these steps:
- Trim Excess Material: Using a saw or a utility knife, carefully trim any excess cedar shake material that extends beyond the edges of the walls or corners. This will create clean and crisp lines.
- Check for Gaps: Inspect the siding for any visible gaps between the cedar shakes. Fill these gaps with a high-quality exterior caulking to prevent moisture from entering and to provide a polished appearance.
- Inspect Corners and Edges: Pay close attention to corners and edges to ensure they are properly aligned and level. Make any necessary adjustments and use trim pieces if needed for a seamless finish.
- Secure Loose Shakes: Throughout the installation process, some cedar shakes may become loose. Go back and secure any loose shakes with additional nails, ensuring they are tightly fastened to the wall.
- Perform a Quality Check: Take a step back and inspect the entire cedar shake siding installation. Look for any visible imperfections, gaps, or areas that may require further attention. Make the necessary adjustments to achieve a professional and visually pleasing result.
By giving attention to the finishing touches and trimming, you can enhance the overall appearance of your cedar shake siding. This step is crucial for achieving a clean and polished final look. Once you have completed these finishing touches, you’re ready for the final step: applying a protective finish.
Step 10: Applying Protective Finish
The final step in the installation process of cedar shake siding is to apply a protective finish. This helps to preserve the natural beauty of the wood and extends the lifespan of the siding. Follow these steps to apply a protective finish:
- Choose the Right Finish: Select a high-quality exterior wood finish that is specifically designed for cedar shake siding. Consider factors such as UV protection, water resistance, and durability.
- Prepare the Siding: Ensure that the cedar shake siding is clean and dry before applying the protective finish. Remove any dust, dirt, or debris using a brush or a soft cloth.
- Stir the Finish: Thoroughly stir the finish to ensure that the ingredients are well mixed. This helps achieve a consistent application and ensures the best performance of the product.
- Apply the Finish: Use a brush, roller, or sprayer to apply the protective finish to the cedar shake siding. Follow the manufacturer’s instructions for the recommended application method.
- Work in Small Sections: Apply the finish in small sections, working from top to bottom. Ensure an even and consistent coat of finish on each cedar shake, covering all surfaces.
- Allow Drying Time: Allow the first coat of finish to dry completely according to the manufacturer’s recommended drying time. This may vary depending on the specific product used.
- Apply Additional Coats: Depending on the manufacturer’s instructions, apply additional coats of the protective finish to enhance durability and longevity. Allow each coat to dry before applying the next.
- Clean Up: Clean up any tools or equipment used for applying the finish according to the manufacturer’s instructions. Dispose of any unused finish or empty containers properly.
Applying a protective finish not only enhances the natural beauty of cedar shake siding but also helps to protect it from the elements. Regular maintenance and reapplication of the finish as needed will help maintain the longevity and appearance of your cedar shake siding for years to come. With the protective finish applied, you’ve successfully completed the installation process of cedar shake siding!
Congratulations on transforming the exterior of your home with the timeless beauty and durability of cedar shake siding. Enjoy the results and the added value that it brings to your property.
Conclusion
Congratulations on completing the installation of cedar shake siding on your home! By following this step-by-step guide, you have successfully transformed your home’s exterior with the natural beauty and durability of cedar shakes. Not only does cedar shake siding provide a rustic and timeless appeal, but it also offers excellent protection against the elements.
Throughout the process, you have learned how to properly prepare the exterior of your home, measure and order the necessary materials, gather the required tools, and install each component with precision. By paying attention to details such as corner caps, starter strips, and proper overlap between shakes, you have ensured a professional and visually appealing end result.
Remember, proper maintenance is key to preserving the beauty and longevity of your cedar shake siding. Regularly inspect the siding for any signs of damage, clean it periodically, and reapply a protective finish as needed. This will help protect the wood from moisture, UV rays, and other potential hazards.
We hope that this comprehensive guide has provided you with the knowledge and confidence to successfully install cedar shake siding on your home. Remember to prioritize safety, consult with experts when needed, and take your time to ensure a well-executed installation. Enjoy your beautiful new cedar shake siding and the enhanced curb appeal it brings to your home!
Frequently Asked Questions about Your Step-by-Step Guide To Installing Cedar Shake Siding
Was this page helpful?
At Storables.com, we guarantee accurate and reliable information. Our content, validated by Expert Board Contributors, is crafted following stringent Editorial Policies. We're committed to providing you with well-researched, expert-backed insights for all your informational needs.


0 thoughts on “Your Step-by-Step Guide To Installing Cedar Shake Siding”