Articles
How To Install Wainscoting Step-by-Step
Modified: January 8, 2024
Learn how to install wainscoting in easy steps with our comprehensive articles, covering everything from materials needed to step-by-step instructions. Gain the skills and confidence to transform your space with beautiful wainscoting.
(Many of the links in this article redirect to a specific reviewed product. Your purchase of these products through affiliate links helps to generate commission for Storables.com, at no extra cost. Learn more)
Introduction
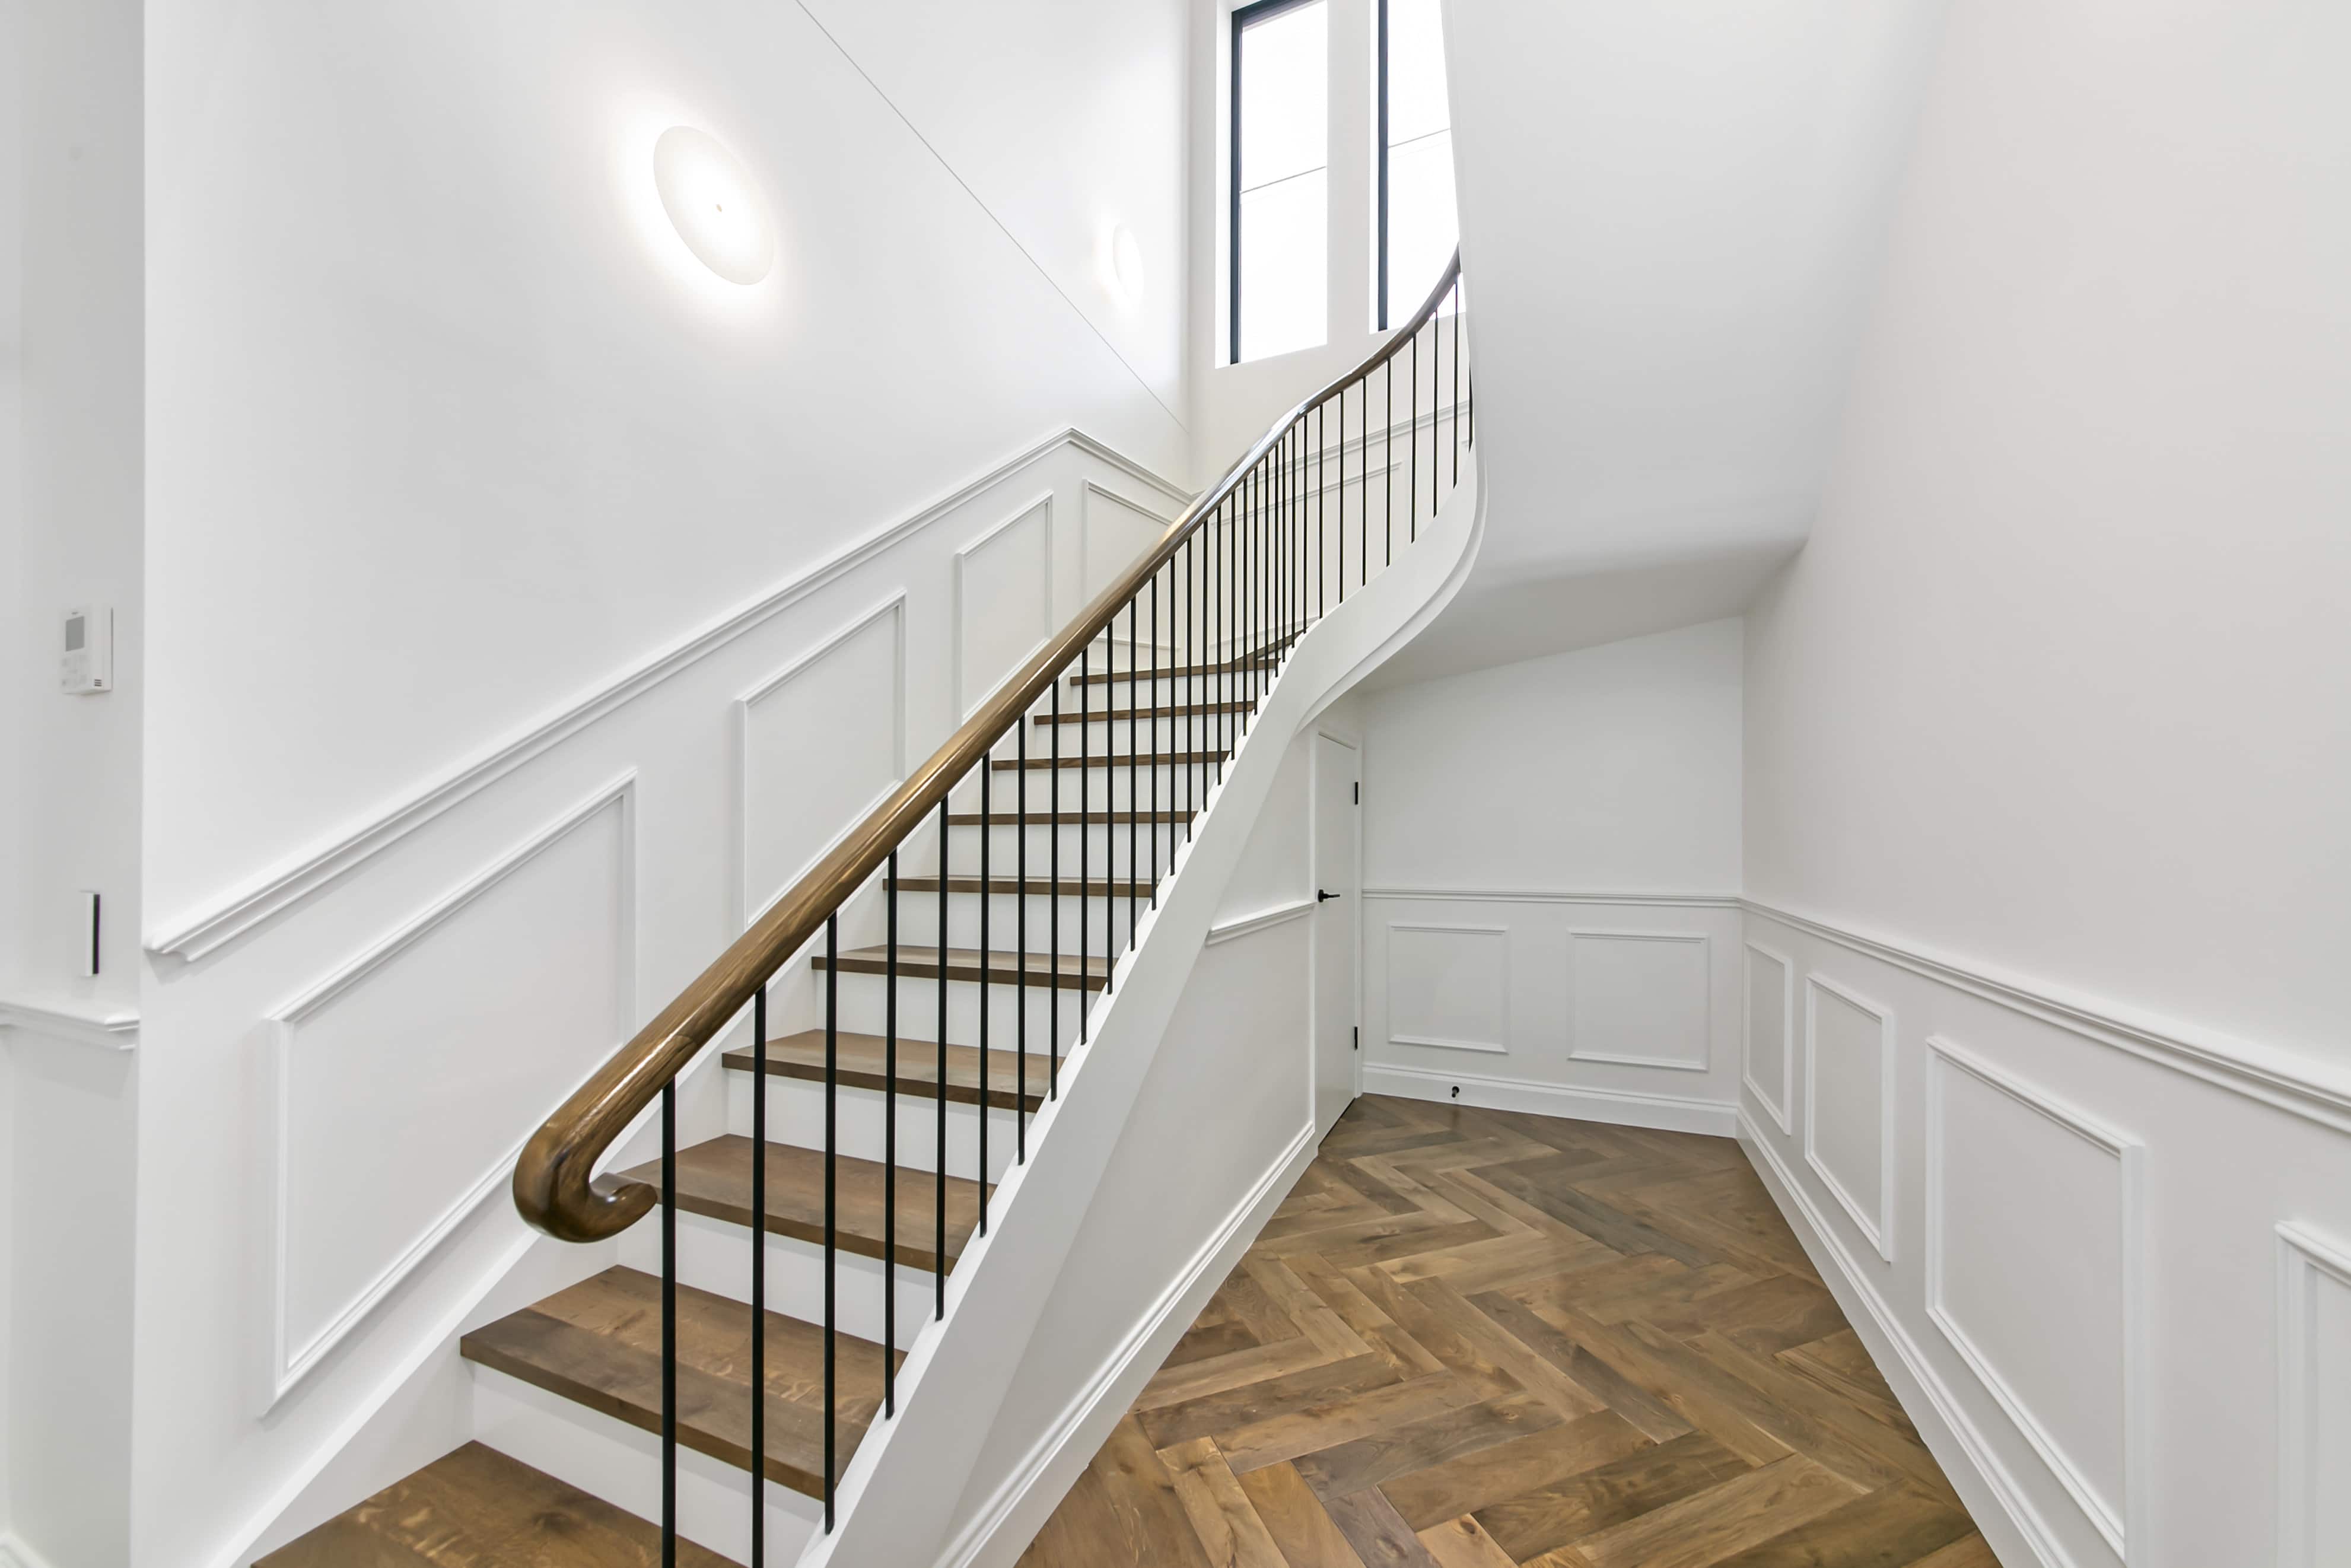
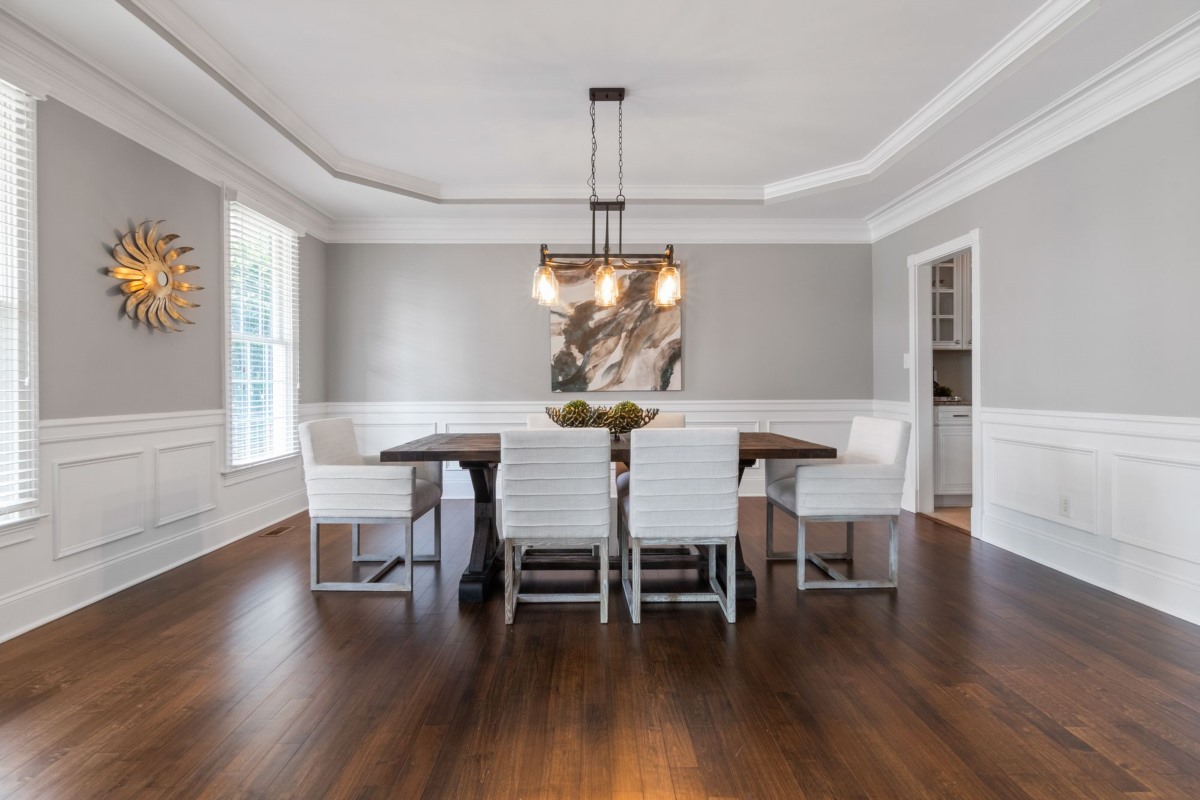
Wainscoting is a classic design element that adds elegance and charm to any room. Whether you want to give your dining room a more sophisticated look, or transform your hallway into a stylish focal point, installing wainscoting can make a big difference. In this step-by-step guide, we will walk you through the process of installing wainscoting, so you can achieve a professional-looking result.
Before you start, it’s important to gather all the necessary materials and tools. You will need wainscoting panels, chair rail, baseboard, construction adhesive, nails, a tape measure, a miter saw, a level, a caulking gun, sandpaper, primer, and paint.
The first step in the installation process is to measure and mark the wall where you’ll be installing the wainscoting. Use a tape measure to determine the height and width of the wall, and mark the desired height of the wainscoting using a pencil.
Now, it’s time to install the chair rail. Measure the length of the wall and cut the chair rail to size using a miter saw. Apply construction adhesive to the back of the chair rail and press it firmly against the wall, making sure it’s level. Secure it in place with nails, spacing them evenly along the length of the chair rail.
Next, measure and cut the wainscoting panels to fit the height of the wall. Use a miter saw to make accurate cuts. Apply construction adhesive to the back of each panel and press it firmly against the wall, aligning it with the chair rail. Secure the panels in place with nails, making sure they are level and evenly spaced.
Continue installing the wainscoting panels, working your way across the wall. Make sure to leave a small gap between each panel to allow for expansion. Trim any excess material at the edges, if necessary.
Once all the panels are installed, it’s time to install the baseboard. Measure the length of the wall and cut the baseboard to size. Apply construction adhesive to the back of the baseboard and press it firmly against the wall, aligning it with the bottom edge of the wainscoting panels. Secure it in place with nails, making sure it’s level.
After the installation is complete, fill any nail holes with wood filler and sand the surface to make it smooth. Wipe away any dust with a damp cloth.
Before you paint, make sure to prime the wainscoting to ensure proper adhesion and coverage. Once the primer is dry, apply two coats of paint in your desired color, allowing each coat to dry before applying the next.
Finally, add the finishing touches by caulking any gaps or seams between the wainscoting, chair rail, and baseboard. This will give your installation a seamless and professional look.
Installing wainscoting may seem daunting, but with the right materials and tools, it can be a rewarding DIY project. Follow these step-by-step instructions, and soon you’ll have a beautiful wainscoting installation that will enhance the aesthetic appeal of your space.
Key Takeaways:
- Elevate your space with wainscoting, adding elegance and charm to any room. Follow the step-by-step guide for a rewarding DIY project that transforms your home.
- Gather materials, measure and mark the wall, install chair rail, cut and install wainscoting panels, add baseboard, fill nail holes, sand, prime, paint, and add finishing touches for a professional wainscoting installation.
Read more: DIY Guide To Installing Wainscoting
Step 1: Gather Materials and Tools
Before you start installing wainscoting, it’s important to gather all the necessary materials and tools. This will ensure that you have everything you need on hand for a smooth and efficient installation process.
Here is a list of the materials and tools you will need:
- Wainscoting panels: These can be made of wood, MDF (medium-density fiberboard), or PVC (polyvinyl chloride). Choose the material that best suits your budget and desired aesthetic.
- Chair rail: This decorative molding will be installed horizontally along the top of the wainscoting panels. It adds a finishing touch and can help protect the wall from chairs or other furniture.
- Baseboard: This molding will be installed along the bottom of the wainscoting panels, providing a clean transition between the panels and the floor.
- Construction adhesive: This will be used to secure the wainscoting panels, chair rail, and baseboard to the wall. Look for an adhesive that is specifically designed for use with your chosen wainscoting material.
- Nails: These will be used to reinforce the adhesive and ensure a secure installation. Choose nails that are appropriate for your wall material and the thickness of the wainscoting panels.
- Tape measure: This essential tool will help you measure the dimensions of the wall and ensure accurate cuts and placements.
- Miter saw: If you need to make angled or beveled cuts, a miter saw will come in handy. It allows you to make precise cuts with ease.
- Level: To ensure that your wainscoting is installed straight and level, you’ll need a level. This tool will help you achieve a professional-looking result.
- Caulking gun: This tool will be used to apply caulk to any gaps or joints between the wainscoting panels, chair rail, and baseboard. It will give your installation a seamless and polished finish.
- Sandpaper: You’ll need sandpaper to smooth any rough edges or surfaces on the wainscoting panels before painting or staining.
- Primer and paint: If you plan to paint your wainscoting, make sure to have primer and paint in your desired color. Opt for a high-quality paint that is durable and easy to clean.
Once you have gathered all the materials and tools, you’ll be well-prepared to tackle the installation process. Take the time to organize your materials and set up your workspace, ensuring that everything is easily accessible and within reach.
With your materials and tools ready, you’re now ready to move on to the next step of installing wainscoting.
Step 2: Measure and Mark the Wall
Now that you have gathered all the necessary materials and tools, it’s time to move on to the next step of installing wainscoting: measuring and marking the wall.
Start by measuring the height and width of the wall where you’ll be installing the wainscoting. Use a tape measure and get accurate measurements to ensure a proper fit. Take note of these measurements as they will guide you throughout the installation process.
Next, determine the desired height of the wainscoting. This will depend on your personal preference and the overall look you want to achieve. Standard wainscoting height is typically around one-third of the wall height, but you can adjust this to suit your taste and the proportions of the room.
Using a pencil, make a level line on the wall at your desired height. Ensure that the line is straight and even by using a level. This will serve as your guide when installing the wainscoting panels and other moldings.
If you have baseboards or existing moldings on the wall, you may need to remove them before proceeding. Use a pry bar or a crowbar to carefully remove any existing trim, taking care not to damage the wall surface. This will provide a clean, flat surface for the wainscoting installation.
Once you have marked the height and removed any existing moldings, it’s a good idea to use painter’s tape to outline the area where the wainscoting will be installed. This will give you a visual reference and help you visualize the final result. It also acts as a protective barrier for the wall surface during the installation process.
Before moving on to the next step, double-check your measurements and markings to ensure their accuracy. Taking the time to measure and mark the wall properly will contribute to a successful wainscoting installation.
With the wall measured and marked, you’re ready to proceed to the next step: installing the chair rail.
Step 3: Install the Chair Rail
Now that you have measured and marked the wall, it’s time to install the chair rail, which will add a decorative element to your wainscoting installation. Follow these steps to ensure a professional and secure installation:
- Measure the length of the wall where you’ll be installing the chair rail. Use a tape measure and get an accurate measurement. If the wall is longer than the length of your chair rail, you may need to join two pieces together.
- Using a miter saw, cut the chair rail to the appropriate length. Remember to make precise and clean cuts to ensure a seamless installation.
- Apply construction adhesive to the back of the chair rail. Use a caulking gun to evenly distribute the adhesive along the length of the rail.
- Press the chair rail firmly against the wall at the desired height, aligning it with the level line you marked earlier. Make sure the chair rail is straight and level using a level. Adjust as needed.
- Secure the chair rail in place by inserting nails through the rail and into the wall. Space the nails evenly along the length of the chair rail to ensure a secure installation. Use a nail punch to sink the nails slightly below the surface, avoiding splintering.
- Continue measuring, cutting, and installing additional sections of chair rail if needed. Make sure to align each section with the previous one for a seamless look. Use a miter saw to make angled cuts if your installation requires it.
As you install the chair rail, be mindful of any corners or obstacles you may encounter. For outside corners, you can make miter cuts to create a clean and professional finish. For inside corners, you can make coping cuts for a seamless joint.
Remember to periodically check that the chair rail is level and straight as you install each section. This will help you maintain a uniform and visually appealing installation.
Once all the chair rail sections are installed, use a damp cloth to wipe away any excess adhesive or dirt. Take a step back and admire your progress! The chair rail adds a touch of elegance to the wainscoting and sets the stage for the next step: installing the wainscoting panels.
In the next step, we’ll guide you through measuring and cutting the wainscoting panels to ensure a perfect fit. Stay tuned!
Step 4: Measure and Cut the Wainscoting Panels
With the chair rail installed, it’s time to move on to the next step: measuring and cutting the wainscoting panels. This step is crucial for achieving a seamless and professional-looking wainscoting installation. Follow these steps to ensure accurate measurements and precise cuts:
- Start by measuring the height of the wall from the top of the chair rail to the baseboard. Use a tape measure and get an accurate measurement. Take note of this measurement, as it will guide you when cutting the wainscoting panels.
- Transfer the measurement from step 1 onto the wainscoting panel. Mark the height on the panel using a pencil or a marker. Make sure the mark is clear and visible.
- Using a miter saw, carefully cut the panel along the marked line. Take your time to ensure a straight and clean cut. Remember to wear safety goggles when using power tools.
- Once the first panel is cut, place it against the wall to check for a proper fit. Adjust the panel, if needed, to ensure it aligns with the chair rail and baseboard. It’s common for walls to have slight variations, so don’t be discouraged if adjustments are necessary.
- If the panel needs further trimming or adjustments, mark the areas that need to be cut. Using a miter saw or a jigsaw, carefully make the necessary cuts. Double-check the fit against the wall and make any additional adjustments, if required.
- Repeat steps 2-5 for each wainscoting panel, making sure to measure and cut them individually according to the specific wall dimensions.
When cutting the wainscoting panels, it’s essential to be precise and maintain straight cuts. Take your time and measure twice before making any cuts. It’s always better to make small adjustments incrementally rather than cutting too much material at once.
If your installation includes corners or angles, such as around doors or windows, take extra care when measuring and cutting. Make sure to properly measure the angle and transfer it onto the wainscoting panel for accurate cuts. Consider using a miter saw to achieve clean, angled cuts.
Once all the wainscoting panels are measured and cut to size, take a moment to layout and arrange them before installation. This allows you to visualize the overall look and make any final adjustments, if necessary.
With the wainscoting panels ready, you’re now prepared to move on to the next step: installing the first wainscoting panel. Keep up the great work!
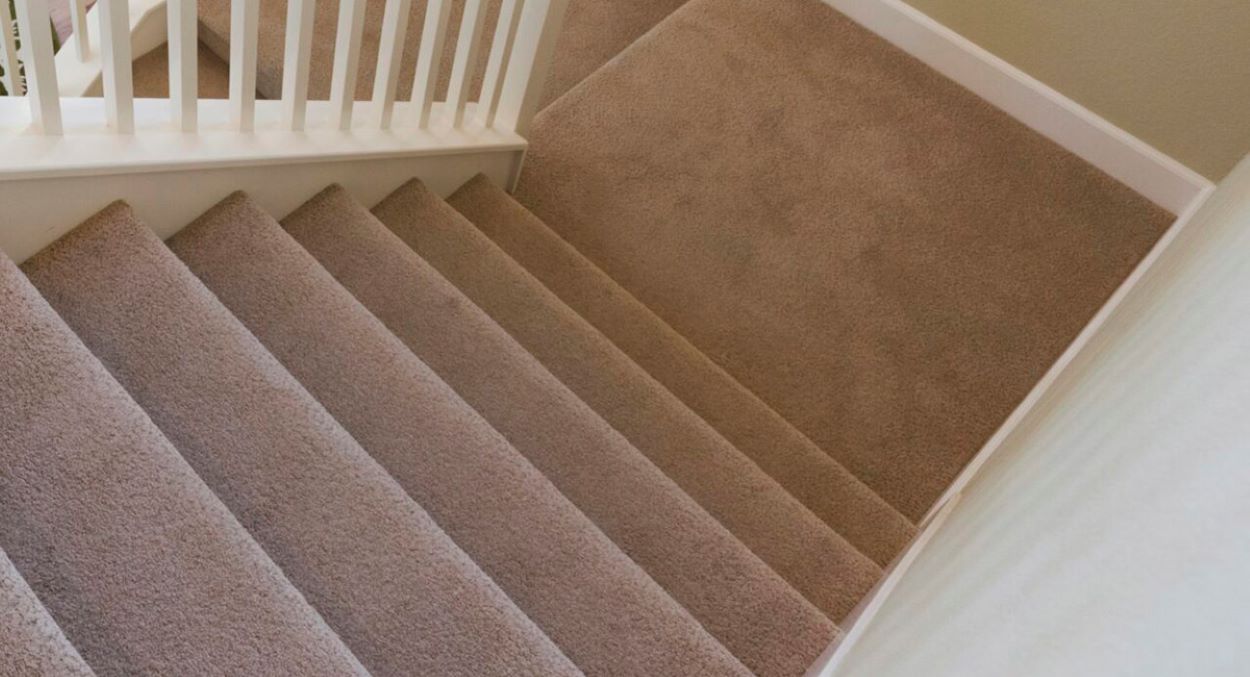
Read more: How To Install A Carpet On Steps
Step 5: Install the First Wainscoting Panel
Now that you have measured and cut the wainscoting panels, it’s time to start installing them. Let’s begin with the first panel, which will set the foundation for the rest of the installation. Follow these steps to ensure a secure and visually appealing installation:
- Apply construction adhesive to the back of the first wainscoting panel. Be sure to follow the manufacturer’s instructions for proper application.
- Position the panel against the wall, aligning it with the chair rail and making sure the bottom edge is level with the baseboard. Press the panel firmly against the wall to ensure proper adhesion.
- Secure the panel in place by inserting nails through the panel and into the wall. Use a nail punch to sink the nails slightly below the surface to create a clean finish. Space the nails evenly along the panel, ensuring it is firmly attached to the wall.
- Check that the panel is straight and level using a level. Adjust as necessary to ensure a visually pleasing installation.
- Continue applying adhesive, positioning, and securing the remaining wainscoting panels, working your way across the wall. Make sure to leave a small gap (about 1/8 inch) between each panel to allow for expansion. Use spacers or blocks to maintain consistent spacing between the panels.
- As you install each panel, double-check that it is aligned with the chair rail and baseboard, and that it is level. Make any adjustments as needed for a seamless and professional look.
Take your time during this step to ensure that each wainscoting panel is properly aligned and securely fastened. As you work, periodically step back and assess the overall appearance of the installation to ensure a uniform and visually appealing result.
If you encounter any obstacles, such as outlets or switches, mark their locations on the back of the panel before applying adhesive. Then, use a jigsaw or a utility knife to cut out the necessary openings for a proper fit.
It’s important to note that wainscoting panels can vary in thickness, so be mindful of the adhesive application. Apply enough adhesive to ensure a secure bond, but avoid excessive amounts that may cause the panel to warp or bulge.
Once the first wainscoting panel is installed, stand back and admire your progress! You have successfully completed the initial phase of the installation. Now, continue with the next step to complete the wainscoting installation process.
When installing wainscoting, make sure to measure and mark the wall accurately before starting. This will ensure that the panels are installed evenly and straight.
Step 6: Continue Installing the Wainscoting Panels
With the first wainscoting panel successfully installed, it’s time to continue the installation process by adding the remaining panels. Follow these steps to ensure a seamless and professional-looking wainscoting installation:
- Apply construction adhesive to the back of the next wainscoting panel. Spread the adhesive evenly using a caulk gun, making sure to cover the entire surface.
- Position the panel against the wall, aligning it with the existing panel and the chair rail. Press the panel firmly against the wall to ensure proper adhesion. Use spacers or blocks to maintain consistent spacing between the panels, leaving a small gap (about 1/8 inch) for expansion.
- Secure the panel in place by inserting nails through the panel and into the wall. Space the nails evenly along the panel, ensuring it is firmly attached. Use a nail punch to sink the nails slightly below the surface to create a clean finish.
- Continue applying adhesive, positioning, and securing the remaining wainscoting panels in the same manner, working your way across the wall. Take care to align each panel with the previous one, ensuring they are level and evenly spaced.
- As you install each panel, periodically step back and assess the overall appearance of the installation. Make any necessary adjustments to ensure a visually pleasing result.
As you work, be mindful of any corners or angles in the wall. For outside corners, you may need to make miter cuts to achieve a clean, tight fit. Use a miter saw to make precise cuts at the appropriate angles. For inside corners, you can use coping cuts to create a seamless joint between the wainscoting panels.
If you encounter any obstacles such as outlets or switches, mark their locations on the back of the panel before applying adhesive. Use a jigsaw or a utility knife to carefully cut out the necessary openings for a proper fit.
As you install the remaining wainscoting panels, check that they align with the chair rail and baseboard, and that they are level. Any adjustments needed, such as trimming or sanding the panels, should be done before securing them in place.
Take your time during this step to ensure that each wainscoting panel is properly aligned, securely fastened, and visually appealing. The installation process may require patience and attention to detail, but the end result will be well worth it.
Once all the wainscoting panels are installed, step back and admire your hard work. You’ve successfully completed the installation process! Now, it’s time to move on to the next step: installing the baseboard.
Step 7: Install the Baseboard
With the wainscoting panels securely in place, it’s time to install the baseboard. The baseboard will provide a finished look and create a clean transition between the wainscoting and the floor. Follow these steps to install the baseboard:
- Measure the length of the wall where you’ll be installing the baseboard. Use a tape measure and get an accurate measurement. If the wall is longer than the length of your baseboard, you may need to join two pieces together.
- Using a miter saw, cut the baseboard to the appropriate length. Make sure to make precise and clean cuts to ensure a seamless installation.
- Apply construction adhesive to the back of the baseboard. Use a caulking gun to evenly distribute the adhesive along the back of the baseboard.
- Press the baseboard firmly against the wall, aligning it with the bottom edge of the wainscoting panels. Make sure it is level using a level tool. Adjust as necessary to achieve proper alignment.
- Secure the baseboard in place by inserting nails through the baseboard and into the wall. Be sure to space the nails evenly along the baseboard to ensure a secure installation. Use a nail punch to sink the nails slightly below the surface for a clean finish.
- Continue measuring, cutting, and installing additional sections of baseboard if needed. Make sure to align each section with the previous one for a seamless look. Use a miter saw to make angled cuts if your installation requires it.
As you install the baseboard, be mindful of any corners or obstacles you may encounter. For outside corners, you can make miter cuts to create a clean and professional finish. For inside corners, you can make coping cuts for a seamless joint.
Ensure that the baseboard aligns with the wainscoting panels and is level. Use a level tool to check its alignment throughout the installation. Adjust as necessary to ensure a visually pleasing result.
Double-check that the baseboard is securely fastened to the wall and that there are no gaps or loose sections. Any gaps can be filled and sealed with caulk for a finished look.
Once the baseboard is installed, step back and admire your progress. The baseboard brings the wainscoting installation together and provides a clean and polished appearance.
Now that the baseboard is in place, it’s time to move on to the next step: filling nail holes and sanding the surface to prepare for painting or staining.
Step 8: Fill Nail Holes and Sand the Surface
After installing the baseboard, it’s important to give your wainscoting installation a smooth and flawless finish. In this step, we will focus on filling nail holes and sanding the surface to prepare it for painting or staining. Follow these steps for a polished final result:
- Inspect the wainscoting installation for any visible nail holes. These are usually located along the chair rail, wainscoting panels, and baseboard. Use a keen eye to identify any holes that need to be filled.
- Prepare a small amount of wood filler or spackle according to the manufacturer’s instructions. You want it to be thick enough to hold its shape but easy to work with.
- Using a putty knife or a small spatula, scoop a small amount of wood filler onto the blade. Press the filler into each nail hole, ensuring it is completely filled and the surface is smooth.
- Scrape off any excess filler using the putty knife, leaving the surface flush with the surrounding wood. Continue this process until all the nail holes are filled and the surface is even.
- Allow the filler to dry completely. The drying time will depend on the product but typically ranges from a few hours to overnight.
- Once the filler is dry, use fine-grit sandpaper (such as 220-grit) to smooth the surface of the wainscoting panels, chair rail, and baseboard. Sand in a circular motion, applying light pressure, until the filled nail holes are flush with the surrounding wood.
- Wipe away any dust or debris using a clean cloth or a vacuum cleaner with a brush attachment. This will ensure a clean surface for painting or staining.
Sanding the surface not only creates a smooth and even finish but also helps to blend the filled nail holes with the surrounding wood, making them less visible. Take your time while sanding to achieve the desired result.
Remember to wear safety goggles and a dust mask during the sanding process to protect your eyes and respiratory system from dust particles.
Once the surface is sanded and cleaned, visually inspect the wainscoting installation to ensure that the filled nail holes are seamlessly blended with the rest of the surface. If necessary, you can apply additional filler and repeat the sanding process until you achieve a flawless finish.
With the surface smoothed and prepped, you’re now ready for the next step: priming and painting the wainscoting. This will add the final touch to your installation and bring the wainscoting to life.
Step 9: Prime and Paint the Wainscoting
Now that the wainscoting installation is smooth and prepared, it’s time to prime and paint the surface. This step will give your wainscoting a beautiful and finished appearance that enhances the overall aesthetic of the room. Follow these steps for a successful priming and painting process:
- Before you start priming, ensure that the wainscoting surface is clean and free of dust. Use a clean cloth or a vacuum cleaner with a brush attachment to remove any debris.
- Apply a coat of primer to the entire wainscoting surface, using a brush or a roller. Primer helps to create a smooth and even base for the paint, promotes adhesion, and ensures better color coverage.
- Follow the manufacturer’s instructions for the specific primer you are using, including recommended drying times between coats.
- Once the primer is dry, lightly sand the primed surface using fine-grit sandpaper (such as 220-grit). This will smooth any imperfections and create a better surface for the paint to adhere to.
- Remove any dust from the sanding using a clean cloth or a vacuum cleaner with a brush attachment.
- Now, it’s time to paint the wainscoting. Choose a paint color that complements your overall design aesthetic.
- Apply the paint using a brush or a roller, working in smooth and even strokes. Start from the top and work your way down, making sure to cover the entire wainscoting surface.
- Apply a second coat if necessary, following the drying time recommended by the paint manufacturer. This will ensure full coverage and a more vibrant finish.
- Allow the paint to dry completely before moving furniture back into the room or making any other adjustments.
Remember to protect the surrounding areas from paint splatter or spills by using painter’s tape and drop cloths.
Additionally, consider using a paint with a semi-gloss or satin finish for wainscoting, as these finishes are easier to clean and will provide a subtle sheen.
With the wainscoting now painted, step back and appreciate the transformation your hard work has brought to the room. The painted wainscoting will add a touch of elegance and sophistication to your space.
In the final step, we will cover some finishing touches to help complete the wainscoting installation and make it truly shine.
Step 10: Finishing Touches
In the last step of the wainscoting installation process, it’s time to add those final touches that will truly bring your project to completion. These small details will enhance the overall appearance of the wainscoting and give it a professional and polished look. Follow these steps for the finishing touches:
- Inspect the wainscoting installation for any gaps or seams between the panels, chair rail, and baseboard. Use a caulking gun to apply caulk along these areas, creating a seamless and smooth transition.
- Run a damp cloth along the caulked areas to smooth and shape the caulk. This step will help create a clean and professional finish.
- If desired, you can paint the caulked areas to match the color of the wainscoting, chair rail, or baseboard. This will further enhance the seamless appearance of your installation.
- Consider adding decorative molding or trim to add visual interest to the wainscoting installation. This can be applied to the top or bottom of the chair rail or along the baseboard. Choose a design that matches your overall aesthetic and install it securely with appropriate adhesive and nails.
- Take a step back and inspect the entire wainscoting installation. Look for any imperfections or areas that may need touch-ups. Fix any visible blemishes, such as paint drips or uneven edges, by carefully sanding or applying touch-up paint.
- Once you’re satisfied with the overall appearance, clean up any tools, materials, and debris from the installation process. This will give your space a clean and organized look.
- Lastly, take a moment to appreciate your hard work and enjoy the transformed space. The wainscoting installation has added character and charm that enhances the overall aesthetic of the room.
With these finishing touches, your wainscoting installation is complete! Take the time to admire and enjoy the fruits of your labor.
If you plan to further decorate the room, ensure that any artwork or wall hangings are securely hung on the wall, taking into consideration the placement of the wainscoting panels and chair rail.
Regular maintenance of your wainscoting, such as regularly cleaning the surface and inspecting for any signs of damage, will help preserve its beauty for years to come.
Congratulations on successfully installing wainscoting! Your attention to detail and patience have resulted in a beautiful and timeless addition to your home.
Remember, whenever you’re ready to take on a new home improvement project, you can always come back to this guide for reference. Happy decorating!
Conclusion
Installing wainscoting is a rewarding DIY project that can transform the look and feel of any room. By following the step-by-step guide outlined in this article, you have learned how to install wainscoting with precision and attention to detail.
We began by gathering all the necessary materials and tools, ensuring that we were well-equipped for the installation process. We then measured and marked the wall, ensuring accurate placement of the wainscoting. Next, we installed the chair rail, which added a decorative element and provided a guide for the rest of the installation.
With the chair rail in place, we moved on to measuring and cutting the wainscoting panels, ensuring a perfect fit against the wall. We then proceeded to install the first panel, followed by the remaining panels, carefully aligning them to create a seamless and visually appealing installation.
After installing the panels, we installed the baseboard, which provided a polished and finished look. We filled any nail holes and sanded the surface to create a smooth and flawless finish.
Next, we primed and painted the wainscoting, adding color and personality to the installation. Finally, we completed the project by adding finishing touches, such as caulking gaps, adding decorative molding, and addressing any imperfections.
By following these steps and paying attention to detail, you have successfully completed your wainscoting installation. The result is a stunning and elegant addition to your space that enhances its overall aesthetic.
Remember, wainscoting not only adds visual appeal but also provides protection to the walls from everyday wear and tear. Regular maintenance and care will ensure the longevity of your wainscoting installation.
Now that you have mastered the art of installing wainscoting, you have the skills to tackle future home improvement projects with confidence and expertise. So go ahead and continue beautifying your living spaces, one project at a time.
Congratulations on your accomplishment, and enjoy the beautiful transformation that wainscoting brings to your home!
Frequently Asked Questions about How To Install Wainscoting Step-by-Step
Was this page helpful?
At Storables.com, we guarantee accurate and reliable information. Our content, validated by Expert Board Contributors, is crafted following stringent Editorial Policies. We're committed to providing you with well-researched, expert-backed insights for all your informational needs.


0 thoughts on “How To Install Wainscoting Step-by-Step”