Home>Ideas and Tips>Home Gym Gymnastic Rings Setup: Bodyweight Exercise Equipment
Ideas and Tips
Home Gym Gymnastic Rings Setup: Bodyweight Exercise Equipment
Published: September 18, 2024
Learn how to set up gymnastic rings in your home gym for a versatile, full-body workout. Discover benefits, safety tips, and exercises.
(Many of the links in this article redirect to a specific reviewed product. Your purchase of these products through affiliate links helps to generate commission for Storables.com, at no extra cost. Learn more)
Introduction
Bodyweight exercises have become super popular lately because they're effective and versatile. Among the various tools for bodyweight training, gymnastic rings stand out. They provide a full-body workout with minimal equipment. These rings are a fantastic addition to any home gym, offering a range of exercises that help build strength, improve flexibility, and enhance overall fitness. So, how do you set up gymnastic rings in your home gym? Let's dive in and find out.
Benefits of Gymnastic Rings
Gymnastic rings are a stellar choice for home gyms because they offer numerous benefits:
-
Full-Body Workout: Gymnastic rings work multiple muscle groups simultaneously, providing a comprehensive full-body workout. This includes the upper body, core, and lower body, making them an ideal tool for those looking to improve overall fitness.
-
Versatility: The rings can be used for a wide range of exercises, from basic push-ups and pull-ups to advanced skills like muscle-ups and planches. This versatility makes them suitable for both beginners and advanced athletes.
-
Portability: One of the significant advantages of gymnastic rings is their portability. They are lightweight and can be easily transported, making them perfect for outdoor workouts or travel.
-
Cost-Effective: Compared to other gym equipment, gymnastic rings are relatively inexpensive. They can be purchased individually or in sets, making them accessible to a wide range of budgets.
-
Scalability: The rings are infinitely scalable, meaning that you can adjust the difficulty level by changing the height or distance between the rings. This feature makes them suitable for people of all fitness levels, from beginners to advanced athletes.
-
Space Efficiency: Unlike traditional pull-up bars, gymnastic rings require minimal space and can be hung from various structures such as doorframes, trees, or even pull-up bars.
Choosing the Right Gymnastic Rings
When selecting gymnastic rings, there are several factors to consider:
-
Material: The most common material used for gymnastic rings is wood, which provides a durable and comfortable grip. However, some rings may also be made from other materials like nylon or steel.
-
Load Capacity: Ensure that the rings you choose have a high load capacity to support your weight during workouts. Typically, gymnastic rings can support weights of up to 600 pounds (272 kg).
-
Strap Quality: The straps should be durable and have length markings to ensure easy height adjustment. Look for straps with sewn-in length markings for added durability.
-
Buckle Type: The buckle should be sturdy and easy to use. Some rings come with adjustable buckles that allow for quick adjustments in height.
-
Brand Reputation: Choose a reputable brand known for producing high-quality gymnastic rings that meet safety standards.
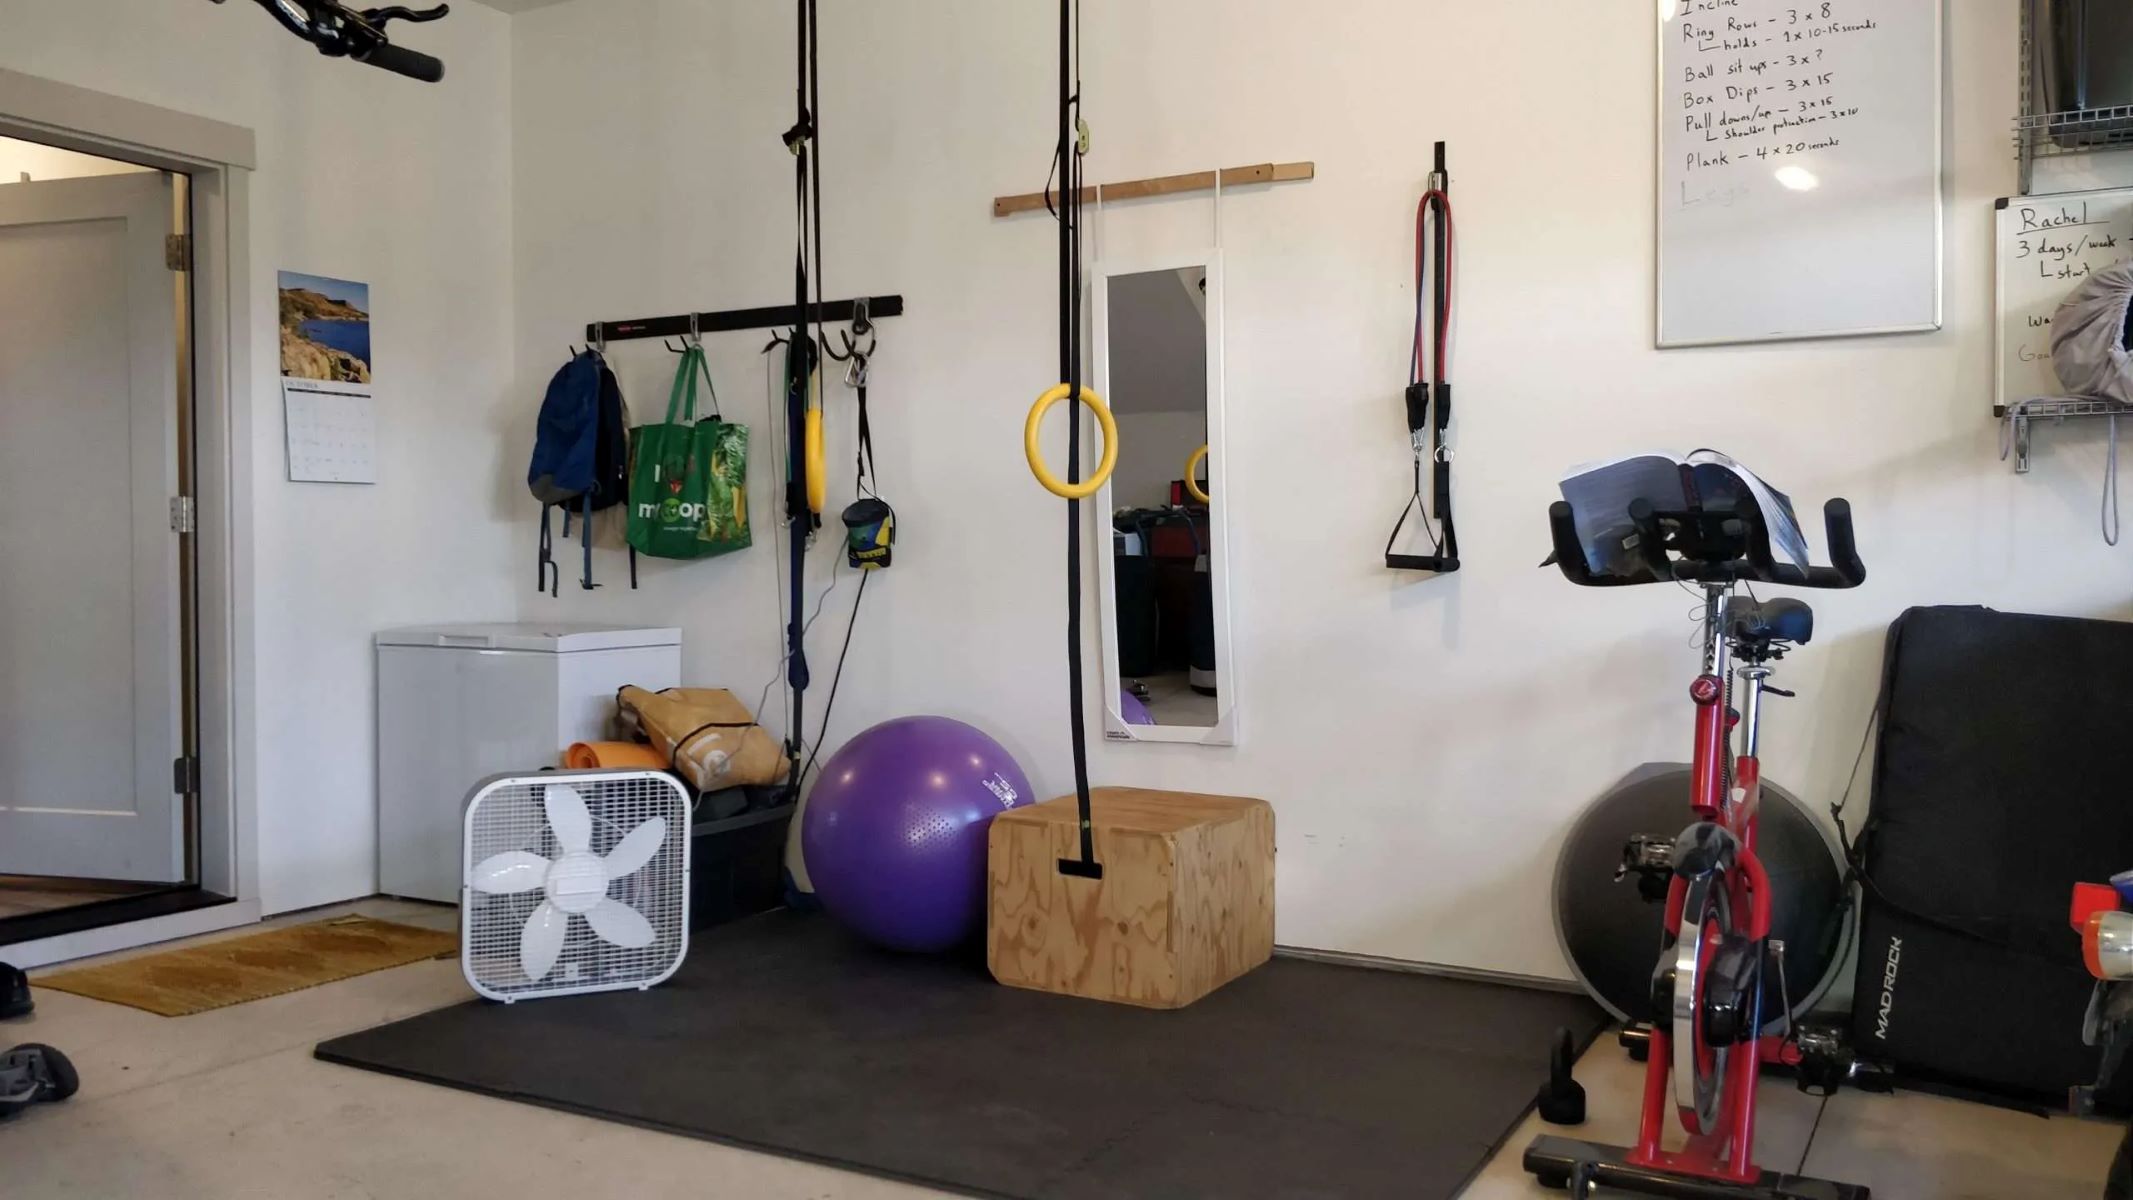
Where to Hang Your Gymnastic Rings
Hanging your gymnastic rings in the right location is crucial for safe and effective training:
-
Ceiling Anchors: If you have access to a sturdy ceiling, you can hang your rings using heavy-duty eye bolts or TRX mounts. Ensure that the anchors are rated for well above your weight to guarantee safety.
-
Door Frames: Hanging your rings from a door frame is a common and convenient option. Use door anchors specifically designed for this purpose to avoid damaging the door or the rings.
-
Garage Rafters: If you have a garage with sturdy rafters, you can hang your rings there. This option provides ample height and space, making it ideal for most users.
-
Trees: For outdoor workouts, hanging your rings from a sturdy tree branch is an excellent option. Use a towel or old blanket to reduce friction on the straps and prevent them from fraying over time.
-
Gym Equipment: If you have access to a gym, check if there are any pull-up stands or other structures that you can use to hang your rings. However, ensure that hanging up your rings does not go against any gym policies.
-
DIY Frame: For those who prefer a more permanent setup, building a DIY frame using wooden beams or pipes is another option. This method requires some carpentry skills but provides a sturdy and customizable setup.
Setting Up Your Gymnastic Rings
Once you have chosen the right location and selected your gymnastic rings, follow these steps to set them up:
-
Inspect the Support Structure: Before hanging your rings, inspect the support structure to ensure it is sturdy enough to hold your weight. Check for any signs of wear or damage.
-
Reduce Strap Friction: To reduce strap friction and prevent them from fraying over time, place a towel or old blanket over the support structure before placing the straps.
-
Throwing the Straps: When throwing the straps over a high structure, wrap them securely around your hand holding the buckle with your other hand. This will prevent the buckle from facing inward and ensure smooth wrapping.
-
Adjusting Height: Use the length markings on the straps to adjust the height of the rings according to your needs. This feature allows you to incrementally increase or decrease the difficulty level of your workouts.
-
Securing the Buckle: Once you have thrown the strap over the support structure, secure it by tightening the buckle. Ensure that it is facing outward to prevent any twisting during use.
-
Testing the Setup: Before starting your workout, test the setup by performing a few exercises to ensure everything is secure and functioning properly.
Safety Considerations
Safety should always be your top priority when using gymnastic rings:
-
Support Structure Stability: Ensure that the support structure can hold your weight without any risk of collapse or damage.
-
Strap Condition: Regularly inspect your straps for signs of wear or damage. Replace them if necessary to maintain safety standards.
-
Clearance: Ensure there is sufficient clearance around the rings to avoid any accidents or injuries during training.
-
Ring Height: Adjust the height of the rings according to your needs but ensure they are not too high or too low for comfortable training.
-
Strap Extension: Use strap extensions for high or permanent installations to prevent any accidents caused by loose straps.
Exercises You Can Perform with Gymnastic Rings
Gymnastic rings offer a wide range of exercises that can help you build strength, improve flexibility, and enhance overall fitness:
-
Push-Ups: Perform push-ups with your hands on the rings to target your chest, shoulders, and triceps.
-
Pull-Ups: Hang from the rings and perform pull-ups to target your back, shoulders, and arms.
-
Dips: Place your hands on the rings and perform dips to target your triceps and chest.
-
Muscle-Ups: Transition from a pull-up to a dip on the rings to target multiple muscle groups simultaneously.
-
L-Sits: Hold yourself up in an L-sit position using the rings to target your core and leg muscles.
-
Planche: Hold yourself up in a planche position using the rings to target your core and upper body muscles.
-
Rows: Perform rows by holding onto one ring with each hand and pulling it towards your chest to target your back muscles.
-
Archer Rows: Perform archer rows by holding one ring in each hand but with one hand higher than the other to target weak points in your back muscles.
-
Curls and Chest Flys: Use the rings to perform curls and chest flys by holding one ring in each hand and moving them in different directions to target weak points in your upper body muscles.
-
Advanced Skills: Once you have mastered basic exercises, you can move on to advanced skills like the Victorian Cross or Iron Cross by using the rings as a support structure.
Conclusion
Gymnastic rings are an excellent addition to any home gym due to their versatility, portability, and cost-effectiveness. By following the steps outlined in this article, you can set up your gymnastic rings safely and effectively in your home gym. Remember to always prioritize safety by ensuring that the support structure is sturdy enough to hold your weight and regularly inspecting your straps for signs of wear or damage. With consistent practice using these rings, you can achieve significant improvements in strength and overall fitness while enjoying the convenience of bodyweight training at home.
Was this page helpful?
At Storables.com, we guarantee accurate and reliable information. Our content, validated by Expert Board Contributors, is crafted following stringent Editorial Policies. We're committed to providing you with well-researched, expert-backed insights for all your informational needs.


0 thoughts on “Home Gym Gymnastic Rings Setup: Bodyweight Exercise Equipment”