Articles
How To Setup Ring Doorbell Pro
Modified: August 31, 2024
Learn how to set up your Ring Doorbell Pro with this comprehensive step-by-step guide. Find troubleshooting tips and expert advice in this informative article on Articles.
(Many of the links in this article redirect to a specific reviewed product. Your purchase of these products through affiliate links helps to generate commission for Storables.com, at no extra cost. Learn more)
Introduction
Welcome to this step-by-step guide on how to set up the Ring Doorbell Pro! A Ring Doorbell Pro is a smart doorbell that allows you to monitor your doorstep, receive notifications, and interact with visitors through your smartphone or tablet. Whether you’re looking to enhance your home security or simply want the convenience of knowing who’s at your door, the Ring Doorbell Pro is an excellent choice.
Setting up the Ring Doorbell Pro might seem like a daunting task at first, but fear not! In this article, we’ll walk you through the process in a clear and easy-to-follow manner. By the end of this guide, you’ll have your Ring Doorbell Pro up and running, providing you with peace of mind and added convenience.
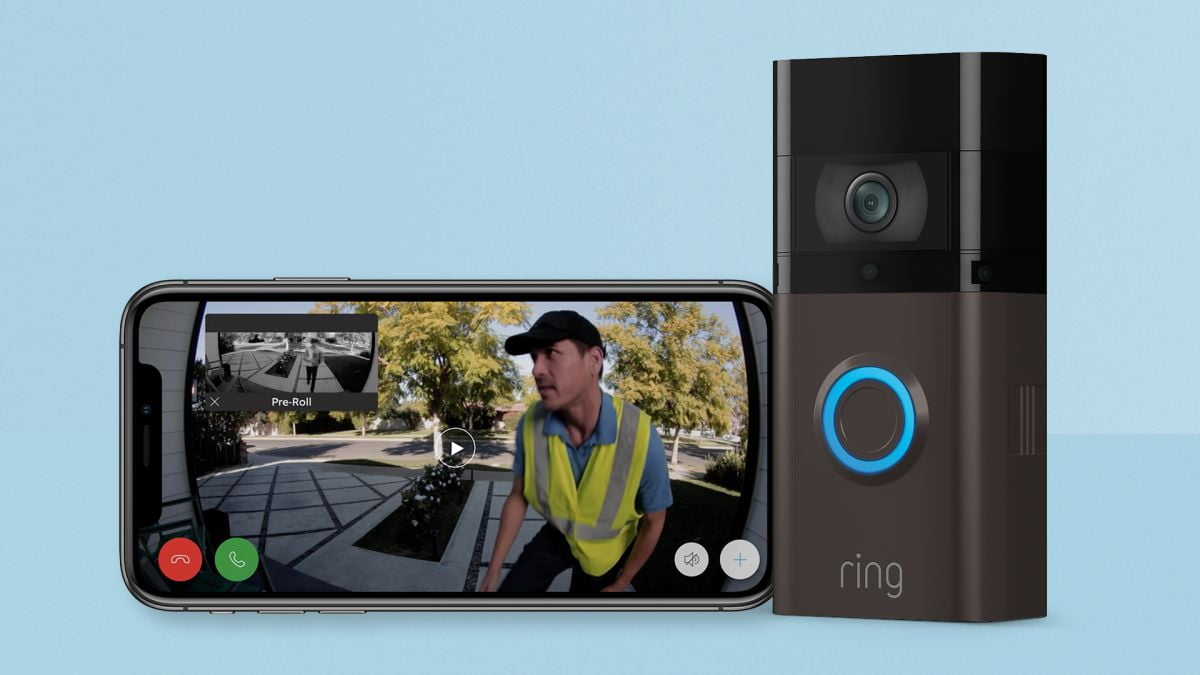
Before we dive into the installation process, let’s take a moment to acknowledge some of the remarkable features the Ring Doorbell Pro offers. With its advanced motion detection capabilities, you’ll receive instant alerts whenever someone approaches your doorstep. The two-way audio feature allows you to communicate with visitors, whether it’s a delivery person or a friend stopping by for a visit. Additionally, the Ring Doorbell Pro is equipped with night vision, ensuring that you have clear visibility even in low-light conditions.
Now that you’re familiar with the amazing features of the Ring Doorbell Pro, let’s move forward and get started with the setup process. Make sure you have the necessary tools and materials on hand, such as a screwdriver, level, and a smartphone or tablet. With everything prepared, let’s unbox the Ring Doorbell Pro and begin our installation journey!
Key Takeaways:
- Setting up the Ring Doorbell Pro is a straightforward process that enhances home security and convenience. With features like motion detection and two-way audio, it provides peace of mind and seamless interaction with visitors.
- The Ring app allows for personalized control and customization of the Ring Doorbell Pro, from motion sensitivity to video quality. Regular testing and maintenance ensure optimal performance for a safer, more connected home.
Read also: 12 Best Ring Video Doorbell Pro for 2025
Step 1: Unboxing the Ring Doorbell Pro
Congratulations on your purchase of the Ring Doorbell Pro! The first step in setting up your Ring Doorbell Pro is to unbox it and familiarize yourself with the contents. When you open the package, you should find the following items:
- Ring Doorbell Pro
- Satin Nickel and Venetian faceplates
- Chime Kit
- Drill Bit
- Masonry Drill Bit
- Screwdriver
- Screws and Anchors
- Wiring Attachments
- Quick Start Guide
Take a moment to inspect each item and ensure that all components are present. It’s essential to have everything you need before proceeding with the installation to avoid any unnecessary delays.
Once you’ve confirmed that all the items are accounted for, set aside the faceplates, chime kit, drill bits, and screws. These will come into play during later steps of the installation process.
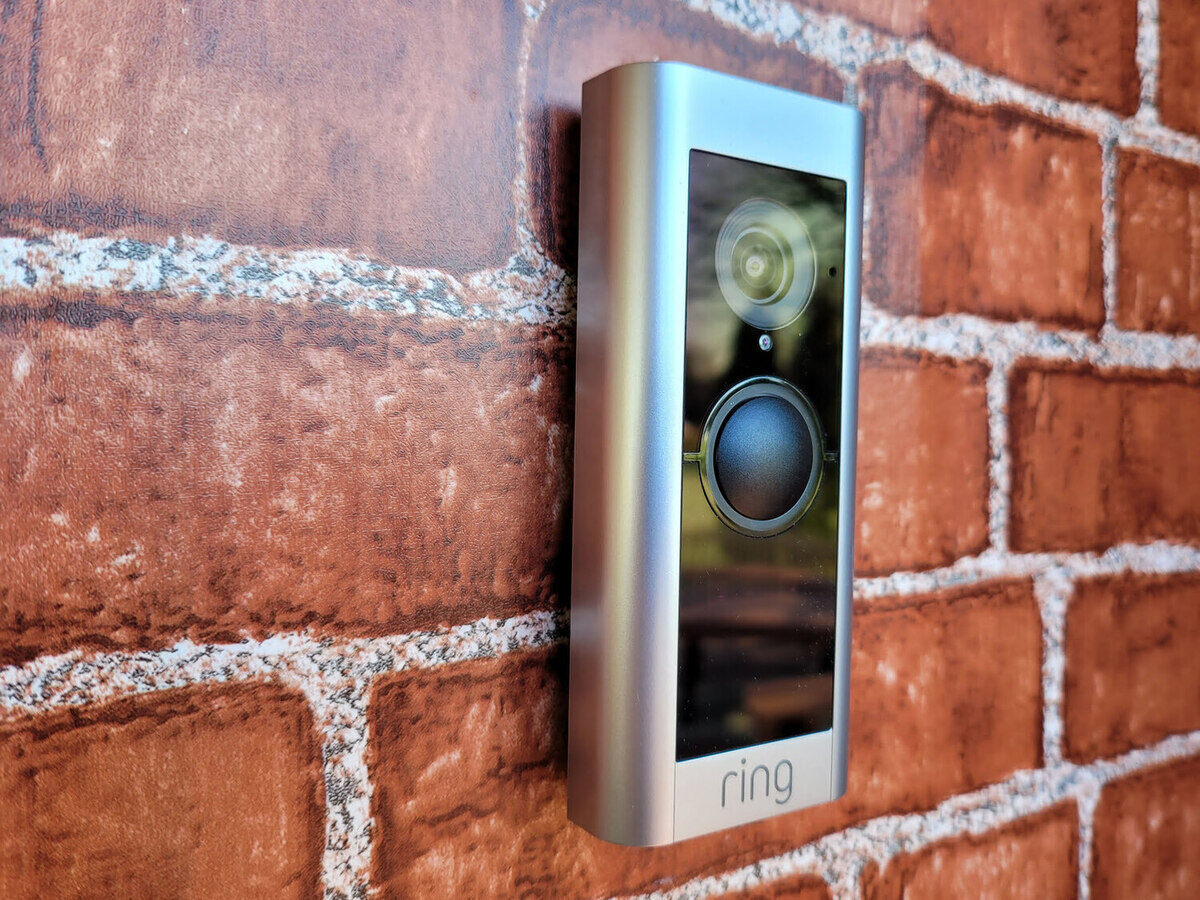
Now, let’s focus on the Ring Doorbell Pro itself. Take a closer look at its sleek and compact design. The Ring Doorbell Pro is designed to fit seamlessly next to your front door, providing a modern and sophisticated appearance. With its advanced features and reliable performance, it’s no wonder that the Ring Doorbell Pro is a popular choice among homeowners.
Before moving on to the next step, it’s worth noting the importance of carefully handling the Ring Doorbell Pro during the installation process. While the device is durable, it’s always a good idea to treat it with care to avoid any damage.
Now that you’ve unboxed the Ring Doorbell Pro and familiarized yourself with its contents, you’re ready to move on to the next step: checking compatibility and requirements.
Step 2: Checking Compatibility and Requirements
Before proceeding with the installation of your Ring Doorbell Pro, it’s essential to ensure that your home meets the compatibility requirements. The Ring Doorbell Pro is designed to work with most standard doorbell systems, but it’s always a good idea to double-check to avoid any compatibility issues. Here’s what you need to consider:
1. Doorbell System: The Ring Doorbell Pro requires a wired doorbell system with a voltage of 16-24VAC. If you already have an existing wired doorbell, you’re likely good to go. However, if you have a battery-operated or wireless doorbell, you’ll need to install a wired doorbell transformer to power the Ring Doorbell Pro.
2. Wi-Fi Network: To connect and control your Ring Doorbell Pro, you’ll need a stable Wi-Fi network with a minimum upload speed of 2 Mbps. Ensure that your home’s Wi-Fi network is accessible near the installation location to ensure a reliable connection.
3. Smartphone or Tablet: You’ll need a compatible smartphone or tablet to set up and control the Ring Doorbell Pro. Ensure that your device meets the minimum requirements and has the latest operating system and the Ring app installed.
4. Mounting Surface: The Ring Doorbell Pro is designed to be mounted on a flat surface near your front door. Ensure that the mounting location has a solid surface and is within reach of the existing doorbell wiring. It’s also important to consider factors such as the height and angle for optimal viewing and performance.
5. Existing Doorbell Wiring: The Ring Doorbell Pro requires a wired connection to your existing doorbell wiring. Ensure that the wiring is in good condition and compatible with the Ring Doorbell Pro. You may need to make adjustments or consult a professional if necessary.
By checking these compatibility requirements, you’ll have a clear understanding of whether your home is ready for the installation of the Ring Doorbell Pro. If you’re unsure about any of the requirements or need assistance, it’s always a good idea to consult the Ring support documentation or reach out to their customer support for guidance.
With the compatibility and requirements checked off, you’re now ready to proceed with the installation process. In the next step, we’ll prepare for the installation by gathering the necessary tools and materials.
Step 3: Preparing for Installation
Now that you’ve checked the compatibility and requirements, it’s time to prepare for the installation of your Ring Doorbell Pro. Before you start, gather the necessary tools and materials to ensure a smooth and efficient installation process. Here’s what you’ll need:
1. Screwdriver: You’ll need a screwdriver to remove the existing doorbell and install the Ring Doorbell Pro. Ensure that you have a screwdriver that is suitable for the type of screws used in your doorbell system.
2. Level: A level will help you ensure that the Ring Doorbell Pro is mounted straight and aligned properly. It’s important to have a level surface for optimal performance and aesthetics.
3. Pliers or Wire Strippers: If necessary, you may need pliers or wire strippers to adjust or strip the existing doorbell wiring. This will depend on the condition and compatibility of your wiring.
4. Existing Doorbell Wiring: Double-check the existing doorbell wiring to ensure that it is accessible and in good condition. If needed, clean the contacts or make any necessary repairs before proceeding.
5. Safety Precautions: It’s always a good idea to prioritize safety during any installation process. Consider wearing safety gloves and goggles to protect your hands and eyes from any potential hazards.
With these tools and materials ready, you’re now prepared to move on to the next step: mounting the Ring Doorbell Pro. Before you start the physical installation, it’s important to ensure the power to your existing doorbell system is turned off to avoid any electrical mishaps. Locate the breaker that controls the doorbell circuit and switch it off before proceeding further.
It’s worth mentioning that if you’re not confident in your DIY skills or are unfamiliar with electrical installations, it’s always a good idea to consult a professional. They will ensure a safe and proper installation of your Ring Doorbell Pro.
Now that you’re fully prepared and equipped, let’s move on to the exciting part – mounting the Ring Doorbell Pro!
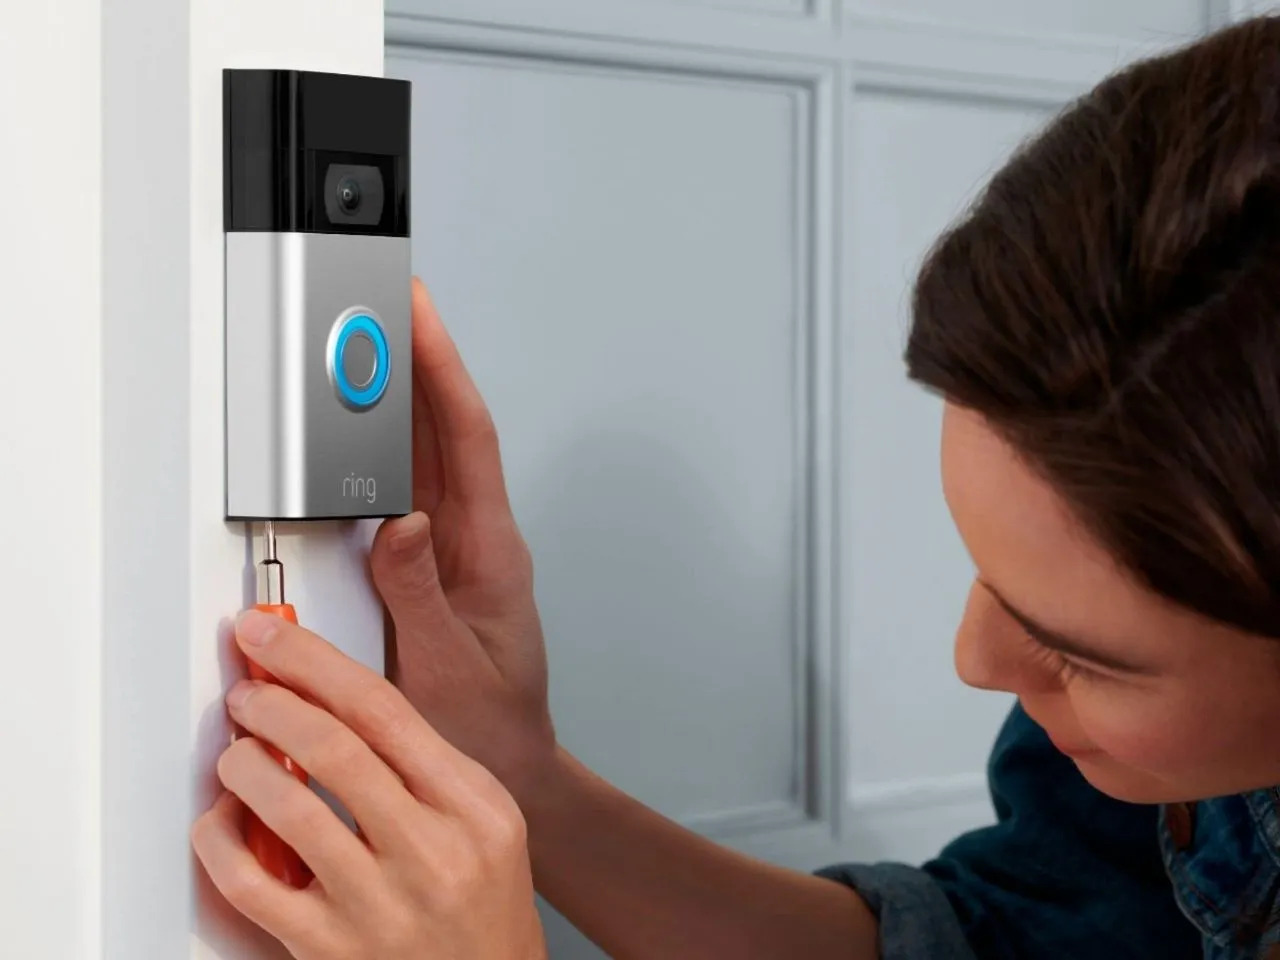
Step 4: Mounting the Doorbell
With all the necessary preparations completed, it’s time to mount the Ring Doorbell Pro. Follow these steps to ensure a secure and proper installation:
1. Choose the Mounting Location: Select a suitable location near your front door where you want to install the Ring Doorbell Pro. Ensure that the area is flat and has a solid surface for mounting. It’s important to consider the height and angle for optimal visibility and performance.
2. Remove the Existing Doorbell: Use a screwdriver to remove the screws that secure the existing doorbell. Carefully disconnect the wiring from the old doorbell and set it aside. Take note of the wiring colors and labels for reference during the installation of the Ring Doorbell Pro.
3. Install the Mounting Bracket: Take the mounting bracket provided with the Ring Doorbell Pro and align it with the screw holes on the mounting surface. Use a level to ensure the bracket is straight and level. Once aligned, use the provided screws to securely fasten the mounting bracket in place.
4. Connect the Wiring: Take the existing doorbell wiring and route it through the wiring hole in the mounting bracket. Ensure that the wiring is not pinched or damaged during this process. If necessary, use wire strippers to remove a small portion of the wire insulation for a clean connection.
5. Attach the Ring Doorbell Pro: Align the Ring Doorbell Pro with the mounting bracket and gently slide it down until it clicks into place. Double-check to ensure that it is securely attached to the bracket.
6. Install the Faceplate: Select the desired faceplate (Satin Nickel or Venetian) and attach it to the Ring Doorbell Pro. The faceplate will give it a finished and customized look that matches your personal preference and home aesthetics.
With the Ring Doorbell Pro securely mounted and the faceplate installed, you’re one step closer to fully experiencing its features and benefits. In the next step, we’ll move on to connecting the wiring and powering up the device.
Before proceeding, it’s important to double-check that the doorbell system’s power is still turned off. Once confirmed, you can proceed to connect the wiring and begin setting up the Ring Doorbell Pro.
Step 5: Connecting the Wiring
Now that the Ring Doorbell Pro is securely mounted, it’s time to connect the wiring. Follow these steps to ensure a proper connection:
1. Identify the Existing Doorbell Wiring: Take a moment to identify and familiarize yourself with the existing doorbell wiring. Typically, you will have two wires: one labeled “Front” or “Trans” and the other labeled “Transformer” or “Rear”. These wires provide power and allow the doorbell to function.
2. Connect the Wiring to the Ring Doorbell Pro: Take the wiring from step 1 and connect it to the corresponding terminals on the back of the Ring Doorbell Pro. Connect the wire labeled “Front” or “Trans” to the Front Terminal and the wire labeled “Transformer” or “Rear” to the Rear Terminal. Use a screwdriver to secure the connections.
3. Inspect the Wiring Connections: After connecting the wires, double-check to ensure they are securely attached and that there is no exposed wiring. Inspect the connections for any signs of damage or loose wires. If everything looks good, you can proceed to the next step.
4. Restore Power to the Doorbell Circuit: Now that the wiring is connected, it’s time to restore power to the doorbell circuit. Locate the breaker that controls the doorbell circuit and switch it back on. This will provide power to the Ring Doorbell Pro.
5. Confirm Power and Connection: Once the power is restored, you should see a spinning white light on the front of the Ring Doorbell Pro. This indicates that the device is receiving power and establishing a connection. If the light does not appear or there are any issues, double-check the wiring connections and consult the Ring support documentation.
Congratulations! You have successfully connected the wiring for your Ring Doorbell Pro. In the next step, we’ll guide you through the process of installing the Ring app on your smartphone or tablet to complete the setup and configuration.
Take a moment to admire your progress and the sleek design of the Ring Doorbell Pro. With the wiring connected, you’re one step closer to enjoying the advanced features and convenience it offers.
When setting up your Ring Doorbell Pro, make sure to connect it to a strong and stable Wi-Fi network to ensure reliable performance and video streaming.
Step 6: Installing the Ring App
With the Ring Doorbell Pro wired and ready to go, it’s time to install the Ring app on your smartphone or tablet. The Ring app will be your central hub for managing and controlling your Ring Doorbell Pro. Follow these steps to install the app:
1. Visit the App Store or Google Play Store: Depending on whether you have an iOS or Android device, go to the respective app store on your device.
2. Search for the Ring App: Once you’re in the app store, search for “Ring” in the search bar. Look for the official Ring app developed by Ring.com.
3. Download and Install the App: Tap on the download or install button to initiate the installation of the Ring app on your device. Wait for the app to download and install. This may take a few moments depending on your internet connection speed.
4. Launch the Ring App: Once the installation is complete, tap on the Ring app icon on your device’s home screen to launch it. The app will guide you through the setup process and help you connect and configure your Ring Doorbell Pro.
5. Sign In or Create a Ring Account: If you already have a Ring account, sign in using your credentials. If you’re new to Ring, tap on “Create Account” or “Sign Up” and follow the prompts to create a new account. Make sure to verify your email address if required.
6. Add a New Device: Once you’re signed in, tap on “Set Up a Device” or the “+” symbol to add a new device to your Ring account. Follow the on-screen instructions and select “Doorbell” as the device type.
7. Enter Device Details: The app will prompt you to enter some details about your Ring Doorbell Pro, such as its location and name. Follow the instructions and provide the required information to continue.
8. Connect to Wi-Fi: The app will guide you through the process of connecting your Ring Doorbell Pro to your home’s Wi-Fi network. Make sure you are connected to a Wi-Fi network with a minimum upload speed of 2 Mbps. Enter your Wi-Fi credentials when prompted and wait for the app to establish a connection.
9. Test the Setup: Once the app confirms that your Ring Doorbell Pro is connected and online, you can perform a test to ensure that everything is working correctly. Follow the on-screen instructions to test the video feed, motion detection, and two-way audio features.
Congratulations! You have successfully installed the Ring app on your smartphone or tablet. With the app set up, you can now control and manage your Ring Doorbell Pro, receive notifications, and access advanced features and settings.
In the next step, we’ll guide you through the process of setting up and configuring your Ring Doorbell Pro on the app for a personalized and seamless user experience.
Step 7: Setting Up the Ring Doorbell Pro on the App
Now that you have the Ring app installed on your smartphone or tablet, it’s time to set up and configure your Ring Doorbell Pro within the app. Follow these steps to complete the setup process:
1. Open the Ring App: Tap on the Ring app icon on your device’s home screen to open it. Sign in using your Ring account credentials if prompted.
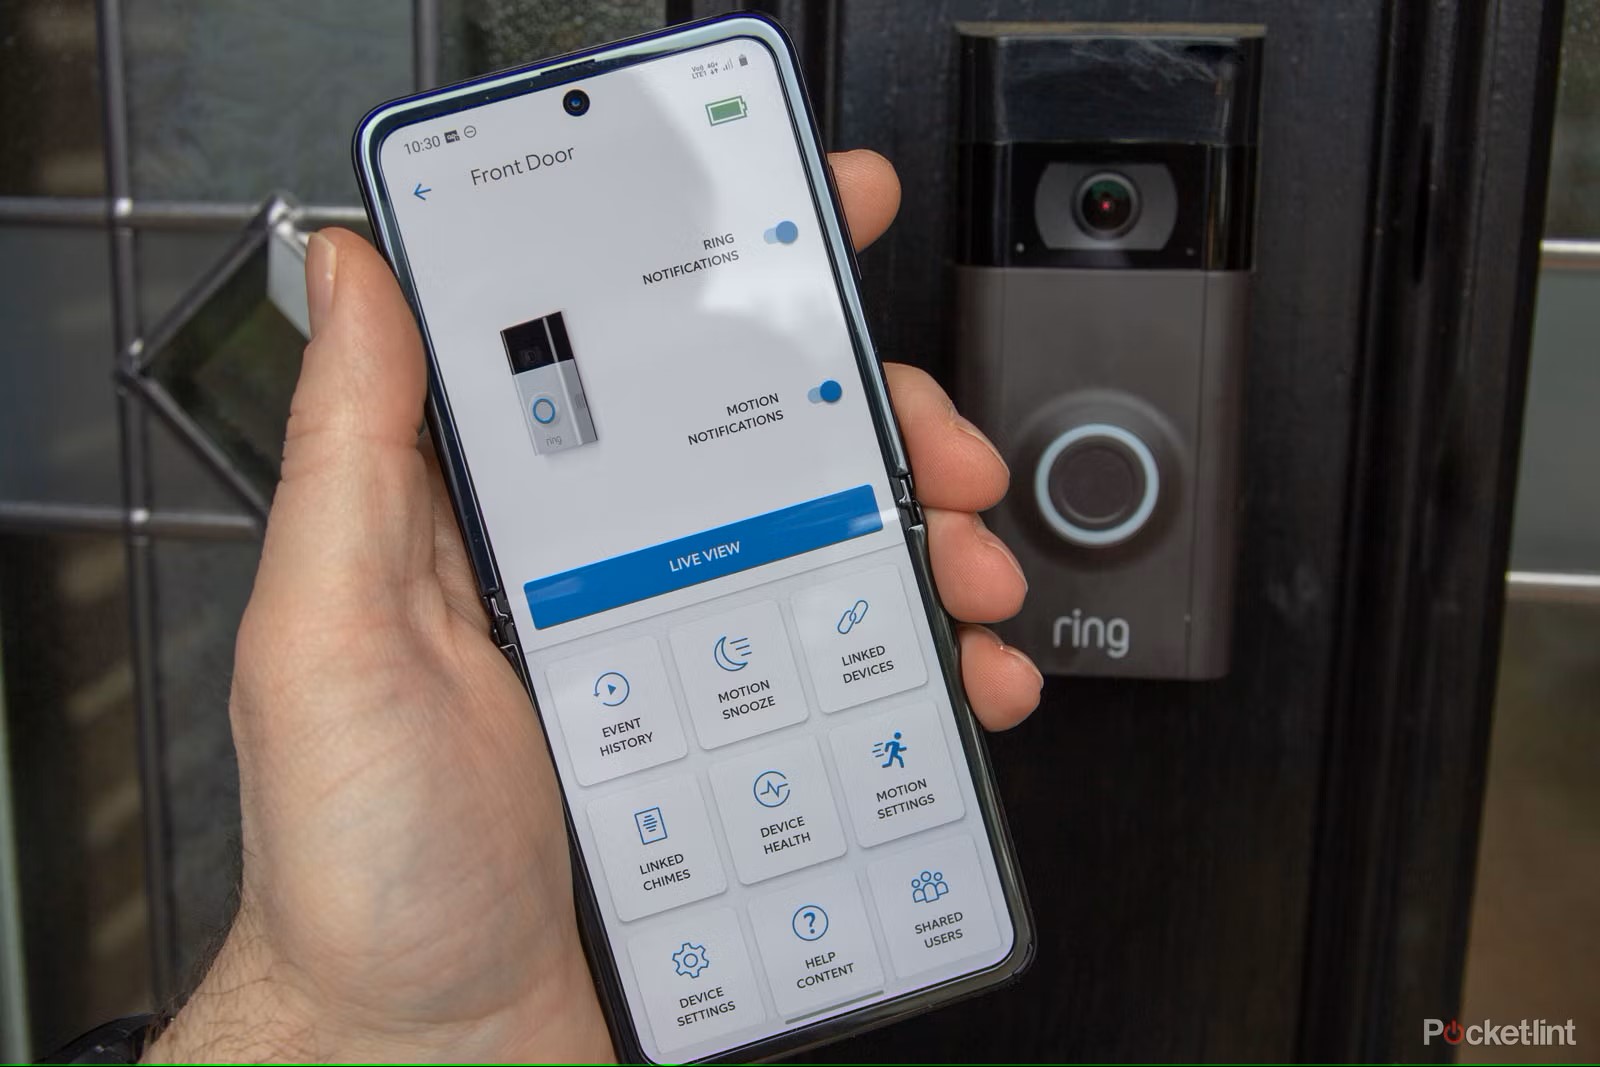
2. Access Device Settings: Once you’re in the app, you’ll see the list of devices associated with your Ring account. Locate and tap on your Ring Doorbell Pro from the device list to access its settings.
3. Set up Motion Detection: Motion detection is a crucial feature of your Ring Doorbell Pro. Within the device settings, navigate to the Motion Detection section. Adjust the motion sensitivity and customize the areas you want to monitor for motion. You can also enable or disable motion alerts according to your preference.
4. Enable Notifications: To ensure that you receive timely notifications, go to the app’s settings and enable notifications for the Ring Doorbell Pro. This will alert you whenever someone approaches your doorstep or triggers the motion detection.
5. Configure Video Settings: You can customize the video settings of your Ring Doorbell Pro to enhance the viewing experience. Within the device settings, explore options such as video quality, night vision, and capturing video recordings. Adjust these settings according to your preferences and needs.
6. Set Up Two-Way Audio: The two-way audio feature allows you to communicate with visitors at your doorstep. Ensure that the audio settings are configured correctly within the app to enable seamless communication. You can also adjust the microphone and speaker volume to your liking.
7. Manage Device Sharing: If you want to share access to your Ring Doorbell Pro with family members or trusted individuals, you can manage device sharing settings within the app. Grant access and define permissions for other users to view and control the device as needed.
8. Explore Additional Features: Take the time to explore the various features and options available within the app. You can set up additional security measures, such as linking your Ring Doorbell Pro to other Ring devices or integrating it with third-party devices or services for a more comprehensive home security system.
By following these steps, you’ll be able to fully set up and configure your Ring Doorbell Pro on the Ring app. This will provide you with complete control and customization over your device’s functionality and settings.
In the next step, we’ll dive into adjusting settings and preferences to further personalize your Ring Doorbell Pro experience.
Step 8: Adjusting Settings and Preferences
Now that your Ring Doorbell Pro is set up on the Ring app, it’s time to fine-tune the settings and preferences to tailor the device to your specific needs. Follow these steps to adjust the settings:
1. Motion Detection Sensitivity: Depending on your location and surroundings, you may need to adjust the motion detection sensitivity. Open the Ring app and go to the device settings. Navigate to the Motion Detection section and find the sensitivity slider. Increase or decrease the sensitivity level according to your preference to reduce false alarms or capture more motion events.
2. Motion Zone Configuration: Within the Motion Detection section of the device settings, you can configure the motion zones. This allows you to specify specific areas within the camera’s field of view where you want motion detection to be active or inactive. Customize these zones based on your desired coverage and avoid unnecessary triggers.
3. Notification Preferences: Open the Ring app’s settings and navigate to the notification preferences. Here, you can choose the type of notifications you’d like to receive, such as motion alerts, doorbell ring alerts, or both. You can also customize the sound and vibration settings for notifications.
4. Video Quality and Recording: If you want to adjust the video quality of your Ring Doorbell Pro, go to the device settings and find the video settings section. Here, you can choose the desired video quality, including options for reducing the bandwidth usage. Additionally, you can configure video recording options, such as the length of recorded clips and whether to enable continuous recording with a Ring Protect subscription.
5. Live View Settings: Live View allows you to manually access the camera feed from your Ring Doorbell Pro at any time. Customize the live view settings within the app to optimize the viewing experience. Adjust settings such as video quality, audio settings, and connection preferences (such as enabling or disabling the Live View on cellular data).
6. Device Health Check: Regularly check the health status of your Ring Doorbell Pro within the app. This feature provides information about the device’s battery life, Wi-Fi signal strength, and overall device health. Address any issues or errors that may be reported to ensure smooth operation.
7. Shared User Control: If you have shared access to your Ring Doorbell Pro with other individuals, review and manage their control and permission settings within the app. Grant or remove access, specify viewing capabilities, and set up additional security measures, such as two-factor authentication, if desired.
8. Integration and Smart Home Options: Explore integration options and smart home features within the Ring app. Connect your Ring Doorbell Pro to compatible devices and services, such as Alexa or Google Assistant, to enhance its functionality and create a comprehensive smart home ecosystem.
By adjusting these settings and preferences, you can customize your Ring Doorbell Pro to fit your specific requirements and preferred user experience. Take the time to explore the various options available within the app and experiment with different settings to find the perfect combination for your needs.
Congratulations! Your Ring Doorbell Pro is now fully configured and ready to provide enhanced security and convenience for your home. In the next step, we’ll guide you through testing the functionality of your Ring Doorbell Pro to ensure everything is working as expected.
Read more: Why Is My Ring Doorbell Not Ringing
Step 9: Testing the Ring Doorbell Pro
Now that you’ve set up and adjusted the settings of your Ring Doorbell Pro, it’s important to perform a thorough test to ensure that everything is functioning as expected. Follow these steps to test your Ring Doorbell Pro:
1. Verify Live View: Open the Ring app on your smartphone or tablet and navigate to the device settings for your Ring Doorbell Pro. Tap on the Live View icon or button to access the live camera feed. Check if you can see a clear and real-time view of the area that your Ring Doorbell Pro is monitoring.
2. Test Motion Detection: Trigger the motion detection of your Ring Doorbell Pro by walking in front of the camera or waving your hand within the motion detection zone. Ensure that you receive a motion alert on your smartphone or tablet through the Ring app. Verify that the motion detection is accurate and captures the desired events.
3. Check Two-Way Audio: Use the Ring app to initiate a two-way audio communication with your Ring Doorbell Pro. Speak into your smartphone or tablet’s microphone and verify that your voice can be heard clearly through the Ring Doorbell Pro’s speaker. Similarly, test the audio input by listening to the sound captured by the Ring Doorbell Pro’s microphone.
4. Ring the Doorbell: Physically press the button on your Ring Doorbell Pro to ring the doorbell. Check if you receive a doorbell ring alert on your smartphone or tablet through the Ring app. Confirm that you can see and hear the doorbell ring notification in the app.
5. Test Night Vision: If it’s nighttime or conditions are dark, check the night vision capability of your Ring Doorbell Pro. Turn off the lights around your front door and use the live view feed to verify that you can see a clear and detailed image, thanks to the infrared night vision feature.
6. Review Recorded Events: In the Ring app, navigate to the event history or recording section and review any recorded events captured by your Ring Doorbell Pro. Ensure that the recordings are stored correctly and that you can play them back without any issues.
7. Test Notifications and Alerts: Verify that you’re receiving notifications and alerts on your smartphone or tablet when the Ring Doorbell Pro detects motion or when the doorbell is rung. Check that the notifications are timely and include the appropriate information, such as live view access, recorded event links, or two-way audio options.
8. Check Battery Life and Device Health: Monitor the battery life and device health status within the Ring app. Ensure that the battery level is sufficient and that the device health report indicates no issues or errors. Address any concerns or notifications related to battery life or device health as necessary.
By conducting this comprehensive test, you can verify the functionality and performance of your Ring Doorbell Pro. If you encounter any issues or concerns during the testing process, consult the Ring app’s support documentation or reach out to Ring’s customer support for assistance.
Congratulations on successfully setting up and testing your Ring Doorbell Pro! You can now enjoy the enhanced security, convenience, and peace of mind that it provides. Remember to periodically check the app and perform necessary maintenance to ensure proper functioning of your Ring Doorbell Pro.
We hope this step-by-step guide has been helpful in your Ring Doorbell Pro setup journey. Happy monitoring and hello to a safer and more connected home!
Conclusion
Congratulations! You have successfully completed the setup and installation process for your Ring Doorbell Pro. By following this comprehensive guide, you now have a fully functional and connected doorbell system that enhances your home security and provides convenience at your fingertips.
The Ring Doorbell Pro offers remarkable features such as motion detection, two-way audio, and night vision, allowing you to monitor and interact with visitors from anywhere using the Ring app on your smartphone or tablet. With customizable settings and preferences, you can tailor the device to meet your specific needs and preferences, ensuring a personalized user experience.
Remember to regularly maintain and update your Ring Doorbell Pro by monitoring the device health, battery life, and software updates. This will ensure optimal performance and reliable functionality over time.
With the Ring Doorbell Pro installed, you can now enjoy the peace of mind that comes with knowing who’s at your doorstep, receiving notifications, and even deterring potential intruders. Embrace the added security and convenience that the Ring Doorbell Pro brings to your home.
Should you have any questions or encounter any difficulties, the Ring app provides a wealth of support documentation and resources. Additionally, Ring’s customer support team is always available to assist you with any inquiries or concerns.
Thank you for choosing the Ring Doorbell Pro and trusting it to enhance the security of your home. We hope this guide has been helpful and that you enjoy the benefits of your Ring Doorbell Pro for years to come.
Stay safe, connected, and always aware with your Ring Doorbell Pro!
Frequently Asked Questions about How To Setup Ring Doorbell Pro
Was this page helpful?
At Storables.com, we guarantee accurate and reliable information. Our content, validated by Expert Board Contributors, is crafted following stringent Editorial Policies. We're committed to providing you with well-researched, expert-backed insights for all your informational needs.


0 thoughts on “How To Setup Ring Doorbell Pro”