Home>Ideas and Tips>Upgrading Your Home’s Exterior With DIY Outdoor Kitchen Island

Ideas and Tips
Upgrading Your Home’s Exterior With DIY Outdoor Kitchen Island
Modified: October 28, 2024
Transform your backyard with a DIY outdoor kitchen island. Enhance functionality, boost property value, and create a perfect space for entertaining.
(Many of the links in this article redirect to a specific reviewed product. Your purchase of these products through affiliate links helps to generate commission for Storables.com, at no extra cost. Learn more)
Introduction
Transforming your backyard into a functional and inviting space is a great way to enhance your home's exterior. One of the most exciting projects you can undertake is building a DIY outdoor kitchen island. Not only does it add value to your property, but it also provides a perfect spot for cooking and entertaining. In this article, we will guide you through the process of creating your dream outdoor kitchen island, from selecting the right materials to the final touches.
Why Build an Outdoor Kitchen Island?
Building an outdoor kitchen island is a fantastic idea for several reasons. First off, it enhances your home's functionality. Imagine having a dedicated space for cooking right in your backyard. Perfect for hosting barbecues, family gatherings, and casual get-togethers. No more running back and forth from the kitchen to the yard. Everything you need is right there.
Secondly, an outdoor kitchen island can significantly boost your property's value. Potential buyers love seeing well-designed outdoor spaces. It makes your home more attractive if you ever decide to sell. Plus, it extends your living area outdoors, creating a seamless transition between indoor and outdoor spaces. You get to enjoy the fresh air and natural beauty of your yard while cooking up a storm.
Lastly, building it yourself allows you to customize the design and materials according to your preferences. You can make sure it perfectly complements your home's style. Whether you want a rustic look with wood or a sleek, modern design with stainless steel, the choice is yours.
Choosing the Right Materials
The first step in building an outdoor kitchen island is selecting the right materials. The choice of materials will significantly impact both the durability and style of your project. Here are some popular options:
Stone
Stone is a popular choice for outdoor kitchens due to its natural beauty and durability. It can be used for countertops, flooring, and even built-in grill islands. Popular types of stone include granite, marble, and quartzite. Stone can withstand harsh weather conditions and requires minimal maintenance.
Wood
Wood can add warmth and a rustic charm to your outdoor kitchen. It is often used for cabinets, pergolas, and furniture. When choosing a type of wood, select varieties resistant to rot and insects, such as cedar or teak. Regular sealing and maintenance keep wood looking its best.
Metal
Metal, particularly stainless steel, is commonly used in outdoor kitchens for appliances, cabinetry, and countertops. It’s highly durable, resistant to rust and corrosion, and easy to clean. Stainless steel provides a sleek, modern look and can withstand the elements.
DIY vs. Professional Installation
When deciding whether to build and design an outdoor kitchen island yourself or hire professionals, consider the following factors:
DIY Installation
Building your outdoor kitchen island on your own can save you money and give you a sense of accomplishment. It allows you to customize the design and materials to your preferences and gives you complete control over the project. However, DIY installation requires a significant time investment and a certain level of skill and experience in construction and utilities.
Professional Installation
Hiring professionals to build your outdoor kitchen island ensures high-quality workmanship and adherence to local codes and regulations. Professionals have the expertise and tools needed to complete the project efficiently and safely. While professional installation will increase the overall cost, it can save time and reduce the risk of costly mistakes.
Step-by-Step Guide to Building an Outdoor Kitchen Island
Step 1: Plan Your Design
Before starting your project, it's crucial to plan your design carefully. Here are some steps to help you get started:
- Determine the Size: Decide on the size of your outdoor kitchen island based on the space available in your backyard and the number of people you plan to entertain.
- Choose a Layout: Select a layout that fits your needs. Common layouts include L-shape, U-shape, and linear designs.
- Consider Appliances: Decide which appliances you want to include, such as a grill, burner, refrigerator, and sink.
- Make a Material List: Create a list of all the materials you will need, including lumber, tile, backer board, and any other components required for your design.
Step 2: Prepare the Site
Once you have your design and materials ready, it's time to prepare the site:
- Clear the Area: Clear the area where you plan to build your outdoor kitchen island. Remove any debris or obstructions.
- Mark Out the Space: Use chalk or stakes to mark out the space where your island will be built.
- Check for Utilities: Ensure that there are no underground utilities in the area you plan to dig.
Step 3: Lay the Foundation
The foundation is crucial for a stable and durable outdoor kitchen island:
- Dig the Footings: Dig footings for your island if necessary. This will depend on the size and weight of your structure.
- Lay the Footing Material: Lay down the footing material (such as concrete) and let it set.
- Build the Base Frame: Construct the base frame using 2×4 lumber or similar materials.
Step 4: Install Countertops and Flooring
Next, install the countertops and flooring:
- Choose Your Countertop Material: Select a material that suits your needs, such as stone or stainless steel.
- Measure and Cut: Measure and cut the countertop material according to your design.
- Install Countertops: Install the countertops ensuring they are level and secure.
- Install Flooring: Install flooring material such as tile or stone around the perimeter of your island.
Step 5: Add Appliances and Cabinets
Now it's time to add appliances and cabinets:
- Install Appliances: Install appliances such as grills, burners, refrigerators, and sinks according to manufacturer instructions.
- Build Cabinets: Construct cabinets using wood or metal frames with appropriate doors and drawers.
- Add Shelves and Drawers: Add shelves and drawers for storage purposes.
Step 6: Finish with Trim Work
Finally, finish with trim work:
- Add Trim: Add trim around edges of countertops and cabinets for a finished look.
- Install Lighting: Install lighting fixtures such as pendant lights or under-cabinet lighting for better visibility.
- Seal All Surfaces: Seal all surfaces with appropriate sealants to protect them from weather conditions.
Tips for Maintenance and Care
Maintaining your outdoor kitchen island is crucial to extend its lifespan:
- Regular Cleaning: Clean all surfaces regularly using mild soap and water avoiding harsh chemicals that can damage materials.
- Inspect Regularly: Perform routine inspections checking for signs of wear and tear, loose connections or weather damage.
- Protect From Elements: Protect your island from elements by covering appliances when not in use and applying weatherproofing treatments to wood and stone surfaces.
Modular Outdoor Kitchen Kits
If you're short on time or lack experience in construction projects, consider using modular outdoor kitchen kits:
- Easy Assembly: Modular kits are designed for easy assembly requiring minimal tools and skills.
- Customizable Designs: Many kits offer customizable designs allowing you to choose from various configurations and styles.
- Cost Considerations: While modular kits can be expensive, they save time and effort compared to building from scratch.
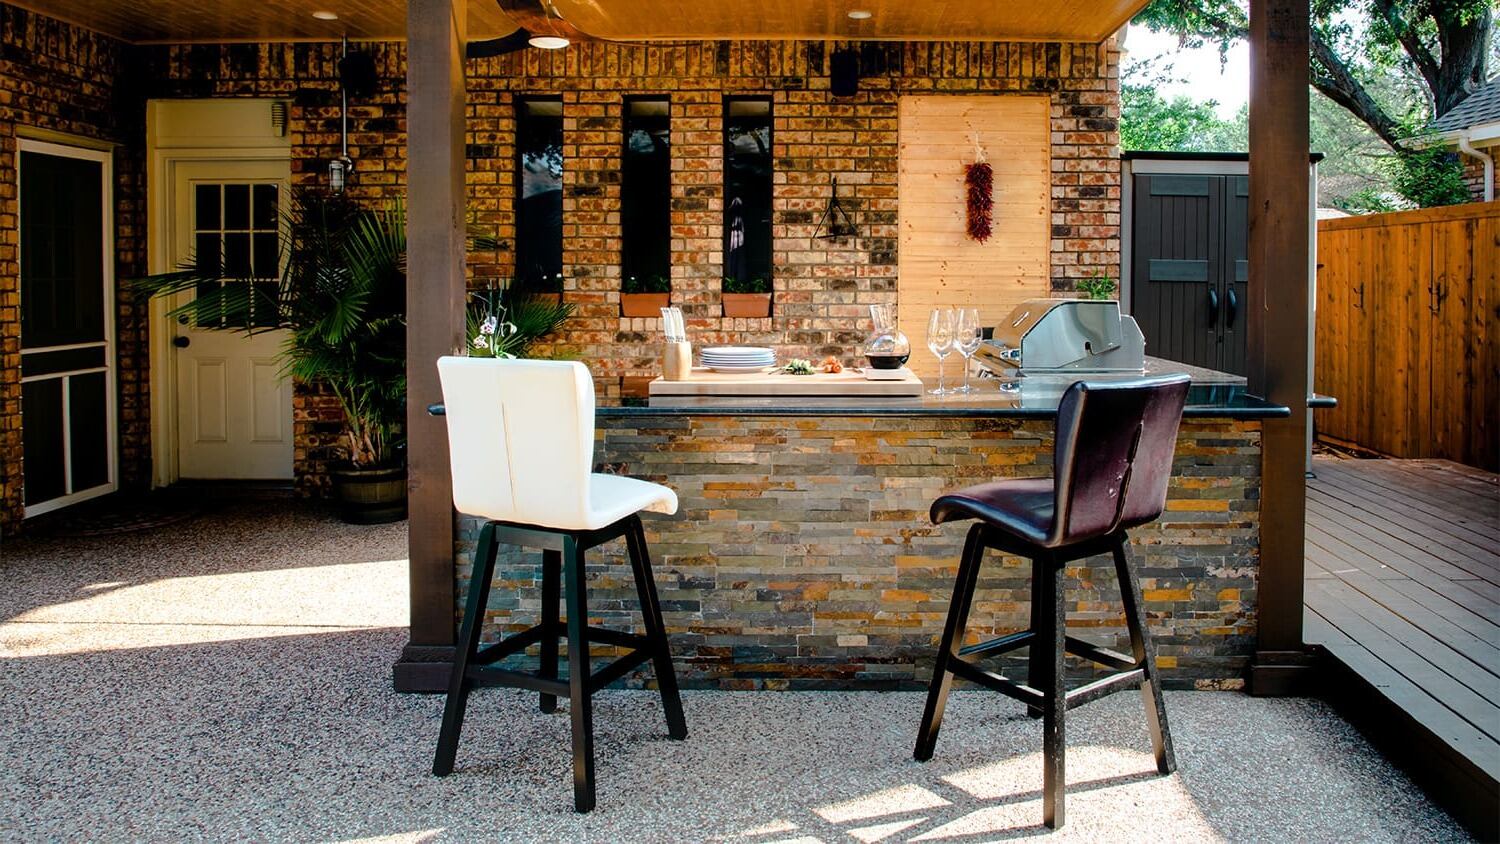
Case Study: Building an Outdoor Kitchen Island
Let's take a look at a real-life example of building an outdoor kitchen island:
Example Project
In an article by Blesser House, the authors share their experience building a modular outdoor kitchen in just one day with two people and one simple tool. Here’s how they did it:
- Choosing the Layout: They chose a layout without an outdoor sink to avoid plumbing issues near their pool deck.
- Selecting Appliances: They included a 36” Coyote C Series Grill, outdoor refrigerator, pull-out trash, double storage drawers, and storage space cabinet.
- Adding Bar Island: They added a bar island for extra seating space.
Challenges Faced
While they were mostly happy with their backyard kitchen, there were some challenges they faced:
- Price: The biggest con was the high price tag for the entire setup which was around $13,595 at the time.
- Limited Design Options: They wished they could have done a white brick design similar to their home but liked how the sleek white composite added a modern look.
- No Charcoal or Smoker Option: They were limited to using built-in gas grills only which their barbecue-loving husband missed.
Conclusion
Building an outdoor kitchen island is a rewarding project that can enhance your home's exterior and increase its value. By carefully planning and selecting the right materials and components, you can create a functional and beautiful space for relaxation and entertaining. Whether you choose to build it yourself or hire professional help, following these guidelines will help you transform your yard into a stunning area perfect for hosting gatherings and enjoying quality time with family and friends.
Remember to always consider maintenance and care tips to ensure your outdoor kitchen island remains in great condition for years to come. With patience, dedication, and the right guidance, you can create an outdoor kitchen island that perfectly complements your home's style while providing endless enjoyment for you and your loved ones.
Was this page helpful?
At Storables.com, we guarantee accurate and reliable information. Our content, validated by Expert Board Contributors, is crafted following stringent Editorial Policies. We're committed to providing you with well-researched, expert-backed insights for all your informational needs.


0 thoughts on “Upgrading Your Home’s Exterior With DIY Outdoor Kitchen Island”