Articles
How To Install Laminate Flooring
Modified: August 27, 2024
Learn how to install laminate flooring with our informative articles. Get step-by-step instructions, tips, and tricks for a successful DIY project.
(Many of the links in this article redirect to a specific reviewed product. Your purchase of these products through affiliate links helps to generate commission for Storables.com, at no extra cost. Learn more)
Introduction
Laminate flooring is a versatile and popular choice for homeowners due to its durability, ease of installation, and wide range of design options. Whether you are renovating your entire home or simply upgrading a room, installing laminate flooring can transform the look and feel of your space. In this article, we will guide you through the step-by-step process of installing laminate flooring, from gathering materials to finishing touches.
Before diving into the installation process, it is important to note that proper preparation and planning are key to a successful laminate flooring installation. By taking the time to gather the necessary tools and materials, prepare the subfloor, and acclimate the laminate flooring, you can ensure a smooth and long-lasting installation.
During the installation process, you will learn how to lay underlayment, measure and plan the first row, install the laminate planks, cut and fit them as needed, and finish off the project with transition strips and baseboards. Each step is crucial in achieving a professional and polished look.
Installing laminate flooring can be a rewarding DIY project, with the added benefit of saving you money on installation costs. However, it is important to note that if you are not confident in your capabilities or if you have a complex flooring layout, it may be best to consult a professional for assistance.
Now, let’s dive into the step-by-step process of how to install laminate flooring and transform your space with a beautiful and durable flooring option.
Key Takeaways:
- Proper preparation, acclimation, and precise installation are crucial for successful laminate flooring. Attention to detail and patience will result in a professional and durable transformation of your space.
- From gathering materials to installing baseboards, the step-by-step process of installing laminate flooring offers a rewarding DIY project. With careful execution, you can achieve a beautiful and cost-effective flooring update.
Read more: How To Level Floor For Laminate
Step 1: Gather Materials and Tools
Before you begin the installation process, it is essential to gather all the necessary materials and tools. Having everything at hand will make the installation process more efficient and prevent any delays or frustrations.
Here is a list of the materials and tools you will need:
- Laminate flooring planks
- Underlayment
- Tape measure
- Pencil
- Straight edge or T-square
- Utility knife
- Hand saw or jigsaw
- Spacers
- Hammer
- Tapping block
- Pull bar
- Crowbar or pry bar
- Chalk line
- Safety goggles
- Knee pads
Before purchasing the laminate flooring, measure the area you want to cover to determine how much you need. It is always recommended to buy extra planks to account for any mistakes or damaged pieces during the installation process.
When selecting the laminate flooring, consider the color, texture, and thickness that best suits your style and needs. Take your time to browse different options and choose a high-quality laminate that will withstand the test of time.
Once you have gathered all the materials and tools, double-check that you have everything you need before proceeding to the next step. Having everything ready will ensure a smoother installation process and minimize any potential interruptions.
Step 2: Prepare the Subfloor
Before you can start installing laminate flooring, it’s crucial to prepare the subfloor to provide a smooth and stable foundation for the new flooring. Follow these steps to properly prepare the subfloor:
- Clear the area: Remove any furniture, rugs, or debris from the room. This will allow you to have a clear workspace and make the subfloor preparation easier.
- Clean the subfloor: Sweep or vacuum the subfloor to remove any dust, dirt, or loose particles. You can also use a damp mop or cloth to ensure it’s thoroughly clean.
- Level the subfloor: Check for any areas of the subfloor that are uneven or have noticeable dips. It’s important to have a level surface to prevent any issues with the laminate flooring. Use a leveling compound or self-leveling floor patch to even out any low spots.
- Repair any damage: Inspect the subfloor for any damage, such as loose or squeaky floorboards or cracks. If necessary, replace or secure loose floorboards and fill any cracks or gaps with a suitable wood filler or patching compound.
- Remove baseboards: Remove the baseboards or shoe molding along the walls using a crowbar or pry bar. This will allow for a clean installation of the laminate flooring, with space for expansion around the perimeter.
- Check for moisture: It’s essential to ensure that the subfloor is dry before installing laminate flooring. Use a moisture meter to check the moisture levels. If the subfloor is too moist, you may need to address the issue before proceeding.
By properly preparing the subfloor, you are setting the stage for a successful and long-lasting installation of the laminate flooring. Taking the time to level the subfloor and address any issues will prevent future problems and ensure a smooth and stable surface for your new flooring.
Step 3: Acclimate the Laminate Flooring
Acclimating the laminate flooring is an important step in the installation process that ensures the planks adjust to the room’s temperature and humidity levels. This helps prevent any expansion or contraction issues after the flooring is installed. Follow these guidelines to acclimate the laminate flooring:
- Bring the laminate flooring to the room: Unbox the laminate flooring and bring it into the room where it will be installed. Keep the planks in their packaging and stack them horizontally on the floor.
- Allow the flooring to acclimate: Let the laminate flooring acclimate for at least 48 hours. This timeframe allows the planks to adjust to the room’s temperature and humidity levels. Check the manufacturer’s instructions for the recommended acclimation time, as it may vary depending on the specific product.
- Maintain proper room conditions: During the acclimation period, it’s important to maintain the room’s temperature and humidity within the recommended range. Keep the room temperature between 60-80°F (15-27°C) and the humidity level between 35-65%. This will ensure the laminate flooring adjusts properly.
- Check moisture levels: Use a moisture meter to check the subfloor and ensure it is within the acceptable moisture range recommended by the laminate flooring manufacturer. Excessive moisture can lead to warping or damage to the laminate planks.
- Keep the flooring packaging intact: It’s important to keep the laminate flooring in its original packaging during the acclimation process. This protects the planks from moisture and prevents them from absorbing excess humidity.
By acclimating the laminate flooring, you allow it to adapt to the room’s natural conditions, reducing the risk of expansion or contraction issues. This step is crucial for a successful and long-lasting laminate floor installation. Make sure to follow the manufacturer’s guidelines and recommendations for acclimation to ensure the best results.
Step 4: Lay Underlayment
Laying down underlayment is a crucial step in the installation of laminate flooring. Underlayment provides a smooth and cushioned surface, reduces noise, and helps with moisture protection. Follow these steps to lay the underlayment:
- Prepare the subfloor: Ensure that the subfloor is clean, dry, and free of any debris or protrusions.
- Roll out the underlayment: Start by unrolling the underlayment parallel to the longest wall of the room. Allow the underlayment to extend slightly up the wall, making sure to overlap any seams.
- Trim the excess: Use a utility knife to trim the excess underlayment at the edges, leaving a small gap between the underlayment and the walls to allow for expansion. Repeat this process for each row of underlayment.
- Secure the underlayment: Depending on the type of underlayment, you may need to secure it in place using adhesive or double-sided tape. Follow the manufacturer’s instructions for proper installation.
- Overlap the underlayment seams: If your underlayment comes in rolls with overlapped seams, make sure to apply adhesive or tape to secure the overlapping edges. This will prevent the underlayment from shifting during the installation process.
- Inspect the underlayment: Once the underlayment is installed, carefully inspect it for any tears, gaps, or irregularities. Make any necessary repairs or adjustments before proceeding with the laminate flooring installation.
By laying down underlayment, you create a stable and comfortable base for the laminate flooring. It provides sound insulation, protects against moisture, and improves the overall performance of the floor. Take your time to ensure the underlayment is properly installed and in good condition before moving on to the next steps.
Read more: Laminate Wood Flooring
Step 5: Measure and Plan the First Row
Properly measuring and planning the first row of laminate flooring is crucial for a seamless and professional-looking installation. Follow these steps to ensure accurate measurements and a well-executed first row:
- Measure the width of the room: Use a tape measure to determine the width of the room. Measure from the starting wall to the ending wall, accounting for any alcoves or nooks that need to be included.
- Calculate the plank width: Divide the width of the room by the width of the laminate planks. This will determine the number of full planks needed for the first row.
- Consider expansion gaps: Remember to account for the necessary expansion gap between the wall and the first row of laminate flooring. Typically, a 1/4-inch gap is recommended to allow for natural expansion and contraction of the planks.
- Plan the layout: Lay out the planks without interlocking them to visualize how they will fit in the room. It’s important to achieve a balanced and visually pleasing arrangement. Avoid having narrow or awkwardly shaped planks at the edges of the room.
- Make necessary adjustments: If the last row of planks is too narrow, you may need to cut the first row to ensure a more balanced layout. This can be achieved by cutting the planks lengthwise using a jigsaw or a table saw.
- Mark the starting wall: Use a pencil or chalk to mark the starting wall where you will begin installing the first row of laminate flooring. This will serve as a guide throughout the installation process.
By measuring and planning the first row carefully, you ensure that the laminate flooring will fit properly and create a visually appealing layout. Taking the time to make adjustments and consider expansion gaps will result in a professional-looking installation that will stand the test of time.
Before starting the installation, make sure the subfloor is clean, level, and dry. Use a moisture barrier underlayment to protect the laminate from moisture and prevent mold growth.
Step 6: Install the First Row
Once you have measured, planned, and prepared the first row of laminate flooring, it’s time to start the installation process. Follow these steps to install the first row:
- Start in the corner: Begin in the corner where you marked the starting point. This will provide a solid reference point for the rest of the installation.
- Place spacers: Insert spacers along the starting wall to create the necessary expansion gap. These spacers will ensure that the laminate flooring has room to expand and contract naturally.
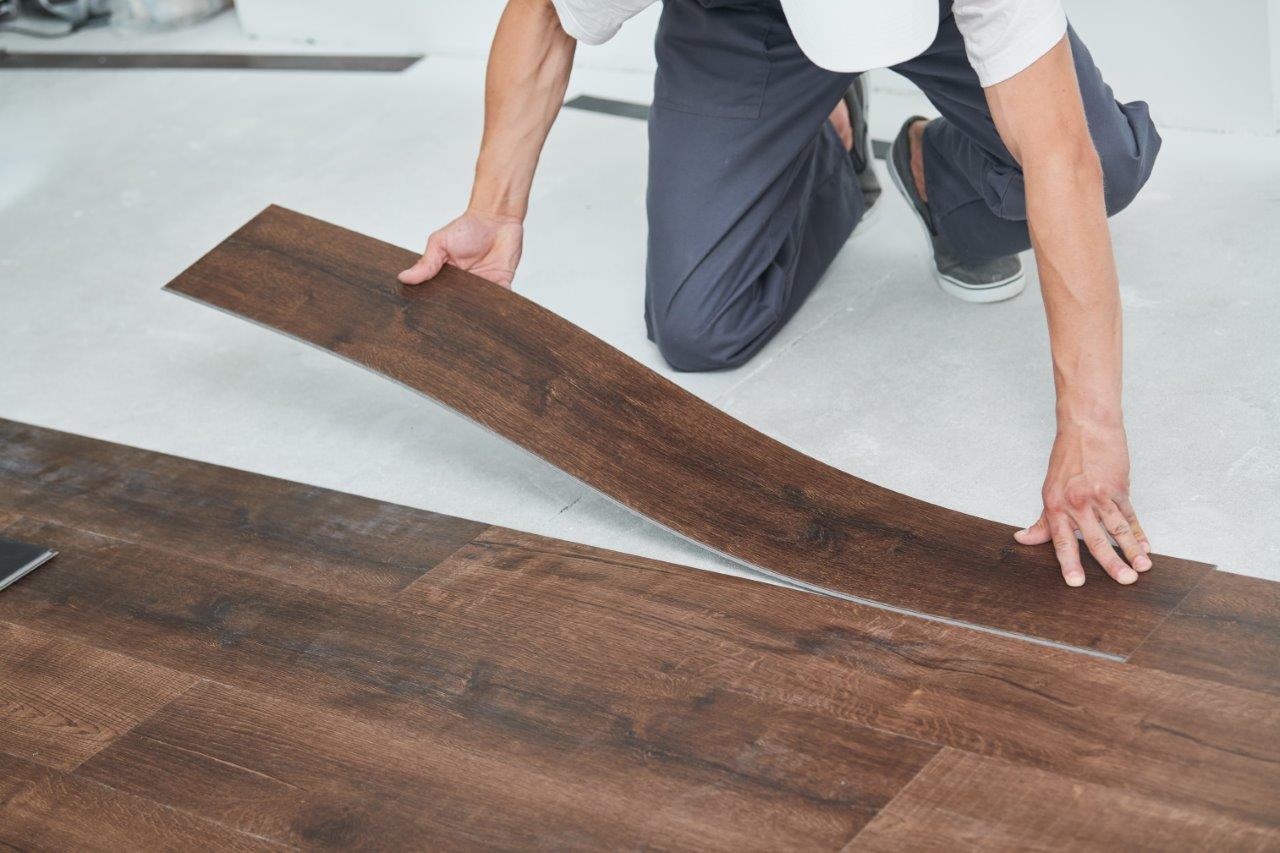
- Install the first plank: Hold the first plank at a slight angle and insert the tongue side into the grooved side of the adjacent plank. Gently lower the plank to the floor and align it with the starting wall. Use a tapping block and hammer to gently tap the plank into place, ensuring a snug fit.
- Continue installing the first row: Repeat the process of interlocking the planks and tapping them into place until you reach the end of the row. Use a pull bar and hammer to connect the last plank of the row more securely.
- Check for gaps: As you install the first row, periodically check for any gaps between the planks. If there are any visible gaps, gently lift the planks and adjust them accordingly to create a tight fit.
- Trim the last plank: Measure and trim the last plank of the first row to fit, leaving the necessary expansion gap. Use a straight edge and a utility knife or a jigsaw to make precise cuts.
- Stagger the joints: When starting the next row, make sure to stagger the joints by at least 6 inches. This will create a more stable and visually appealing flooring pattern.
Installing the first row of laminate flooring is a crucial step and sets the foundation for the rest of the project. Take your time to ensure a proper and secure installation before moving on to subsequent rows.
Step 7: Install the Remaining Rows
With the first row of laminate flooring successfully installed, it’s time to move on to installing the remaining rows. Follow these steps to ensure a seamless installation of the laminate planks:
- Apply adhesive or tape (if necessary): Depending on the specific laminate flooring you are using, you may need to apply adhesive or double-sided tape to secure the planks. Follow the manufacturer’s instructions for proper installation.
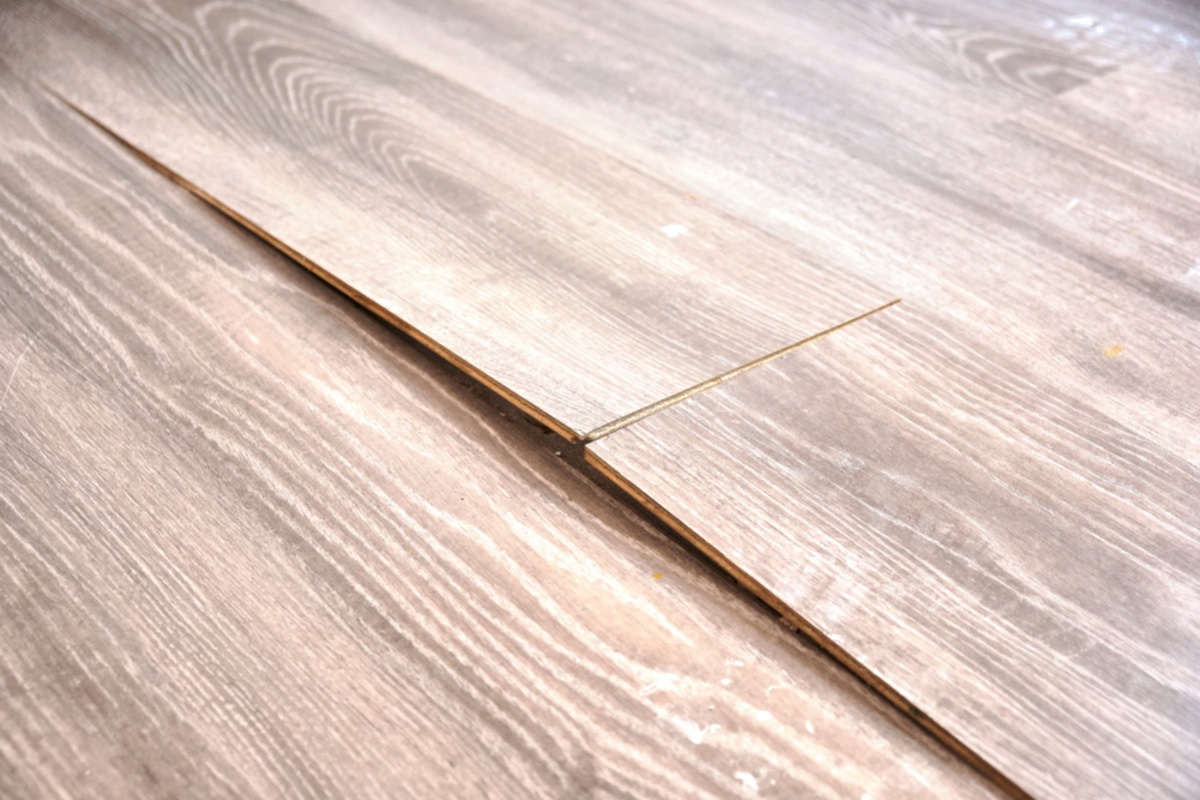
- Interlock the planks: Hold the next plank at a slight angle and insert the tongue side into the grooved side of the previous row. Gently lower the plank to the floor and use a tapping block and hammer to ensure a snug fit.
- Tap the planks together: Use a tapping block and hammer to tap the new row of planks securely into place. Continue this process for each row, ensuring that the planks are tightly interlocked.
- Stagger the joints: Throughout the installation process, remember to stagger the joints between the planks. This will create a more stable and visually appealing flooring pattern, as well as reduce the chance of plank separation.
- Check for gaps and adjust: As you install each row, periodically check for gaps between the planks. If necessary, gently lift the planks and adjust them to create a tight fit without visible gaps.
- Trim the last row: Measure and trim the last row of laminate flooring to fit the remaining space. Remember to leave the necessary expansion gap between the planks and the wall. Use a straight edge and a utility knife or jigsaw to make precise cuts.
- Continue until completion: Repeat the process of interlocking and installing the remaining rows until you reach the opposite wall. Take your time to ensure each plank is securely placed and that the flooring appears smooth and even.
Installing the remaining rows of laminate flooring requires precision and careful attention to detail. Take your time to ensure each plank is properly interlocked and that there are no visible gaps between the rows. Watch out for any corners or irregular spaces that may require additional cutting or fitting adjustments.
Throughout the installation process, periodically step back and assess the overall appearance of the laminate flooring. Making necessary adjustments and ensuring a seamless and visually appealing pattern will result in a professional-looking installation.
Step 8: Cut and Fit Laminate Planks
As you progress with the installation of laminate flooring, you may encounter areas that require you to cut and fit the planks to accommodate corners, doorways, or irregular spaces. Follow these steps to successfully cut and fit laminate planks:
- Measure the space: Carefully measure the dimensions of the area where you need to install a cut plank. Use a tape measure to ensure accuracy.
- Transfer the measurements: Transfer the measurements onto a laminate plank, making sure to account for the necessary expansion gap.
- Mark the cut line: Use a straight edge or T-square to mark a straight cut line on the surface of the plank. Ensure that the line is clear and visible.
- Choose the appropriate cutting tool: Depending on the type of cut you need to make, choose the appropriate cutting tool. A jigsaw or a table saw can be used for straight cuts, while a coping saw or a utility knife can be used for more intricate or curved cuts.
- Make the cut: Carefully cut along the marked line, following the manufacturer’s instructions and safety precautions for the chosen cutting tool.
- Check the fit: After making the cut, carefully place the plank in the designated area to check the fit. Ensure that it sits flush with the adjacent planks and that there are no visible gaps.
- Make any necessary adjustments: If the cut plank does not fit properly, make any necessary adjustments. This may involve recutting or fine-tuning the shape using sandpaper or a file.
- Continue with the installation: Once the cut plank fits properly, continue with the installation process, interlocking the planks and tapping them securely into place.
Remember to measure and cut each plank individually, as there may be slight variations in the dimensions of the spaces you are fitting them into. Take your time to ensure precise and accurate cuts, as this will result in a professional-looking installation.
When installing laminate flooring in areas with doorways, it may be necessary to undercut the door jambs to allow the planks to fit seamlessly. Use a handsaw or oscillating multi-tool with a wood-cutting blade to carefully remove a small portion of the door jamb to accommodate the planks.
By cutting and fitting laminate planks accurately, you can achieve a polished and cohesive look throughout your flooring installation.
Read more: How To Lay Laminate Floor
Step 9: Install Transition Strips
Transition strips are essential for creating a smooth and professional transition between different flooring surfaces, such as laminate and carpet or laminate and tile. Follow these steps to install transition strips:
- Select the appropriate transition strip: Choose a transition strip that matches the height, color, and material of your laminate flooring. There are various types of transition strips available, including T-moldings, reducers, and thresholds.
- Measure the doorway or transition area: Measure the width of the doorway or the area where the transition strip will be installed. Ensure the measurement is accurate.
- Mark the position: Mark the position where the transition strip will be installed, taking into account the expansion gaps and the desired placement to create a seamless transition.
- Cut the transition strip: Use a saw or appropriate cutting tool to cut the transition strip to the measured length. Ensure a clean and precise cut.
- Prepare the subfloor: Depending on the type of transition strip, you may need to install a track or adhesive to secure it in place. Follow the manufacturer’s instructions for proper installation.
- Install the transition strip: Insert the transition strip into the track or apply adhesive to the back of the strip. Press the strip firmly into place, ensuring it is level and secure. Follow the manufacturer’s recommendations for any additional installation steps.
- Check for proper alignment: After installation, check that the transition strip aligns evenly with both flooring surfaces. Make any necessary adjustments to ensure a seamless and smooth transition.
- Repeat for additional transition areas: If you have multiple transition areas, repeat the steps above for each one, ensuring a consistent and professional installation.
Transition strips not only create a visually appealing transition between different flooring types but also help in preventing tripping hazards and damage to the laminate flooring edges. Take your time to ensure a precise fit and proper installation for each transition strip.
Note that different transition strips may have specific installation instructions or requirements. Always refer to the manufacturer’s guidelines for the specific product you are using to ensure a correct and secure installation.
Step 10: Install Baseboards
Installing baseboards is the final step in completing the installation of laminate flooring. Baseboards not only provide a finished look to the room but also cover any expansion gaps between the flooring and the walls. Follow these steps to install baseboards:
- Select the baseboard material: Choose the type of baseboard material that complements your laminate flooring and suits the style of your room. Common options include wood, MDF, or PVC.
- Measure and cut the baseboards: Measure the length of each wall where the baseboards will be installed. Cut the baseboards to the appropriate lengths using a miter saw or a handsaw.
- Prepare the baseboards: If the baseboards are unfinished, paint or stain them to the desired color before installation. Allow them to dry completely before proceeding.
- Position the baseboards: Starting from one corner of the room, position the baseboards along the walls, ensuring they are flush against the floor and the wall.
- Secure the baseboards: Use a combination of adhesive and finishing nails to secure the baseboards to the wall. Apply adhesive to the backside of the baseboards and press them firmly against the wall. Then, nail them into place, ensuring the nails are driven at an angle into the wall studs for a secure attachment.
- Fill nail holes and gaps: Fill any nail holes or gaps between the baseboards and the wall using wood filler or caulking. Smooth out the filler or caulk with a putty knife and allow it to dry completely.
- Paint or touch up the baseboards: Once the filler or caulk has dried, paint or touch up the baseboards as necessary to achieve a seamless and finished appearance.
- Clean up: Remove any excess adhesive or filler from the baseboards and the floor using a damp cloth or sponge. Ensure that the area is clean and free of debris.
Installing baseboards completes the look of your laminate flooring and adds a final touch of elegance to the space. Take your time to ensure precise measurements, secure installation, and a clean finish.
Remember to allow for proper expansion and contraction of the laminate flooring by leaving a small gap between the baseboards and the flooring. This gap can be covered using quarter-round molding or other appropriate trim pieces.
Congratulations! With the installation of the baseboards, your laminate flooring is now complete, providing a beautiful and durable addition to your space.
Conclusion
Installing laminate flooring can be a rewarding and cost-effective way to update the look and feel of your home. With the right materials, tools, and step-by-step guidance, you can achieve a professional and polished installation that will transform your space. Here’s a recap of the steps involved in installing laminate flooring:
- Gather Materials and Tools
- Prepare the Subfloor
- Acclimate the Laminate Flooring
- Lay Underlayment
- Measure and Plan the First Row
- Install the First Row
- Install the Remaining Rows
- Cut and Fit Laminate Planks
- Install Transition Strips
- Install Baseboards
Throughout the installation process, remember the importance of proper preparation, accurate measurements, and attention to detail. Take your time to ensure each step is executed meticulously, and make any necessary adjustments along the way.
By following this comprehensive guide, you can successfully install laminate flooring and enjoy its durability and aesthetic appeal for years to come. Remember to always refer to the manufacturer’s instructions and guidelines for the specific laminate flooring product you are using.
Whether you’re updating a single room or renovating your entire home, laminate flooring provides a versatile and stylish option that fits a variety of design preferences. With its affordability, ease of installation, and wide range of design options, laminate flooring is a popular choice among homeowners.
Now it’s time to put your knowledge into action and transform your space with the beauty and functionality of laminate flooring. Enjoy the process and the satisfaction of a job well done!
Now that you've mastered installing laminate flooring, why not consider sprucing up your kitchen with new floors? Whether you're renovating or just looking to refresh your space, choosing the right flooring is crucial. Our guide on kitchen flooring options will help you find the perfect fit that meets both your style and functionality needs. Don't miss out on transforming your kitchen into a stunning and practical area of your home.
Frequently Asked Questions about How To Install Laminate Flooring
Was this page helpful?
At Storables.com, we guarantee accurate and reliable information. Our content, validated by Expert Board Contributors, is crafted following stringent Editorial Policies. We're committed to providing you with well-researched, expert-backed insights for all your informational needs.


0 thoughts on “How To Install Laminate Flooring”