Home>Ideas and Tips>Upgrading Your Home’s Garage With DIY Workbench

Ideas and Tips
Upgrading Your Home’s Garage With DIY Workbench
Published: August 31, 2024
Transform your garage into a professional-grade workshop with a DIY workbench. Boost productivity, safety, and storage with easy upgrades.
(Many of the links in this article redirect to a specific reviewed product. Your purchase of these products through affiliate links helps to generate commission for Storables.com, at no extra cost. Learn more)
Introduction
The garage is often overlooked as a space for improvement, but it can be transformed into a highly functional and efficient workshop with the right upgrades. One of the most crucial elements in any workshop is the workbench. A well-designed and upgraded workbench can significantly enhance your productivity and make your garage a more enjoyable place to work. In this article, we will explore various DIY workbench improvements that can turn your garage into a professional-grade workshop.
Why Upgrade Your Workbench?
Upgrading your workbench isn't just about making it look good. It's about making your life easier and your work more efficient. Imagine having all your tools organized and within arm's reach. No more wasting time searching for that one screwdriver or wrench. A well-organized workbench can save you tons of time and effort. Plus, it can make your projects go smoother and faster.
Safety is another big reason to upgrade. A sturdy workbench with built-in safety features like a vice and proper lighting can significantly reduce the risk of accidents. You don't want your workbench wobbling while you're sawing a piece of wood, right? A solid, stable workbench can make all the difference.
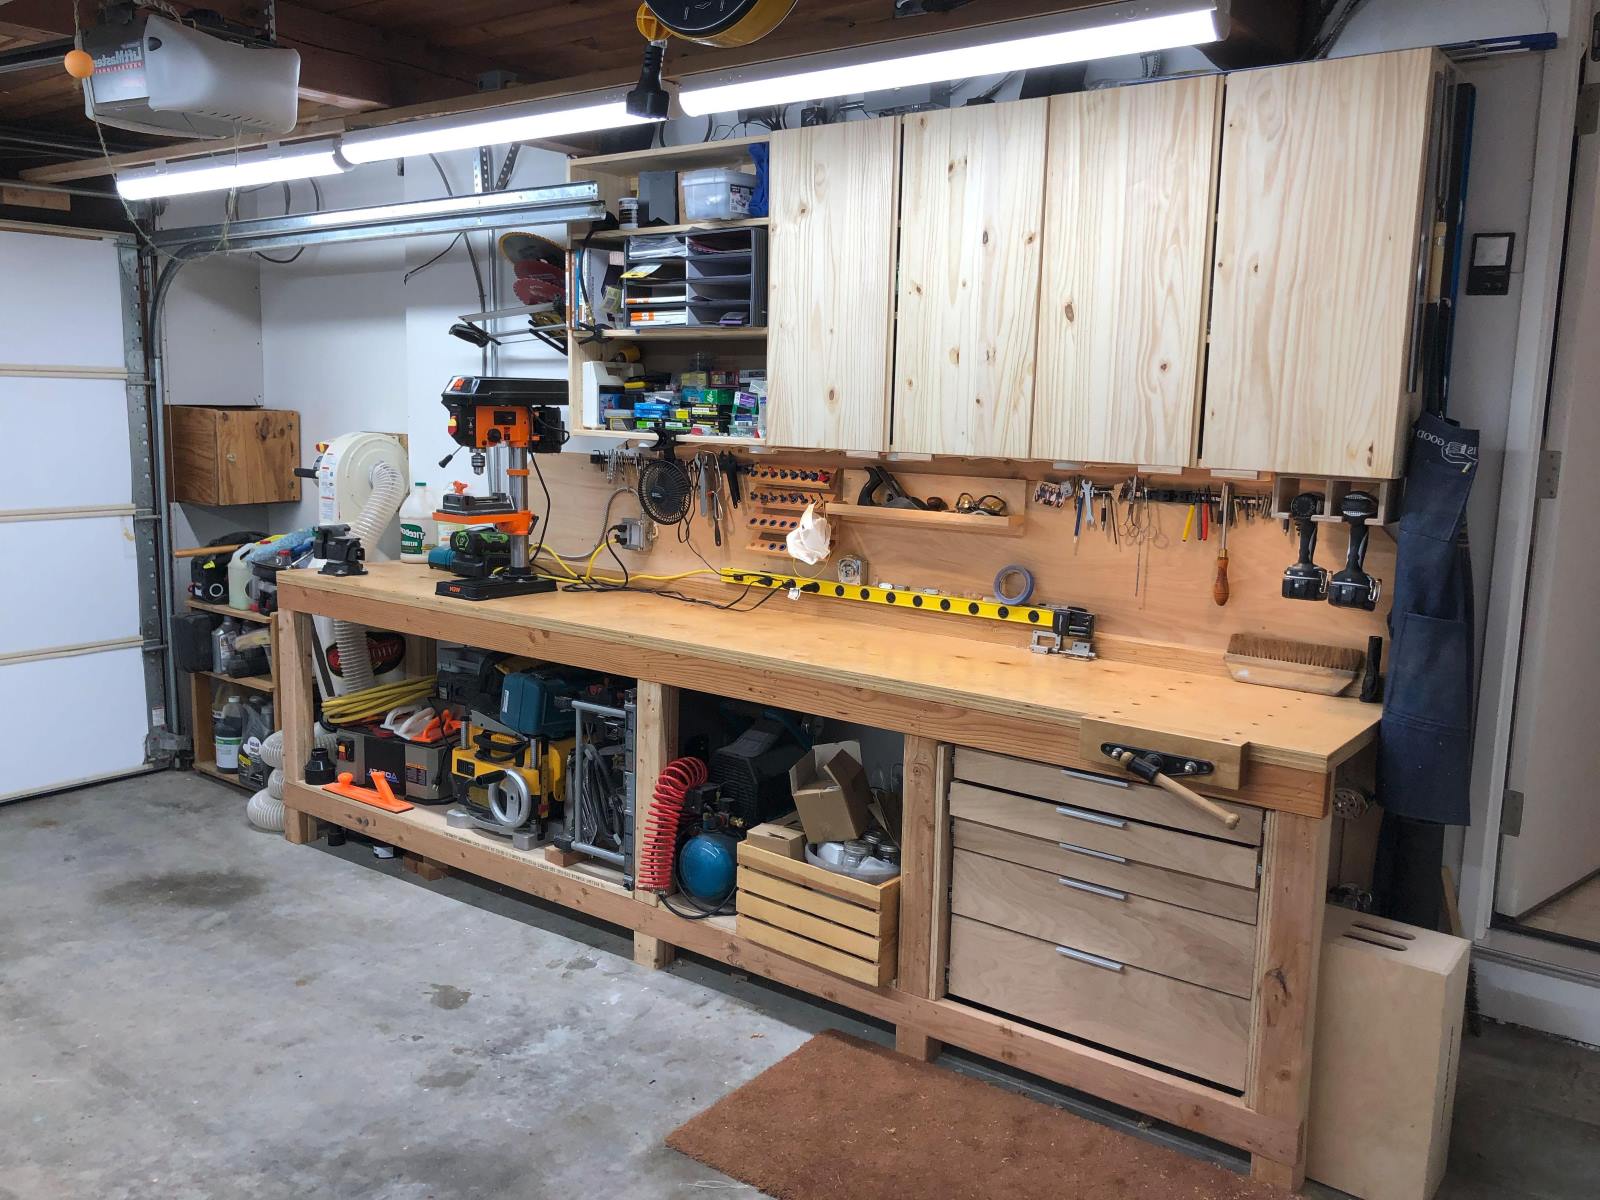
Storage is another huge benefit. Adding drawers, cabinets, and pegboards can help keep your tools and materials organized. This means less clutter and more space to work on your projects. You can even customize your workbench to fit your specific needs. Whether you're a hobbyist or a professional, you can tailor the design to fit your workflow.
Basic Components of a DIY Workbench
Before diving into the upgrades, let's cover the basic components of a DIY workbench:
-
Top Surface: The top surface of your workbench should be sturdy and large enough to accommodate your projects. Common materials include plywood, MDF, or solid wood.
-
Legs and Frame: The legs and frame provide stability and support to the workbench. You can use 2x4s or other lumber for this purpose.
-
Shelves and Drawers: Additional shelves and drawers offer storage space for tools, materials, and other items.
-
Pegboard: A pegboard is an excellent way to hang frequently used tools, keeping them within easy reach.
-
Vice: A vice is essential for holding materials in place while you work on them.
Step-by-Step Guide to Building a Basic Workbench
Building a basic workbench is a great starting point for any DIY project. Here’s a step-by-step guide:
Materials Needed
- (2) 2 x 4 x 8s
- (2) 2 x 4 x 12s
- (1) Sheet of Plywood
- (52) #8 x 2 1/2 Wood Screws
- Power Drill
- Impact Driver
- Pencil
- Tape Measure
Cut List
- (4) 2 x 4 @ 48″ – Cut from the 2 x 4 x 8s
- (4) 2 x 4 @ 36″ – Cut from the 2 x 4 x 12s
- (6) 2 x 4 @ 21″ – Cut from the 2 x 4 x 12s
- (2) 24″ x 48″ Pieces of Plywood – Cut from Sheet
Instructions
-
Determine Dimensions: Decide on your workbench dimensions based on your needs. For example, you might want it to be 36 inches high with a 48-inch length and 24-inch depth.
-
Cut Legs and Frame: Cut your 2x4s according to your cut list. Assemble the legs and frame using screws.
-
Attach Top Surface: Place your plywood on top of the frame and secure it with screws.
-
Add Shelves and Drawers: If desired, add shelves or drawers for additional storage.
-
Install Pegboard: Attach a pegboard above or below your workbench for hanging tools.
-
Add Vice: Install a vice on one end of your workbench for holding materials in place.
Easy Workbench Improvements
Once you have a basic workbench set up, it's time to think about upgrades that can enhance its functionality and efficiency. Here are 15 easy workbench improvements you can consider:
-
Add More Storage
- Install additional shelves or cabinets to keep your tools and materials organized.
- Use bins and containers to store small items like screws, nails, and other hardware.
-
Improve Organization
- Use a pegboard to hang frequently used tools.
- Label each tool and bin for easy identification.
-
Enhance Lighting
- Install LED lights under the workbench or above it to provide better illumination.
- Use task lighting for specific areas where you need more light.
-
Add a Vice
- Install a vice on one end of your workbench for holding materials in place.
- Consider adding a bench vise for more versatility.
-
Incorporate a Down Draft Table
- Build a down draft table into your workbench to improve ventilation and dust collection.
- Attach a shop vac to the underside of the table for easy dust collection.
-
Increase Workspace
- Add an overhang on all sides of your workbench for clamping area.
- Use a speed square holder on every corner to keep your tools within reach.
-
Customize Your Workbench
- Add a mallet holder, screw box holders, and hardware storage bins.
- Incorporate a custom bench cookie dispenser or clamp storage.
-
Make It Mobile
- Build your workbench on wheels with a brake for easy mobility.
- Use a frame made of profile tube 30x30mm and attach the table top with 15mm plywood.
-
Enhance Safety Features
- Bolt your workbench to the wall with lag bolts to ensure stability.
- Use metal folding steps for easy access to high shelves.
-
Add Magnetic Strips
- Attach magnetic strips to the sides of your workbench for storing small metal items like screws or nails.
-
Incorporate Toolboxes
– Use Husky boxes or other storage solutions to keep your tools organized and within reach. -
Add Lighting Above Pegboard
– Install LED lights above your pegboard for better illumination of hanging tools. -
Create a Tool Station
– Designate an area of your workbench as a tool station with specific bins for different types of tools. -
Use French Cleats
– Attach hardware storage bins using French cleats so they are removable or rearrangeable as needed. -
Add Drawer Organizers
– Use drawer organizers to keep your drawers tidy and make it easier to find what you need quickly.
Tips and Tricks
Here are some additional tips and tricks to keep in mind when upgrading your workbench:
-
Measure Twice, Cut Once
– Double-check your measurements before cutting any lumber to avoid mistakes. -
Use Proper Safety Gear
– Always wear safety gear like hearing protection and a respirator when working with power tools or materials that produce dust. -
Keep It Simple
– Start with basic upgrades and gradually move on to more complex ones as you gain experience. -
Customize Based on Needs
– Tailor your workbench upgrades based on your specific needs and preferences. -
Seek Inspiration
– Browse online forums like Reddit’s r/Workbenches or YouTube videos for inspiration and tips from other DIY enthusiasts.
Conclusion
Upgrading your home's garage with a DIY workbench is a rewarding project that can significantly enhance your productivity and enjoyment of working in your garage. By following these steps and tips, you can create a highly functional and efficient workspace that meets all your needs. Whether you're a hobbyist or a professional, investing time and effort into upgrading your workbench will pay off in the long run. So why wait? Start building today and transform your garage into a professional-grade workshop!
Additional Resources
For those looking for more detailed plans or inspiration, here are some additional resources:
- Garage Makeover Series by The Craft Crib – This series includes detailed plans for building custom shelves and a workbench that matches the shelving.
- Ultimate Plywood Workbench Plans Modifications by Wilkerdos – This guide provides modifications for an ultimate plywood workbench, including adding a vice and down draft table.
- Sturdy Garage Workbench With Top Pegboard, Cabinet and Bottom Shelf by Instructables – This project includes a detailed guide on building a sturdy garage workbench with additional storage solutions.
By combining these resources with the tips and tricks provided in this article, you'll be well on your way to creating an upgraded DIY workbench that meets all your needs and enhances your garage workspace.
Was this page helpful?
At Storables.com, we guarantee accurate and reliable information. Our content, validated by Expert Board Contributors, is crafted following stringent Editorial Policies. We're committed to providing you with well-researched, expert-backed insights for all your informational needs.









0 thoughts on “Upgrading Your Home’s Garage With DIY Workbench”