Home>Ideas and Tips>Upgrading Your Home’s Windows With DIY Weather Stripping
Ideas and Tips
Upgrading Your Home’s Windows With DIY Weather Stripping
Published: September 18, 2024
Upgrade your home's windows with DIY weather stripping for better energy efficiency, noise reduction, and security. Learn how with our step-by-step guide.
(Many of the links in this article redirect to a specific reviewed product. Your purchase of these products through affiliate links helps to generate commission for Storables.com, at no extra cost. Learn more)
Introduction
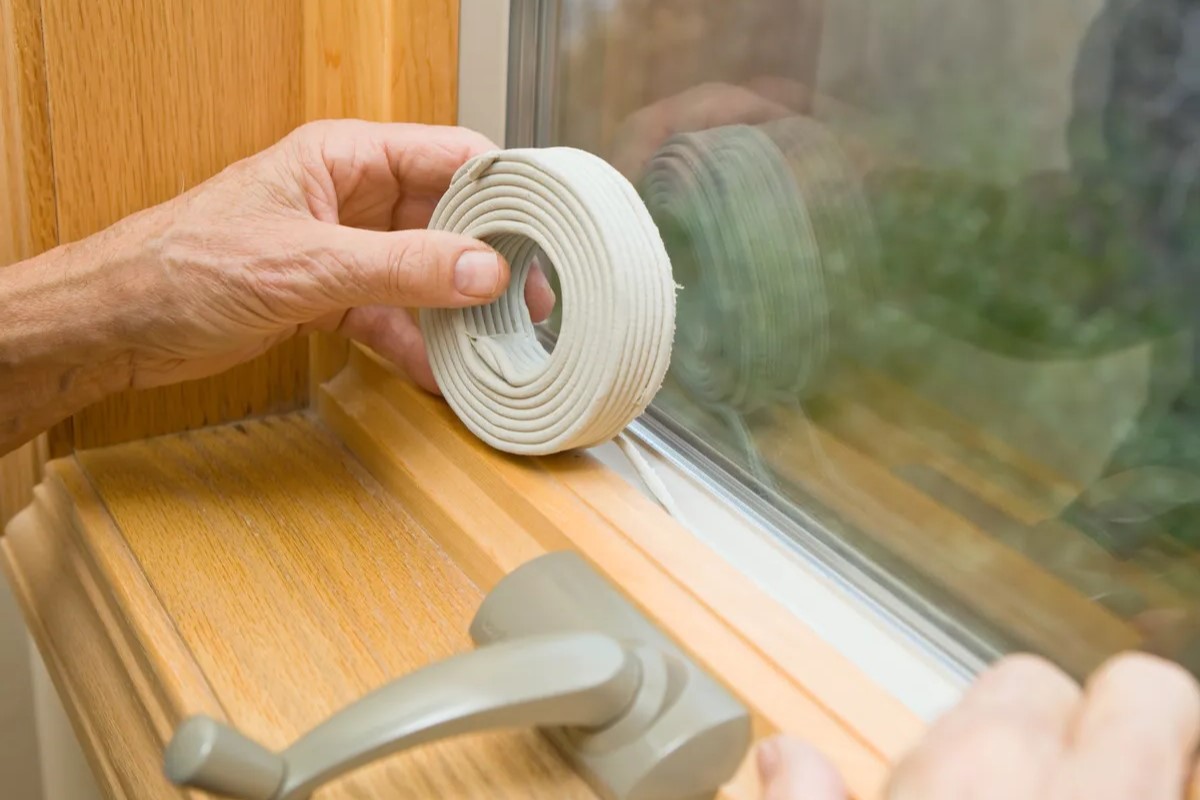
As the seasons change, homeowners often find themselves dealing with the challenges of maintaining their homes. One of the most critical areas to focus on is the windows, as they play a significant role in energy efficiency, comfort, and overall home value. One simple yet effective way to upgrade your home's windows is by applying DIY weather stripping. This article will guide you through the process of installing DIY weather stripping, highlighting its benefits, the materials needed, and step-by-step instructions.
Benefits of DIY Weather Stripping
Before diving into the installation process, it's essential to understand the benefits of using DIY weather stripping. Here are some key advantages:
-
Energy Efficiency: By sealing gaps around windows, you can significantly reduce heat loss in the winter and heat gain in the summer. This leads to lower energy bills and a more comfortable living space.
-
Noise Reduction: Weather stripping can help block outside noise, creating a quieter environment inside your home.
-
Improved Security: Sealing gaps around windows makes it more difficult for intruders to enter your home.
-
Enhanced Aesthetics: Properly sealed windows can improve the overall appearance of your home by reducing drafts and ensuring that windows operate smoothly.
-
Cost-Effective: Unlike professional window treatments, DIY weather stripping is an affordable solution that can be completed with minimal investment.
Materials Needed
To get started with your DIY weather stripping project, you'll need the following materials:
-
Weather Stripping Tape or Foam: This is the primary material used to seal gaps around windows. You can choose from various types such as foam tape, vinyl tape, or felt strips.
-
Adhesive Remover (Optional): If you're using old weather stripping or need to remove existing adhesive residue, an adhesive remover will come in handy.
-
Utility Knife or Scissors: For cutting the weather stripping tape or foam to the correct size.
-
Measuring Tape: To measure the gaps around your windows accurately.
-
Pencil or Marker: For marking where you'll apply the weather stripping.
-
Cleaning Solution (Optional): To clean the surface before applying new weather stripping.
Step-by-Step Instructions
Step 1: Prepare Your Windows
Before applying the weather stripping, ensure that your windows are clean and free of debris. If necessary, use a cleaning solution to wipe down the surfaces where you'll be applying the tape or foam.
Step 2: Measure and Mark Gaps
Using a measuring tape, measure the width of each gap around your windows. Mark these measurements on the surface with a pencil or marker. This will help you place the weather stripping accurately.
Step 3: Cut Weather Stripping
Using a utility knife or scissors, cut the weather stripping tape or foam to match the measurements you've taken. Make sure to leave a little extra material at each end for easy application.
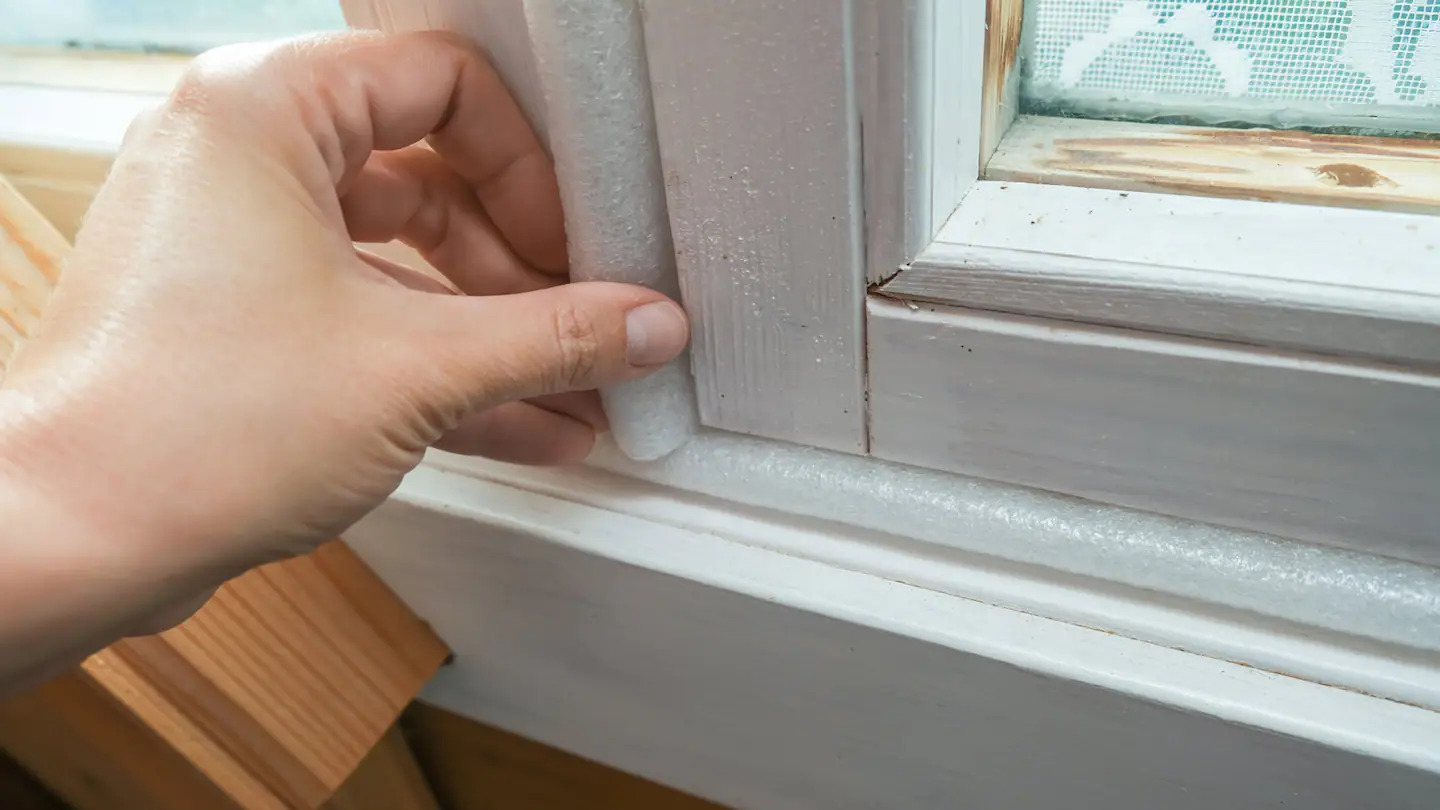
Step 4: Apply Weather Stripping
Peel off the backing from one end of the weather stripping and press it firmly onto one side of the gap. Continue applying it along the marked line, ensuring it's smooth and even. If necessary, use a credit card or similar tool to press down firmly and remove any air bubbles.
Step 5: Secure Weather Stripping (Optional)
If you're using foam tape that doesn't stick well on its own, you can use adhesive remover to clean any residue from previous applications before applying new tape.
Step 6: Inspect and Adjust
After applying all necessary sections of weather stripping, inspect each window to ensure that gaps are fully sealed. If necessary, adjust any sections that may not be fitting perfectly.
Types of DIY Weather Stripping
There are several types of DIY weather stripping available in the market:
-
Foam Tape: This is one of the most common types used due to its ease of application and effectiveness in sealing gaps.
-
Vinyl Tape: Similar to foam tape but made from vinyl material which provides better durability over time.
-
Felt Strips: These are more traditional options made from felt material which can be more aesthetically pleasing but less effective than modern alternatives.
-
Self-Adhesive Foam: This type comes pre-adhesive making application even simpler by just peeling off backing before pressing onto surfaces.
Common Mistakes to Avoid
While installing DIY weather stripping is relatively straightforward, there are some common mistakes you should avoid:
-
Incorrect Measurement: Failing to measure gaps accurately can lead to improper fitting which defeats the purpose of sealing gaps effectively.
-
Insufficient Adhesion: Not pressing down firmly enough during application can result in poor adhesion leading back into drafts issues later down line.
-
Using Wrong Material: Choosing wrong type based solely upon aesthetics rather than functionality might not provide desired results leading back into same problems again soon after installation process completes itself fully successfully without any issues whatsoever!
Conclusion
Upgrading your home's windows with DIY weather stripping is an easy yet effective way not only save money but also improve overall comfort level inside living space itself By following simple steps outlined above along choosing right materials available market today ensures successful completion project without any major complications arising along way forward journey ahead towards achieving desired outcomes ultimately end goal mind sight always kept focus throughout entire process itself!
Remember always double check measurements before cutting anything down size required fit perfectly around edges frames themselves ensuring smooth operation overall system functioning correctly without any hiccups whatsoever Happy DIY-ing
Was this page helpful?
At Storables.com, we guarantee accurate and reliable information. Our content, validated by Expert Board Contributors, is crafted following stringent Editorial Policies. We're committed to providing you with well-researched, expert-backed insights for all your informational needs.


0 thoughts on “Upgrading Your Home’s Windows With DIY Weather Stripping”