Home>Energy>Home Insulation & Ventilation>How To Replace Weather Stripping Around Car Window
Home Insulation & Ventilation
How To Replace Weather Stripping Around Car Window
Modified: January 4, 2024
Learn how to replace weather stripping around your car window for better home insulation and ventilation. Follow our step-by-step guide to improve your car's energy efficiency.
(Many of the links in this article redirect to a specific reviewed product. Your purchase of these products through affiliate links helps to generate commission for Storables.com, at no extra cost. Learn more)
Introduction
Welcome to the comprehensive guide on how to replace weather stripping around a car window. Weather stripping plays a crucial role in maintaining the comfort and integrity of your vehicle. Over time, weather stripping can deteriorate due to exposure to the elements, leading to air and water leaks. By learning how to replace weather stripping, you can ensure that your car remains well-protected from external elements, while also enhancing its overall insulation and energy efficiency.
In this guide, we will walk you through the step-by-step process of replacing weather stripping around a car window, providing you with the knowledge and confidence to tackle this task effectively. Whether you are a seasoned DIY enthusiast or a novice looking to expand your automotive maintenance skills, this guide will equip you with the essential know-how and tips to successfully complete the replacement process.
So, grab your tools and let's dive into the world of weather stripping replacement to keep your car snug and secure!
Key Takeaways:
- Replacing weather stripping around a car window is crucial for maintaining a snug and secure vehicle interior. By following the step-by-step process, you can enhance insulation and protect your car from external elements.
- After installing new weather stripping, conducting a thorough test is essential to ensure effective sealing. This proactive approach contributes to a comfortable and secure driving experience, free from drafts, water leaks, and excessive noise.
Tools and Materials Needed
Before embarking on the weather stripping replacement journey, it’s essential to gather the necessary tools and materials. Here’s what you’ll need:
Tools:
- Flathead screwdriver
- Trim removal tool
- Needle-nose pliers
- Utility knife
- Clean cloth
- Adhesive remover (if applicable)
Materials:
- New weather stripping (make sure it's the correct type and size for your car model)
- Cleaner or solvent for prepping the surface
- Adhesive (if the new weather stripping does not come with pre-applied adhesive)
- Protective gloves (to safeguard your hands during the process)
Having these tools and materials at your disposal will streamline the replacement process and ensure that you are well-prepared to tackle any challenges that may arise along the way. Now that you’re equipped with the essentials, it’s time to roll up your sleeves and get ready to remove the old weather stripping!
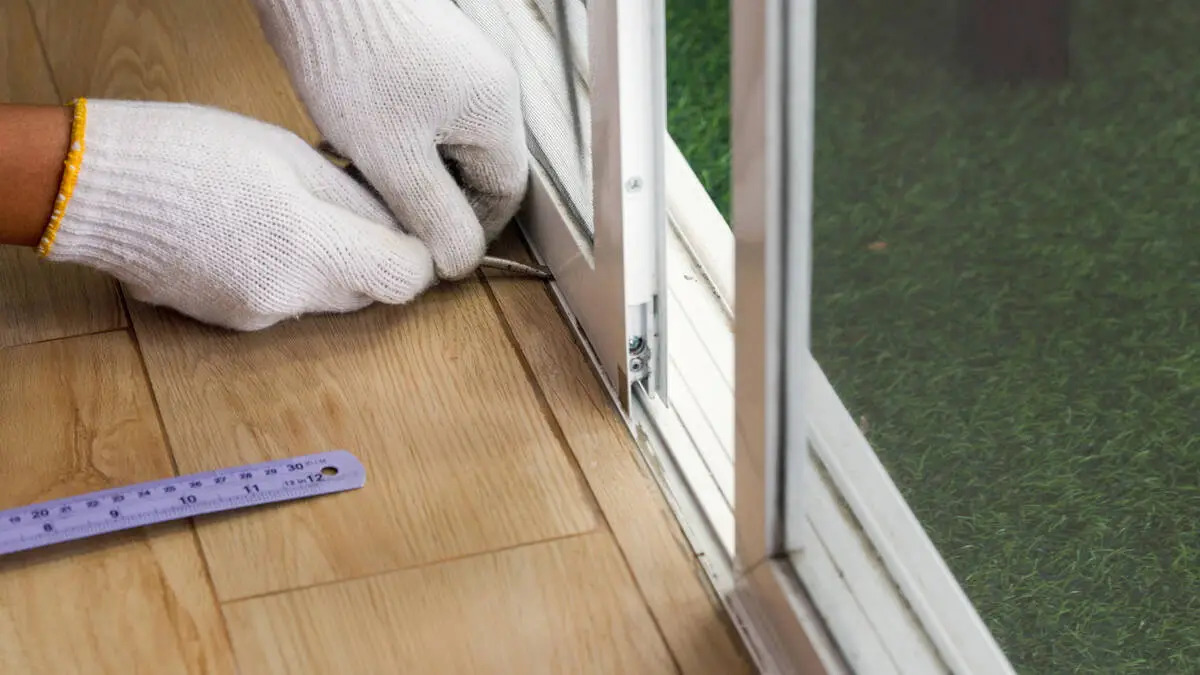
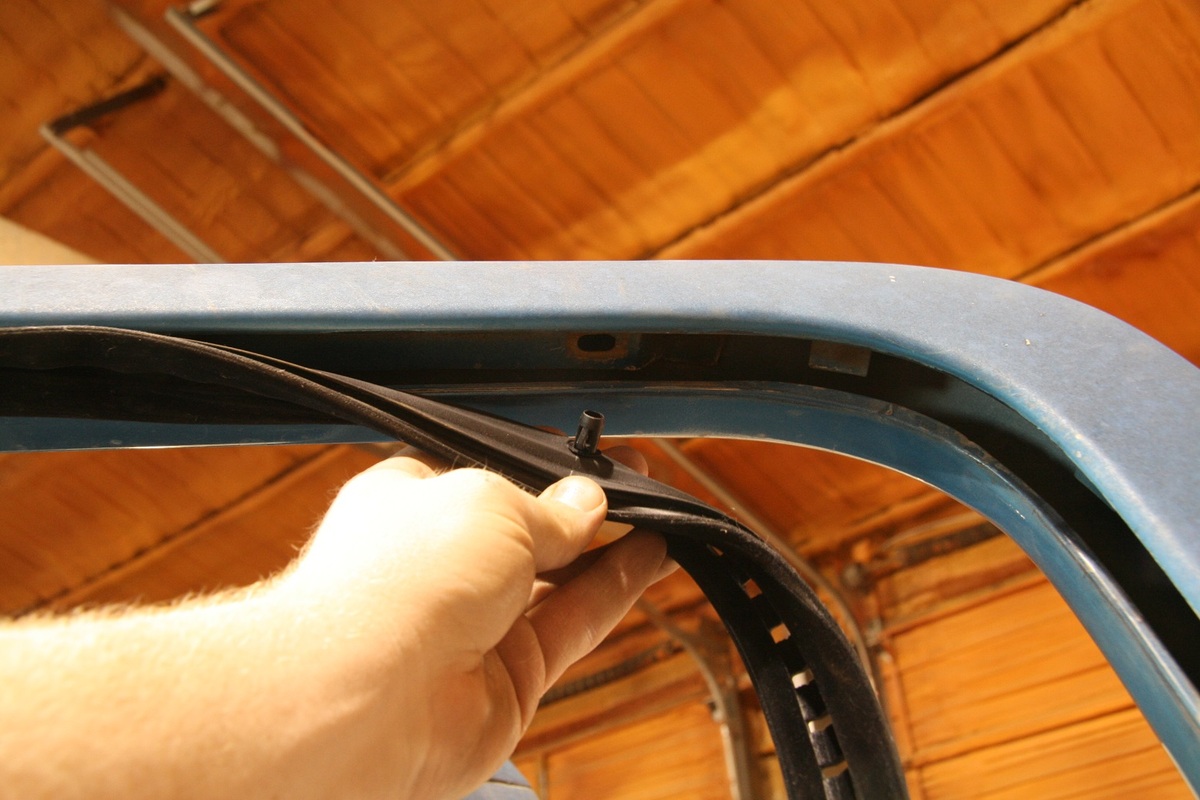
Removing the Old Weather Stripping
Before installing new weather stripping, the old weather stripping must be removed thoroughly. Here’s a step-by-step guide to help you through this process:
Read more: How Often To Replace Weather Stripping
Step 1: Prepare the Work Area
Begin by parking your car in a well-lit and ventilated area. Ensure that the car’s exterior surfaces, especially around the window where the weather stripping will be replaced, are clean and free from debris. This will provide a conducive environment for the replacement process.
Step 2: Assess the Condition of the Old Weather Stripping
Carefully examine the old weather stripping to identify any areas of damage or wear. This assessment will help you understand the extent of the replacement needed and provide insights into potential underlying issues such as water damage or rust.
Step 3: Use the Flathead Screwdriver and Trim Removal Tool
Gently insert the flathead screwdriver or trim removal tool between the old weather stripping and the car’s frame. Apply steady pressure to pry the weather stripping away from the frame. Take your time and work methodically to avoid damaging the surrounding surfaces.
Step 4: Remove the Weather Stripping Piece by Piece
As you continue to loosen the weather stripping, use the needle-nose pliers to grip and pull it away from the frame. Depending on the type of weather stripping, it may come off in sections or as a continuous piece. Exercise caution to prevent any adhesive residue from sticking to the car’s surface.
Read more: How To Repair A Car With Weather Stripping
Step 5: Clean the Surface
Once the old weather stripping has been completely removed, use a clean cloth and an adhesive remover, if necessary, to wipe away any remaining adhesive or debris. This will ensure a clean and smooth surface for installing the new weather stripping.
By following these steps, you can effectively remove the old weather stripping and prepare the window area for the installation of the new weather stripping. With the old weather stripping out of the way, it’s time to move on to the exciting phase of installing the fresh, protective barrier around your car’s window!
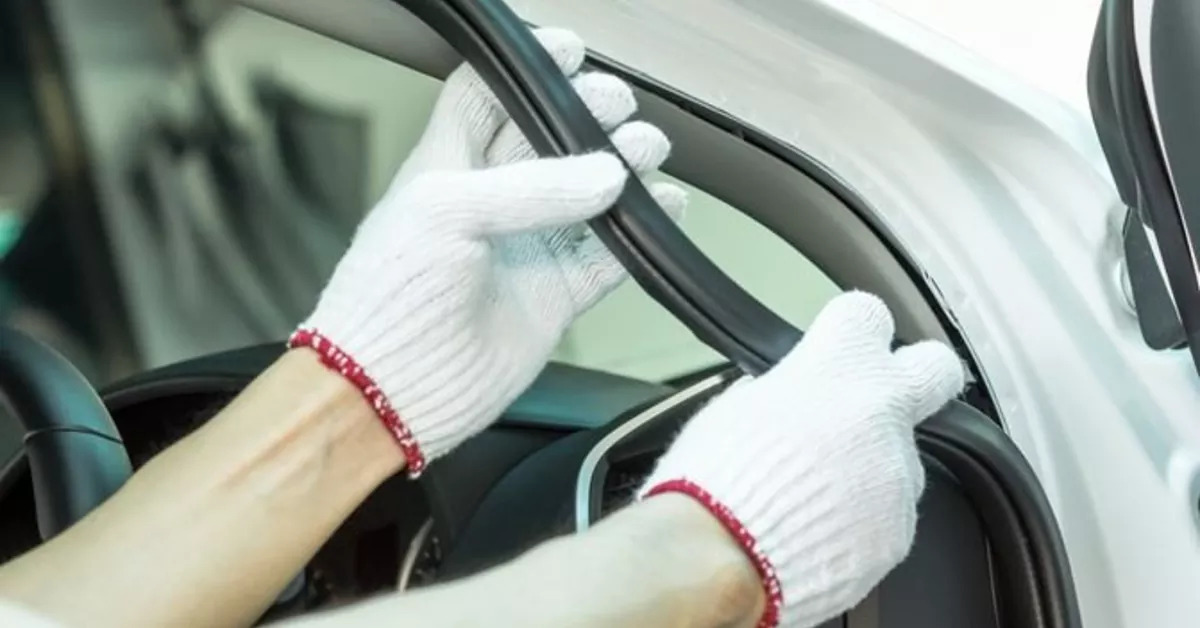
Installing the New Weather Stripping
With the old weather stripping removed and the surface prepped, it’s time to embark on the installation of the new weather stripping. Follow these steps to ensure a successful and secure installation:
Step 1: Inspect the New Weather Stripping
Before proceeding, carefully examine the new weather stripping to confirm that it matches the specifications of your car’s make and model. Verify that the length and dimensions align with the window frame, ensuring a proper fit.
Step 2: Apply Adhesive (if necessary)
If the new weather stripping does not come with pre-applied adhesive, use a suitable automotive adhesive to coat the contact surface of the weather stripping. Be sure to follow the manufacturer’s instructions for the application and drying time of the adhesive.
Read more: How To Put Weather Stripping On A Window
Step 3: Position and Secure the Weather Stripping
Starting at one end of the window frame, carefully align the new weather stripping with the edge, ensuring that it sits flush and snugly against the surface. Use gentle pressure to press the weather stripping into place, working your way along the frame. If the weather stripping has adhesive, ensure a firm bond with the frame.
Step 4: Trim Excess Weather Stripping
Once the weather stripping is securely in place, use a utility knife to trim any excess material, ensuring a clean and precise finish. Take care not to cut too close to the frame, allowing for a proper seal and preventing any gaps that may compromise the effectiveness of the weather stripping.
Step 5: Test the Seal
After installing the new weather stripping, carefully close the car window to test the seal. Listen for any unusual sounds or air leaks, and visually inspect the perimeter of the window to ensure that the weather stripping forms a tight and uniform seal.
By following these steps, you can successfully install new weather stripping around your car window, providing enhanced protection against external elements and contributing to a more comfortable and secure driving experience. With the new weather stripping in place, it’s essential to conduct a thorough test to validate its effectiveness before concluding the replacement process.
Testing the New Weather Stripping
After installing the new weather stripping, it’s crucial to conduct a comprehensive test to ensure that it effectively seals the window and provides the desired level of protection. Here’s how to perform a thorough test of the new weather stripping:
Step 1: Visual Inspection
Carefully examine the perimeter of the window to visually inspect the newly installed weather stripping. Look for any gaps, wrinkles, or areas where the weather stripping may not be making full contact with the window or the frame. Address any irregularities to ensure a uniform and secure seal.
Step 2: Listen for Air Leaks
With the car window closed, pay attention to any unusual sounds that may indicate air leaks. Run your hand along the edge of the window to feel for drafts or air movement, particularly in areas where the weather stripping meets the frame. Any noticeable airflow may indicate a need for readjustment or additional sealing.
Step 3: Conduct a Water Test
To test the weather stripping’s resistance to water infiltration, use a gentle stream of water from a hose or a spray bottle to wet the exterior of the window. Observe the interior of the car for any signs of water seepage or moisture. If water penetrates the seal, it may indicate a need for further adjustment or reinforcement of the weather stripping.
Step 4: Test During Driving Conditions
Take your car for a short drive, paying attention to any changes in interior noise levels and airflow around the window area. Listen for wind noise or rattling that may indicate inadequate sealing. Additionally, observe how the car’s HVAC system performs, as compromised weather stripping can impact its efficiency.
Read more: What Glue To Use For Car Weather Stripping
Step 5: Reassess and Make Adjustments
Based on the results of the visual inspection, air leak test, water test, and driving conditions, make any necessary adjustments to the weather stripping. This may involve repositioning the stripping, applying additional adhesive, or replacing any sections that do not meet the desired sealing standards.
By conducting a thorough test of the new weather stripping, you can identify and address any potential issues, ensuring that your car’s window is effectively sealed against external elements. This proactive approach will contribute to a more comfortable and secure driving experience, free from unwanted drafts, water leaks, and excessive noise.
Conclusion
Congratulations on successfully replacing the weather stripping around your car window! By following this comprehensive guide, you’ve taken a proactive step toward enhancing the insulation, protection, and overall comfort of your vehicle. The meticulous process of removing the old weather stripping, installing the new one, and conducting thorough tests has equipped you with valuable skills and knowledge in automotive maintenance.
Remember, maintaining well-sealed windows not only contributes to a quieter and more comfortable driving experience but also helps safeguard your car’s interior from moisture and external elements. Properly functioning weather stripping is essential for preserving the integrity of your vehicle and ensuring optimal energy efficiency.
As you enjoy the benefits of your newly installed weather stripping, take pride in your ability to tackle this essential maintenance task. Your attention to detail and commitment to quality ensure that your car remains a reliable and well-protected mode of transportation.
Should you encounter any future issues with weather stripping or other aspects of automotive maintenance, you now have the confidence and expertise to address them effectively. Embracing a proactive approach to car care not only enhances the longevity of your vehicle but also contributes to a more enjoyable and worry-free driving experience.
Thank you for joining us on this journey to master the art of weather stripping replacement. We hope this guide has empowered you to take charge of your car’s maintenance needs and inspired you to explore further DIY automotive projects. Here’s to many more miles of safe, comfortable, and well-insulated travels!
Frequently Asked Questions about How To Replace Weather Stripping Around Car Window
Was this page helpful?
At Storables.com, we guarantee accurate and reliable information. Our content, validated by Expert Board Contributors, is crafted following stringent Editorial Policies. We're committed to providing you with well-researched, expert-backed insights for all your informational needs.

0 thoughts on “How To Replace Weather Stripping Around Car Window”