Home>Interior Design>14 Universal Design Tips To Make Your Home More Accessible
Interior Design
14 Universal Design Tips To Make Your Home More Accessible
Modified: October 27, 2024
Learn 14 essential universal design tips to create a more accessible and inclusive home. Discover how interior design can promote accessibility and improve daily living.
(Many of the links in this article redirect to a specific reviewed product. Your purchase of these products through affiliate links helps to generate commission for Storables.com, at no extra cost. Learn more)
Introduction
Welcome to the world of interior design, where aesthetics and functionality come together to create beautiful spaces. However, it’s important to remember that design should never compromise accessibility. Universal design is a concept that aims to make homes more accessible and inclusive for people of all ages, sizes, and abilities.
Creating a home that is universally accessible not only benefits individuals with disabilities but also provides convenience and comfort to everyone who resides in or visits the space. Whether you are remodeling an existing home or designing a new one, incorporating universal design principles will ensure that your space is accessible to all.
In this article, we will explore 14 universal design tips that can make your home more accessible. From widening doorways to installing ramps, adding grab bars, and integrating smart home technology, these tips will help you create a space that is functional, stylish, and inclusive for everyone.
By implementing these tips, you will not only enhance the accessibility of your home but also increase its overall value and appeal. So, let’s dive in and discover how you can create a space that welcomes everyone with open arms.
Key Takeaways:
- 1. Universal design principles, such as widening doorways, installing ramps, and incorporating smart home technology, can transform your home into an inclusive sanctuary that promotes independence and accessibility for individuals of all abilities.
- 2. From barrier-free showers and adjustable-height countertops to smooth outdoor pathways and voice-activated assistants, integrating universal design tips creates a safe, user-friendly, and welcoming environment that celebrates diversity and unique needs.
Tip 1: Widening doorways for wheelchair accessibility
One of the key elements in creating an accessible home is ensuring that doorways are wide enough to accommodate wheelchairs and other mobility devices. Standard doorways are typically around 30-32 inches wide, which can pose a challenge for wheelchair users.
To make your home more wheelchair accessible, consider widening doorways to a minimum of 36 inches. This will provide enough space for most standard wheelchairs to pass through comfortably. You may need to consult with a contractor or architect to determine if structural modifications are required.
In addition to widening doorways, it’s also important to ensure that they are free from any obstructions. Remove furniture, rugs, or any objects that may hinder wheelchair movement. This will create a clear and unobstructed path for individuals using mobility devices.
Furthermore, you can enhance door accessibility by installing swing-away hinges on doors. These hinges allow the door to swing open a few inches more, providing additional clearance for wheelchair users. This small adjustment can make a significant difference in improving accessibility.
When selecting door handles, opt for lever-style handles instead of knobs. Lever handles are easier to grip and operate, especially for individuals with limited hand dexterity. This simple change in door hardware can greatly enhance accessibility and convenience for everyone in the household.
By widening doorways and making thoughtful modifications, you can create a more inclusive and accessible home environment. This not only benefits individuals with mobility challenges but also provides a sense of freedom and independence to navigate the space with ease.
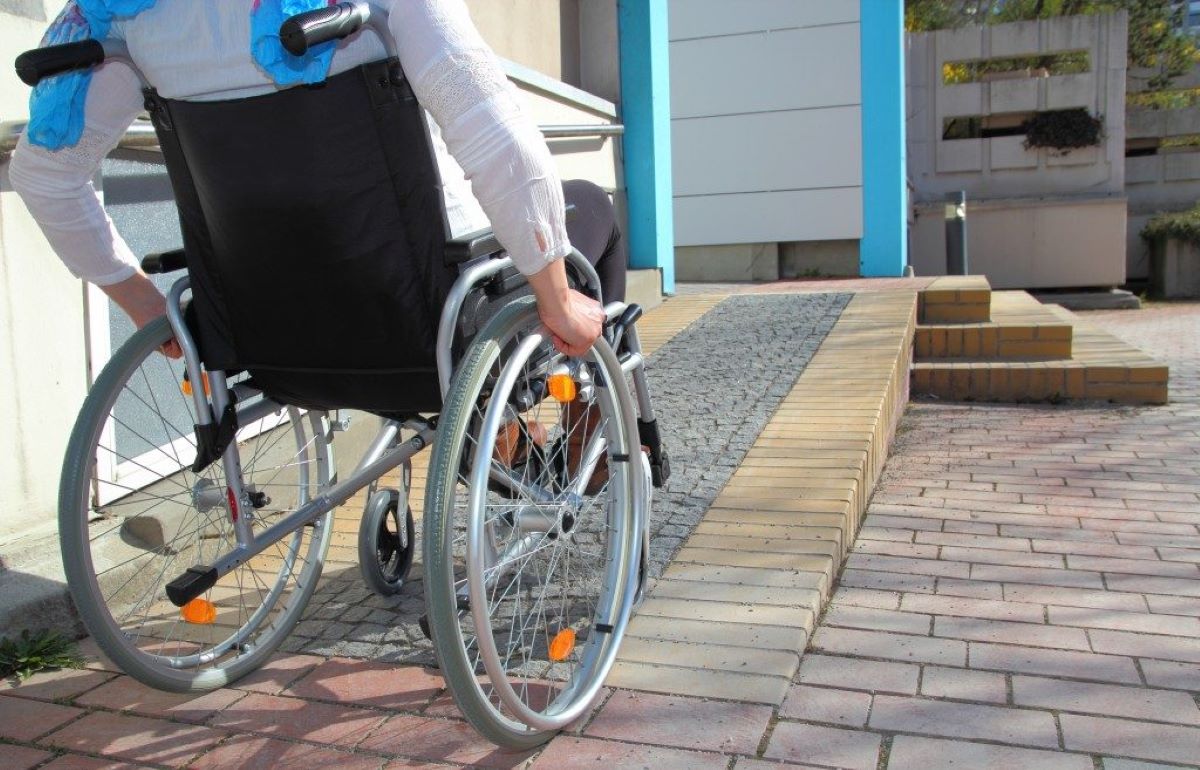
Tip 2: Installing ramps for easy entry and exit
When it comes to accessibility, entry and exit points are crucial areas to consider. Traditional steps can be a significant barrier for individuals with mobility issues, making it difficult for them to access the home. Installing ramps is an effective solution to make your home more accessible.
Ramps provide a smooth and gradual incline that allows individuals using wheelchairs, walkers, or other mobility devices to navigate entrances with ease. It’s essential to design ramps with the proper slope to ensure safety and compliance with accessibility standards.
The recommended slope for a ramp is a ratio of 1:12, which means for every inch of vertical rise, there should be 12 inches of ramp length. This slope is gentle enough for most individuals to navigate comfortably. However, for longer ramps, it may be necessary to include rest areas or intermediate landings to prevent fatigue and provide a place to rest.
When designing a ramp, consider the materials used. Non-slip surfaces are essential to prevent slips and falls, especially during inclement weather. Choose materials that provide good traction, such as textured concrete, rubber, or composite decking. These materials not only enhance safety but also withstand outdoor elements.
If space permits, opt for wider ramps to allow for easy maneuverability. This is particularly important if the ramp needs to accommodate individuals using mobility aids, such as wheelchairs or walkers. A wider ramp also allows for easier passing and turning, ensuring a smooth and hassle-free entry and exit experience.
It’s important to note that ramps should have handrails on both sides for added stability and support. These handrails should be at a comfortable height for individuals to grip while navigating the ramp. They should also extend beyond the ramp’s length to provide continuous support.
By installing ramps at entry and exit points, you are ensuring that individuals with mobility challenges can access your home with ease. Ramps provide a practical and inclusive solution, allowing everyone to enter and exit the space comfortably and independently.
Tip 3: Adding grab bars in bathrooms and other necessary areas
The bathroom is a critical area where safety and accessibility are of utmost importance. Adding grab bars throughout the bathroom can greatly enhance mobility and reduce the risk of accidents for individuals with disabilities or limited mobility.
When installing grab bars, it’s essential to consider their proper placement to ensure optimal support. In the shower or bathtub area, install grab bars vertically or horizontally to provide stability while standing, sitting, or transferring. These bars should be securely anchored to the wall and able to support the weight of a person.
Place a horizontal grab bar along the back wall of the shower or bathtub to assist with stability and balance. You can also install a vertical grab bar near the entrance of the shower or bathtub for additional support while entering and exiting. If a shower seat is present, consider installing an adjacent grab bar for ease of use.
Outside the shower or bathtub area, install grab bars near the toilet. These bars assist individuals with sitting down or getting up from the toilet. Place one grab bar horizontally on the wall next to the toilet and another on the back wall to provide support in different positions.
It’s important to select grab bars that are designed for bathroom use and are capable of supporting weight. ADA-compliant grab bars are recommended, as they meet specific guidelines for safety and accessibility. These bars are available in various styles and finishes to match your bathroom decor.
In addition to the bathroom, consider adding grab bars in other necessary areas of the home. For example, near staircases, entrances, or hallways where individuals may require additional support. Install them at a comfortable height and ensure they are securely attached to the wall or other structure.
By incorporating grab bars in bathrooms and other necessary areas, you are providing essential support and stability for individuals with mobility challenges. These simple additions can make a world of difference in promoting independence and safety within the home.
Tip 4: Using lever-style door handles for easy gripping
Door handles play a significant role in the accessibility and ease of movement throughout a home. Traditional round doorknobs can be challenging to grasp for individuals with limited hand dexterity or strength. To improve accessibility, consider replacing them with lever-style door handles.
Lever-style door handles are much easier to grip and operate for individuals with mobility issues or arthritis. Unlike traditional doorknobs, which require a twisting motion, lever handles can be easily pushed down or pulled up to open or close a door. This design allows for a more natural and effortless movement.
In addition to being easier to use, lever-style door handles also offer other benefits. They are particularly advantageous for those carrying items in their hands, as operating a lever handle can be done with a simple elbow or forearm movement. This can make a significant difference when navigating through doorways with hands full.
When choosing lever-style door handles, consider the height and placement. Install them at a comfortable and reachable height for individuals of various heights and mobility levels. The standard height for door handles is typically around 36 inches from the floor, but adjustments can be made depending on specific needs.
Furthermore, lever handles should be operable with minimal force or pressure. A smoothly functioning door handle allows individuals with limited strength or mobility to easily open and close doors without straining or struggling. Avoid handles that require excessive force to cause frustration and potential injury.
It’s worth noting that lever-style door handles can add a touch of elegance and modernity to your home’s aesthetic. They are available in a variety of styles, finishes, and materials, allowing you to choose options that complement your interior design.
By using lever-style door handles, you enhance the accessibility and ease of movement throughout your home. This simple change can make a significant impact on individuals with mobility challenges, promoting independence and creating a more inclusive living environment.
Tip 5: Installing non-slip flooring for improved safety
Flooring choices have a significant impact on the safety and accessibility of a home. Slippery or uneven surfaces can pose serious risks for individuals with mobility challenges or balance issues. Installing non-slip flooring is a crucial step towards creating a safe and accessible environment.
Non-slip flooring options provide enhanced traction and stability, reducing the likelihood of slips and falls. There are several types of non-slip flooring materials available, each with its own benefits and considerations.
One popular choice is ceramic or porcelain tiles with a textured, slip-resistant surface. These tiles have a slightly rough texture that provides better traction, even when wet. Look for tiles with a high slip resistance rating, such as those with a “Ramp Test” or “COF” (Coefficient of Friction) rating of 0.6 or above.
Another option is vinyl flooring, which comes in a variety of styles and finishes. Manufacturers produce vinyl flooring with textured surfaces to improve grip and reduce slippage. It’s essential to choose vinyl flooring with a slip-resistant rating, such as those with a “R” value of 10 or above.
If you prefer a more natural and sustainable option, consider bamboo or cork flooring. These materials are known for their durability and eco-friendliness. Bamboo and cork flooring can also be treated or designed with textured finishes to enhance slip resistance.
No matter what type of flooring you choose, it’s important to ensure that the installation is done correctly. Properly leveled and secured flooring is crucial to prevent tripping hazards and maintain stability. If necessary, consult with a professional flooring contractor to ensure proper installation.
In addition to choosing non-slip flooring, it’s also important to keep floors clean and free from hazards. Regularly clean up spills, remove loose rugs or mats, and ensure that walking paths are clear of any obstacles. These simple preventative measures can further minimize the risk of accidents.
By installing non-slip flooring, you create a safer environment for all occupants of your home. This proactive approach to preventing slips and falls is particularly beneficial for individuals with mobility challenges, allowing them to navigate the space with confidence and peace of mind.
Tip 6: Incorporating adjustable-height countertops and workspaces
Creating a truly accessible home involves designing spaces that can accommodate individuals of varying heights, sizes, and abilities. Adjustable-height countertops and workspaces are an excellent addition to ensure that everyone can comfortably use these areas.
Adjustable-height countertops offer the flexibility to raise or lower the surface to a comfortable position. This feature is particularly beneficial for individuals who use a wheelchair, as it allows them to access the countertop at a height that works best for their needs. It also benefits individuals of different heights, ensuring that they can comfortably work without straining or bending excessively.
There are several ways to incorporate adjustable-height countertops into your kitchen or workspace design. One option is to install motorized or manually operated lift systems that can raise or lower the countertop as needed. These systems allow for easy adjustment and can be controlled with the touch of a button or a simple manual mechanism.
Another option is to utilize adjustable-height desks or tables that can be raised or lowered to accommodate different users. These versatile workspaces are not only convenient for individuals with mobility challenges but are also beneficial for anyone who desires the flexibility to switch between sitting and standing positions.
When planning for adjustable-height countertops or workspaces, it’s essential to consider the range of heights that need to be accommodated. You want to ensure that the countertop can be adjusted to a comfortable height for both individuals using wheelchairs and those who prefer to work while standing.
Furthermore, it’s important to provide enough knee and leg clearance underneath the countertop to accommodate individuals using wheelchairs. This ensures that they can comfortably reach and utilize the surface without any obstructions or limitations.
By incorporating adjustable-height countertops and workspaces, you create an environment that caters to the unique needs of individuals with varying heights and mobility concerns. This inclusive design element promotes comfort, efficiency, and independence for all users, regardless of their physical abilities.
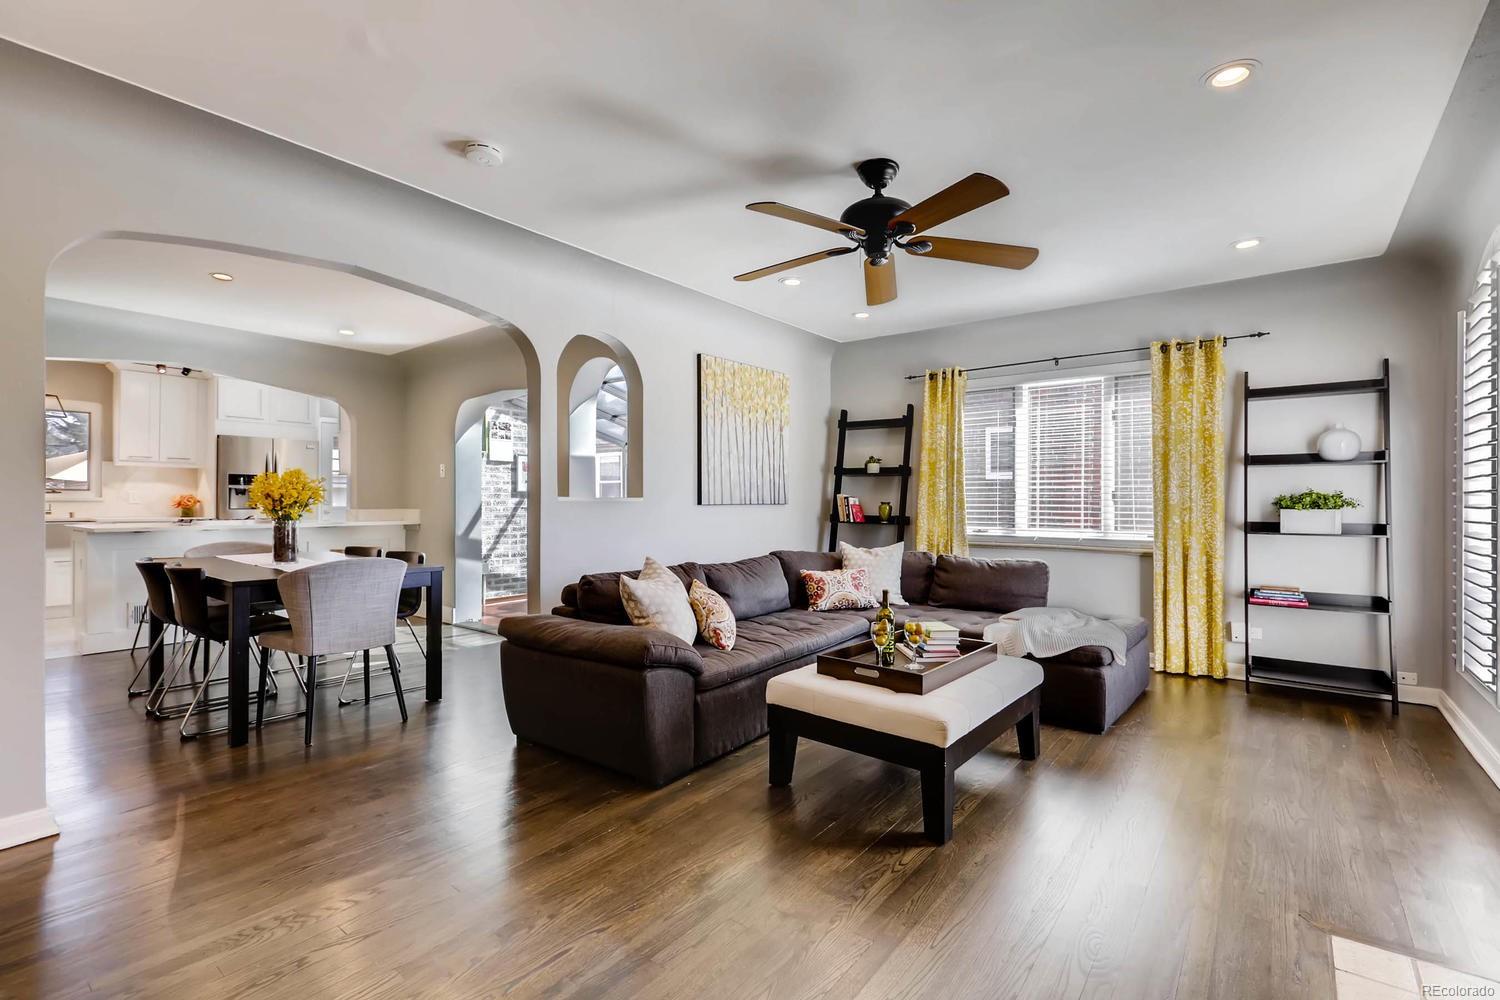
Tip 7: Creating open floor plans for enhanced maneuverability
An open floor plan is not only a popular architectural choice for its visual appeal, but it also significantly enhances mobility and accessibility within a home. By removing unnecessary walls and barriers, an open floor plan allows for seamless movement, making it easier for individuals with mobility challenges to navigate their surroundings.
Open floor plans promote a sense of spaciousness, eliminating the feeling of being confined or restricted to specific areas. This freedom of movement is particularly beneficial for individuals using wheelchairs, walkers, or other mobility aids, as it eliminates the need to maneuver through narrow doorways or around obstructive corners.
With an open floor plan, individuals can move more freely and independently throughout the space, whether it’s moving from room to room or within a single area. This increased mobility not only improves accessibility but also promotes social interaction and connectivity, as individuals can engage with others without barriers.
When designing an open floor plan, consider the strategic placement of furniture and fixtures to promote easy navigation. Ensure that there is ample space between furniture pieces, allowing for clear pathways and maneuverability. It’s also important to carefully consider the location and height of electrical outlets and switches to ensure they are easily accessible.
Lighting is another essential aspect to consider in open floor plans. Well-placed lighting fixtures, such as recessed lights or track lighting, can help create a well-lit environment that facilitates safe movement. Additionally, incorporating natural light through windows and skylights can further enhance visibility and the overall ambiance of the space.
It’s important to note that open floor plans are versatile and can be adapted to individual needs and preferences. Consider incorporating design elements like contrasting flooring or area rugs to help define specific zones or areas within the open space. This allows for both visual interest and differentiation of function without compromising on accessibility.
By creating an open floor plan, you are not only enhancing the accessibility and maneuverability of your home but also creating a more inclusive and inviting environment for all occupants. This design choice promotes a seamless and barrier-free experience, empowering individuals with mobility challenges to move freely and comfortably throughout the space.
Install lever-style door handles instead of knobs to make it easier for people with limited hand strength or dexterity to open doors.
Tip 8: Installing touch-activated or motion-sensor light switches
Lighting plays a vital role in creating a safe and accessible home environment. Traditional light switches can be difficult for individuals with mobility challenges, especially those with limited hand dexterity or strength. Installing touch-activated or motion-sensor light switches can greatly enhance accessibility and convenience for everyone in the household.
Touch-activated light switches are designed to respond to a simple touch or tap, eliminating the need to grasp or manipulate a traditional switch. These switches can be easily operated with a gentle touch of a finger or even the back of the hand, making them an ideal solution for individuals with limited hand mobility.
Motion-sensor light switches are another excellent option for improving accessibility. These switches automatically detect motion within their range and turn the lights on or off accordingly. They are particularly beneficial in areas such as hallways, staircases, or bathrooms, where individuals may have difficulty reaching or operating a traditional switch.
The installation of touch-activated or motion-sensor light switches provides several advantages beyond accessibility. They offer convenience and energy-saving benefits as well. With touch-activated switches, you no longer have to fumble for a switch in the dark or struggle to find the right position to turn on the lights. Motion-sensor switches automatically turn off the lights when no movement is detected, saving energy and reducing utility costs.
When selecting touch-activated or motion-sensor light switches, ensure they meet safety and quality standards. Look for switches that are designed for residential use and carry appropriate certifications. It’s advisable to consult with an electrician to ensure proper installation and integration with the existing electrical system.
Consider the placement of light switches to ensure they are easily accessible from different heights and positions. Install switches at a comfortable height for individuals of varying abilities and consider adding additional switches near entryways or in convenient locations for ease of use.
By installing touch-activated or motion-sensor light switches, you provide a simple and intuitive solution for individuals with mobility challenges. These switches enhance accessibility, convenience, and energy efficiency, creating a more inclusive and user-friendly home environment for everyone.
Tip 9: Using contrasting colors for better visibility and navigation
When it comes to creating an accessible home, color plays a crucial role in enhancing visibility and navigation for individuals with visual impairments or cognitive difficulties. Incorporating contrasting colors throughout your space can greatly improve accessibility and make it easier for everyone to move around and identify different elements within the home.
Contrasting colors provide a visual distinction between different surfaces, objects, and boundaries. They create a clear differentiation that helps individuals with visual impairments perceive and navigate their surroundings more easily. Additionally, contrasting colors can also benefit individuals with cognitive difficulties who may struggle with processing visual information.
One effective way to use contrasting colors is by employing light and dark shades. For example, if you have dark flooring, consider using light-colored baseboards to create a clear boundary between the floor and the walls. This contrast helps individuals with visual impairments distinguish between different surfaces and avoid potential tripping hazards.
Similarly, using contrasting colors for door frames, window frames, and trim can help individuals identify these elements more quickly and accurately. For instance, if your walls are light-colored, consider choosing a darker hue for the door frames, making them stand out and providing a clear reference point.
In areas like kitchens or bathrooms, it’s important to create contrast between countertops, cabinetry, and the surrounding walls. Using different colors or finishes for these elements can help individuals with visual impairments identify the location and boundaries of different surfaces.
Contrasting colors can also be employed in signage and labeling. For example, use a high-contrast color scheme for room signs, making them easily distinguishable against the background. Additionally, consider using large, bold, and high-contrast text on labels or instructions to ensure readability and clarity.
It’s worth mentioning that color contrast can also be used in furniture and decor elements. For individuals with visual impairments or cognitive difficulties, using contrasting colors between furniture and the surrounding space aids in better spatial perception.
By incorporating contrasting colors in your home’s design, you improve visibility, navigation, and overall accessibility. This simple yet impactful design technique creates a more inclusive and user-friendly environment, allowing individuals with varying abilities to move around with confidence and ease.
Tip 10: Designing barrier-free showers with seating and grab bars
When it comes to creating an accessible bathroom, designing a barrier-free shower is a must. Barrier-free showers are not only practical and convenient for individuals with mobility challenges but also provide a safe and inclusive bathing experience for everyone in the household. Incorporating features such as seating and grab bars can further enhance accessibility and comfort.
A barrier-free shower is designed without any step or threshold, allowing individuals to easily enter and exit the shower area without the risk of tripping or falling. This seamless transition promotes independence and eliminates the need for assistance when taking a shower.
Adding a built-in bench or fold-down seating within the shower provides comfort and stability for those who may have difficulty standing for long periods or balancing. This seating option allows individuals to sit while showering, reducing the risk of slips or falls. The bench should be sturdy, non-slip, and positioned at a height that accommodates different users.
Incorporating grab bars within the shower is essential for maintaining stability and support. These bars offer assistance while entering, exiting, and maneuvering within the shower area. Grab bars should be securely installed and capable of supporting the weight of a person. They should be strategically placed at appropriate heights, such as near the entrance, along the walls, and in positions that individuals can easily reach and grasp.
When designing a barrier-free shower, consider the flooring materials and finishes. Opt for non-slip tiles or flooring options that provide good traction even when wet. The texture of the flooring should enhance stability and minimize the risk of slipping.
Furthermore, it’s important to ensure proper drainage within the shower area. Adequate sloping and the use of linear drains or trench drains can help prevent water pooling and ensure efficient drainage. This prevents not only slips and falls but also helps maintain a clean and hygienic shower environment.
By designing barrier-free showers with seating and grab bars, you create a safe and accessible bathing experience for individuals with mobility challenges. These features also provide added convenience and comfort for individuals of all abilities, ensuring that everyone can enjoy a relaxing and independent shower experience.
Tip 11: Implementing universal design principles in kitchen layouts
Kitchens are the heart of the home, and incorporating universal design principles into their layout is essential for creating an accessible and functional space. Universal design in the kitchen ensures that individuals of all ages, sizes, and abilities can navigate and use the space with ease. Here are some tips for implementing universal design principles in kitchen layouts:
1. Adequate Clearances: Design the kitchen with sufficient clearances to accommodate individuals using wheelchairs or other mobility devices. Ensure there is enough space between countertops, appliances, and cabinetry to allow for easy maneuverability.
2. Lowered Countertops: Include lowered countertops or sections with adjustable heights to accommodate individuals who prefer to work or prepare food while sitting. This feature benefits wheelchair users and those with limited mobility, providing them with a comfortable working space.
3. Accessible Sinks: Install a sink that is designed with accessibility in mind. Consider a sink with shallow depth and a shallow basin to minimize reaching and bending. Additionally, ensure that there is enough knee clearance underneath the sink to accommodate wheelchair users.
4. Easy-to-Reach Storage: Organize kitchen storage to make items easily accessible. Use pull-out shelves or drawers instead of deep, hard-to-reach cabinets. Incorporate adjustable shelving to accommodate different storage needs and preferences.
5. User-Friendly Appliances: Choose appliances with user-friendly features. Look for appliances with front-mounted controls, clear and easy-to-read displays, and large, tactile buttons. Appliances with voice control or smart technology can also be beneficial for individuals with mobility challenges.
6. Proper Lighting: Ensure the kitchen is well-lit to enhance visibility and safety. Install task lighting under cabinets and in work areas to provide focused illumination. Consider using motion-activated lighting in pantries or cabinets to make it easier to locate items.
7. Non-Slip Flooring: Select flooring materials with non-slip properties to minimize the risk of slips and falls. Choose materials that provide good traction, even when wet. Additionally, ensure that transitions between flooring materials are smooth and level to prevent tripping hazards.
8. Safety Features: Incorporate safety features such as heat-resistant countertops, easy-to-use fire extinguishers, and rounded edges on countertops and cabinets to minimize the risk of accidents and injuries.
9. Rounded Corners and Edges: Opt for rounded corners and edges on countertops, tables, and islands. This reduces the risk of injury from sharp corners and makes the kitchen safer, especially for individuals with mobility challenges.
10. Multi-Height Surfaces: Include surfaces at varying heights to accommodate users of different heights or preferences. For example, consider incorporating a raised breakfast bar or a lowered section of the countertop for individuals who prefer to sit or require a lower work surface.
By implementing universal design principles in kitchen layouts, you create a space that is accessible, user-friendly, and inclusive for everyone. Regardless of age, ability, or mobility, individuals can enjoy the full functionality and convenience that a well-designed kitchen has to offer.
Tip 12: Installing stairlifts or elevators for multi-level homes
For individuals with mobility challenges or limited strength, navigating a multi-level home can be a significant challenge. Installing stairlifts or elevators provides a practical and safe solution, allowing individuals to move effortlessly between different levels of the home. Here are some considerations for installing stairlifts or elevators:
1. Stairlifts: Stairlifts are an excellent option for homes with straight or curved staircases. These motorized chairs are attached to a railing system installed along the staircase. They safely transport individuals up and down the stairs, eliminating the need for physical exertion or assistance. Stairlifts can be customized to fit different stair configurations and can include features such as swivel seats and safety sensors.
2. Platform Lifts: Platform lifts are ideal for homes with shorter or wider staircases, as well as for navigating small steps or level changes. These lifts consist of a platform that can accommodate a wheelchair or mobility device, allowing individuals to remain seated as they are safely transported between levels. Platform lifts can be installed indoors or outdoors, providing accessibility to different areas of the home.
3. Home Elevators: Home elevators offer full accessibility to all levels of the home, providing a seamless and convenient solution for individuals with mobility challenges. These elevators can be hydraulic or cable-driven and are designed to accommodate individuals using wheelchairs or mobility devices. Home elevators can be customized with various finishes and features to match the home’s interior design.
4. Space and Design Considerations: Before installing a stairlift or elevator, it’s important to assess the available space and determine the most suitable location. Consider factors such as the size of the stairwell or the area where the elevator will be installed. Work with a professional contractor or elevator specialist to ensure that the chosen option fits well within the space and adheres to safety regulations.
5. Safety Features: Installation of stairlifts or elevators should include essential safety features. These may include seat belts, safety sensors to detect obstructions, emergency stop buttons, and battery backup systems to ensure functionality during power outages. Regular maintenance and inspections are also crucial to ensure the ongoing safety and reliability of the lift or elevator.
6. Building Codes and Permits: Check with local building codes and regulations to determine any specific requirements for installing a stairlift or elevator. In some cases, permits may be necessary before installing these accessibility solutions. It’s important to comply with all regulations to ensure a safe and legal installation.
Installing stairlifts or elevators in a multi-level home provides individuals with mobility challenges the freedom and independence to access all areas of the house. These accessibility solutions not only improve quality of life but also allow individuals to age in place, avoiding the need to relocate to a single-level home or assisted living facility.
Tip 13: Creating accessible outdoor spaces with smooth pathways
The accessibility of a home extends beyond its interior walls. Designing accessible outdoor spaces is just as important to ensure individuals with mobility challenges can fully enjoy and navigate the surroundings. One key aspect of accessible outdoor design is the creation of smooth pathways. Here are some tips for creating accessible outdoor spaces:
1. Clear and Wide Pathways: Ensure pathways are wide enough to accommodate individuals using wheelchairs or mobility devices comfortably. The minimum recommended width is 36 inches, but more generous widths are preferable to allow for easy passing and turning. Clear any obstacles, such as rocks, roots, or debris that may impede smooth navigation.
2. Smooth and Slip-Resistant Surfaces: The surfaces of outdoor pathways should be smooth and provide good traction to minimize the risk of slips and falls. Avoid using materials like loose gravel or uneven paving stones, as they can be challenging to navigate for individuals with mobility challenges. Consider using materials such as concrete, asphalt, or textured pavers that offer a stable and slip-resistant surface.
3. Gradual Slopes: If your outdoor space involves changes in elevation, it’s essential to incorporate gradual slopes or ramps to ensure easy access for individuals using wheelchairs or mobility devices. Avoid steep inclines or sudden changes in elevation, as they can be difficult to navigate. The recommended slope for accessibility is a ratio of 1:12, which means for every inch of vertical rise, there should be 12 inches of horizontal distance.
4. Continuous Handrails: Install handrails along pathways, especially when there are changes in elevation or stairs. Handrails provide support and stability for individuals with mobility challenges. Ensure the handrails are at an appropriate height and extend beyond the endpoints for easy gripping. Use contrasting colors for the handrails to enhance visibility.
5. Adequate Lighting: Proper lighting is crucial in outdoor spaces to ensure safety and visibility. Install sufficient lighting along pathways, especially in dimly lit areas or near stairs. Incorporate motion sensor lights to automatically illuminate the path as someone approaches. Proper lighting not only facilitates safe navigation but also enhances the overall aesthetics of the outdoor space.
6. Landscaping Considerations: When designing accessible outdoor spaces, consider the placement of trees, shrubs, and other landscaping elements. Ensure they are strategically positioned to avoid obstructing pathways or impeding visibility. Trim tree branches or bushes that may hang low and obstruct the pathway to ensure clear passage for individuals using wheelchairs or mobility aids.
7. Rest Areas and Benches: Include rest areas along the pathways, providing individuals with opportunities to take breaks and enjoy the outdoor environment. Install benches at regular intervals to offer seating for individuals to rest, providing a more enjoyable experience for everyone using the outdoor space.
Creating accessible outdoor spaces with smooth pathways ensures that individuals with mobility challenges can fully participate in outdoor activities and enjoy the surrounding environment. It promotes inclusivity, independence, and the overall well-being of all individuals in the household.
Tip 14: Incorporating voice-activated or smart home technology
In today’s technologically advanced world, incorporating voice-activated or smart home technology is a revolutionary way to enhance accessibility and convenience within your home. These innovative features can greatly benefit individuals with mobility challenges, making everyday tasks easier and more accessible. Here are some tips for incorporating voice-activated or smart home technology:
1. Voice-Activated Assistants: Install voice-activated assistants, such as Amazon Echo or Google Home, throughout your home. These devices can be operated entirely by voice commands, allowing individuals with mobility challenges to control various aspects of their environment, such as lighting, temperature, and entertainment. With voice-activated assistants, tasks like adjusting the thermostat or turning on/off lights can be done effortlessly, promoting independence and convenience.
2. Automated Lighting Systems: Implement automated lighting systems that can be controlled remotely or through voice commands. These systems allow individuals to turn lights on and off without physically accessing light switches. This feature is particularly beneficial for those with limited mobility or difficulty reaching light switches, as it eliminates the need for manual operation and promotes safety within the home.
3. Smart Locks: Install smart locks that can be unlocked and locked remotely or through voice commands. Smart locks provide individuals with convenient and secure access to their homes without the need for physical keys. They can be managed through smartphone applications or integrated with voice-activated assistants, allowing for seamless entry and exit from the home.
4. Motorized Window Treatments: Incorporate motorized window treatments, such as blinds or curtains, which can be controlled remotely or through voice commands. These automated window treatments provide individuals with mobility challenges the ability to adjust natural light levels without the physical effort of manually operating the blinds or curtains. This feature also enhances privacy and energy efficiency within the home.
5. Home Security and Surveillance: Utilize smart home security systems that can be monitored and controlled remotely. These systems often include cameras, motion sensors, and door/window sensors that can be accessed through smartphone apps or voice-activated assistants. Smart security systems provide peace of mind for individuals with mobility challenges, allowing them to keep an eye on their homes even when they are away.
6. Smart Appliances: Consider incorporating smart appliances into your home, such as voice-activated ovens, refrigerators, or washing machines. These appliances can be controlled with voice commands or through smartphone apps, making them easier to use and providing greater accessibility for all household members.
7. Customizable Home Automation: Take advantage of customizable home automation systems that allow you to program specific routines or commands for your unique needs. For example, you can create a “Good Night” routine that turns off lights, locks doors, adjusts the thermostat, and activates the security system with a simple voice command.
Incorporating voice-activated or smart home technology enhances accessibility, convenience, and overall quality of life for individuals with mobility challenges. It fosters independence, reduces physical strain, and promotes a more inclusive and comfortable living environment within your home.
Conclusion
Creating an accessible and inclusive home environment goes beyond just aesthetics and functionality. It is about ensuring that individuals of all abilities can navigate and enjoy the space with ease, promoting independence, comfort, and a sense of belonging. By incorporating the 14 universal design tips discussed in this article, you can transform your home into a sanctuary that welcomes everyone.
From widening doorways and installing ramps to adding grab bars and using lever-style door handles, these tips address various aspects of the home to enhance accessibility. Non-slip flooring, adjustable-height countertops, open floor plans, and touch-activated light switches further contribute to an inclusive and user-friendly environment.
Your bathroom can become a haven of accessibility with barrier-free showers, seating, and grab bars. In the kitchen, implementing universal design principles ensures that individuals can comfortably navigate and utilize the space. Installing stairlifts or elevators makes multi-level homes accessible to all, while creating smooth pathways and incorporating smart home technology extends accessibility to outdoor spaces.
Overall, by considering these tips and integrating universal design principles into your home, you are fostering an environment that embraces diversity, promotes accessibility, and celebrates the unique needs and abilities of every individual. Whether you are designing a new home or renovating an existing one, think beyond the ordinary and take the opportunity to create a space that is truly inclusive, safe, and accessible for everyone.
Remember, universal design is not a one-size-fits-all approach, but rather an ethos that encourages adaptable and flexible solutions that prioritize inclusiveness. By incorporating these tips, you are not only enhancing the functionality and accessibility of your home but also creating a warm and welcoming environment that allows individuals to thrive and live their lives to the fullest.
Frequently Asked Questions about 14 Universal Design Tips To Make Your Home More Accessible
Was this page helpful?
At Storables.com, we guarantee accurate and reliable information. Our content, validated by Expert Board Contributors, is crafted following stringent Editorial Policies. We're committed to providing you with well-researched, expert-backed insights for all your informational needs.


0 thoughts on “14 Universal Design Tips To Make Your Home More Accessible”