Home>Interior Design>Easter Craft Ideas: 10 Elegant DIY Easter Crafts
Interior Design
Easter Craft Ideas: 10 Elegant DIY Easter Crafts
Modified: October 20, 2024
Discover 10 elegant DIY Easter craft ideas to transform your home with stylish interior design this Easter.
(Many of the links in this article redirect to a specific reviewed product. Your purchase of these products through affiliate links helps to generate commission for Storables.com, at no extra cost. Learn more)
Introduction
Welcome to the wonderful world of Easter crafts! Easter is a time of celebration and renewal, and what better way to embrace the spirit than by indulging in some DIY crafting projects? From colorful eggs to adorable bunny-themed creations, there are endless possibilities when it comes to unleashing your creativity and adding a touch of elegance to your Easter decor.
In this article, we will explore ten elegant DIY Easter crafts that will not only spruce up your home but also provide a fun and engaging activity for you and your loved ones. Whether you are an experienced crafter or a beginner looking to delve into the world of DIY, these projects offer something for everyone.
So, grab your crafting supplies and let’s jump into the wonderful world of Easter crafts that will bring joy, beauty, and creativity into your celebrations.
Key Takeaways:
- Embrace the joy of Easter with elegant DIY crafts that add a personal touch to your celebrations. From floral centerpieces to whimsical bunny-themed accessories, infuse your home with creativity and enchantment.
- Create lasting memories and strengthen bonds by involving loved ones in delightful Easter crafting projects. From wreaths to tote bags, these DIY crafts offer a fun and engaging way to spread holiday cheer.
Easter Egg Wreath
Add a festive touch to your front door with a stunning Easter egg wreath. This elegant craft is a perfect way to showcase your love for Easter while welcoming guests into your home.
To create this beautiful wreath, gather a variety of plastic Easter eggs in different sizes and colors. You can find these eggs at your local craft store or repurpose ones you may already have. If desired, you can even paint the eggs with pastel colors or decorate them with glitter for an extra touch of sparkle.
Next, grab a foam wreath form from your local craft store. Use a hot glue gun to attach the eggs onto the wreath, covering the form completely. Arrange the eggs in a pattern or create a random design, depending on your preference. Feel free to add additional embellishments like silk flowers or ribbon bows to make the wreath even more eye-catching.
Once the eggs are securely attached, hang your Easter egg wreath on your front door using a wreath hanger or a ribbon. The vibrant colors and whimsical design will surely bring a smile to anyone who passes by.
This Easter egg wreath is not only a beautiful decor piece but also a fun project to engage in with family and friends. You can even customize it by adding personalized touches like monogram letters or small Easter-themed figurines.
Now, sit back and enjoy the compliments you receive as your Easter egg wreath becomes the centerpiece of your Easter decorations. It’s a wonderful way to spread holiday cheer and make your home feel warm and inviting this Easter season.
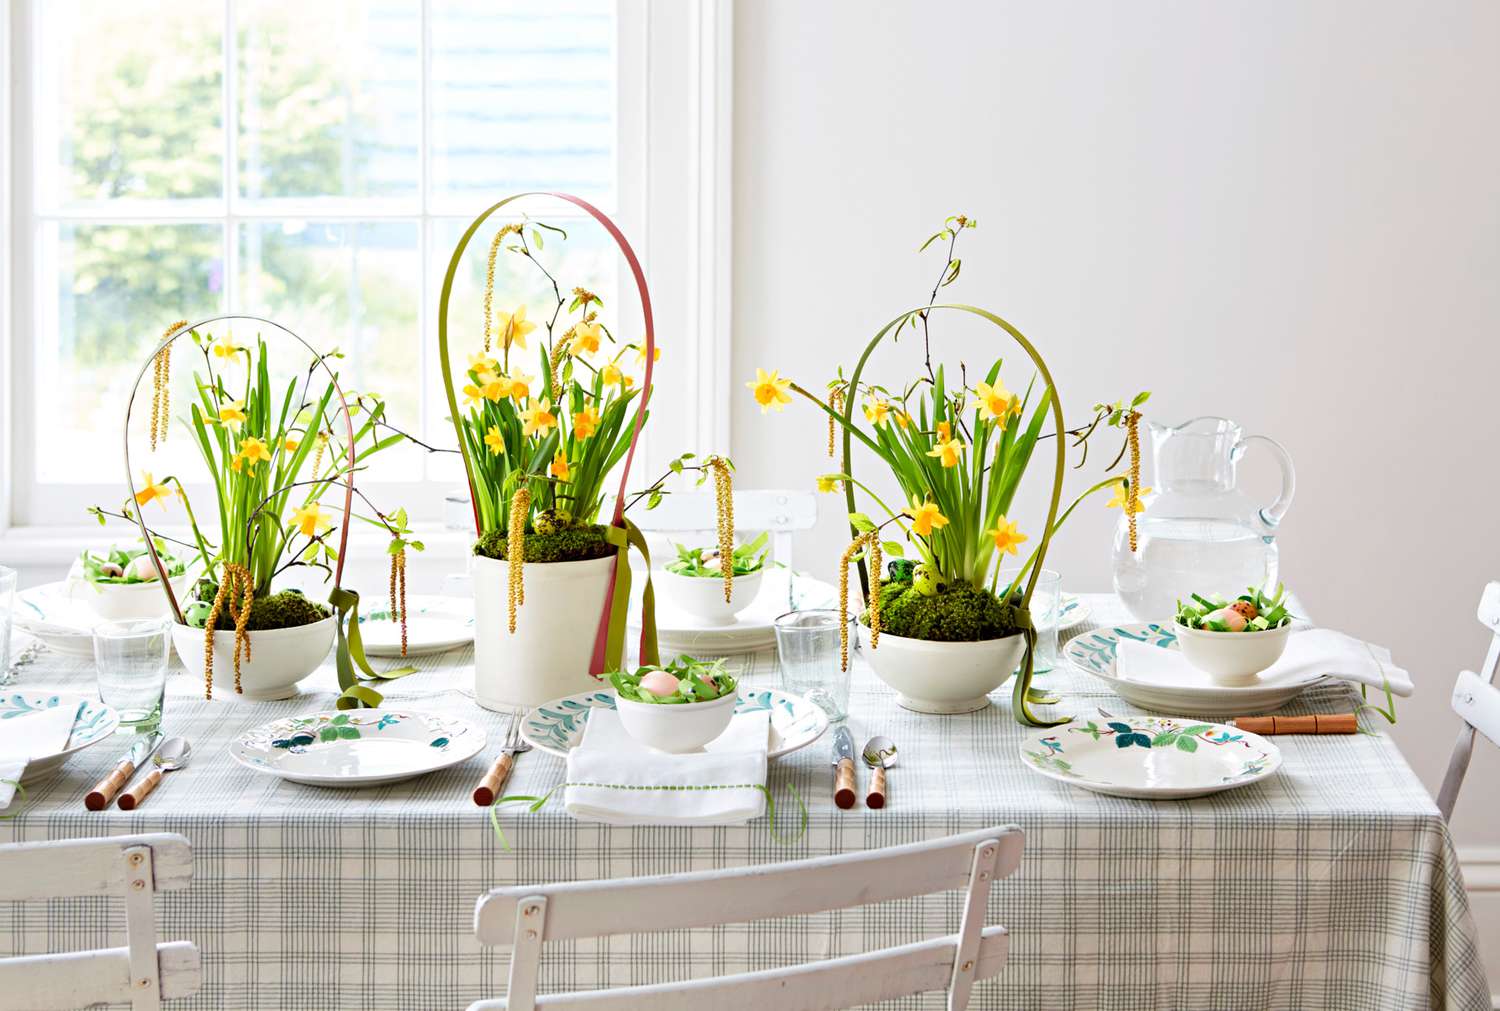
Floral Easter Centerpiece
Liven up your dining table with a stunning floral Easter centerpiece that will captivate your guests. This elegant DIY craft combines the beauty of fresh flowers with the spirit of Easter, creating a visually appealing and fragrant focal point for your table.
To create your own floral Easter centerpiece, start by selecting a low and wide container that will serve as the base. You can use a decorative vase, a decorative basket, or even a shallow bowl lined with floral foam or wet oasis for water retention.
Next, gather an assortment of fresh spring flowers in pastel shades, such as tulips, daffodils, hyacinths, and lilies. Trim the stems to the desired length and arrange them in the container, ensuring a balanced and visually pleasing composition. Feel free to include greenery and foliage to add texture and depth to the arrangement.
For an extra touch of Easter charm, incorporate some Easter-themed elements into the centerpiece. You can add miniature Easter eggs, decorative bunnies or chicks, or even small nests with colorful egg-shaped candies. These whimsical additions will tie the Easter theme together and create a delightful centerpiece that will be the talk of the table.
Remember to water your floral arrangement regularly to keep the flowers looking fresh and vibrant. You can also add floral preservatives to the water to extend the lifespan of the blooms.
Not only does the floral Easter centerpiece add a touch of elegance to your table, but it also creates a warm and inviting ambiance for your Easter gathering. It’s a wonderful way to showcase your creativity and infuse your dining experience with the beauty of nature.
So, gather your favorite spring flowers, unleash your imagination, and create a stunning centerpiece that will be the highlight of your Easter celebration. Your guests will surely be impressed by your artistic flair and attention to detail.
Easter Bunny Mason Jars
Add a touch of whimsy to your Easter decor with adorable Easter Bunny Mason Jars. These charming and versatile crafts can be used as candle holders, vases, or even as sweet treat containers.
To create your own Easter Bunny Mason Jars, you will need a few supplies. Start with mason jars in various sizes, depending on your preference. You can find mason jars at your local craft store or repurpose ones you may already have. Clean and dry the jars thoroughly before starting the craft.
Next, gather some craft materials like white acrylic paint, small paintbrushes, and googly eyes. Paint the mason jars white, ensuring to cover the entire surface evenly. Allow the paint to dry completely before moving on to the next step.
Now it’s time to add the bunny details. Using a small paintbrush and a contrasting color like pink or gray, paint a triangle shape for the nose in the center of the jar. Add a small mouth and whiskers to complete the bunny face.
Once the paint is dry, glue on googly eyes just above the nose. These will bring the bunny’s face to life and add a playful element to the jars.
For the finishing touches, you can use ribbon or twine to tie a bow around the neck of the jar. This adds a cute and festive touch to the Easter Bunny Mason Jars.
You can use these jars in various ways to enhance your Easter decor. Place a tealight candle inside to create a warm and cozy atmosphere, or fill the jars with fresh flowers for a charming centerpiece. You can also fill them with small Easter candies or chocolates for a delightful treat jar.
Easter Bunny Mason Jars are not only fun to make, but they also make delightful gifts for family and friends. Personalize them by adding names or initials to make them truly special.
So, unleash your creativity and hop into the world of Easter Bunny Mason Jars. They are a delightful and versatile addition to your Easter decorations that will bring joy and cuteness to your home.
Spring Flower Crown
Channel your inner bohemian spirit with a stunning Spring Flower Crown. This whimsical accessory is perfect for Easter gatherings, festivals, or simply to add a touch of enchantment to your day.
To create your own Spring Flower Crown, start by gathering an assortment of fresh flowers and greenery. Choose flowers in various sizes, shapes, and colors to add depth and visual interest to your crown. Popular flower choices include daisies, roses, baby’s breath, and lavender.
Measure the circumference of your head with a flexible measuring tape or a piece of string. Use this measurement to cut a sturdy wire or floral tape to size. This will serve as the base of your flower crown.
Next, take individual flowers and trim the stems to approximately 2 inches in length. Secure the flowers onto the wire or floral tape by wrapping the stems tightly around the base. For added stability, use floral wire or hot glue to secure any loose stems or delicate flowers.
Continue adding flowers and greenery to the crown, alternating between different types and colors to create a balanced and visually pleasing arrangement. Feel free to experiment with different placements and styles, adding as many or as few flowers as you prefer.
Once you have completed the crown, try it on and make any necessary adjustments. You can add extra flowers or greenery to fill in any gaps or create a fuller look. Alternatively, you can also attach ribbons or small decorative elements to personalize your flower crown.
Wearing a Spring Flower Crown adds a touch of natural beauty and whimsy to any outfit. It’s a lovely way to embrace the spirit of spring and celebrate the joyous Easter season. Whether you’re attending a festive gathering or simply enjoying a sunny day outdoors, the flower crown will surely turn heads and make you feel like a bohemian goddess.
Don’t forget to snap some photos and share your creation with family and friends. They’ll be amazed by your DIY skills and creativity!
So, embrace your inner flower child and create a captivating Spring Flower Crown. Let the beauty and fragrance of fresh flowers transform you into a vision of springtime enchantment.
Read more: Affordable Elegance In Interior Decorating
Easter Egg Tree
Add a festive touch to your home with a delightful Easter Egg Tree. This cheerful and whimsical decoration will bring the joy of Easter to any room and serve as a wonderful centerpiece for your Easter festivities.
To create your own Easter Egg Tree, start by gathering small tree branches. You can collect branches from your backyard or go for a nature walk to find the perfect ones. Trim the branches to the desired height and remove any excess twigs or leaves.
Place the branches in a vase or container filled with sand, pebbles, or foam to anchor them securely. This will ensure that your Easter Egg Tree stands tall and steady.
Next, let your creativity shine as you decorate the branches with colorful Easter eggs. You can use plastic eggs, wooden eggs, or even blow out real eggs and paint them in vibrant hues. Decorate the eggs with patterns, glitter, or stickers for added charm.
To attach the eggs to the branches, you can use colorful ribbons or string. Simply tie a knot around each egg’s loop or puncture a small hole in each egg and thread the ribbon through.
As a finishing touch, you can add other Easter-themed decorations to your tree. Consider hanging small bunnies, chicks, or spring flowers from the branches to create a whimsical and festive display.
Display your Easter Egg Tree on a tabletop or as a centerpiece on your dining table. It will bring a burst of color and joy to your Easter celebrations, and serve as a delightful conversation starter for your guests.
For an extra touch of personalization, you can invite family members and friends to participate in decorating the tree. Each person can contribute their own decorated egg or create special ornaments, making the Easter Egg Tree a truly collaborative and meaningful piece of decor.
Remember to keep the tree away from direct sunlight or heat sources to prevent any damage to the eggs or decorations.
So, gather your supplies, embrace your creativity, and create a whimsical Easter Egg Tree that will fill your home with the spirit of Easter. It’s a joyful and festive way to celebrate the season and create lasting memories with your loved ones.
When creating elegant DIY Easter crafts, consider using pastel colors, delicate materials like lace or ribbon, and incorporating natural elements like flowers or greenery for a sophisticated and timeless look.
Easter Bunny Napkin Rings
Add a charming and whimsical touch to your Easter table setting with adorable Easter Bunny Napkin Rings. These DIY napkin rings will not only keep your napkins tidy but also delight your guests with their cute and festive design.
To create your own Easter Bunny Napkin Rings, you will need a few basic supplies. Start with plain wooden or plastic napkin rings, which you can find at your local craft store. You will also need craft foam or felt in various colors, scissors, hot glue gun, and googly eyes.
Begin by cutting out bunny ear shapes from the craft foam or felt. You will need two identical ear shapes for each napkin ring. The size should be appropriate for the napkin ring, typically 2-3 inches long and 1 inch wide.
Once you have cut out the bunny ears, fold one end of each ear slightly to create a tab. Apply a small amount of hot glue to the tab and attach it to the napkin ring, positioning it slightly towards the top.
Repeat this process with the second ear, attaching it to the opposite side of the napkin ring. Make sure the ears are secure and stand upright.
Now it’s time to add the bunny face details. Use hot glue to attach googly eyes towards the top of the napkin ring, above the ears. Cut a small triangle out of pink craft foam or felt for the nose and glue it in the center of the ring, just below the eyes. If desired, you can also create a tiny mouth using a thin piece of black craft foam or a black marker.
For an extra touch of cuteness, you can add a small bow tie or a ribbon around the napkin ring to resemble a collar. This will further enhance the Easter bunny theme and add a festive element to your table.
Once the napkin rings are complete, slide your folded napkins through them and arrange them on your Easter table. The Easter Bunny Napkin Rings will bring a smile to your guests’ faces and create a charming and cohesive Easter table setting.
Encourage creativity and engagement by involving children in the process. Let them decorate their own napkin rings, adding their personal touch with different colors and embellishments.
So, hop into the Easter spirit and create these adorable Easter Bunny Napkin Rings. They are the perfect finishing touch for an Easter-themed table and are sure to make your guests feel extra special during the holiday festivities.
Lace-Trimmed Easter Eggs
Elevate your Easter egg decorating game with elegant Lace-Trimmed Easter Eggs. These exquisite and delicate eggs will add a touch of sophistication to your Easter decor and make beautiful decorations or gifts.
To create your own Lace-Trimmed Easter Eggs, you will need hard-boiled eggs, lace trim or lace ribbon, scissors, and craft glue. Lace trim can be found at your local craft store, and you can choose from a variety of designs and widths to suit your preference.
Start by carefully cutting the lace trim or ribbon into smaller sections that will fit around the circumference of the egg. The length of the lace will depend on the size of your eggs, so make sure to measure and cut accordingly.
Apply a small amount of craft glue along the length of the lace trim or ribbon, ensuring to spread it evenly. Then, gently wrap the lace around the egg, pressing it firmly to adhere it to the surface. Smooth out any wrinkles or air bubbles as you go.
Allow the glue to dry completely before handling the eggs further to ensure that the lace stays in place. You can use a drying rack or egg carton to hold the eggs upright as they dry.
Once the eggs are fully dried, you can further embellish them if desired. Add small decorative elements like satin bows, pearls, or rhinestones to enhance the elegance and charm of the lace-trimmed eggs. Attach these embellishments using craft glue, and let them dry completely.
Lace-Trimmed Easter Eggs can be displayed in various ways. Arrange them in a glass bowl or a decorative basket to create a stunning centerpiece for your Easter table. You can also hang them from a tree branch or on an Easter-themed wreath for a unique and eye-catching display.
These lace-trimmed eggs can also be a thoughtful and personalized gift for friends and family. Place them in a gift box or wrap them in colored tissue paper for a lovely Easter surprise.
With their intricate lace designs and delicate beauty, Lace-Trimmed Easter Eggs are sure to impress. They provide a unique twist on traditional Easter egg decorating and allow you to express your creativity in an elegant and sophisticated way.
So, embrace the beauty of lace and transform your ordinary eggs into works of art. Lace-Trimmed Easter Eggs will become cherished decor pieces that capture the essence of Easter and add a touch of grace to your holiday celebrations.
Bunny Ear Floral Headband
Add a whimsical and enchanting touch to your Easter outfit with a Bunny Ear Floral Headband. This charming accessory is not only a fun DIY project, but it also adds a playful and festive element to your Easter celebration.
To create your own Bunny Ear Floral Headband, you will need a plain headband, floral wire, floral tape, wire cutters, and an assortment of artificial flowers and greenery. Choose flowers in pastel colors like pink, lavender, and yellow to stay true to the Easter theme.
Start by measuring and cutting two pieces of floral wire to create the bunny ear shapes. Each wire piece should be approximately 12 inches long. Shape the wires into the desired bunny ear shape, using the wire cutters to trim any excess length.
Next, wrap each wire ear with floral tape to give it a smooth and cohesive look. Floral tape is self-adhesive and can be easily stretched and wrapped around the wire.
Now it’s time to add the flowers and greenery to the bunny ears. Begin by selecting a variety of blooms and greenery elements, trimming the stems to a few inches in length. Use the floral tape to secure the flowers and greenery onto the wire ears, wrapping the tape tightly around the stem and ear.
Continue adding flowers and greenery until the bunny ears are fully covered, creating a lush and vibrant display. Feel free to incorporate different textures and shapes to add dimension and visual interest to the headband.
Once the bunny ears are complete, attach them to the headband by wrapping the ends of the wires around the headband and securing them in place with floral tape. Make sure the ears are evenly spaced and positioned on the headband for a balanced look.
Put on your Bunny Ear Floral Headband and prepare to hop into the Easter spirit. This playful and whimsical accessory will bring a smile to your face and make you stand out at Easter egg hunts, parties, or festive gatherings.
Share the joy by creating Bunny Ear Floral Headbands for family and friends. You can host a crafting party where everyone can personalize their headbands with their favorite flowers and colors.
So, embrace your inner bunny and express your creativity with a Bunny Ear Floral Headband. It’s a delightful and charming accessory that will make you the star of the Easter celebration and spread joy wherever you go.
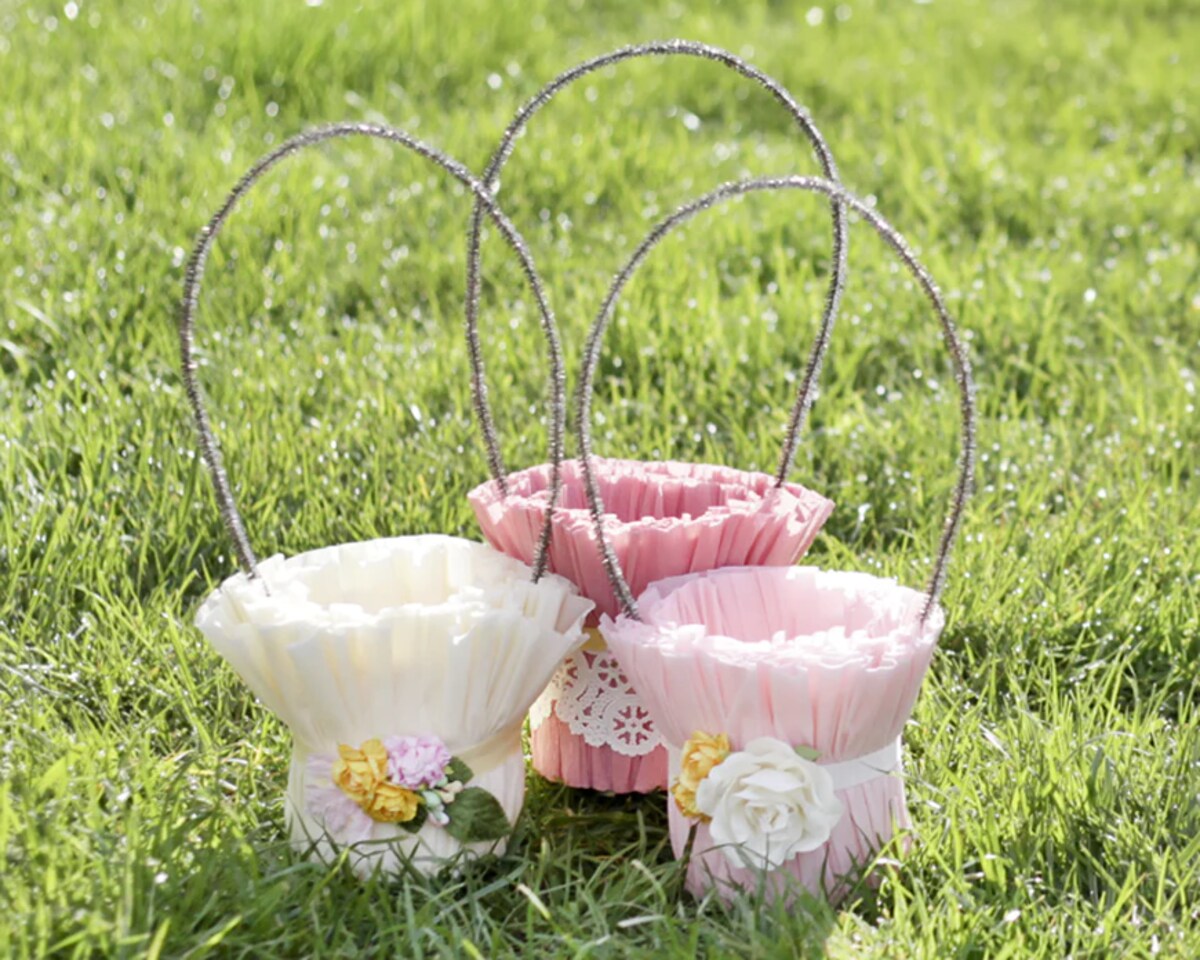
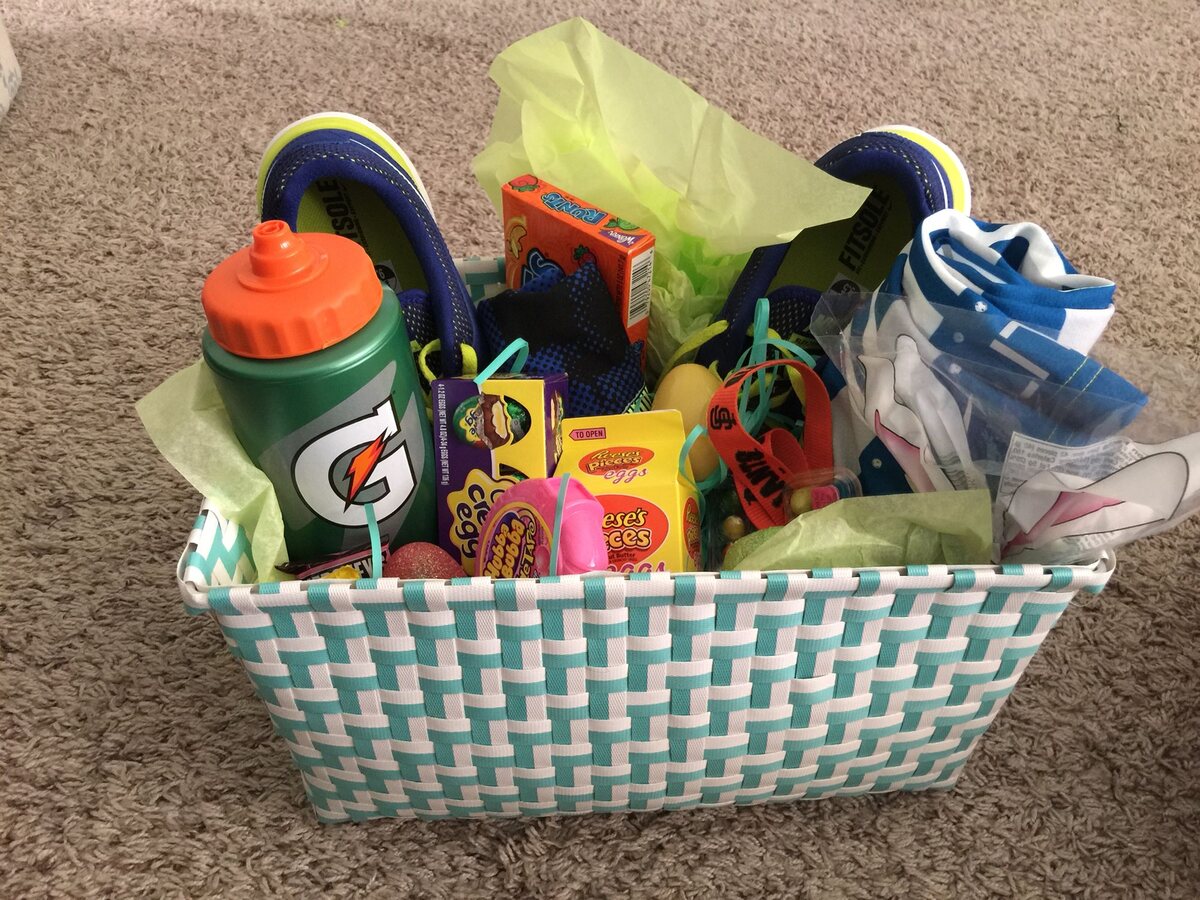
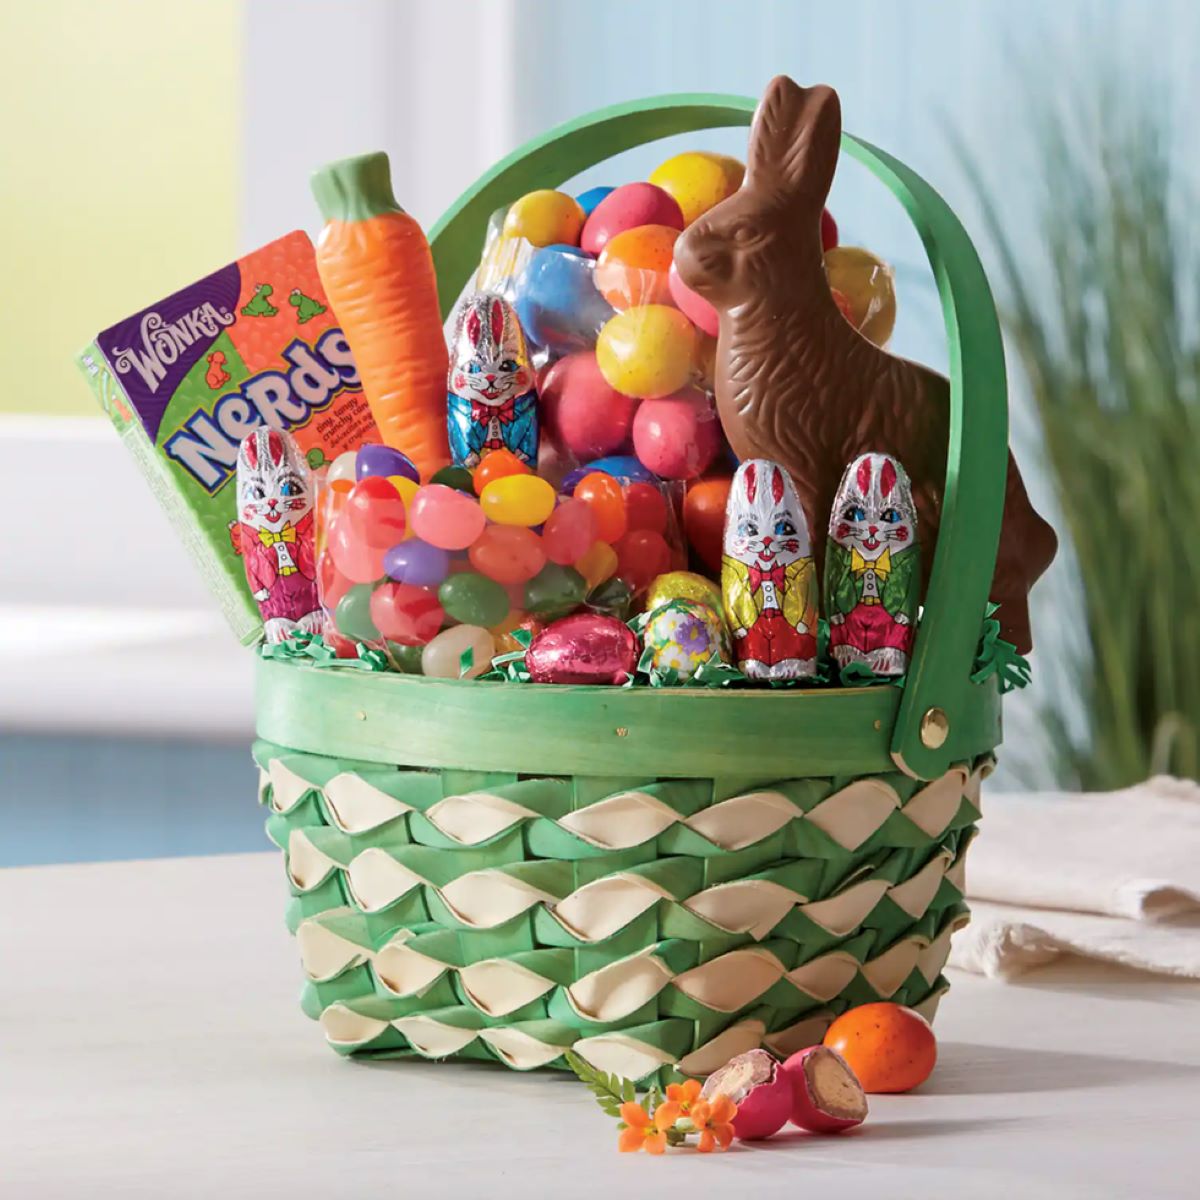
DIY Easter Basket
Create a personalized and charming DIY Easter Basket that will be the perfect vessel for collecting Easter goodies. Making your own Easter basket allows you to add a unique touch and demonstrate your creativity while providing a functional and beautiful container for Easter egg hunts and gift-giving.
To create your own DIY Easter Basket, you will need a sturdy base, such as a woven basket or a cardboard box, as well as various decorative materials. You can find these items at your local craft store or repurpose items you may already have.
Start by choosing your base material. If using a woven basket, make sure it is clean and free of any loose or broken pieces. If using a cardboard box, you can cover it with colorful fabric, wrapping paper, or paint to create a custom look.
Next, let your creativity flow as you decorate your Easter Basket. Consider adding ribbons, bows, lace, or fabric trim to the edges of the basket for a polished and decorative touch. You can also embellish with Easter-themed stickers, cutouts, or even personalized name tags.
If you want to go the extra mile, consider incorporating some seasonal elements into your Easter Basket. Attach artificial flowers, small Easter figurines, or even miniature nest with colorful eggs to create a whimsical and festive look.
For an added touch of personalization, you can use fabric paint or markers to write the recipient’s name or draw cute Easter-themed designs on the basket.
Once the decorative elements are in place, make the Easter Basket functional by adding a lining. You can use a colorful cloth napkin, a piece of fabric, or even tissue paper to line the inside of the basket. This will provide a soft and cushioned base for the Easter eggs or gifts.
Finally, fill the Easter Basket with shredded paper, Easter grass, or tissue paper to create a bed for the goodies. Add colorful Easter eggs, chocolates, small toys, or any other treats that suit your recipient’s preferences for a delightful surprise.
Your DIY Easter Basket is now ready to be used and enjoyed. Whether it’s for an Easter egg hunt, a gift for a loved one, or as a decorative centerpiece, your personalized creation will surely bring joy and excitement.
Don’t be afraid to experiment and let your creativity shine. Each DIY Easter Basket is a unique expression of your artistic flair and love for the holiday.
So, grab your materials, let your imagination soar, and create a one-of-a-kind DIY Easter Basket that will be cherished and enjoyed for years to come.
Easter Bunny Tote Bag
Add a touch of Easter charm to your outfit with a delightful Easter Bunny Tote Bag. This DIY project allows you to showcase your creativity while creating a functional and adorable accessory for Easter egg hunts, shopping trips, or any day you need a cute and spacious tote.
To create your own Easter Bunny Tote Bag, you will need a plain canvas tote bag, fabric paint or markers, a stencil or template of a bunny shape, scissors, and a hot glue gun.
Start by prepping your canvas tote bag. If it’s new, ensure that it is clean and free of any dust or debris. If you’re repurposing an old bag, make sure it’s also clean before proceeding.
Next, place the stencil or template of a bunny shape onto the front of the canvas tote bag. You can find bunny shapes online or create your own by drawing a simple bunny silhouette onto cardboard or thick paper and cutting it out.
Once the stencil is securely in place, use fabric paint or markers to trace the outline of the bunny shape onto the tote bag. Take your time and fill in the shape with desired colors to bring the bunny to life. You can add fun patterns, polka dots, or even personalize it with names or initials.
Allow the paint or markers to dry completely before moving on to the next step. This ensures that the design remains intact and doesn’t smudge.
Now it’s time to add a fluffy bunny tail! Cut out a small circular shape from white fabric or faux fur. Use a hot glue gun to attach the fluffy tail to the back of the tote bag, just below the bunny shape. Press it firmly to secure it in place.
Once the glue is dry, your Easter Bunny Tote Bag is ready to be used. Fill it with Easter eggs, treats, groceries, or any other items you need for your day. The sturdy canvas material and spacious design make it perfect for carrying a variety of items.
Not only is the Easter Bunny Tote Bag a practical accessory, but it also adds a whimsical and festive element to your outfit. It’s a delightful way to showcase your love for the holiday and spread joy wherever you go.
So, let your creativity shine and hop into the Easter spirit with a personalized Easter Bunny Tote Bag. It’s a fun and functional project that will make you smile every time you use it.
Conclusion
Celebrating Easter is not only about delicious treats and egg hunts but also about creating a warm and festive atmosphere with beautiful decorations. DIY Easter crafts provide the perfect opportunity to infuse your home with creativity, elegance, and a personal touch.
From the elegant Easter Egg Wreath to the whimsical Bunny Ear Floral Headband, we’ve explored ten enchanting DIY Easter crafts that can enhance your celebrations. These crafts allow you to showcase your artistic flair, engage in enjoyable activities with family and friends, and create memorable decorations that will spark joy and wonder.
Each craft offers a unique opportunity to explore your creativity and customize the final outcome to suit your style and preferences. Whether you prefer traditional pastel colors, vibrant and bold hues, or a more minimalistic and elegant approach, there’s a craft for everyone.
Not only do DIY Easter crafts provide an outlet for creative expression, but they also offer a chance to connect with loved ones. Hosting a crafting session or involving family members and friends in the process can strengthen bonds, create lasting memories, and ignite the joy of the holiday season.
So, gather your crafting supplies, let your imagination soar, and embark on a journey of creating beautiful Easter decorations. Whether it’s a stunning floral centerpiece or a whimsical Bunny Ear Floral Headband, the crafts you create will add a touch of elegance and enchantment to your home.
Remember, while crafting, it’s important to have fun, embrace imperfections, and allow your personality to shine through. The joy and satisfaction of creating something unique and beautiful with your own hands is incomparable.
As you display your crafts and share them with others, you’ll undoubtedly receive compliments and bring smiles to the faces of those who see them. These DIY Easter crafts are not just decorations; they are a reflection of your passion, creativity, and love for this special time of year.
So, let your creative spirit soar, infuse your home with the beauty of these Easter crafts, and celebrate the joy and renewal that Easter brings.
Frequently Asked Questions about Easter Craft Ideas: 10 Elegant DIY Easter Crafts
Was this page helpful?
At Storables.com, we guarantee accurate and reliable information. Our content, validated by Expert Board Contributors, is crafted following stringent Editorial Policies. We're committed to providing you with well-researched, expert-backed insights for all your informational needs.


0 thoughts on “Easter Craft Ideas: 10 Elegant DIY Easter Crafts”