Home>Interior Design>Craft Room Ideas: 10 Ways To Create A Practical Yet Stylish Space
Interior Design
Craft Room Ideas: 10 Ways To Create A Practical Yet Stylish Space
Modified: October 29, 2024
Looking for craft room ideas? Discover 10 stylish and practical ways to create your dream space. Learn how interior design techniques can elevate your craft room to the next level.
(Many of the links in this article redirect to a specific reviewed product. Your purchase of these products through affiliate links helps to generate commission for Storables.com, at no extra cost. Learn more)
Introduction
Are you passionate about crafting and DIY projects? If so, having a dedicated craft room can greatly enhance your creativity and productivity. A well-designed craft room not only provides a functional space to work on your projects but also allows you to stay organized and inspired.
In this article, we will explore 10 practical yet stylish craft room ideas to help you create the perfect creative haven. Whether you have a spacious room or a small corner, these tips and suggestions will guide you in designing a craft room that suits your needs and reflects your personal style.
Your craft room should be a place where you can unleash your imagination and bring your ideas to life. It should inspire you to explore different techniques, materials, and colors, while also providing the necessary tools and storage solutions to keep everything organized.
So, let’s dive into the world of craft room design and discover how you can transform any space into a functional and aesthetically pleasing haven for your creative pursuits. Whether you are a seasoned crafter or just starting out, these ideas will help you create a space that motivates and nurtures your artistic side.
Remember, the key to a successful craft room is to strike a balance between practicality and style. You want a space that is not just functional, but also visually appealing, as it can greatly enhance your mood and creativity. From choosing the right room for your craft room to incorporating proper lighting and storage solutions, we will cover all the essential elements to help you design your dream craft room.
So, let’s get started and explore these 10 craft room ideas that will take your creativity to the next level and transform your craft room into a haven of inspiration and organization. Whether you’re into sewing, scrapbooking, painting, or any other craft, these ideas are sure to ignite your passion and help you create a space that you will love to spend time in. Get ready to design a craft room that is practical, stylish, and uniquely yours!
Key Takeaways:
- Transform any space into a practical and stylish craft room by considering natural light, efficient organization, and personalized decor. Create a haven that inspires creativity and productivity.
- Prioritize comfort and functionality in your craft room with ergonomic design, clutter-free organization, and ample storage options. Design a space that supports your creative pursuits and enhances your crafting experience.
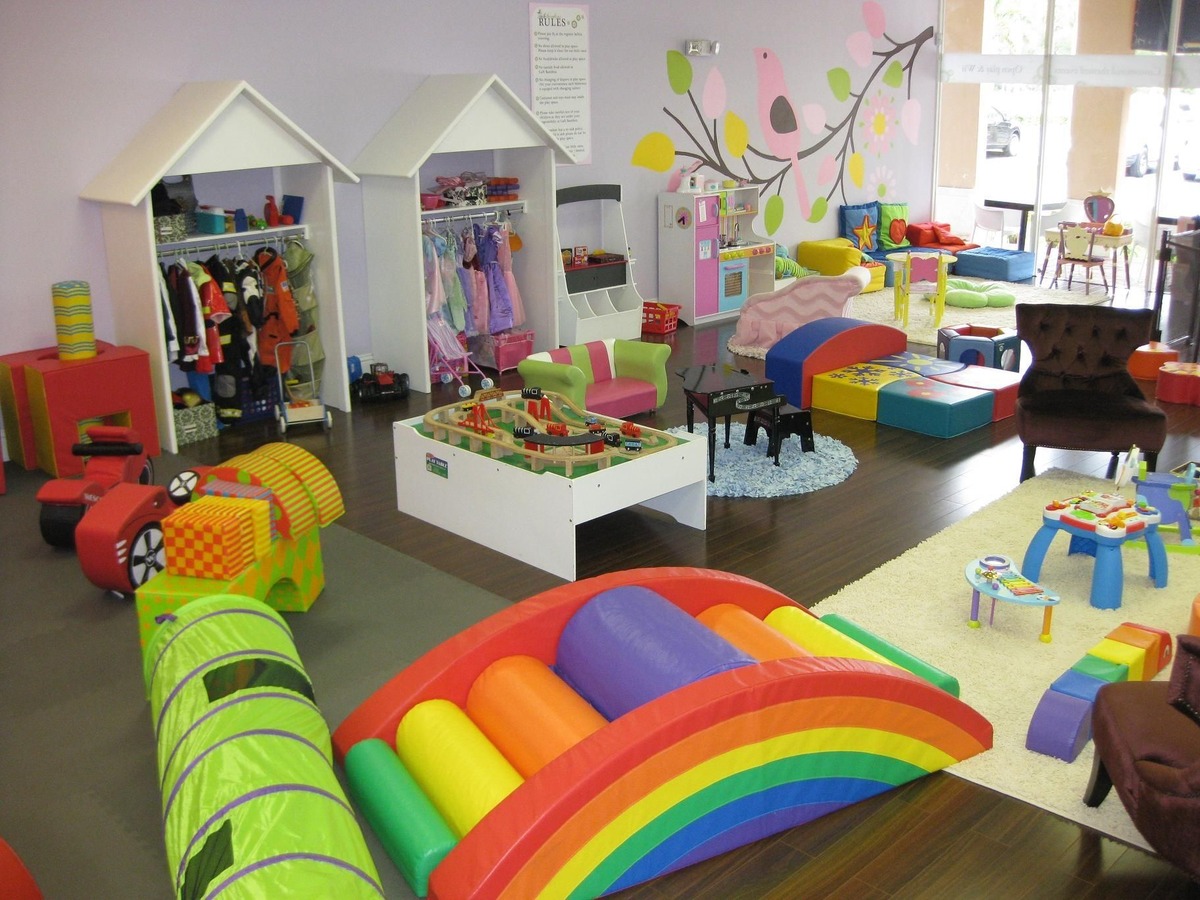
Read more: Kids’ Rooms: Playful Yet Practical Designs
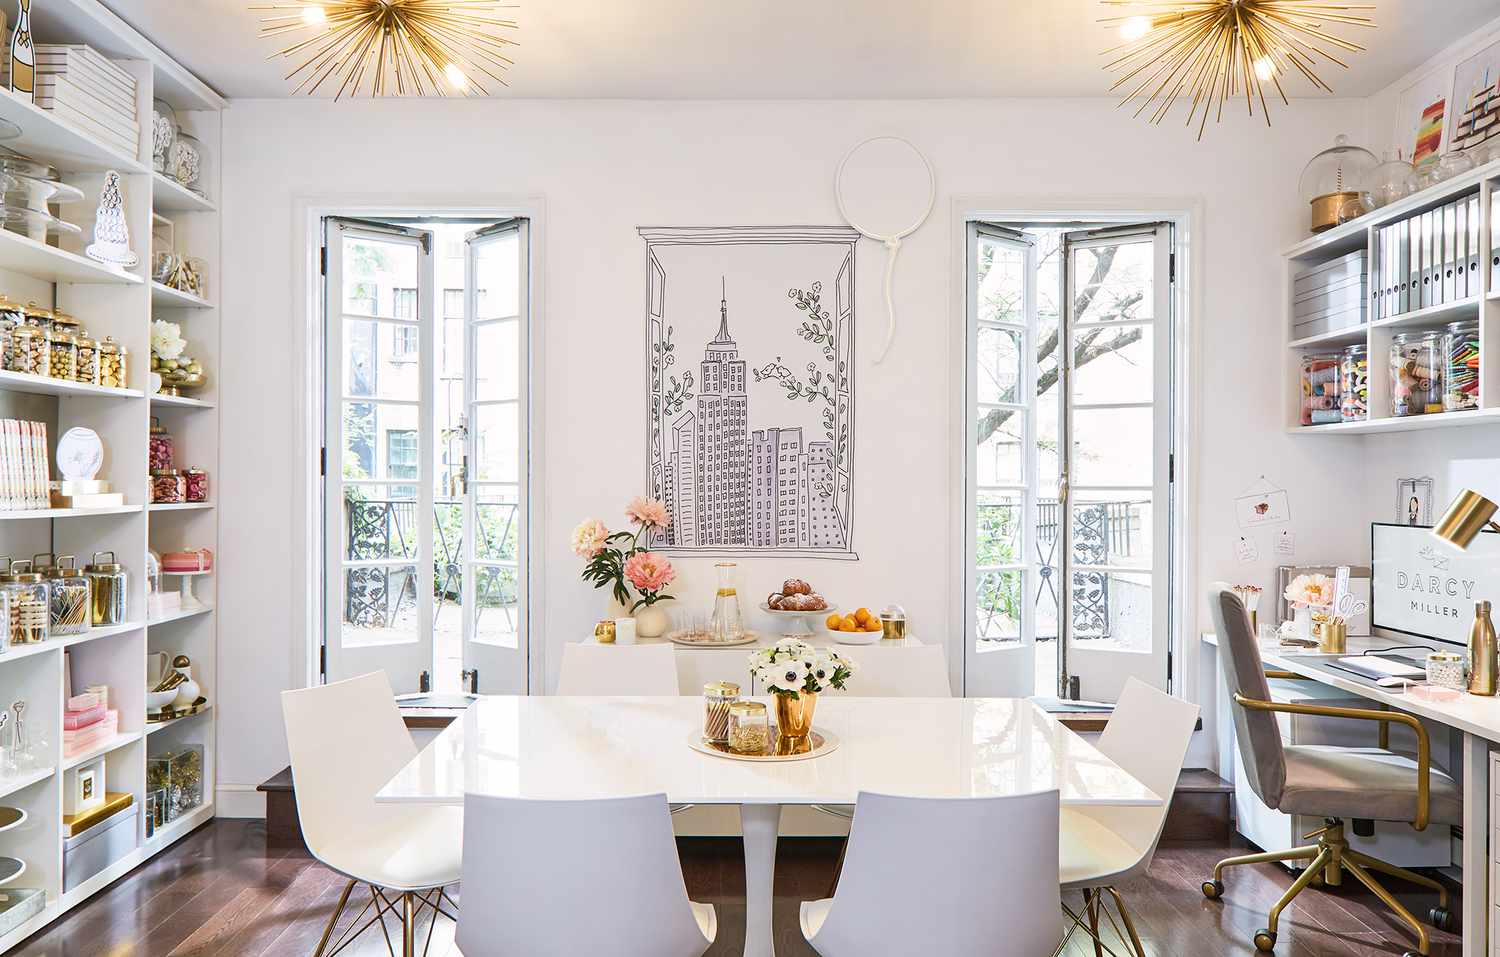
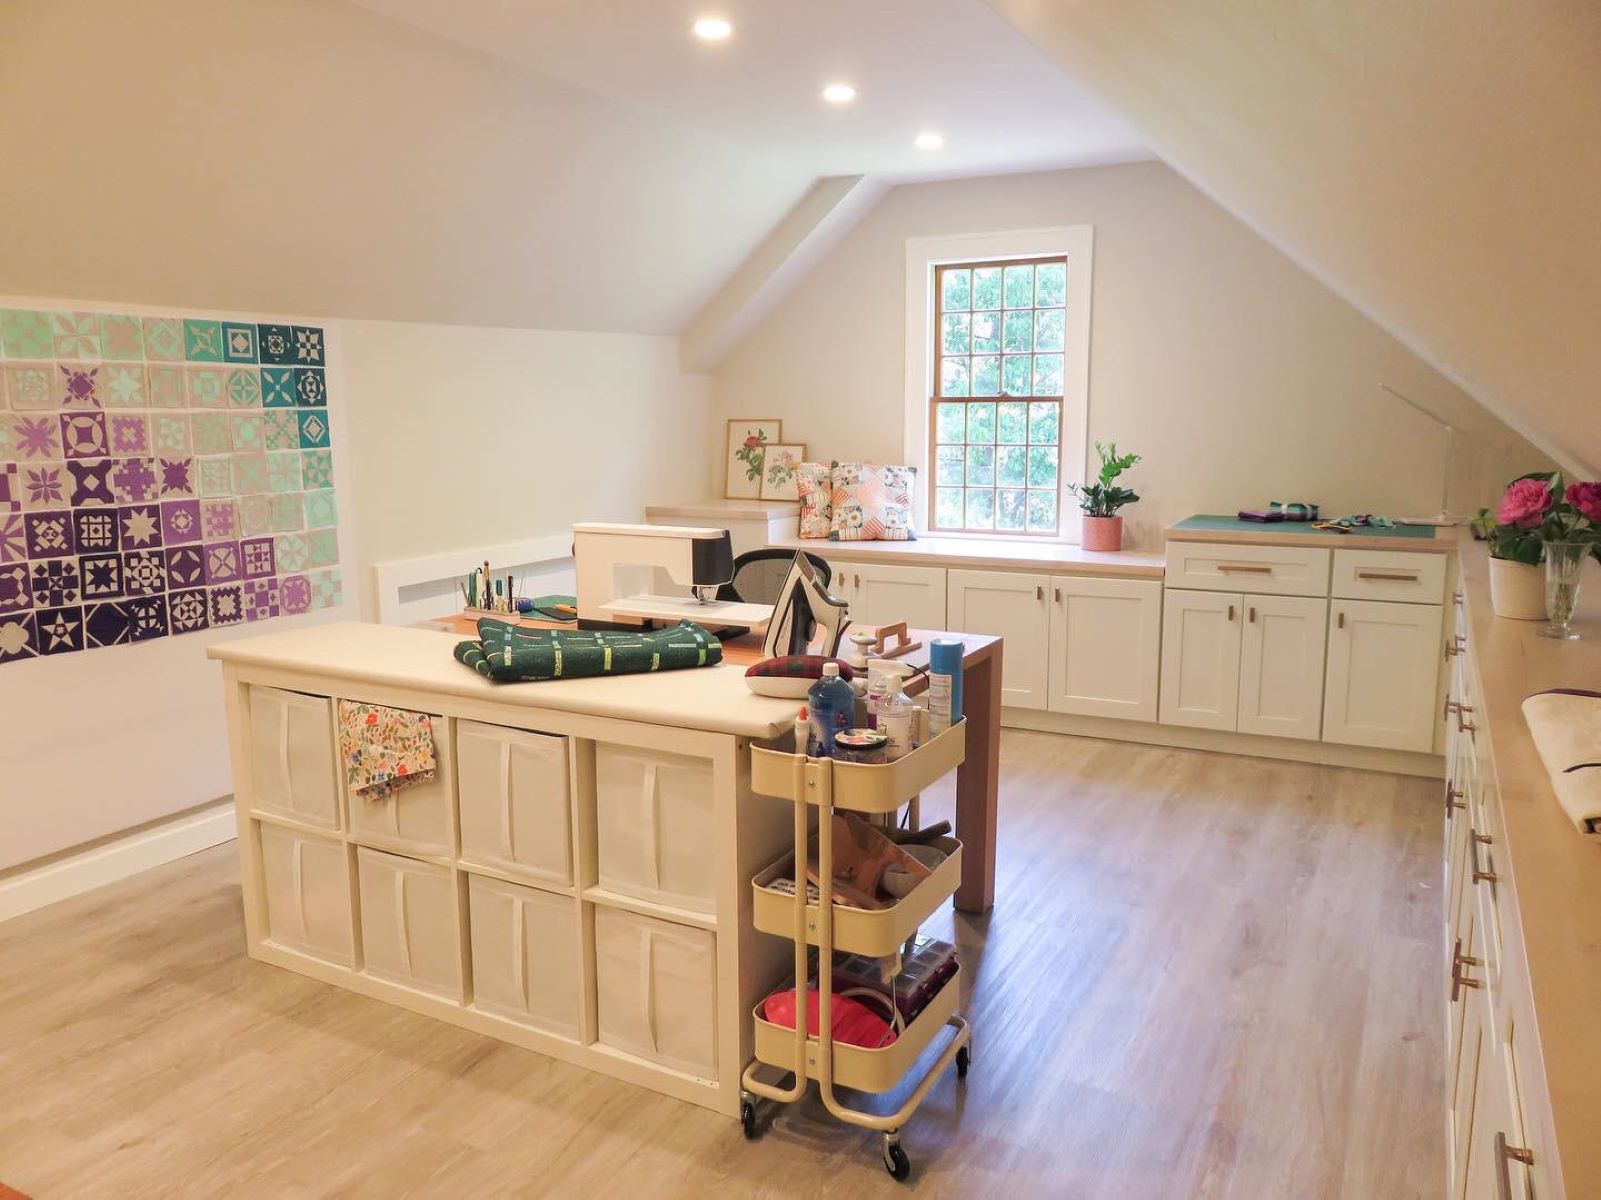
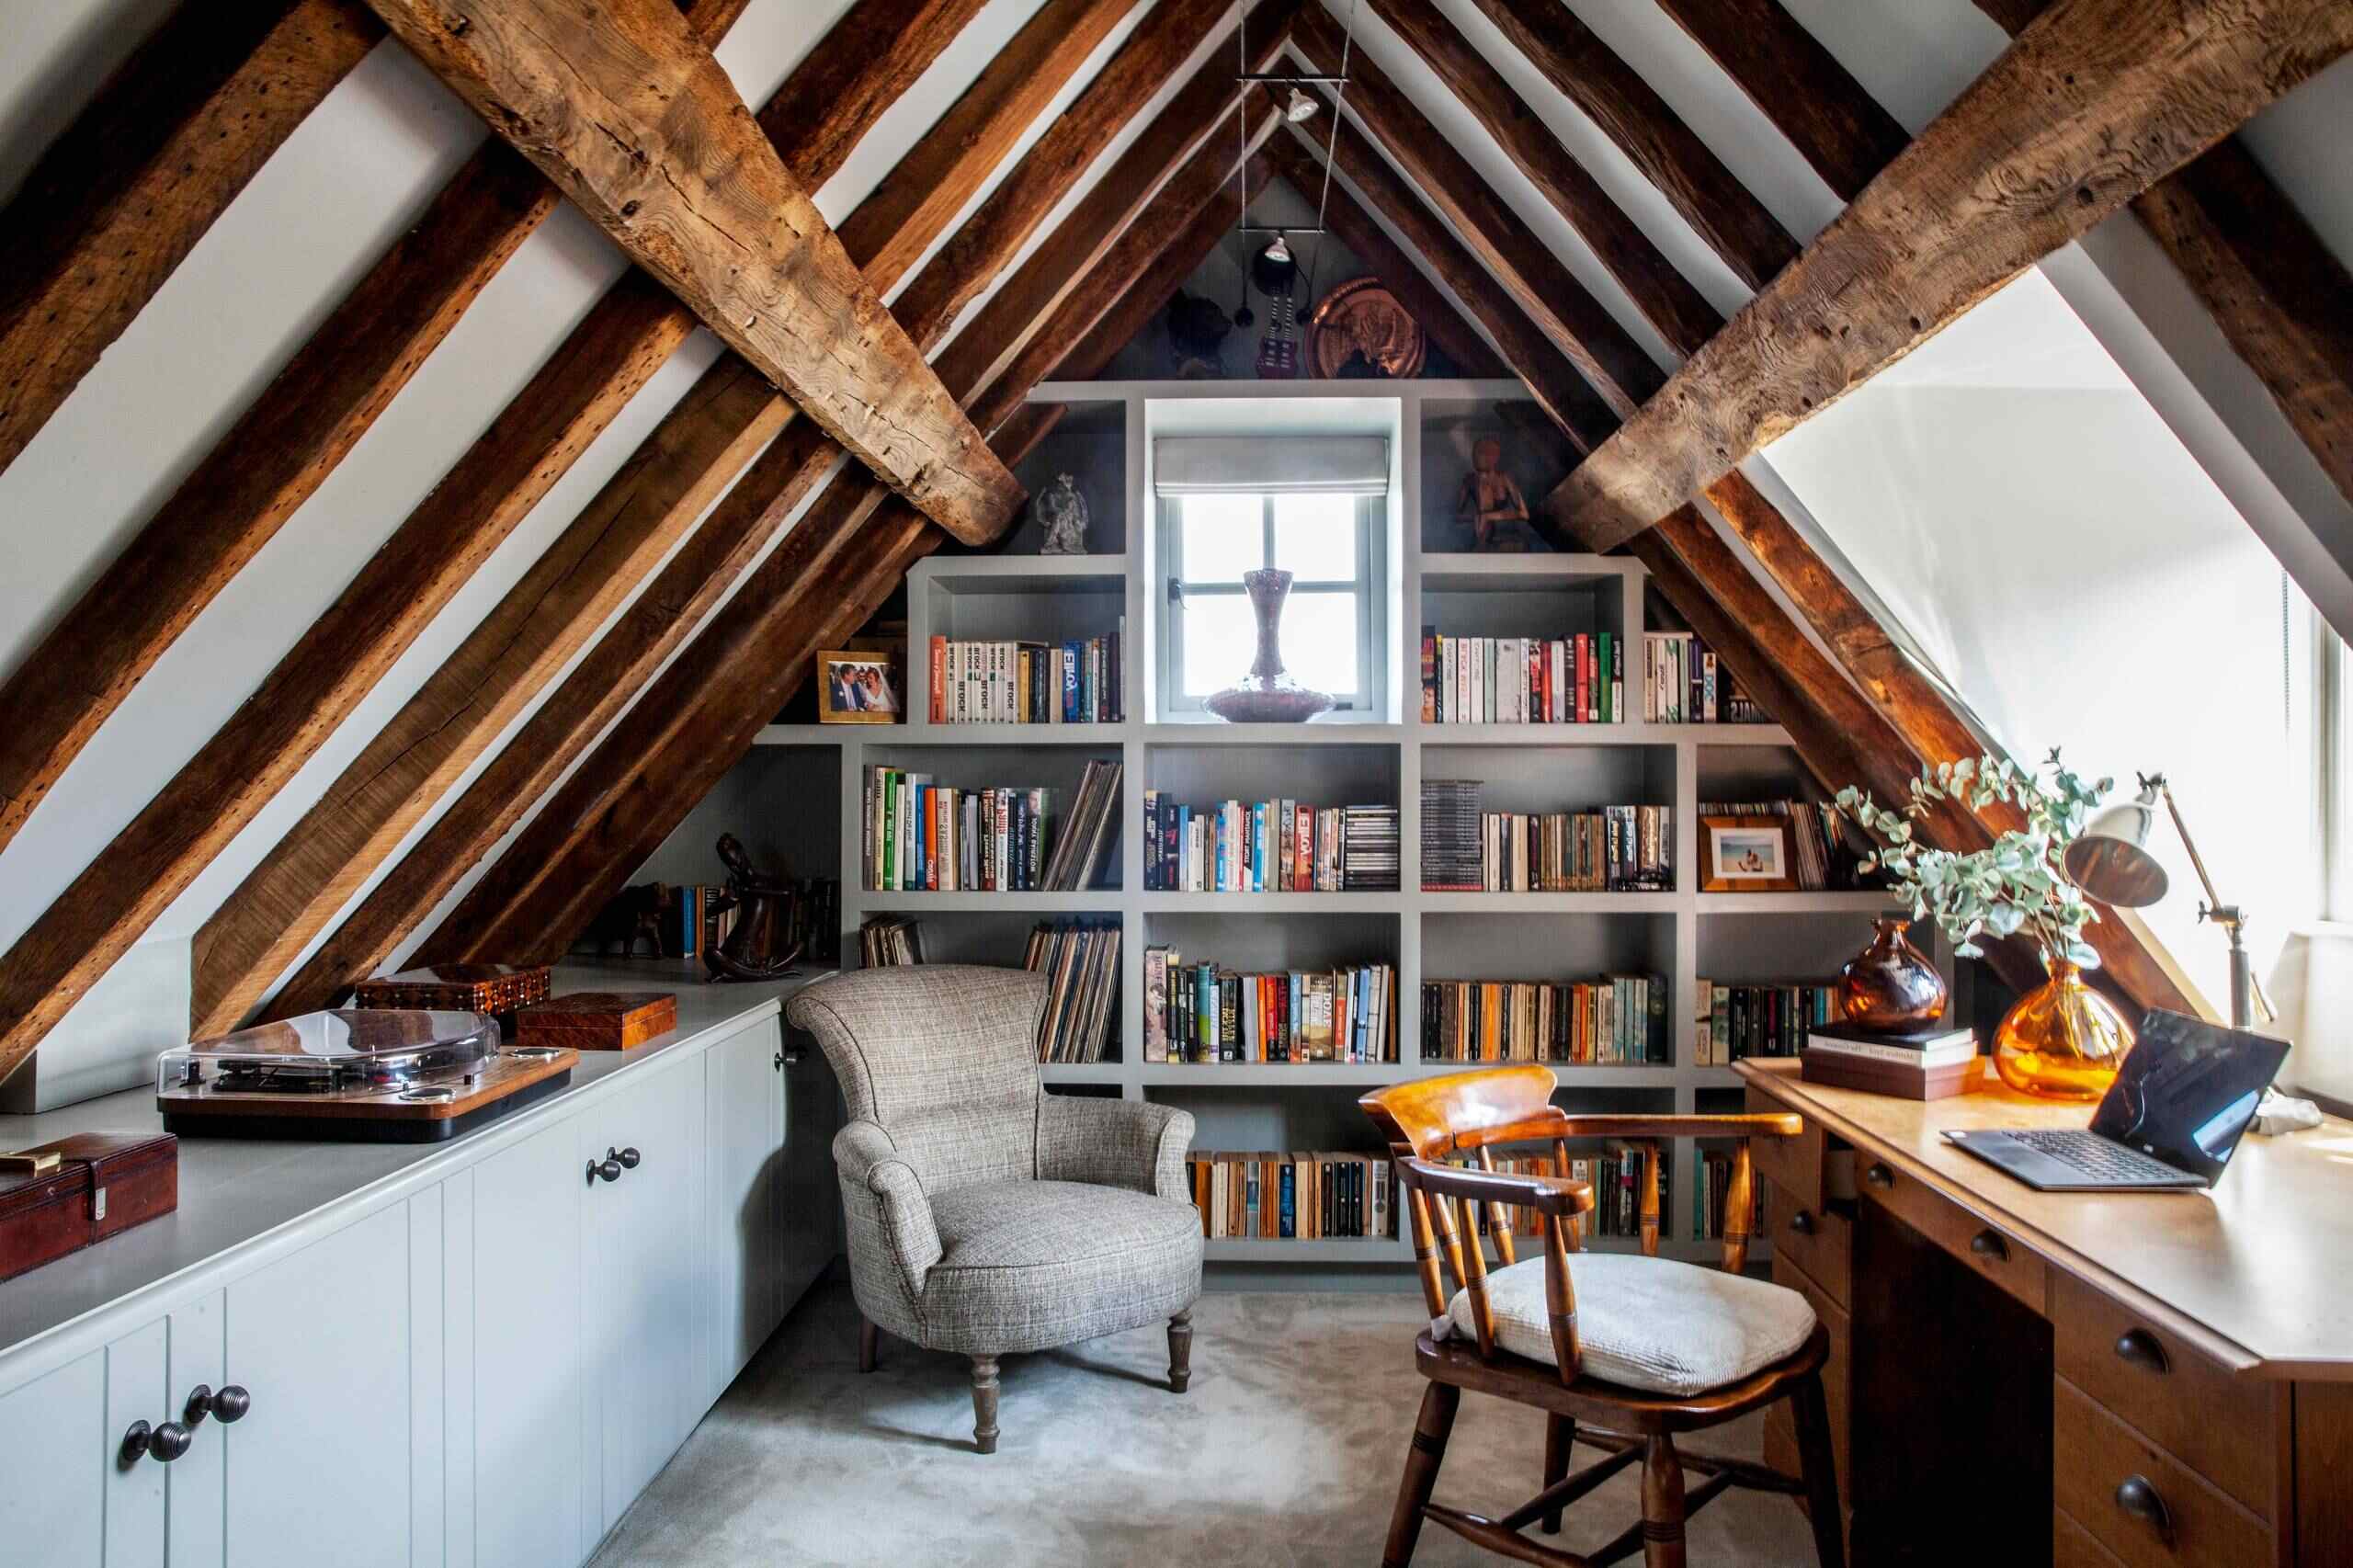
Choose the Right Room
When it comes to setting up a craft room, the first step is to select the right room for your creative endeavors. Depending on the available space in your home, you may have a dedicated room, a spare bedroom, or even just a corner in a multipurpose area. Regardless of the size, there are a few key factors to consider when choosing the room for your craft room.
Firstly, think about the amount of natural light the room receives. Natural light is essential for any creative space, as it not only improves visibility but also enhances your mood and motivation. Look for a room with large windows or consider setting up your craft area near a window to maximize the natural light. If this is not possible, opt for a room with good artificial lighting options.
The next consideration is the size of the room. If you have ample space, lucky you! You will have more freedom to design and organize your craft room. However, even with limited space, it’s important to make the most of what you have. A strategically planned layout and efficient storage solutions can help you optimize a small craft room.
Consider the proximity of your craft room to other areas in your home. If you frequently need to access materials from kitchen or bathroom areas, it may be more convenient to choose a room closer to those spaces. This way, you can easily access your supplies without trekking across the house.
Additionally, think about the noise level in the room. If you enjoy crafting activities that can be noisy, such as woodworking or using a sewing machine, you may want to choose a room that is not adjacent to bedrooms or areas where noise may be disruptive. This will allow you to work on your projects without disturbing others in the house.
Lastly, consider the overall ambience and atmosphere of the room. Your craft room should be a space that ignites your creativity and makes you feel inspired. Choose a room that you feel comfortable in, whether that means a bright and colorful space or a more serene and calming environment. Remember, this is your sanctuary for creativity, so make sure it reflects your personal style and preferences.
Once you have considered these factors, you are ready to select the right room for your craft room. Take the time to evaluate the available options and choose a room that meets your needs and allows you to create a space where your creative ideas can flourish.
Determine Your Crafting Needs
Before you start designing your craft room, it’s crucial to assess your crafting needs and the activities you frequently engage in. Understanding your crafting needs will help you plan the layout, storage solutions, and functionality of your craft room more effectively.
Start by making a list of the crafts and projects you enjoy the most. Are you a painter, a scrapbooker, a seamstress, or a jewelry maker? Consider the specific tools, materials, and equipment required for each craft. This will give you a clear idea of the storage and organization solutions you’ll need to incorporate into your craft room.
Once you have identified your main crafts, think about the space and working surface you’ll require for each activity. For example, if you’re a painter, you’ll need a large easel and enough space to move around comfortably. On the other hand, if you’re into sewing, you’ll need a sturdy sewing table and a dedicated area for cutting and measuring fabrics.
Consider the types and sizes of materials and supplies you typically use. If you work with fabric, yarn, or paper, you’ll need ample storage for rolls, sheets, and spools. If you are a jewelry maker, you’ll need compartments and containers for beads, findings, and small tools. Consider the dimensions and storage requirements of your materials when planning your craft room layout.
Don’t forget about workspace organization. Think about how you like to organize your tools and supplies. Do you prefer having everything within arm’s reach or do you like to have designated drawers and compartments for different items? Understanding your organizational preferences will help you choose the right storage solutions for your craft room.
Another important aspect to consider is the need for a designated area for computer or digital work. If you frequently use a computer for designing, editing photos, or running your crafting business, make sure to allocate space for a desk or workstation that can accommodate your technical needs.
By determining your crafting needs, you can create a craft room that is tailored to your specific activities and workflows. It will help you optimize storage solutions, workspace layout, and organization systems. This way, when you step into your craft room, everything you need will be at your fingertips, allowing you to focus on unleashing your creativity and enjoying your crafting process.
Organize Your Supplies
One of the key elements of a functional craft room is efficient organization. When your supplies are well-organized, you can easily find what you need and streamline your creative process. Here are some tips to help you effectively organize your craft supplies:
1. Categorize and Sort: Start by categorizing your supplies into different groups based on craft type or material. For example, if you’re a painter, separate your paints, brushes, and canvases into different categories. Once you’ve categorized your supplies, sort them further by color, size, or any other relevant criteria. This will make it easier for you to locate specific items when you’re working on a project.
2. Storage Containers and Labels: Invest in storage containers like bins, baskets, and boxes to store your supplies. Choose clear containers whenever possible so you can easily see what’s inside. Label each container with the contents to quickly identify what you need. You can use adhesive labels, chalkboard labels, or even create your own labels with colorful markers. This way, you’ll always know where to find your materials.
3. Utilize Vertical Space: Take advantage of vertical space in your craft room by installing shelves, pegboards, or wall-mounted organizers. Use hooks or pegs to hang tools, scissors, rulers, and other items that you frequently reach for. This not only saves space but also keeps your supplies easily accessible and visible.
4. Drawer Organizers: If you have drawers in your craft room, invest in drawer organizers to keep small items like beads, buttons, and needles neatly arranged. You can find customizable organizers with adjustable compartments to suit your specific needs. This will prevent items from getting mixed up and make it easier to find what you’re looking for.
5. Utilize Unused Spaces: Make use of any unused spaces in your craft room for storage. This includes under-desk storage carts, over-door organizers, or even repurposing furniture like bookshelves or cabinets for craft supply storage. Be creative and think outside the box to maximize your storage options.
6. Display Inspiration: Incorporate a space in your craft room to display inspirational items or finished projects. This could be a bulletin board, a pegboard with hanging clips, or a gallery wall. Having visual reminders of your past work or ideas that inspire you can keep your creativity flowing and motivate you to dive into new projects.
Remember, the key to effective organization is finding a system that works for you. Everyone’s crafting supplies and preferences differ, so customize your organization system to suit your needs. Regularly declutter and reassess your supplies to keep your craft room organized and ensure you’re only keeping what you truly need and use.
By organizing your supplies, you’ll create a craft room that is not only aesthetically pleasing but also functional and efficient. You’ll spend less time searching for materials and more time focusing on your creative pursuits. So, roll up your sleeves, start sorting, and transform your craft room into an organized oasis of creativity.
Create a Functional Work Surface
A functional work surface is the heart of any craft room. It’s where you’ll spend a significant amount of time working on your projects and bringing your creative ideas to life. Here are some tips to help you create a functional and practical work surface in your craft room:
1. Consider the Size and Shape: The size and shape of your work surface will depend on the type of crafts you engage in and the available space in your craft room. For activities like sewing or painting, you’ll need a larger surface area. If you have limited space, consider a fold-out table or a multi-purpose desk that can be expanded when needed.
2. Choose the Right Material: Selecting the right material for your work surface is essential. Opt for a sturdy and durable material that can withstand the wear and tear of your crafting activities. Some popular options include solid wood, laminate, or even a durable, heat-resistant countertop material. The material should be easy to clean and maintain to ensure a long-lasting work surface.
3. Adequate Lighting: Proper lighting is crucial for any workspace, especially for detailed craft projects. Ensure that your work surface is well-lit with natural or artificial light. Consider adding task lighting such as adjustable desk lamps or overhead lighting fixtures to eliminate shadows and improve visibility.
4. Incorporate Ergonomics: Crafting can be a physically demanding activity, so it’s important to consider ergonomics when designing your work surface. Ensure that your work surface is at a comfortable height that prevents strain on your back, neck, and arms. If you’re working with a sewing machine or other equipment, make sure they are positioned at a comfortable distance and height to minimize strain on your posture.
5. Add Storage Solutions: A functional work surface should also provide ample storage options within arm’s reach. Incorporate drawers, shelves, or cubbies directly below or above your work surface to store frequently used tools, supplies, and materials. This will keep your workspace organized and allow you to easily access what you need without disrupting your creative flow.
6. Personalize Your Work Surface: Make your work surface your own by adding personal touches. Consider adding a pinboard or a pegboard above your work surface to hang inspiration, tools, or visual reminders. Add a comfortable chair with back support to ensure maximum comfort during long crafting sessions. Customize your work surface with storage and organization solutions that fit your specific needs and workflow.
By creating a functional work surface in your craft room, you’ll have a designated space that inspires and facilitates your creativity. It will be a place where you can comfortably work on your projects, with everything you need within reach. Remember to arrange your supplies, tools, and equipment in a way that makes sense for your crafting style and workflow. With a well-designed work surface, your craft room will become a haven of productivity and enjoyment.
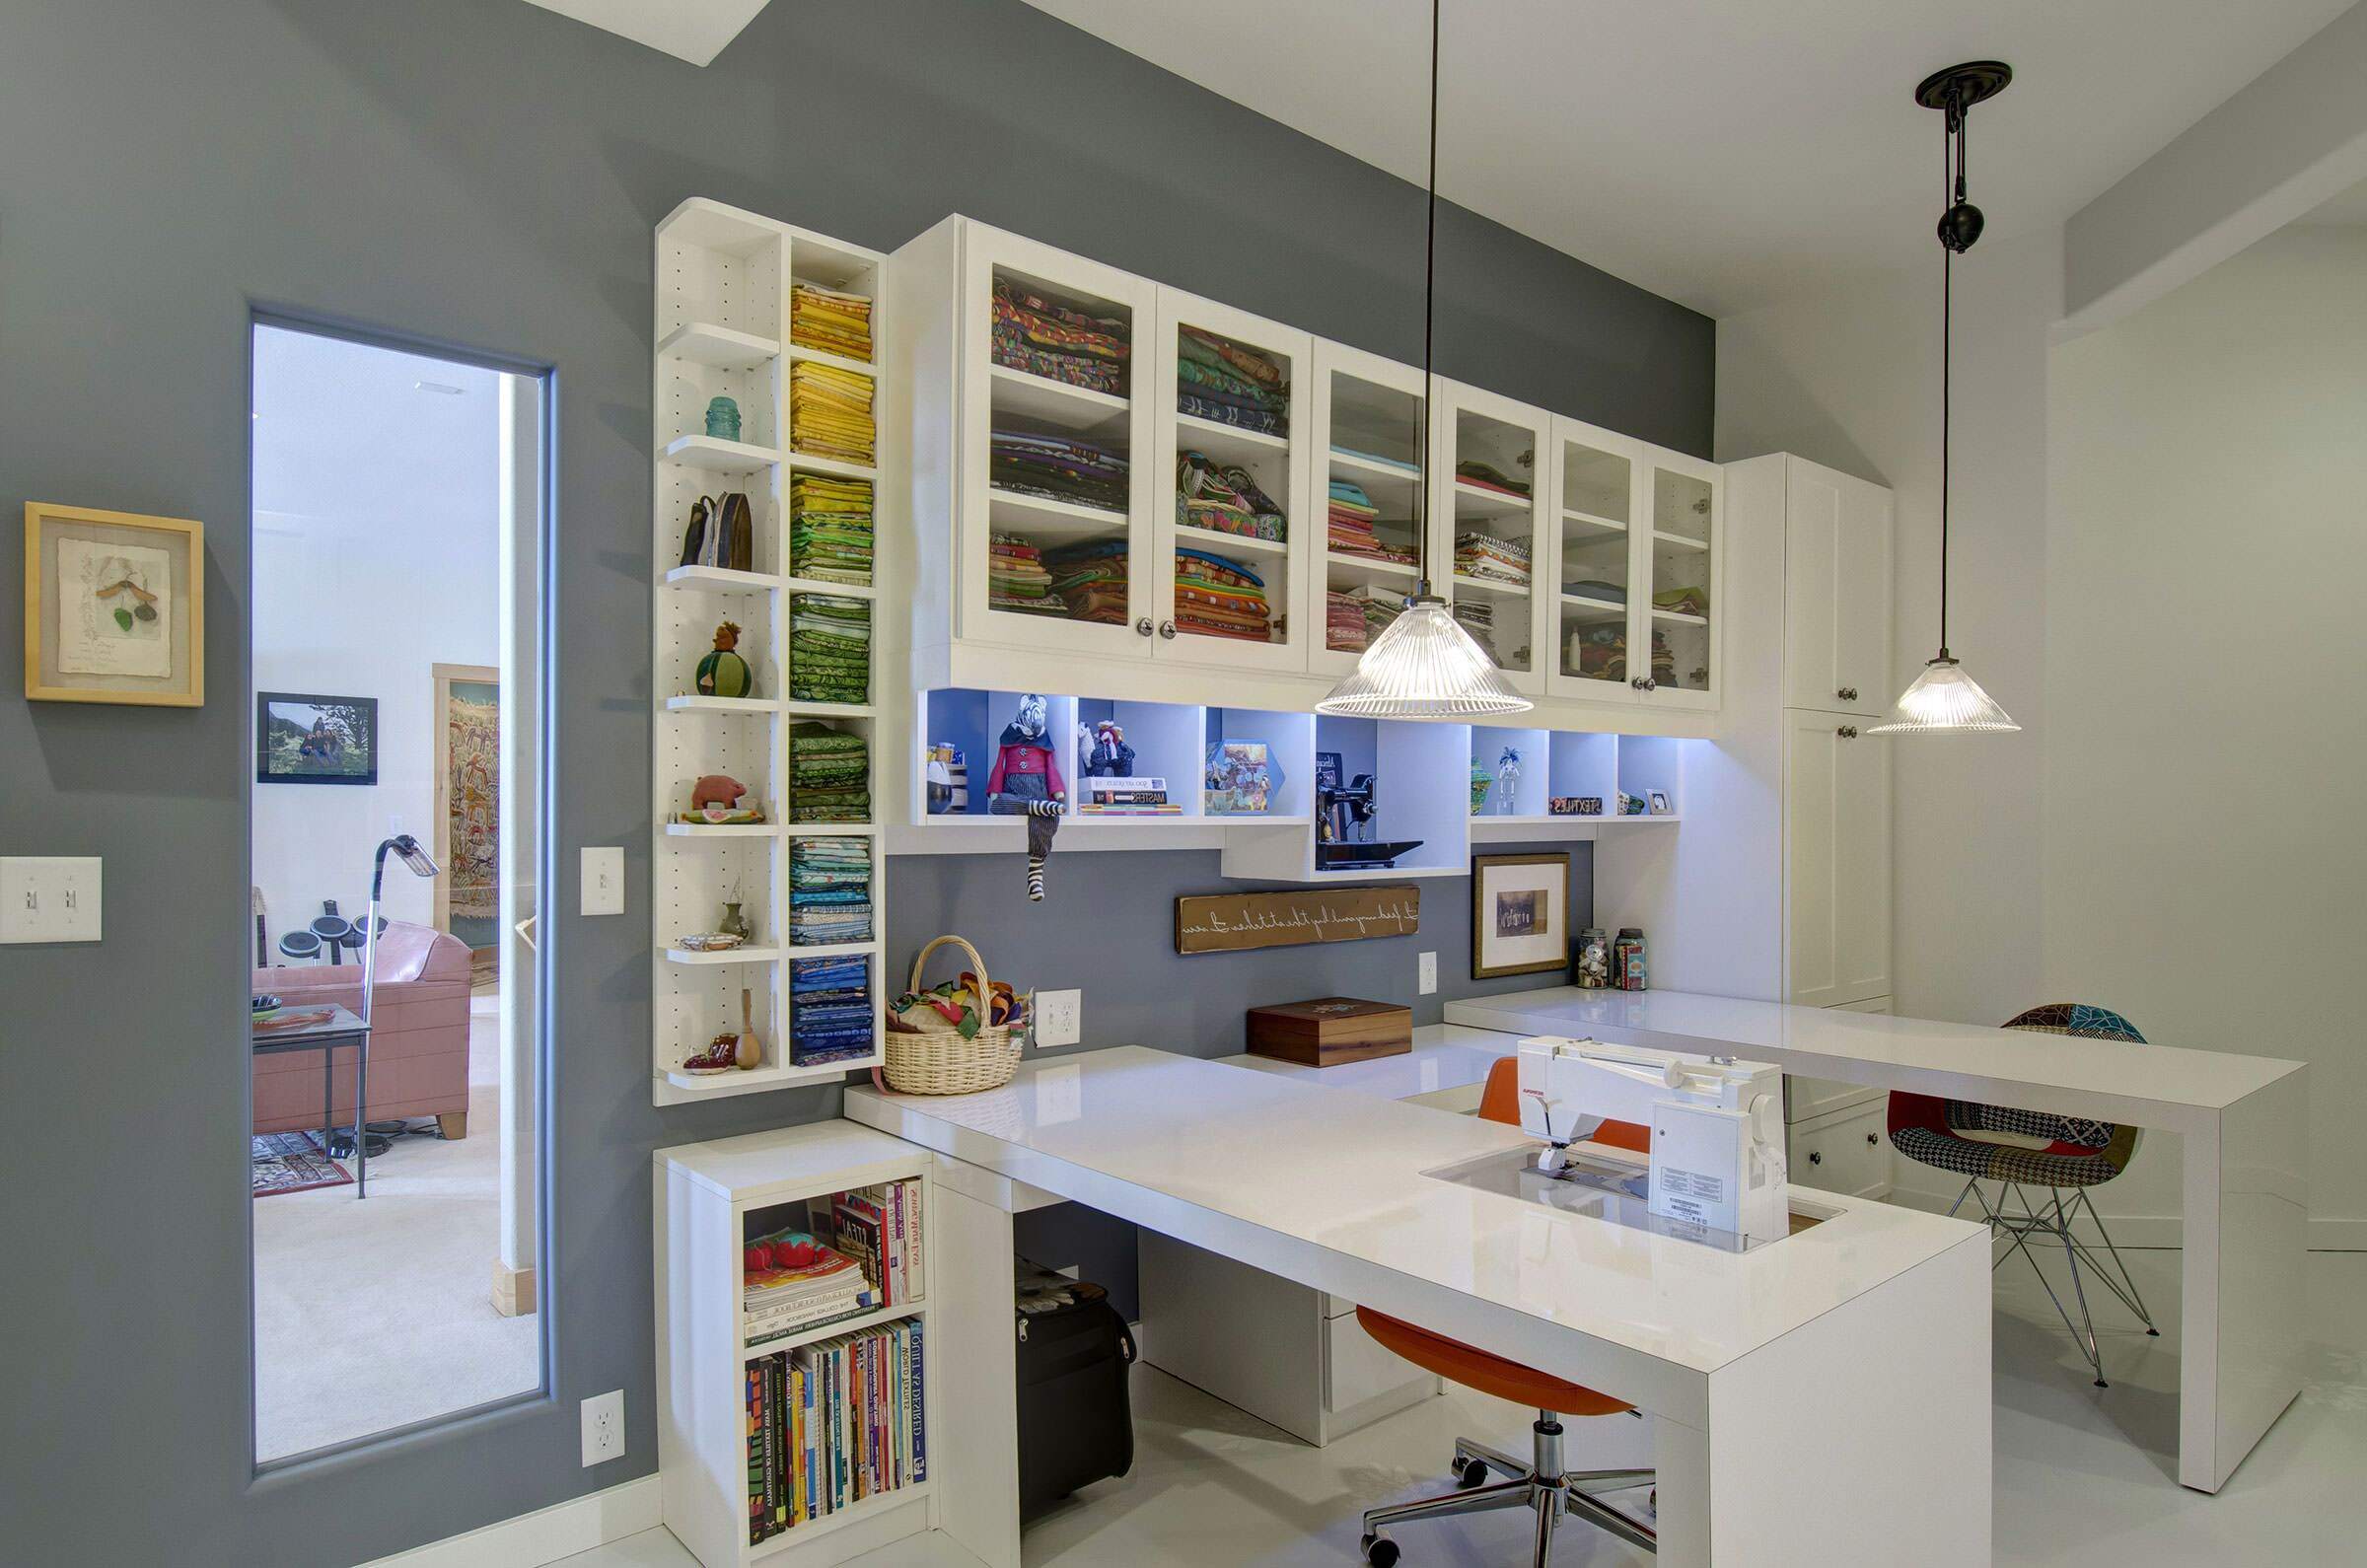
Add Ample Storage Options
A well-organized craft room needs ample storage options to keep your supplies and materials organized and easily accessible. Whether you have a large craft room or a small corner dedicated to crafting, here are some storage ideas to help you maximize your space:
1. Shelving Units: Shelving units are a versatile storage solution that can be customized to fit your needs. Install open shelves on the walls to store bins, baskets, and containers. This allows you to easily see and access your supplies. You can also mix and match different sizes and styles of shelves for a unique look.
2. Cubbies and Boxes: Cubbies or storage boxes with dividers are great for organizing smaller items like beads, buttons, or sewing notions. Label each cubby or box to quickly find what you need. Stackable boxes or clear plastic containers are ideal for storing larger supplies such as fabric, yarn, or paper.
3. Pegboards: Install a pegboard on a wall to create a flexible and customizable storage solution. Use hooks or pegs to hang tools, scissors, ribbons, and other craft supplies. This not only keeps your supplies organized but also adds a visual element to your craft room.
4. Drawer Organizers: Drawers can quickly become a jumbled mess if not organized properly. Invest in drawer organizers or dividers to keep small items like buttons, threads, and needles neatly separated. This will make it easier to find what you need and prevent clutter.
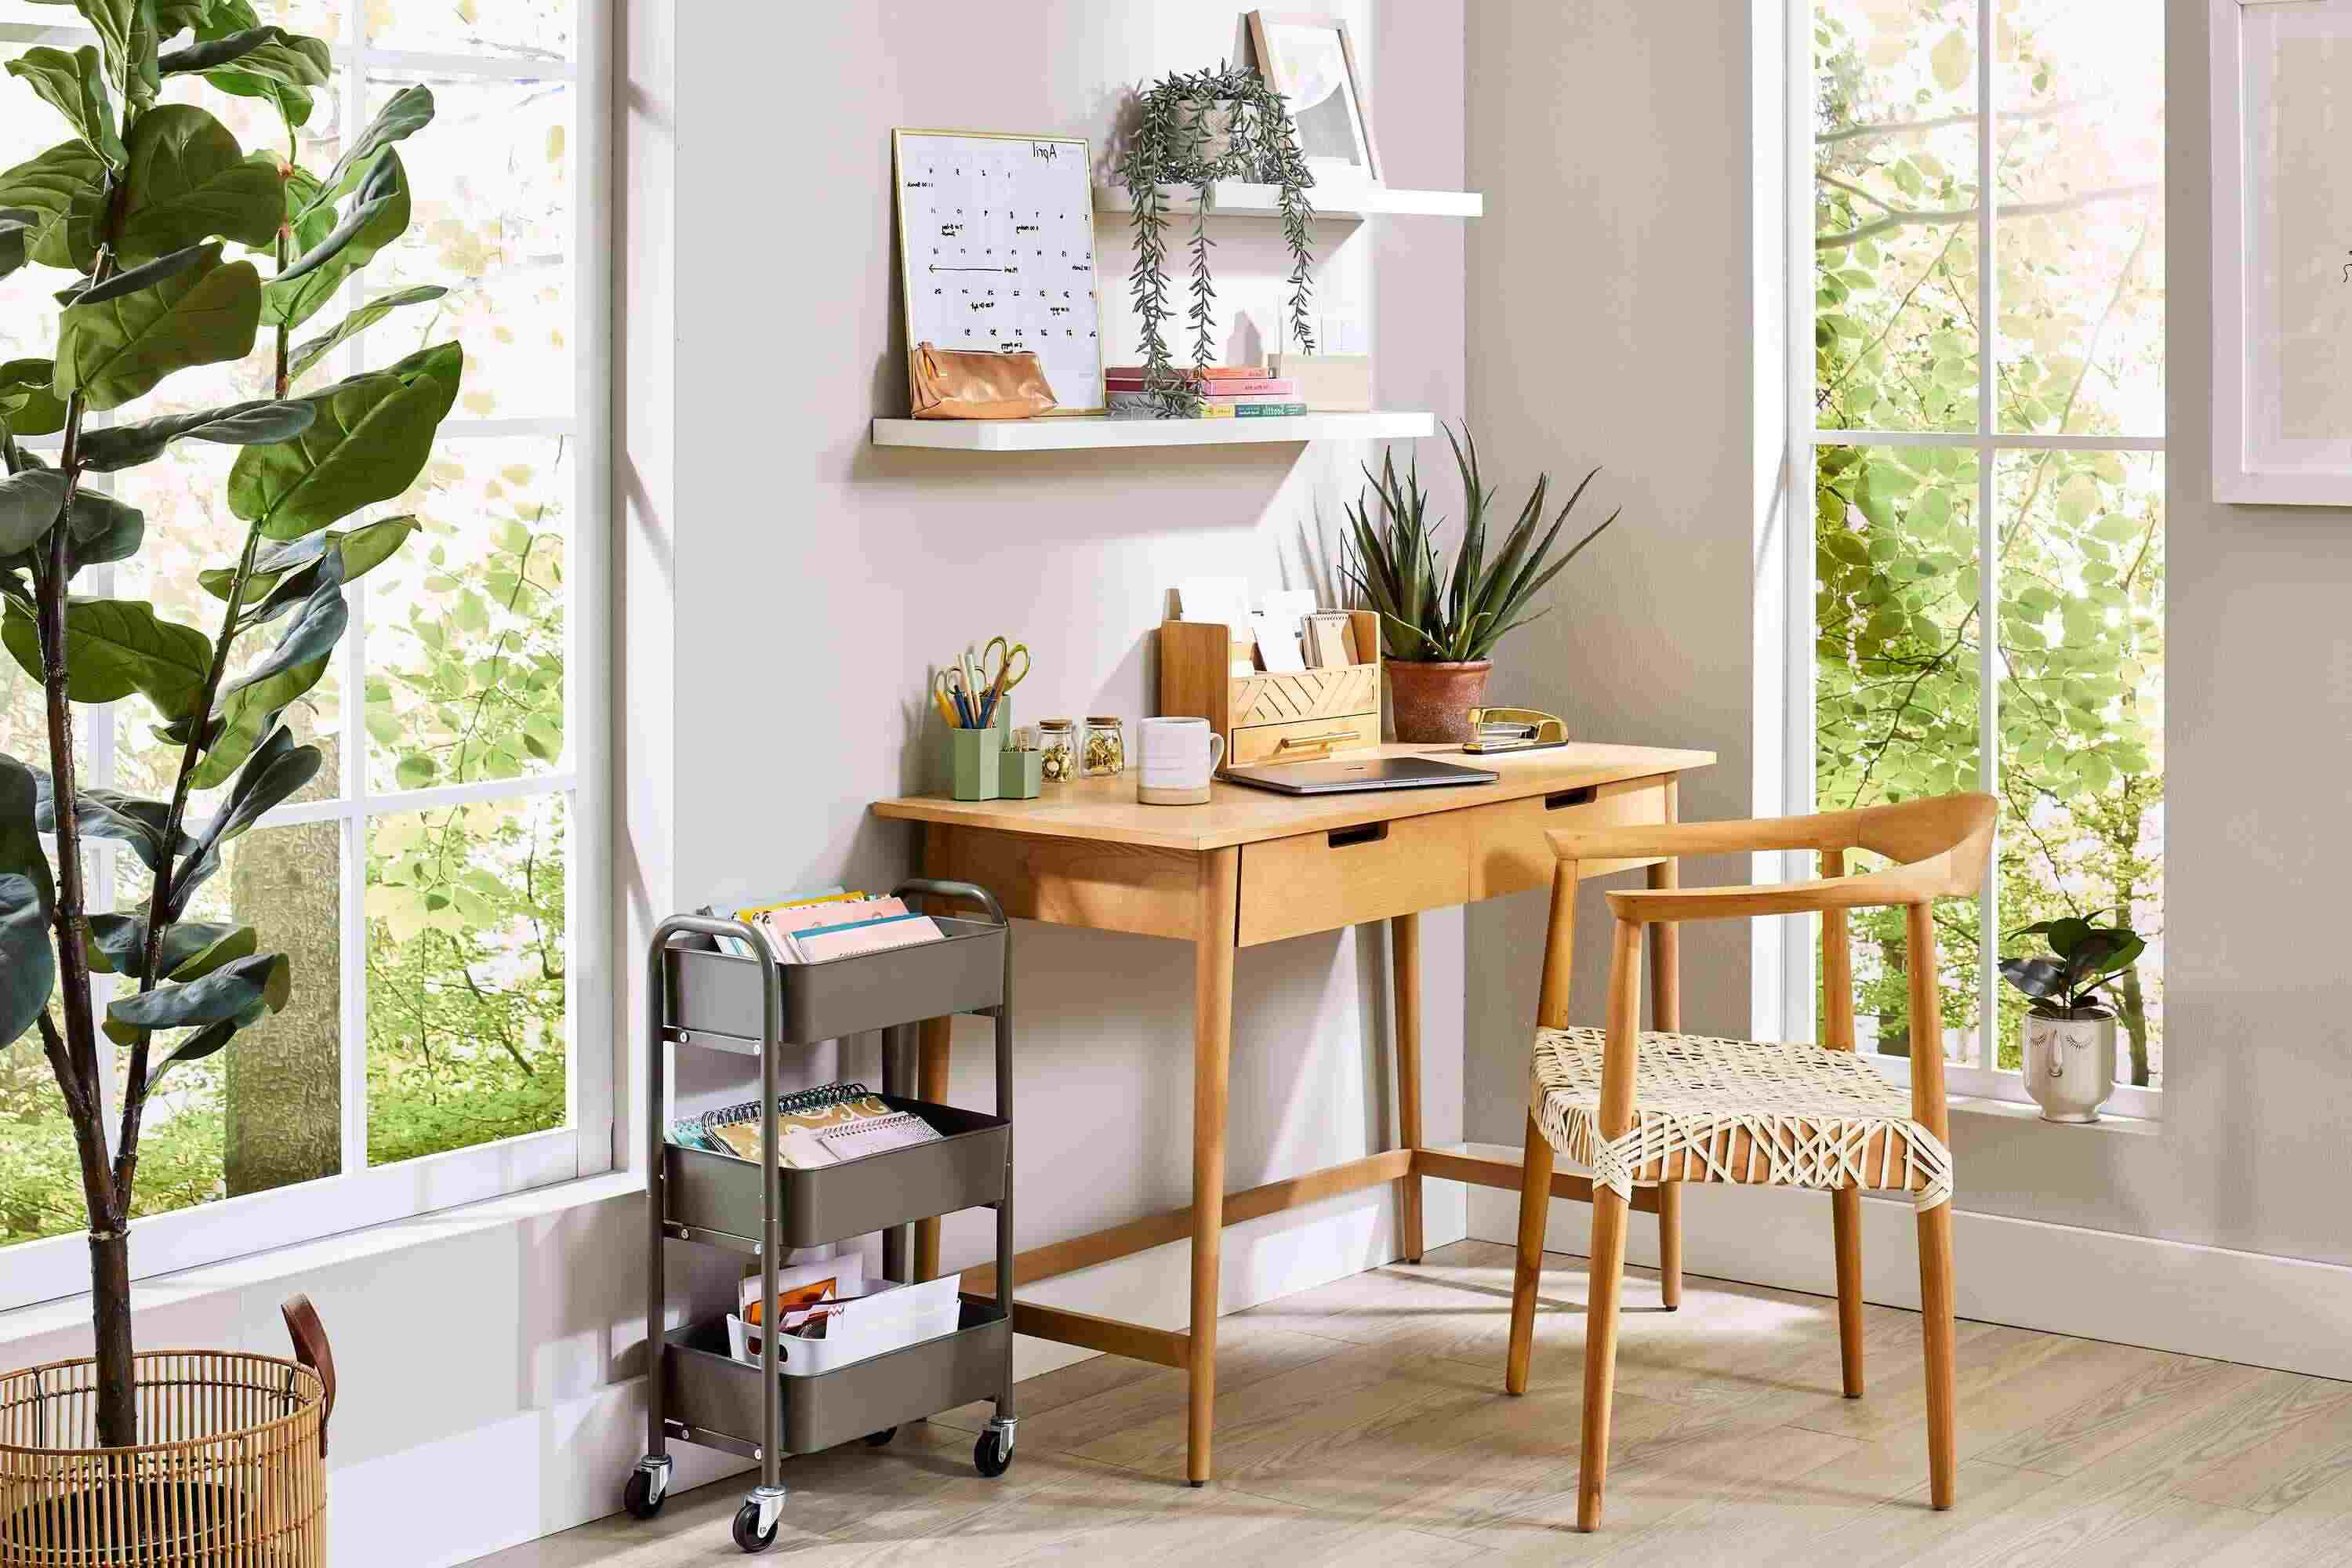
5. Rolling Carts: Rolling carts with multiple tiers can be a lifesaver in a small craft room. Use them to store frequently used supplies or to create a mobile workstation. The cart can be rolled around as needed, allowing you to access your supplies from different areas of the room.
6. Wall-Mounted Organizers: Utilize wall space by installing wall-mounted organizers. These can include wall pockets, file holders, or magazine racks to store papers, patterns, or other flat items. This keeps your surfaces clutter-free and allows for easy access to important documents.
7. Utilize Closet Space: If your craft room has a closet, maximize its storage potential. Install shelves, hooks, or hanging organizers inside the closet to store larger items like totes, fabric rolls, or wrapping paper. Take advantage of every inch of available space.
8. Repurposed Furniture: Repurpose furniture like bookshelves, cabinets, or dressers to store your craft supplies. Add baskets or bins to keep things organized and visually appealing. You can customize the furniture with paint or wallpaper to match your craft room’s aesthetic.
Remember to regularly declutter and reassess your storage solutions to ensure they are still effective for your needs. As your craft supplies and materials change, you may need to make adjustments to your storage setup.
By adding ample storage options to your craft room, you’ll create a clutter-free environment where everything has its place. This not only makes it easier to find what you need but also allows you to fully utilize your creative space. A well-organized craft room will inspire you to dive into projects and focus on your crafting, rather than searching for misplaced supplies.
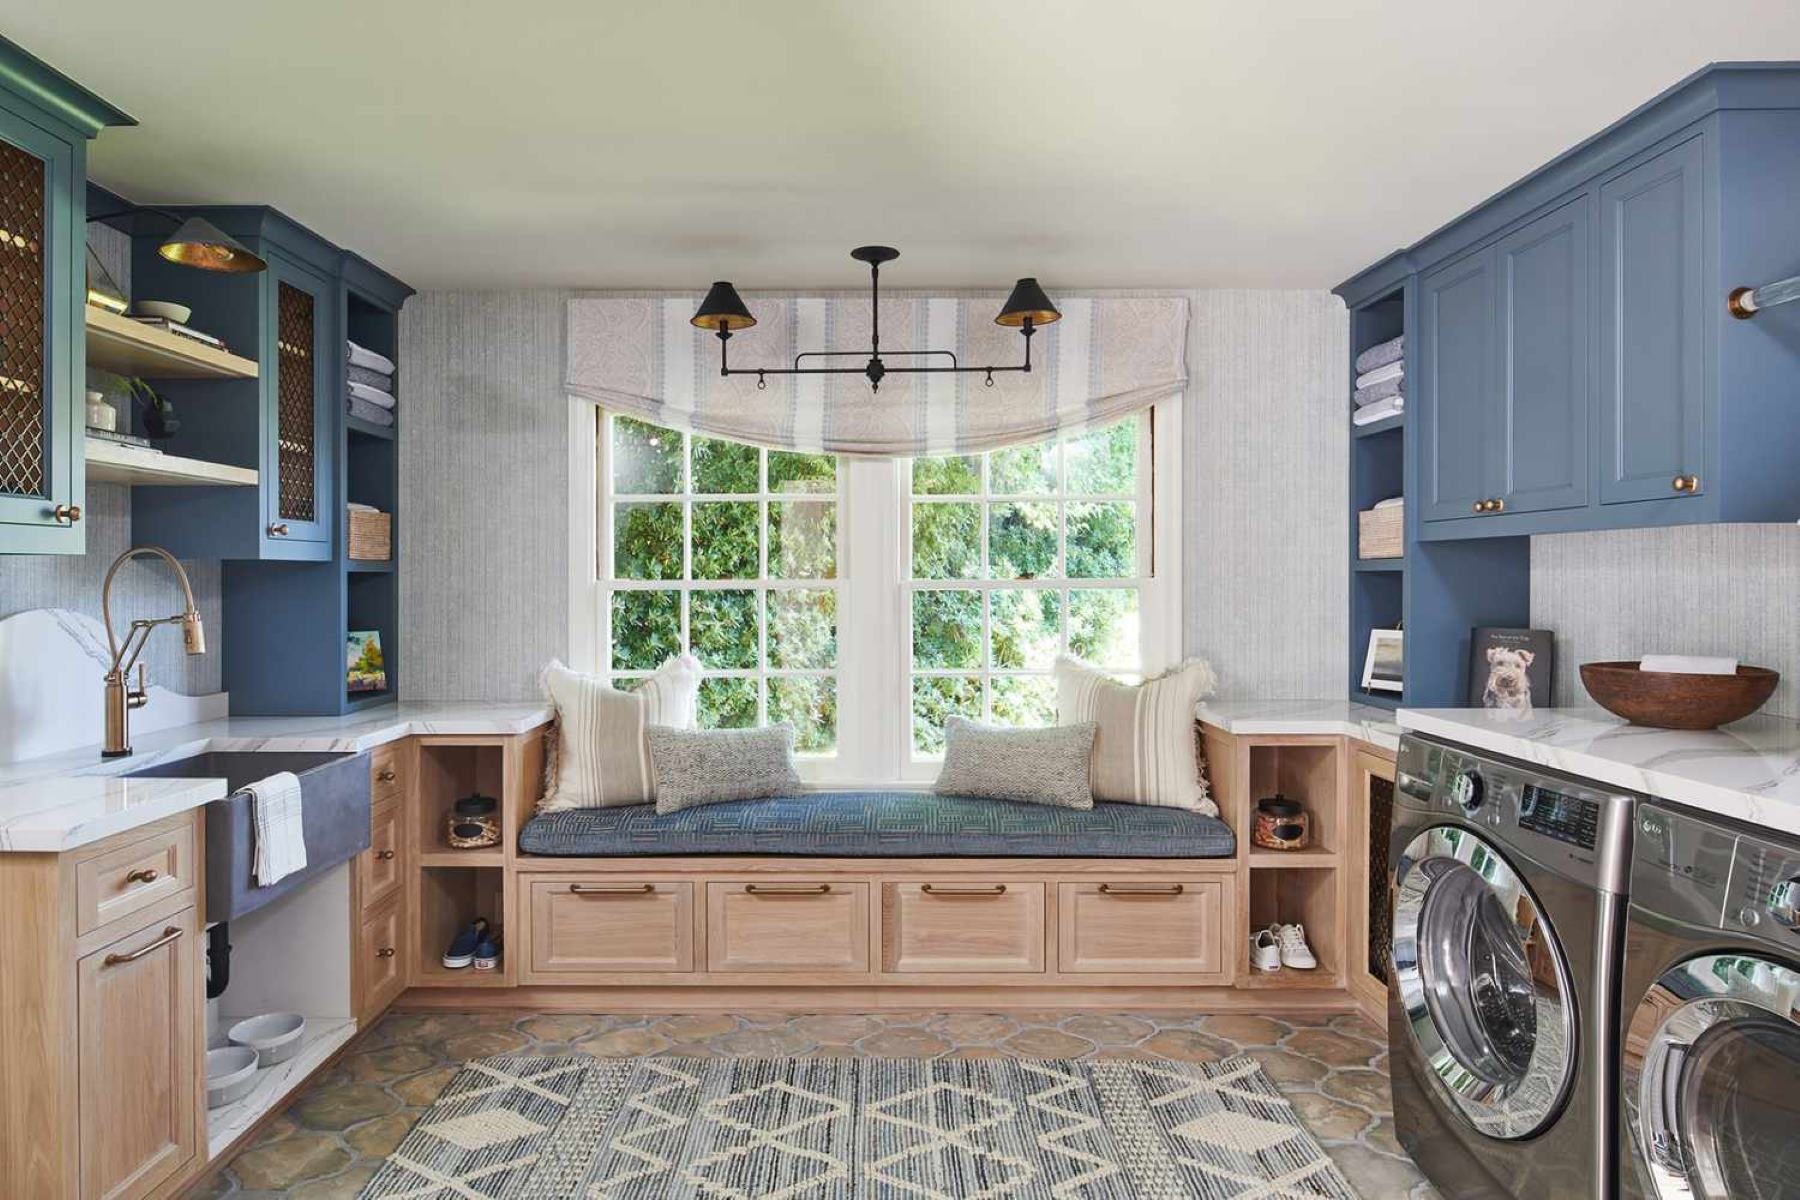
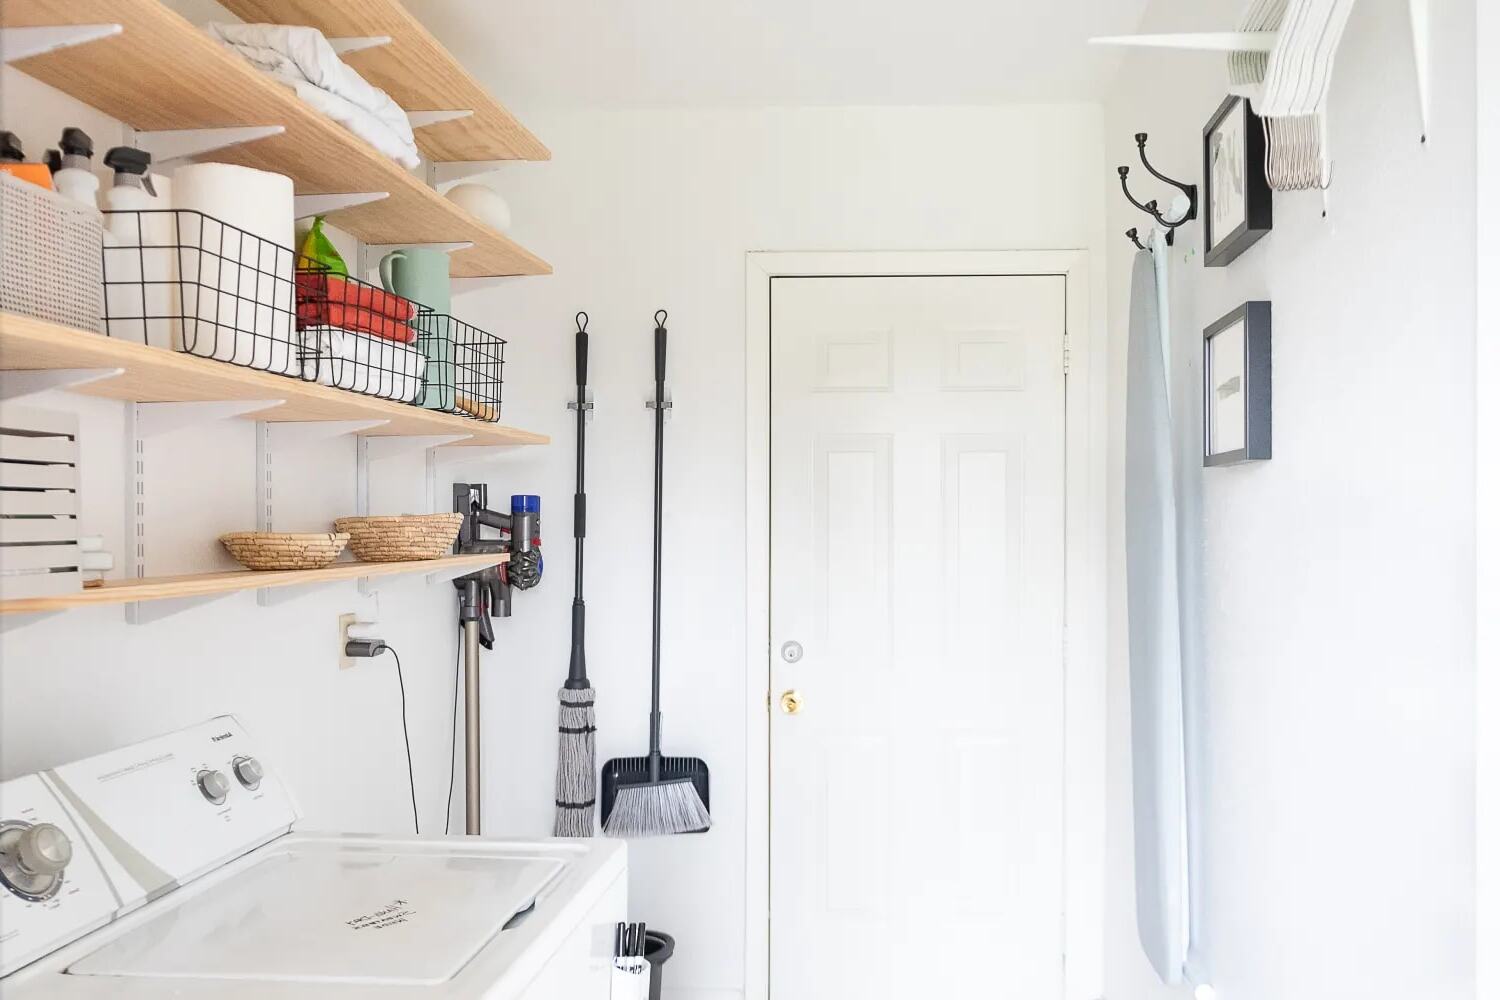
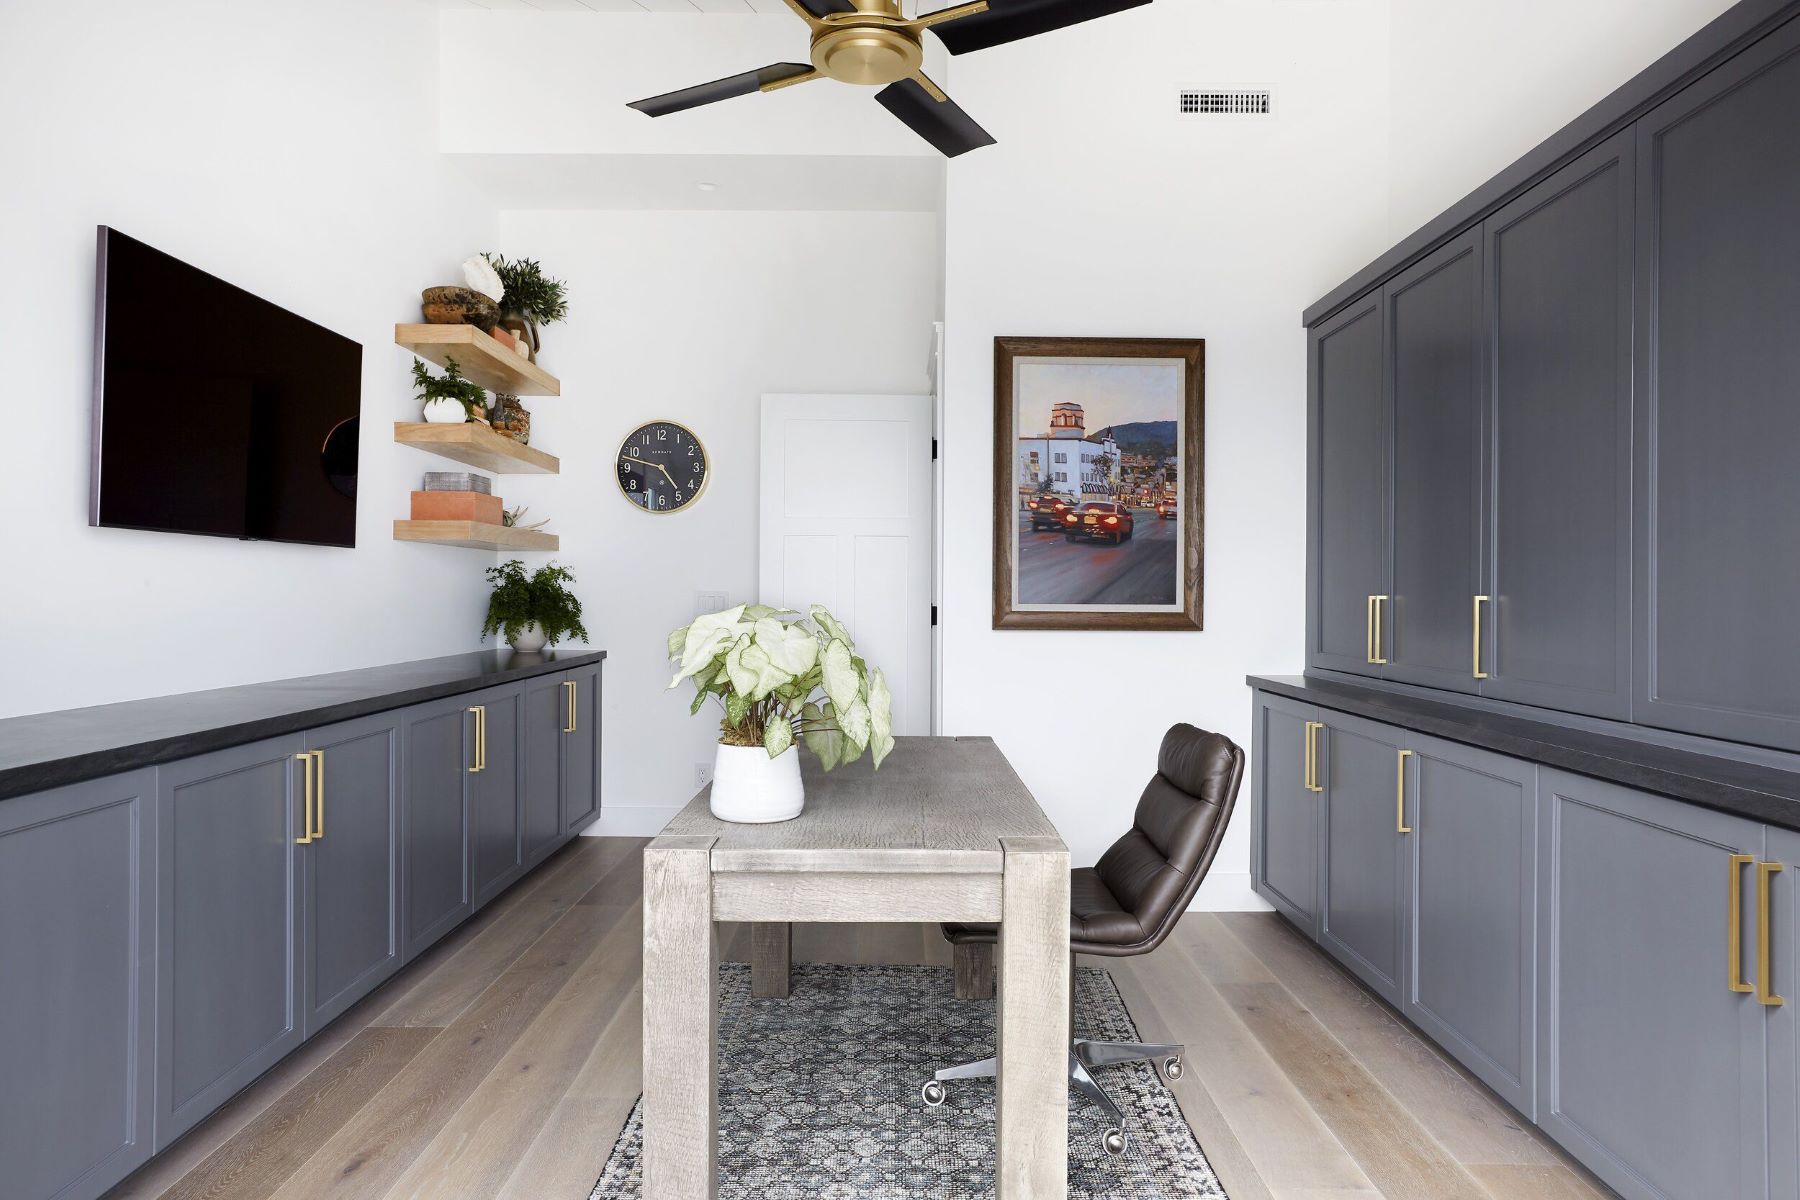
When designing a craft room, consider using a mix of open shelving and closed storage to keep supplies organized and easily accessible while maintaining a clean and stylish look.
Incorporate Proper Lighting
Proper lighting is essential in a craft room to ensure that you have optimal visibility while working on your projects. Good lighting not only improves accuracy but also prevents eye strain and enhances your overall crafting experience. Here are some tips on incorporating proper lighting into your craft room:
1. Natural Light: Make the most of natural light by positioning your work area near a window. Natural light is the most flattering and provides the best color accuracy. Choose a location where the sunlight won’t cast direct glare onto your work surface. Utilize light-colored curtains or blinds that can be easily adjusted to control the amount of light entering the room.
2. Overhead Lighting: Install bright, overhead lighting fixtures to illuminate the entire craft room. Consider using LED or daylight bulbs that mimic natural light. Ensure that the lighting is evenly distributed to prevent shadows on your work surface. If your craft room is large, consider incorporating multiple overhead lights for uniform lighting throughout the space.
3. Task Lighting: Task lighting is crucial for detailed work. Add adjustable desk lamps, floor lamps, or clamp lights to focus light directly on your work area. Position task lights so that they do not cast shadows or create glare on your workspace. Adjustable lamps with a flexible neck or gooseneck design allow you to direct the light precisely where you need it.
4. Light Temperature: Consider the color temperature of the light bulbs you choose. Bulbs that emit a cool white or daylight color temperature (around 5000K) provide a bright and invigorating light that closely resembles natural daylight. This type of light is ideal for activities that require color accuracy, such as painting or working with fabrics. Avoid using bulbs with warm tones (lower than 5000K) as they can distort colors.
5. Lighting Accessories: Enhance your craft room’s lighting with accessories such as light diffusers, magnifying lamps, or lighted magnifying glasses. A light diffuser can soften the harshness of bright lights and create a more pleasant ambiance. Magnifying lamps are useful for intricate tasks, providing both magnification and illumination, making it easier to see small details.
6. Flexible Lighting Options: To accommodate varying lighting needs, consider using dimmer switches or multiple lighting options on different circuits. This allows you to adjust the intensity of the lighting based on the specific task or time of day. Having control over the brightness of your craft room’s lighting enhances both functionality and ambiance.
Regularly assess your lighting setup to ensure that it meets your needs as your crafting activities or vision requirements may change over time. Experiment with different lighting options to find the combination that best suits your craft room and personal preferences.
Incorporating proper lighting into your craft room will greatly enhance your ability to work with precision and ease. It will minimize eye strain, improve color accuracy, and create a pleasant and inviting atmosphere. With the right lighting, you can enjoy your creative pursuits in a well-lit and inspiring space.
Utilize Wall Space for Organization
When designing your craft room, don’t overlook the potential of the walls for storage and organization. Utilizing wall space is a smart and efficient way to keep your supplies within reach while maximizing your workspace. Here are some tips for utilizing wall space for organization:
1. Install Shelves: Adding shelves to your walls is a versatile storage solution. Install floating shelves or wall-mounted shelves of various sizes and depths to hold bins, baskets, and containers for your supplies. Organize your materials by category or project and label the shelves accordingly. This not only keeps your supplies organized, but it also adds visual interest to your craft room.
2. Hang Pegboards: Pegboards are an excellent way to maximize vertical space in your craft room. Install a pegboard on a wall and use hooks or pegs to hang tools, scissors, rulers, and other frequently used items. This allows you to keep them easily accessible and visible, while also freeing up valuable workspace. You can even add small baskets or jars to hold smaller items like buttons or beads.
3. Magnetic Strips and Boards: Install magnetic strips or boards on your walls to hold metal tools, such as scissors, knives, or paper clips. This keeps them within reach and prevents them from getting lost in a cluttered drawer. Magnetic boards can also be used to display your works-in-progress or inspiring artwork.
4. Wall Pockets and Organizers: Optimize your wall space by using wall pockets or hanging organizers. These can be made of fabric, plastic, or even repurposed file holders. Wall pockets are perfect for storing papers, patterns, or craft magazines, while hanging organizers can hold small tools or supplies. Hang them near your work surface for easy access.
5. Wire Grid Panels: Wire grid panels are versatile and customizable organization solutions. These panels can be mounted on the wall and used with various accessories like hooks, clips, or baskets. You can easily move and rearrange the accessories to fit your changing needs.
6. Corkboards or Bulletin Boards: Install a corkboard or bulletin board on your wall to pin inspirational images, notes, or project ideas. This creates a visually appealing display while keeping your creative inspiration within sight. Use colorful push pins or clips to make it more visually appealing.
7. Wall-Mounted Cabinets or Cubbies: If you have limited floor space, consider installing wall-mounted cabinets or cubbies above your work surface. This provides additional storage for your supplies while keeping them easily accessible. You can choose cabinets with doors to keep the contents hidden or opt for open shelving for a more visually appealing display.
Make sure to plan and arrange the wall organization systems in a way that suits your workflow and preferences. Group similar items together and keep frequently used items within arm’s reach. Remember to regularly declutter and reorganize to maintain an efficient and productive craft room.
By utilizing wall space for organization, you’ll free up valuable workspace and keep your supplies neatly arranged and easily accessible. It not only adds functionality but also adds a decorative element to your craft room. With an organized and efficient craft room, you can focus on unleashing your creativity without the distraction of clutter.
Personalize Your Craft Room
Personalizing your craft room is all about creating a space that reflects your unique style and inspires your creativity. Adding personal touches and infusing your personality into the room can make it a more inviting and enjoyable place to work on your projects. Here are some tips on how to personalize your craft room:
1. Choose a Color Scheme: Select a color scheme that resonates with you and sets the mood for your craft room. Consider colors that inspire creativity and make you feel energized. Whether you prefer vibrant and bold hues or calming pastels, incorporating your favorite colors into the room will give it a personal touch.
2. Display Your Work: Showcase your finished projects or works-in-progress in your craft room. Hang or frame your favorite pieces on the walls to create a mini gallery. This not only adds a personal touch but also serves as a reminder of your creative accomplishments and helps spark further inspiration.
3. Inspirational Quotes and Artwork: Hang motivational quotes or artwork that inspires you. You can create custom artwork or print out quotes and frame them. Place them on your desk or on the walls to serve as a source of motivation and encouragement when you’re working on your crafts.
4. Incorporate Sentimental Objects: Add sentimental objects or items that hold special meaning to you. It could be family heirlooms, trinkets from your travels, or gifts from loved ones. These objects will not only bring joy and nostalgia but also make your craft room feel more personal and connected to your life outside of crafting.
5. DIY Decorations: Infuse your craft room with your own handmade decorations. Create wall art, decorative storage containers, or unique displays for your supplies. This allows you to showcase your crafting skills and adds a personal touch to the space.
6. Organize with Style: Incorporate stylish storage options that align with your personal aesthetic. Choose baskets, bins, and containers that not only serve a practical purpose but also complement the overall style and color scheme of your craft room. Personalize them with labels or decorative labels to make them uniquely yours.
7. Comfortable Work Area: Make your work area comfortable and inviting. Select a chair that offers good support and cushioning for long crafting sessions. Add cozy cushions or throws to make the space feel cozy and welcoming. The more comfortable you are, the more enjoyable and productive your crafting sessions will be.
8. Mood-Boosting Elements: Consider adding mood-boosting elements to your craft room. Incorporate plants or fresh flowers to bring nature indoors and add a touch of freshness. Scented candles or essential oil diffusers can create a calm and soothing ambiance. Play your favorite music or inspirational podcasts to set the mood and keep your creativity flowing.
Remember, the goal is to make your craft room a space that brings you joy and ignites your creativity. Infuse it with elements that resonate with you and reflect your unique style and personality. Personalizing your craft room will make it a space that you look forward to spending time in, where you can fully express yourself and create to your heart’s content.
Maintain a Clutter-Free Space
To truly enjoy and make the most of your craft room, it’s important to maintain a clutter-free space. A clutter-free environment not only improves your focus and productivity but also creates a calming and inviting atmosphere. Here are some tips to help you keep your craft room organized and clutter-free:
1. Regular Decluttering: Set aside time on a regular basis to declutter your craft room. Go through your supplies, materials, and tools and assess what items you truly need and use regularly. Donate or discard items that are no longer serving a purpose or are taking up unnecessary space.
2. Create Dedicated Storage Areas: Designate specific areas for different types of supplies and materials. Having a designated place for everything makes it easier to find what you need and ensures that items are returned to their proper place after use. Make use of shelves, drawer organizers, bins, and other storage solutions to keep your supplies organized and easily accessible.
3. Utilize Vertical Space: Maximize wall space by using hooks, pegboards, or wall-mounted organizers to hang tools, scissors, rulers, and other frequently used items. Keeping these items off the table or work surfaces helps free up space for your actual projects and prevents clutter from accumulating.
4. Create a System for Incoming Materials: Put a system in place for dealing with new materials or supplies that enter your craft room. Have a designated area to prioritize and sort through new items. This can help prevent them from getting scattered around the room and becoming clutter.
5. Clear Work Surfaces: Keep your work surfaces clear and free of unnecessary items. Only have the tools or materials necessary for your current project on the table or desk. Put away or store any other items that are not in use to prevent them from cluttering up your workspace.
6. Use Clear Containers or Labels: Store your supplies in clear containers or use labels to clearly mark the contents. This makes it easier to identify items without having to rummage through multiple containers, preventing unnecessary clutter and frustration.
7. Establish a Cleaning Routine: Implement a regular cleaning routine to keep your craft room tidy. This can include dusting surfaces, vacuuming or sweeping the floor, and organizing any stray items. A clean workspace allows you to start each crafting session with a fresh mindset.
8. Practice the “One In, One Out” Rule: For every new item you bring into your craft room, remove one item that you no longer need or use. This helps prevent accumulation of unnecessary items and ensures that your supplies remain manageable.
9. Keep a Donation Box: Have a designated box or bin to collect items that you no longer need or use. When the box is full, donate or pass on these items to someone who can benefit from them. This helps keep your craft room clutter-free while also benefiting others.
By maintaining a clutter-free space in your craft room, you’ll be able to work more efficiently, find items easily, and enjoy a more relaxed and creative environment. Regular organization and decluttering sessions ensure that your craft room remains a sanctuary for your creative pursuits, free from unnecessary distractions and overwhelming clutter.
Consider Ergonomic Design
When designing your craft room, it’s important to prioritize your physical comfort and well-being. Incorporating ergonomic design principles into your space can help prevent discomfort, pain, and injuries, allowing you to craft for longer periods without strain. Here are some tips to consider for an ergonomic craft room design:
1. Proper Seating: Invest in a comfortable and supportive chair that promotes good posture. Look for a chair with adjustable height, backrest, and armrests. Ensure that your feet are flat on the floor or use a footrest to maintain proper alignment. Consider using a chair with a cushion or gel seat pad for added comfort during longer crafting sessions.
2. Adequate Work Surface Height: Your work surface should be at a height that allows you to work comfortably without slouching or straining your back. Ensure that your elbows are at a 90-degree angle when your hands are on the table. If needed, use an adjustable desk or add risers to adjust the height to your specific needs.
3. Lighting Placement: Proper lighting is crucial not only for visibility but also for preventing eye strain. Position your lighting sources to minimize glare and shadows on your work surface. Consider using task lighting that can be adjusted or directed to specific areas to ensure that you have adequate lighting for intricate work.
4. Organize Supplies Within Reach: Place frequently used supplies, tools, and materials within easy reach to minimize repetitive reaching and stretching. This reduces the risk of strain or injury. Consider using drawer organizers, wall-mounted storage, or rolling carts to keep your essentials nearby.
5. Use Tools and Equipment with Ergonomic Design: Look for tools and equipment that are specifically designed with ergonomic features. This includes tools with cushioned grips, adjustable handle lengths, or tools that reduce strain on your wrists. Ergonomic craft scissors, rotary cutters, and sewing machine accessories are examples of specialized tools that can make your crafting tasks more comfortable.
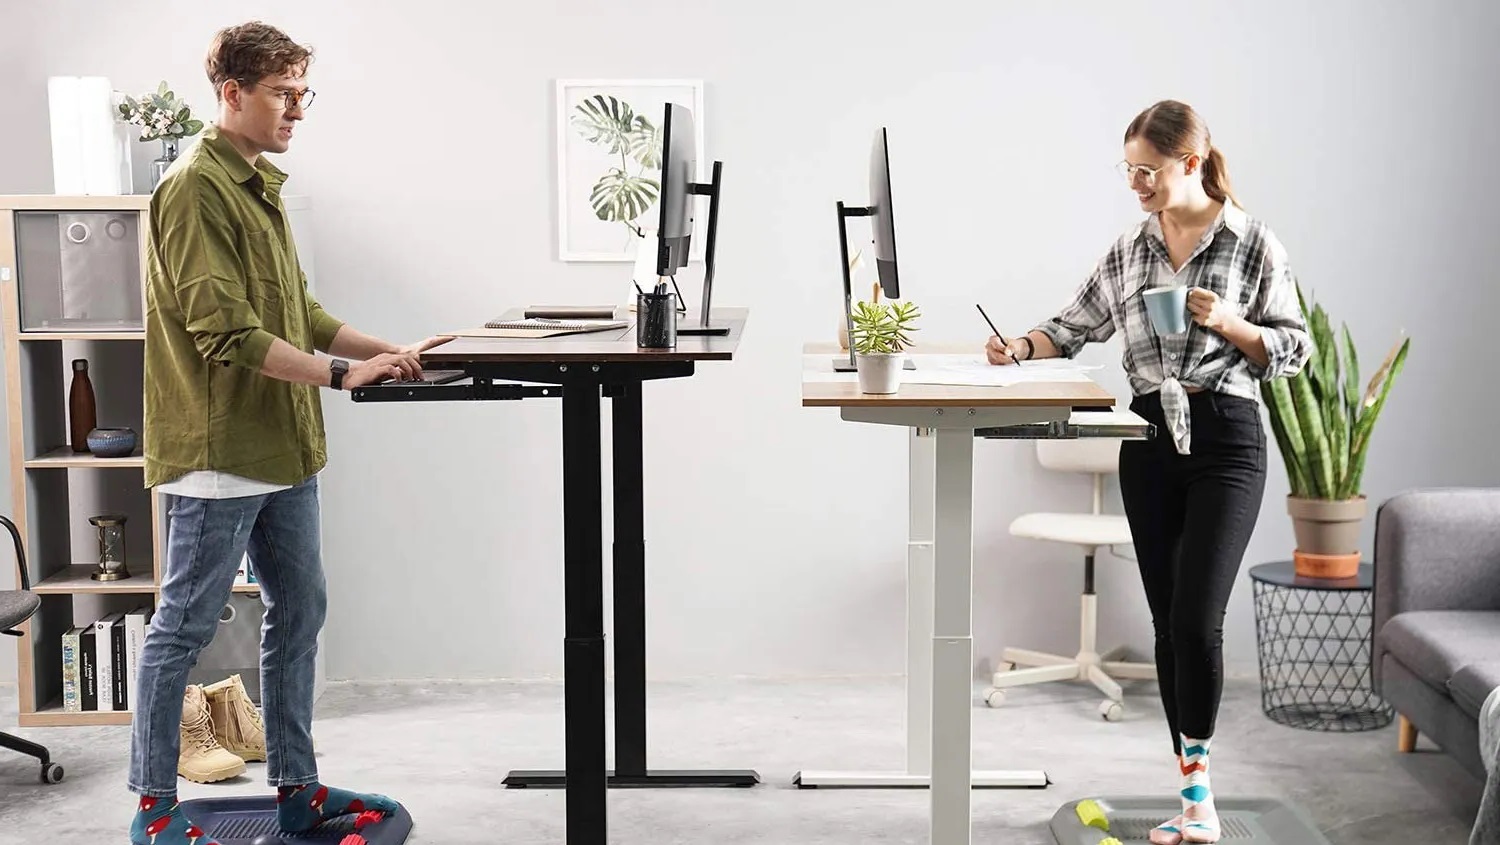
6. Consider Anti-Fatigue Mats: If you spend long hours standing while crafting, consider using anti-fatigue mats. These mats provide cushioning for your feet and reduce the pressure on your joints and muscles. They can help alleviate fatigue and discomfort associated with prolonged standing.
7. Organize Cables and Cords: Keep your craft room tidy and eliminate tripping hazards by organizing cables and cords. Use cable management solutions such as cord clips or cable sleeves to keep cords out of your way and prevent them from tangling. This ensures a safer and more ergonomic workspace.
8. Take Breaks and Stretch: Remember to take regular breaks during your crafting sessions. Get up and stretch your body to release tension and prevent stiffness. Incorporate stretching exercises that target your neck, shoulders, wrists, and back to prevent muscle strain.
9. Adjust Your Work Position: Vary your work positions to avoid prolonged strain on a particular area of your body. Sit or stand in different positions throughout your crafting session to distribute the workload and reduce the risk of muscle fatigue or discomfort.
10. Listen to Your Body: Pay attention to any signs of discomfort or strain in your body. If you experience pain or discomfort, reassess your posture and workflow. Make adjustments as needed to create a more ergonomic and comfortable working environment.
By considering ergonomic design principles in your craft room, you prioritize your physical well-being and create a space that supports your creative endeavors. A comfortable and ergonomically optimized craft room allows you to immerse yourself in your projects for longer periods, with reduced strain and increased joy in your crafting experience.
Conclusion
Designing a craft room that is both practical and stylish is essential for creating a space that inspires and supports your creativity. By following the tips and ideas outlined in this article, you can transform any room or corner into an organized and inviting craft haven.
Starting from choosing the right room and considering your crafting needs, to organizing your supplies, creating a functional work surface, and incorporating proper lighting, each step plays a crucial role in optimizing your craft room. Personalizing the space with your favorite colors, artwork, and sentimental objects adds an extra layer of inspiration and makes it truly your own.
By maintaining a clutter-free space and incorporating ergonomic design principles, you ensure that your craft room is not only aesthetically pleasing but also functional and comfortable. Proper organization, storage solutions, and efficient use of wall space help keep your supplies within reach and your workspace tidy.
Remember, your craft room should be a place where you can let your imagination run wild and bring your creative ideas to life. It’s a space that reflects your personality and provides a sanctuary for self-expression. By designing a craft room that meets your specific needs and brings you joy, you create an environment where your creativity can flourish.
So, whether you have a dedicated room or a small corner, don’t underestimate the power of a well-designed craft space. Take the time to plan and implement the ideas discussed in this article, and watch as your craft room becomes a source of inspiration, organization, and productivity.
Now, armed with these 10 craft room ideas, it’s time to roll up your sleeves, let your creativity soar, and begin transforming your craft room into a practical yet stylish haven that will take your crafting to new heights! Enjoy the process, embrace your creativity, and have fun crafting in your beautifully designed space.
Frequently Asked Questions about Craft Room Ideas: 10 Ways To Create A Practical Yet Stylish Space
Was this page helpful?
At Storables.com, we guarantee accurate and reliable information. Our content, validated by Expert Board Contributors, is crafted following stringent Editorial Policies. We're committed to providing you with well-researched, expert-backed insights for all your informational needs.
0 thoughts on “Craft Room Ideas: 10 Ways To Create A Practical Yet Stylish Space”