Articles
17 Do-It-Yourself Outdoor Project Ideas
Modified: October 20, 2024
Looking for some outdoor project ideas? Check out these 17 do-it-yourself articles that will inspire you to transform your outdoor space.
(Many of the links in this article redirect to a specific reviewed product. Your purchase of these products through affiliate links helps to generate commission for Storables.com, at no extra cost. Learn more)
Introduction
Welcome to the world of do-it-yourself outdoor projects! There’s something incredibly fulfilling about rolling up your sleeves, grabbing your tools, and creating something beautiful and functional for your outdoor space. Whether you have a sprawling lawn, a cozy patio, or a tiny balcony, there are endless possibilities for DIY projects that will transform your outdoor area into an oasis of relaxation and entertainment.
Not only will these projects provide you with a sense of accomplishment, but they will also save you money compared to buying pre-made outdoor furniture and accessories. Plus, you’ll have the freedom to customize every aspect of your project to suit your personal style and preferences.
So, if you’re ready to unleash your creative side and enhance your outdoor living experience, let’s dive into 17 amazing do-it-yourself outdoor project ideas that will inspire and delight you.
Key Takeaways:
- Unleash your creativity and enhance your outdoor living experience with 17 amazing DIY outdoor project ideas, from fire pits to meditation spaces, creating a personalized and enchanting outdoor oasis.
- Transform your outdoor space into a haven of relaxation, entertainment, and culinary delight with DIY projects like fire pits, pizza ovens, seating areas, and water features, adding value and personalized charm to your home.
DIY Outdoor Fire Pit
There’s nothing quite like the crackling sound of a fire and the warmth it provides on a chilly evening. With a DIY outdoor fire pit, you can enjoy cozy nights with family and friends right in your backyard.
To build your own fire pit, start by selecting a suitable location. Make sure it’s a safe distance away from any structures or flammable materials. Next, gather your materials, including stones or bricks for the fire pit walls, gravel for the base, and a metal fire ring to contain the fire.
Begin by marking the area where you want to build your fire pit. Dig a shallow hole around 12 inches deep and slightly wider than the fire ring diameter. This will serve as the foundation for your fire pit.
Once the hole is dug, place a layer of gravel at the bottom to ensure proper drainage. Then, carefully arrange the stones or bricks around the perimeter of the hole, stacking them securely. You can use a construction adhesive to reinforce the structure.
Continue building up the walls of the fire pit until you reach your desired height. Make sure the stones or bricks are tightly packed to prevent any gaps or instability.
Finally, insert the metal fire ring into the center of the pit. This will help contain the flames and provide a safe barrier between the fire and the surrounding stones or bricks.
Once your DIY outdoor fire pit is complete, it’s important to follow safety precautions when using it. Always have a fire extinguisher or a bucket of water nearby, never leave the fire unattended, and remember to fully extinguish the flames before leaving the area.
Now, you can gather around your newly built fire pit, roast marshmallows, and enjoy the cozy ambiance it creates. It’s the perfect addition to any outdoor space, providing warmth and a focal point for gatherings.
Build Your Own Outdoor Pizza Oven
If you love the delicious taste of freshly baked pizza, why not take it to the next level by building your very own outdoor pizza oven? With a DIY outdoor pizza oven, you can achieve that authentic wood-fired flavor right in your backyard.
Building a pizza oven may sound intimidating, but with the right materials and guidance, it can be a rewarding and enjoyable project. The most common type of DIY outdoor pizza oven is made from clay or concrete materials.
To begin, decide on the size and design of your oven. You can choose between a barrel-shaped oven, a dome-shaped oven, or a rectangular brick oven. Each style has its own unique advantages and aesthetics, so pick one that suits your preferences.
Next, gather the necessary materials, including fire bricks, fire clay, refractory cement, insulation material, and a metal door for the oven opening. You may also need a sturdy base to support the weight of the oven.
Start by creating the foundation for your oven. This can be a concrete slab or a raised platform made of bricks or stones. Ensure that the base is level and stable.
Then, begin laying the fire bricks to form the cooking surface inside the oven. Use fire clay and refractory cement to secure the bricks in place, creating a solid and durable base for your pizzas.
Next, construct the dome-shaped structure by layering fire bricks. This will provide insulation and retain heat for optimal cooking conditions. Finish off the dome by adding a layer of insulation material, such as ceramic fiber or perlite concrete mix.
Once the structure is complete, install the metal door to seal the oven opening. This will help control the airflow and maintain the desired temperature while cooking.
Before using your outdoor pizza oven, make sure to cure it by gradually increasing the temperature over several days. This process helps to strengthen the oven and removes any residual moisture.
Now, you’re ready to fire up the oven and start baking delicious homemade pizzas. The wood-fired heat will give your pizzas a crispy crust and smoky flavor that simply cannot be replicated in a regular oven.
Invite your friends and family over for a pizza party and impress them with your culinary skills. With your DIY outdoor pizza oven, you’ll be the talk of the town and enjoy countless memorable meals under the open sky.
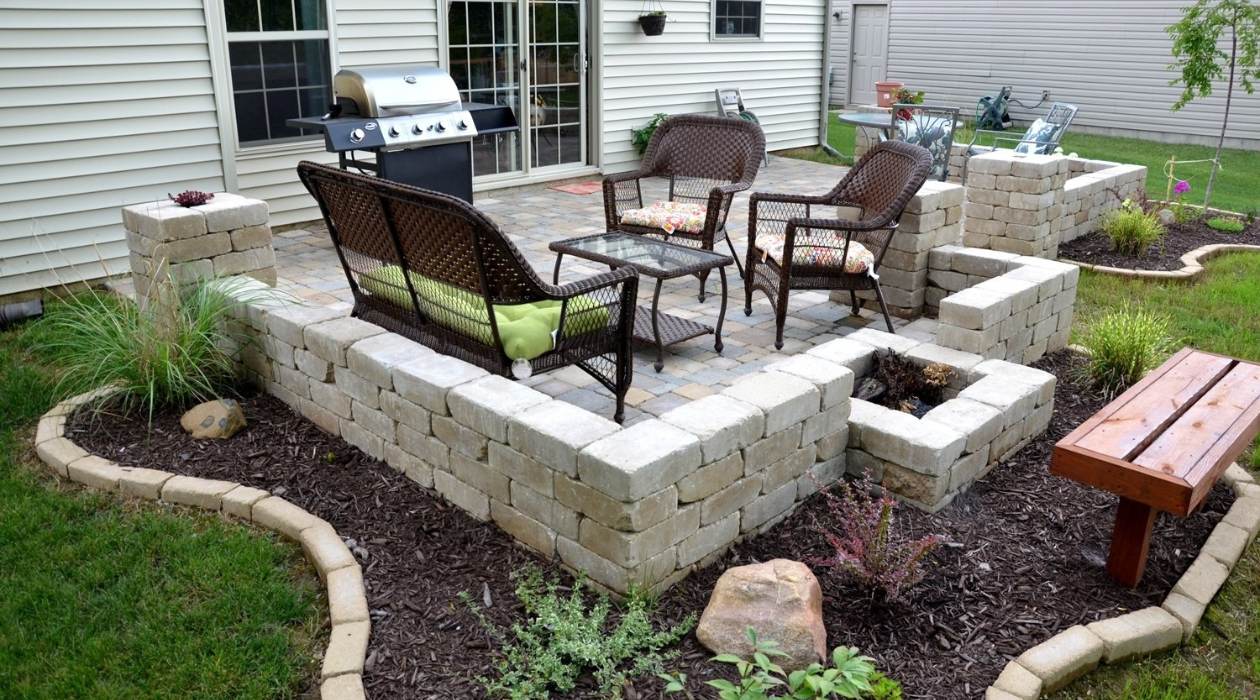
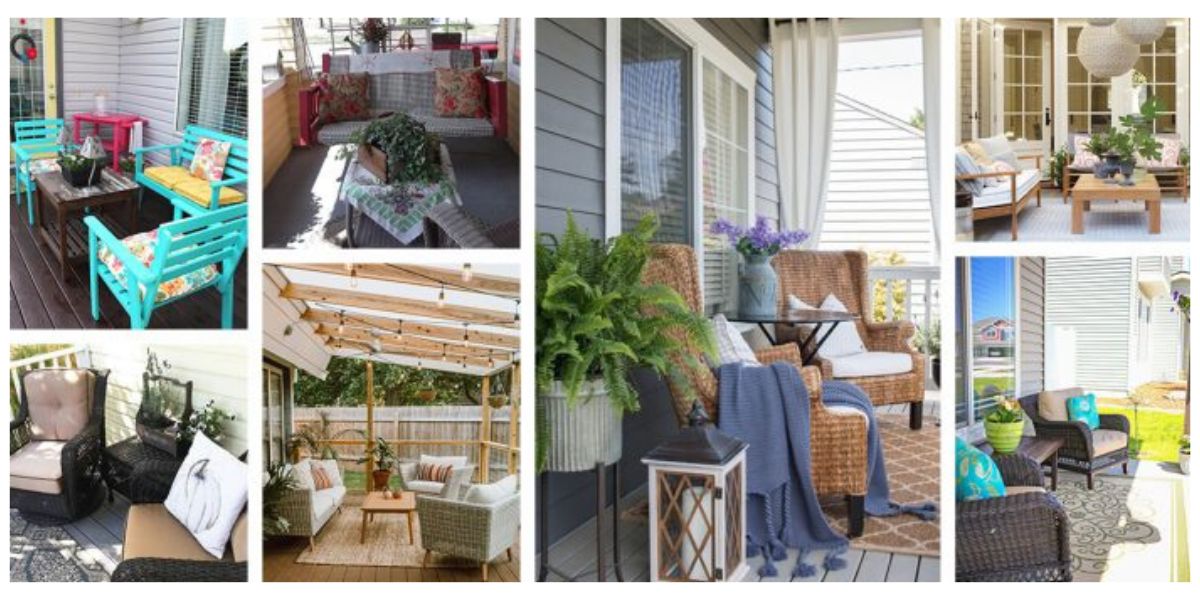
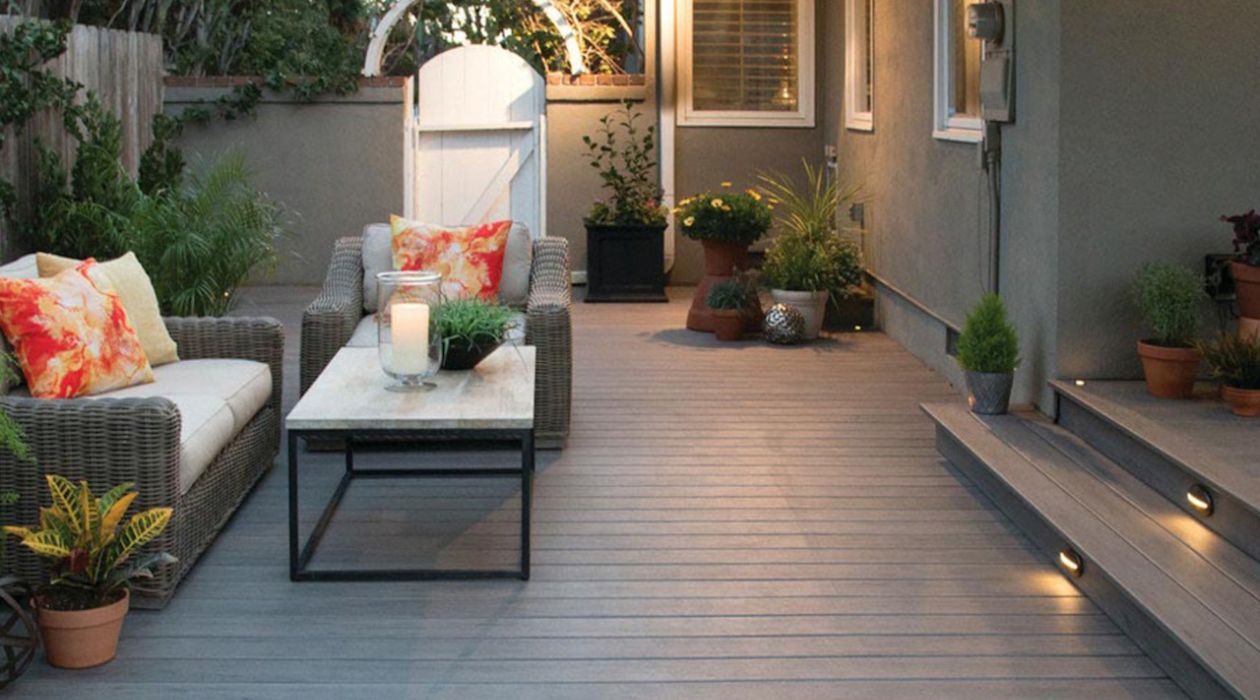
Create a Cozy Outdoor Seating Area
Transform your outdoor space into an inviting retreat by creating a cozy seating area. Whether you have a sprawling backyard or a small balcony, there are numerous DIY projects that can help you design a comfortable and stylish outdoor seating area.
Start by assessing the available space and determining how you want to utilize it. Do you envision a lounge area with comfortable chairs and a coffee table, or perhaps a dining area with a table and chairs for outdoor meals?
Once you’ve identified the purpose of your seating area, it’s time to gather the necessary furniture and accessories. Look for weather-resistant materials like teak, aluminum, or resin wicker that can withstand outdoor elements.
If you have a budget, you can purchase pre-made outdoor furniture. However, if you prefer a more personalized touch and enjoy DIY projects, consider building your own seating area using pallets, repurposed materials, or even concrete blocks.
For a simple seating option, arrange pallets in a desired configuration and place cushions or outdoor pillows on top for comfort. Alternatively, you can build a bench using cinder blocks for a more industrial look.
Enhance the ambiance of your outdoor seating area by incorporating lighting elements. Hang string lights or install solar-powered lanterns to create a warm and inviting atmosphere. Candles or torches can also add a touch of cozy ambiance.
Don’t forget to add some personal touches to make your seating area feel like an extension of your indoor living space. Decorative cushions, throw blankets, and outdoor rugs can add comfort and style to the area. You can also add potted plants or hanging baskets to bring a touch of nature to your outdoor oasis.
To provide shade and protection from the elements, consider installing a pergola, canopy, or large umbrella over your seating area. This will ensure that you can enjoy your outdoor space even during sunny or rainy days.
Lastly, don’t overlook the importance of privacy. If you have neighbors or nearby buildings that overlook your outdoor area, incorporate privacy screens, trellises, or tall plants to create a sense of seclusion and tranquility.
Creating a cozy outdoor seating area will not only enhance the aesthetics of your outdoor space but also provide a place to relax, unwind, and enjoy the beauty of nature. Whether you’re hosting a gathering or simply enjoying a quiet afternoon, your DIY seating area will become a favorite spot for relaxation and quality time spent outdoors.
Construct a DIY Vertical Garden
If you have limited space in your outdoor area or want to add a unique and eye-catching element, a vertical garden is a perfect solution. This innovative DIY project allows you to create a lush and vibrant display of plants and flowers on a vertical surface, such as a wall or fence.
Building a DIY vertical garden is not only a great way to maximize your space but also brings a touch of nature and greenery to any outdoor setting.
To start, choose a location for your vertical garden. It can be an exterior wall, a fence, or even a free-standing structure like a pallet or a trellis. Ensure that the chosen surface receives adequate sunlight and is structurally sound to support the weight of the plants.
The materials needed for your vertical garden will depend on the specific design you choose. Popular options include using a pallet, hanging pots or containers, or creating a modular or pocketed system.
If you’re using a pallet, start by preparing it for planting by covering the back and sides with landscape fabric or a sturdy plastic sheet. This will prevent soil erosion and maintain the integrity of the pallet.
Next, fill the pallet with a lightweight soil mix suitable for vertical gardening. Insert plants or seedlings into the openings between the slats and secure them firmly with additional soil. You can use a variety of plants, including herbs, succulents, or flowering plants, depending on your preferences and the amount of sunlight available.
If you’re using hanging pots or containers, choose sturdy pots with good drainage holes. Attach hooks or brackets to the chosen surface and hang the pots at varying heights for an artistic and dynamic display.
Another option is to create a modular or pocketed system using fabric or felt pockets attached to a frame. This allows for a greater variety of plants and provides excellent drainage. Fill each pocket with soil and insert your chosen plants.
When watering your vertical garden, pay attention to the specific needs of the plants you’ve selected. Some plants may require more frequent watering than others, so be mindful of their individual requirements.
As your vertical garden grows, trim and prune the plants regularly to maintain a neat and attractive appearance. Additionally, fertilize the plants periodically with a slow-release fertilizer or organic compost to promote healthy growth.
Not only does a DIY vertical garden add beauty and visual interest to your outdoor space, but it also helps improve air quality, reduces noise, and provides a habitat for beneficial insects and birds. It’s a sustainable and creative way to bring nature closer to your home.
Whether you have a small balcony or a large backyard, you can create a stunning vertical garden that will be the envy of your neighbors and a source of pride for you. Get started on this unique and eco-friendly project and watch your outdoor space come to life with the beauty of a vertical garden.
Build a DIY Outdoor Bar
Bring the party outdoors by building your very own DIY outdoor bar. Whether you enjoy entertaining guests or simply want a convenient spot to enjoy a refreshing beverage, an outdoor bar adds both functionality and style to your outdoor space.
To get started, determine the location for your outdoor bar. It can be on your patio, near the pool, or as a standalone structure in your backyard. Consider factors like access to electricity, plumbing, and shelter from the elements.
Next, gather the necessary materials for your outdoor bar. This can include wooden boards for the bar counter, treated lumber for the frame, screws, nails, and a waterproof sealant or paint to protect the wood from weather damage.
If you have basic carpentry skills, you can build a simple bar using a pre-made plan or your own design. Start by constructing the frame of the bar using the treated lumber. This will provide the structure and stability for the bar counter.
Attach the wooden boards to the frame, creating the countertop of your outdoor bar. Ensure that the boards are securely fastened and level. You can add a footrest along the front of the bar for added comfort.
Consider adding shelves or compartments beneath the bar counter for storage. This will allow you to keep bar accessories, supplies, and beverages easily accessible and organized.
Once the basic structure is complete, apply a waterproof sealant or paint to the wood to protect it from moisture and UV rays. Choose a finish that complements the overall design and style of your outdoor space.
You can also personalize your outdoor bar by adding creative elements, such as a built-in cooler, a sink, or a built-in grill. These additions will enhance the functionality and convenience of your outdoor bar.
Complete the look of your DIY outdoor bar by accessorizing it with bar stools, outdoor lighting, and decorative elements like tiki torches or string lights for a festive touch.
Finally, stock your outdoor bar with your favorite beverages, glassware, and cocktail tools, and get ready to enjoy the camaraderie and relaxation of your own outdoor bar.
Whether you’re hosting a backyard barbecue, enjoying a quiet evening with a drink, or celebrating a special occasion, your DIY outdoor bar will be the perfect gathering spot. Cheers to your creativity and craftsmanship!
Design Your Own Outdoor Kitchen
Take your culinary skills outside by designing your own outdoor kitchen. Creating a dedicated cooking and dining space in your backyard allows you to enjoy the benefits of outdoor living while expanding your culinary capabilities.
When designing your outdoor kitchen, the first step is to determine the layout and placement of the various components. Consider factors such as the size of your outdoor space, the proximity to your indoor kitchen, and the flow of traffic.
Next, choose the appliances and fixtures that will best suit your cooking needs and preferences. Popular options for outdoor kitchens include a built-in grill, a sink with running water, a refrigerator, and even a pizza oven or a smoker.
When selecting appliances, opt for those specifically designed for outdoor use. They are built to withstand the elements and provide the durability and performance needed for outdoor cooking.
Once you have decided on the appliances, it’s time to think about the layout and materials for the countertops and cabinetry. Look for materials that are weather-resistant and easy to clean, such as granite, stainless steel, or tile.
Consider the storage needs for your outdoor kitchen. Include cabinets, drawers, and shelves to keep your cooking utensils, dishes, and ingredients organized and easily accessible.
To create an inviting and comfortable space, incorporate a dining area into your outdoor kitchen design. This can be a countertop overhang with bar stools, a dining table and chairs, or even a cozy nook with a built-in bench and a table.
Enhance the ambiance of your outdoor kitchen by incorporating lighting elements. Install task lighting above the cooking and prep areas, as well as ambient lighting to create a warm and inviting atmosphere for dining and entertaining.
Don’t forget about the importance of shade in your outdoor kitchen. Install a pergola, awning, or patio umbrella to provide protection from the sun while you’re cooking or enjoying a meal.
Lastly, add personal touches to your outdoor kitchen to make it feel like an extension of your indoor living space. Decorate with potted plants, outdoor rugs, and other decorative elements that reflect your style and create a welcoming environment.
Designing your own outdoor kitchen allows you to fully customize the space to fit your cooking and entertaining preferences. It provides a versatile and stylish area for preparing delicious meals and enjoying memorable moments with family and friends.
So roll up your sleeves, start planning, and soon you’ll be cooking up fantastic feasts in your very own outdoor kitchen.
Build a DIY Pergola or Gazebo
Create a stunning focal point in your outdoor space by building your own DIY pergola or gazebo. These structures not only add visual interest and architectural appeal but also provide a shaded area for relaxation and outdoor gatherings.
First, decide whether you want to build a pergola or a gazebo. A pergola consists of an open framework with overhead supports, while a gazebo is a fully enclosed structure with a solid roof and walls.
Once you’ve made your choice, gather the necessary materials, including pressure-treated lumber, post anchors, screws, and a level. You may also need additional materials like concrete, if using concrete footings, and decorative elements such as lattice or fabric for added privacy and style.
Begin by selecting the ideal location for your pergola or gazebo. Ensure that the ground is level and free from any obstructions or utilities such as plumbing or electrical lines.
If you’re building a pergola, start by digging post holes at each corner of the structure. The depth and diameter of the holes will depend on the size and weight of the pergola. Install the post anchors and secure the posts in place using concrete or compacted soil.
Next, construct the framework of the pergola by attaching the beams and rafters to the posts. Use a level to ensure that everything is aligned and square.
For a gazebo, follow a similar process of digging post holes and installing post anchors. However, ensure that you have enough posts to support the walls and roof of the gazebo.
Once the framework is complete, add decorative elements such as lattice, fabric, or climbing plants to enhance the aesthetic appeal of your pergola or gazebo.
If desired, you can also add a roof to your pergola using materials like wood slats, polycarbonate panels, or fabric. A roof provides extra shade and protection from the elements.
To complete your DIY pergola or gazebo, consider adding comfortable seating, outdoor lighting, and other decorative elements. This will transform the structure into a cozy and inviting space for relaxation, entertaining, or enjoying meals with family and friends.
Building your own pergola or gazebo allows you to customize the design and size to suit your specific needs and style preferences. It’s a rewarding project that adds both beauty and functionality to your outdoor space.
So, get ready to enjoy peaceful moments under the shade of your DIY pergola or gazebo, creating lasting memories in your own backyard oasis.
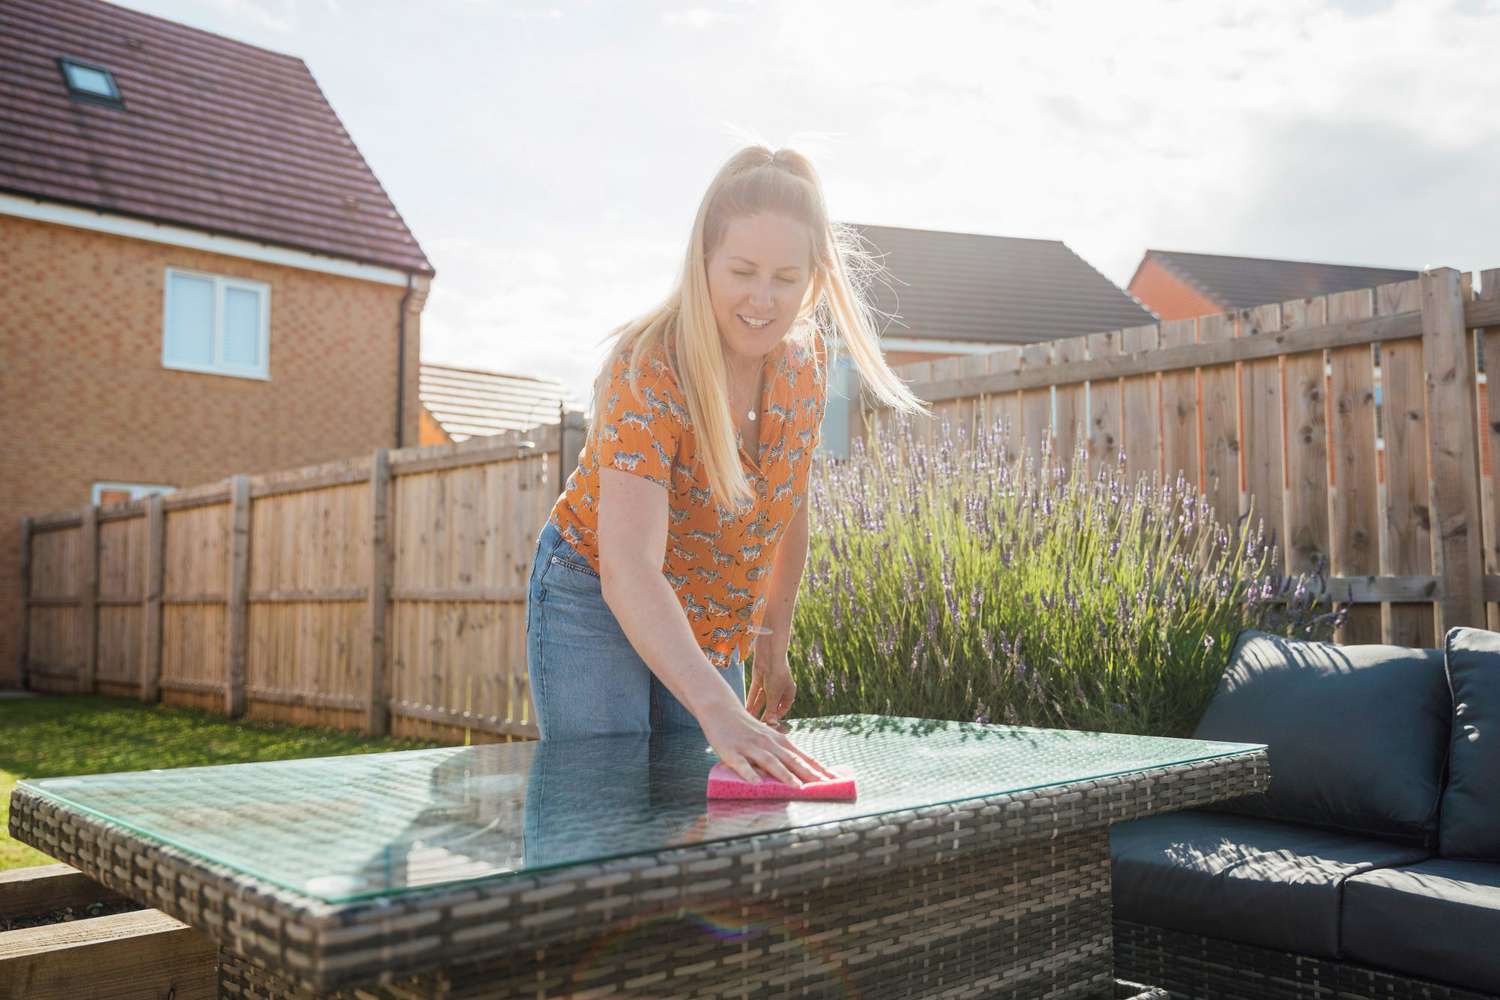
Create a Rustic Outdoor Dining Area
Bring the charm and warmth of rustic style to your outdoor space by creating a rustic outdoor dining area. This inviting and cozy setting will allow you to enjoy meals al fresco while surrounded by natural beauty and rustic aesthetics.
To start creating your rustic outdoor dining area, choose a suitable location. It can be a patio, a deck, or a designated area in your garden. Consider the size of the space and ensure it can accommodate a dining table and chairs comfortably.
When selecting furniture, opt for pieces that embody the rustic style. Look for materials like reclaimed wood, wrought iron, or distressed finishes. A large, sturdy farmhouse-style table with rough-hewn edges will anchor the space and set the rustic tone.
Pair your dining table with mismatched chairs made from wood, wrought iron, or even repurposed items like wooden crates or old barrels. The mix of different styles and finishes adds to the rustic charm.
To enhance the rustic ambiance of your outdoor dining area, incorporate natural elements. Use burlap or linen table runners, woven placemats, and ceramic or wooden dishware. Rustic, unrefined textures and earthy colors blend seamlessly with the outdoor environment.
Add a touch of greenery to your dining area by placing potted plants, herbs, or even a small herb garden on the table or nearby surfaces. Fresh herbs can be used to season your meals, and the green foliage adds a vibrant and organic feel to the space.
Consider creating a focal point or accent wall using reclaimed wood, stacked stone, or even a trellis covered in climbing plants. This element will add depth and character to the rustic ambiance and create a cozy atmosphere for dining.
Install soft, warm lighting to create an intimate and magical atmosphere in your rustic outdoor dining area. Hang string lights overhead, place lanterns on tables, or use candles in hurricane lanterns for a soft and inviting glow.
Finally, don’t forget the importance of comfort. Add seat cushions and outdoor pillows to the chairs to make your guests feel relaxed during mealtime. Outdoor rugs can also provide a soft and cozy underfoot feel, especially on cooler evenings.
Creating a rustic outdoor dining area allows you to reconnect with nature while enjoying meals with loved ones. The warm and inviting atmosphere will invite conversation, laughter, and memorable moments in your own rustic-inspired outdoor retreat.
Read more: How To Do Home Repairs Yourself
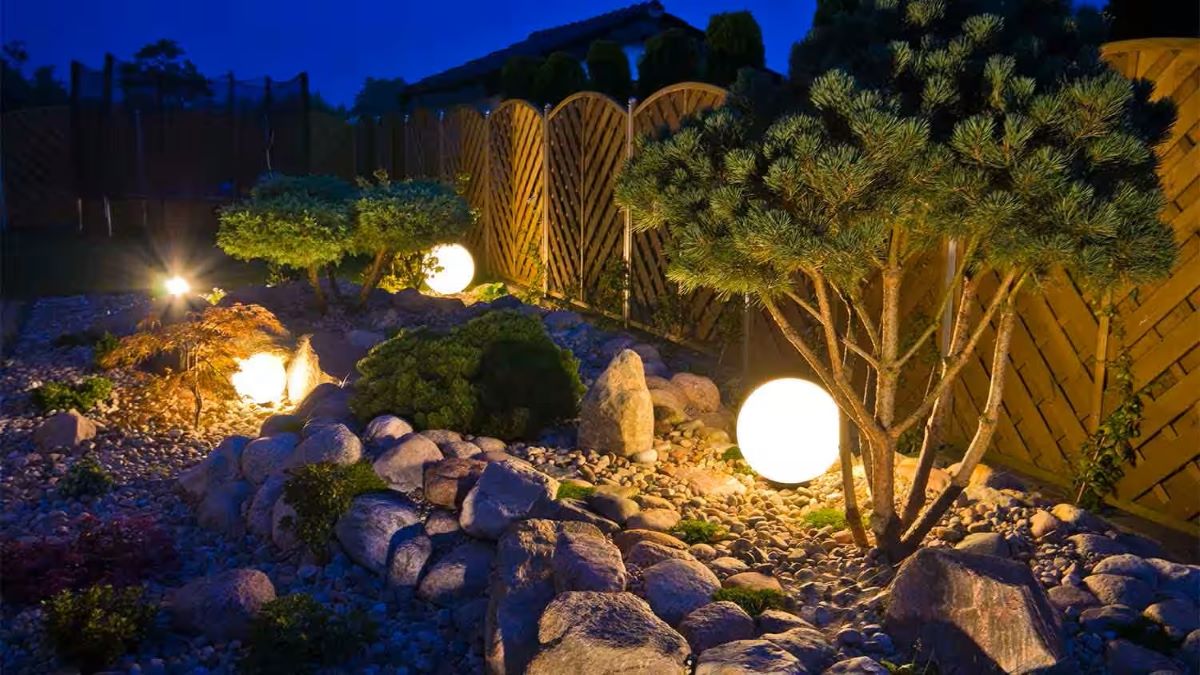
Install Outdoor Lighting
Enhance the beauty and functionality of your outdoor space by installing outdoor lighting. Proper lighting not only adds ambiance and visual appeal, but it also improves safety and extends the usability of your outdoor areas into the evening hours. Whether you have a sprawling yard or a cozy patio, outdoor lighting can transform your space into a nighttime oasis.
Before you start installing outdoor lighting, assess the areas you want to illuminate and determine your goals. Do you want to highlight specific architectural features, create a warm and inviting ambiance, or illuminate pathways and stairs for safety?
There are various types of outdoor lighting to consider, including wall-mounted fixtures, pathway lights, spotlights, string lights, and solar-powered options. You can also choose between LED or traditional incandescent bulbs, depending on your preferences.
One of the easiest ways to add outdoor lighting is by installing wall-mounted fixtures on the exterior walls of your home or other structures. These fixtures can be positioned strategically to create a welcoming glow and provide functional lighting for areas such as entryways, patios, or decks.
Pathway lights are another popular option that adds an inviting ambiance while ensuring safe navigation. These low-level lights can be installed along walkways, driveways, or around landscaping features.
For highlighting specific architectural elements or focal points in your outdoor space, use spotlights. These powerful lights can be directed to draw attention to trees, statues, or other outdoor decor pieces.
String lights are a versatile and charming option for creating a festive atmosphere. They can be hung between trees, along fences, or across a pergola to add a soft and enchanting glow.
If you prefer an eco-friendly and cost-effective option, consider solar-powered outdoor lighting. These lights absorb sunlight during the day and automatically turn on at night, eliminating the need for electrical wiring.
When installing outdoor lighting, make sure to follow safety precautions. Use weatherproof fixtures and ensure that electrical connections are properly sealed. It’s also a good idea to consult a professional electrician if you’re unsure about any electrical work.
Experiment with different lighting techniques to create depth and visual interest. Consider uplighting, downlighting, or cross-lighting to achieve the desired effects.
Lastly, don’t forget about controlling your outdoor lighting. Install dimmers or timers to adjust the intensity and set a schedule for the lights to automatically turn on and off, providing convenience and energy efficiency.
By installing outdoor lighting, you can extend the enjoyment of your outdoor space well into the evening hours. Whether you’re hosting a gathering, enjoying a quiet evening alone, or simply enhancing the aesthetics of your outdoor area, proper lighting will create a welcoming and beautiful ambiance.
When working on outdoor DIY projects, always make sure to wear appropriate safety gear such as gloves, goggles, and sturdy footwear to protect yourself from potential hazards.
Build a DIY Outdoor Shower
Experience the refreshing sensation of showering in the great outdoors by building your own DIY outdoor shower. It’s a practical and fun addition to your outdoor space, allowing you to rinse off after a swim, cool down on a hot day, or simply enjoy a unique bathing experience.
To start building your DIY outdoor shower, you’ll need to consider a few key factors. First, determine the location for your shower. Choose an area that offers privacy and easy access to water and drainage. It could be near a pool, a beach, or even in a secluded corner of your backyard.
Next, think about the materials you’ll use. Opt for weather-resistant materials such as stainless steel, copper, or treated wood that can withstand outdoor elements. You’ll also need plumbing fixtures, such as a showerhead, mixing valve, and pipes.
Begin by installing the necessary plumbing connections for your outdoor shower. If you have existing plumbing, you can connect your outdoor shower to the water supply and drainage system. Otherwise, consider using a hose connection or installing a separate water source.
Once the plumbing is in place, build the framework for your outdoor shower. Use treated wood or other suitable materials to construct a sturdy structure. This can be as simple as a basic frame or as elaborate as a fully enclosed stall.
Next, install the showerhead and other fixtures according to your desired design. Consider options like rainfall showerheads, handheld sprayers, or even misting systems for a unique and refreshing experience.
It’s important to ensure the privacy of your outdoor shower. Use walls or curtains made from materials like bamboo, fabric, or privacy screens to create a sense of seclusion. This will allow you to enjoy your shower with peace of mind.
Consider adding some finishing touches to enhance the aesthetics and functionality of your outdoor shower. Install hooks or shelves to hang towels and bathing essentials. You can also include a non-slip mat or pavers for safety.
Finally, test your outdoor shower by turning on the water and checking for proper drainage. Make any necessary adjustments or repairs to ensure that everything is working correctly.
Now you can enjoy the luxury of showering under the open skies. Whether you’re rinsing off after a swim, washing away the day’s stresses, or simply embracing a unique and invigorating bathing experience, your DIY outdoor shower will provide an oasis of relaxation in your own backyard.
Construct a DIY Hammock Stand
Experience the ultimate relaxation and comfort by constructing your own DIY hammock stand. Having a sturdy and functional hammock stand allows you to enjoy the gentle sway and blissful moments of lounging in a hammock without the need for trees or other supports. It’s the perfect addition to any outdoor space, whether it’s a backyard, patio, or even a balcony.
To start building your DIY hammock stand, gather the necessary materials. You will need pressure-treated lumber for the base and posts, galvanized screws or bolts for secure connections, and concrete or gravel for stability.
Begin by measuring and cutting the lumber for the base of your hammock stand. The dimensions will vary depending on the size of your hammock, but aim for a length that is about 2 feet longer than the total length of your hammock.
Next, construct the base by attaching the side pieces to the two end pieces using screws or bolts. Ensure that the connections are secure to provide a stable foundation for your hammock stand.
Once the base is complete, dig holes for the posts at each end of the base. The holes should be deep enough to provide stability, so aim for a depth of about 2 feet. Place the posts into the holes and fill them with concrete or gravel to secure the posts in place.
While the concrete or gravel is setting, attach cross beams or braces between the posts to provide additional stability and support for the hammock stand.
Once the concrete or gravel has fully cured, attach hooks or eye bolts to the top of each post. These will serve as attachment points for the hammock.
Now, it’s time to hang your hammock. Place the hammock onto the hooks or eye bolts, ensuring that it is properly and securely attached.
Before you hop into your hammock for a well-deserved relaxation session, make sure to test the stability and weight capacity of your DIY hammock stand. Give it a gentle push or lean into it to ensure that it can safely support your weight.
Now you can enjoy leisurely afternoons or lazy weekends lounging in your DIY hammock stand. Whether you’re reading a book, taking a nap, or simply soaking up the beauty of the outdoors, your hammock stand will provide a cozy and tranquil escape in your outdoor space.
Design Your Own Outdoor Movie Theater
Turn your outdoor space into a captivating entertainment area by designing your own outdoor movie theater. With a bit of creativity and the right equipment, you can create a cozy and immersive cinematic experience right in your own backyard.
To design your outdoor movie theater, you’ll need a few essential components. First and foremost, you will need a projector to display the movie onto a screen or surface. Choose a high-quality projector that suits your budget and offers the desired resolution and brightness.
Next, consider the screen or surface on which to project the movie. This can be as simple as a white bedsheet or a blank wall, or you can invest in a retractable outdoor projection screen for a more professional setup.
Once you have the projector and screen, think about the seating arrangements. Outdoor loungers, bean bags, or even picnic blankets can provide a casual and comfortable seating experience. Or, consider building a DIY seating area using wooden pallets or repurposed furniture.
Enhance the audio experience by incorporating outdoor speakers or a portable sound system. Make sure the speakers are weatherproof and positioned strategically to deliver optimal sound quality for everyone in the viewing area.
Consider the lighting needs for your outdoor movie theater. Install dimmable string lights or low-level pathway lights to provide a soft and cozy ambiance. You can also use flameless candles or lanterns for a touch of warmth and charm.
To create a truly immersive experience, add some outdoor décor elements. Hang movie posters or create a movie-themed backdrop to set the stage. Place potted plants or use outdoor rugs to create a cozy and inviting atmosphere for your guests.
Prepare for the movie night by setting up a concession stand or snack station. Offer a variety of movie snacks, such as popcorn, candy, and refreshments, to enhance the theater experience.
Before the movie begins, ensure that your outdoor space has proper weather protection. Consider using a gazebo, canopy, or large umbrella to shield against any rain or harsh sunlight. This will ensure that your movie night can proceed regardless of the weather conditions.
As the night falls and the movie begins, sit back and enjoy the magical atmosphere of your outdoor movie theater. Invite family, friends, and neighbors to share in the experience, creating memorable movie nights under the starry sky.
Designing your own outdoor movie theater allows you to bring the magic of the cinema to your own backyard. It’s a perfect way to enjoy movies with loved ones, create lasting memories, and make the most of your outdoor space.
Read more: Lawn Care: How To Do It Yourself
Build a Backyard Putting Green
Create a golfer’s dream in your own backyard by building a backyard putting green. This DIY project will not only enhance your golf game but also add a unique and attractive focal point to your outdoor space.
To build your backyard putting green, you’ll need some essential materials and tools. Begin by selecting the area in your yard where you want to install the putting green. Consider the available space and ensure that it has adequate sunlight and proper drainage.
Start by clearing the area and leveling the ground. Remove any rocks, debris, or vegetation that may hinder the installation process. Use a level or a straight edge to ensure that the ground is perfectly flat and even.
Next, decide on the size and shape of your putting green. Keep in mind that larger putting greens require more maintenance and effort to keep them in top condition. Start with a smaller, manageable size and expand if desired.
Install a border or edging around the perimeter of your putting green. This will define the boundaries and prevent the turf from spreading outside the designated area. Options for edging include timber, bricks, or plastic landscape borders.
Once the border is in place, it’s time to prepare the base. Lay down a layer of compacted crushed stone or gravel. This will provide a stable foundation for the putting green and aid in drainage.
Choose an artificial turf specifically designed for putting greens. Look for a high-quality synthetic turf that resembles natural grass and has a smooth and consistent surface. Consider the pile height and density to ensure a realistic feel and performance.
Roll out the artificial turf over the prepared base, ensuring that it fits snugly within the border. Trim any excess turf and secure it using landscaping stakes or adhesive as recommended by the manufacturer.
Finish the installation by spreading a layer of fine sand or infill over the surface of the putting green. This will help the blades of the turf stand upright, provide a natural feel underfoot, and aid in ball roll and speed.
To add some challenge to your backyard putting green, consider incorporating slope or contour features. You can use soil, sand, or rubber mats to create undulations and breaks to mimic real course conditions.
Now that your backyard putting green is complete, it’s time to practice your putting skills. Set up some targets or holes around the green to create a mini-golf course experience. Invite friends and family to compete in friendly putting competitions and improve your golf game right in the comfort of your own backyard.
Building a backyard putting green allows you to enjoy the game of golf without leaving home. It’s a fantastic addition to any outdoor space, providing endless hours of fun and practice for golf enthusiasts of all skill levels.
Create DIY Outdoor Play Equipment
Turn your outdoor space into a haven of fun and adventure by creating your own DIY outdoor play equipment. Building play equipment not only encourages children to stay active and engage in imaginative play but also provides an opportunity for creativity and bonding as a family. From swings to forts, you can construct a variety of play structures that will inspire laughter and create lasting memories.
Before you start building, consider the age and interests of your children. Tailor the play equipment to their specific needs and abilities. Keep safety in mind by selecting sturdy materials and ensuring that the structures are installed on level ground.
One of the most classic and beloved outdoor play structures is a swing set. You can build a simple A-frame style swing set using pressure-treated lumber, sturdy chains or ropes, and comfortable swing seats. Make sure to place the swing set on a soft surface like sand or rubber mulch to minimize the risk of injury from falls.
To foster creativity and adventure, construct a DIY fort or playhouse. Use recycled pallets, sheets of plywood, or even tree branches to build the structure’s frame. Add walls, windows, and a door using panels or fabric, and let your imagination run wild with decorations and play accessories.
For younger children, create a DIY sandbox. Build a frame using wood or use a repurposed table or large plastic container, and fill it with clean sand. Add buckets, shovels, and small toys for endless hours of imaginative play and sensory exploration.
Another fun and thrilling option is a DIY obstacle course. Use wooden beams, old tires, sturdy ropes, and other materials to create a challenging and exciting course in your outdoor space. Incorporate a balance beam, climbing wall, or crawling tunnels to engage children’s motor skills and physical development.
If you have a tree in your yard, consider building a DIY treehouse. Utilize the natural branches and trunk to create a platform or use a combination of lumber and supports to construct a safe and sturdy structure. Add a ladder or rope for access and let your children’s imaginations soar as they play in their elevated sanctuary.
Don’t forget to involve your children in the building process. Let them assist with measuring, hammering, and painting. This not only fosters teamwork and a sense of accomplishment but also gives them a sense of ownership over their new play equipment.
Remember to regularly inspect and maintain the play equipment to ensure its safety and longevity. Regularly check for any loose or damaged parts, and make any necessary repairs or replacements.
Creating DIY outdoor play equipment allows you to customize the play structures to suit your children’s interests and your yard’s size and layout. It provides a space for imaginative play, physical activity, and quality family time spent outdoors.
So roll up your sleeves, gather your tools, and embark on the exciting adventure of building your own outdoor play equipment. Let the laughter and memories begin in your very own playground masterpiece.
Design a Relaxing Outdoor Meditation Space
Create a serene sanctuary in your outdoor space where you can escape the busyness of the world and find inner peace. Designing a relaxing outdoor meditation space allows you to connect with nature, reduce stress, and cultivate a sense of calm and tranquility.
Start by selecting a quiet and peaceful area in your outdoor space that offers privacy and a sense of serenity. It can be a corner of your garden, a secluded spot under a tree, or even a small patio or balcony.
Choose comfortable seating that supports good posture and relaxation. Options include cushions on the ground, a meditation bench, or a comfortable outdoor chair. Consider adding blankets or pillows for extra comfort.
Create a sense of enclosure and privacy by adding natural elements like tall plants, bamboo screens, or hanging curtains. These will shield you from distractions and create an intimate and secluded atmosphere.
Introduce elements of nature into your meditation space. Incorporate potted plants, a small waterfall or trickling fountain, or a Zen garden. The sights, sounds, and scents of nature will enhance the tranquility of your meditation experience.
Opt for calming colors in your meditation space. Soft shades of green, blue, or earth tones can create a soothing and peaceful ambiance. Use outdoor rugs or meditation mats in these calming colors to define the space and provide a comfortable and dedicated area for your practice.
Consider adding sensory elements such as wind chimes, soft music, or nature sounds to create an immersive and relaxing environment. These sounds can help to deepen your meditation practice and foster a sense of calm and mindfulness.
Lighting is crucial for creating the right ambiance in your meditation space. During the day, take advantage of natural sunlight. Position your seating area to maximize sunlight or create shade with a pergola or canopy. In the evenings, incorporate soft, warm lighting such as string lights or lanterns. Avoid harsh or bright lighting that may disturb your focus.
Finally, infuse your meditation space with personal touches that are meaningful to you. Place crystals, symbols, or sacred objects that hold significance in your meditation practice. Display inspiring quotes or affirmations to uplift your spirit and invite positive energy.
Remember to maintain a clean and clutter-free space. Regularly tidy up the area and remove any distractions or unnecessary items. This will cultivate a sense of clarity and serenity in your meditation practice.
Designing a relaxing outdoor meditation space is an invitation to quiet the mind, reconnect with your inner self, and find harmony with nature. It is a sacred space where you can embark on a journey of self-discovery and profound peace.
Embrace the beauty of the outdoors, let go of daily distractions, and create a peaceful oasis where you can find solace, clarity, and deep relaxation.
Construct a DIY Outdoor Water Feature
Elevate the ambiance of your outdoor space by constructing a captivating DIY outdoor water feature. The soothing sound of flowing water and the visual allure of a shimmering fountain or cascading waterfall can create a serene and tranquil atmosphere right in your own backyard.
When planning your DIY outdoor water feature, consider the available space, the style of your outdoor area, and the desired visual and auditory impact. There are various types of water features to choose from, including fountains, ponds, water walls, and bubbling rock features.
If you’re looking for a simple yet elegant option, consider constructing a fountain. Begin by selecting a suitable container or basin to serve as the reservoir for the water. This can be a ceramic pot, a stone basin, or a repurposed item like a barrel. Ensure that the container has a waterproof seal or lining.
Next, choose a fountain pump that suits the size and flow rate desired for your fountain. Position the pump in the reservoir, and connect tubes or tubing to guide the water flow. Experiment with various fountain heads or nozzles to create different water patterns and effects.
Consider enhancing the visual appeal of your fountain by incorporating decorative elements like rocks, pebbles, or aquatic plants. These elements can add texture and interest to the overall design.
For a more natural and captivating water feature, you can construct a DIY pond. Start by digging a hole in your desired location, ensuring that it is level and adequately spacious for the size of the pond. Line the hole with a pond liner, which helps retain the water and prevents leakage.
Fill the pond with water while keeping an eye on the water level to ensure it remains consistent. Add aquatic plants, such as water lilies or lotus flowers, to enhance the beauty and natural ecosystem of the pond. Introduce fish or frogs to create a dynamic and lively environment.
To create a stunning statement piece, consider building a water wall. This involves constructing a vertical structure with water cascading down its surface. Use materials such as stacked stone, glass, or metal to form the framework of the water wall. Install a recirculating pump to feed water to the top of the structure, allowing it to flow downward in a continuous cycle.
If you prefer a more rustic and earthy water feature, consider a bubbling rock feature. Gather a assortment of rocks and boulders in various sizes and stack them to create a visually appealing arrangement. Place a recirculating pump at the bottom and a decorative water basin to catch and recycle the water. The water will percolate through the rocks, creating a gentle bubbling effect.
Remember to incorporate appropriate safety measures when constructing your water feature, especially if you have young children or pets. Consider installing fences or barriers around deep ponds and ensure that electrical components are properly grounded.
Constructing a DIY outdoor water feature adds an element of beauty, serenity, and tranquility to your outdoor space. Whether it’s the calming gurgle of a fountain, the mesmerizing flow of a waterfall, or the gentle ripple of a pond, your water feature will become a captivating centerpiece and a source of relaxation and rejuvenation.
Read more: How To Do Spray Foam Insulation Yourself
Build a DIY Outdoor Barbecue Area
Elevate your outdoor cooking experience by constructing a DIY outdoor barbecue area. Having a dedicated space for grilling and entertaining allows you to indulge in delicious meals while enjoying the beauty of the great outdoors.
To start building your DIY outdoor barbecue area, select a suitable location in your yard or patio. Consider factors such as the proximity to your indoor kitchen, ease of access, and adequate ventilation for smoke dispersal.
Begin by creating a sturdy foundation for your barbecue area. This can be a concrete slab, a paver patio, or a gravel base. Ensure that the chosen surface is level and can support the weight of your barbecue equipment.
Next, choose the type of grill or barbecue equipment that suits your cooking style and preferences. Options include charcoal grills, gas grills, or even wood-fired pizza ovens. Consider the size and functionality of the equipment, as well as the available fuel source.
Design and construct a countertop or workspace adjacent to the grill area. Use weather-resistant materials such as concrete, stone, or stainless steel to ensure durability and easy maintenance. Include storage space for grilling utensils, ingredients, and accessories.
To enhance the functionality and convenience of your outdoor barbecue area, consider incorporating additional features. Build a sink for food preparation and easy cleanup, or install a small refrigerator to keep beverages and perishable items within reach.
Create a comfortable seating area near the grill so your guests can relax and enjoy the cooking experience. Arrange outdoor furniture such as dining tables, chairs, or built-in benches to create a welcoming and socializing space.
Install adequate lighting in your barbecue area to ensure safe cooking and enjoyment after dark. Use outdoor-rated fixtures or LED lights to provide sufficient lighting for food preparation and dining. Consider adding string lights or pathway lights to create a cozy and inviting atmosphere.
Enhance the aesthetics of your outdoor barbecue area by incorporating landscaping elements. Plant some shrubs, flowers, or herbs around the perimeter to add a touch of greenery and create a pleasant and inviting ambiance.
Finally, add personal finishing touches such as decorations, outdoor artwork, or a canopy or pergola for shade. Make the space your own and reflect your style and personality.
Building a DIY outdoor barbecue area provides a dedicated space for cooking, entertaining, and enjoying the company of family and friends. It allows you to savor the flavors of outdoor cooking while creating memorable moments in your own backyard.
So gather your favorite recipes, fire up the grill, and enjoy the delights of alfresco dining in your beautifully constructed DIY outdoor barbecue area.
Conclusion
Transforming your outdoor space into a haven of relaxation, entertainment, and culinary delight is an exciting and rewarding endeavor. By building DIY projects like outdoor fire pits, pizza ovens, seating areas, water features, and more, you can create a personalized and enchanting outdoor oasis.
With each project, you have the opportunity to unleash your creativity, enhance your outdoor living experience, and add value to your home. These DIY endeavors not only provide a sense of accomplishment but also allow you to customize every aspect to suit your individual style and preferences.
As you embark on your outdoor project journey, remember to balance functionality, aesthetics, and safety. Ensure that your projects are structurally sound, utilize weather-resistant materials, and comply with any necessary local regulations or permits.
By incorporating personal touches, attention to detail, and a keen eye for design, you can create outdoor spaces that reflect your unique personality and create memorable experiences for family and friends.
Whether you’re gathering around a cozy fire pit on a cool evening, enjoying homemade pizza from your outdoor oven, or finding tranquility in a peaceful meditation space, these DIY projects will enhance your lifestyle and make the most of your outdoor area.
So, lace up your DIY boots, grab your tools, and let your imagination soar as you embark on your next outdoor adventure. Let the joy of creation guide you as you transform your outdoor space into a truly remarkable place to live, relax, and connect with the beauty of nature.
Frequently Asked Questions about 17 Do-It-Yourself Outdoor Project Ideas
Was this page helpful?
At Storables.com, we guarantee accurate and reliable information. Our content, validated by Expert Board Contributors, is crafted following stringent Editorial Policies. We're committed to providing you with well-researched, expert-backed insights for all your informational needs.


0 thoughts on “17 Do-It-Yourself Outdoor Project Ideas”