Home>Interior Design>Storage Ideas For Sheds: 10 Practical Ways To Keep A Shed Organized
Interior Design
Storage Ideas For Sheds: 10 Practical Ways To Keep A Shed Organized
Modified: October 20, 2024
Discover 10 practical interior design storage ideas for sheds to keep your space organized and clutter-free. Transform your shed into an organized haven with these ingenious storage solutions.
(Many of the links in this article redirect to a specific reviewed product. Your purchase of these products through affiliate links helps to generate commission for Storables.com, at no extra cost. Learn more)
Introduction
When it comes to maintaining an organized shed, finding effective storage solutions is key. A cluttered shed not only makes it difficult to find what you need, but it can also be a safety hazard. Don’t let your shed become a chaotic mess – take control and create a functional space with these practical storage ideas. From wall-mounted shelving to overhead storage racks, we’ve got you covered with 10 ways to keep your shed organized.
Key Takeaways:
- Maximize shed space with wall-mounted shelving, hanging tool racks, and stackable bins. Utilize unused areas like ceilings and corners for efficient storage. Keep your shed organized for a seamless DIY experience.
- Create a functional shed with portable shelves, sports equipment hooks, and overhead storage racks. Utilize every nook and cranny for efficient organization. Enjoy a clutter-free workspace for all your projects.
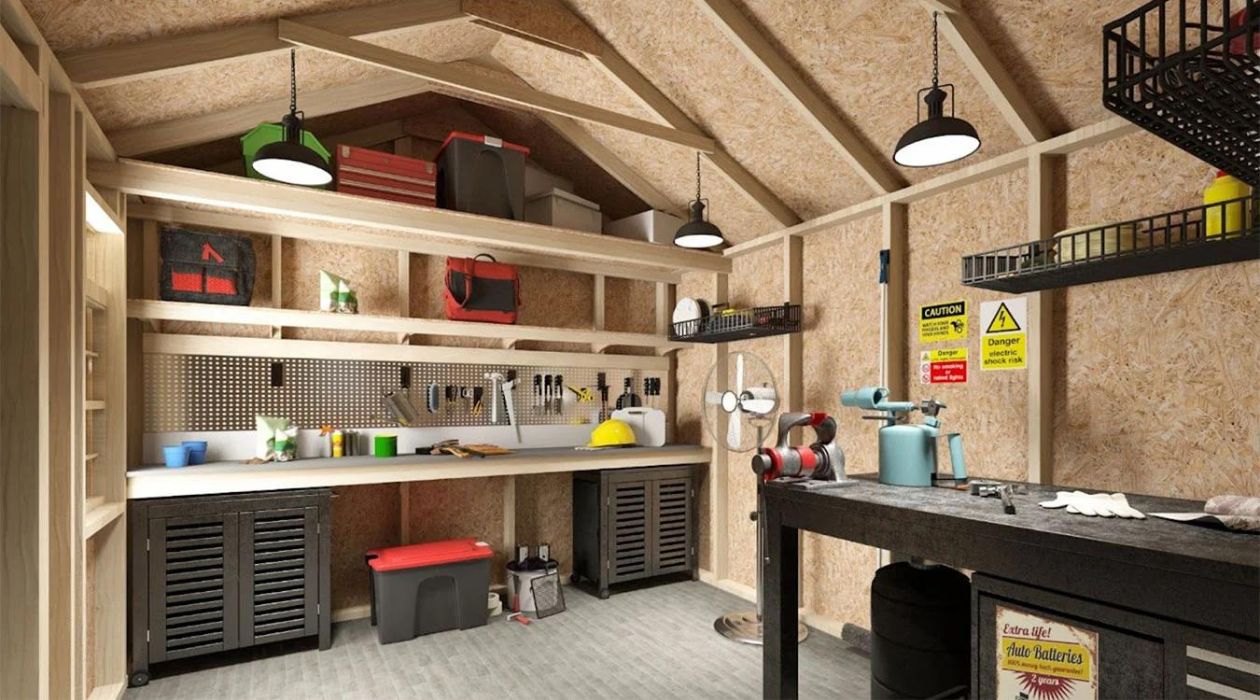
Wall-mounted shelving
One of the most versatile storage options for your shed is wall-mounted shelving. Installing shelves on the walls maximizes the vertical space and keeps your floor clear for larger items or workspaces. Whether you have a small or large shed, wall-mounted shelving can be customized to fit your specific needs.
When choosing wall-mounted shelves, opt for sturdy materials like metal or heavy-duty plastic. These materials are durable and can withstand the weight of tools, equipment, and storage bins. Adjustable shelves allow you to create different levels of storage, accommodating items of various sizes.
Consider grouping items on the shelves based on their categories. For example, dedicate one shelf to gardening tools, another for automotive supplies, and another for paint cans or cleaning supplies. This organization system makes it easier to locate what you need and prevents items from getting mixed together.
To further optimize your wall-mounted shelving, consider adding hooks, baskets, or bins to the shelves. This provides additional storage options for smaller items such as hand tools, gardening gloves, or paintbrushes. Utilizing these accessories keeps your space tidy and prevents items from cluttering the shelves.
Installation of wall-mounted shelving requires some basic tools and know-how. Locate the studs in your shed walls to ensure the shelves are securely anchored. Use a level to ensure the shelves are straight and even. Follow the manufacturer’s instructions for installing the brackets and shelves for a sturdy and safe setup.
Wall-mounted shelving is an excellent solution for keeping your shed organized and maximizing storage space. With the ability to customize the layout and add accessories, you can create a functional storage area that meets your specific needs.
Hanging tool rack
A hanging tool rack is a practical and space-saving storage solution for your shed. Instead of laying your tools haphazardly on a workbench or in a drawer, a hanging tool rack keeps them organized and easily accessible.
There are various types of hanging tool racks available, including magnetic strips, pegboards, and wall-mounted racks with hooks. Choose the option that works best for your shed and the types of tools you have.
With a magnetic strip, you can securely attach metal tools such as wrenches, screwdrivers, and pliers. A magnetic strip keeps the tools within reach and prevents them from getting lost or buried in a tool drawer. This type of hanging tool rack is especially useful when you have limited wall space.
Pegboards are another popular choice for hanging tools. They feature a grid of evenly spaced holes that allow you to insert hooks or pegs to hang your tools. Pegboards come in various sizes, and you can customize the arrangement of hooks and pegs to accommodate different tool sizes and shapes. This makes it easy to create a designated spot for each tool, ensuring they stay in place and are easily visible.
If you prefer a more traditional approach, a wall-mounted rack with hooks may be the right choice for you. These racks typically have pre-drilled holes or hooks where you can hang your tools. Some racks even come with adjustable hooks or slots to accommodate different tool sizes. This type of hanging tool rack is sturdy and can hold larger, heavier tools such as hammers or saws.
When installing a hanging tool rack, ensure that it is securely mounted to the wall. Use appropriate screws or hardware to support the weight of the tools. Spread the tools evenly across the rack to distribute the weight and prevent it from becoming unbalanced or overloaded.
A hanging tool rack keeps your tools organized, visible, and easily accessible. Say goodbye to rummaging through drawers or searching for misplaced tools. With a hanging tool rack in your shed, you’ll always know where to find the tool you need for your next project.
Magnetic strips for tools
When it comes to organizing small hand tools in your shed, magnetic strips are a simple and efficient solution. These strips, typically made of strong magnets embedded in a strip of adhesive material, allow you to securely attach metal tools to the wall or other surfaces.
Magnetic strips are particularly useful for tools like screwdrivers, wrenches, pliers, and other metal objects that can easily get lost or buried in toolboxes or drawers. By mounting a magnetic strip on a wall or the inside of a cabinet door, you can keep your tools within arm’s reach while saving valuable space.
To install a magnetic strip, clean the surface where you plan to mount it and ensure it is dry. Remove the adhesive backing and press the strip firmly against the wall. It’s important to choose a spot that is easily accessible and visible, so you can quickly grab the tool you need without searching.
Arrange your tools on the magnetic strip in a way that makes sense for your workflow. For example, you may want to group screwdrivers together, keeping smaller ones on one end and larger ones on the other. This makes it easy to locate and grab the right tool for the job.
One benefit of using magnetic strips is that they allow you to quickly and easily see if a tool is missing. If you notice an empty spot on the strip, you’ll know that a tool is not in its proper place or may have been misplaced. This can help you stay organized and ensure that all tools are accounted for after each use.
When using magnetic strips, it’s important to consider the weight and size of the tools you plan to hang. Make sure the magnet is strong enough to hold the tools securely in place without the risk of them falling off. If you have particularly heavy or large tools, you may need multiple magnetic strips or a larger-sized strip.
By utilizing magnetic strips for your tools, you can free up valuable drawer or toolbox space and keep your shed more organized. With your tools easily accessible and visible, you’ll save time and frustration searching for the right tool, allowing you to focus on your projects with ease.
Pegboards for small items
When it comes to organizing smaller items in your shed, pegboards are a versatile and practical storage solution. These perforated boards allow you to hang various tools, accessories, and supplies using hooks or pegs, keeping them organized and easily accessible.
Pegboards come in different sizes and can be easily mounted on a wall or the back of a shed door. They provide a customizable storage solution, as you can arrange the hooks and pegs to accommodate different sizes and shapes of items. This allows you to create a dedicated spot for each tool or accessory, ensuring they are visible and readily available.
To install a pegboard, you’ll need to mount it securely to the wall using appropriate hardware. Make sure to choose a spot that is easily accessible and has enough space to accommodate the size of the pegboard. Use a level to ensure it is straight before securing it in place.
Once the pegboard is installed, it’s time to start organizing your small items. Sort them into categories such as hand tools, gardening accessories, or painting supplies. Then, choose the appropriate hooks or pegs to hang each item on the board. Adjustable hooks or pegs can accommodate different sizes of items, making it easy to create a custom storage system.
Consider labeling or color-coding sections of your pegboard to further streamline organization. This can help you quickly locate items and ensure they are returned to the correct spot after use. Additionally, you can use baskets or bins to hold smaller items that may not hang securely on hooks or pegs.
One of the advantages of using pegboards is their flexibility. As your storage needs change, you can easily rearrange the hooks and pegs or add new ones to accommodate additional items. This adaptability makes pegboards ideal for organizing and reorganizing your shed as needed.
Pegboards are not only practical but also visually appealing. They can add a decorative touch to your shed, turning it into a functional and aesthetically pleasing space. With your small items hanging neatly on the pegboard, you’ll have more available space on shelves or workbenches for larger items or projects.
Take advantage of pegboards to keep your small items organized and easily accessible. With this versatile storage solution, you can efficiently utilize the wall space in your shed and eliminate clutter, making your workspace more efficient and enjoyable.
Overhead storage racks
If you’re looking to make the most of your shed’s vertical space, overhead storage racks are an excellent solution. These racks are mounted on the ceiling, allowing you to store items that are not frequently used or are too large to fit on shelves or in cabinets.
Overhead storage racks are ideal for items such as seasonal decorations, camping gear, or bulky tools. By utilizing the overhead space in your shed, you can free up valuable floor and wall space for more frequently accessed items.
Before installing overhead storage racks, it’s essential to assess the weight-bearing capacity of your shed’s ceiling. Make sure it can support the weight of the stored items and the storage rack itself. If needed, reinforce the ceiling or consult a professional to ensure the safety of the installation.
Once you’ve determined the placement and size of the overhead storage racks, assemble the rack according to the manufacturer’s instructions. Mount the rack securely to the ceiling using appropriate hardware to ensure stability.
When organizing items on the overhead storage racks, consider grouping them by category or seasonal use. Use labeled bins or storage containers to keep smaller items organized and protected. This way, you can easily locate and retrieve items when needed, without having to sift through a cluttered area.
It’s important to be mindful of the weight distribution when storing items on overhead racks. Place heavier items closer to the support beams or corners of the rack to ensure balance. Avoid overloading the racks, as this can compromise the stability of the installation.
To access items stored on the overhead racks, use a step stool or ladder for safety. Make sure you have a clear path and sufficient lighting to prevent accidents. If you frequently need to access these items, consider using pulley systems or sliding rails to lower the storage racks to a more easily reachable height.
Overhead storage racks provide an efficient way to maximize your shed’s storage space. By utilizing the often underutilized vertical space, you can keep your shed organized, make room for larger items, and create a safer working environment.
Use clear plastic bins to store smaller items in your shed, making it easy to see what’s inside and keeping everything organized.
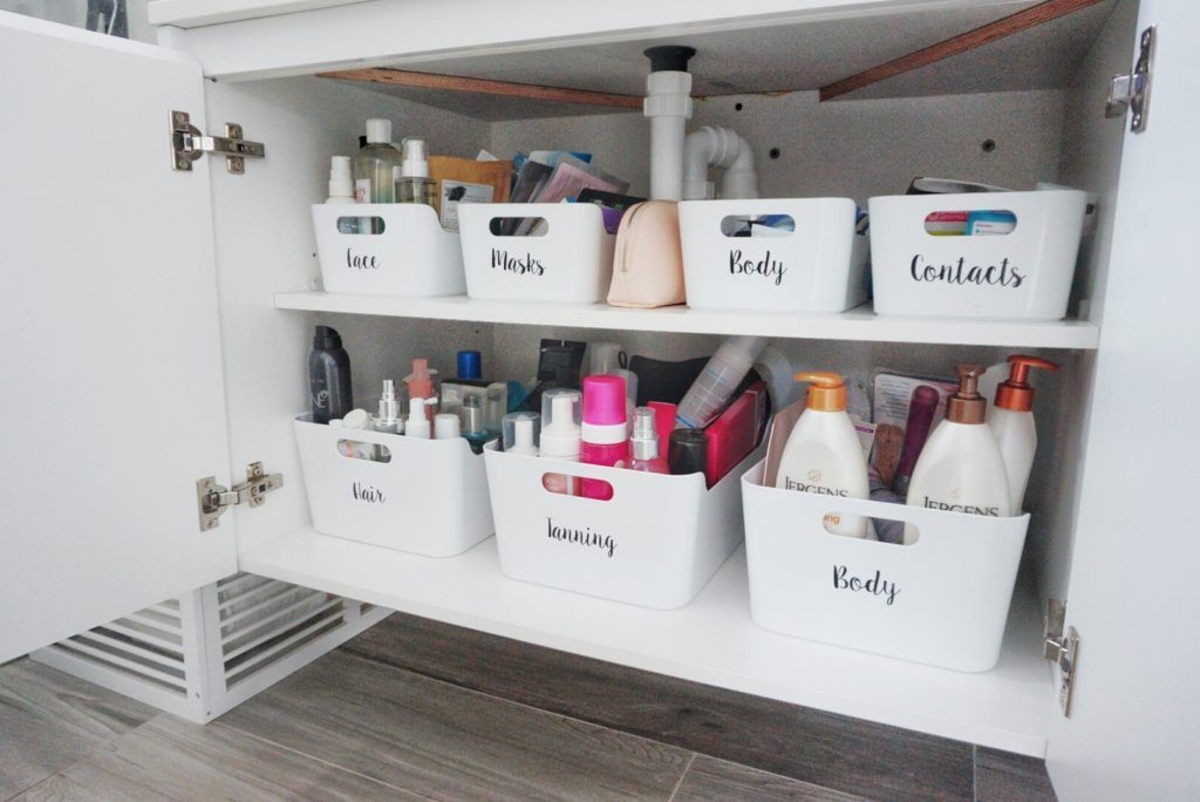
Stackable bins and storage containers
When it comes to storing smaller items in your shed, stackable bins and storage containers are a game-changer. They are designed to keep your belongings organized, easily accessible, and protected from dust, moisture, and pests.
Stackable bins and storage containers come in various sizes and materials, including plastic, metal, or fabric. Choose containers that are durable and have secure lids to prevent items from falling out or getting damaged.
Before purchasing stackable bins and containers, assess the type and quantity of items you need to store. Consider whether you want see-through containers for easy visual identification or solid-colored ones for a neater appearance. Opt for containers with handles, making it easier to carry or move them around in your shed.
Sort your items into categories, such as tools, hardware, gardening supplies, or painting materials. This will help you determine the size and number of containers needed. You can further organize the items within each container using dividers, trays, or smaller compartments.
One of the biggest advantages of stackable bins and storage containers is their ability to save space. Utilize vertical space in your shed by stacking bins on top of each other. Make sure to label each container or use clear containers, so you can quickly identify the contents without having to open every bin.
To access items stored in the lower bins without having to remove the ones on top, consider using sliding shelves or pull-out drawers. These additions allow easy access to the desired container, saving you time and effort.
If your shed is prone to humidity or excess moisture, consider using sealed containers or ones with built-in moisture absorbers. This will help protect your belongings from damage and ensure they remain in good condition.
Regularly review and declutter your stackable bins and storage containers to ensure you only keep items that are useful or frequently used. Purging unnecessary items will free up space and make it easier to maintain an organized shed.
By using stackable bins and storage containers, you can transform your shed into a well-organized space. With easy access to your belongings and protection against external elements, you’ll have a tidy and functional workspace to tackle any project.
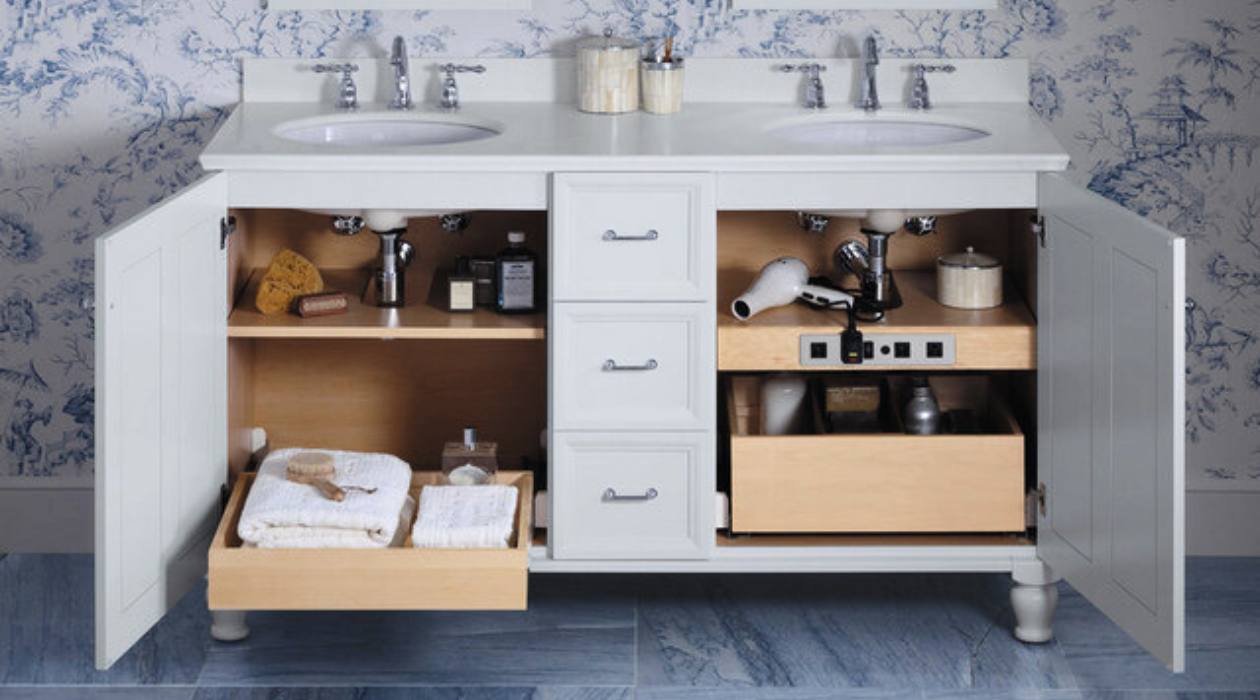
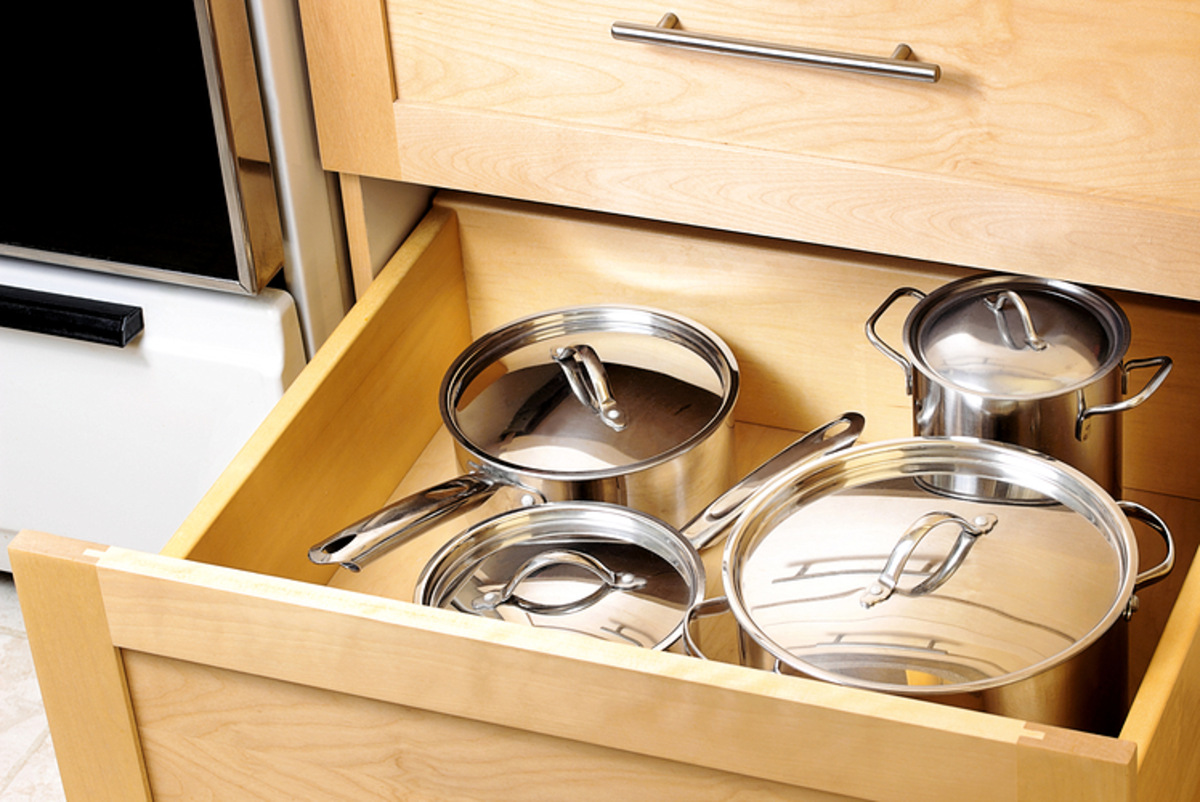
Cabinets and drawers
When it comes to organizing your shed, cabinets and drawers are essential for keeping tools, equipment, and supplies neatly tucked away. They provide a convenient and efficient way to store items while maintaining a clean and organized workspace.
Cabinets and drawers come in a variety of sizes, materials, and configurations, allowing you to choose the option that best suits your storage needs. Consider whether you need cabinets with shelves, drawers, or a combination of both.
For smaller tools and accessories, drawers are ideal as they allow for easy access and organization. Utilize drawer dividers or trays to separate items, keeping them neatly sorted and preventing them from getting mixed up. Label each drawer or use clear containers to quickly identify the contents.
Cabinets with shelves are perfect for storing larger items such as power tools, gardening equipment, and paint cans. Adjustable shelves provide flexibility, allowing you to customize the space to accommodate items of different heights. Consider using bins or baskets within the cabinets to further organize smaller items and prevent clutter.
To ensure the longevity and functionality of cabinets and drawers, choose ones made from durable materials such as metal or high-quality plastic. They should have sturdy hinges, locks, or latches to securely close and protect your belongings.
When arranging items in cabinets and drawers, group similar items together. Keep frequently used tools or supplies within easy reach, while placing less commonly used items in the back or on higher shelves. This will optimize your workflow and make it easier to find what you need.
Maximize the available space in your shed by utilizing the vertical height of your cabinets. Install hooks or racks on the inside of cabinet doors to hang small tools or accessories. Use the top of cabinets or drawers as additional workspace or storage area for larger items.
Regularly clean and declutter your cabinets and drawers to maintain an organized shed. Remove any items that are no longer needed or in use. This will free up space and make it easier to locate and access the items you do need.
By incorporating cabinets and drawers into your shed, you’ll have an efficient and organized storage solution. With a designated place for each item, you’ll be able to work with ease and enjoy a clutter-free workspace.
Portable shelves or rolling carts
When it comes to creating versatile storage in your shed, portable shelves or rolling carts are a practical solution. These movable storage units provide flexibility and convenience, allowing you to easily reconfigure your shed’s layout and access your belongings wherever needed.
Portable shelves come in various sizes and styles, including freestanding shelves with multiple tiers or collapsible shelves that can be folded and stored when not in use. Rolling carts, on the other hand, typically have wheels and can be easily maneuvered around your shed.
One advantage of portable shelves and rolling carts is their ability to hold different types of items. Whether you need storage for tools, cleaning supplies, or gardening equipment, these units offer ample space to keep your belongings organized and accessible.
To optimize your portable shelves or rolling carts, consider grouping similar items together. Dedicate one shelf or section of the cart to gardening tools, another for cleaning supplies, and another for paint cans or automotive supplies. Clearly label each area to ensure items are returned to their designated spot after use.
Another benefit of portable shelves and rolling carts is their convenience in creating additional workspace. Use the top surface of the shelf or cart as a temporary workbench for small projects or as a staging area for tools and materials needed for a specific task.
When selecting portable shelves or rolling carts, opt for ones made from sturdy materials that can support the weight of the items you plan to store. Look for shelves or carts with adjustable features, such as height-adjustable shelves or carts with removable baskets or bins, to accommodate items of different sizes.
Consider the mobility aspect of rolling carts. Look for units with durable wheels that can easily navigate various surfaces, including uneven floors or gravel. Lockable wheels provide added stability when the cart is stationary.
Regularly assess and rearrange the contents of your portable shelves or rolling carts to maximize storage efficiency. Purge items that are no longer needed or in use to free up space for new items or to maintain an organized shed.
Portable shelves and rolling carts offer a versatile storage solution for your shed. Whether you need to reconfigure your space or conveniently transport items, these units provide practicality and flexibility. With easy access to your belongings, you’ll be able to efficiently tackle any project in your well-organized shed.
Bicycles and sports equipment hooks
If you’re an avid cyclist or sports enthusiast, finding a proper storage solution for your bicycles and sports equipment is essential. Bicycles and sports equipment hooks provide a space-saving and organized way to store these items in your shed.
Hooks designed for bicycles and sports equipment are typically mounted on the wall or ceiling, allowing you to hang your items securely and keep them off the floor. This not only saves valuable space but also helps protect your belongings from damage.
When installing bicycle hooks, make sure they are sturdy and can support the weight of your bikes. Locate the studs or use appropriate wall anchors to ensure a secure attachment. Hang your bicycles vertically to maximize space or horizontally if you have limited vertical clearance.
Sports equipment hooks are designed to hold items such as tennis rackets, baseball bats, golf clubs, or hockey sticks. These hooks can be installed on the wall or hang from a ceiling-mounted rack. Make sure the hooks are appropriately sized and spaced to accommodate your specific equipment.
When selecting hooks for your bicycles and sports equipment, consider those with rubber or plastic coatings to prevent scratches or damage to your gear. You may also find hooks with additional features, such as adjustable arms or clips, to secure your equipment more effectively.
Group similar items together when hanging them on the hooks. For bicycles, you can arrange them by size or type, placing children’s bikes in one area and adult bikes in another. With sports equipment, hang items in a logical order that makes sense for your activities.
Utilizing hooks for bicycles and sports equipment not only keeps your shed organized but also makes it easier to access and retrieve items when you need them. You’ll no longer have to navigate around obstacles or deal with tangled gear.
To maximize space, consider installing the hooks at varying heights. Hang bicycles higher on the wall, leaving room below for other storage solutions such as shelves, cabinets, or bins. This ensures efficient use of vertical space and makes room for other items in your shed.
As you hang your bicycles and sports equipment, ensure that they are securely fastened and balanced on the hooks. This will prevent them from slipping or falling, reducing the risk of damage or injury.
With the help of bicycle and sports equipment hooks, you can keep your shed organized, save valuable floor space, and protect your gear. By providing dedicated storage for your items, you’ll have a more functional and clutter-free workspace for your outdoor activities.
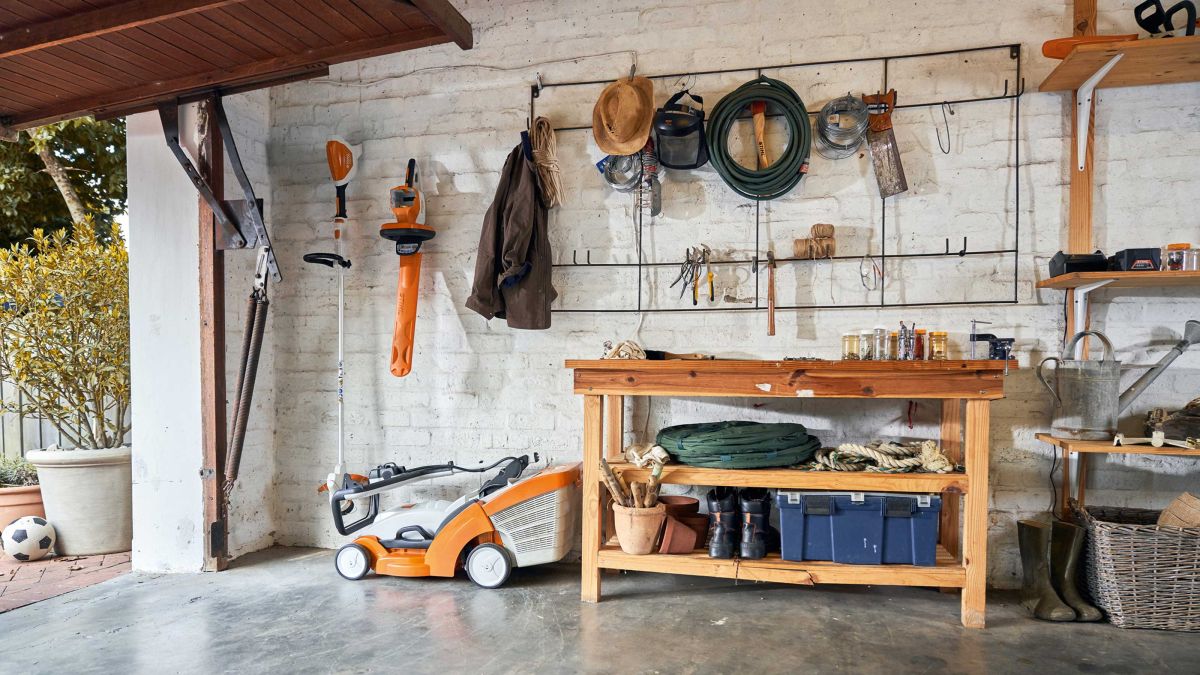
Utilizing Unused Space
When it comes to maximizing storage in your shed, it’s important to think outside the box and utilize every inch of available space, including the often overlooked areas. By getting creative and thinking vertically and horizontally, you can transform unused spaces into valuable storage areas.
1. Ceiling space: Install overhead racks or hooks to store items that are not frequently used or are bulky. This could include camping gear, seasonal decorations, or large power tools. Make sure to check the weight-bearing capacity of your shed’s ceiling and use appropriate hardware for installation.
2. Wall space: Install wall-mounted tool racks, pegboards, or shelving units to keep tools and equipment within easy reach. Use hooks or hanging systems to store items like hoses, cords, or ladders. Magnetic strips can be used to hang metal tools, further optimizing wall space.
3. Door space: Attach hooks or pocket organizers to the back of your shed door to store small hand tools, gloves, or other frequently used items. You can also hang a shoe organizer to hold gardening supplies, spray bottles, or small hardware items.
4. Underneath shelves: Attach hooks or hang baskets underneath existing shelves to make use of the empty space. This provides additional storage for small items such as screws, bolts, or gardening accessories.
5. Corners: Install corner shelves or utilize corner brackets to create storage in otherwise unused corners of your shed. These shelves can hold items like paint cans, cleaning supplies, or smaller tools.
6. Above windows and doors: Install shelves either above windows or doors to store lightweight items such as empty pots, gardening tools, or decorative items. Be mindful of the weight and ensure the shelves are securely fastened.
7. Behind the shed door: Hang hooks or create a foldable pegboard on the backside of your shed door. This provides additional storage space for larger tools or equipment that can be easily accessed when the door is open.
8. Beneath workbenches: If your shed has a workbench, make use of the space underneath by installing pull-out drawers or storage bins. This area can be used to store power tools, toolboxes, or other frequently used items.
Remember to regularly assess and declutter these storage areas to ensure they remain organized and efficient. Remove any items that are no longer needed or in use to create space for new items or to maintain a clutter-free shed.
By utilizing every nook and cranny of your shed, you can maximize storage and create a well-organized space. Take advantage of unused areas to keep your belongings easily accessible and create a functional and efficient workspace. With a little creativity, you’ll have a shed that meets your storage needs and supports your projects.
Conclusion
Maintaining an organized shed is crucial for a functional and enjoyable space. By implementing effective storage solutions, you can keep your shed clutter-free and make the most of your available space. From wall-mounted shelving and hanging tool racks to stackable bins and portable shelves, there are various options to suit your specific storage needs.
Wall-mounted shelving provides vertical storage and allows you to customize the layout to accommodate different items. Hanging tool racks keep your tools organized and easily accessible, while magnetic strips are perfect for securely storing metal tools. Pegboards offer versatile storage for small items, and overhead storage racks take advantage of unused ceiling space.
Stackable bins and storage containers are ideal for organizing smaller items, while cabinets and drawers provide convenient storage for larger tools and equipment. Portable shelves and rolling carts offer flexibility and easy access to your belongings. Bicycles and sports equipment hooks keep them off the floor and maximize space, and utilizing unused areas such as ceilings, walls, and corners maximizes storage capacity.
By combining these storage solutions and keeping your shed organized, you’ll be able to locate items quickly, work efficiently, and prevent accidents caused by clutter. Regularly reassess your storage system, declutter, and maintain it to ensure your shed remains a well-organized and functional space.
Remember, the key to an organized shed is not only finding the right storage solutions but also establishing a system that works for you. Choose solutions based on your shed’s size, your specific storage needs, and the types of items you need to store. With a well-organized shed, you’ll enjoy a seamless and enjoyable experience during your DIY projects, gardening tasks, or any other activities that take place in your shed.
Excited about getting your shed in shape? Why stop there? Dive into our comprehensive guide on tool storage ideas that really work. Whether you're a seasoned DIYer or just starting out, these ingenious solutions will help you keep every wrench, screwdriver, and hammer perfectly in place. Make the most out of your workspace and ensure every tool is right where you need it, without the usual clutter or hassle.
Frequently Asked Questions about Storage Ideas For Sheds: 10 Practical Ways To Keep A Shed Organized
Was this page helpful?
At Storables.com, we guarantee accurate and reliable information. Our content, validated by Expert Board Contributors, is crafted following stringent Editorial Policies. We're committed to providing you with well-researched, expert-backed insights for all your informational needs.


0 thoughts on “Storage Ideas For Sheds: 10 Practical Ways To Keep A Shed Organized”