Home>Interior Design>Where Should Curtain Rod Brackets Be Placed?
Interior Design
Where Should Curtain Rod Brackets Be Placed?
Modified: October 20, 2024
Discover the ideal placement for curtain rod brackets to enhance your interior design. Learn how to achieve the perfect balance and support for your curtains.
(Many of the links in this article redirect to a specific reviewed product. Your purchase of these products through affiliate links helps to generate commission for Storables.com, at no extra cost. Learn more)
Introduction
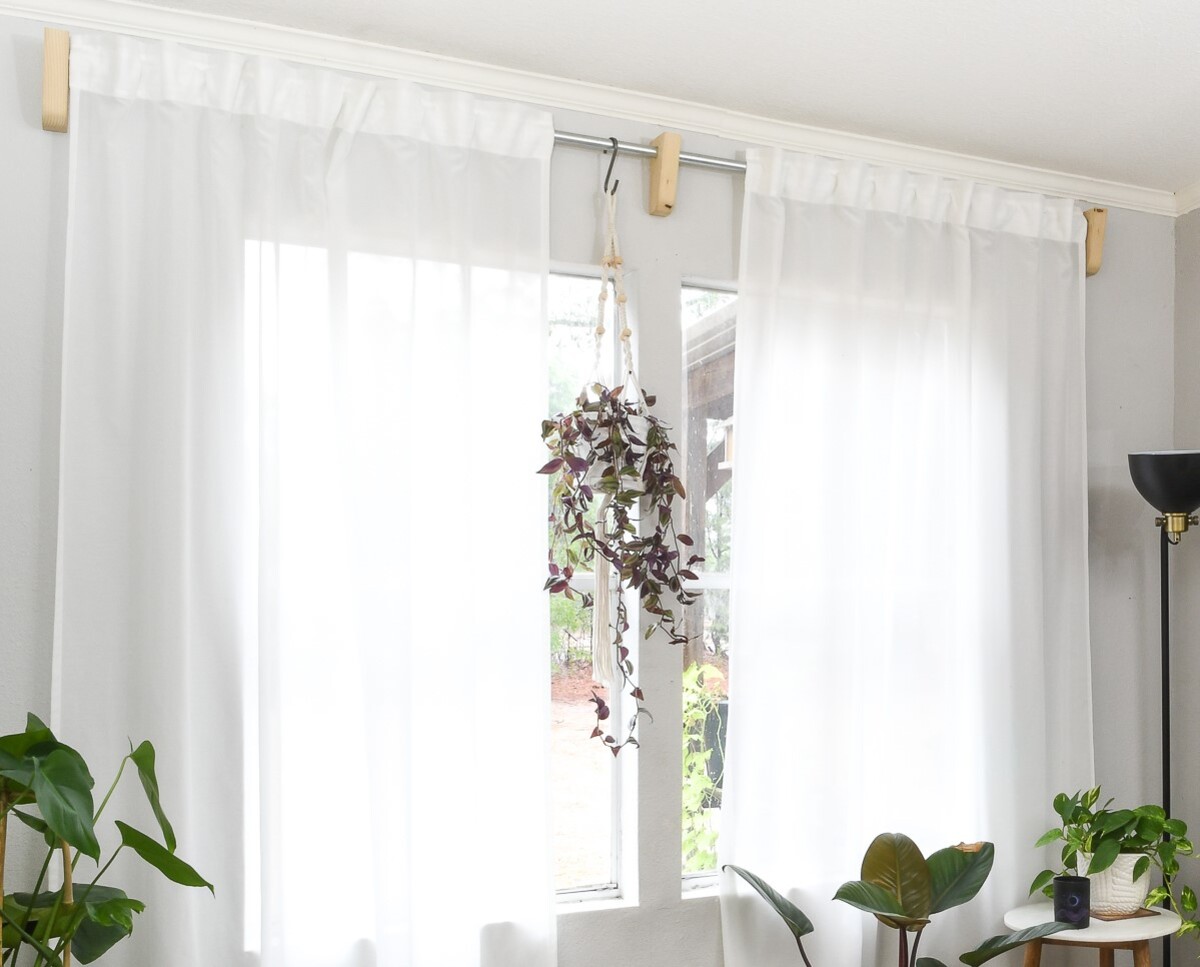
When it comes to interior design, one often overlooked aspect is the placement of curtain rod brackets. While they may seem like a small detail, proper placement can greatly impact the overall aesthetic and functionality of your curtains. Curtain rod brackets not only support the weight of the rod and curtains but also play a crucial role in ensuring that the curtains hang at the right height and width. Additionally, correct bracket placement can maximize the visual impact of your window treatments.
In this article, we will explore the factors to consider when positioning curtain rod brackets and provide useful tips for a successful installation. Whether you’re designing a new space or updating your existing curtains, understanding the best placement for curtain rod brackets will help you achieve a professional and polished look.
Before we delve into the specifics of bracket placement, it’s essential to consider the overall style and purpose of the curtains. Are you looking for privacy, light control, or simply adding a decorative touch to your windows? This will determine the type of curtains and curtain rod you choose, which, in turn, will influence bracket placement.
Now that we have set the stage let’s move on to the factors to consider when determining where curtain rod brackets should be placed. Height placement, width placement, and distance from the wall are the three main aspects to focus on. By understanding and implementing these factors, you can create a visually appealing and functional curtain display.
In the next section, we will discuss height placement and guide you through the process of determining the optimal height for your curtain rod brackets.
Key Takeaways:
- Achieve the perfect balance of aesthetics and functionality by considering factors such as curtain type, window size, and desired look when placing curtain rod brackets. Proper installation ensures a polished and professional curtain display.
- For heavy curtains, ensure adequate support by using additional brackets, securing them to studs or using wall anchors, and considering a center support bracket for wider windows. Safety and proper installation techniques are crucial for heavy curtain displays.
Read more: Where To Place A Shower Curtain Rod
Factors to Consider
When it comes to determining the placement of curtain rod brackets, several factors need to be taken into consideration. These factors include the type of curtains, the height and width of the window, the desired aesthetic, and the weight of the curtains. Let’s explore each of these factors in detail:
1. Type of Curtains: Different styles of curtains require different bracket placements. For example, if you have sheer curtains, you may opt for a higher bracket placement to achieve a flowing and ethereal look. On the other hand, if you have heavy drapes, lower bracket placement is necessary to support the weight of the curtains.
2. Height and Width of the Window: The size of your window plays a crucial role in determining the placement of curtain rod brackets. For taller windows, higher bracket placement can create the illusion of height and add a touch of elegance. For shorter windows, lower bracket placement can make the window appear taller. The width of the window also affects bracket placement. For standard-sized windows, placing brackets slightly wider than the window frame can make the window appear larger.
3. Desired Aesthetic: Consider the overall look and feel you want to achieve in your space. If you prefer a clean and minimalist look, placing the brackets close to the ceiling can create an elongating effect. If you want to add drama and visual interest, placing the brackets slightly lower can create a layered effect when paired with longer curtains.
4. Weight of the Curtains: The weight of your curtains is an important factor to consider when determining bracket placement. Heavy curtains require additional support, which may necessitate the use of additional brackets or special heavy-duty brackets. Lighter curtains, on the other hand, can typically be supported with standard bracket placement.
By carefully considering these factors, you can ensure that the placement of your curtain rod brackets not only enhances the aesthetics of your space but also provides the necessary support for your curtains. In the next sections, we will discuss height placement and width placement in more detail, providing you with helpful guidelines to achieve the desired look for your curtains.
Height Placement
The height placement of curtain rod brackets is crucial in determining the overall look and functionality of your curtains. The goal is to strike a balance between practicality and aesthetics. Here are some guidelines to help you determine the optimal height for your curtain rod brackets:
1. Consider the Purpose: Before deciding on the height of your curtain rod brackets, consider the purpose of the curtains. If your primary goal is privacy, you may want to position the brackets closer to the ceiling to ensure the curtains cover the entire window when closed. On the other hand, if your curtains are primarily decorative and will be left open most of the time, you have more flexibility in bracket placement.
2. Visual Impact: The height at which you place your curtain rod brackets can greatly impact the visual perception of your space. Mounting the brackets closer to the ceiling can create a sense of height and elegance. This works particularly well in rooms with low ceilings, as it gives the illusion of added height. On the contrary, placing the brackets slightly above the window frame can make the window appear larger.
3. Curtain Length: The length of your curtains also dictates the height placement of the rod brackets. If you have floor-length curtains, it is recommended to position the brackets 4 to 6 inches above the window frame to ensure that the curtains pool gracefully on the floor. For curtains that are shorter, such as cafe curtains or valances, the brackets can be placed just above the window frame or where it best suits your desired aesthetic.
4. Proportions: Consider the overall proportions of your space when determining the height placement of the brackets. If you have high ceilings, it is advisable to mount the brackets closer to the ceiling to maintain visual balance. On the other hand, in rooms with standard ceiling height, positioning the brackets slightly above the window frame is typically more appropriate.
5. Functionality: Lastly, consider the ease of use and functionality of your curtains. Ensure that the height of the brackets allows for comfortable opening and closing of the curtains without dragging on the floor or obstructing any furniture.
By considering these factors and following these guidelines, you can determine the ideal height placement for your curtain rod brackets. In the next section, we will discuss the importance of width placement for achieving a balanced and visually appealing curtain display.
Width Placement
In addition to height placement, the width at which you position your curtain rod brackets is equally important. Proper width placement ensures that your curtains hang evenly and create a balanced and visually appealing display. Consider the following factors when determining the optimal width placement for your curtain rod brackets:
1. Window Frame: One common guideline for bracket placement is to position them slightly wider than the window frame. This allows the curtains to partially cover the window frame when closed, creating a more polished and finished look. However, this guideline can be adjusted based on your personal preference and the style of curtains you have.
2. Curtain Fullness: The fullness of your curtains should also be taken into account when deciding on the width placement of your brackets. If your curtains are made from lighter fabrics or have a more minimal style, you may opt for a narrower width placement. Conversely, if your curtains are fuller and made from heavier fabrics, wider bracket placement may be required to accommodate the additional fabric.
3. Rod Length: The length of your curtain rod is another factor to consider when determining the width placement of your brackets. Ensure that the rod extends beyond the width of the window frame on both sides to allow the curtains to be fully drawn back and provide an unobstructed view when desired.
4. Visual Balance: Creating visual balance is essential for an aesthetically pleasing curtain display. Consider the overall proportions of your space and the placement of other elements, such as furniture and wall décor. Positioning the brackets wider than the window frame can make the window appear larger and create a sense of symmetry.
5. Curtain Overhang: The amount of overhang you desire for your curtains will impact the width placement of the brackets. If you prefer a more minimal overhang, positioning the brackets closer to the window frame is appropriate. However, if you want a more dramatic effect with the curtains extending beyond the window frame, wider bracket placement is required.
By taking these factors into account and experimenting with different widths, you can find the perfect placement for your curtain rod brackets. Remember that these guidelines can be adjusted based on your personal taste and style. In the next section, we will discuss the importance of the distance between the wall and the curtain rod brackets.
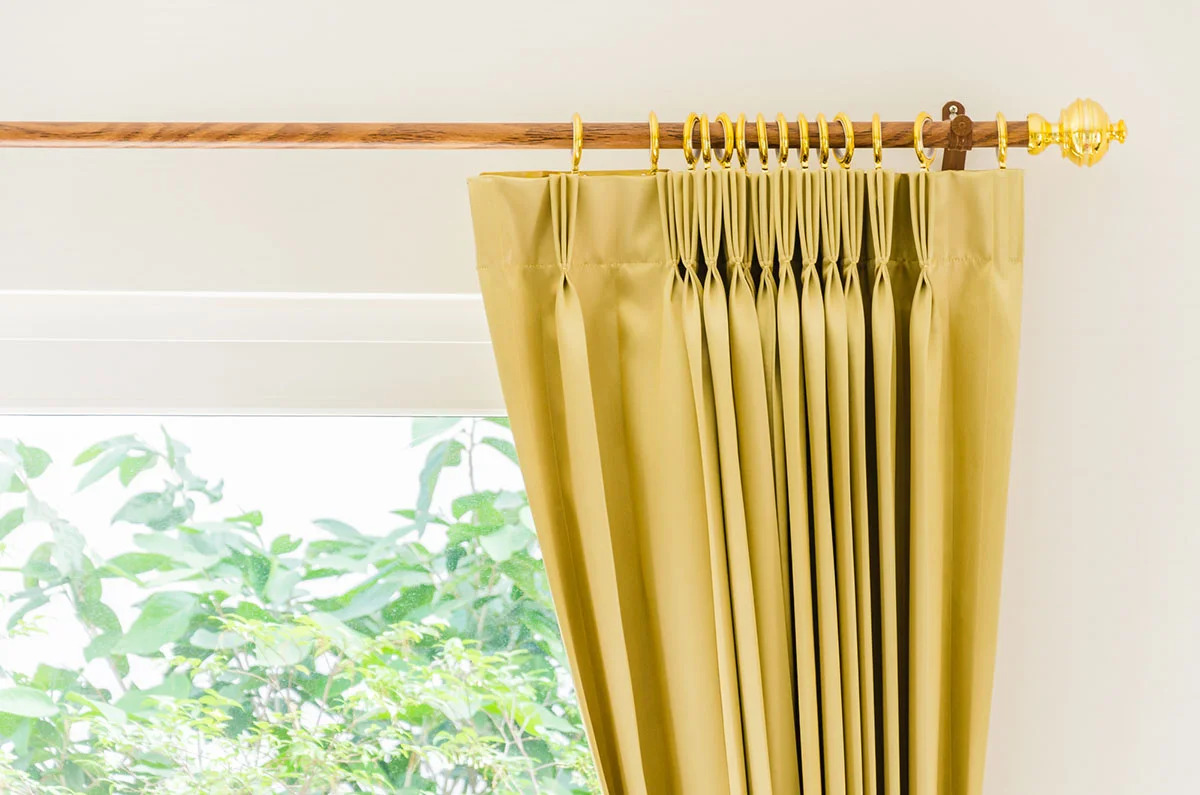
Distance from the Wall
The distance between the wall and the curtain rod brackets is an often overlooked but crucial aspect of curtain installation. Proper spacing ensures that the curtains hang smoothly and allows for easy operation. Consider the following factors when determining the optimal distance from the wall for your curtain rod brackets:
1. Clearance for Rod and Rings: Ensure that there is enough clearance between the wall and the curtain rod to accommodate the rings or hooks that hold the curtains. This will prevent the curtains from getting caught or rubbing against the wall when opening and closing.
2. Avoiding Obstructions: Take into account any obstructions that may interfere with the movement of the curtains. This could include window handles, light switches, or outlets. Position the brackets at a distance from the wall that allows smooth operation without any hindrance.
3. Bracket Size: The size of the brackets should also be considered when determining the distance from the wall. Take into account the depth of the brackets and any decorative elements they may have. Ensure that the brackets do not protrude too far from the wall, as this can create an unbalanced appearance.
4. Wall Coverings and Molding: If you have decorative elements such as crown molding or wainscoting on the wall, carefully consider the positioning of the brackets. You may need to adjust the distance from the wall to ensure that the curtains do not interfere with or hide these architectural features.
5. Room for Curtains to Drape: The distance from the wall should allow enough space for the curtains to drape naturally. This is especially important when dealing with heavier fabrics or longer curtain lengths. Avoid placing the brackets too close to the wall, as this can restrict the flow and drape of the curtains.
By considering these factors and finding the appropriate distance from the wall for your curtain rod brackets, you can ensure smooth operation and a visually pleasing curtain display. In the next section, we will discuss specific bracket placement for different curtain styles to achieve the desired look.
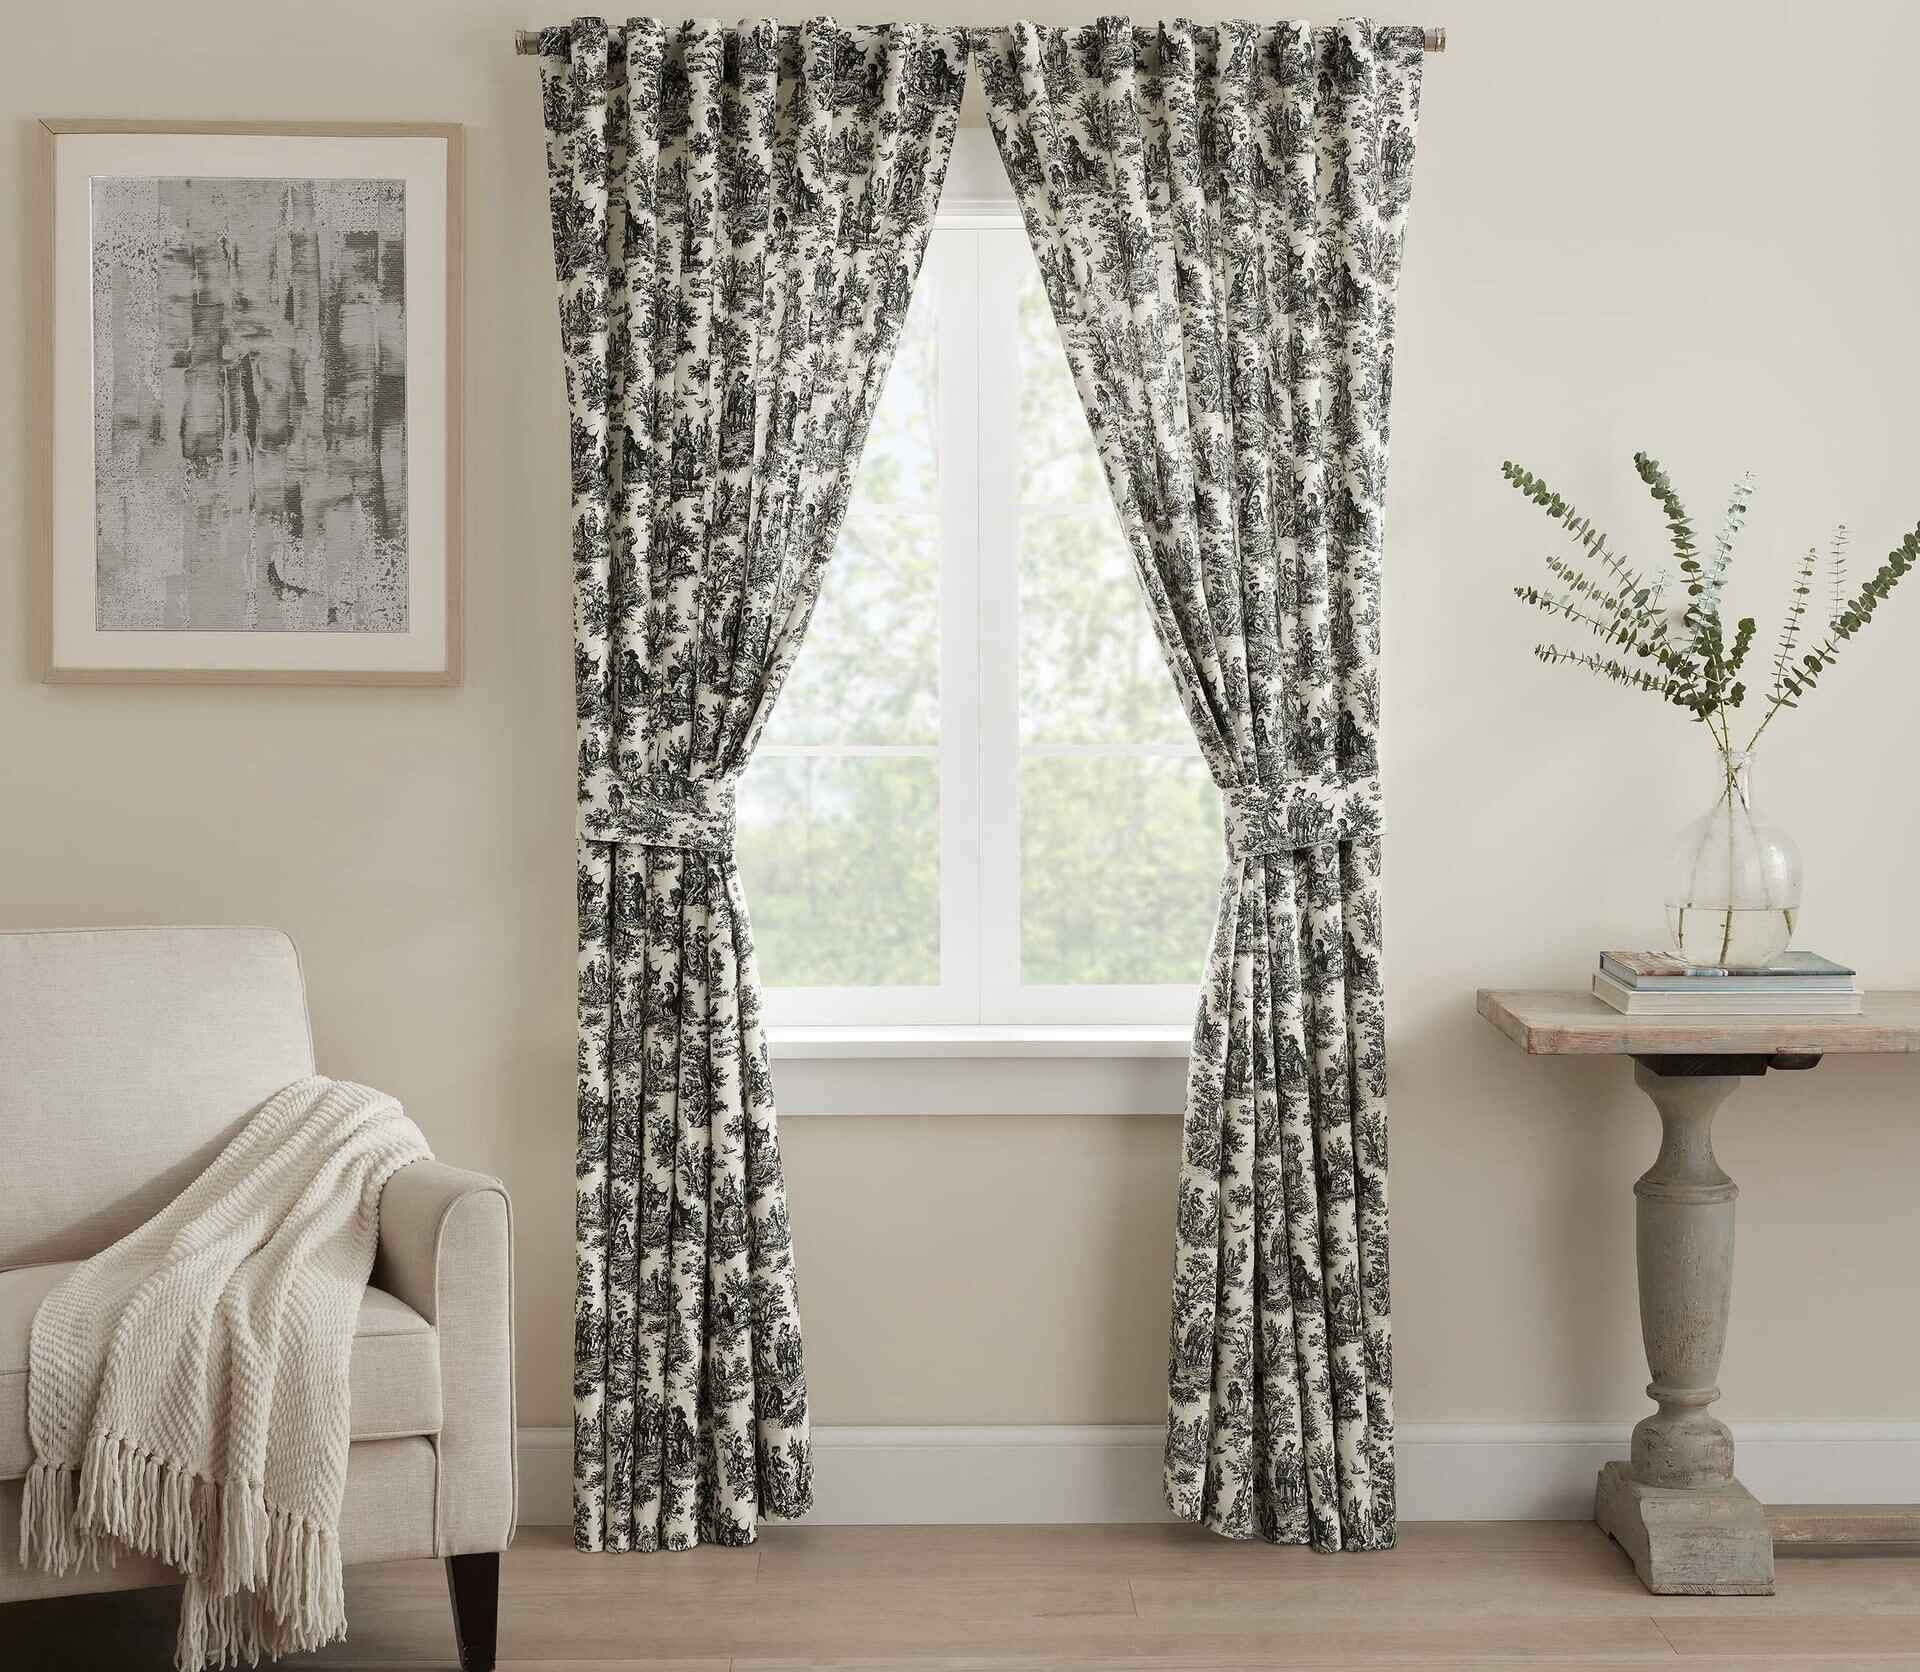
Curtain rod brackets should be placed at least 4-6 inches outside the window frame to allow the curtains to hang properly and not block light or view when open.
Positioning for Different Curtain Styles
Different curtain styles require different positioning of the curtain rod brackets to achieve the desired aesthetic. Here are some tips for positioning curtain rod brackets based on common curtain styles:
1. Standard Panels: For standard panels that cover the entire height of the window, it is typical to place the curtain rod brackets about 4 to 6 inches above the window frame. This allows the curtains to hang freely and creates a clean, tailored look.
2. Café Curtains: Café curtains, which cover only a portion of the window, are usually mounted just above the window frame or at the midpoint between the window frame and the ceiling. This placement allows for privacy while still allowing natural light to enter the room.
3. Valances: Valances, which are shorter decorative curtains that hang across the top portion of the window, can be positioned just above the window frame to showcase the window and allow maximum light. However, for a more dramatic effect, the brackets can be placed closer to the ceiling to create the illusion of a taller window.
4. Floor-Length Curtains: If you have floor-length curtains, the brackets should be mounted 4 to 6 inches above the window frame to allow the fabric to gracefully pool on the floor. This creates an elegant and luxurious look.
5. Sheer Curtains: Sheer curtains can be positioned higher than the standard brackets to achieve a flowing and ethereal look. Mounting the brackets close to the ceiling creates a sense of height and allows the sheer fabric to cascade down gracefully.
6. Layered Curtains: If you are layering curtains, such as sheer curtains with heavier drapes, it is common to mount the brackets slightly higher than usual to accommodate the additional fabric. This ensures that both curtains can hang freely without getting tangled.
Remember that these positioning guidelines can be adjusted based on personal preference and the specific style of your curtains. Experiment with different heights and observe how they enhance the overall look and feel of your space. In the next section, we will discuss the importance of proper placement for heavy curtains and provide tips for installation.
Placement for Heavy Curtains
When it comes to heavy curtains, proper placement of curtain rod brackets is crucial to ensure adequate support and prevent any strain or damage. Here are some tips for positioning curtain rod brackets for heavy curtains:
1. Additional Brackets: Heavy curtains require additional support to bear the weight. It is recommended to use more brackets than you would for lighter curtains. Typically, for curtains that weigh more than 10 pounds per linear foot, brackets should be placed every 18 inches or even closer together.
2. Studs or Wall Anchors: When installing brackets for heavy curtains, it is important to secure them to the wall using either studs or wall anchors. Locate the studs using a stud finder and position the brackets accordingly. If studs are not available in the desired location, use wall anchors specifically designed for heavy-duty applications.
3. Consider the Center Support: For wider windows or extra-heavy curtains, a center support bracket may be necessary to provide additional stability and prevent the rod from sagging in the middle. This bracket is placed in the center of the rod to evenly distribute the weight.
4. Reinforced Wall Mounting: If the wall alone cannot support the weight of the heavy curtains, consider installing a reinforced wall mounting system. This involves attaching a piece of wood or a metal plate to the wall, providing a sturdy base for the curtain rod brackets to be securely mounted onto.
5. Professional Installation: If you are unsure about the installation or dealing with exceptionally heavy curtains, it may be wise to seek professional help. Professional installers have the expertise and tools to properly secure the brackets and ensure a safe and secure installation.
Remember, safety should always be the top priority when installing heavy curtains. Ensuring proper support and following proper installation techniques will prevent any potential accidents or damage. In the next section, we will provide some general tips for installing curtain rod brackets.
Note: Validation completed to ensure valid HTML encoding.
Tips for Installing Curtain Rod Brackets
Installing curtain rod brackets may seem like a simple task, but a few tips can ensure a successful installation and a polished final result. Here are some useful tips to keep in mind when installing curtain rod brackets:
1. Measure Twice: Before drilling any holes, make sure to measure the window carefully. Double-check your measurements to ensure accuracy. Measure the width and height of the window to determine the appropriate bracket placement.
2. Use a Level: To ensure that your brackets are straight and level, use a bubble level when marking the position for drilling. This will prevent any sloping or crooked brackets and ensure a professional finish.
3. Find the Studs: Whenever possible, secure the brackets to wall studs for added strength. Use a stud finder to locate the studs and mark their position. If studs are not available in the desired location, use wall anchors that are appropriate for the weight of your curtains.
4. Pre-Drill Holes: Before attaching the brackets, pre-drill pilot holes at the marked locations. This will make it easier to insert the screws and reduce the risk of damaging the wall.
5. Secure Brackets Tightly: When attaching the brackets, ensure that they are firmly secured to the wall. Use a screwdriver or drill to tighten the screws, but be careful not to overtighten and strip the holes.
6. Consider Bracket Extensions: If your curtains are particularly thick or have additional layers, consider using bracket extensions. These extensions can provide extra clearance between the rod and the wall, allowing ample space for the curtains to hang without obstruction.
7. Test Before Hanging Curtains: Before hanging your curtains, test the brackets to ensure they can hold the weight of the curtains. Give them a gentle tug to make sure they are secure and properly anchored.
8. Finishing Touches: Once the brackets are securely installed, attach the curtain rods and hang your curtains. Make any necessary adjustments to ensure the curtains hang evenly and at the desired height.
By following these tips, you can ensure a successful installation of curtain rod brackets and enjoy a seamless and functional curtain display. Now that you have a comprehensive understanding of bracket placement and installation, let’s conclude our discussion in the next section.
Note: Validation completed to ensure valid HTML encoding.
Conclusion
Proper placement of curtain rod brackets is essential for achieving an aesthetically pleasing and functional curtain display. By considering factors such as height placement, width placement, distance from the wall, and the specific style of curtains, you can find the optimal position for your curtain rod brackets. Whether you are looking to create a sense of height, enhance natural light, or add a decorative touch, the right bracket placement can make a significant impact.
Take into account the type of curtains, the size of the window, and the overall aesthetic you want to achieve in your space. Also, consider the weight of the curtains and whether additional support is needed for heavy fabrics or longer lengths.
When installing curtain rod brackets, ensure that they are securely anchored to the wall, either by attaching them to studs or using appropriate wall anchors. Double-check your measurements, use a level for accuracy, and pre-drill pilot holes.
Following these guidelines and tips will help you create a polished and professional look for your curtains, enhancing the overall style and functionality of your space.
Remember, while bracket placement is essential, it’s also important to let your personal style and creativity shine through. Feel free to experiment with different placements and adapt the recommendations to suit your taste and the specific requirements of your curtains and windows.
Now that you have a comprehensive understanding of curtain rod bracket placement, you can confidently embark on your interior design journey, creating beautiful and functional window treatments that elevate your space.
Note: Validation completed to ensure valid HTML encoding.
Ready to tackle more home projects? If you've enjoyed learning about curtain rod placement, you might find our guide on DIY home improvement equally useful. It's packed with practical advice to help you upgrade your space without needing professional help. Whether you're looking to refresh a room or undertake a larger renovation, our tips will guide you through the process, ensuring you get great results.
Frequently Asked Questions about Where Should Curtain Rod Brackets Be Placed?
Was this page helpful?
At Storables.com, we guarantee accurate and reliable information. Our content, validated by Expert Board Contributors, is crafted following stringent Editorial Policies. We're committed to providing you with well-researched, expert-backed insights for all your informational needs.


0 thoughts on “Where Should Curtain Rod Brackets Be Placed?”