Home>Maintenance & Safety>Child & Elderly Safety at Home>How To Make A High Chair Banner
Child & Elderly Safety at Home
How To Make A High Chair Banner
Modified: February 18, 2024
Learn how to create a high chair banner for your child's safety at home. Discover tips for child and elderly safety to keep your home secure.
(Many of the links in this article redirect to a specific reviewed product. Your purchase of these products through affiliate links helps to generate commission for Storables.com, at no extra cost. Learn more)
Introduction
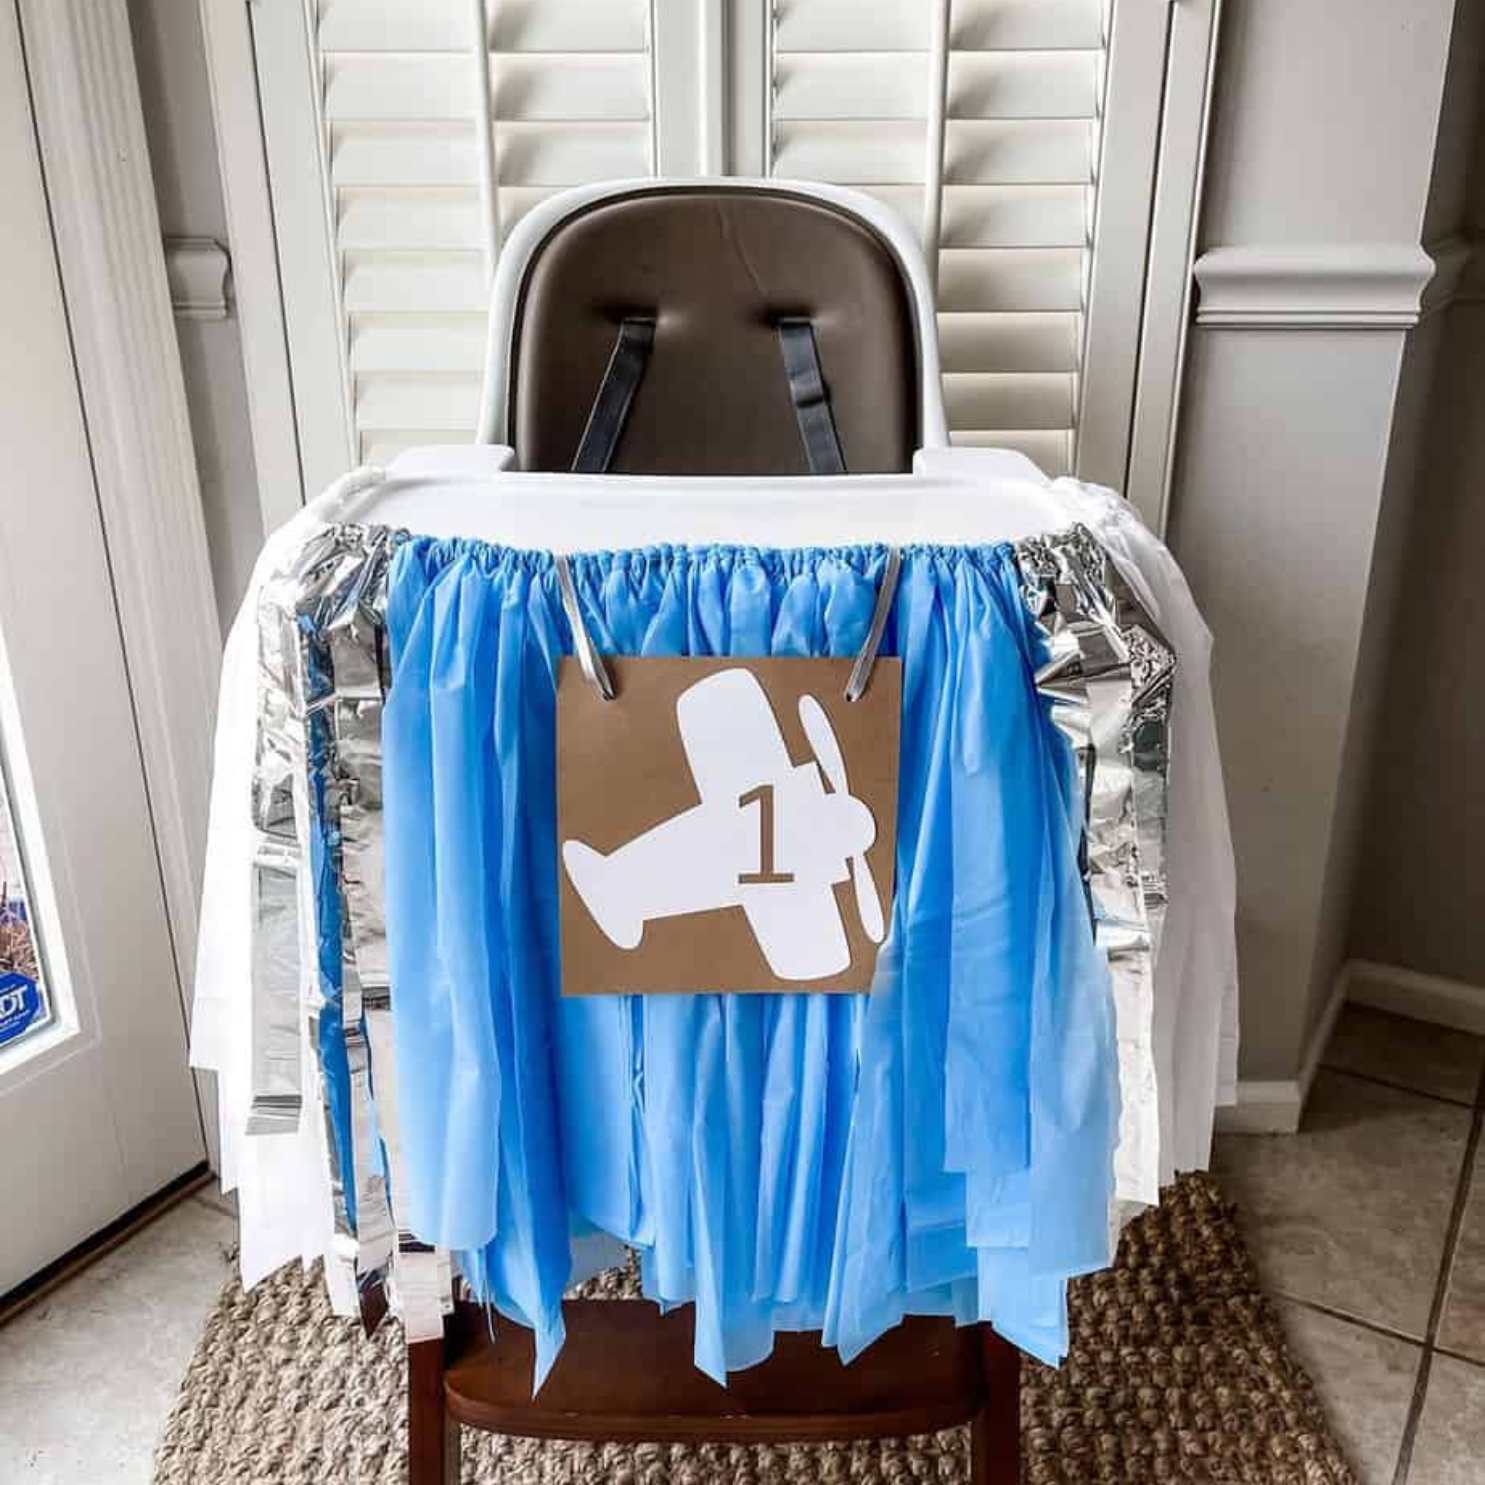
Creating a high chair banner is a delightful way to add a personalized touch to a special occasion, such as a first birthday celebration or a baby shower. This charming decorative piece not only adds a festive flair to the high chair but also serves as a wonderful backdrop for capturing memorable photographs. Whether you're a seasoned crafter or a novice DIY enthusiast, making a high chair banner is a gratifying and achievable project that allows you to showcase your creativity while celebrating a precious milestone.
The process of crafting a high chair banner provides an opportunity to infuse your unique style and personality into the design. From selecting the perfect fabric and embellishments to customizing the banner with the guest of honor's name or themed elements, every step of the creation process allows for personalization and creativity. Additionally, the satisfaction of seeing the finished banner adorning the high chair, ready to elevate the ambiance of the celebration, is truly rewarding.
Not only does a high chair banner serve as a visually appealing decoration, but it also holds sentimental value. As it becomes a focal point during the festivities, it symbolizes the love and joy surrounding the little one's milestone. The banner becomes a cherished keepsake, evoking fond memories each time it is admired in photographs or carefully stowed away as a memento of the special day.
In the following sections, we will explore the materials needed and the step-by-step process to create a high chair banner that will be the highlight of the celebration. With a few simple materials and a touch of creativity, you can embark on this delightful crafting journey and produce a stunning high chair banner that will be treasured for years to come. Let's dive into the creative process and bring your vision to life!
Key Takeaways:
- Crafting a high chair banner is a fun and rewarding way to add a personal touch to special occasions. It allows for creativity and personalization, making it a cherished keepsake for years to come.
- The process involves selecting fabric, measuring and cutting, sewing, adding embellishments, and attaching the banner to the high chair. It’s a delightful journey that culminates in a visually captivating and cherished decoration.
Read more: How To Attach A High Chair Banner
Materials Needed
To embark on the delightful journey of creating a high chair banner, you will need a few essential materials to bring your vision to life. Gathering these supplies is the first step toward crafting a charming and personalized decoration that will add a touch of whimsy to any celebratory occasion. Here's a list of the materials you'll need to get started:
-
Fabric: Select a fabric that aligns with the theme or color scheme of the event. Whether it's a soft pastel for a baby shower or vibrant hues for a birthday celebration, the fabric will serve as the foundation of your high chair banner.
-
Scissors: A pair of sharp fabric scissors is essential for cutting the fabric into the desired shapes and sizes. Precision is key when working with fabric, so ensure that your scissors are suitable for this purpose.
-
Sewing Machine or Needle and Thread: Depending on your preference and expertise, you can use a sewing machine or a needle and thread to assemble the fabric pieces. A sewing machine offers efficiency, while hand-sewing allows for a more personalized touch.
-
Embellishments: Consider adding embellishments such as ribbons, lace, or felt shapes to adorn the banner and enhance its visual appeal. These decorative elements will infuse personality and charm into your creation.
-
Measuring Tape: Accurate measurements are crucial for ensuring that the fabric pieces are cut to the appropriate size. A measuring tape will aid in achieving precision and uniformity throughout the crafting process.
-
Cardstock or Felt: Opt for sturdy cardstock or felt to create letters or shapes that spell out the guest of honor's name or convey the theme of the celebration. These materials will form the decorative elements of the banner.
-
Hot Glue Gun or Fabric Glue: A hot glue gun or fabric glue will be indispensable for securely attaching the embellishments and decorative elements to the fabric, ensuring that they withstand the festivities.
-
Ribbon or Twine: Select a coordinating ribbon or twine to string the fabric pieces together and hang the banner from the high chair. This element adds a delightful finishing touch to the overall design.
By gathering these materials, you are poised to embark on a delightful crafting endeavor that will result in a captivating high chair banner. With these essentials at your disposal, you can infuse your creativity and personal flair into the project, culminating in a charming decoration that will be cherished during the celebratory event and for years to come.
Step 1: Measure and Cut the Fabric
The initial step in creating a captivating high chair banner is to measure and cut the fabric, laying the foundation for the charming decorative piece. Begin by selecting the fabric that aligns with the theme or color scheme of the event, ensuring that it reflects the desired ambiance and complements the overall aesthetic. Whether it's a soft pastel for a baby shower or vibrant hues for a birthday celebration, the fabric serves as the canvas for your creative vision.
Using a measuring tape, carefully determine the dimensions for the fabric pieces, considering the size of the high chair and the desired length of the banner. It's essential to achieve uniformity in the fabric pieces to ensure a cohesive and visually appealing design. Once the measurements are established, use sharp fabric scissors to cut the fabric into the desired shapes and sizes, exercising precision and attention to detail throughout the process.
Whether you opt for traditional rectangular pieces or whimsical pennant shapes, the fabric pieces should be cut with care to maintain clean edges and a polished appearance. The dimensions of the fabric pieces will dictate the overall look and feel of the banner, so take the time to ensure that each piece is crafted with accuracy and intention.
As you embark on this step, consider the placement of any decorative elements or embellishments that will adorn the fabric pieces. Whether it's delicate lace trim, vibrant ribbon accents, or charming felt shapes, envision how these embellishments will complement the fabric and enhance its visual appeal. By strategically planning the placement of these elements, you can seamlessly integrate them into the fabric pieces during the subsequent steps of the crafting process.
By meticulously measuring and cutting the fabric with precision and creativity, you set the stage for the next steps in the crafting journey, laying the groundwork for a high chair banner that exudes charm and personality. With the fabric pieces cut to perfection, you are ready to move on to the next phase of assembling and embellishing the banner, bringing your unique vision to life with each thoughtful detail.
Step 2: Sew the Fabric Pieces Together
With the fabric pieces meticulously cut and adorned with envisioned embellishments, the next step in creating a captivating high chair banner is to sew the fabric pieces together. This pivotal phase of the crafting process brings the individual elements together, transforming them into a cohesive and visually stunning banner that will adorn the high chair with charm and elegance.
If you are adept at sewing and have access to a sewing machine, this step offers an opportunity to leverage the efficiency and precision of machine sewing. Begin by arranging the fabric pieces in the desired sequence, ensuring that the decorative elements and embellishments are strategically positioned to achieve a harmonious overall design. With the fabric pieces aligned, carefully feed them through the sewing machine, securing them together with neat and straight stitches. As you guide the fabric through the machine, maintain a steady pace to achieve uniformity in the stitching, ensuring that each piece is securely attached to the next.
For those who prefer a more hands-on approach or do not have access to a sewing machine, hand-sewing presents a delightful alternative. Thread a needle with coordinating thread and carefully stitch the fabric pieces together, employing a simple running stitch or a decorative stitch pattern to add a personalized touch to the banner. As you navigate the fabric with the needle and thread, pay close attention to the tension and spacing of the stitches, aiming for a seamless and polished outcome.
Throughout the sewing process, it's essential to maintain a keen eye for detail, ensuring that the fabric pieces are aligned and the decorative elements are securely attached. Whether you opt for machine sewing or hand-sewing, the goal is to create a durable and visually appealing bond between the fabric pieces, resulting in a cohesive and enchanting high chair banner.
As the fabric pieces are skillfully sewn together, the banner begins to take shape, reflecting the care and creativity infused into its crafting. Each stitch serves as a testament to the dedication and artistry poured into the project, culminating in a charming decoration that will elevate the ambiance of the celebratory event. With the fabric pieces seamlessly united, the banner is poised for the final embellishments and the eagerly anticipated attachment to the high chair, marking the culmination of the crafting journey and the beginning of its enchanting presence at the celebration.
When making a high chair banner, use sturdy materials like cardstock or fabric to ensure it holds up well. Be sure to measure the dimensions of the high chair tray to ensure a proper fit. Use strong adhesive or ties to secure the banner to the chair.
Step 3: Add Embellishments
With the fabric pieces skillfully sewn together, the high chair banner is ready to undergo a transformative phase as embellishments are added to infuse it with personality and charm. This step presents an opportunity to elevate the visual appeal of the banner, adding delightful accents that capture the essence of the celebratory occasion and reflect the unique style of the creator.
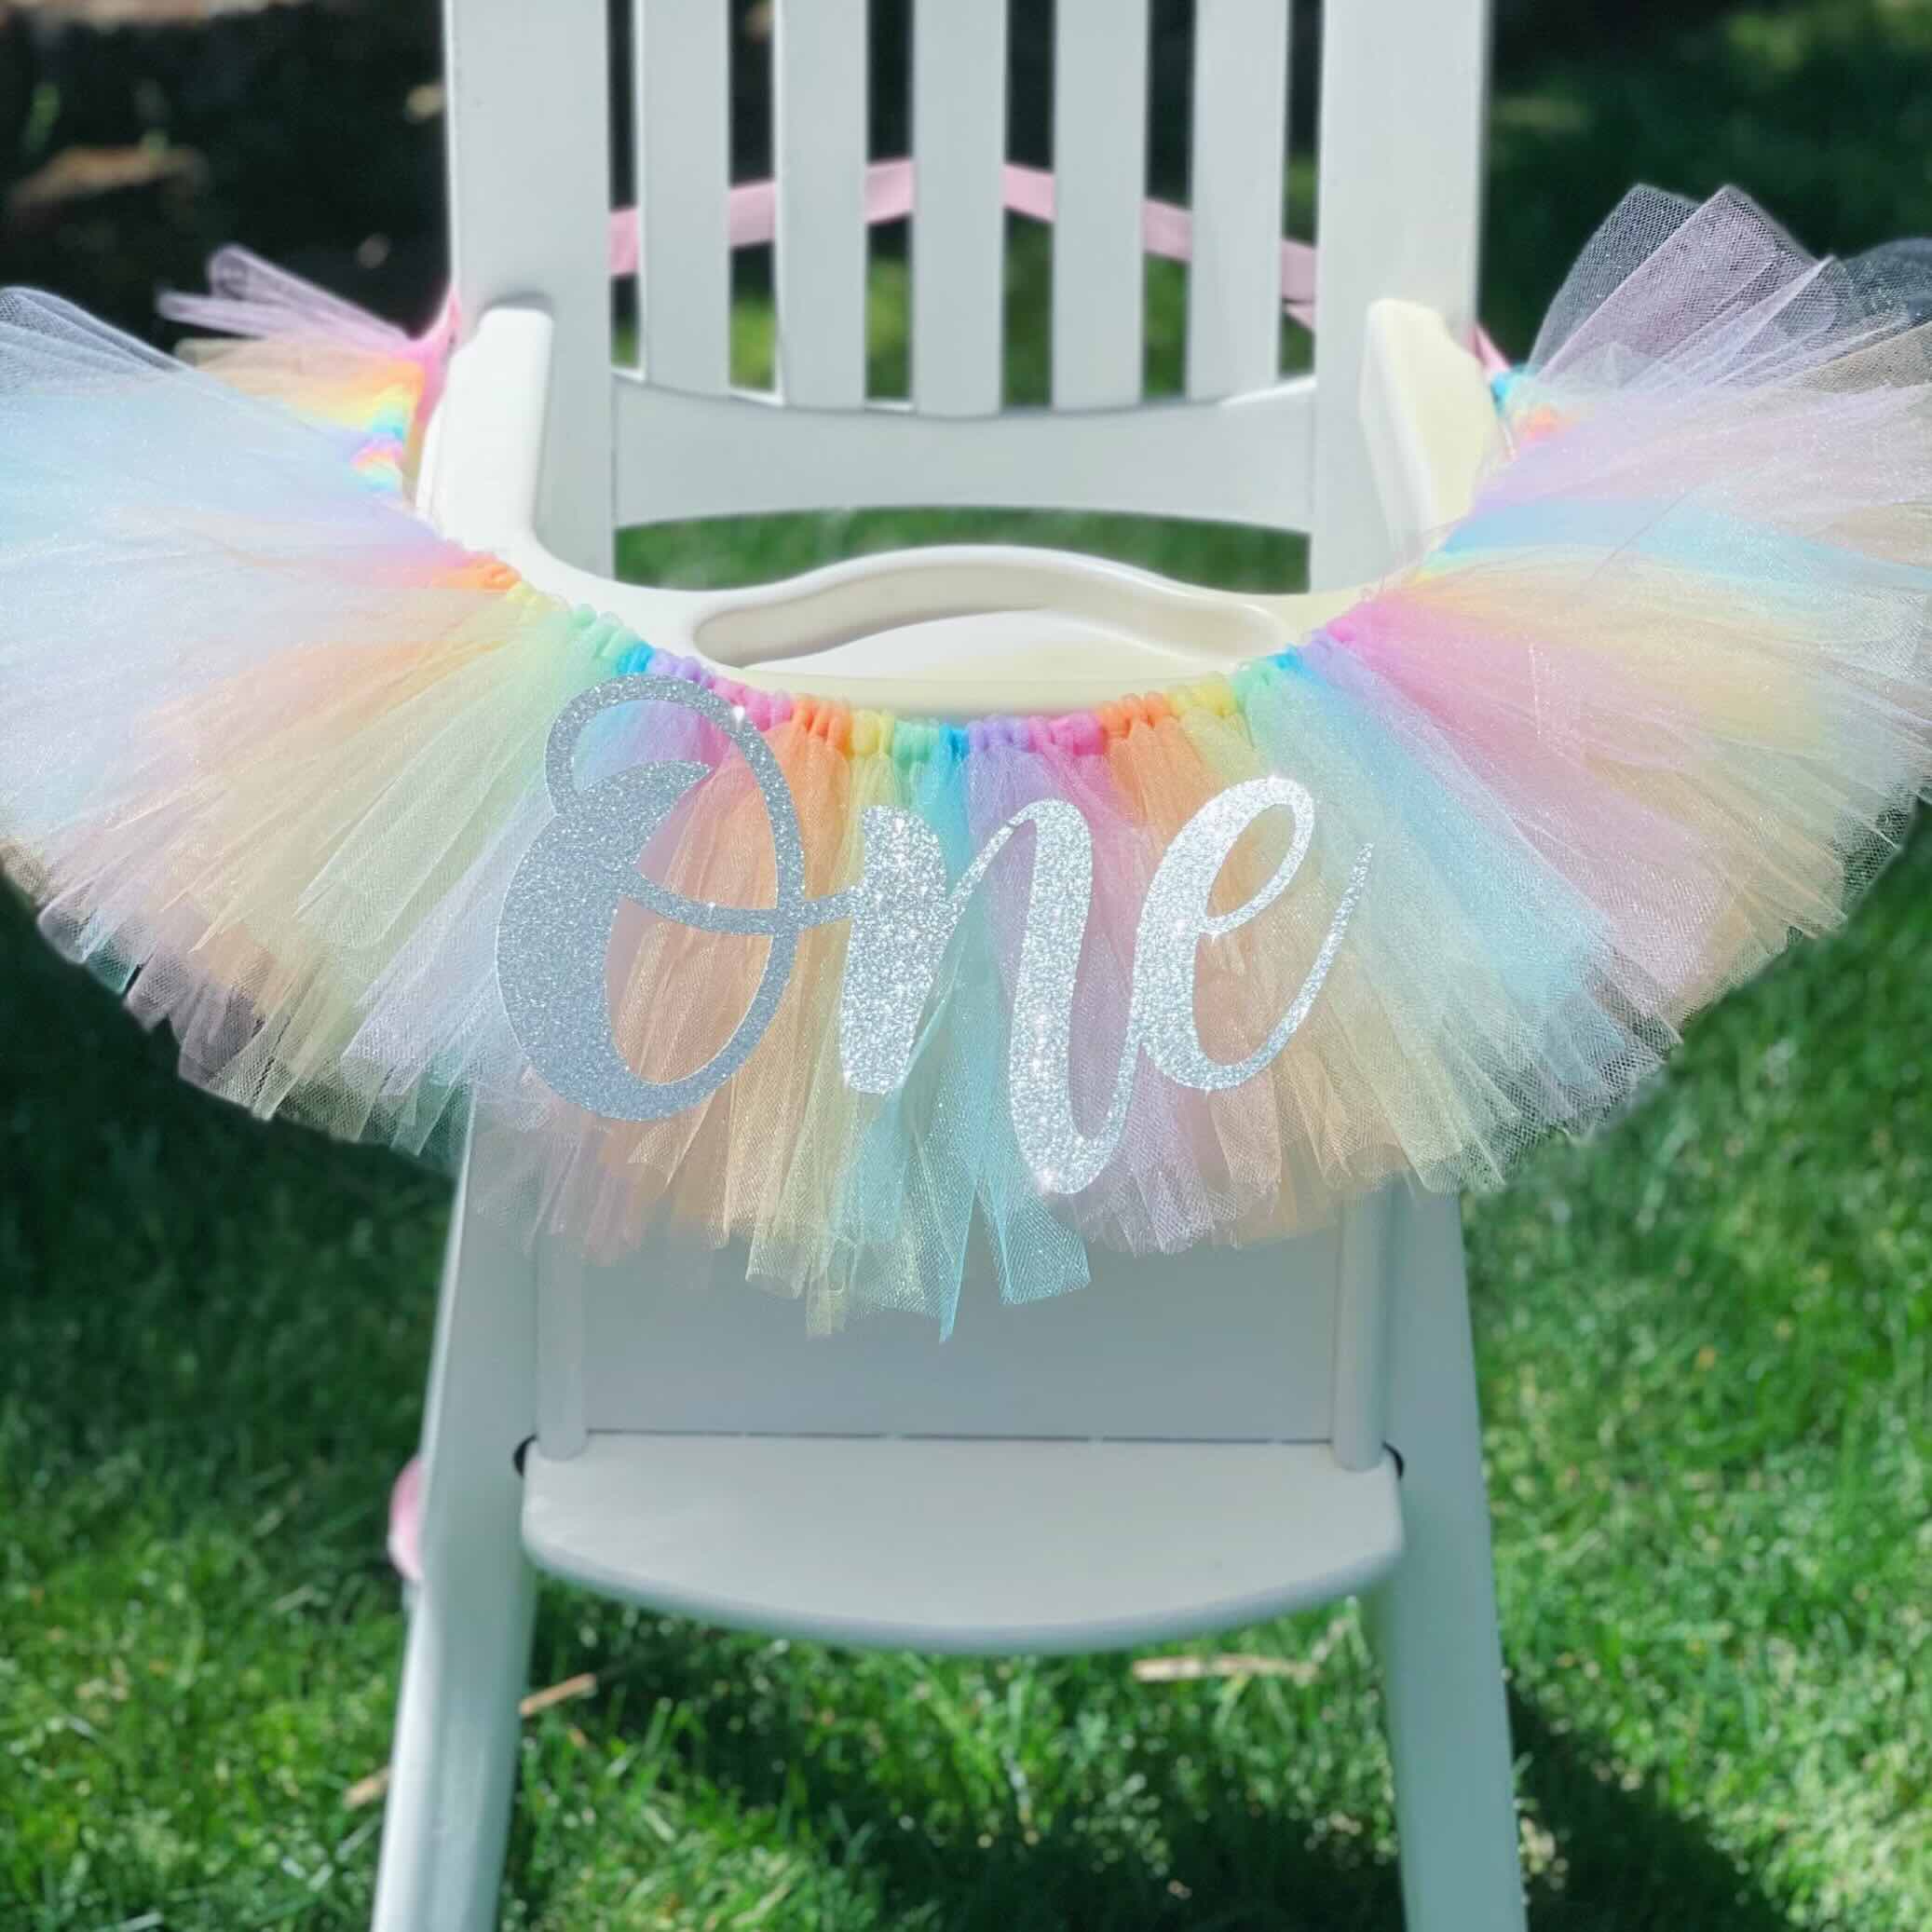
Embellishments play a pivotal role in enhancing the banner's aesthetic appeal, allowing for creative expression and personalization. Consider incorporating an array of decorative elements such as ribbons, lace, felt shapes, or miniature bunting to adorn the fabric pieces. These embellishments serve as whimsical touches that elevate the banner, infusing it with character and visual allure.
When adding embellishments, envision how each element contributes to the overall design, harmonizing with the fabric and contributing to the cohesive aesthetic. Whether it's delicate lace trim adorning the edges of the fabric pieces, vibrant ribbons cascading gracefully along the banner, or charming felt shapes depicting thematic elements, each embellishment should be thoughtfully integrated to create a captivating visual composition.
The placement of embellishments is a creative endeavor that allows for artistic expression and attention to detail. Carefully consider the arrangement of each decorative element, ensuring that they complement the fabric pieces and contribute to a harmonious and enchanting design. Whether you opt for symmetrical placement or a whimsical scattering of embellishments, each decision adds to the banner's unique charm.
As you add embellishments, consider the tactile and visual impact they will impart. The texture of lace, the sheen of satin ribbons, and the whimsy of felt shapes contribute to a multi-dimensional and captivating aesthetic. By incorporating a variety of textures and materials, the banner becomes a tactile and visual delight, inviting admiration and evoking a sense of joy and celebration.
The addition of embellishments marks a significant milestone in the crafting journey, infusing the high chair banner with personality, charm, and a touch of whimsy. Each carefully selected and thoughtfully placed embellishment contributes to the banner's visual narrative, transforming it into a captivating decorative piece that will enchant and delight during the celebratory event.
With the embellishments adorning the fabric pieces, the high chair banner blossoms into a charming and visually captivating decoration, ready to take its place of honor and infuse the celebratory occasion with warmth and enchantment. The next step will involve attaching the banner to the high chair, bringing the crafting journey to a delightful culmination as the banner assumes its role as a cherished centerpiece of the celebration.
Read more: How To Make High Chair Garland
Step 4: Attach the Banner to the High Chair
The final step in bringing your high chair banner to life is to delicately and securely attach it to the high chair, where it will serve as a captivating centerpiece during the celebratory event. This pivotal phase marks the culmination of your crafting journey, as the banner transitions from a work in progress to a charming and visually enchanting decoration that will infuse the occasion with warmth and joy.
Begin by carefully positioning the high chair banner to ensure that it drapes elegantly and prominently, serving as a delightful backdrop for photographs and a focal point of the celebratory space. Whether you opt to affix the banner to the high chair tray or the backrest, take the time to assess the placement and ensure that it is visually appealing and securely positioned.
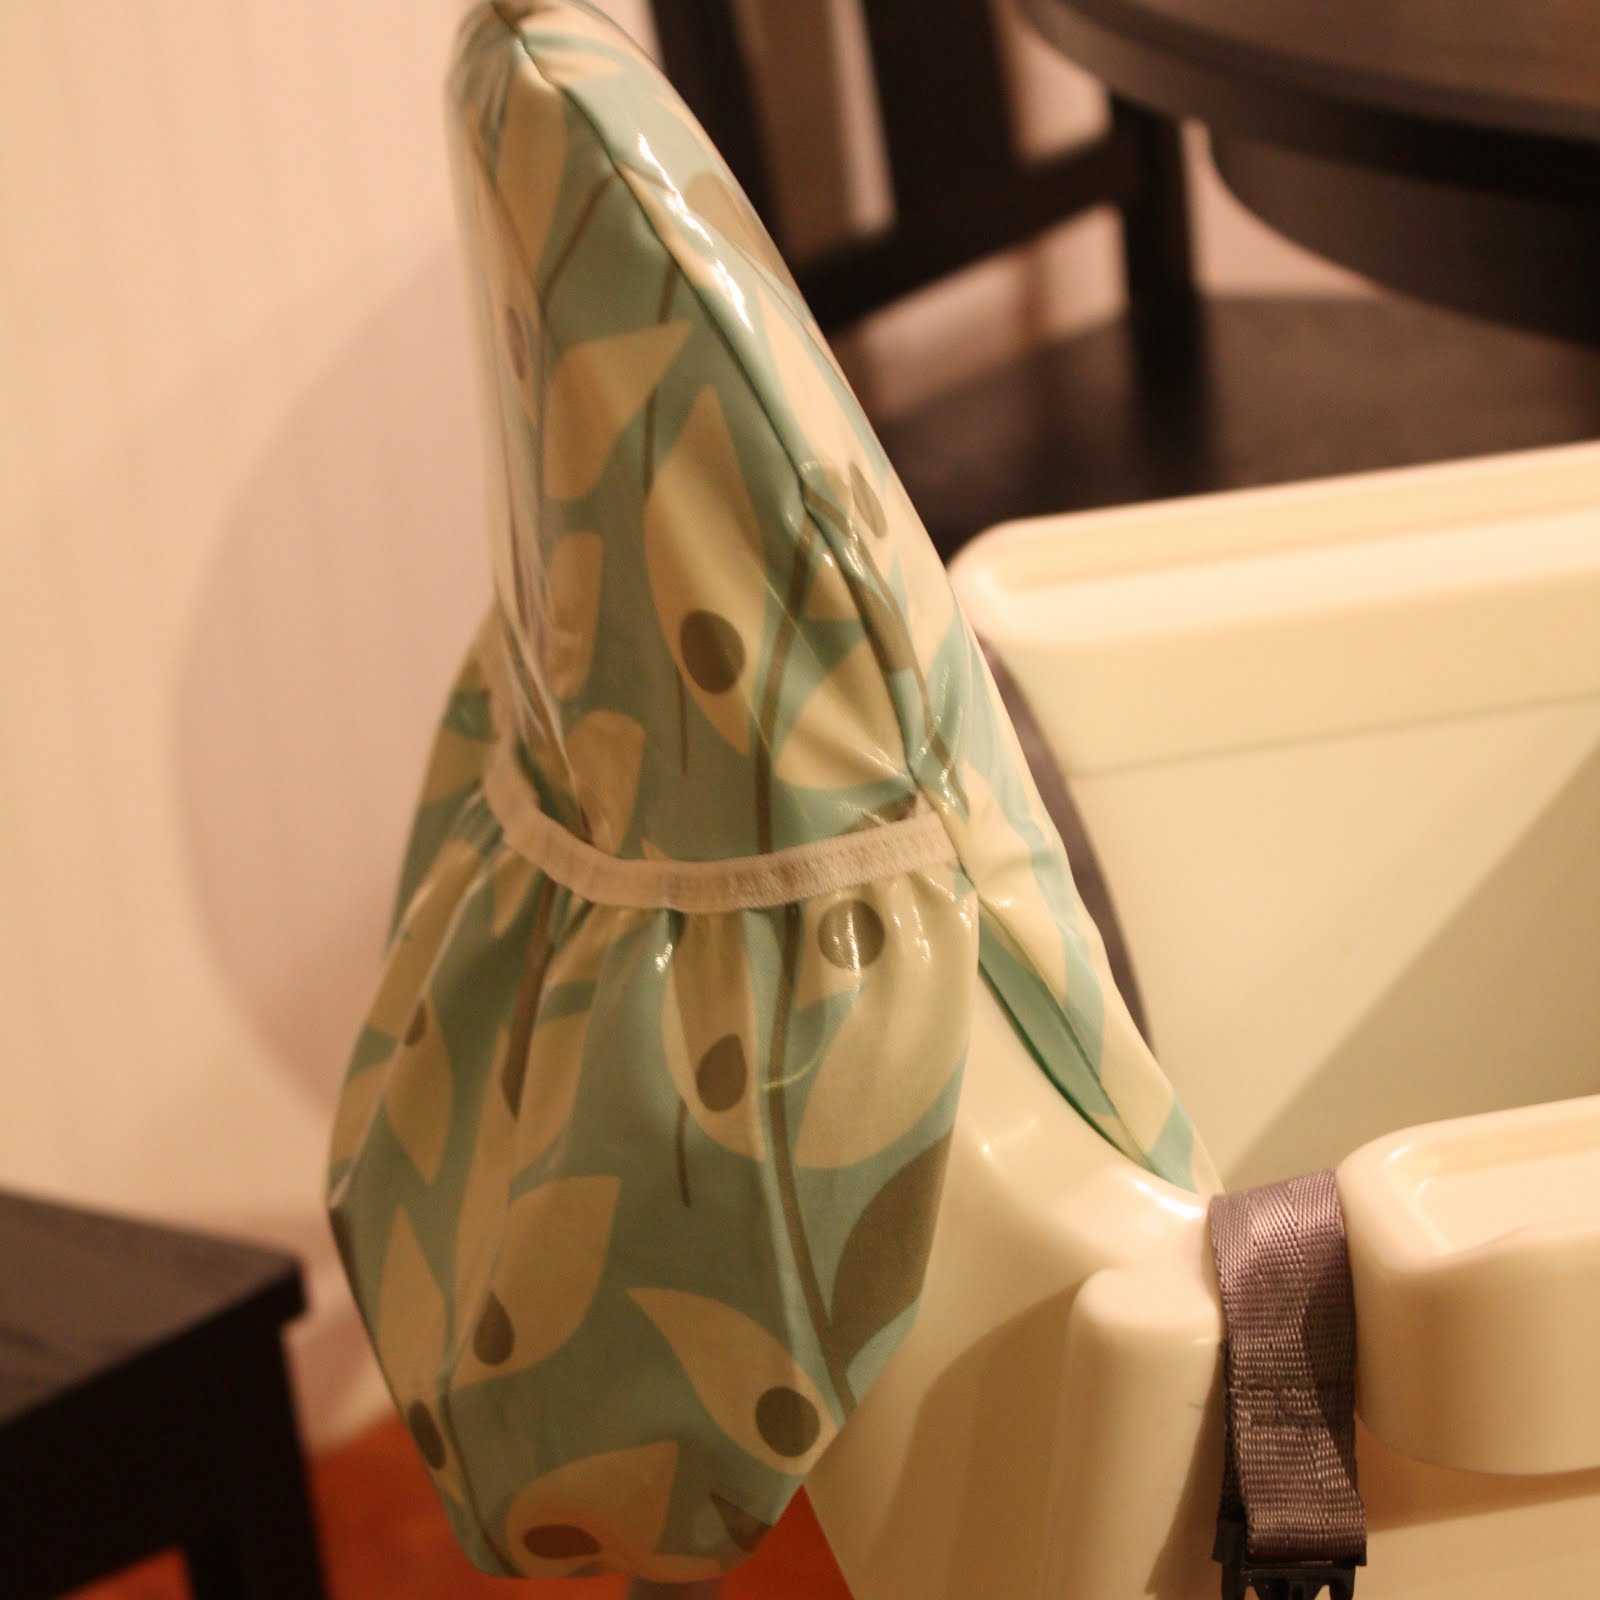
Depending on the design of the high chair and the structure of the banner, you can employ various attachment methods to secure the banner in place. For high chairs with a tray, consider using removable adhesive hooks or clips to affix the banner to the tray's edges, ensuring a snug and secure fit without causing damage to the high chair's surface.
If the high chair features a solid backrest, you can utilize coordinating ribbons or twine to elegantly tie the banner to the chair, creating a charming and seamless attachment that complements the overall design. This method allows for flexibility in adjusting the banner's position and ensures that it remains taut and visually captivating throughout the event.
As you affix the high chair banner, pay close attention to the alignment and symmetry, ensuring that it hangs gracefully and serves as a captivating embellishment to the high chair. Take a step back to admire the banner from various angles, making any necessary adjustments to achieve a visually appealing and harmonious presentation.
With the high chair banner securely attached, take a moment to revel in the culmination of your crafting endeavor. The banner, infused with your creativity and personal touch, now stands as a captivating and cherished decoration that will elevate the ambiance of the celebratory occasion. Its presence symbolizes the love and joy surrounding the milestone, serving as a visual testament to the warmth and celebration that fills the air.
As the high chair banner takes its place of honor, it becomes a focal point for capturing cherished memories and evoking a sense of delight and enchantment. Its presence adds a touch of whimsy and personalized charm to the celebratory space, creating a warm and inviting atmosphere that resonates with the joy of the occasion.
With the high chair banner delicately and securely attached, your crafting journey reaches a delightful culmination, as the banner assumes its role as a cherished centerpiece of the celebration. As it adorns the high chair with grace and charm, it stands as a testament to the artistry and creativity poured into its creation, ready to enchant and delight all who gather to celebrate the special milestone.
Conclusion
In conclusion, the process of creating a high chair banner is a delightful and rewarding endeavor that allows for the infusion of creativity, personalization, and heartfelt artistry. From selecting the perfect fabric and meticulously measuring and cutting it to sewing the fabric pieces together and adding enchanting embellishments, each step of the crafting journey contributes to the creation of a captivating and visually appealing decoration. As the banner is delicately attached to the high chair, it assumes its role as a cherished centerpiece of the celebratory event, infusing the space with warmth, charm, and a touch of whimsy.
The high chair banner, adorned with thoughtful details and personalized elements, serves as a visual testament to the love and joy surrounding the milestone being celebrated. Its presence evokes a sense of delight and enchantment, creating a warm and inviting atmosphere that resonates with the joy of the occasion. Whether it's a first birthday celebration, a baby shower, or any special event, the high chair banner becomes a focal point for capturing cherished memories and adding a personalized charm to the celebratory space.
As a cherished keepsake, the high chair banner holds sentimental value, evoking fond memories each time it is admired in photographs or carefully stowed away after the festivities. Its presence symbolizes the artistry and creativity poured into its creation, serving as a visual representation of the warmth and celebration that fills the air during the special occasion.
The crafting journey involved in making a high chair banner not only results in a visually captivating decoration but also fosters a sense of accomplishment and creative fulfillment. The opportunity to infuse the banner with personal style and thematic elements allows for a unique and heartfelt expression of love and celebration. Whether it's the selection of fabric that reflects the event's theme, the meticulous placement of embellishments, or the delicate attachment to the high chair, each step is imbued with care and intention, resulting in a charming and cherished creation.
In essence, the high chair banner becomes more than a decorative piece; it becomes a visual narrative of the love, joy, and creativity woven into its fabric. As it adorns the high chair with grace and charm, it stands as a testament to the artistry and personal touch poured into its creation, ready to enchant and delight all who gather to celebrate the special milestone.
Frequently Asked Questions about How To Make A High Chair Banner
Was this page helpful?
At Storables.com, we guarantee accurate and reliable information. Our content, validated by Expert Board Contributors, is crafted following stringent Editorial Policies. We're committed to providing you with well-researched, expert-backed insights for all your informational needs.

0 thoughts on “How To Make A High Chair Banner”