Home>Maintenance & Safety>Child & Elderly Safety at Home>How To Make High Chair Garland
Child & Elderly Safety at Home
How To Make High Chair Garland
Modified: February 18, 2024
Learn how to create a beautiful high chair garland for your child's safety at home, with our expert tips for child and elderly safety. Elevate your home decor and ensure a safe environment.
(Many of the links in this article redirect to a specific reviewed product. Your purchase of these products through affiliate links helps to generate commission for Storables.com, at no extra cost. Learn more)
Introduction
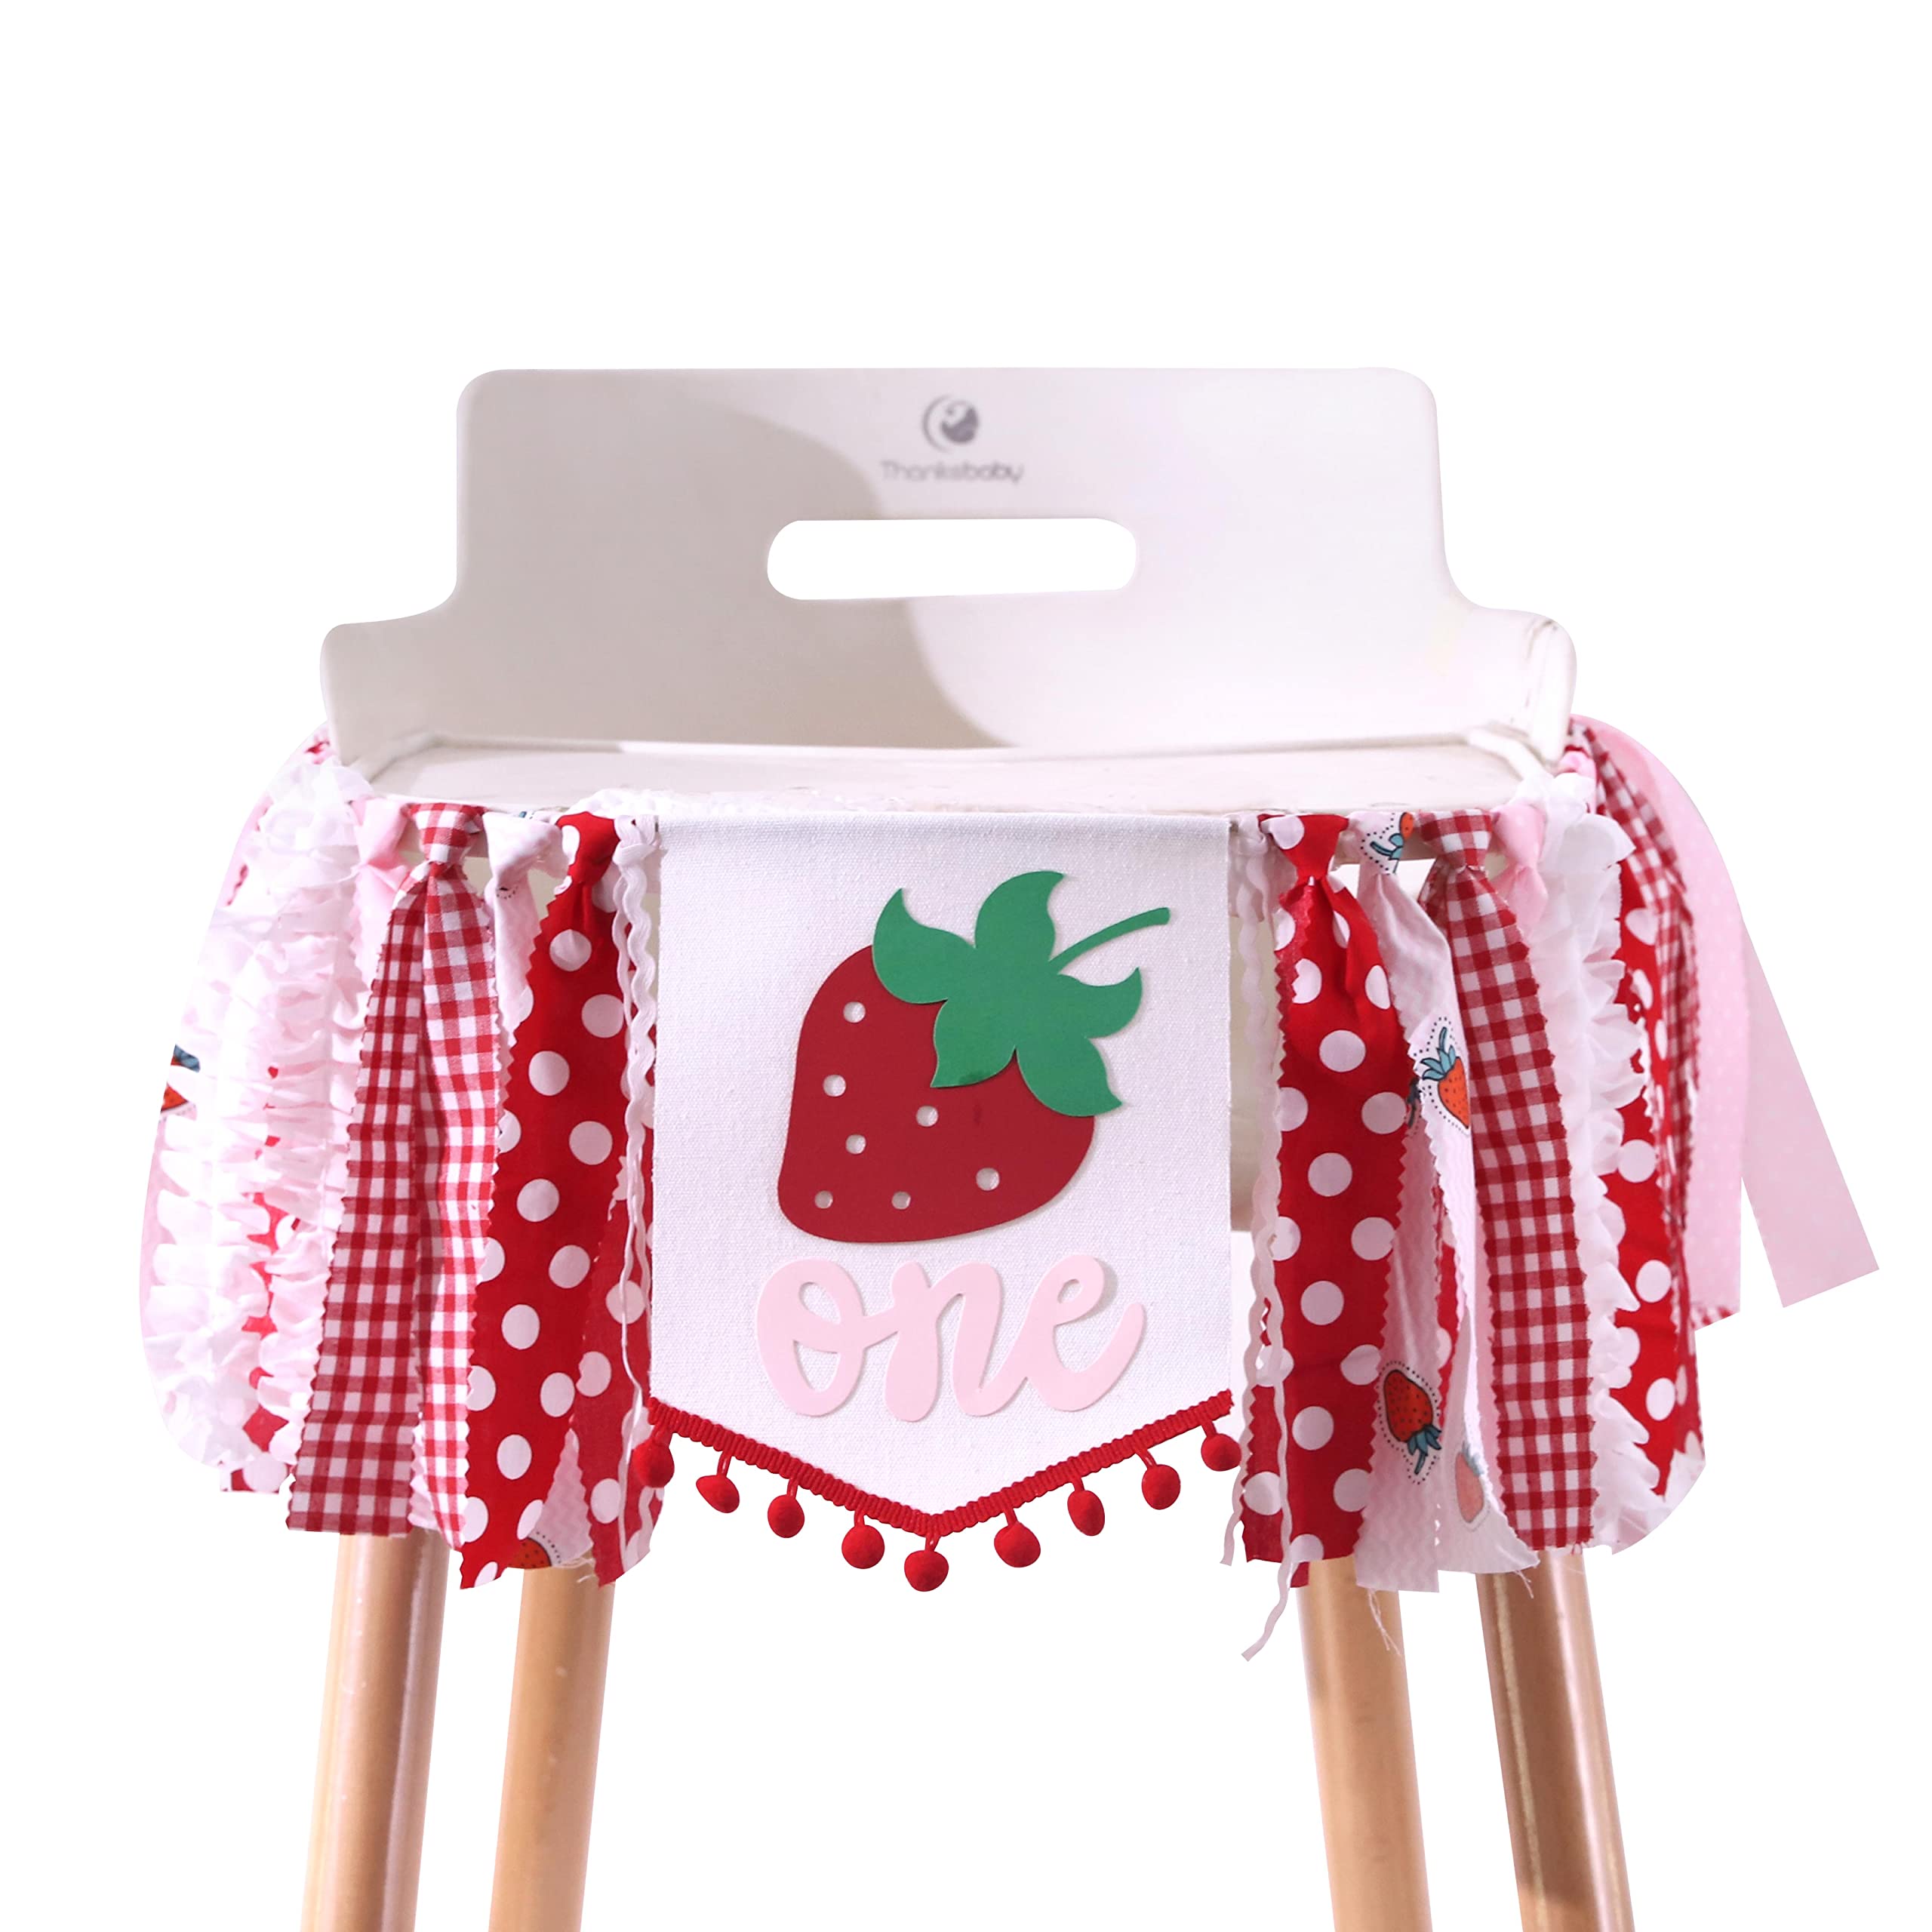
Creating a beautiful and festive high chair garland is a delightful way to add a touch of charm to any special occasion, particularly when celebrating a little one's milestone moments. Whether it's a first birthday, a baby shower, or any other joyous event, a high chair garland can instantly elevate the decor and make the little guest of honor feel extra special.
The process of crafting a high chair garland is not only enjoyable but also allows for personalization to suit the theme and color scheme of the celebration. By incorporating greenery, flowers, and decorative elements, you can infuse the garland with a whimsical and enchanting ambiance that complements the overall decor.
In this guide, we will walk through the step-by-step process of creating a stunning high chair garland. From gathering the essential materials to the final placement on the high chair, each stage will be detailed to ensure that you can embark on this creative endeavor with confidence and enthusiasm. Whether you are a seasoned crafter or a novice DIY enthusiast, this guide will provide clear and concise instructions to help you bring your vision to life.
So, gather your materials, unleash your creativity, and get ready to embark on a delightful crafting journey as we dive into the art of making a captivating high chair garland. Let's infuse joy and elegance into the celebration by crafting a beautiful adornment that will be cherished and admired by all.
Key Takeaways:
- Create a stunning high chair garland by combining ribbon, greenery, flowers, and decorative elements. This DIY project adds charm and elegance to any special occasion, delighting guests and honoring the little celebrant.
- Infuse joy and whimsy into celebrations by crafting a personalized high chair garland. With careful measurements, creative arrangements, and delicate placement, transform the high chair into a captivating focal point that embodies the spirit of the occasion.
Read more: How To Make A High Chair Tutu
Materials Needed
To embark on the delightful journey of creating a captivating high chair garland, it's essential to gather the necessary materials that will bring your vision to life. The following items are fundamental for crafting a stunning garland that will infuse joy and elegance into any celebratory occasion:
-
Ribbon or Fabric Strips: Select a ribbon or fabric that complements the color scheme and theme of the event. The length of the ribbon will depend on the size of the high chair and the desired draping effect.
-
Greenery: Opt for artificial greenery such as eucalyptus, ivy, or faux leaves. The greenery will serve as the base of the garland, providing a lush backdrop for the decorative elements.
-
Flowers: Choose an assortment of artificial flowers in various sizes, shapes, and colors. Consider blooms that align with the event's theme and the overall aesthetic you wish to achieve.
-
Decorative Elements: Incorporate decorative elements such as faux berries, small ornaments, or themed embellishments to add texture and visual interest to the garland.
-
Scissors: A pair of sharp scissors will be essential for cutting the ribbon and trimming the greenery and flowers to the desired lengths.
-
Hot Glue Gun and Glue Sticks: Ensure a reliable hot glue gun is on hand to securely attach the greenery, flowers, and decorative elements to the ribbon or fabric.
-
Wire or Floral Tape: This will be used to secure the greenery and flowers to the ribbon, providing additional stability and structure to the garland.
-
Measuring Tape: Having a measuring tape handy will aid in determining the appropriate lengths for the ribbon and greenery, ensuring a balanced and visually appealing garland.
-
Optional: Faux Foliage and Vines: If desired, consider incorporating faux foliage and vines to enhance the lushness and organic feel of the garland.
-
Optional: LED String Lights: For evening or indoor events, LED string lights can be woven into the garland to impart a magical and enchanting glow.
By gathering these materials, you will be well-equipped to commence the crafting process and bring your high chair garland to fruition. With a creative spirit and these essential items at your disposal, you are poised to embark on a delightful crafting endeavor that will add a touch of whimsy and elegance to any celebratory setting.
Step 1: Measure and Cut the Ribbon
The initial step in creating a captivating high chair garland involves measuring and cutting the ribbon to lay the foundation for the decorative masterpiece. This pivotal stage sets the stage for the garland's dimensions and draping effect, ensuring that it harmonizes seamlessly with the high chair's proportions and the overall aesthetic of the event.
Begin by selecting a ribbon or fabric that aligns with the color scheme and theme of the celebration. The length of the ribbon will depend on the size of the high chair and the desired draping effect. To determine the appropriate length, envision how you want the garland to cascade along the high chair and gently sweep the floor, creating an enchanting and whimsical ambiance.
Using a measuring tape, carefully measure and mark the desired length of the ribbon, allowing for additional length to accommodate graceful draping. It's essential to ensure that the ribbon is cut with precision, as this will directly impact the visual appeal and overall presentation of the garland.
Once the measurements are marked, carefully cut the ribbon using sharp scissors, following the designated guidelines to achieve a clean and polished edge. Attention to detail during this phase is crucial, as it sets the stage for the subsequent steps of attaching greenery, flowers, and decorative elements.
As you complete this step, envision the ribbon as the canvas upon which the garland will come to life, infusing the celebration with charm and elegance. With the ribbon expertly measured and cut, you are now poised to embark on the next stage of attaching the greenery, laying the groundwork for a visually captivating and enchanting high chair garland.
By meticulously measuring and cutting the ribbon with care and precision, you have taken the first step towards crafting a stunning adornment that will elevate the ambiance of the celebration, delighting guests and creating a cherished focal point for the little guest of honor.
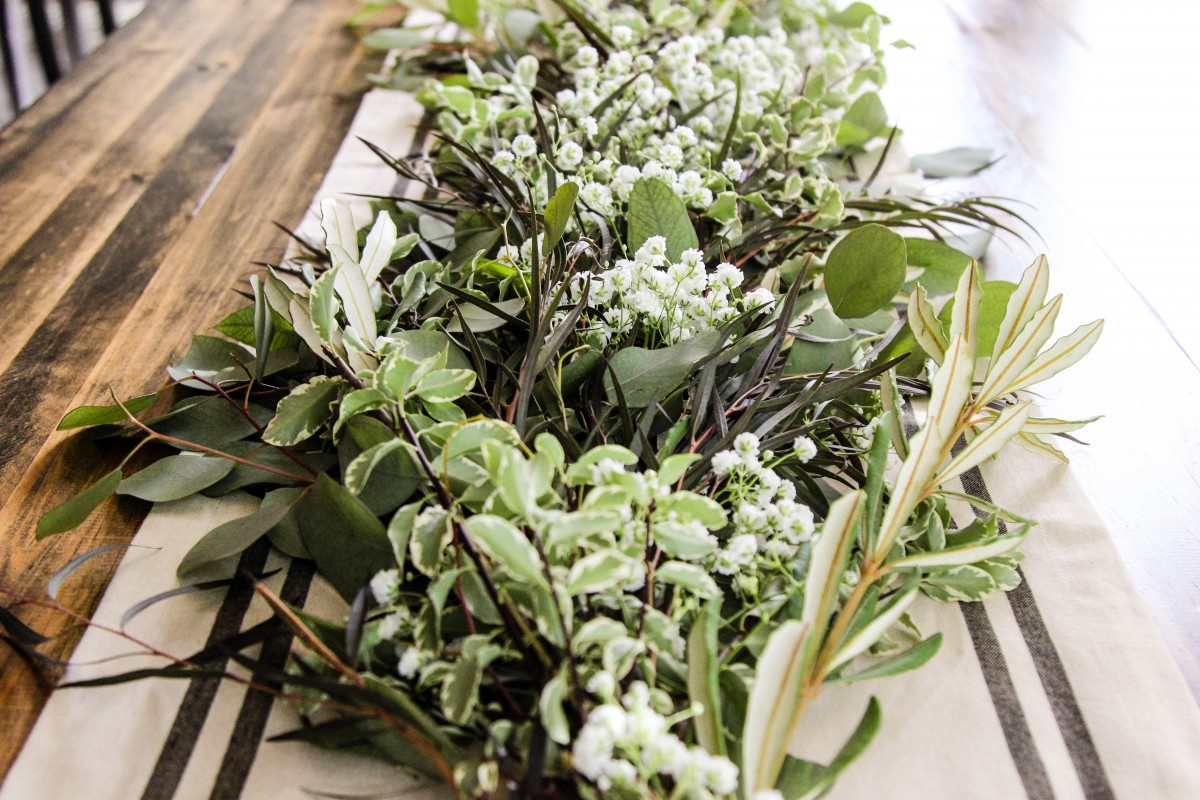
Step 2: Attach the Greenery
With the ribbon serving as the foundational canvas for the high chair garland, the next pivotal step involves attaching the lush greenery that will form the backdrop for the enchanting decorative elements. The greenery not only adds a touch of natural elegance but also provides a visually captivating base for the vibrant flowers and ornamental accents that will follow.
Begin by selecting artificial greenery such as eucalyptus, ivy, or faux leaves, ensuring that the chosen foliage complements the overall theme and aesthetic of the event. The greenery should be trimmed into manageable sections, allowing for ease of attachment to the ribbon. Using a pair of sharp scissors, carefully trim the greenery to the desired lengths, ensuring that each piece harmonizes with the dimensions of the ribbon and the envisioned cascading effect.
Once the greenery is prepared, it's time to affix it to the ribbon. A reliable hot glue gun and glue sticks will be indispensable for securely attaching the greenery, ensuring that it remains steadfast and visually appealing throughout the celebration. Apply a thin, even line of hot glue along the back of the greenery, then gently press it onto the ribbon, holding it in place for a few moments to allow the adhesive to set.
As you proceed with attaching the greenery, consider the placement and arrangement, aiming for a balanced and lush appearance. Layer the greenery along the length of the ribbon, allowing it to gracefully drape and create a verdant backdrop that sets the stage for the forthcoming floral embellishments.
To further fortify the attachment of the greenery, consider using wire or floral tape to secure any delicate or protruding sections, ensuring that the garland maintains its structural integrity and visual allure. This additional reinforcement will provide stability and longevity, allowing the garland to withstand the festivities and remain a captivating focal point throughout the event.
As the greenery is meticulously affixed to the ribbon, envision the transformation taking place, as the once bare canvas evolves into a lush and enchanting adornment that will infuse the celebration with natural beauty and whimsical charm. With the greenery expertly attached, the garland begins to exude an organic elegance that sets the stage for the subsequent embellishments, culminating in a visually captivating and enchanting high chair garland.
By skillfully attaching the greenery with precision and artistry, you have laid the foundation for a garland that will captivate and delight, infusing the celebratory setting with a touch of natural splendor and timeless elegance.
When making a high chair garland, be sure to use sturdy materials that can withstand movement and potential tugging from the child. Also, consider using non-toxic materials in case the child decides to touch or taste the garland.
Step 3: Add Flowers and Decorations
With the lush greenery serving as the verdant backdrop for the high chair garland, the next enchanting phase involves the addition of vibrant flowers and decorative elements, infusing the adornment with a captivating burst of color, texture, and whimsical charm. This pivotal stage allows for the infusion of personalized touches, aligning the garland with the event's theme and creating a visually captivating masterpiece that will delight guests and honor the little celebrant.
Select an assortment of artificial flowers in various sizes, shapes, and colors, ensuring that they harmonize with the overall aesthetic and color scheme of the celebration. Opt for blooms that evoke a sense of joy and celebration, such as dainty roses, cheerful daisies, or elegant peonies, infusing the garland with a delightful array of floral splendor. Additionally, consider incorporating decorative elements such as faux berries, small ornaments, or themed embellishments, adding texture and visual interest to the garland while further personalizing it to suit the occasion.
Carefully trim the stems of the artificial flowers to the desired lengths, allowing for seamless integration into the garland. With a pair of sharp scissors, ensure that each bloom is prepared for attachment, maintaining a balance of sizes and colors to create a harmonious and visually appealing arrangement. Once the flowers are prepared, begin affixing them to the garland, interspersing them among the greenery to create a captivating tapestry of natural beauty and floral elegance.
A reliable hot glue gun and glue sticks will be indispensable for securely attaching the flowers and decorative elements to the garland, ensuring that they remain steadfast and visually enchanting throughout the celebration. Apply a small amount of hot glue to the base of each flower and carefully position it amidst the greenery, holding it in place for a few moments to allow the adhesive to set. As you proceed with the placement of the flowers and decorative elements, consider the overall composition, aiming for a balanced and visually captivating arrangement that exudes a sense of whimsy and natural splendor.
To further enhance the garland's allure, consider weaving in faux berries, small ornaments, or themed embellishments, adding delightful accents that reflect the event's theme and infuse the garland with personalized charm. These decorative elements will contribute to the garland's enchanting narrative, creating a visually captivating masterpiece that serves as a cherished focal point for the celebration.
As the flowers and decorative elements are meticulously integrated into the garland, envision the transformation taking place, as the once verdant backdrop evolves into a vibrant tapestry of natural beauty and whimsical charm. With each carefully positioned bloom and embellishment, the garland becomes a visual symphony of color and elegance, infusing the celebratory setting with an enchanting ambiance that captivates and delights.
By skillfully adding flowers and decorative elements with precision and artistry, you have elevated the garland into a captivating masterpiece that embodies the joy and elegance of the occasion, creating a cherished focal point that will be admired and celebrated by all.
Read more: How To Make A High Chair Cover
Step 4: Hang the Garland on the High Chair
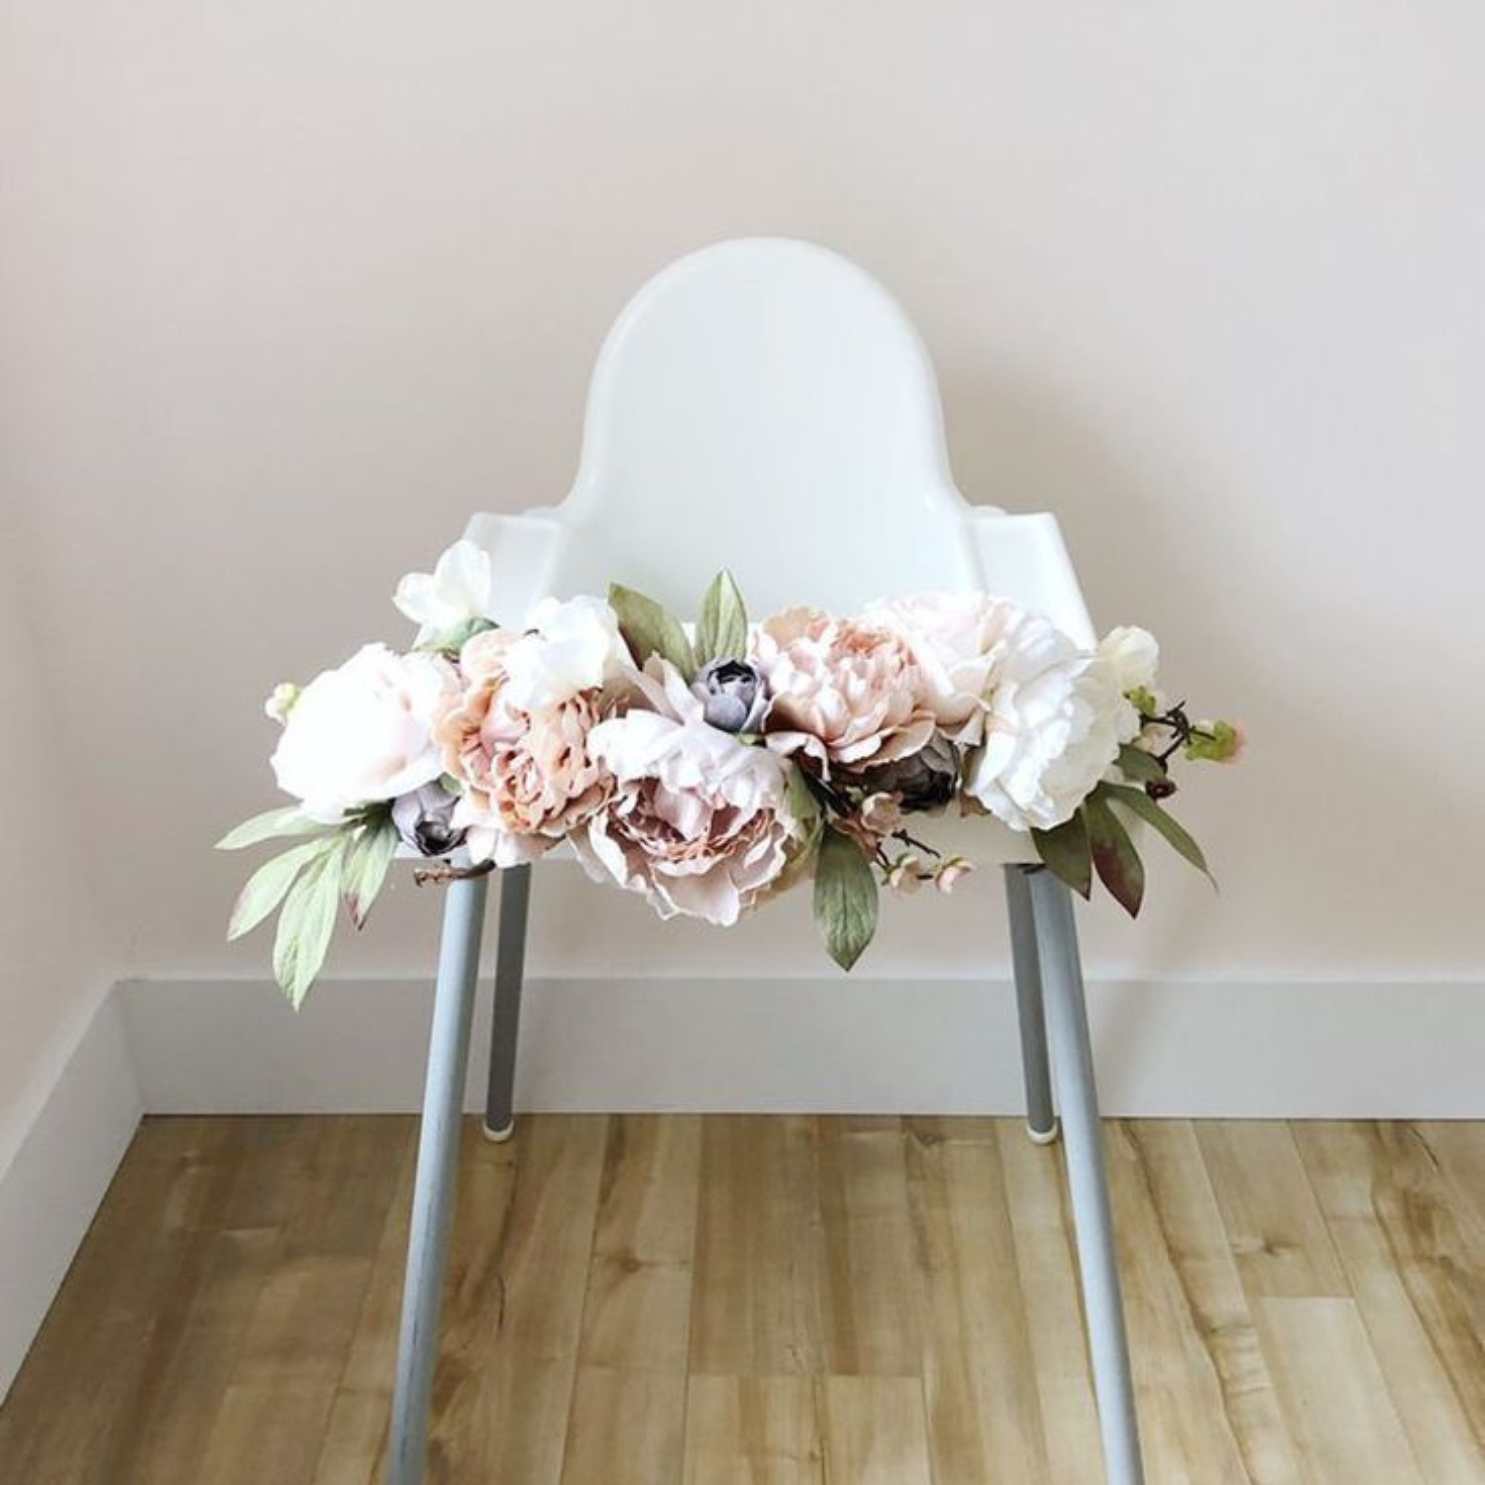
With the meticulously crafted high chair garland now adorned with lush greenery, vibrant flowers, and delightful decorative elements, the final and most gratifying step awaits – the placement of the garland on the high chair. This culminating stage brings the vision to fruition, infusing the celebratory setting with an enchanting ambiance and creating a captivating focal point that honors the little guest of honor.
To begin, carefully drape the adorned garland along the high chair, allowing it to gracefully cascade and frame the seat with an air of whimsical elegance. Ensure that the garland is evenly distributed along the length of the high chair, creating a balanced and visually captivating display that harmonizes with the surrounding decor.
As you position the garland, take a moment to step back and admire the enchanting transformation it brings to the high chair. The lush greenery, vibrant blooms, and personalized decorative elements intertwine to create a captivating tapestry of natural beauty and joyous celebration, infusing the high chair with an aura of elegance and charm.
Once the garland is delicately draped and positioned to perfection, take a moment to make any necessary adjustments, ensuring that it flows seamlessly and exudes an enchanting allure. The garland should gently sweep the floor, creating a whimsical and visually captivating display that serves as a cherished focal point for the celebration.
As the garland adorns the high chair, it becomes a symbol of joy and celebration, embodying the essence of the special occasion and honoring the little one at the center of the festivities. The vibrant colors, lush greenery, and personalized touches converge to create a visually captivating masterpiece that delights guests and creates lasting memories.
With the high chair garland expertly positioned and adorning the seat with grace and elegance, the celebratory setting is transformed into a whimsical and enchanting space that exudes warmth and joy. The garland serves as a testament to the artistry and creativity poured into its creation, leaving a lasting impression and becoming a cherished element of the celebration.
In this culminating moment, the high chair garland stands as a testament to the joy and elegance of the occasion, creating a captivating focal point that embodies the spirit of celebration and serves as a visual ode to the little one at the heart of the festivities.
Conclusion
In conclusion, the art of crafting a high chair garland is a delightful and rewarding endeavor that infuses any celebratory occasion with a touch of whimsy, elegance, and personalized charm. From the initial selection of materials to the final placement on the high chair, each step in the crafting process contributes to the creation of a visually captivating masterpiece that honors the little guest of honor and delights guests.
As the garland takes shape, the meticulous attachment of lush greenery, vibrant flowers, and personalized decorative elements transforms the once bare ribbon into a vibrant tapestry of natural beauty and joyous celebration. The careful consideration of color schemes, floral arrangements, and personalized touches ensures that the garland harmonizes seamlessly with the event's theme, creating a visually enchanting adornment that becomes a cherished focal point.
The culmination of the crafting journey, marked by the delicate placement of the adorned garland on the high chair, brings the vision to fruition, infusing the celebratory setting with an enchanting ambiance that captivates and delights. The garland becomes a symbol of joy and celebration, embodying the essence of the special occasion and honoring the little one at the center of the festivities.
As guests gather to celebrate and create lasting memories, the high chair garland stands as a testament to the artistry and creativity poured into its creation. It becomes a cherished element of the celebration, leaving a lasting impression and serving as a visual ode to the little one at the heart of the festivities.
In essence, the process of crafting a high chair garland transcends the mere arrangement of materials; it embodies the spirit of celebration, creativity, and personalized expression. Each carefully placed bloom, verdant leaf, and themed embellishment contributes to the creation of a visually captivating masterpiece that exudes warmth, joy, and timeless elegance.
With the high chair garland adorning the seat with grace and elegance, the celebratory setting is transformed into a whimsical and enchanting space that serves as a testament to the joy and elegance of the occasion. The garland becomes a cherished focal point, embodying the spirit of celebration and creating a captivating ambiance that will be admired and celebrated by all.
In crafting a high chair garland, one embarks on a journey of creativity, artistry, and joyful expression, culminating in the creation of a visually captivating masterpiece that becomes an integral part of the celebration, leaving a lasting impression and creating cherished memories for years to come.
Frequently Asked Questions about How To Make High Chair Garland
Was this page helpful?
At Storables.com, we guarantee accurate and reliable information. Our content, validated by Expert Board Contributors, is crafted following stringent Editorial Policies. We're committed to providing you with well-researched, expert-backed insights for all your informational needs.

0 thoughts on “How To Make High Chair Garland”