Home>Garden Essentials>How To Make Fresh Greenery Garlands
Garden Essentials
How To Make Fresh Greenery Garlands
Modified: August 27, 2024
Learn how to make stunning fresh greenery garlands for your garden. Our step-by-step guide will help you create beautiful and natural garden decorations.
(Many of the links in this article redirect to a specific reviewed product. Your purchase of these products through affiliate links helps to generate commission for Storables.com, at no extra cost. Learn more)
Introduction
Welcome to the world of fresh greenery garlands! There’s something magical about adorning your home or event space with lush greenery, bringing the beauty of the outdoors indoors. Whether you’re planning a wedding, hosting a party, or simply want to add a touch of nature to your living space, creating your own fresh greenery garland is a wonderful way to unleash your creativity.
The art of making fresh greenery garlands has been practiced for centuries, originating from traditions where greenery was used to celebrate nature and bring good fortune. Today, it has become a popular DIY project for garden lovers and craft enthusiasts alike.
In this article, we will take you through the step-by-step process of creating your very own fresh greenery garlands. From gathering the materials to adding the finishing touches, you’ll learn all the tips and tricks to make a stunning masterpiece.
So, roll up your sleeves, put on your gardening gloves, and let’s get started on this exciting journey of creating beautiful greenery garlands!
Key Takeaways:
- Creating a fresh greenery garland is a fun and rewarding DIY project that allows you to bring the beauty of nature indoors. From gathering greenery to adding decorative elements, the process is a delightful journey of creativity and connection with the outdoors.
- By following the step-by-step process outlined in the article, you can craft a stunning fresh greenery garland to adorn your home or event space. Embrace the greenery, let your creativity soar, and enjoy the gratifying experience of making a natural masterpiece.
Read more: How Much Is A Greenery Garland
Materials Needed
Before we dive into the process of making fresh greenery garlands, let’s gather all the necessary materials. Here’s a list of what you’ll need:
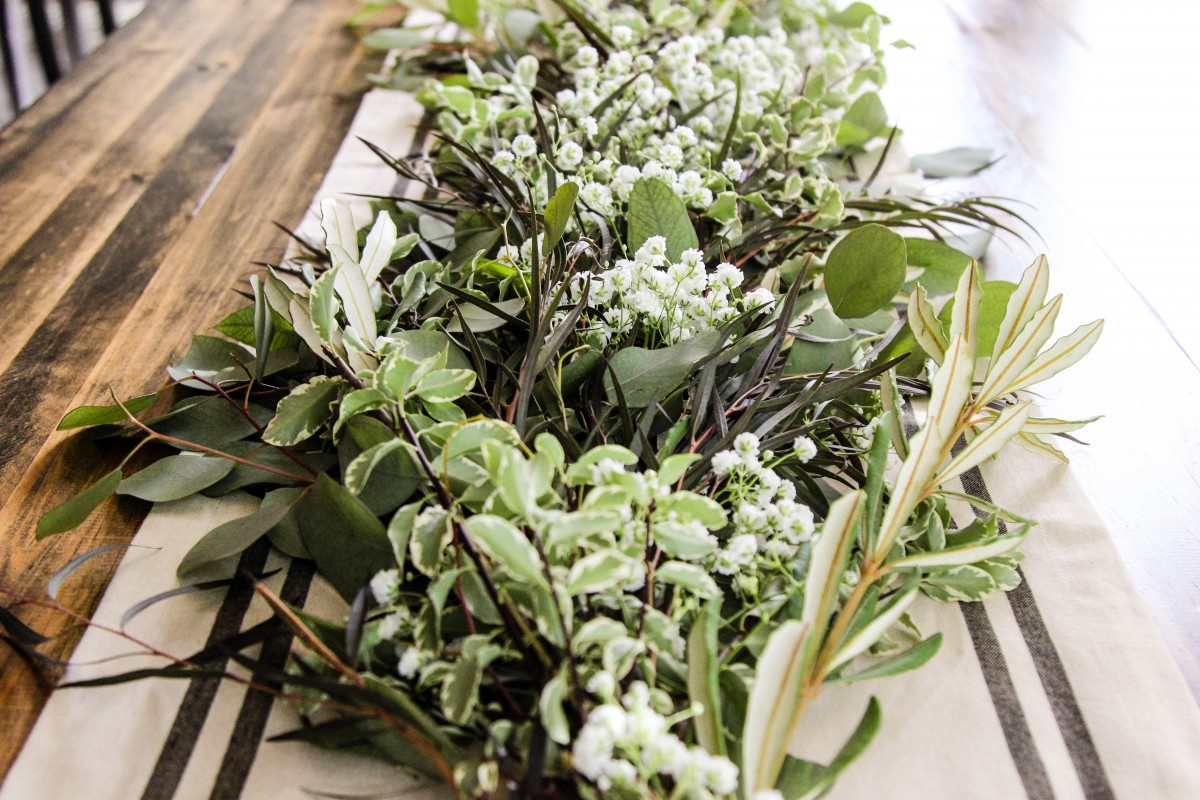
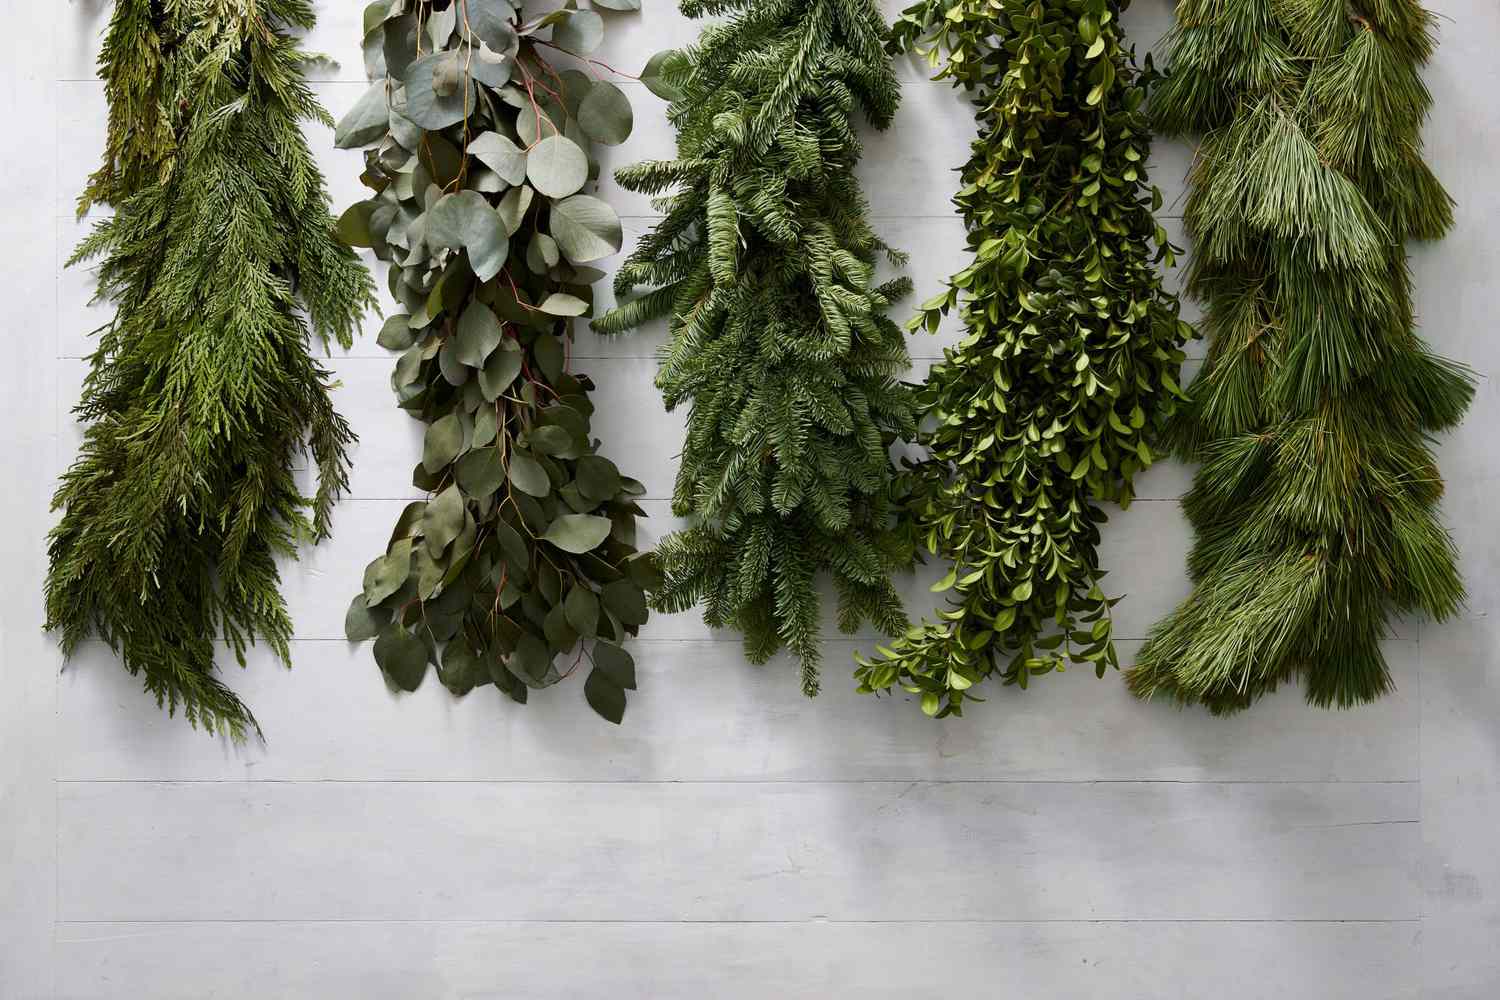
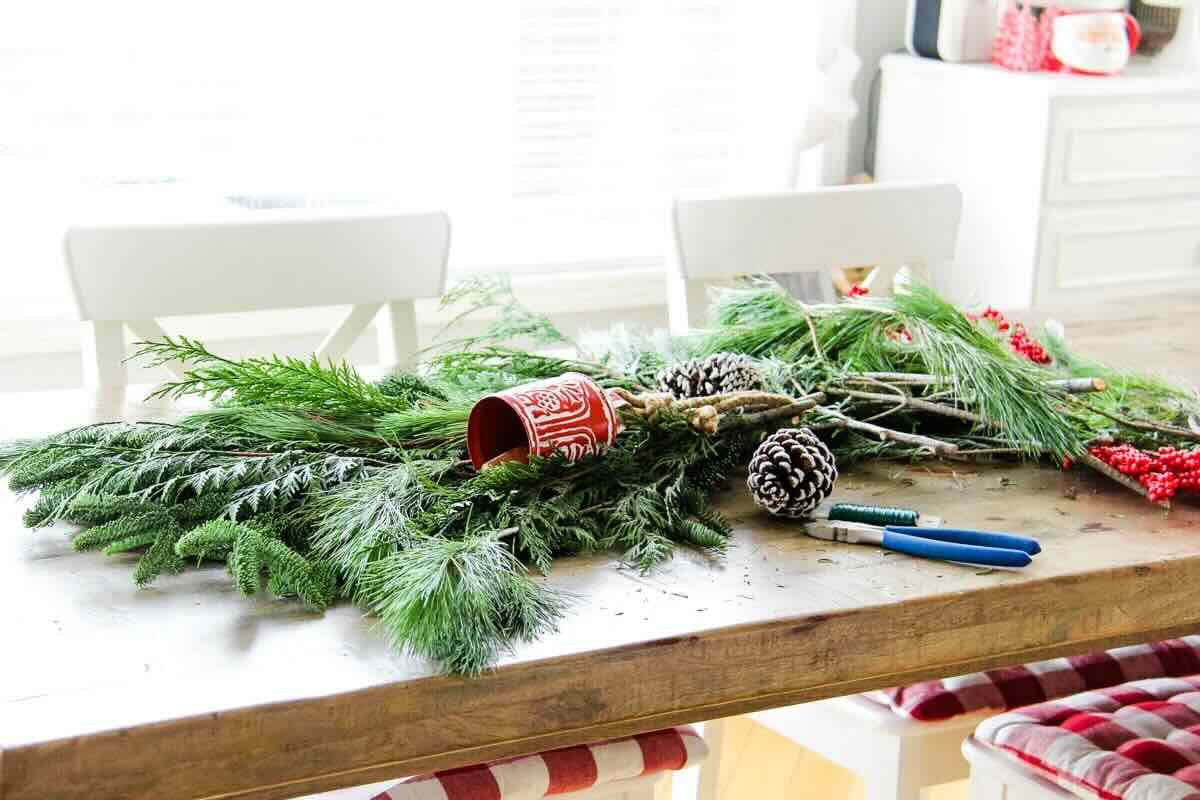
- Assorted greenery: Choose a variety of greenery, such as eucalyptus, ivy, ferns, or any other leafy branches you prefer. The more textures and colors, the better!
- Floral wire: This will be used to secure the greenery together and create the base of the garland.
- Pruning shears or scissors: You’ll need a sharp pair of shears or scissors to trim the greenery to the desired length.
- Twine or ribbon: Use twine or ribbon to hang the garland or add decorative elements.
- Optional: Additional decorative elements like flowers, berries, or pinecones to add extra flair to your garland.
Make sure to gather all these materials before you start, so you have everything at hand when you begin creating your greenery garland.
Step 1: Gather Greenery
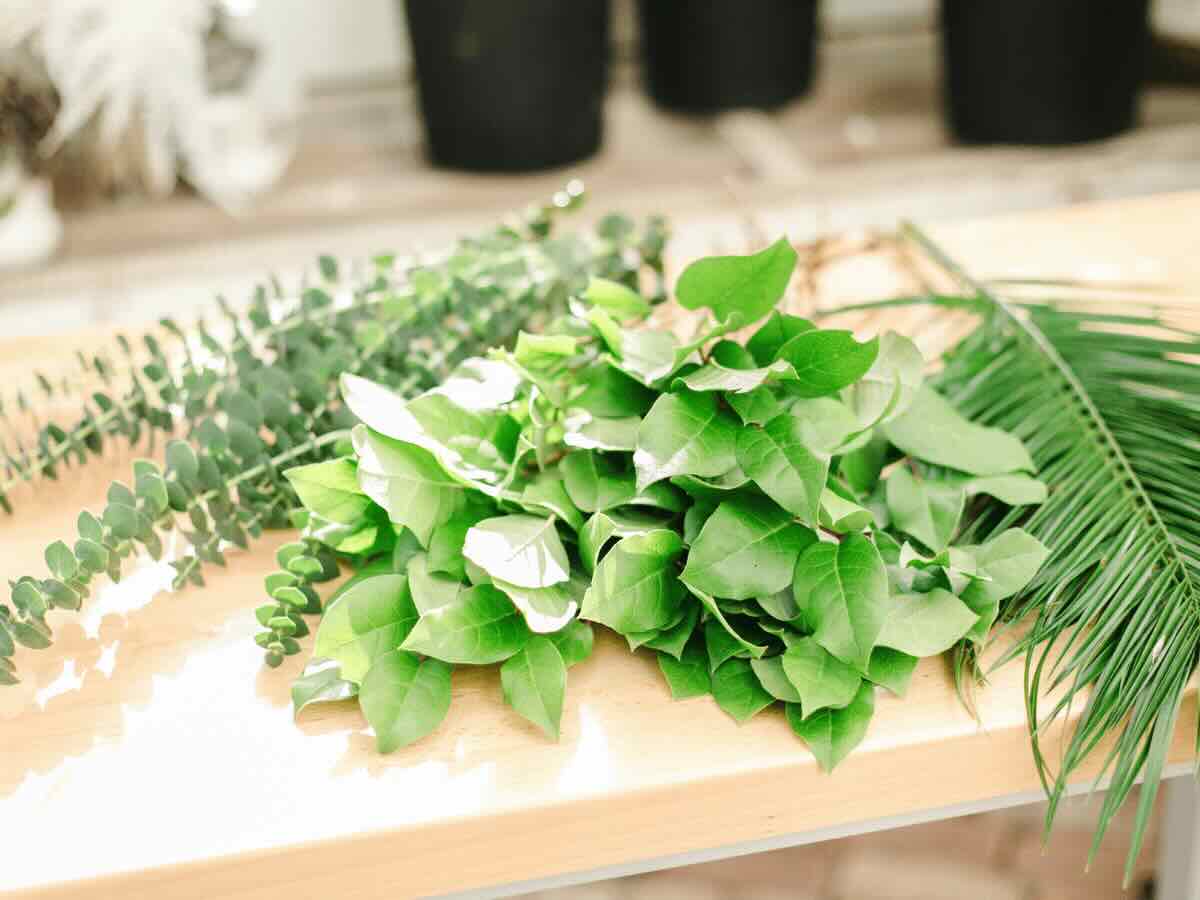
The first step in creating a fresh greenery garland is to gather your desired greenery. Head outside to your garden or local nursery to search for the perfect foliage. Look for a variety of textures, sizes, and colors to add depth and visual interest to your garland.
If you have access to a garden, you may be able to find an array of leaves, branches, and vines right at your fingertips. Explore your surroundings and take note of any foliage that catches your eye. Pay attention to different shades of green and consider adding in contrasting colors like burgundy or silver to create an eye-catching garland.
If you don’t have a garden, don’t worry! Many local nurseries or florists carry a wide selection of greenery. Visit your nearest nursery and speak with the staff, who can guide you in choosing the best greenery for your garland project.
When gathering greenery, keep in mind the length of the garland you’d like to create. Take into account the size of the area where you plan to display the garland and ensure you collect enough greenery to cover that space.
Remember to handle the greenery with care, as some leaves and branches can be delicate. Gently cut or remove the desired stems from the plant, making sure to leave enough foliage intact.
Once you have gathered your greenery, it’s time to move on to the next step: prepping the greenery for your garland.
Step 2: Prep the Greenery
Now that you have gathered your greenery, it’s time to give it a little TLC before starting to assemble the garland. Prepping the greenery will ensure that it stays fresh and vibrant for as long as possible.
Begin by gently removing any damaged or wilted leaves from the stems. This will help the garland maintain its aesthetic appeal and prevent any wilting or browning as the garland ages.
Next, give the stems a quick rinse under cool water to remove any dirt or debris. Be sure to handle the delicate leaves with care, as excessive handling can cause them to bruise or break. Pat the greenery dry with a clean towel or allow it to air dry.
If you want to prolong the lifespan of your garland, consider giving the greenery a little longevity boost. Fill a container with water and place the stems in it, ensuring that the water level covers the cut ends of the stems. This will keep the greenery hydrated and fresh as you assemble the garland.
Now that your greenery is prepped and ready to go, it’s time to move on to the next step: measuring and trimming.
Step 3: Measure and Trim
With your prepped greenery in hand, it’s time to measure and trim the stems to the desired length for your garland. This step is crucial to ensure that your garland fits perfectly in your desired space.
Start by determining the length of the garland you want to create. Measure the area where you plan to display the garland, whether it’s a mantel, staircase, or table. Take note of the measurements as a guide for cutting the stems.
Using a pair of pruning shears or sharp scissors, begin trimming the stems of your greenery to the desired length. Consider creating a tapered effect by cutting the stems at different lengths. This will add a natural and organic look to your garland.
As you trim each stem, carefully remove any excess foliage or unwanted branches. Take your time and pay attention to detail, ensuring that each stem is cut to the appropriate length and shape.
Don’t be afraid to experiment with different lengths and layering techniques. You can also leave some stems longer to create cascading elements in your garland. Play around with the greenery to achieve the desired look and ensure that it fits harmoniously in your chosen space.
Once you have measured and trimmed your greenery, it’s time to move on to the next step: creating the base of the garland.
To make a fresh greenery garland, start by gathering a variety of greenery such as eucalyptus, pine, and cedar. Then, use floral wire to attach the greenery to a long piece of twine or rope, overlapping the stems as you go. Keep adding greenery until the garland reaches your desired length.
Step 4: Create the Base
Now that you have your greenery trimmed to the desired length, it’s time to create the base of your fresh greenery garland. The base will provide support and structure for the rest of the greenery to be attached to.
Start by taking a piece of floral wire and measuring it to match the length of the garland you want to create. Add a few extra inches on each end to ensure that you have enough wire to secure the greenery in place.
Bend the wire into the shape of your desired garland, whether it’s a full circle, a straight line, or a specific shape like a heart or star. Make sure the wire is sturdy and holds its shape.
Once the wire is formed, it’s time to attach the greenery. Begin by selecting a few stems of greenery and placing them along the wire base. Use the floral wire to secure the stems by wrapping it tightly around the base and the stems. Continue adding more greenery, overlapping the stems and securing them with wire as you go.
As you attach the greenery, keep the stems facing the same direction to maintain a consistent look. Ensure that the wire is hidden beneath the leaves and branches, creating a seamless and natural appearance.
Continue adding greenery, working your way around the wire base until it is fully covered. Take breaks to step back and assess the garland’s shape and fullness. Make adjustments as needed, adding or removing greenery to achieve your desired look.
Once the base is complete, secure the end of the wire by wrapping it tightly around the last piece of greenery. Ensure that the wire is tightly secured to prevent any loosening or shifting of the greenery.
With the base created, it’s time to move on to the next step: attaching the remaining greenery to complete the garland.
Step 5: Attach the Greenery
Now that you have created the base of your fresh greenery garland, it’s time to attach the remaining greenery to add volume and create a lush appearance.
Start by selecting additional stems of greenery that complement the existing foliage on the base. Choose different types of greenery to add texture and variety to your garland.
Take each stem of greenery and position it alongside the existing foliage. Use floral wire to secure the stem to the base by wrapping it tightly around both the stem and the wire base. Repeat this process with each stem, making sure to space them evenly and cover any gaps in the garland.
As you attach the greenery, step back frequently to assess the overall look and make any necessary adjustments. Don’t be afraid to bend and manipulate the stems to create your desired shape and arrangement.
Remember to maintain a consistent direction for the stems, ensuring that the foliage faces the same way throughout the garland. This will give your garland a cohesive and polished appearance.
Continue attaching greenery until you’ve achieved the desired fullness and look. Take your time during this process, ensuring that each stem is securely fastened and the garland is balanced in terms of color and texture.
Once all the greenery is attached, step back and admire your beautiful and vibrant fresh greenery garland! But we’re not done just yet – there’s still room for some additional elements to take your garland to the next level.
Move on to the next step, where we’ll explore how to add extra elements to your garland for that wow factor.
Step 6: Add Additional Elements
Now that you have your greenery securely attached, it’s time to add some extra elements to elevate your fresh greenery garland. These additional elements will add depth, color, and a touch of charm to your creation.
Consider incorporating flowers into your garland to add a pop of color and a fresh, floral scent. Choose flowers that complement the greenery you’ve used, ensuring a cohesive look. You can either weave the flower stems into the garland or secure them using floral wire.
For a more rustic or festive feel, you can add berries, pinecones, or even small ornaments to your garland. These elements will add visual interest and give your garland a unique and personalized touch.
If you’re creating a garland for a specific occasion or theme, consider adding relevant decorative elements. For example, for a festive holiday garland, you can incorporate mini ornaments, ribbons, or even small LED lights. For a wedding or romantic setting, delicate lace or satin ribbons can be added.
Play around with the placement of these additional elements. You can scatter them throughout the garland or create clusters for a more defined look. The goal is to strike a balance between the greenery and the added elements, ensuring that they enhance the overall aesthetic without overpowering it.
Remember to step back and assess the placement as you go. This will help you achieve a visually pleasing and well-balanced garland.
Once you’re satisfied with the additional elements, it’s time to move on to the final step: adding the finishing touches to complete your fresh greenery garland.
Step 7: Finishing Touches
Congratulations! You’ve reached the final step of creating your fresh greenery garland. Now it’s time to add those finishing touches that will make your garland truly shine.
Start by stepping back and taking a look at your garland as a whole. Check for any gaps or areas that may need a little extra foliage or adjustment. Use this opportunity to fine-tune the shape and overall appearance of the garland.
Next, consider adding a decorative ribbon or twine to hang your garland. Choose a ribbon that matches the overall style and theme of your garland. You can attach the ribbon to the ends of the wire base or create loops along the garland to hang it from a hook or nail.
If you want to give your garland a more polished look, you can trim any excess wire or visible stems. Use sharp scissors or wire cutters to carefully trim any protruding pieces. Ensure that the cuts are clean and blend in seamlessly with the rest of the garland.
Lastly, step back once again and admire your completed fresh greenery garland. Take a moment to appreciate all the hard work and creativity that went into its creation.
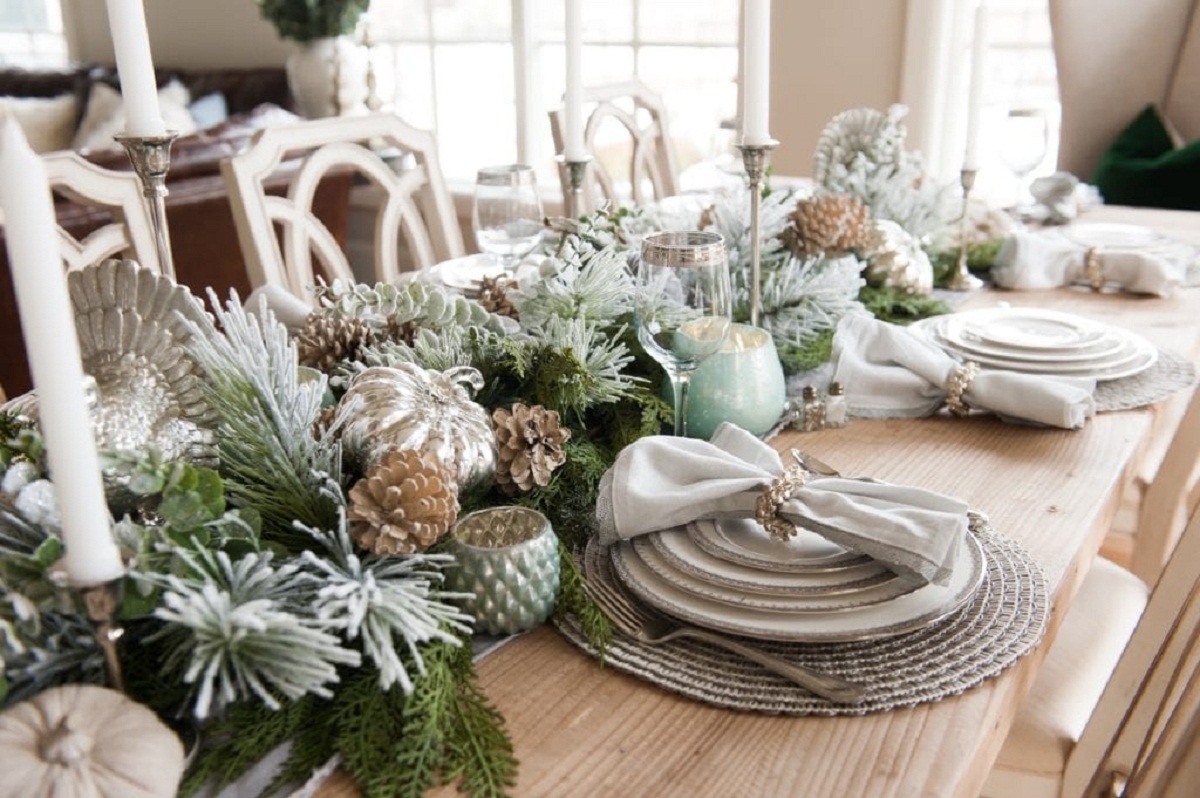
Now it’s time to display your garland proudly! Hang it above a fireplace, drape it along a staircase railing, or use it as a table centerpiece. The possibilities are endless, and the fresh greenery will bring a vibrant and natural touch to any space.
Remember to keep your garland hydrated, especially if you’re using fresh flowers or delicate leaves. Mist the greenery with water daily or place small water-filled containers among the foliage to prolong its life.
And there you have it – a stunning fresh greenery garland that you can proudly showcase in your home or event space. Enjoy the beauty and natural charm that it brings, and don’t forget to share your creation with others!
Thank you for joining us on this journey of creating a fresh greenery garland. We hope you’ve enjoyed the process and that your garland becomes a captivating focal point in your space.
Happy garland-making!
Read more: How To Make High Chair Garland
Conclusion
Congratulations! You have now learned how to create your own fresh greenery garland from start to finish. This DIY project allows you to bring the beauty of nature indoors and add a touch of elegance to any space or occasion.
By following the steps outlined in this article, you can gather your preferred greenery, prep it for assembly, measure and trim it to the desired length, create a sturdy base, attach the greenery securely, add additional elements for flair, and add the finishing touches that make your garland truly shine.
Remember to let your creativity flow as you experiment with different greenery combinations, explore various decorative elements, and adapt the garland to suit your personal style and the space where it will be displayed.
As you work on your garland, take a moment to appreciate the beauty of nature and the joy of creating something with your own hands. Making a fresh greenery garland is a gratifying process that allows you to connect with the outdoors and bring a touch of nature’s splendor into your home.
Whether you’re planning a wedding, hosting a party, or simply adding a decorative touch to your living space, a fresh greenery garland is a versatile and visually stunning choice. It enhances the ambiance, creates a focal point, and adds a sense of natural beauty to any setting.
Now that you’re equipped with the knowledge and skills to create your own fresh greenery garland, it’s time to unleash your creativity and let your imagination soar. Gather your materials, embrace the greenery, and enjoy the process of crafting a garland that will be cherished and admired by all.
So, go ahead and create your own breathtaking fresh greenery garland – a masterpiece that will bring nature’s beauty to life in your space. Enjoy the journey, and remember to have fun along the way!
Happy garland-making!
Frequently Asked Questions about How To Make Fresh Greenery Garlands
Was this page helpful?
At Storables.com, we guarantee accurate and reliable information. Our content, validated by Expert Board Contributors, is crafted following stringent Editorial Policies. We're committed to providing you with well-researched, expert-backed insights for all your informational needs.


0 thoughts on “How To Make Fresh Greenery Garlands”