Home>Renovation & DIY>Tools & Equipment>How Long Does A Sandpaper Last
Tools & Equipment
How Long Does A Sandpaper Last
Modified: January 8, 2024
Learn how long a sandpaper typically lasts and get insights on tips to make it last longer. Explore the importance of quality tools and equipment in sanding projects.
(Many of the links in this article redirect to a specific reviewed product. Your purchase of these products through affiliate links helps to generate commission for Storables.com, at no extra cost. Learn more)
Introduction
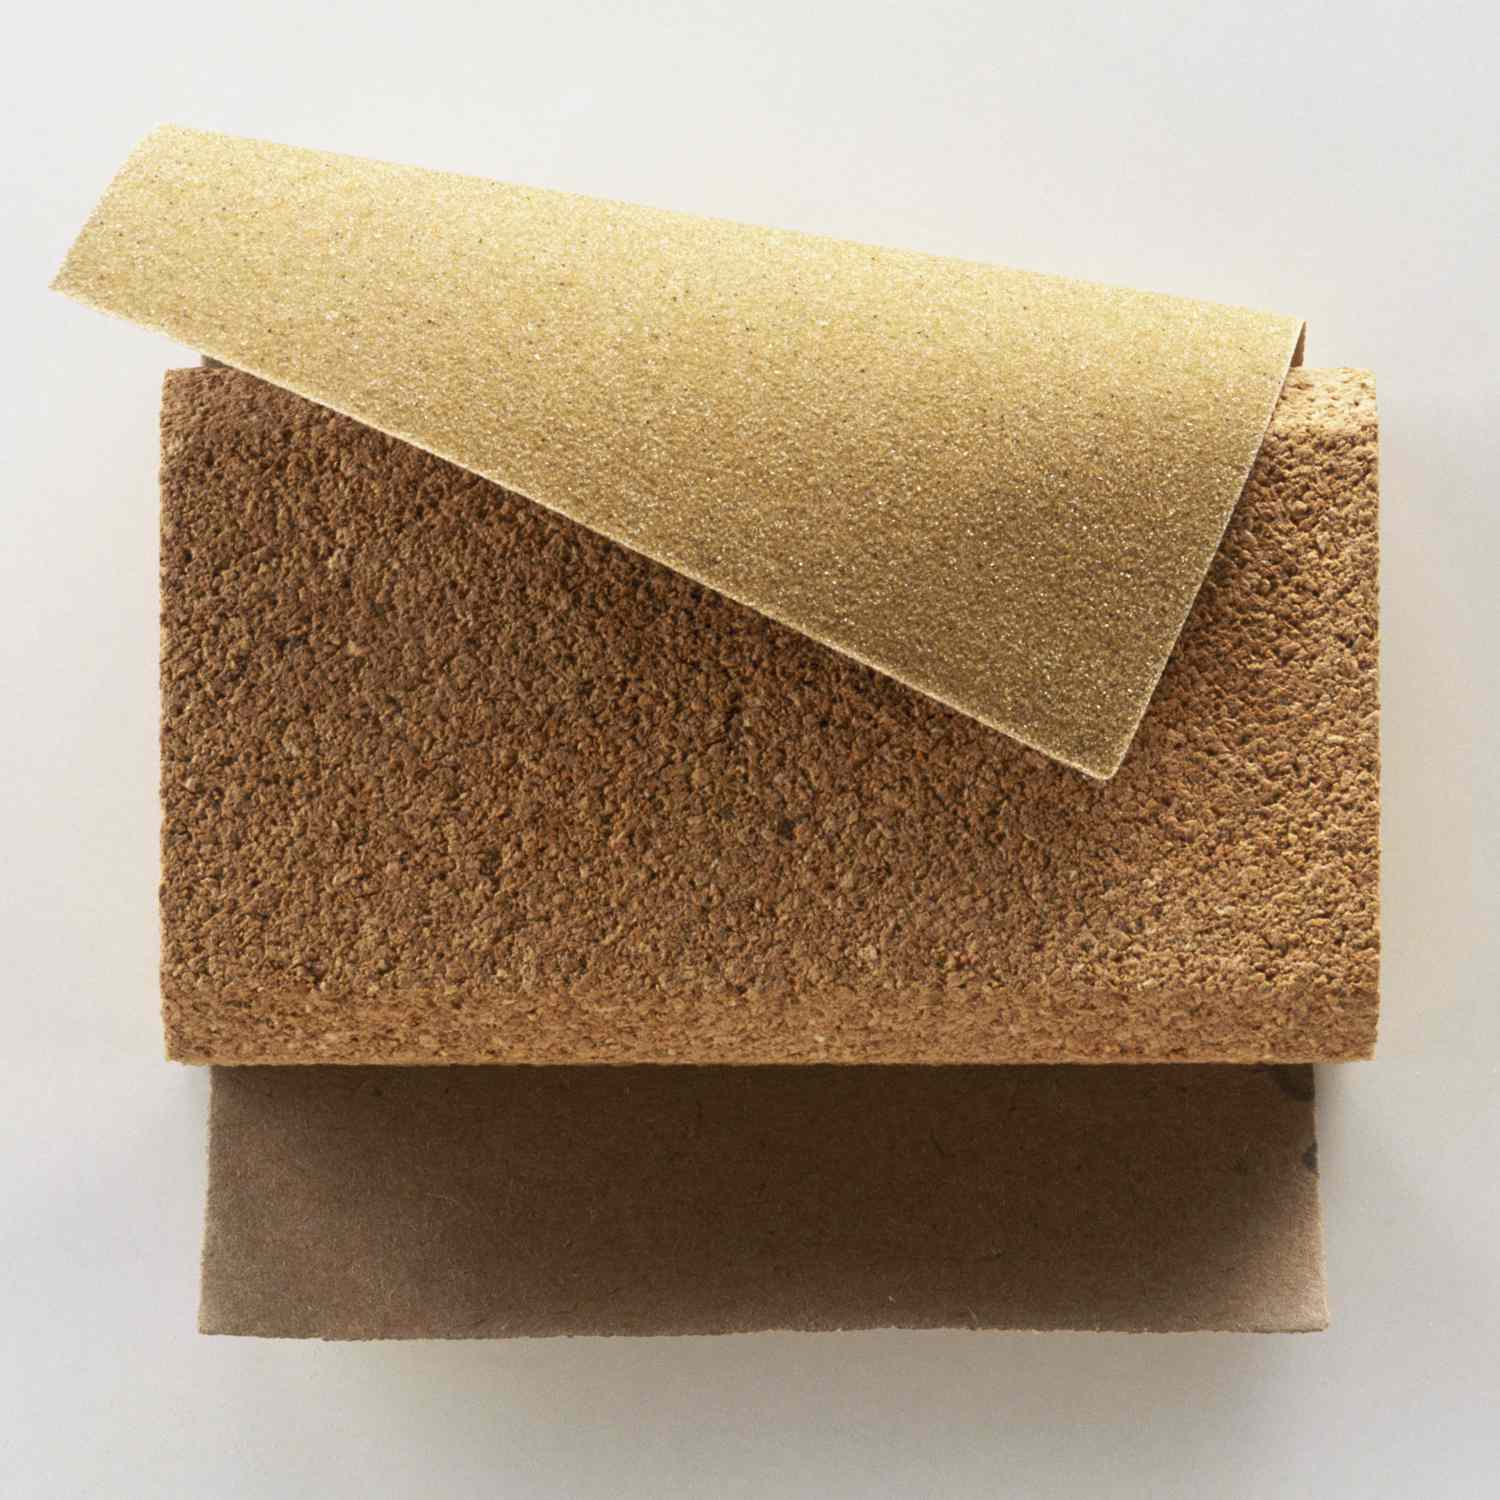
Sandpaper is an essential tool for various woodworking, metalworking, and DIY projects. It is used to smooth surfaces, remove old finishes, and prepare materials for painting or staining. Whether you’re a professional craftsman or a DIY enthusiast, one question that often arises is, “How long does sandpaper last?”.
The lifespan of sandpaper can vary depending on several factors. Understanding these factors and knowing how to maximize the longevity of your sandpaper can save you time and money in the long run. In this article, we will explore the different factors that affect the lifespan of sandpaper and provide some useful tips on how to extend its usability.
Key Takeaways:
- Choose the right abrasive grit and adjust pressure based on the material being worked on to extend sandpaper lifespan and achieve optimal results in woodworking and DIY projects.
- Regular cleaning, proper storage, and using sanding blocks can significantly prolong sandpaper usability, saving money on replacements and improving overall sanding experience.
Read more: How Long Does A Toothbrush Last
Factors Affecting the Lifespan of Sandpaper
Several factors can influence the lifespan of sandpaper. By understanding these factors, you can choose the right type of sandpaper for your project and ensure its longevity. Let’s take a closer look at the key factors:
- Abrasive Grit: The grit size of sandpaper plays a crucial role in determining its lifespan. Coarser grits, such as 60 or 80, are more aggressive but tend to wear out quickly. Finer grits, like 240 or 320, are less abrasive but last longer. The choice of grit depends on the level of material removal required and the surface finish desired.
- Material Being Worked On: Different materials have varying levels of hardness. Sandpaper used on softwoods will typically last longer compared to using the same sandpaper on hardwoods or metal. Harder materials tend to wear down sandpaper more quickly, necessitating the need for replacements.
- Technique and Pressure Applied: The way you utilize the sandpaper can impact its lifespan. Applying excessive pressure or using aggressive sanding techniques can wear out the sandpaper faster. Instead, use a light to moderate pressure and let the sandpaper do the work. This not only extends its lifespan but also reduces the risk of damaging the material being worked on.
- Cleaning and Maintenance: Proper cleaning and maintenance of sandpaper can help prolong its lifespan. Sandpaper can get clogged with dust, debris, and material particles, reducing its effectiveness. Regularly clean the sandpaper by using a sandpaper cleaning stick or gently tapping it to remove accumulated particles. This will help maintain its abrasive properties and extend its usability.
Considering these factors when selecting and using sandpaper will not only ensure its longevity but also enhance your overall sanding experience. Up next, we will explore the signs that indicate when sandpaper needs to be replaced.
Abrasive Grit
The abrasive grit of sandpaper refers to the size of the abrasive particles embedded on the sanding surface. Grit sizes range from very coarse to very fine, with each size serving a specific purpose. The choice of abrasive grit depends on the level of material removal required and the desired surface finish.
Coarse grits, such as 60 or 80, are ideal for heavy material removal, such as sanding rough lumber or removing stubborn finishes. However, due to their aggressiveness, they tend to wear out more quickly compared to finer grits. These grits are not suitable for achieving a smooth finish, as they can leave noticeable scratches on the surface.
Medium grits, ranging from 100 to 180, strike a balance between material removal and achieving a relatively smooth surface. They are commonly used for prepping surfaces before applying paint or stain. These grits offer a good compromise between removing imperfections and creating a surface ready for finishing.
Fine grits, such as 220 to 400, are used for sanding between coats of finish or creating a smooth surface prior to applying paint, varnish, or polish. They are less aggressive and more delicate, resulting in a finer surface texture. Fine grit sandpaper generally lasts longer compared to coarser grits, as the abrasive particles are less prone to wearing down quickly.
Extra-fine grits, typically above 400, are used for achieving an ultra-smooth and polished finish. They are commonly used in the final stages of sanding, where the goal is to remove any remaining minor imperfections and create a flawless surface.
It is important to choose the right abrasive grit based on the specific task at hand. Using a grit that is too coarse for the job can result in premature sandpaper wear and potentially damage the material being worked on. Conversely, using a grit that is too fine for heavy material removal can lead to frustration and inefficient sanding.
By selecting the appropriate abrasive grit for your project, you can ensure that your sandpaper lasts longer and produces the desired results. However, it’s important to keep in mind that other factors, such as the material being worked on and the technique applied, also affect the lifespan of sandpaper.
Material Being Worked On
The material being worked on is another crucial factor that can greatly impact the lifespan of sandpaper. Different materials possess varying levels of hardness and abrasiveness, which can wear down sandpaper at different rates.
Softwoods, such as pine or cedar, are generally softer and more forgiving on sandpaper. Sanding these types of materials will usually result in less wear and tear on the abrasives. As a result, sandpaper tends to last longer when used on softwoods compared to harder materials.
Hardwoods, such as oak or maple, are denser and more abrasive. Sanding hardwoods requires more effort and may cause the sandpaper to wear out faster due to the resistance encountered. The harder the material, the more abrasive it is on the sandpaper, resulting in shorter lifespan.
Metal surfaces, such as steel or aluminum, can be exceptionally abrasive to sandpaper. Metal particles can become embedded in the sanding surface, causing the sandpaper to lose its efficiency and wear down quickly. When working with metals, it’s important to choose sandpaper specifically designed for metalworking or use sandpaper with a higher grit that is more resistant to wear.
It’s important to consider the material being worked on when selecting the appropriate sandpaper and to be mindful of the wear and tear it may cause. If you find that the sandpaper is wearing out too quickly, you may need to switch to a more durable type of sandpaper or adjust your sanding technique to reduce the amount of pressure applied.
Remember, different materials require different approaches, so understanding the properties of the material being worked on can help you choose the right sandpaper and extend its lifespan.
Technique and Pressure Applied
The technique and pressure applied during sanding can significantly impact the lifespan of sandpaper. Using the right techniques and applying appropriate pressure can both extend the life of the sandpaper and ensure optimum results.
When sanding, it’s important to let the sandpaper do the work rather than relying solely on brute force. Excessive pressure can cause the sandpaper to wear down more quickly and may even result in damaging the surface being worked on. Instead, apply a moderate, even pressure to achieve the desired results.
Using smooth and even strokes can also help prolong the lifespan of sandpaper. Avoid applying uneven pressure or using a back-and-forth motion, as this can lead to premature wear and create uneven sanding marks. Opt for a consistent moving motion, such as sanding in one direction, to ensure even and effective material removal.
It’s also important to consider the speed at which you move the sandpaper across the surface. Sanding too slowly can cause the sandpaper to heat up and the abrasives to wear down more quickly. Conversely, moving the sandpaper too quickly may not effectively remove material. Find a balance between speed and efficiency to maximize the lifespan of the sandpaper.
Additionally, using the right sanding technique for the task at hand can make a significant difference. For example, when sanding a curved surface, it’s best to use a sanding block or a flexible sanding sponge to maintain consistent pressure across the curve. This prevents the sandpaper from prematurely wearing down in certain areas.
By employing proper sanding techniques and applying the right amount of pressure, you can prolong the lifespan of your sandpaper while achieving optimal results. Remember, it’s a balance between being gentle enough not to damage the material and applying enough pressure to effectively remove the desired amount of material.
To extend the life of your sandpaper, try using a sanding block to distribute pressure evenly and prevent premature wear. Additionally, clean the sandpaper regularly to remove buildup and maintain its effectiveness.
Read more: How Long Does A Seed Last
Cleaning and Maintenance
Proper cleaning and maintenance of your sandpaper can significantly extend its lifespan. Over time, sandpaper can become clogged with dust, debris, and particles from the materials being worked on. This buildup reduces the effectiveness of the sandpaper, resulting in less efficient sanding and faster wear. Here are some tips to help you keep your sandpaper clean and maintain its effectiveness:
- Use a Sandpaper Cleaning Stick: A sandpaper cleaning stick is a handy tool designed to remove debris and buildup from the surface of the sandpaper. Simply rub the cleaning stick lightly over the sandpaper while it is running to dislodge any particles. This process helps restore the sandpaper’s abrasiveness and extends its usability.
- Tap or Brush off Debris: While working, periodically tap or brush the sandpaper against a hard surface to dislodge any particles or dust that may have accumulated. This simple action can help maintain the sandpaper’s effectiveness and prevent clogging.
- Avoid Excessive Heat: Excessive heat can cause the sandpaper to become brittle and wear down more quickly. To prevent this, avoid pressing the sandpaper against the surface with excessive force or using high-speed sanding machines for extended periods. Allow the sandpaper to cool down between uses to maintain its longevity.
- Store Properly: Proper storage is essential to protect your sandpaper from damage and maintain its effectiveness. Store sandpaper in a clean, dry place, away from moisture and direct sunlight. You can use a sandpaper organizer or keep them in a labeled box or drawer to prevent them from getting damaged or lost.
Regularly cleaning and maintaining your sandpaper will help keep it in optimal condition for longer periods. By removing debris and ensuring proper storage, you can maximize its lifespan and ensure effective sanding results.
Keep in mind that sandpaper has a finite lifespan and will eventually wear out. However, by implementing these cleaning and maintenance practices, you can significantly extend the usability of your sandpaper and save money by minimizing the need for frequent replacements.
Signs of Worn-Out Sandpaper
Knowing when your sandpaper is worn out is crucial for achieving optimal results in your sanding projects. Continuing to use worn-out sandpaper can lead to inefficient sanding, poor finish quality, and potential damage to the material being worked on. Here are some signs to look out for that indicate it’s time to replace your sandpaper:
- Loss of Abrasive Power: As sandpaper wears down, the abrasive grit becomes less sharp and effective. If you notice that your sandpaper is no longer cutting through the material efficiently or is leaving behind deep scratches instead of a smooth finish, it may be time to replace it.
- Visible Wear and Tear: Examine the surface of your sandpaper for visible signs of wear and tear. If you see significant fraying, tearing, or the abrasive layer has worn down, it’s a clear indication that the sandpaper has reached the end of its lifespan.
- Ineffective Material Removal: If you find that you need to apply excessive pressure or make multiple passes to remove the desired amount of material, it is likely that the sandpaper is worn out. In such cases, replacing the sandpaper will improve efficiency and save you valuable time and effort.
- Clogging: Over time, sandpaper can become clogged with dust, debris, and particles from the material being worked on. This reduces its effectiveness and leads to more frequent clogging. If your sandpaper gets clogged quickly and fails to remove material efficiently even after cleaning, it may be time to replace it.
It’s essential to pay attention to these signs and replace your sandpaper when necessary to ensure that you achieve the best results in your sanding projects. By using fresh, effective sandpaper, you will achieve smoother finishes, save time, and avoid potential damage to your materials.
Tips for Extending the Lifespan of Sandpaper
While sandpaper does have a limited lifespan, there are several steps you can take to maximize its usability and extend its lifespan. By implementing these tips, you can get the most out of your sandpaper and achieve better results in your sanding projects:
- Select the Right Grit: Choosing the appropriate grit for the task at hand is crucial in maximizing the lifespan of sandpaper. Using a grit that is too coarse can result in quicker wear, while a grit that is too fine may not effectively remove material. Consider the material and the level of material removal required to select the right grit.
- Use Light to Moderate Pressure: Applying excessive pressure can wear down sandpaper more quickly. Instead, use a light to moderate pressure and let the sandpaper do the work. This not only extends its lifespan but also reduces the risk of damaging the surface being worked on.
- Consider Sanding Blocks or Sanders: Using sanding blocks or sanding machines with proper attachments can distribute the pressure evenly, reducing wear on specific areas of the sandpaper. These tools provide stability and control, resulting in more efficient sanding and prolonging the life of the sandpaper.
- Take Breaks: Give your sandpaper and the surface being sanded periodic breaks to cool down. Extended sanding sessions can generate excessive heat, causing the sandpaper to wear down faster. Allowing the sandpaper to cool down between uses can extend its lifespan.
- Rotate the Sandpaper: As sandpaper wears, the abrasive surface becomes uneven. To ensure even wear and maximize usability, periodically rotate the sandpaper or change its orientation. This helps maintain a consistent cutting surface and extends the life of the sandpaper.
- Clean Regularly: Regularly clean your sandpaper to remove dust, debris, and particles that can clog the abrasive surface. Use a sandpaper cleaning stick or gently tap the sandpaper to dislodge accumulated particles. Cleaning the sandpaper restores its effectiveness and prolongs its lifespan.
- Proper Storage: Store your sandpaper in a clean, dry place away from moisture and direct sunlight. Proper storage prevents damage and helps maintain the sandpaper’s abrasive properties. Consider using a sandpaper organizer or keeping them in labeled containers for easy access and protection.
By following these tips, you can significantly extend the lifespan of your sandpaper, save money on replacements, and achieve better results in your sanding projects. Remember to take care of your sandpaper, use proper techniques, and select the right grit for each task to maximize its usability.
Conclusion
Understanding the factors that affect the lifespan of sandpaper is crucial for achieving optimal results in your woodworking, metalworking, and DIY projects. By considering the abrasive grit, material being worked on, technique and pressure applied, and cleaning and maintenance practices, you can maximize the usability of your sandpaper and save money in the long run.
Choosing the right abrasive grit for the task at hand and being mindful of the material’s hardness can help prolong the lifespan of sandpaper. Applying light to moderate pressure and using proper sanding techniques not only ensures efficient material removal but also extends the life of the sandpaper. Regular cleaning and maintenance, such as using a sandpaper cleaning stick and tapping off debris, help maintain the sandpaper’s effectiveness and prevent clogging.
Knowing the signs of worn-out sandpaper, such as loss of abrasive power, visible wear and tear, ineffective material removal, and clogging, is essential for knowing when to replace your sandpaper. By recognizing these signs and replacing worn-out sandpaper, you can achieve smoother finishes and avoid potential damage to your materials.
Implementing the tips for extending the lifespan of sandpaper, such as selecting the right grit, using light to moderate pressure, considering sanding blocks or sanders, taking breaks, rotating the sandpaper, regularly cleaning, and proper storage, can greatly enhance the longevity of your sandpaper and improve your sanding results.
Remember, while sandpaper does have a finite lifespan, taking care of it and using proper techniques will help you get the most out of each sheet. By understanding these factors and following the tips provided, you can maximize the lifespan of your sandpaper, save money on replacements, and achieve superior results in your sanding projects.
Frequently Asked Questions about How Long Does A Sandpaper Last
Was this page helpful?
At Storables.com, we guarantee accurate and reliable information. Our content, validated by Expert Board Contributors, is crafted following stringent Editorial Policies. We're committed to providing you with well-researched, expert-backed insights for all your informational needs.


0 thoughts on “How Long Does A Sandpaper Last”