Home>Renovation & DIY>Tools & Equipment>What Spackle Should I Use

Tools & Equipment
What Spackle Should I Use
Published: December 19, 2023
Discover the best spackle for your project with our comprehensive guide. Find the right tools and equipment for a flawless finish.
(Many of the links in this article redirect to a specific reviewed product. Your purchase of these products through affiliate links helps to generate commission for Storables.com, at no extra cost. Learn more)
Introduction
Are you looking to give your walls a flawless finish before painting or simply seeking to repair minor imperfections? Spackle, a versatile and indispensable tool in the realm of home improvement, can be your go-to solution. This remarkable compound, also known as patching compound or filler, is designed to fill in cracks, holes, and dents in various surfaces, leaving them smooth and ready for a fresh coat of paint. However, with an array of spackle options available, it's crucial to choose the right one for your specific project to achieve optimal results.
In this comprehensive guide, we will delve into the world of spackle, exploring the different types available, the factors to consider when selecting the ideal spackle for your project, and the best application techniques. Whether you're a seasoned DIY enthusiast or a novice looking to elevate your home improvement skills, this guide will equip you with the knowledge and confidence to tackle spackling projects with finesse. Let's embark on this journey to uncover the secrets of spackling and unlock the potential of your living spaces.
Key Takeaways:
- Choose the right spackle based on your project’s scale, surface type, and drying time to achieve professional-quality repairs and renovations with ease and confidence.
- Master the art of spackling by preparing surfaces, applying spackle in thin layers, and blending it seamlessly for flawless results that elevate the beauty and resilience of your living spaces.
Read more: What Can I Use Instead Of Spackle
Types of Spackle
When it comes to spackling, it’s essential to understand the diverse range of spackle types available, each tailored to specific applications and surfaces. Here are some common types of spackle:
- All-Purpose Spackle: This versatile option is suitable for a wide range of projects, including filling small holes, cracks, and blemishes on walls, ceilings, and wood. It dries relatively quickly and can be sanded to a smooth finish, making it a go-to choice for many DIY enthusiasts.
- Lightweight Spackle: Ideal for repairing minor imperfections, lightweight spackle is easy to apply and sands down smoothly. It’s a popular choice for filling small cracks and holes in drywall and plaster.
- Fast-Drying Spackle: As the name suggests, this type of spackle sets and dries rapidly, making it perfect for quick touch-ups and minor repairs. It’s an excellent option when time is of the essence and you need to complete a project promptly.
- Interior/Exterior Spackle: Designed to withstand varying environmental conditions, this spackle is suitable for both interior and exterior use. It provides durable and long-lasting repairs, making it a reliable choice for projects that require resilience against the elements.
- Pre-Mixed Spackle: For added convenience, pre-mixed spackle comes ready to use straight out of the container, eliminating the need for mixing. It’s a time-saving option for small to medium repair jobs, offering consistent quality without the hassle of preparing the compound.
Each type of spackle has its own unique characteristics and benefits, so it’s important to assess the specific requirements of your project before selecting the most suitable option. Whether you’re addressing minor blemishes or undertaking extensive repairs, understanding the distinctions between these spackle types will empower you to make informed decisions and achieve professional-quality results.
Choosing the Right Spackle for Your Project
With a myriad of spackle options available, selecting the right one for your project is essential to ensure a seamless and professional finish. Consider the following factors when choosing the ideal spackle:
- Surface Type: Assess the surface you’ll be working on, whether it’s drywall, plaster, wood, or another material. Different spackle types are formulated to adhere optimally to specific surfaces, so matching the spackle to the surface is crucial for a durable and flawless repair.
- Project Scale: Determine the scale of your project, whether it involves minor touch-ups, extensive repairs, or a full-scale renovation. For small blemishes and quick fixes, lightweight or fast-drying spackle may suffice, while larger repairs may benefit from the versatility of all-purpose spackle.
- Indoor or Outdoor Use: If your project extends to outdoor surfaces, such as siding or trim, opt for an interior/exterior spackle to withstand the elements and ensure long-lasting durability. For indoor projects, the focus may be on achieving a smooth finish and easy sanding.
- Drying Time: Consider the time frame for your project. If you’re working on a time-sensitive task, fast-drying spackle can expedite the repair process, allowing you to move on to the next stages of your project sooner.
- Convenience: For convenience and ease of use, pre-mixed spackle offers a ready-to-use solution without the hassle of mixing, making it ideal for small to medium-sized repairs and touch-ups.
By carefully evaluating these factors, you can pinpoint the most suitable spackle for your specific project, ensuring that the repair process is efficient, effective, and tailored to your unique requirements. Choosing the right spackle lays the foundation for a successful and satisfying outcome, whether you’re addressing minor imperfections or embarking on a comprehensive renovation.
When choosing spackle, consider the size of the hole or crack you need to fill. Use lightweight spackle for small holes and vinyl spackle for larger ones.
Application Techniques
Mastering the art of spackling involves not only choosing the right type of spackle but also employing effective application techniques to achieve seamless and professional results. Here are some essential tips for applying spackle:
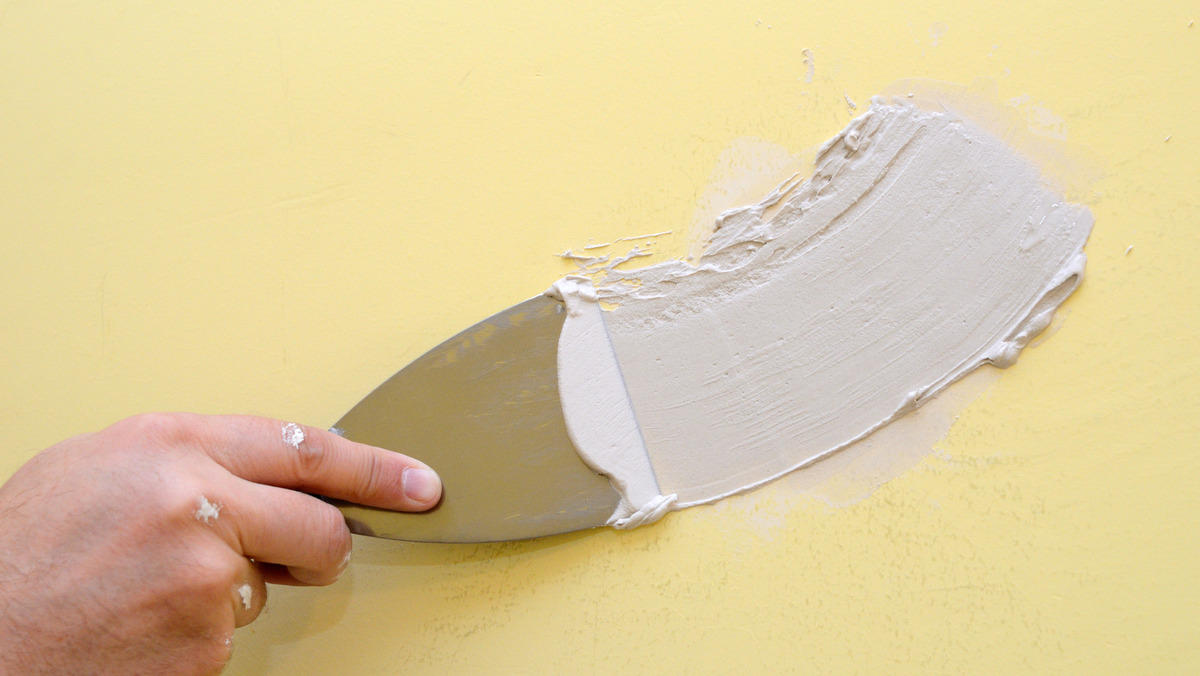
- Surface Preparation: Before applying spackle, ensure that the surface is clean, dry, and free of dust and debris. Use a putty knife to remove any loose particles and create a smooth foundation for the spackle application.
- Application Method: Use a putty knife or a spackling knife to apply the spackle, pressing it firmly into the crack, hole, or blemish. Apply the spackle in thin layers, gradually building it up until the imperfection is filled and level with the surrounding surface.
- Smoothing and Blending: Once the spackle is applied, use the putty knife to smooth and blend the spackle into the surrounding surface. Feather the edges to seamlessly integrate the spackled area with the rest of the wall or ceiling, ensuring a uniform and natural finish.
- Drying and Sanding: Allow the spackle to dry completely according to the manufacturer’s instructions. Once dry, use fine-grit sandpaper to gently sand the spackled area, achieving a smooth and even surface that’s ready for painting or further finishing.
- Repeat as Needed: For deeper or wider imperfections, multiple layers of spackle may be necessary. Apply, dry, and sand each layer before adding more spackle, ensuring that the repair is built up gradually for a seamless result.
By following these application techniques with precision and care, you can transform unsightly blemishes and imperfections into flawlessly repaired surfaces that are primed for painting or finishing touches. The art of spackling lies not only in the selection of the right spackle but also in the meticulous application and finishing processes that elevate the overall quality of your home improvement endeavors.
Conclusion
As we conclude our exploration of the world of spackle, it’s evident that this versatile compound holds the power to elevate the appearance and integrity of various surfaces within your living spaces. By understanding the different types of spackle, selecting the right one for your project, and mastering effective application techniques, you can achieve professional-quality repairs and enhancements with confidence and finesse.
Whether you’re embarking on a minor touch-up, addressing extensive imperfections, or preparing surfaces for a fresh coat of paint, the right spackle, coupled with meticulous application, can make a significant difference in the outcome of your home improvement endeavors. The ability to seamlessly repair cracks, holes, and blemishes not only enhances the aesthetic appeal of your living spaces but also contributes to the overall maintenance and longevity of your walls, ceilings, and other surfaces.
As you venture into the realm of spackling, remember that attention to detail, surface preparation, and the choice of the appropriate spackle type are pivotal in achieving a flawless finish. Embrace the process as an opportunity to enhance the beauty and resilience of your home, and let your newfound knowledge and skills in spackling empower you to transform imperfections into immaculate surfaces that exude craftsmanship and care.
With the right spackle at your disposal and a mastery of application techniques, you are poised to embark on a journey of home improvement, armed with the tools and knowledge to create spaces that reflect your attention to detail and commitment to quality. Let spackling be your gateway to achieving seamless, professional results and unlocking the full potential of your living environment.
Frequently Asked Questions about What Spackle Should I Use
Was this page helpful?
At Storables.com, we guarantee accurate and reliable information. Our content, validated by Expert Board Contributors, is crafted following stringent Editorial Policies. We're committed to providing you with well-researched, expert-backed insights for all your informational needs.


0 thoughts on “What Spackle Should I Use”