Home>Storage Ideas>Kitchen Storage>How To Organize A Kitchen Island: 10 Expert Ways
Kitchen Storage
How To Organize A Kitchen Island: 10 Expert Ways
Modified: October 20, 2024
Discover 10 expert kitchen storage ideas to beautifully organize your kitchen island and maximize its functionality.
(Many of the links in this article redirect to a specific reviewed product. Your purchase of these products through affiliate links helps to generate commission for Storables.com, at no extra cost. Learn more)
Introduction
Welcome to the world of kitchen storage ideas! Your kitchen island is not just a countertop; it’s a versatile space that can serve multiple purposes while providing ample storage. Whether you have a small or large kitchen, organizing your island effectively is essential for maximizing its functionality and keeping your cooking experience smooth and enjoyable.
In this article, we will delve into 10 expert ways to organize your kitchen island. From optimizing storage space to creating designated areas for different tasks, we will explore a variety of strategies that can transform your island into an organized and efficient hub in your kitchen.
Before we dive into the details, it is important to remember that kitchen organization is a subjective process. What works for one person may not work for another, so feel free to adapt these ideas to suit your specific needs and preferences. The key is to strike a balance between functionality and aesthetics, creating a space that not only looks great but also simplifies your everyday kitchen activities.
So, let’s get started and discover how to make the most of your kitchen island!
Key Takeaways:
- Transform your kitchen island into a well-organized and efficient space by choosing the right layout, maximizing storage, and creating dedicated zones for different tasks. Personalize with decorative elements for a visually pleasing and functional cooking hub.
- Keep your kitchen island clean and organized by implementing regular maintenance habits, such as wiping down surfaces, decluttering, and organizing as you go. With a well-maintained island, you’ll enjoy a harmonious and efficient cooking environment.
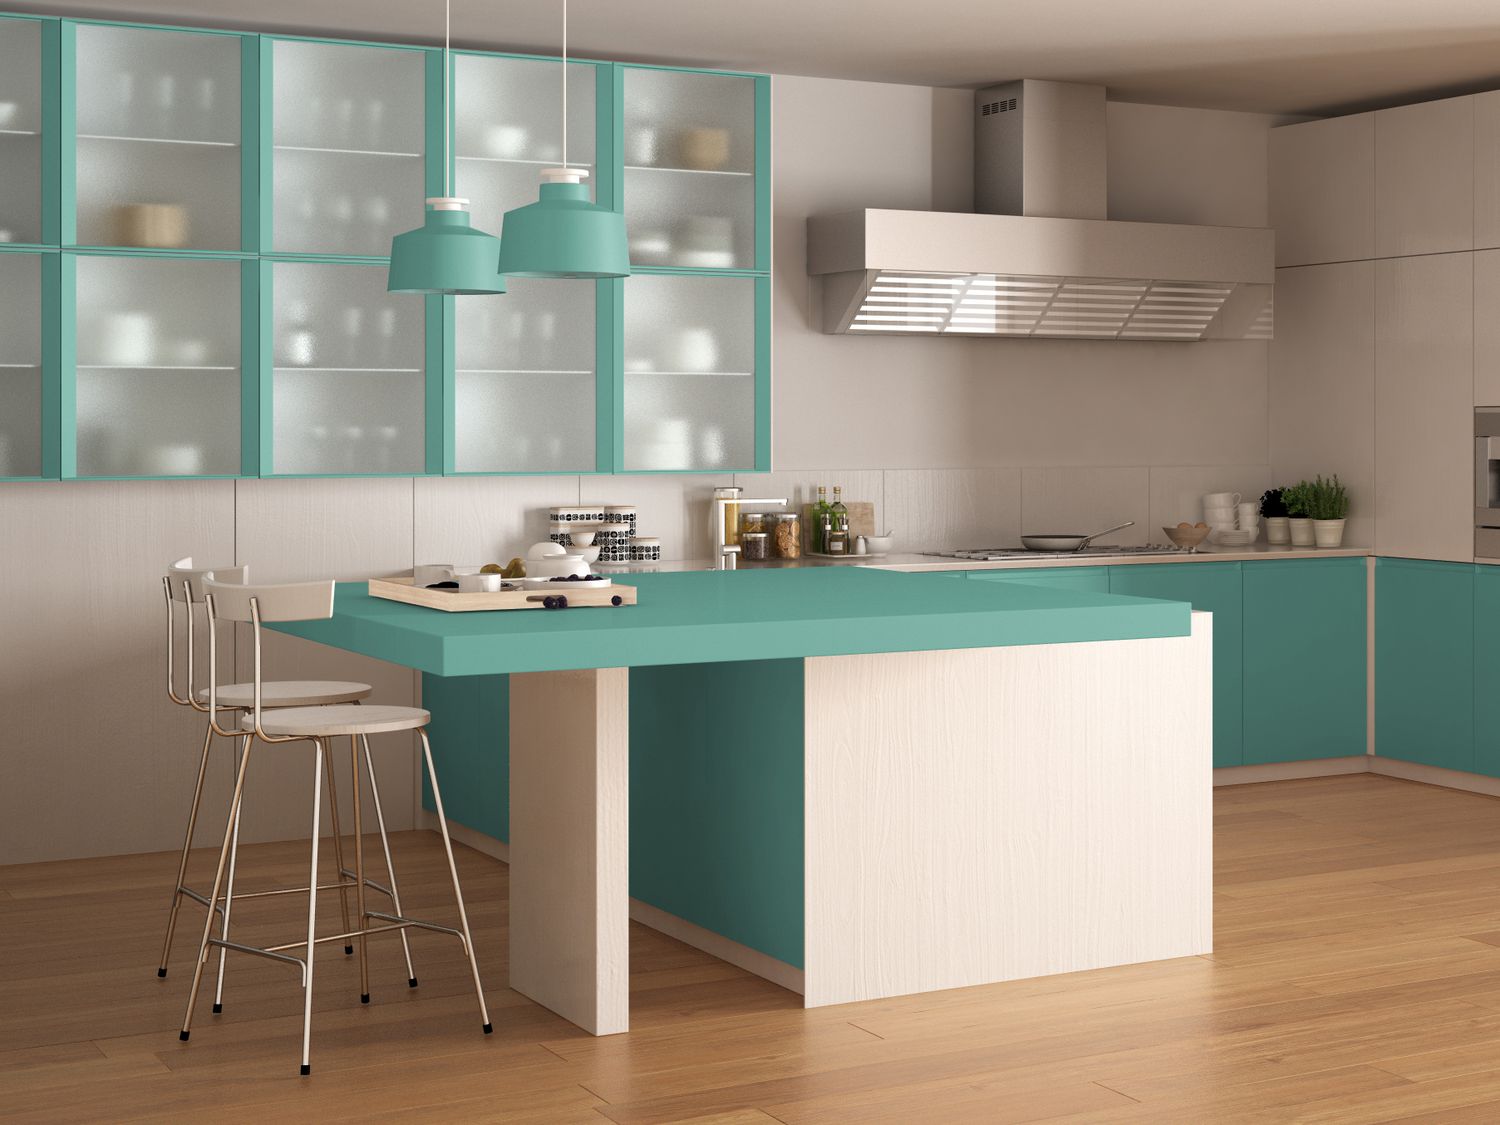
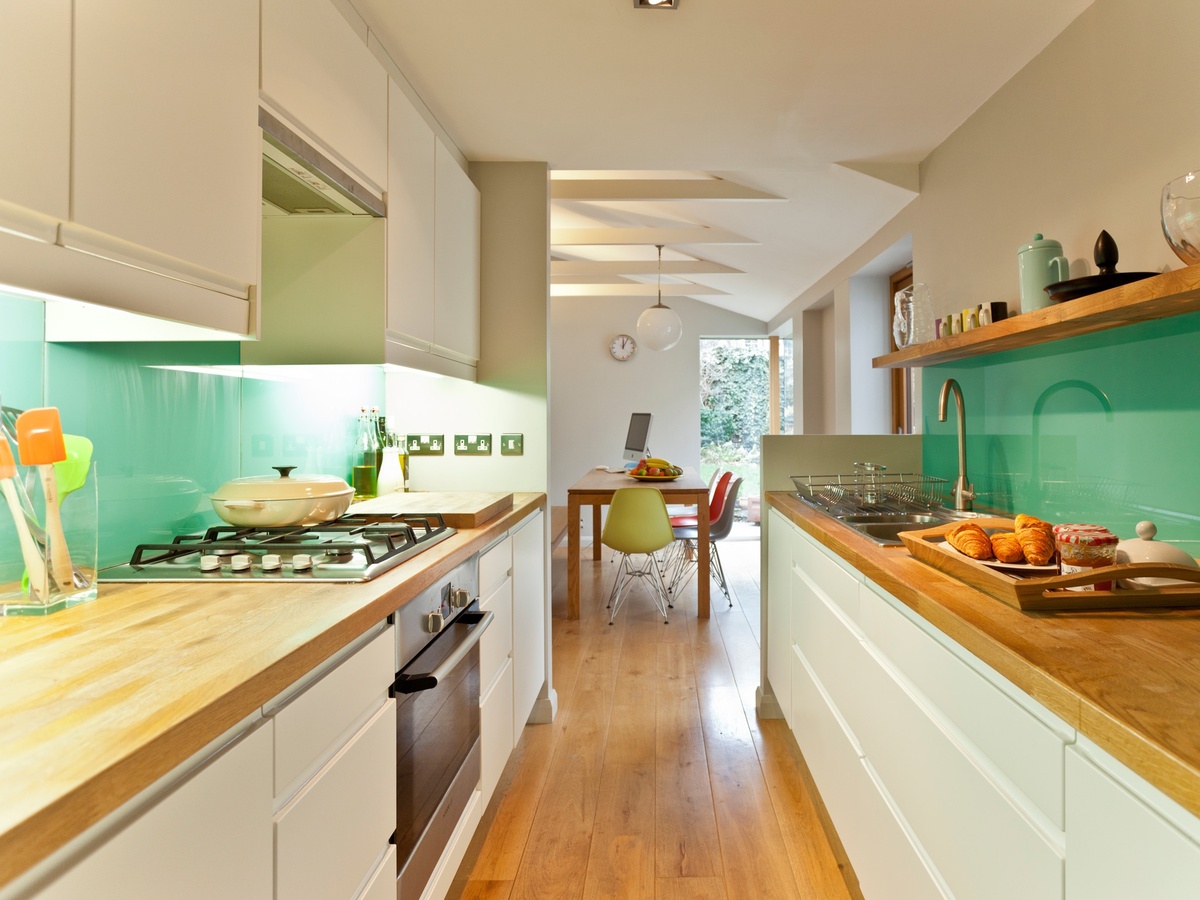
Choose the Right Layout
The first step in organizing your kitchen island is to select the right layout that suits your needs. The layout will depend on the size and shape of your island, as well as your cooking style and preferences. Here are a few popular layout options to consider:
- Open Shelving: If you want to showcase your kitchenware or display decorative items, open shelving can be a great choice. This layout creates an open and airy feel, but keep in mind that it requires regular organization and dusting.
- Cabinets and Drawers: Adding cabinets and drawers to your island allows for hidden storage, keeping clutter out of sight. It is an ideal solution for storing items that you don’t use regularly or want to keep away from the main kitchen area.
- Mix of Open and Closed Storage: For a balanced approach, consider incorporating a combination of open and closed storage. This allows you to showcase specific items and keep others concealed.
- Island with Seating: If you plan on using your kitchen island as a dining or entertaining area, opt for a layout that includes seating. This can be achieved by extending the countertop to create an overhang for bar stools or incorporating a built-in dining table.
Remember to consider the flow of your kitchen and ensure that the chosen layout complements the overall design. Take measurements of your island and plan accordingly to ensure that the layout is both functional and visually appealing.
Furthermore, it’s important to consider the specific storage needs of your kitchen. Are you an avid baker? Do you have an extensive collection of cookware? Tailor the layout of your island to accommodate these specific needs. This will help you optimize the available space and ensure that everything you need is easily accessible.
By selecting the right layout for your kitchen island, you lay the foundation for an organized and efficient storage solution. So take the time to consider your options and choose a layout that works best for you!
Maximize Storage Space
When it comes to kitchen organization, maximizing storage space is key. Making the most of every available inch on your kitchen island will allow you to efficiently store your items and keep your workspace tidy. Here are some expert ways to maximize storage space:
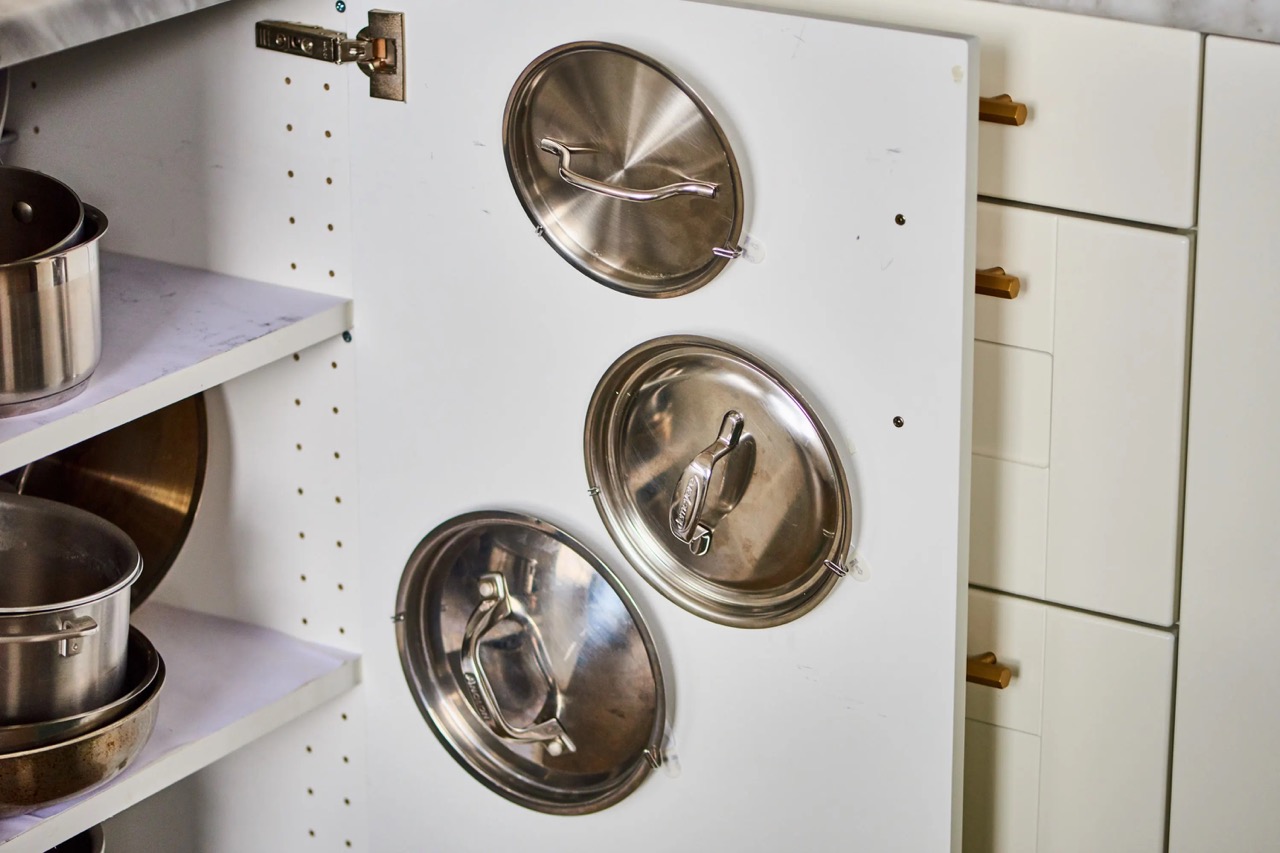
- Utilize Vertical Space: Take advantage of the vertical space on your island by adding shelves or hanging storage. Install hooks underneath the countertop to hang utensils or oven mitts, or use a hanging pot rack to store your cookware. This will free up valuable drawer and cabinet space.
- Use Adjustable Shelving: Incorporate adjustable shelving in your island cabinet. This allows you to customize the height of each shelf based on the items you need to store. Adjustable shelves are particularly useful for storing bulky kitchen gadgets or tall bottles.
- Install Pegboards: Consider installing a pegboard on the side of your island. Pegboards provide a versatile storage solution where you can hang kitchen tools, cutting boards, and even small pots and pans. They are easy to customize and can be rearranged as needed.
- Make Use of Corner Space: Corners can often be wasted space, but with the right storage solutions, they can become valuable storage areas. Install corner drawers or a lazy Susan in the corner of your island to make use of these otherwise unused spaces.
- Invest in Small Organizers: Maximize the storage potential of your island drawers by using small organizers. These can be used to separate and categorize items like utensils, baking tools, or spices. Drawer dividers and inserts are also great for keeping items neat and organized.
By implementing these storage-maximizing ideas, you can effectively utilize every nook and cranny of your kitchen island, ensuring that there is a dedicated place for every item. This will not only keep your island clutter-free but also make it easier to find what you need when cooking or baking.
Remember to regularly declutter and reassess the items you store on your island. If you notice any items that are rarely used, consider relocating them to free up space for more frequently used items. This will help maintain an efficient and functional storage system.
With these expert tips, you can transform your kitchen island into a storage powerhouse, allowing you to have a well-organized and clutter-free cooking environment.
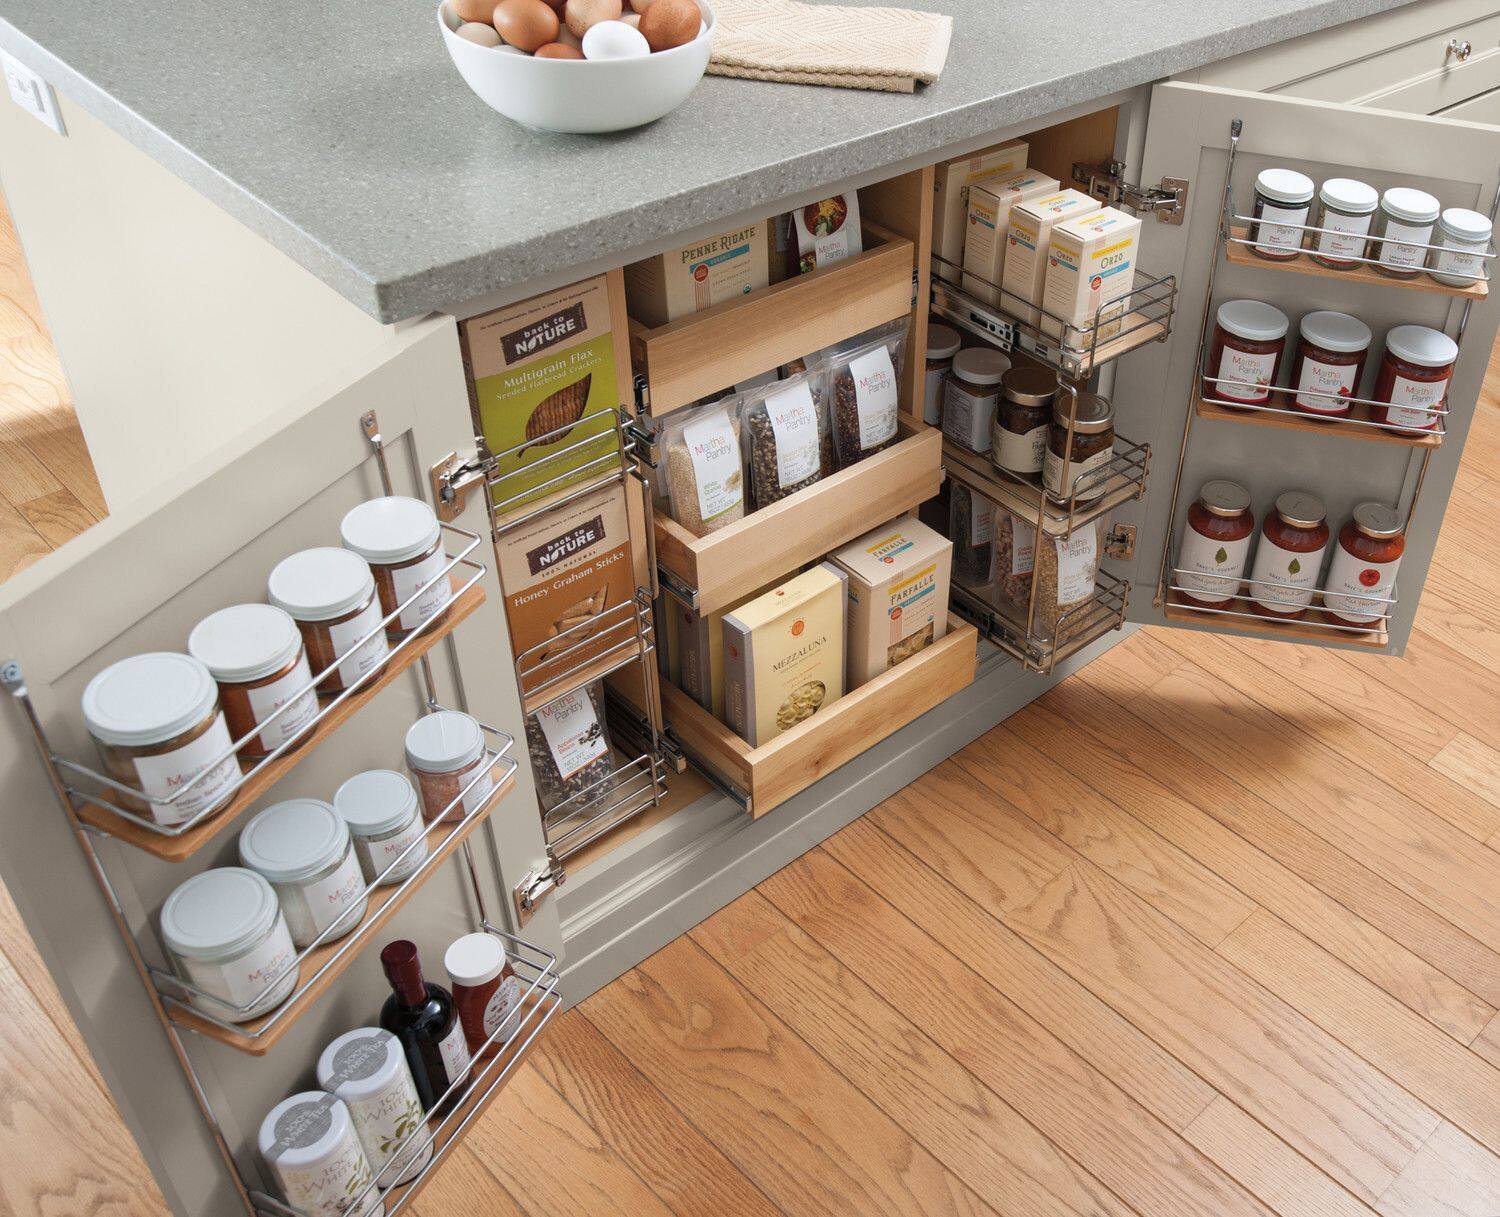
Utilize Drawer Dividers
When it comes to organizing your kitchen island, drawer dividers are a game-changer. These simple yet effective tools can transform cluttered drawers into neat and organized spaces. Here are some tips on how to make the most of drawer dividers:
- Categorize Your Items: Before adding drawer dividers, it’s important to categorize the items you plan to store in each drawer. Group similar items together, such as cooking utensils, measuring spoons, or baking tools. This will help you determine the size and shape of the dividers needed.
- Choose the Right Divider Configuration: There are various types of drawer dividers available, including adjustable dividers, modular dividers, or customizable inserts. Consider the size of your items and choose dividers that can accommodate them comfortably.
- Separate and Conquer: Dividers allow you to create separate compartments within a drawer, preventing items from shifting and becoming tangled. Use dividers to create dedicated spaces for different types of utensils or tools, making it easy to find and grab what you need.
- Consider Depth and Height: Don’t forget to consider the depth and height of your drawers when choosing dividers. Take accurate measurements to ensure that the dividers fit snugly and make effective use of the available space.
- Optimize Small Spaces: Drawer dividers are particularly useful for organizing small and narrow drawers. They prevent items from getting mixed up and enable efficient use of limited space.
Not only do drawer dividers keep your kitchen island drawers organized, but they also save you time and frustration by allowing easy access to your utensils and tools. No more digging through a messy drawer to find the right gadget!
To further enhance organization, consider labeling each section created by the dividers. This will ensure that everything has its designated place and make it easier to maintain order over time.
Remember to regularly declutter your drawers and reassess the items you store. If you find items that you no longer use or need, consider donating or repurposing them to free up space for more essential items.
Utilizing drawer dividers may seem like a small step, but it can have a significant impact on the overall organization and functionality of your kitchen island. By implementing this simple tool, you’ll be one step closer to a well-organized and efficient cooking space.
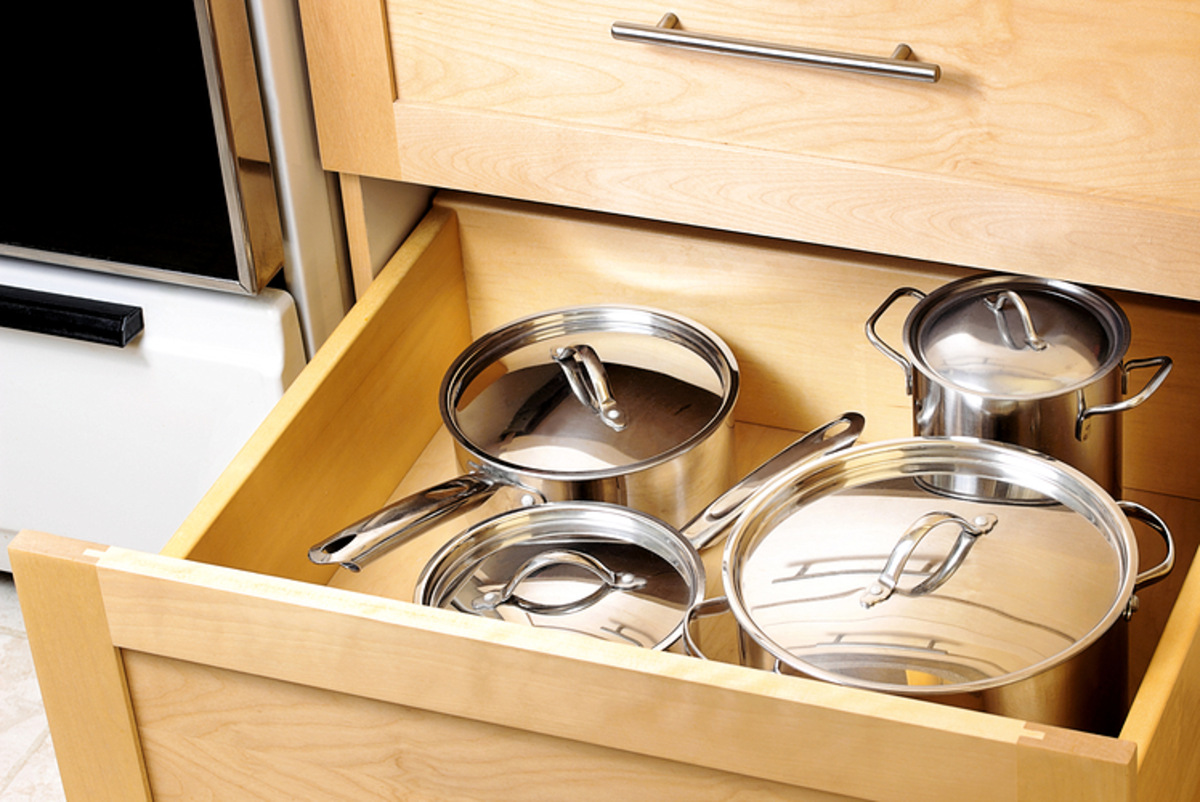
Incorporate Pull-Out Shelves
One of the best ways to optimize storage space and improve accessibility in your kitchen island is by incorporating pull-out shelves. These innovative shelves provide easy access to items at the back of the cabinet, eliminating the need to rummage through a deep and cluttered space. Here’s how you can make the most of pull-out shelves:
- Utilize Deep Cabinets: Pull-out shelves are perfect for deep cabinets where items can easily get lost or forgotten. By installing pull-out shelves, you can fully utilize the depth of the cabinet and easily access items stored at the back.
- Enhance Visibility: One of the advantages of pull-out shelves is that they bring items to the forefront, improving visibility and making it easier to locate what you need. No more straining your back or reaching into dark corners to find that elusive pot or pan!
- Customize for Your Needs: Pull-out shelves come in various sizes and configurations, allowing you to customize them based on your specific storage needs. Whether you need shelves for pots and pans, baking sheets, or small appliances, there are pull-out options to fit your requirements.
- Consider Double-Tiered Shelves: Double-tiered pull-out shelves are a great option for maximizing vertical space. These shelves have two levels, allowing you to stack items and effectively use the height of the cabinet.
- Maintain Order: Pull-out shelves make it easier to keep your items organized and prevent clutter. Assign specific shelves for different categories of items, such as mixing bowls, bakeware, or food storage containers.
When designing your kitchen island, keep in mind the installation of pull-out shelves and plan the cabinets accordingly. If you already have an existing island, you may be able to retrofit the cabinets with pull-out shelves, although this may require some professional assistance.
It’s important to note that when organizing your pull-out shelves, you should arrange items based on frequency of use. Store frequently used items on lower shelves for easy access, while reserving higher shelves for items used less frequently.
With pull-out shelves in your kitchen island, you can say goodbye to the frustrations of hard-to-reach items and maximize the storage capacity of your cabinets. These shelves provide convenience and efficiency, making your cooking experience more enjoyable and streamlined.
Install Hanging Pot Racks
Installing hanging pot racks in your kitchen island is a stylish and practical way to save space and keep your cookware within reach. Here’s how you can make the most of hanging pot racks:
- Utilize Vertical Space: Hanging pot racks take advantage of the unused vertical space above your kitchen island. By hanging your pots and pans, you free up valuable cabinet and drawer space for other items.
- Easy Accessibility: Having your cookware hanging overhead makes it incredibly easy to grab the right pot or pan when you need it. No more rummaging through cabinets or stacking them on top of each other.
- Showcase Your Collection: If you have a beautiful collection of cookware, hanging pot racks provide an opportunity to display them as part of your kitchen decor. It adds a touch of charm and personality to your kitchen island.
- Organize with Style: Hanging pot racks typically come with hooks of different sizes, allowing you to organize your cookware based on their shape and size. This ensures that everything has its designated spot, making it easy to maintain order.
- Consider Additional Storage: Some hanging pot racks come with built-in shelves or hooks for storing additional kitchen utensils, cutting boards, or spices. This maximizes the storage potential of your kitchen island and keeps everything easily accessible.
When installing hanging pot racks, consider the weight capacity of the rack and how it will be anchored to the ceiling. It’s important to ensure that the installation is secure and can withstand the weight of your cookware collection.
Also, think about the height at which you hang your pot rack. Make sure it is positioned at a height that is comfortable for you to reach without any strain. Take into account the length of your longest pot or pan to determine the appropriate height.
Furthermore, maintain the organization of your hanging pot rack by arranging your cookware in a visually pleasing and practical manner. Consider organizing them based on frequency of use, with frequently used items placed within easy reach.
With a hanging pot rack in your kitchen island, you can create a functional and visually appealing storage solution for your pots and pans. It not only saves space but also adds a touch of elegance to your kitchen decor.
Consider using drawer dividers and organizers to keep utensils, gadgets, and small items neatly separated and easily accessible in your kitchen island. This will help maximize space and keep everything in its place.
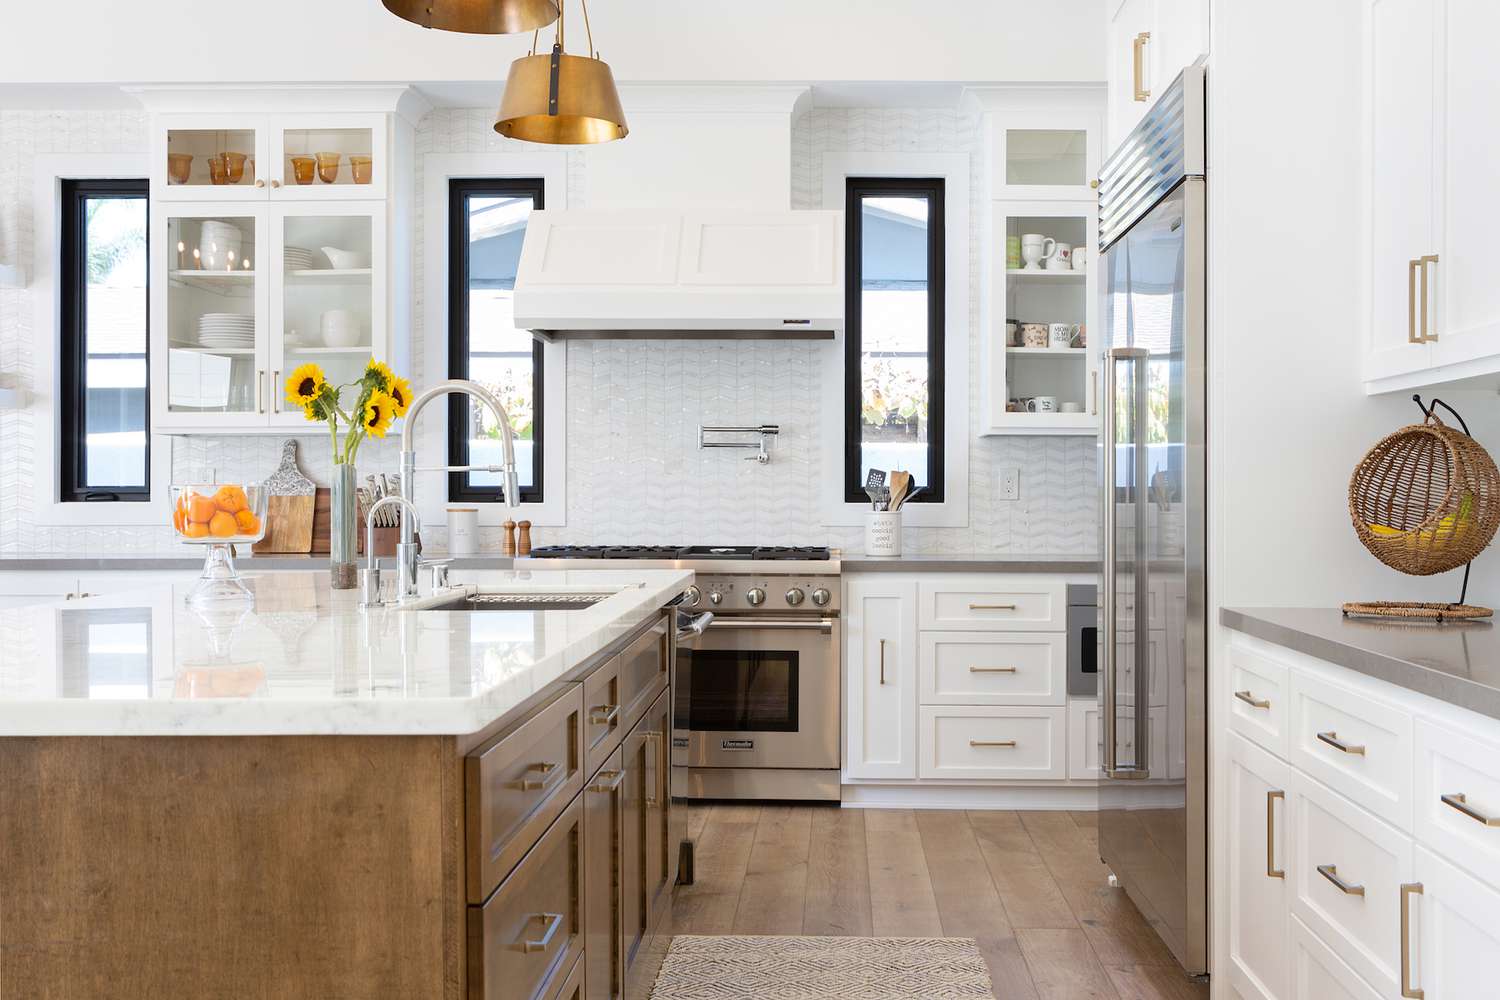
Create a Dedicated Prep Area
A well-organized kitchen island should not only provide storage but also offer a dedicated space for food preparation. By creating a designated prep area on your island, you can streamline your cooking process and make meal preparation more efficient. Here’s how you can create a dedicated prep area:
- Clear Countertop Space: Start by clearing a designated section of your kitchen island’s countertop. Remove any unnecessary items, such as decorative pieces or small appliances, to create an open space for prepping ingredients and cooking.
- Include a Cutting Board: Incorporate a built-in cutting board into your kitchen island. This saves space and keeps your cutting surface easily accessible. Consider a pull-out or foldable cutting board that can be stored neatly when not in use.
- Install a Prep Sink: If you have the resources and space, consider installing a small prep sink in your kitchen island. This allows you to rinse ingredients, wash hands, or clean utensils without having to move to the main sink. It’s a convenient addition for a dedicated prep area.
- Add Task Lighting: Good lighting is crucial for a functional prep area. Install task lighting above your kitchen island to ensure sufficient illumination during food prep. This will make it easier to see what you’re doing and ensure precision in your cooking techniques.
- Keep Essential Tools within Reach: Organize your prep area by keeping essential tools within arm’s reach. This can include knives, cutting boards, measuring utensils, and mixing bowls. Use drawer dividers or containers to keep these items organized and easy to find.
By dedicating a specific area on your kitchen island for food prep, you create a focused and efficient workspace. It allows you to have all the necessary tools and ingredients within reach, eliminating the need to move around the kitchen during the cooking process.
When designing your prep area, consider the flow of your kitchen and ensure that it aligns with your workflow. Position the prep area close to the main cooking area, allowing you to easily transfer ingredients from the island to the stove or oven.
Remember to clean and sanitize your prep area regularly to maintain hygiene and food safety. Keep your cutting boards, utensils, and prep sink clean to avoid cross-contamination.
With a dedicated prep area on your kitchen island, you create a central hub for food preparation, making cooking a more organized and enjoyable experience.
Use Wall-Mounted Spice Racks
When it comes to organizing spices, a wall-mounted spice rack is a practical and space-saving solution. By utilizing the walls of your kitchen island, you can keep your spices readily accessible and free up valuable counter and cabinet space. Here’s how you can make the most of wall-mounted spice racks:
- Create Vertical Storage: Wall-mounted spice racks utilize vertical space, allowing you to store a wide variety of spices without taking up precious countertop or cabinet space. By mounting the racks on the walls of your kitchen island, you can keep spices within easy reach while cooking.
- Organize by Category: Arrange your spices in an organized manner, grouping them by category or cuisine. This will make it easier to find and grab the spices you need during meal preparation. Consider using clear spice jars or labels to further enhance organization.
- Consider Magnetic Spice Racks: Magnetic spice racks are a popular option for wall-mounted storage. These racks feature magnetic tins that can be easily attached to the metal surface of your kitchen island. They offer a sleek and modern storage solution while keeping spices easily accessible.
- Utilize Unused Wall Space: Take advantage of any unused wall space on your kitchen island. This can be the side panel of a cabinet or even the back of the island. Install spice racks in these areas to maximize storage without interfering with other kitchen activities.
- Showcase Your Collection: If you have a wide variety of spices and want to showcase your collection, consider using open or glass-fronted spice racks. This allows you to display your spices as part of your kitchen island decor, adding a touch of color and visual interest.
When installing wall-mounted spice racks, ensure they are securely affixed to the wall to prevent accidental falls or spills. Consider the weight of the spice jars and choose racks that can support the load without compromising safety.
Additionally, periodically check your spices for freshness and replace any that have lost their flavor. Properly storing spices in a cool, dry place will help maintain their potency for longer periods.
With wall-mounted spice racks on your kitchen island, you can easily access and organize your spices, creating a well-arranged and efficient cooking experience. Say goodbye to rummaging through cluttered cabinets and embrace the convenience of wall-mounted spice storage!
Designate Zones for Different Tasks
When organizing your kitchen island, it’s important to create designated zones for different tasks. By dividing your island into specific areas, you can streamline your workflow and ensure that everything has its place. Here’s how you can effectively designate zones on your kitchen island:
- Cooking Zone: Dedicate a section of your island for cooking activities. This can include a built-in stovetop, a grill, or a portable induction cooktop. Make sure this zone is well-ventilated and equipped with the necessary cooking utensils and tools.
- Prep Zone: Create a separate area for food preparation. This can be a countertop space with a built-in cutting board or a designated space for prepping ingredients. Keep essential tools like knives, cutting boards, and mixing bowls within reach in this zone.
- Cleaning Zone: Allocate an area on your kitchen island for cleaning and washing up. Include a small sink or a designated space for rinsing dishes and utensils. This zone can also house a dishwasher or a drying rack for convenience.
- Serving Zone: If your kitchen island doubles as a dining area, designate a section for serving meals. This can be a raised countertop for barstool seating or a built-in dining table extension. Ensure this zone is well-lit and has ample space for plates, cutlery, and serving dishes.
- Storage Zone: Make sure to allocate ample storage space within your kitchen island for pantry items, cookware, and utensils. Incorporate pull-out shelves, drawer dividers, and hanging racks to maximize storage efficiency.
When designing your kitchen island, consider the flow and placement of these zones. Position them strategically to create an efficient and ergonomic workspace. For example, place the prep zone near the cooking zone for easy transfer of ingredients, and the cleaning zone near the sink or dishwasher for convenient cleanup.
Labeling or visually marking each zone can further enhance organization and help everyone in the household understand the designated purpose of each area. This ensures that everyone knows where to find and return items, maintaining order and efficiency in the kitchen.
By designating zones in your kitchen island, you create a functional and organized workspace tailored to your specific cooking needs. This allows you to move seamlessly between tasks and increases productivity in the kitchen.
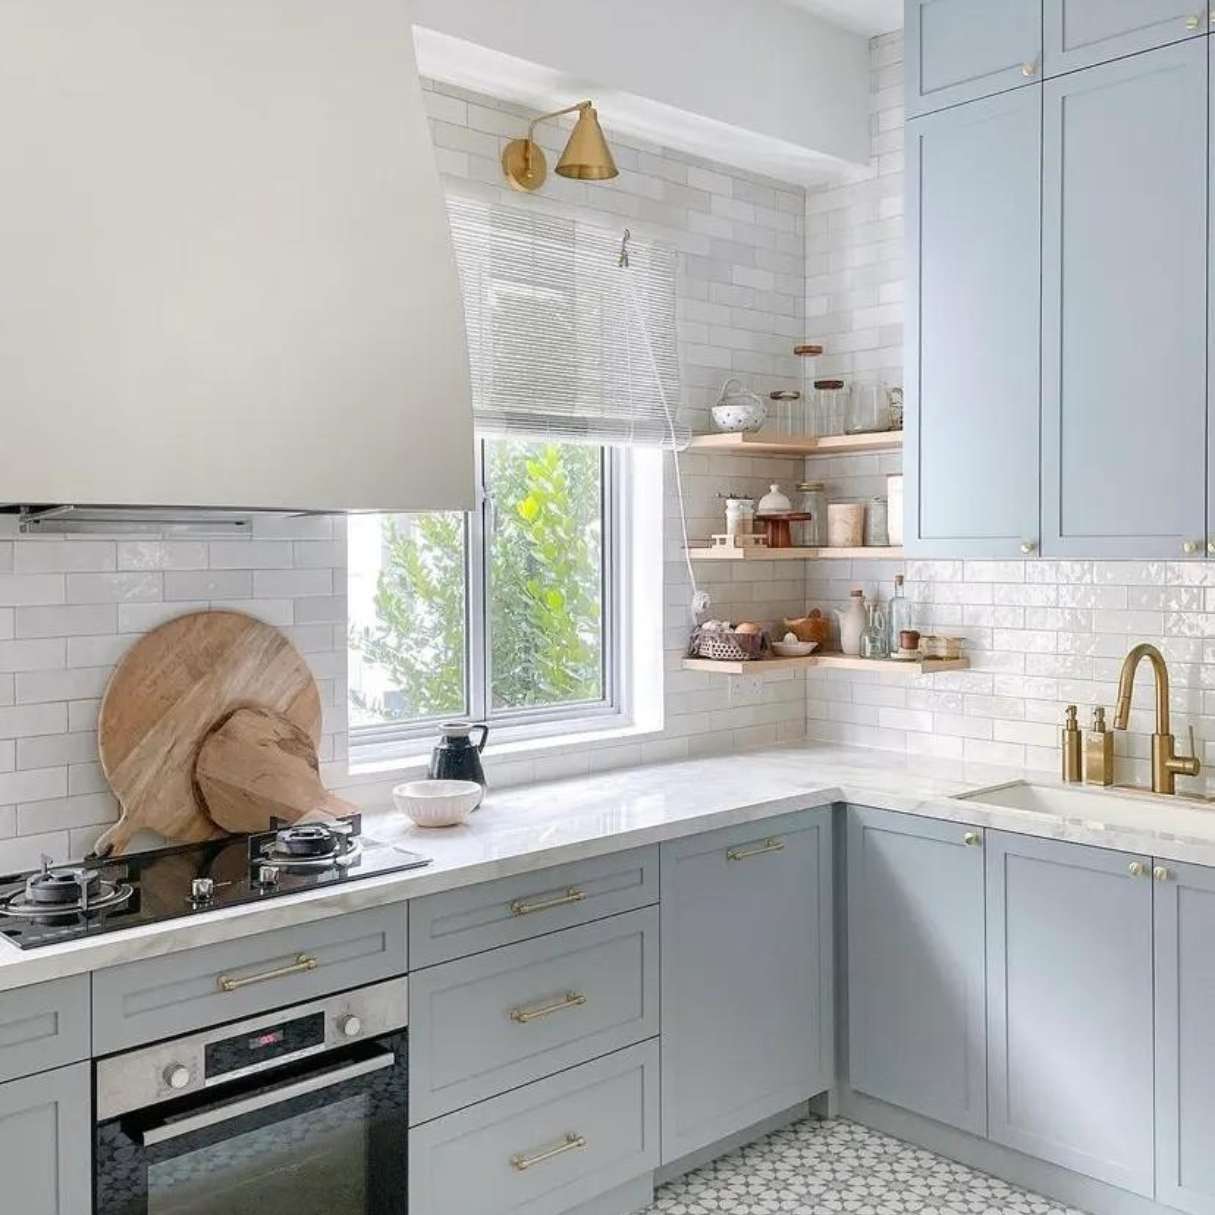
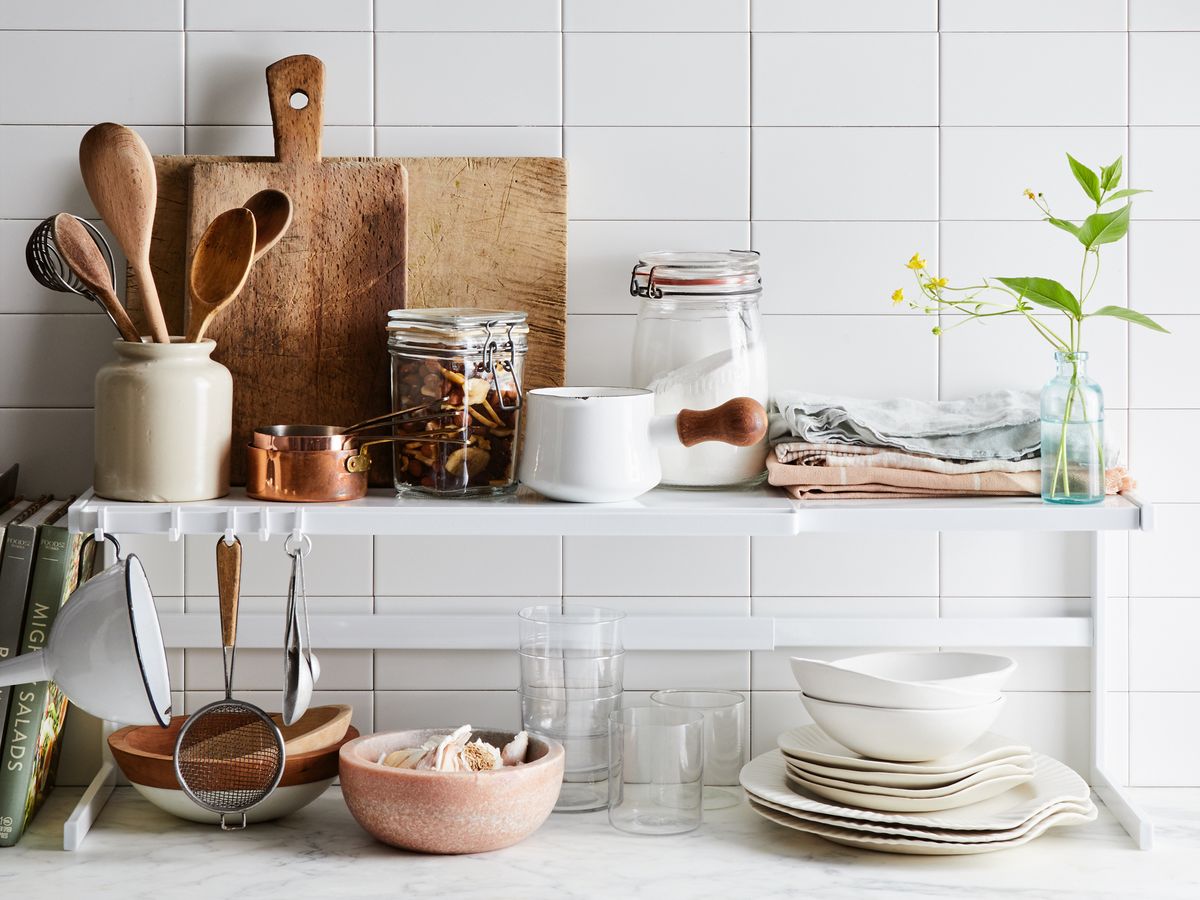
Personalize with Decorative Elements
An organized kitchen island doesn’t have to be purely functional—it can also be a beautiful and personalized space that reflects your style and personality. By incorporating decorative elements, you can transform your island into a visually pleasing focal point in your kitchen. Here’s how you can personalize your kitchen island:
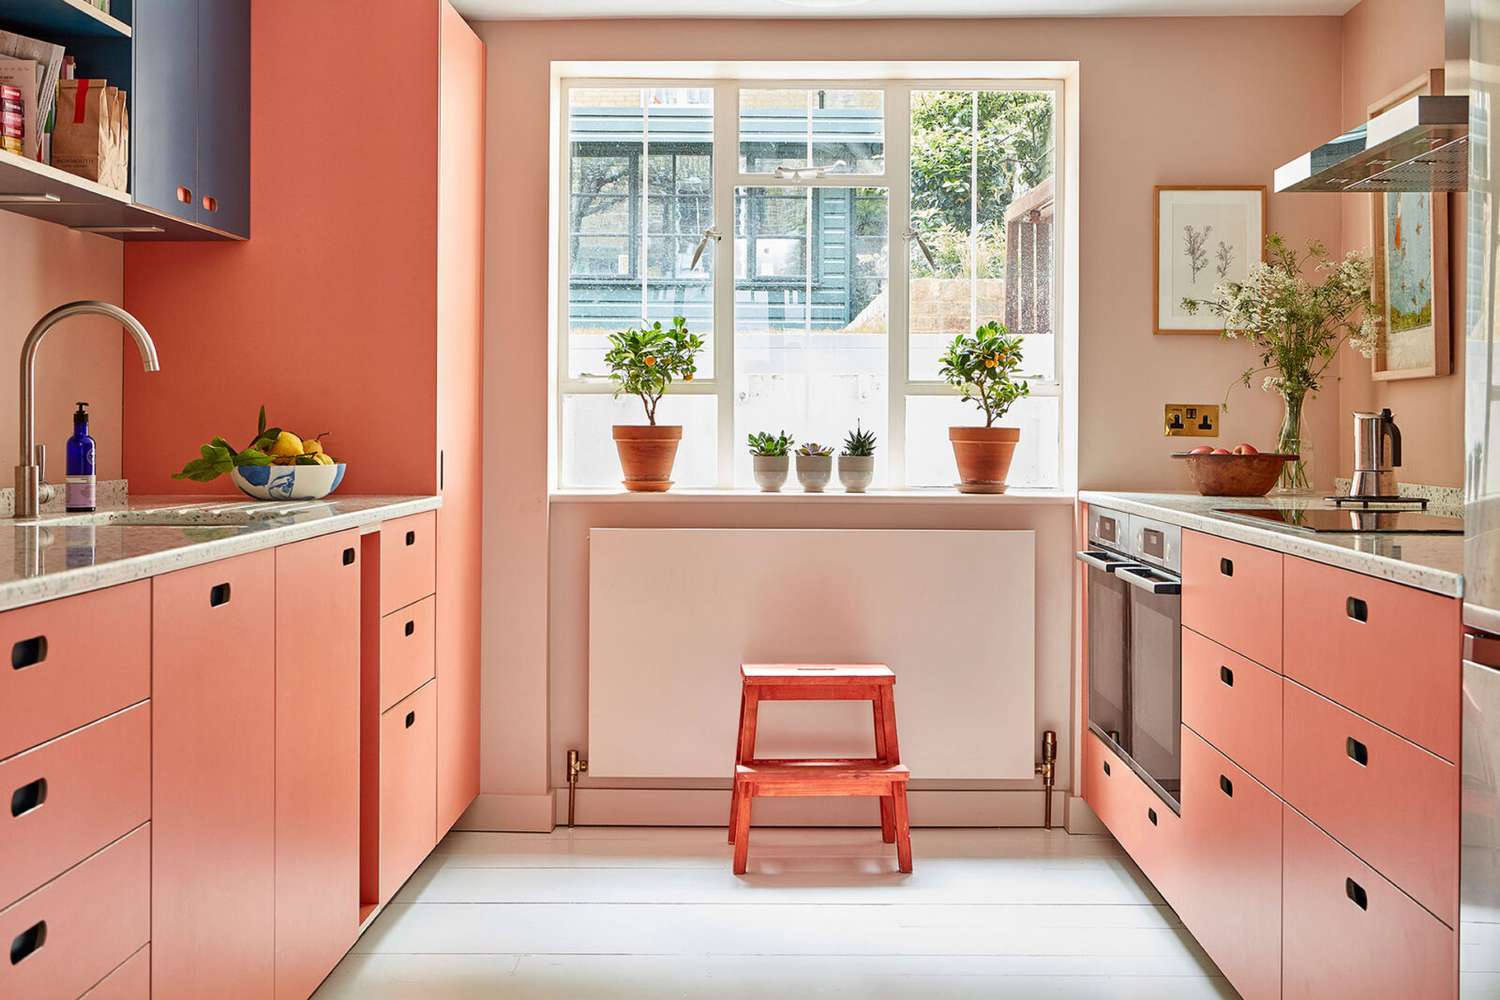
- Add Greenery: Bring life to your kitchen island by incorporating potted plants or fresh herbs. Not only do they add a touch of natural beauty, but they can also be practical if you enjoy cooking with fresh ingredients.
- Showcase Artwork or Photographs: Use your island as a display area for artwork or photographs that inspire you. Choose pieces that complement your kitchen decor and reflect your personal taste.
- Display Cookbooks: If you have a collection of cookbooks, incorporate a stylish bookshelf or stand on your kitchen island to showcase your favorite recipes and culinary inspiration. This adds a personal touch and makes your island feel more inviting.
- Incorporate Decorative Accessories: Consider adding decorative accessories like vases, candle holders, or decorative bowls. Choose items that match your kitchen’s theme and color palette to create a cohesive look.
- Use Stylish Containers: Store kitchen essentials like utensils or ingredients in aesthetically pleasing containers or canisters. Opt for materials such as glass, ceramic, or stainless steel to add a touch of elegance to your island.
- Show Off Unique Kitchen Tools: If you have unique or vintage kitchen tools, display them on your island to add character and charm. Hang them on hooks or place them in a glass case for everyone to admire.
When personalizing your kitchen island, it’s important to strike a balance between functionality and aesthetics. Ensure that the decorative elements you incorporate do not interfere with the usefulness and accessibility of your island’s storage and workspace.
Moreover, periodically reassess and update your decorative elements to keep your kitchen island fresh and inspiring. Swap out artwork, change the placement of plants, or rotate decorative accessories to keep the space visually engaging.
By personalizing your kitchen island, you create a space that not only serves as a functional workspace but also brings joy and inspiration to your daily cooking routine.
Keep it Clean and Organized
Once you’ve organized your kitchen island, it’s essential to establish a routine for keeping it clean and organized. Maintaining a tidy and well-structured island will not only enhance its functionality but also contribute to an overall pleasant cooking experience. Here’s how you can keep your kitchen island clean and organized:
- Wipe Down Regularly: Make it a habit to wipe down your kitchen island regularly. Use a damp cloth or sponge to clean the countertop, shelves, and drawers. This will prevent dirt, spills, and crumbs from accumulating and keep your island looking pristine.
- Declutter Frequently: Take the time to declutter your island at regular intervals. Remove any items that don’t belong or are no longer needed. Return utensils, appliances, and ingredients to their designated storage areas to maintain order.
- Organize as You Go: While cooking or using your island for meal prep, practice organizing as you go. Clean up spills immediately, put away ingredients after use, and wash dishes and utensils promptly. This will prevent clutter from building up and make cleanup easier.
- Label Containers: If you store ingredients or items in containers, consider labeling them. Clear labels will help you quickly identify what’s inside and maintain order in your island’s storage areas.
- Implement a Storage System: Establish a system for storing items on your island. Assign specific areas or containers for different categories, such as spices, utensils, or pantry items. Return items to their designated spots after each use to promote organization.
- Regularly Assess and Update: Periodically assess the functionality of your island’s storage and organization. If certain systems or containers aren’t working effectively, make necessary adjustments or consider alternative solutions.
By consistently incorporating these habits into your routine, you’ll be able to maintain an orderly kitchen island. Not only will this keep your island looking tidy, but it will also ensure that items are easily accessible when you need them.
Remember, organizing and cleaning your kitchen island is an ongoing process. It requires dedication and regular maintenance. But with time and practice, it will become second nature, leading to a well-functioning and harmonious cooking environment.
With a clean and organized kitchen island, you’ll have a space that promotes efficiency, allows for creativity, and ultimately enhances your overall culinary experience.
Conclusion
Organizing your kitchen island is a game-changer when it comes to maximizing storage and efficiency in your kitchen. By implementing the expert tips and strategies discussed in this article, you can transform your kitchen island into a well-organized and functional space that not only meets your storage needs but also reflects your personal style. Let’s recap the key points:
We started by emphasizing the importance of choosing the right layout for your kitchen island, considering factors like size, shape, and specific storage needs. Then we explored ways to maximize storage space through vertical storage solutions, adjustable shelving, and utilizing corner spaces.
We also discussed the benefits of incorporating drawer dividers to keep your utensils and tools neatly organized, as well as the advantages of pull-out shelves for easy access to items stored in deep cabinets. Hanging pot racks were introduced as an excellent option for maximizing vertical space and showcasing your cookware collection.
In addition, we highlighted the significance of creating a dedicated prep area on your kitchen island, complete with a cutting board, prep sink, and proper lighting. We also emphasized the value of designating zones for different tasks, such as cooking, prepping, cleaning, serving, and storage.
To add a personal touch, we explored the benefits of incorporating decorative elements like plants, artwork, and stylish containers. We also emphasized the importance of keeping your kitchen island clean and organized through regular wiping down, decluttering, and implementing efficient storage systems.
In conclusion, an organized and well-designed kitchen island not only enhances the functionality of your kitchen but also contributes to a more enjoyable and efficient cooking experience. By following the expert tips in this article, you can transform your kitchen island into a hub of organization, creativity, and personalization. So go ahead and unleash your creativity, optimize your storage, and enjoy the benefits of an organized kitchen island!
Frequently Asked Questions about How To Organize A Kitchen Island: 10 Expert Ways
Was this page helpful?
At Storables.com, we guarantee accurate and reliable information. Our content, validated by Expert Board Contributors, is crafted following stringent Editorial Policies. We're committed to providing you with well-researched, expert-backed insights for all your informational needs.


0 thoughts on “How To Organize A Kitchen Island: 10 Expert Ways”