Home>Interior Design>Tips For Painting Kitchen Cabinets: 17 Ways To An Expert Finish

Interior Design
Tips For Painting Kitchen Cabinets: 17 Ways To An Expert Finish
Modified: October 20, 2024
Achieve an expert finish on your kitchen cabinets with these 17 interior design tips. Transform your space with the help of our painting techniques and tricks.
(Many of the links in this article redirect to a specific reviewed product. Your purchase of these products through affiliate links helps to generate commission for Storables.com, at no extra cost. Learn more)
Introduction
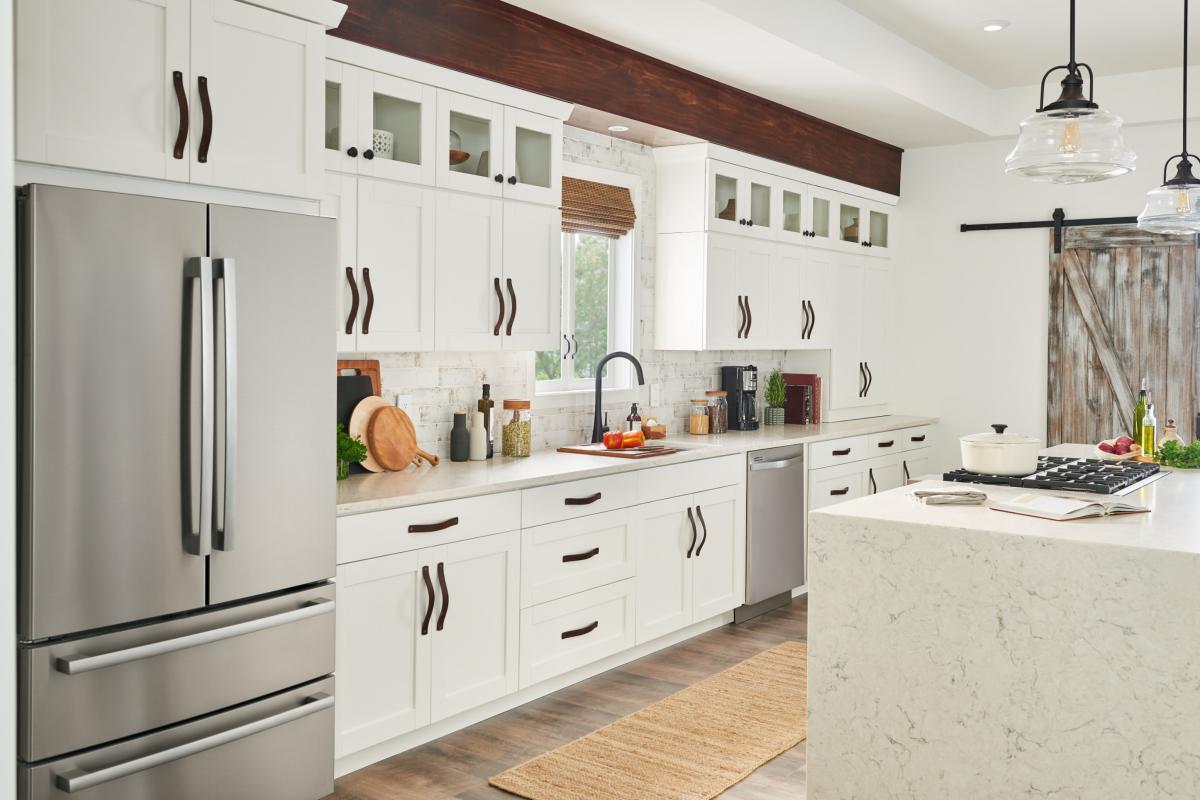
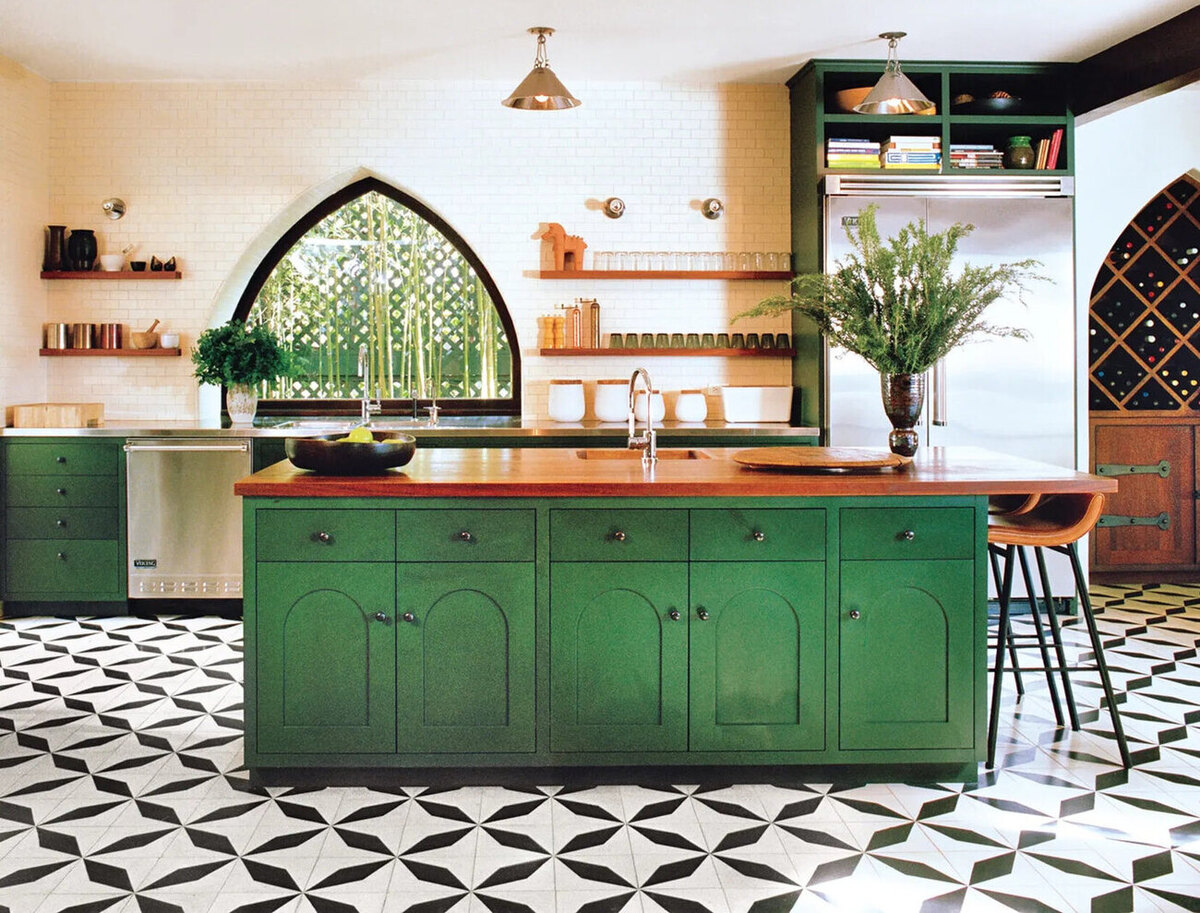
Painting kitchen cabinets can be an excellent way to transform the look and feel of your kitchen without the need for a complete renovation. Whether you’re looking to update the style, refresh the color, or add a personal touch, painting your kitchen cabinets can give your space a whole new lease on life.
When it comes to painting kitchen cabinets, there are several factors to consider, from proper preparation to choosing the right paint and applying it skillfully. In this article, we will explore 17 expert tips that will help you achieve a professional finish and ensure your painted cabinets look stunning and last for years to come.
Taking the time to properly prepare your cabinets is crucial for achieving a flawless finish. This involves removing cabinet hardware, cleaning the cabinets thoroughly, and sanding the surfaces to create a smooth texture for the paint to adhere to. Additionally, filling any holes or gaps and applying a primer will lay the foundation for a long-lasting paint job.
Choosing the right paint is equally important. Opt for a high-quality paint specifically formulated for cabinets, as it will be durable and resistant to moisture, grease, and stains. Consider the color and finish you desire, whether it’s a classic white, a trendy gray, or a bold statement color. Additionally, invest in high-quality brushes or rollers to ensure even application and a smooth finish.
Applying multiple thin coats of paint is key to achieving a flawless and professional-looking result. Allow proper drying time between coats and sand lightly to create a smooth surface. Protecting the surrounding areas from paint splatters or spills is essential, so be sure to cover countertops, floors, and appliances with drop cloths or tape.
To achieve a smooth and seamless finish, employ proper painting techniques. Work in small sections, keeping a wet edge to avoid visible lines or brush strokes. Applying a second coat of paint will ensure full coverage and enhance the durability of your cabinets.
Once the paint has dried and cured, it’s time to reinstall the cabinet hardware, adding the final touches to your newly painted cabinets. Whether you choose sleek and modern handles or vintage-inspired knobs, the hardware will complete the look and tie your kitchen’s aesthetic together.
By following these 17 expert tips, you can achieve a professional finish when painting your kitchen cabinets. Whether you’re a seasoned DIY enthusiast or tackling this project for the first time, taking the time to properly prepare, choose the right tools and paint, and employ the proper techniques will ensure a stunning end result that will breathe new life into your kitchen.
Now, let’s dive into each step in detail, so you can confidently embark on your journey to beautifully painted kitchen cabinets.
Key Takeaways:
- Transform your kitchen without a complete renovation by following expert tips for painting cabinets. Proper preparation, high-quality paint, and attention to detail are key for achieving a professional and long-lasting finish.
- Reinstalling cabinet hardware is the final touch to a freshly painted kitchen. Ensure proper alignment, functionality, and finishing touches for a cohesive and polished look.
Proper Preparation
Proper preparation is the key to a successful and long-lasting paint job on kitchen cabinets. Before you begin, it’s important to gather all the necessary supplies and tools, as well as clear out the contents of the cabinets for easy access.
Start by removing all cabinet doors and drawers, as well as any shelves or hardware. This will allow you to work on a flat surface and ensure that every nook and cranny of the cabinet can be properly painted. Lay the doors and drawers on a clean and protected surface, such as a drop cloth or old sheet.
Next, take the time to clean the cabinets thoroughly. Grease, oil, and dirt can build up on cabinet surfaces over time, preventing the paint from adhering properly. Use a gentle household cleaner or a mixture of warm water and mild detergent to wipe down the cabinets. Be sure to remove any residue and dry the surfaces thoroughly before proceeding.
Sanding the surfaces is an essential step in creating a smooth and adhesive-friendly surface for the paint. Use medium-grit sandpaper or a sanding block to gently roughen up the cabinet surfaces, removing any existing finish or gloss. This will help the primer and paint adhere better and ensure a more even finish.
After sanding, inspect the cabinets for any holes, scratches, or gaps. Use a wood filler or putty to fill these imperfections, ensuring a seamless surface for painting. Allow the filler to dry completely and use fine-grit sandpaper to smooth out the patched areas.
Priming is a crucial step in the painting process. Primer creates a bonding surface for the paint and helps to block stains and old paint colors from bleeding through. Choose a high-quality primer that is specifically designed for use on kitchen cabinets. Apply a thin and even coat of primer using a brush or roller, following the instructions on the product label.
Allow the primer to dry completely before moving on to the next step. This may take several hours or overnight, depending on the type of primer used. Check the drying time recommendations on the product label to ensure proper curing.
Proper preparation sets the foundation for a successful paint job on kitchen cabinets. Taking the time to remove cabinet doors and hardware, clean the surfaces, sand away any existing finish, fill any imperfections, and apply a high-quality primer will result in a smooth and long-lasting paint finish. When it comes to preparing your cabinets, remember that attention to detail and thoroughness will pay off in the final result.
Removing Cabinet Hardware
Removing the cabinet hardware is an important step in the painting process as it allows for easier access to the cabinets and ensures a more professional-looking finish. By taking the time to properly remove the hardware, you can avoid any accidental paint spills or drips on your knobs, handles, or hinges.
Start by gathering the necessary tools for removing the hardware, such as a screwdriver or drill, depending on the type of screws used. Carefully examine each cabinet door and drawer to identify the hardware that needs to be removed. Take note of the location and arrangement of each piece, as this will make reinstallation much easier later on.
Begin by removing the screws from each piece of hardware. Place the screws in a small container or bag to keep them organized and prevent them from getting lost. If the hardware is painted or tarnished, you may want to consider replacing it altogether for a fresh and updated look.
For knobs and handles, it’s usually just a matter of unscrewing them from the front of the cabinet. However, some knobs may have a hidden screw on the back that needs to be loosened before the knob can be removed. Check beneath the knob or handle to ensure there are no additional screws holding it in place.
In the case of hinges, you will need to unscrew them from both the cabinet frame and the back of the cabinet door. Carefully place the screws in a labeled container to ensure they stay organized and don’t get mixed up with other hardware.
Once all the hardware has been removed, you can set it aside for cleaning or replacement. If you plan to reuse the same hardware, it’s a good idea to clean it thoroughly before reinstallation. Use a mild detergent and warm water to remove any dirt, grease, or grime. Allow the hardware to dry completely before reinstalling it.
If you decide to replace the hardware, take this opportunity to explore different styles and finishes to enhance the overall aesthetic of your kitchen cabinets. Consider choosing hardware that complements the chosen paint color and adds a touch of personality to your kitchen.
By properly removing the cabinet hardware before painting, you can ensure a smoother and more professional-looking finish. Taking the time to label and organize the hardware, as well as cleaning or replacing it, will ensure a seamless process when it comes to reassembling your cabinets. Remember to keep track of all the screws and small parts to avoid any complications during reinstallation.
Cleaning the Cabinets
Cleaning the cabinets thoroughly before painting is an essential step to ensure a smooth and long-lasting finish. Over time, kitchen cabinets can accumulate grease, grime, and dust, which can hinder paint adhesion. By taking the time to clean the cabinets properly, you can create a clean and smooth surface for the paint to adhere to.
To begin, remove any loose debris or items from the cabinets. Take out all contents, including dishes, utensils, and appliances, so that you have easy access to all surfaces. This will allow you to clean every nook and cranny of the cabinets effectively.
Next, prepare a cleaning solution by mixing warm water with a mild detergent or a gentle household cleaner. Avoid using harsh chemicals or abrasive cleaners as they can damage the cabinet finish. Dip a soft cloth or sponge into the cleaning solution and wring out any excess moisture.
Starting from the top of the cabinets, wipe down the exterior surfaces, including the doors, drawers, and cabinet frames. Use gentle, circular motions to remove any grease or grime. Pay extra attention to areas near stovetops and cooking areas, as these tend to accumulate more grease and require more thorough cleaning.
For cabinets with raised panel designs, use a soft-bristled brush or an old toothbrush to clean any intricate details. This will help to remove any dirt or debris that may be trapped in the crevices. Be careful not to scrub too vigorously, as this can damage the wood or paint finish.
After cleaning the exterior surfaces, move on to the interior of the cabinets. Wipe down the shelves, sides, and back panels with the cleaning solution. If there are any stubborn stains or sticky residue, you can use a slightly stronger cleaner or a mixture of vinegar and water to help break it down.
Once you have cleaned all the surfaces, rinse the cabinets with a clean cloth or sponge dampened with plain water to remove any soap residue. Make sure to wipe them dry with a clean, lint-free cloth to prevent water spots or streaks.
Allow the cabinets to air dry completely before moving on to the next step. This will ensure that the cabinets are completely dry and ready for sanding, filling, and priming.
By taking the time to clean the cabinets thoroughly before painting, you can ensure that the paint adheres properly and provides a professional-looking finish. Removing grease, grime, and dust will not only improve the overall appearance of the cabinets but also help the paint to bond better to the wood or existing finish. Remember to use gentle cleaning methods and avoid using harsh chemicals that could damage the cabinets.
Sanding the Surfaces
Sanding the surfaces of your kitchen cabinets is a crucial step in the painting process. Sanding helps to create a smooth and textured surface that allows the paint to adhere properly, resulting in a professional-looking finish. It also helps to remove any existing finish or gloss, promoting better paint adhesion.
To begin, gather the necessary tools for sanding, including medium-grit sandpaper or sanding blocks. It’s recommended to start with a medium-grit sandpaper (around 120-150 grit) and adjust the grit level as needed for the specific condition of the cabinets.
Before you begin sanding, it’s essential to protect yourself by wearing safety goggles and a dust mask. Sanding can produce fine dust particles that can be harmful if inhaled, so taking proper precautions is important.
Start by sanding the cabinet surfaces in the direction of the wood grain. This will help to avoid any visible scratches or marks. Use long, even strokes with firm but gentle pressure. Avoid pressing too hard, as this can damage the wood or create uneven areas.
Pay special attention to areas that may have existing damage or rough spots, such as scratches or dents. Sand these areas more thoroughly to ensure a smooth surface. Take your time and be thorough in your sanding process, as this will greatly contribute to the final appearance of the cabinets.
After sanding, wipe down the surfaces with a clean, damp cloth to remove any residual dust. This step is crucial, as any remaining dust particles can affect the finish of the paint. Once wiped down, allow the cabinets to dry completely before taking the next steps.
It’s important to note that if your cabinets have a glossy finish or are covered in polyurethane, you may need to use a liquid deglosser before sanding. A deglosser will help to break down the shiny surface and make it easier for the paint to adhere. Follow the instructions on the deglosser product carefully and always wear protective gloves during the application process.
Sanding the surfaces of your kitchen cabinets is a vital step in achieving a professional and long-lasting paint finish. By properly sanding the wood, you create a smooth and textured surface that promotes better paint adhesion. Remember to take your time, use even strokes, and protect yourself by wearing safety goggles and a dust mask.
Filling any Holes or Gaps
Before painting your kitchen cabinets, it’s important to inspect them for any holes, cracks, or gaps that need to be filled. Filling these imperfections will ensure a smooth and seamless surface for the paint, resulting in a professional-looking finish.
To begin, gather the necessary supplies for filling holes and gaps, such as wood filler or putty and a putty knife or scraper. Choose a wood filler that matches the color of your cabinets or one that can be easily painted over.
Start by examining the cabinets closely to identify any holes, cracks, or gaps. These can be caused by previous hardware installations, aging cabinets, or general wear and tear. Common areas to check include the corners of cabinet frames, where hardware was previously installed, or where two cabinets meet.
Once you have identified the areas that need filling, scoop a small amount of wood filler or putty onto the edge of your putty knife or scraper. Apply the filler to the holes or gaps, pressing it firmly into place. Use the edge of the putty knife to scrape away any excess filler, making the surface as smooth and flush as possible.
For larger holes or gaps, you may need to apply multiple layers of filler, allowing each layer to dry before adding the next. Follow the manufacturer’s instructions for drying time between layers and ensure that each layer is sanded smooth before proceeding.
After the filler has dried completely, use fine-grit sandpaper to sand down the patched areas. This will help to create a smooth surface and blend the patch with the rest of the cabinets. Take care to feather the edges of the patch, blending it seamlessly with the surrounding wood.
Once you have finished sanding, wipe down the cabinets with a clean, damp cloth to remove any dust or residue. Allow the cabinets to dry completely before moving on to the next steps of priming and painting.
Filling any holes or gaps in your kitchen cabinets is an important step in achieving a professional-looking finish. By taking the time to fill these imperfections, you create a smooth and seamless surface for the paint to adhere to. Remember to match the filler color to your cabinet or be prepared to paint over it, and follow the manufacturer’s instructions for drying and sanding times.
Applying Primer
Applying primer is a crucial step in the process of painting kitchen cabinets. Primer creates a bonding surface for the paint and helps to block stains and old paint colors from bleeding through. It also provides a smooth and uniform base for the paint, resulting in a professional-looking finish.
Before applying the primer, make sure your cabinets are clean, sanded, and free from dust. Protect the surrounding areas by covering countertops, floors, and appliances with drop cloths or tape.
Choose a high-quality primer that is specifically designed for use on kitchen cabinets. There are different types of primers available, such as oil-based or water-based. Consider factors such as odor, drying time, and ease of application when selecting the primer.
Start by stirring the primer thoroughly to ensure a consistent and even application. This is important as some primers may settle or separate over time. Use a paintbrush or roller to apply the primer to the cabinets, starting with the backs and sides of the doors and then moving on to the fronts.
Apply the primer in thin and even coats, following the direction of the wood grain. This will help to avoid brush marks and create a smooth surface. Pay extra attention to any areas that have been patched or filled, ensuring that the primer covers these areas completely.
Allow the primer to dry according to the manufacturer’s instructions. This may take anywhere from a couple of hours to overnight, depending on the type of primer used. It’s important to give the primer enough time to dry and cure properly before moving on to the next step.
After the primer has dried, inspect the cabinets for any areas that may require additional primer. If necessary, apply a second coat of primer to ensure full coverage and better adhesion of the paint. Remember to allow the second coat to dry completely before proceeding.
Once the primer has dried and cured, you will have a smooth and uniform base for the paint. The primer not only enhances the adhesion and durability of the paint but also helps to prevent any stains or old paint colors from showing through. It’s an essential step in achieving a professional and long-lasting finish for your kitchen cabinets.
Remember to clean your brushes or rollers thoroughly after applying the primer. If you plan to continue painting the next day or at a later time, cover your brushes or rollers tightly in plastic wrap or place them in a sealed plastic bag to keep them from drying out.
Applying primer is a critical step in the painting process of kitchen cabinets. It prepares the surface for the paint, improves adhesion, and creates a smooth and consistent base. Take your time to apply the primer properly, allowing it to dry and cure before moving on to the final step of painting your cabinets.
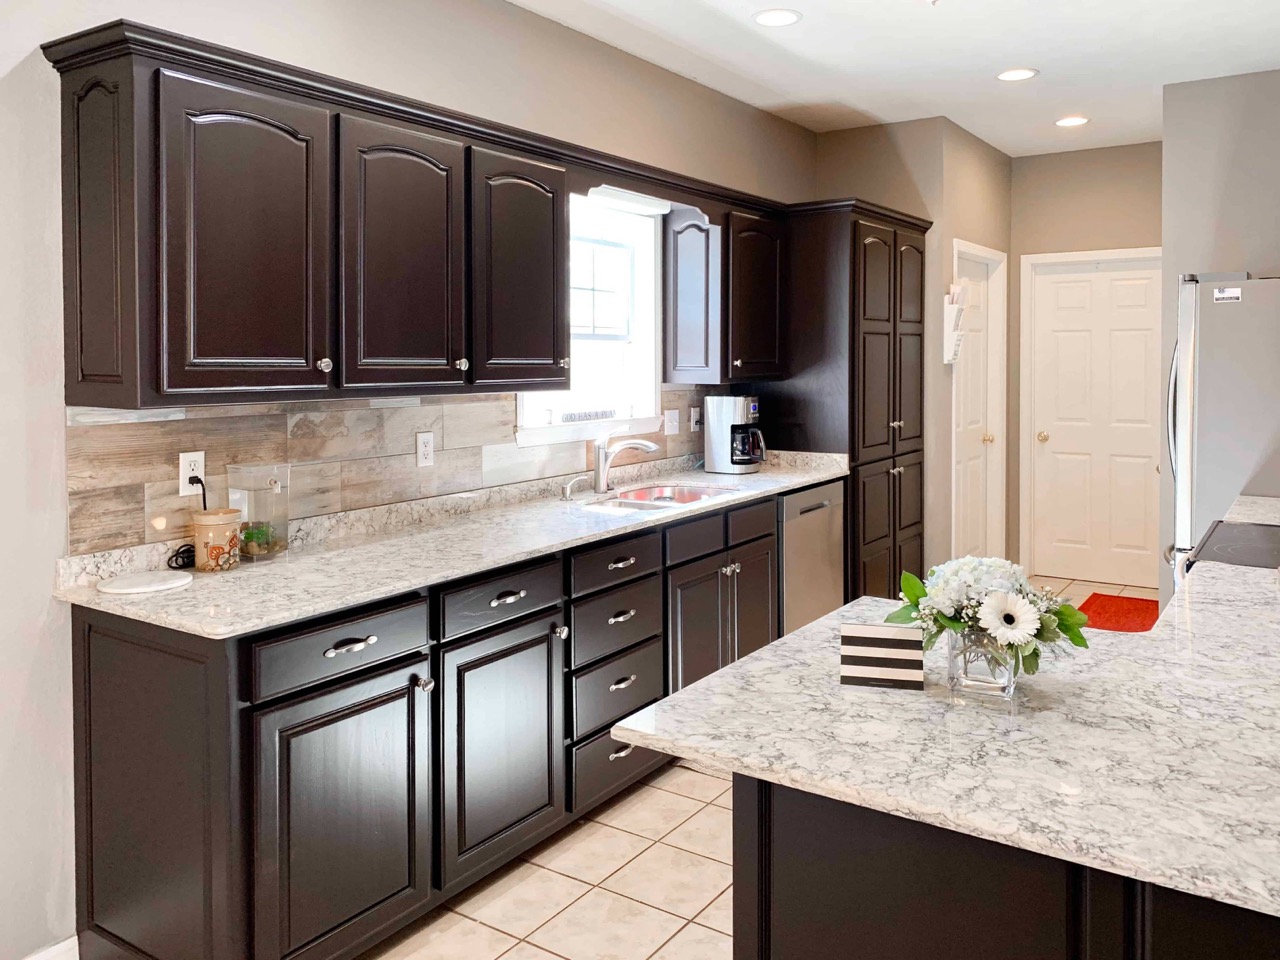
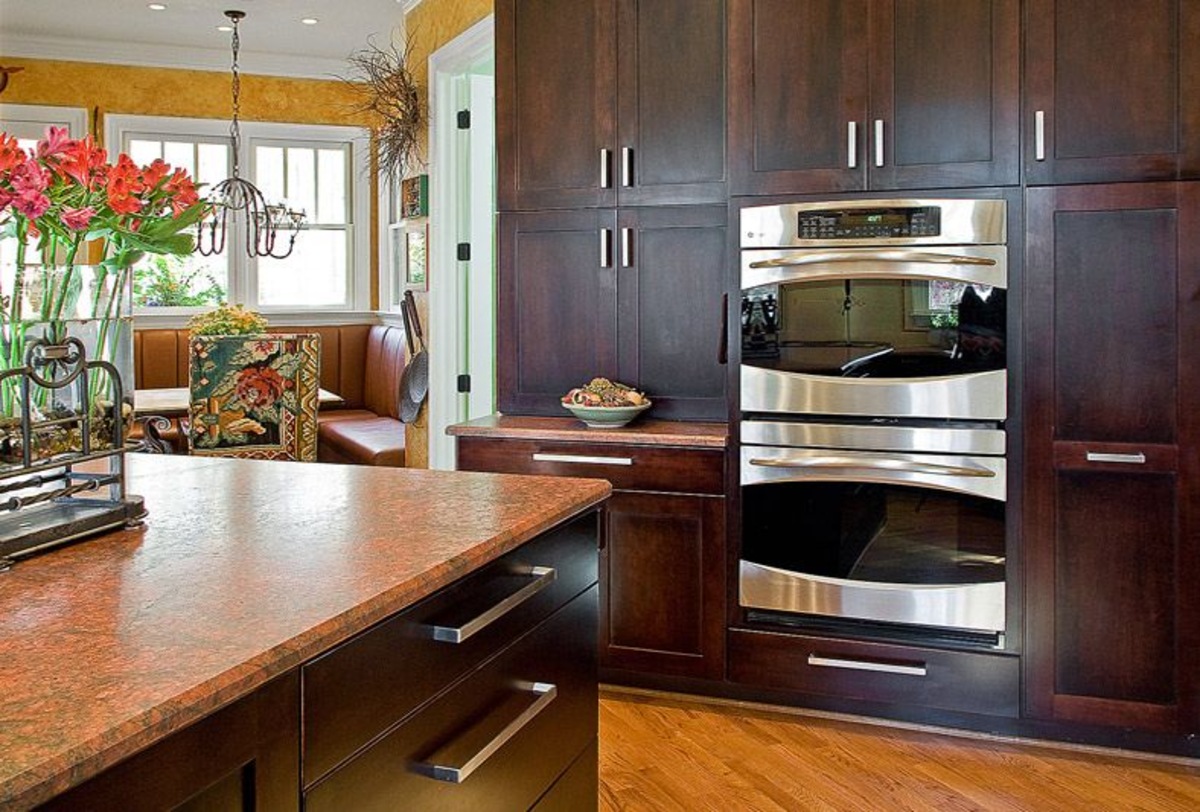
Choosing the Right Paint
Choosing the right paint for your kitchen cabinets is essential for achieving a beautiful and long-lasting finish. The paint you select should be durable, easy to clean, and capable of withstanding the demands of a kitchen environment. Here are some key factors to consider when choosing the right paint for your cabinets:
1. Cabinet Material: The type of material your cabinets are made of will impact the type of paint you choose. For wood cabinets, consider using an oil-based or latex-based paint. Oil-based paints provide a stronger finish and are more resistant to chipping or peeling, while latex-based paints are easier to clean and have less odor.
2. Paint Finish: The finish of the paint can greatly influence the overall look and durability of your cabinets. Choose a finish that suits your style and matches the aesthetic of your kitchen. Popular options include satin, semi-gloss, or high-gloss finishes. Satin finishes offer a subtle sheen and are easy to clean, while semi-gloss and high-gloss finishes provide a more shiny and reflective appearance and are more resistant to moisture and stains.
3. Paint Color: The color of the paint is a personal choice and should match your desired kitchen aesthetics. Consider the overall color scheme of your kitchen and select a paint color that complements or contrasts with the countertops, appliances, and backsplash. Neutral colors like white, gray, or beige are timeless choices, while bold colors can add a pop of personality to the space.
4. Quality of Paint: Investing in high-quality paint will ensure better coverage, durability, and longevity. Quality paints are formulated with a higher concentration of pigments, which results in better color saturation and coverage. They also tend to have better adhesion and resistance to wear and tear.
5. Cabinet Usage: Consider the level of usage your cabinets will endure when choosing the paint. For heavily used cabinets, such as those in the kitchen or bathroom, opt for a paint that is resistant to moisture, grease, and stains. Look for paints that have special formulations designed for high-traffic areas.
6. Paint Application: Consider the method of application for the paint. For most kitchen cabinets, using a paintbrush or a foam roller will suffice. However, if you prefer a smoother finish, you may want to consider using a paint sprayer. Keep in mind that using a sprayer requires more skill and additional equipment for proper ventilation and overspray protection.
7. Environmental Impact: If you are conscious of the environmental impact, look for paints that are low or zero-VOC (volatile organic compounds). These paints have reduced levels of harmful chemicals and odors, making them a healthier choice for you and the environment.
Before you start painting your kitchen cabinets, take the time to explore different paint options, read product labels, and consult with experts if necessary. Choosing the right paint will not only enhance the aesthetics of your cabinets but also ensure their durability and longevity.
Using High-Quality Brushes or Rollers
Using high-quality brushes or rollers is essential when painting your kitchen cabinets to ensure a professional and flawless finish. The right tools will make the application process more efficient, provide better coverage, and result in a smoother, more even coat of paint. Here’s how to choose and use the right brushes or rollers for your cabinet painting project:
1. Brush Selection: When selecting brushes, opt for high-quality brushes specifically designed for painting cabinets. Look for brushes with tightly packed, synthetic bristles that are suitable for the type of paint you are using. Avoid cheap brushes with loose or uneven bristles, as they can leave streaks or hairs behind.
2. Brush Size: Consider the size of the brush head in relation to the size of your cabinets. For smaller areas and intricate details, choose a smaller brush with a narrow tip. For larger flat surfaces, a larger brush will help you cover more area quickly and efficiently.
3. Roller Selection: If you prefer to use a roller for painting your cabinets, choose a high-quality roller specifically designed for smooth surfaces. Look for a foam or microfiber roller, as they tend to provide a smoother finish compared to traditional nap rollers.
4. Roller Size: Select a roller with the appropriate size for your cabinets. A 4-inch roller is typically suitable for most cabinet surfaces. A smaller roller may be needed for tight spaces or narrow sections.
5. Use the Right Technique: Whether you’re using a brush or roller, the key to achieving a smooth finish is to apply paint in thin and even coats. Load the brush or roller with a moderate amount of paint, making sure not to overload it. This will help prevent drips or excess paint on the cabinet surfaces.
6. Apply with Light Pressure: When applying paint, use light pressure with the brush or roller. Smooth and even strokes will result in a more professional-looking finish with fewer visible brush or roller marks.
7. Blend Strokes: To avoid brush or roller marks, blend each stroke into the previous one while the paint is still wet. This technique, known as feathering or “working wet,” helps create a seamless finish.
8. Cut-In the Edges: For areas that are difficult to reach with a roller, use a brush to “cut-in” by painting along the edges, corners, and crevices. This will ensure that every part of the cabinet is covered with paint.
9. Maintain a Wet Edge: When working on larger surfaces, try to maintain a wet edge by working quickly and smoothly. This means overlapping each stroke with the previous one while the paint is still wet. This technique helps to blend the paint and prevent visible lines or unevenness.
10. Proper Cleaning and Storage: After each use, clean your brushes or rollers thoroughly according to the instructions provided by the paint manufacturer. Proper cleaning will ensure that your brushes or rollers remain in good condition for future use. Store them in a clean and dry place to prevent damage or deformation.
Using high-quality brushes or rollers is essential for achieving a professional finish when painting kitchen cabinets. With the right tools and proper technique, you can ensure even coverage, smooth strokes, and a flawless result that will transform the look of your cabinets. Invest in good brushes or rollers, take your time, and follow the recommended painting techniques to achieve stunning cabinets that will stand the test of time.
Applying Thin Coats
When painting kitchen cabinets, applying thin coats of paint is crucial for achieving a smooth and flawless finish. Thick coats of paint can result in drips, uneven drying, and a less professional-looking outcome. By applying thin coats, you can ensure better adhesion, drying, and overall durability of the paint. Here’s how to apply thin coats effectively:
1. Dilute or Thin the Paint (if necessary): Depending on the type of paint you are using, you may need to thin it down slightly to achieve the desired consistency for thin coats. Follow the manufacturer’s instructions on the paint can and mix in any necessary thinning agent accordingly. If your paint doesn’t require thinning, proceed with the original consistency.
2. Use the Right Brushes or Rollers: Choose high-quality brushes or rollers that are suitable for the type of paint you are using. Quality tools will allow for better control and help in achieving even application of thin coats. Ensure that the brushes or rollers are clean and free from any debris or old paint before starting the application process.
3. Load the Brush or Roller Properly: Dip the brush or roller into the paint, but do not overload it. Excess paint can lead to drips and a buildup of thick layers. Instead, aim for a moderate amount of paint on the bristles or roller cover.
4. Apply with Light Pressure: When applying the paint, use light pressure with the brush or roller. Pressing too hard can result in excess paint being released, leading to thicker coats. Light and even strokes will help achieve a more controlled and consistent application.
5. Work in small sections: Divide the cabinet surfaces into smaller sections to ensure complete coverage and better control of the paint application. Focus on one section at a time, applying thin coats evenly before moving on to the next section. This approach helps to prevent the paint from drying too quickly and allows for better blending of each coat.
6. Feather Edges: When applying each coat, be mindful of feathering the edges. Feathering refers to blending the edges of the newly applied coat with the previously painted area. This technique helps to create a seamless transition between coats and reduces the appearance of visible brush or roller marks.
7. Allow Proper Drying Time: Follow the drying time indicated on the paint can for each coat. It’s important to allow each coat to dry completely before applying the next one. Rushing the drying process can lead to smudging or marring the previously applied coats.
8. Sand Between Coats (if necessary): If you notice any imperfections or rough areas between coats, lightly sand them with fine-grit sandpaper before applying the next coat. This will help to create a smoother surface for subsequent coats.
9. Build up Multiple Thin Coats: Rather than applying one thick coat, aim to build up multiple thin coats to achieve the desired coverage and finish. Thin coats allow each layer to dry thoroughly and adhere well, resulting in a more durable and professional-looking painted surface.
By applying thin coats, you can achieve a smoother and more even finish when painting your kitchen cabinets. Remember to work in small sections, feather the edges, and allow proper drying time between coats. Taking the time to apply thin coats will result in a longer-lasting and professionally painted cabinet appearance.
Before painting kitchen cabinets, make sure to thoroughly clean and degrease the surfaces to ensure proper adhesion of the paint. Sanding the cabinets lightly will also help the paint adhere better.
Allowing Proper Drying Time
Allowing proper drying time between coats is crucial for achieving a successful and professional-looking finish when painting kitchen cabinets. Rushing the drying process can result in smudges, uneven textures, and compromised adhesion of subsequent coats. Here are some tips for allowing proper drying time:
1. Follow Manufacturer’s Instructions: Different paint types have varying drying times, so it’s important to read and follow the drying time recommendations provided by the paint manufacturer. These recommendations can typically be found on the paint can or container.
2. Consider Environmental Factors: Keep in mind that the drying time may be affected by environmental factors such as temperature, humidity, and airflow. Higher humidity or colder temperatures can prolong the drying process, while warmer temperatures and good airflow can speed up drying time.
3. Thin Coats Dry Faster: Applying thin coats of paint helps speed up the drying process. Thick coats take longer to dry and may be prone to issues such as wrinkling or sagging. Remember to follow the recommended number of coats for your specific paint type.
4. Allow Each Coat to Dry Fully: It’s important to allow each coat of paint to dry fully before applying the next coat. Even if the surface appears dry, the paint may still be in the process of curing beneath the surface. Check the drying time recommendations on the paint can, as some paints may require several hours or even overnight drying before applying the next coat.
5. Test for Dryness: To determine if the paint is dry, gently touch a small inconspicuous area with your finger. If it feels cool or damp, the paint is still drying and needs more time. If it feels dry and has no tackiness, it is ready for the next coat.
6. Avoid Dust and Debris: During the drying process, try to minimize any exposure to dust or debris that can land on the cabinets and mar the finish. Keep the workspace as clean as possible and cover the cabinets with a clean, breathable cloth or plastic sheeting to protect them from particles.
7. Patience is Key: Patience is crucial when allowing proper drying time. It can be tempting to rush the process, but taking the time to let each coat dry fully will ensure a more durable and professionally finished result. Resist the temptation to handle or place items on the painted cabinets until they have fully dried and cured.
By allowing proper drying time between coats, you ensure that each layer of paint has sufficient time to dry and cure thoroughly. This promotes better adhesion, minimizes the risk of smudging or damage, and enhances the overall durability of the paint finish. Remember to follow the paint manufacturer’s recommendations and be patient throughout the drying process to achieve the best possible results.
Sanding Between Coats
Sanding between coats is an important step in achieving a smooth and professional finish when painting kitchen cabinets. It helps to create a uniform surface, remove any imperfections, and promote better adhesion of subsequent coats. Here are some key points to consider when sanding between coats:
1. Wait for Proper Drying: Before sanding between coats, ensure that the previous coat of paint has dried completely. Follow the manufacturer’s instructions on the paint can for the recommended drying time. Rushing the drying process can lead to damage or uneven results.
2. Use Fine-Grit Sandpaper: Choose fine-grit sandpaper, typically between 220 to 320 grit, for sanding between coats. Fine-grit sandpaper removes any roughness or brush marks while creating a smooth surface for the next coat to adhere to. Avoid using sandpaper with a coarse grit as it can damage the paint or wood surface.
3. Lightly Sand the Surface: Use a light touch and sand in a gentle, circular motion. The goal is to lightly scuff the surface rather than aggressively remove the paint. Sanding too aggressively may remove too much paint or create visible scratches.
4. Sand in One Direction: Sand in one direction, following the natural grain of the wood or the direction of the strokes from the previous coat. This will help create a more even and consistent surface.
5. Focus on Problem Areas: Pay particular attention to any areas that may have uneven texture, drips, or visible brush or roller marks. Sand these areas carefully to smooth out any imperfections.
6. Remove Sanding Residue: After sanding, wipe down the cabinets with a clean, lint-free cloth or tack cloth to remove any sanding residue. This will prevent the particles from interfering with the next coat of paint and ensure a clean and smooth finish.
7. Avoid Over-Sanding: Be cautious not to over-sand the surface, as this can remove too much paint and compromise the integrity of the finish. The goal is to create a smooth surface, not to remove all the paint.
8. Clean the Sanding Tools: Clean the sandpaper or sanding block periodically during the sanding process to remove any build-up of paint particles. This will help maintain the effectiveness of the sanding tool and prevent uneven sanding.
9. Repeat as Necessary: Depending on the condition of the surface and the desired level of smoothness, you may need to repeat the sanding process between each coat. This ensures that each layer is smooth and uniform before applying the next coat of paint.
Sanding between coats helps create a flawless and professional finish when painting kitchen cabinets. By lightly sanding the surface, you remove imperfections, smooth out any roughness, and promote better adhesion for subsequent coats. Take your time, use fine-grit sandpaper, and maintain a gentle touch to achieve the best results.
Protecting the Surrounding Areas
Protecting the surrounding areas is crucial when painting kitchen cabinets to prevent accidental paint spills, splatters, or drips on countertops, floors, appliances, or other nearby surfaces. Taking the necessary precautions will save you time and effort in cleaning up, as well as ensure a more professional and seamless painting process. Here are some essential steps to protect the surrounding areas:
1. Clear the Workspace: Start by removing any items from the immediate vicinity of the cabinets. Clear off countertops, remove small appliances, and cover larger ones with drop cloths or plastic sheets to protect them from dust and paint splatter.
2. Cover Floors: Lay down drop cloths, plastic sheets, or old newspapers to cover and protect the floors in the area where you’ll be working. Secure the coverings with painter’s tape or masking tape to ensure they stay in place during the painting process.
3. Masking Tape: Use masking tape or painter’s tape to cover and protect the edges of countertops, backsplashes, and any areas where the cabinets meet walls or ceilings. This will create clean edges and prevent any accidental paint overlap onto these surfaces.
4. Protect Appliances: If there are appliances near the cabinets, cover them with plastic sheets or drop cloths to shield them from paint splatter. Make sure the coverings are secure and won’t shift during the painting process.
5. Ventilation: Ensure adequate ventilation in the workspace by opening windows or using fans. Proper air circulation helps to dissipate paint fumes and minimize the risk of strong odors or discomfort while painting.
6. Use Plastic Sheeting: Utilize plastic sheeting or large garbage bags to cover and protect larger appliances or fixtures that cannot be moved. This will safeguard them from accidental paint splatter or overspray.
7. Secure Cabinets: If you’re able to access the cabinets from the inside, consider using plastic sheeting or garbage bags to cover the interiors. This will protect the contents from dust and paint particles that may be generated during the painting process.
8. Seal Gaps and Cracks: Check for any gaps, cracks, or openings between the cabinets and walls or ceilings. Use painter’s caulk or a similar sealant to fill in these areas and prevent paint from seeping through.
9. Take Extra Precautions: For added protection, use old bedsheets or plastic drop cloths to cover larger areas such as entire walls or countertops. This will provide an extra layer of protection against accidental paint spills or splatters.
Remember, taking the time to properly protect the surrounding areas will save you from costly cleanup and potential damage to your kitchen. By covering floors, countertops, appliances, and fixtures, you can focus on painting your cabinets with peace of mind, knowing that the surrounding areas are secure. Prepare your workspace and protect the surroundings to ensure a smooth and hassle-free painting experience.
Using Proper Painting Techniques
Using proper painting techniques is crucial when painting kitchen cabinets to achieve a smooth, professional-looking finish. Employing the right techniques will help minimize brush strokes, roller marks, and other imperfections, resulting in a flawless and long-lasting paint job. Here are some essential painting techniques to consider:
1. Cut-In Edges: Before applying paint to the larger surfaces of the cabinets, use a brush to “cut-in” around the edges, corners, and crevices. This technique ensures full coverage in hard-to-reach areas and creates clean, crisp lines.
2. Paint in Thin, Even Coats: Apply paint in thin, even coats instead of one thick coat. Thick coats can lead to drips, uneven drying, and an unprofessional appearance. Multiple thin coats allow for better adhesion and a smoother finish.
3. Use High-Quality Brushes or Rollers: Invest in high-quality brushes or rollers that are suitable for the type of paint you are using. Quality tools will help create a more even application and reduce the appearance of brush or roller marks.
4. Work in Small Sections: Divide your cabinets into smaller sections and focus on one section at a time. This allows you to maintain a wet edge, ensuring that each stroke blends seamlessly with the previous one. Avoid letting the paint dry between sections to prevent visible lines or inconsistent coverage.
5. Follow the Wood Grain: When using a brush, follow the direction of the wood grain as much as possible for a more natural and appealing finish. This technique helps to minimize visible brush strokes and create a smoother appearance.
6. Feather Out Edges: When painting larger surfaces, feather out the edges of each stroke to avoid harsh lines or noticeable transitions. This technique involves lightly blending each stroke into the adjacent area while the paint is still wet.
7. Roll in One Direction: If using a roller, roll in one direction, following the natural grain of the wood or the direction of previous strokes. Rolling back and forth can create roller marks and texture inconsistencies.
8. Maintain a Wet Edge: To achieve a seamless finish, work quickly and maintain a wet edge as you paint each section. A wet edge refers to the area of the paint that is still wet and workable as you progress. This helps to blend each stroke and prevent visible lines or overlapping marks.
9. Use Light Pressure: Apply light pressure with brushes or rollers to avoid pressing too much paint into one area. This will help prevent excess paint build-up, drips, and uneven coverage.
10. Hold Brushes Properly: Hold brushes at the base of the handle and use a firm grip. This provides better control and allows for smoother, more precise brush strokes.
11. Check for Drips or Runs: Periodically check for any drips or runs in the paint and immediately smooth them out with a brush or roller before they dry. This will help maintain a uniform finish.
12. Don’t Rush: Take your time and be patient while painting your cabinets. Rushing the process can lead to mistakes or imperfections. Allow each coat to dry properly before applying the next one, and follow the recommended drying times provided by the paint manufacturer.
By using proper painting techniques, you can achieve a flawless and professional finish when painting your kitchen cabinets. From cutting-in edges to working in thin, even coats, these techniques will help minimize brush strokes, roller marks, and other imperfections, resulting in beautifully painted cabinets that will enhance the overall aesthetics of your kitchen.
Working in Small Sections
Working in small sections is a crucial painting technique when tackling kitchen cabinets. Breaking down the project into manageable sections allows for better control, consistent application, and a more professional-looking finish. Here’s why working in small sections is important, along with some tips to help you achieve the best results:
Working in small sections provides several benefits:
1. Even Application: By focusing on one section at a time, you can ensure an even and consistent application of paint. This helps to avoid visible brush or roller marks and prevents the paint from drying too quickly before you have a chance to blend each stroke.
2. Limit Overworking: Painting large surfaces all at once can lead to overworking the paint, resulting in uneven coverage or streaks. Working in small sections allows you to complete each area efficiently without spreading paint too thin or going back over already dried areas.
3. Wet Edge Maintenance: Maintaining a wet edge is crucial for achieving a seamless finish. With small sections, you can keep a wet edge by blending each stroke into the adjacent area while the paint is still wet. This ensures a smooth transition and minimizes visible lines or overlap marks.
4. Better Control: Painting small sections allows for better control over the brush or roller, resulting in fewer mistakes. It’s easier to navigate corners, edges, and details accurately and effectively without worrying about accidentally touching already painted areas.
Tips for working in small sections:
1. Plan the Order: Devise a plan in advance for the order in which you’ll tackle each section. Start with areas that have more corners, crevices, or smaller details, as they require more precision. Then move on to larger flat surfaces for a smoother workflow.
2. Tape Off Adjacent Surfaces: Use painter’s tape or masking tape to create clean edges and protect adjacent surfaces. This will ensure that paint stays only on the intended section and doesn’t accidentally bleed onto neighboring areas.
3. Load Paint Appropriately: Load your brush or roller with a moderate amount of paint to ensure even coverage without excess drips or spills. Avoid overloading, as it can lead to messy application and longer drying times.
4. Blend Paint Strokes: As you paint each small section, make sure to blend each stroke into the previous one while the paint is wet. This technique helps to create a seamless finish without visible brush or roller marks.
5. Check for Drips or Runs: Periodically check for any drips or runs and promptly smooth them out with a brush or roller. This vigilance will help maintain a uniform appearance and prevent the need for extensive touch-ups later.
6. Be Mindful of Timing: Depending on the paint and environmental conditions, you may need to work quickly in small sections to prevent the paint from drying before you have a chance to blend it. Adjust your pace accordingly to avoid visible lines or unevenness.
Working in small sections allows for greater precision and control when painting kitchen cabinets. By breaking down the project into manageable areas, you can achieve an even application, maintain a wet edge, and ensure a seamless finish. Follow these tips and take your time to work methodically, and you’ll be rewarded with beautifully painted cabinets that transform the look of your kitchen.
Keeping a Wet Edge
Keeping a wet edge is an important painting technique that helps achieve a seamless and professional-looking finish when tackling kitchen cabinets. Maintaining a wet edge refers to the practice of blending each brush or roller stroke with the previous one while the paint is still wet. This technique evens out the paint, minimizes visible lines, and ensures a uniform appearance. Here’s why keeping a wet edge is crucial and how to accomplish it effectively:
Why keeping a wet edge is important:
1. Avoid Visible Lines: When paint is applied and starts to dry, it can leave noticeable lines or lap marks where the wet and dry areas meet. Keeping a wet edge allows you to blend the strokes together, eliminating these lines and creating a smooth transition.
2. Seamless Finish: By continuously working on wet paint, the newly applied paint blends with the still-wet paint, seamlessly merging each stroke. This results in a cohesive and professional finish without any visible brush or roller marks.
3. Even Distribution of Paint: Maintaining a wet edge ensures consistent coverage of paint across the surface. It prevents the accumulation of excess paint, which can lead to drips, sags, or an uneven texture. By working with wet paint, you have more control over the distribution and thickness of the paint.
How to keep a wet edge:
1. Plan Ahead: Before you begin painting, plan the order in which you will work on different sections of the cabinets. Start with smaller areas or details and gradually move on to larger surfaces. This allows you to maintain a wet edge as you move from one section to another.
2. Work in Small Sections: Divide the cabinets into manageable sections or panels. By focusing on one section at a time, you can concentrate on applying the paint smoothly and blending each stroke while the paint is still wet.
3. Blend Each Stroke: With each stroke of the brush or roll of the roller, slightly overlap the previous stroke. This overlapping ensures that the wet paint merges with the previous stroke, continuously blending the edges.
4. Avoid Overworking: Maintain a steady pace while working to avoid overworking the paint. Rapid or excessive strokes can cause the paint to dry too quickly, making it challenging to blend the edges effectively. Find a rhythm that allows you to work consistently without rushing.
5. Monitor the Paint: Keep a close eye on the paint as you work to identify any drying or tackiness. If you notice the paint starting to dry, adjust your technique or apply slightly more paint to that area to maintain a wet edge.
6. Use Proper Lighting: Adequate lighting is important when keeping a wet edge. Good lighting enables you to see any subtle variations in color or texture, allowing you to blend and adjust as needed.
7. Work from Top to Bottom: When painting vertical surfaces such as cabinet doors or side panels, start at the top and work your way down. This way, any drips or excess paint can be caught or blended as you progress downward.
By keeping a wet edge, you ensure a smooth and flawless finish when painting your kitchen cabinets. Practice blending each stroke, work in controlled sections, and maintain a steady pace. With patience and attention to detail, your cabinets will have a professional-quality appearance with no visible lines or brush/roller marks.
Adding a Second Coat
Adding a second coat of paint is a critical step in achieving a durable, professional, and long-lasting finish when painting kitchen cabinets. While the first coat provides a base layer, the second coat enhances the color, coverage, and overall appearance of the cabinets. Here’s why adding a second coat is important and how to ensure a successful outcome:
Importance of adding a second coat:
1. Improved Color Saturation: The second coat intensifies the color of the paint, giving your cabinets a more vibrant and consistent appearance. It helps achieve the desired shade and eliminates any patchiness or uneven color that may exist after the first coat.
2. Enhanced Coverage: The second coat ensures complete coverage, hiding any underlying imperfections, stains, or brush strokes that may still be visible. It provides a more polished and flawless finish by concealing any areas of inconsistency or unevenness.
3. Increased Durability: Applying a second coat of paint creates a more robust and durable protective barrier on the cabinets. This additional layer enhances the cabinet’s ability to resist wear, scratches, and cleaning agents, making it more resistant to everyday use and extending its lifespan.
4. Professional Finish: Multiple coats of paint contribute to a professional-grade finish. The depth and richness of the color, along with the smoothness and uniformity of the coats, significantly elevate the overall aesthetic of the cabinets, giving them a refined and sophisticated look.
Steps to successfully add a second coat:
1. Inspect and Prepare: Before adding a second coat, carefully inspect the cabinets to ensure that the first coat has dried and cured completely. Check for any blemishes, rough areas, or visible brush or roller marks that may require touch-ups or light sanding.
2. Lightly Sand: If needed, lightly sand the cabinets using fine-grit sandpaper to smooth out any imperfections or roughness. This step promotes adhesion and creates a better surface for the second coat to adhere to. Be sure to wipe away any sanding residue with a clean cloth before proceeding.
3. Clean the Surface: Thoroughly clean the cabinets to remove any dust or debris that may have accumulated during sanding. Use a gentle cleaner or a mixture of warm water and mild detergent, and ensure the cabinets are completely dry before moving on to the second coat.
4. Apply Second Coat: Using the same application technique as the first coat (brush or roller), apply the second coat of paint evenly and smoothly. Work in systematic sections to maintain a consistent flow. Use long, even strokes and avoid overloading the brush or roller to prevent drips or excess paint.
5. Feather and Blend Strokes: Blend each stroke of the brush or roller with the previous stroke to maintain a wet edge and create a seamless finish. Feather the edges to ensure a uniform appearance without noticeable lines or overlap marks.
6. Allow Proper Drying Time: Follow the drying time indicated on the paint can for the second coat. It’s crucial to allow sufficient time for the paint to dry and cure fully before handling or reinstalling the cabinets.
By adding a second coat of paint to your kitchen cabinets, you achieve deeper color saturation, enhanced coverage, and increased durability. Follow proper preparation, application, and drying techniques to ensure a successful result. With a second coat, your cabinets will exhibit a professional and refined finish that enhances the overall aesthetics of your kitchen.
Read more: DIY Guide To Painting Kitchen Cabinets
Reinstalling Cabinet Hardware
After completing the painting process for your kitchen cabinets, the final step is to reinstall the cabinet hardware. Reattaching the knobs, handles, and hinges not only completes the new look but also ensures proper functionality. Here are some important considerations when reinstalling cabinet hardware:
1. Organize and Inspect: Before reinstalling, gather all the cabinet hardware and organize them according to their respective locations. Inspect each piece for any damage or wear that may require replacement.
2. Align with Existing Holes: Align the hardware with the existing holes on the cabinets. If necessary, use a template or marker to indicate the precise location for the screws.
3. Choose the Right Screw Size: Ensure that you use the appropriate screw size for each piece of hardware. Screws that are too short may not secure the hardware firmly, while screws that are too long can damage the cabinets.
4. Screwdriver or Drill: Use a manual screwdriver or a drill with a screwdriver bit to attach the hardware. Be cautious not to overtighten the screws, as this can strip the holes or cause damage.
5. Standardize Mounting: If you’re installing new hardware, consider standardizing the mounting positions. This involves determining a consistent distance from the edge of the cabinets for each piece of hardware. Using a measuring tape or a template can help achieve consistent and balanced placement.
6. Leveling and Alignment: Ensure that the hardware is level and aligned properly. Use a level or a straightedge to verify horizontal alignment for knobs and handles. For hinges, ensure they are straight and properly aligned to allow the doors to open and close smoothly.
7. Soft-Close Hinges: If you have chosen to upgrade to soft-close hinges, follow the manufacturer’s instructions for installation. Soft-close hinges provide a gentle closing mechanism, preventing slamming and reducing wear and tear on the cabinet doors.
8. Test and Adjust: Once the hardware is installed, test each piece to ensure it functions properly. Open and close cabinet doors, ensuring they align and operate smoothly. Make any necessary adjustments, such as tightening or loosening screws, to achieve the desired fit and operation.
9. Consider Adequate Clearance: When attaching knobs or handles, ensure there is sufficient clearance between the hardware and any adjacent cabinets or drawers. This will prevent accidental collisions and minimize the risk of damage.
10. Clean and Finish: After reinstalling the hardware, wipe down the cabinets to remove any smudges or fingerprints. Take this opportunity to add any finishing touches, such as adding felt pads to the bottom of knobs or handles to prevent scratches on cabinet surfaces.
By reinstalling the cabinet hardware with care and precision, you put the finishing touches on your newly painted kitchen cabinets. Pay attention to proper alignment, screw sizes, and leveling to ensure functionality and aesthetic appeal. Take your time, double-check your work, and enjoy the refreshed and cohesive look that the hardware provides to your cabinets.
Conclusion
Painting kitchen cabinets is an excellent way to transform the look and feel of your kitchen without the need for a complete renovation. By following these expert tips and techniques, you can achieve a professional and long-lasting finish that will breathe new life into your cabinets and enhance the overall aesthetics of your kitchen.
Proper preparation is key to a successful paint job. Take the time to remove cabinet hardware, clean the cabinets thoroughly, and sand the surfaces to create a smooth texture. Fill any holes or gaps to ensure a seamless surface, and apply a high-quality primer to promote better adhesion for the paint.
Choosing the right paint is essential. Consider the cabinet material, desired color, and finish options to achieve the look you desire. Use high-quality brushes or rollers to ensure even application and a smooth finish. Apply thin coats of paint, allowing proper drying time between each coat to achieve a flawless and durable result.
Sanding between coats helps create a consistent and smooth surface, removing any imperfections or roughness. Protect the surrounding areas by covering countertops, floors, and appliances to prevent accidental paint spills or splatters. Use proper painting techniques such as working in small sections, maintaining a wet edge, and blending each stroke to achieve a professional-looking finish.
Adding a second coat enhances the color, coverage, and durability of the paint, providing a more polished and finished appearance. Once the cabinets are painted, carefully reinstall the cabinet hardware, ensuring proper alignment and functionality. Take the time to clean and finish the cabinets, paying attention to detail for a cohesive and beautiful end result.
With these expert tips and techniques, you can successfully transform your kitchen cabinets and create a space that reflects your personal style. Whether you’re tackling this project on your own or seeking professional assistance, the result will be a kitchen that feels refreshed, modern, and inviting.
Remember, proper preparation, attention to detail, and patience are key throughout the painting process. By investing the time and effort into painting your kitchen cabinets, you will enjoy the benefits of a transformed space that brings joy and satisfaction for years to come. Happy painting!
Frequently Asked Questions about Tips For Painting Kitchen Cabinets: 17 Ways To An Expert Finish
Was this page helpful?
At Storables.com, we guarantee accurate and reliable information. Our content, validated by Expert Board Contributors, is crafted following stringent Editorial Policies. We're committed to providing you with well-researched, expert-backed insights for all your informational needs.

0 thoughts on “Tips For Painting Kitchen Cabinets: 17 Ways To An Expert Finish”