Home>Articles>17 Shed Organization Ideas To Keep Your Outdoor Supplies Neat And Tidy
Articles
17 Shed Organization Ideas To Keep Your Outdoor Supplies Neat And Tidy
Modified: October 30, 2024
Discover 17 articles filled with shed organization ideas to tidy up your outdoor supplies and keep them neatly organized.
(Many of the links in this article redirect to a specific reviewed product. Your purchase of these products through affiliate links helps to generate commission for Storables.com, at no extra cost. Learn more)
Introduction
Welcome to the wonderful world of shed organization! If you have an outdoor shed, you know how quickly it can become a messy and chaotic space. From tools and gardening supplies to seasonal decorations and outdoor furniture, it’s easy for everything to become jumbled and hard to find.
But fear not! With some clever organizational strategies and a bit of creativity, you can transform your disorganized shed into a well-organized storage space that is not only functional but also visually appealing. In this article, we will explore 17 shed organization ideas that will help you keep your outdoor supplies neat and tidy.
Whether you have a small shed or a spacious one, these organization tips will work for any size space. Say goodbye to rummaging through piles of clutter to find what you need and hello to an organized shed that makes it easy to locate and access your outdoor essentials.
From utilizing vertical space and categorizing items to using clear containers and labeling everything, these ideas will revolutionize the way you store and organize your shed. We’ll also explore the benefits of creating dedicated work areas, utilizing pegboards and overhead storage, and establishing designated stations for gardening and recycling.
Additionally, we’ll discuss the importance of regularly maintaining your shed organization by incorporating regular cleanouts and purges to keep clutter at bay. And of course, we can’t forget about safety – we’ll cover the essentials of having a well-stocked first aid kit in your shed.
So, if you’re ready to transform your shed from a cluttered mess to an organized haven, let’s dive into these 17 shed organization ideas that will make your outdoor supplies storage a breeze!
Key Takeaways:
- Transform your shed into an organized and functional space with 17 innovative ideas. From utilizing vertical space to creating dedicated work areas, these strategies will revolutionize your shed organization and enhance your outdoor experience.
- Keep your shed clutter-free and efficient by implementing regular cleanouts and maintaining a well-stocked first aid kit. Embrace the challenge of shed organization to enhance productivity and enjoyment of your outdoor activities.
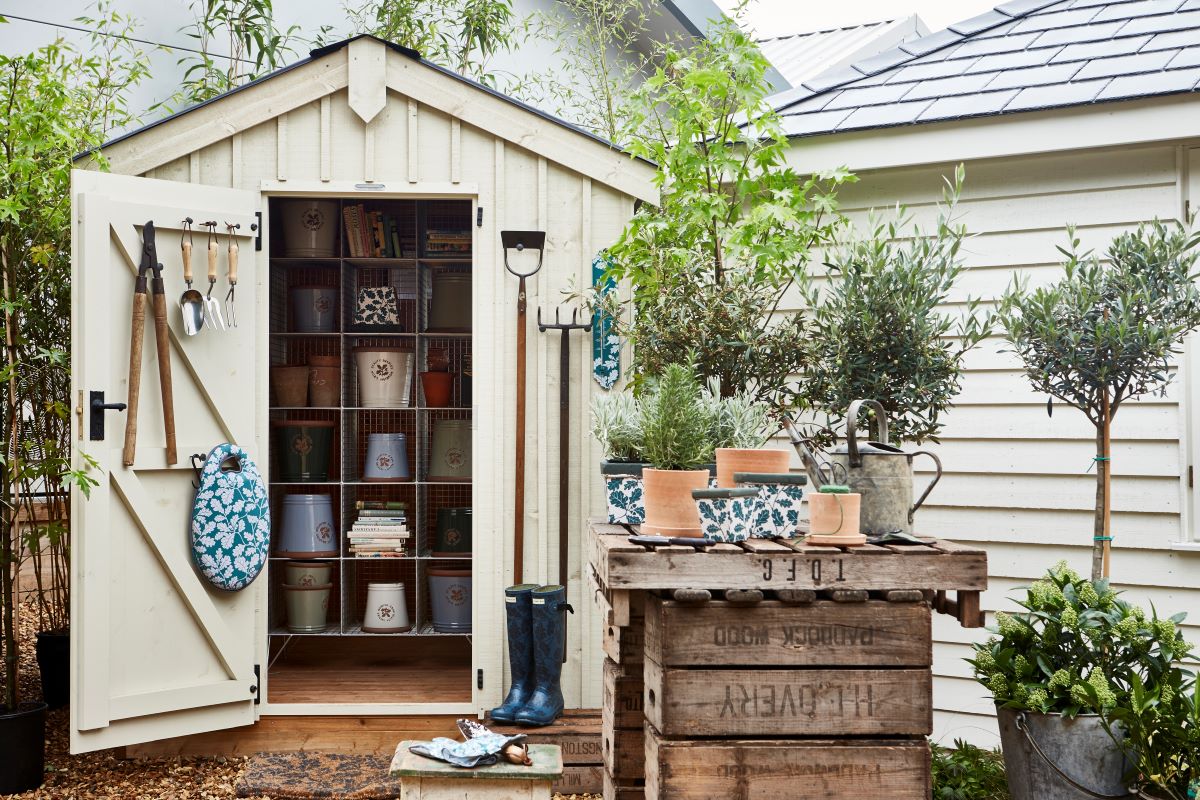
Utilize Vertical Space
When it comes to maximizing storage space in your shed, one of the most effective strategies is to utilize vertical space. Instead of leaving tools scattered on the floor or stacked in a corner, take advantage of the walls to hang them up. This not only frees up valuable floor space but also keeps them easily accessible.
One way to hang tools is by using a pegboard. Pegboards are versatile and allow you to customize the arrangement of your tools. Simply mount the pegboard to the wall and use hooks or pegs to hang your tools. This not only keeps them organized but also allows you to see everything at a glance.
In addition to pegboards, you can also install shelves and racks on the walls of your shed. Shelves provide a sturdy platform to store items like paint cans, jars, or any other supplies that you want to keep off the ground. You can use them to organize smaller tools or containers as well.
Wall-mounted racks are ideal for storing larger items such as shovels, rakes, and brooms. You can find various types of racks designed to hold different tools and equipment. Some racks even have adjustable hooks or slots to accommodate a range of items. By installing racks, you can keep your long-handled tools in one place, preventing them from falling over and becoming a hazard.
Remember to consider the weight capacity of the shelves and racks you install to ensure that you’re not overloading them. It’s important to find a balance between maximizing space and maintaining safety.
By utilizing vertical space in your shed, you’ll be able to reclaim valuable floor space, eliminate clutter, and keep your tools and supplies easily reachable.
Categorize Items
One of the key principles of effective shed organization is categorizing items. By sorting and grouping similar items together, you not only create a sense of order but also make it easier to locate specific items when you need them.
Start by taking inventory of the items in your shed and identifying common categories. For example, you may have a category for gardening tools, another for power tools, and one for outdoor equipment. Consider your specific needs and the types of items you have, then create categories that make sense for your storage space.
Once you have identified your categories, designate specific areas or shelves in your shed for each category. This will help keep items organized and reduce the likelihood of them getting mixed up or misplaced.
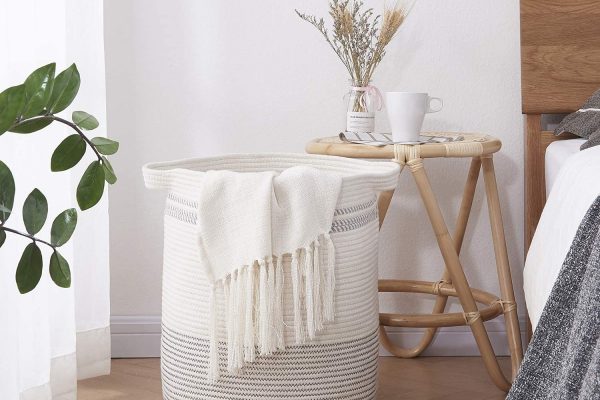
For smaller items, consider using clear plastic bins with lids. Label each bin with the category it represents, and then sort and store items accordingly. This allows you to see what’s inside each bin without having to open it, making it easier to find what you need.
When it comes to larger items, such as outdoor equipment or furniture, try to dedicate a separate area for each category. For example, have a designated corner for gardening equipment, and another area specifically for sporting equipment. By keeping similar items together, you’ll have a clear idea of where to find them and where to return them after use.
In addition to categorizing items, consider the frequency of use when determining the placement of different categories. Keep frequently used items easily accessible, while items that are used less frequently can be placed in harder-to-reach areas.
By categorizing your items, you’ll create a more organized and efficient storage system. You’ll no longer waste time searching for misplaced items, and it will be easier to maintain a neat and tidy shed.
Use Clear Plastic Containers
When it comes to organizing and storing your outdoor supplies, using clear plastic containers can be a game-changer. These containers offer several benefits, including keeping your supplies visible and easily accessible.
One of the advantages of using transparent containers is that they allow you to see what’s inside without having to open each one. This can save you a lot of time and effort, especially when you’re searching for a specific item. Instead of rummaging through multiple opaque bins, you can quickly identify the container that holds the item you need.
Clear plastic containers also make it easier to maintain an organized system. You can label each container with its contents, ensuring that everything has a designated place. This reduces the chances of items getting mixed up or misplaced. Plus, if you need to retrieve an item in a hurry, you can quickly scan the containers to find what you’re looking for.
Furthermore, clear plastic containers provide protection for your supplies. They keep dust, moisture, and pests away, ensuring that your items remain in good condition for a longer period of time. This is particularly important for items that are susceptible to damage or deterioration, such as gardening seeds, fertilizers, or delicate tools.
When selecting clear plastic containers for your shed storage, choose ones that are durable and stackable. This will maximize your storage space and allow you to efficiently utilize vertical space. Look for containers with secure lids to keep your supplies safe and secure.
Consider different sizes of containers depending on the types of items you need to store. Smaller containers are ideal for organizing smaller tools, accessories, or hardware, while larger containers can accommodate bigger items like watering cans or outdoor cushions.
Overall, using clear plastic containers is a practical and effective way to keep your outdoor supplies organized. With everything easily visible and accessible, you’ll be able to find what you need when you need it, and maintain a clutter-free and functional shed.
Label Everything
When it comes to shed organization, one of the most essential steps is to label everything. Clearly marking containers and shelves not only helps you locate items quickly but also ensures that everything gets returned to its proper place.
The key to effective labeling is to make it clear and consistent. Use large, legible labels that are easy to read. You can create labels using adhesive labels, a label maker, or even by hand using a permanent marker.
Start by labeling your storage containers. Use descriptive labels that indicate the contents of each container. For example, if you have a bin for gardening tools, label it as “Gardening Tools” or “Garden Supplies. This will help you identify the bin at a glance and prevent unnecessary searching.
In addition to labeling containers, consider labeling shelves and other storage areas. This not only helps you remember where items are stored but also makes it easier to maintain the organization in your shed. You can use adhesive labels or even paint markers on shelves, racks, or pegboards to indicate specific areas or categories.
Incorporating color-coded labels can also be beneficial, especially if you have multiple categories or sections in your shed. Assign a different color to each category and use corresponding colored labels. For example, use green labels for gardening supplies, blue labels for power tools, and so on. This visual cue will make it even easier to locate specific items and maintain a organized system.
Don’t forget to update labels as needed. If the contents of a container change or you rearrange the layout of your shed, make sure to update the labels accordingly. This will help you avoid confusion and ensure that everything is properly labeled and organized.
By clearly marking containers and shelves, you’ll eliminate the guesswork and save time when searching for items in your shed. It also makes it easier for others to find and return items, maintaining the organization you’ve worked hard to establish.
Create a Workbench Area
A dedicated workbench area in your shed is a must-have for any DIY enthusiast or handy person. Having a designated space for repairs and projects not only provides a functional workspace but also helps keep your shed organized.
When creating a workbench area, consider the following factors:
- Location: Choose a location in your shed that provides ample lighting and enough space to comfortably work on projects. Ideally, the workbench should be positioned near a window or a well-lit area to maximize natural light. Additionally, ensure that the workbench is easily accessible without obstructing other areas of the shed.
- Size and Surface: Determine the size of your workbench based on the available space and your specific needs. A sturdy and durable workbench is essential for handling various tasks and projects. Consider a workbench with a solid surface that can withstand the pressure of tools and equipment.
- Storage: Incorporate storage solutions into your workbench area to keep tools and supplies organized and within easy reach. Install shelves, drawers, or pegboards above or below the workbench to store frequently used items such as screwdrivers, wrenches, and nails.
- Power Outlets and Lighting: Ensure that your workbench area is equipped with sufficient power outlets for your tools and equipment. Additionally, adequate lighting is crucial for working safely and efficiently. Install overhead lights or position a portable task light to illuminate your work area.
- Tool Organization: Organize your tools in a logical and accessible manner. Consider using pegboards or wall-mounted tool racks to keep your tools visible and within arm’s reach. Create outlines or labels for each tool to make it easier to identify and return them after use.
Having a dedicated workbench area in your shed not only provides a practical space for repairs and projects but also helps maintain a clutter-free environment. You’ll no longer have to search through piles of tools or clear off a space to work. Everything will be readily available, ensuring that your projects proceed smoothly and efficiently.
Install Pegboards
Pegboards are a versatile and practical solution for organizing your shed. They provide a customizable system for hanging tools and equipment, allowing for easy access and efficient use of space.
When installing pegboards in your shed, follow these steps:
- Choose the Right Size: Measure the available wall space in your shed and select a pegboard that fits well. Consider using multiple pegboards if you have a large collection of tools and equipment.
- Mounting: Position the pegboard against the wall and use a level to ensure it’s straight. Mark the mounting holes on the wall, then drill pilot holes. Insert wall anchors, if necessary, and secure the pegboard to the wall with screws.
- Arrange and Hang Tools: Once the pegboard is securely mounted, it’s time to arrange and hang your tools. Use a variety of hooks, pegs, and hangers designed for pegboards to accommodate different types of tools. Hang frequently used tools within arm’s reach for quick and easy access.
- Create Outlines or Silhouettes: To maintain an organized pegboard, consider creating outlines or silhouettes of your tools. This will help you easily identify where each tool should be hung and ensure that everything is returned to its designated spot. You can accomplish this by tracing the shape of the tools on the pegboard or by using pre-made tool organizers with tool cutouts.
- Utilize Shelf Attachments: Some pegboards come with shelf attachments or you can purchase separate hooks or brackets to create shelving. This provides additional storage space for containers or larger items that can’t be hung directly on the pegboard.
Pegboards offer several benefits when it comes to shed organization. They not only keep your tools visible and easily accessible but also save valuable floor and wall space. By hanging your tools, you’ll eliminate the need for bulky toolboxes or rummaging through drawers to find what you need.
Additionally, if you frequently use your tools, a pegboard setup allows you to quickly identify missing tools. If a silhouette or outline is empty, you’ll know that a tool is still in use and needs to be returned – making it easy to keep track of your inventory.
With a well-organized pegboard system, you’ll have a tidy shed and a functional space that makes it a breeze to find and use your tools and equipment.
Maximize Floor Space
When it comes to organizing your shed, it’s essential to make the most of your available floor space. By maximizing the floor space, you can create a clutter-free environment and make it easier to move around and access your belongings. Here are some strategies to help you make the most of your shed’s floor area:
- Stacking: One effective way to maximize floor space is by stacking items. This applies to boxes, containers, and other storage units. If you have items that can be safely stacked, such as storage bins or crates, stack them vertically rather than spreading them out horizontally. This allows you to utilize the vertical space in your shed and frees up more floor area.
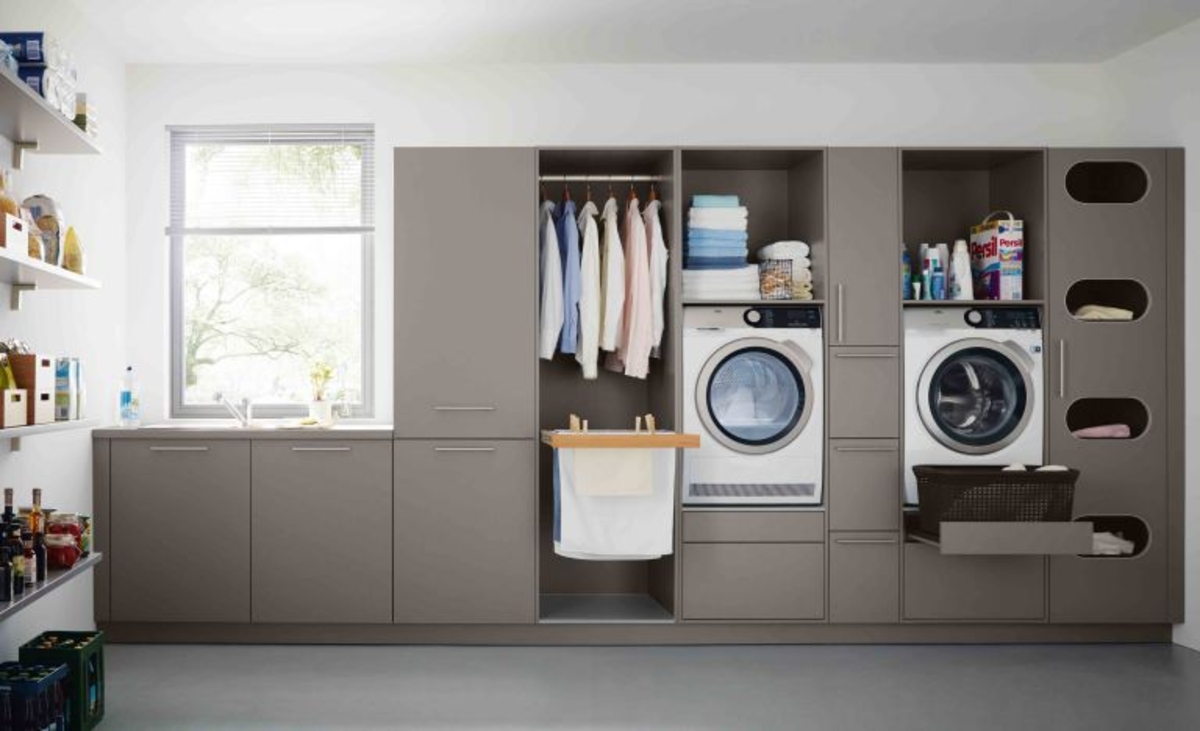
- Shelving Units: Consider installing freestanding or wall-mounted shelving units in your shed. Shelves provide additional storage space, allowing you to use the vertical space effectively. You can use shelves to store items that don’t necessarily need to be hung or stacked, such as bulky equipment or larger containers.
- Hanging Storage: Take advantage of overhead space in your shed by installing hanging storage solutions. This could be in the form of ceiling racks or hanging hooks. By hanging items such as bicycles, ladders, or garden hoses from the ceiling or walls, you free up valuable floor space and keep these items safely stowed away.
- Utilize Wall Space: Make use of the walls in your shed by installing wall-mounted storage solutions. This could include pegboards, hooks, or racks. By hanging tools, gardening equipment, or even folding chairs on the walls, you further maximize floor space and keep items easily accessible.
- Consider Portable Storage: If you have larger items that can be easily moved, consider investing in portable storage solutions such as rolling carts or mobile cabinets. This allows you to rearrange your shed as needed and create temporary storage areas without permanently taking up valuable floor space.
By implementing these strategies, you’ll be able to efficiently use the floor space in your shed. This not only helps keep your shed organized and visually appealing but also provides a safer environment, with less risk of tripping or knocking over items.
Remember to plan your storage layout based on the frequency of use – keep frequently used items easily accessible, while items used less often can be stored in more difficult-to-reach areas. This ensures that your shed remains functional and easy to navigate.
Maximizing floor space is a crucial step in effective shed organization. With smart storage solutions and strategic placement, you’ll create a spacious and efficient environment for all your outdoor supplies.
Utilize Overhead Storage
When it comes to shed organization, don’t forget about the often-overlooked space above your head. Utilizing overhead storage in your shed can significantly increase your storage capacity and free up valuable floor and wall space. Here are some ways to utilize overhead storage effectively:
- Ceiling Racks: Install ceiling racks in your shed to take advantage of the empty space above. Ceiling racks typically consist of a sturdy metal frame with adjustable hooks or slats. They are perfect for storing larger or bulkier items such as camping gear, sports equipment, or even storage bins. By lifting these items off the floor or walls, you create more space for other storage solutions.
- Overhead Hooks: Use overhead hooks to suspend items from the ceiling. These hooks are usually screwed into the ceiling beams or joists and can be used to hang bicycles, ladders, folding chairs, or other items that can be secured with hooks. Overhead hooks keep these items out of the way while still providing easy access when needed.
- Netting or Mesh Storage: Consider installing netting or mesh storage systems that attach to the ceiling. These systems are ideal for storing lightweight items such as camping gear, pool toys, or seasonal decorations. The netting or mesh creates a barrier, preventing items from falling off while still allowing visibility and airflow.
- Pulley Systems: For heavy or bulky items that are difficult to lift or lower manually, install pulley systems. These systems let you raise and lower items with minimal effort. They are especially useful for items like kayaks, canoes, or lawn mowers that are not regularly used but still need to be stored safely.
When installing overhead storage solutions, consider the weight capacity and load-bearing capabilities of your shed. Ensure that the racks, hooks, or systems are securely mounted to provide a stable and safe storage solution.
Labeling items on overhead storage is crucial to quickly and easily locate what you need. Use tags, labels, or colored markings to identify the contents of each storage unit, making it effortless to find specific items without having to take everything down.
By utilizing overhead storage, you maximize the available space in your shed, reduce clutter, and create a more organized and functional environment. Your shed will become a well-utilized, efficient storage space where items are easily accessible, freeing up valuable floor and wall space for other storage needs.
Create a Gardening Station
For those with a green thumb, having a dedicated gardening station in your shed is a game-changer. A gardening station not only keeps your gardening tools and supplies organized but also provides a convenient space for potting plants and tending to your garden. Here’s how to create an efficient and functional gardening station:
- Designate an Area: Choose a specific area or corner of your shed to devote to your gardening station. This can be a countertop, table, or even a dedicated workbench if space allows. Having a designated spot for gardening activities helps streamline your gardening tasks and keeps everything in one place.
- Hanging Tool Storage: Install hooks, pegboards, or hanging rails to hang your gardening tools. This method keeps your tools easily accessible and prevents them from getting mixed up or lost. Hang tools such as trowels, hand pruners, and gloves, keeping them within arm’s reach as you work at the gardening station.
- Shelving and Containers: Utilize shelves or containers to organize smaller gardening supplies such as seed packets, plant labels, fertilizers, and gardening gloves. Plastic bins or baskets are great for storing these items, keeping them organized and easy to find. Label the containers for quick identification.
- Watering Station: Include a designated area for watering your plants. This can be a sink or a water source with a hose attachment, making it easier to water and maintain your plants without having to go back and forth to an external water source.
- Workspace: Ensure you have enough workspace for potting plants and performing gardening tasks. This can be a sturdy table or bench where you can pot or repot plants, sow seeds, or organize seed trays. Having a dedicated workspace within your gardening station saves time and provides a clean, stable surface for your gardening activities.
- Organization and Labels: Keep your gardening supplies organized by using clear containers for items such as potting soil, fertilizers, and plant food. Label the containers for easy identification and ensure that everything has a designated spot.
A well-organized gardening station makes it effortless to care for your plants and complete gardening tasks. With everything easily accessible and in its place, you can focus more on enjoying your gardening hobby and less on searching for tools or supplies.
Remember to clean up and put tools and supplies back in their proper place after each gardening session. This helps maintain the organization of your gardening station and prevents any accidents or damage that may occur from untidiness.
By creating a gardening station in your shed, you’ll have a dedicated space to nurture your plants and enjoy the beauty of your garden.
Use clear plastic bins to store smaller items like gardening gloves, trowels, and seeds. Label the bins for easy identification and stack them to save space.
Designate a Potting Bench
A potting bench is a must-have for any gardening enthusiast. It provides a dedicated area for potting plants, sowing seeds, and tending to your garden with ease. Having a designated potting bench in your shed allows you to keep your gardening activities organized and makes the planting process more efficient. Here’s how to set up a functional and efficient potting bench:
- Select the Right Location: Choose a location in your shed that offers ample space for your potting bench. Ideally, it should be near a window or a well-lit area for natural light. This will ensure that your plants receive adequate sunlight and that you have a clear view of your work as you pot and care for them.
- Bench or Table: Invest in a sturdy, durable bench or table that can withstand the demands of potting and gardening tasks. The potting surface should be spacious enough to accommodate multiple pots, trays, and gardening tools. Consider one with a smooth, easy-to-clean surface that can handle soil spills and moisture.
- Storage Space: Include storage options on or around your potting bench to keep your gardening tools, potting mix, and supplies organized. Shelves or hooks above the bench can hold tools and small containers, keeping them within arm’s reach. Underneath the bench, use storage bins or drawers to store larger items like bags of potting soil or extra pots.
- Workspace Organization: Arrange your potting bench so that commonly used tools and supplies are within easy reach. Have a designated area for your trowels, hand pruners, gloves, and watering can. Consider using containers or trays to corral small items such as seed packets, labels, and plant markers.
- Potting Soil and Fertilizers: Keep your potting soil and fertilizers in close proximity to your potting bench. This ensures easy access and saves time during the potting process. Use clear bins or containers to store these items and label them for quick identification.
- Cleanup Essentials: Incorporate a sink or a water source near your potting bench for convenient cleanup. Having access to water allows you to wash your hands, rinse tools, and clean up soil spills without leaving your potting area. If a sink is not feasible, consider a small water container with a spout for easy access.
A designated potting bench streamlines your gardening tasks and creates a dedicated workspace for your planting activities. It keeps your tools and supplies organized, reduces clutter, and provides a comfortable area to work on your plants.
Remember to clean up after each potting session, discarding excess soil and cleaning your tools. This ensures that your potting bench area remains tidy and ready for your next gardening endeavor.
With a well-designed potting bench in your shed, you’ll be able to enjoy the satisfaction of potting plants and watching them grow with ease and efficiency.
Store Outdoor Furniture
If you have outdoor furniture such as chairs, tables, and cushions, proper storage is essential to protect them from the elements and extend their lifespan. Storing your outdoor furniture in your shed not only keeps it safe and protected but also ensures that it remains in good condition for future use. Here are some tips for properly storing your outdoor furniture:
- Clean and Prepare: Before storing your outdoor furniture, make sure to clean it thoroughly. Wipe down surfaces, remove any debris, and use a mild soap and water solution to clean cushions and fabric. Allow everything to dry completely before placing them in storage.
- Disassemble if Possible: If your outdoor furniture can be disassembled, consider taking it apart before storing. This makes it easier to organize and stack the pieces, saving space in your shed. Keep all nuts, bolts, and screws in a labeled container or bag to ensure that you can easily reassemble it when needed.
- Protective Covers: Invest in high-quality covers or tarps to protect your outdoor furniture from dust, dirt, and moisture. Make sure the covers are waterproof and UV-resistant to provide the best protection. Cover each piece of furniture individually or stack them with layers of protective material in between.
- Elevate Furniture: If possible, elevate your furniture off the floor of your shed to prevent any potential damage from moisture. Use pallets or wooden blocks to create a raised platform for each piece of furniture. This helps to improve air circulation and protects against water damage.
- Separate Cushions: If you have cushions for your outdoor furniture, it’s important to store them separately. Clean and dry them thoroughly before storing in labeled, airtight containers to prevent moisture or mold buildup. Alternatively, consider using storage bags specifically designed for cushion storage.
- Organize and Label: As you store your outdoor furniture, strive to keep it well-organized for easy retrieval when needed. Stack chairs and tables with care, ensuring that they are stable and won’t topple over. Use labels or tags to identify the contents of each storage area, making it simpler to find the specific pieces of furniture you’re looking for.
By properly storing your outdoor furniture in your shed, you protect it from weather damage, extend its lifespan, and ensure that it remains in optimal condition for years to come. You’ll be able to enjoy your outdoor furniture for many seasons, without worry of deterioration or unnecessary wear and tear.
Remember to inspect your furniture periodically, especially before taking it out of storage. Replace any damaged or worn-out pieces and perform any necessary maintenance to keep your outdoor furniture looking its best.
With proper storage, your outdoor furniture will be ready and waiting for you to enjoy once the weather is right.
Hang Bicycles and Sporting Equipment
If you have bicycles and sporting equipment taking up valuable floor space in your shed, it’s time to utilize hooks or racks for vertical storage. Hanging these items not only frees up floor space for other storage needs but also keeps them organized, easily accessible, and in good condition. Here’s how to efficiently hang bicycles and sporting equipment in your shed:
- Bicycle Hooks: Install sturdy hooks on the walls or ceiling of your shed to hang bicycles vertically. Choose hooks specifically designed for bikes, ensuring they can support the weight. Hang the hooks at a height that allows sufficient clearance for other items in your shed. Ideally, position the hooks in a way that keeps the bikes suspended and out of the way.
- Bike Racks: Wall-mounted or freestanding bike racks are another excellent option for vertical bike storage. These racks typically feature adjustable arms or hooks that securely hold bicycles. They provide a convenient and organized solution for storing multiple bikes, with options to stack them vertically or side by side. Make sure to anchor the racks properly to ensure stability.
- Sporting Equipment Hooks and Racks: For sporting equipment such as tennis rackets, baseball bats, or golf clubs, utilize hooks or racks specifically designed for these items. Wall-mounted or freestanding racks with hooks or slots are available for a range of sporting equipment. Install them in the shed at a convenient height, ensuring that the equipment is secure and easily accessible. Consider grouping similar items together, such as placing all golf clubs or tennis rackets on the same rack.
- Basketball or Ball Storage: Utilize wall-mounted racks or hanging nets to store basketballs, soccer balls, or other sports balls. These racks or nets keep the balls off the floor and prevent them from rolling around. Install them at a height that allows for easy access and retrieval.
- Equipment Storage Bins or Bags: Consider using storage bins or bags designed specifically for sporting equipment. These containers offer compartments and pockets to organize smaller items and keep everything in one place. Label the bins or bags to easily identify the contents and prevent searching through multiple containers.
By utilizing hooks or racks for vertical storage, you make efficient use of your shed space and keep your bicycles and sporting equipment in good condition. Vertical storage not only prevents damage or scratches but also ensures that these items are readily accessible and ready for use whenever you need them.
Remember to clean and maintain your bicycles and sporting equipment regularly to ensure their longevity. Inspect them for any signs of damage or wear and perform necessary maintenance as needed.
With proper vertical storage, your shed will become a well-organized space where bicycles and sporting equipment are neatly stored and easily accessible whenever adventure calls.
Organize Lawn Care Tools
Your lawn care tools play a vital role in keeping your outdoor space looking pristine. To ensure that they are readily accessible and well-maintained, it’s important to establish a designated area in your shed for organizing these tools. By creating an organized system, you’ll save time and effort when it comes to lawn maintenance. Here are some tips for organizing your lawn care tools:
- Categorize Tools: Start by categorizing your lawn care tools based on their function. Group similar tools together, such as rakes, shovels, and hoes in one category, and lawnmowers, trimmers, and edgers in another. This will help you organize and locate them more efficiently.
- Tool Storage Solutions: Invest in tool storage solutions that are specifically designed for lawn care tools. Wall-mounted tool racks or tool hangers are great options for keeping your tools neatly arranged and easily accessible. They can be installed on the walls or hung from pegboards, providing a designated spot for each tool.
- Labeling or Outlining: Labeling or outlining the tools’ shapes on a pegboard or wall can help you quickly identify where each tool belongs. This ensures that they are returned to their proper place after use, maintaining the organization of your shed.
- Long-handled Tool Storage: Long-handled tools, such as rakes and shovels, can be prone to falling over and taking up excess space. Utilize tall buckets, PVC pipes, or even a dedicated long-handled tool rack to store these items vertically. This not only keeps them well-organized but also saves valuable floor space.
- Small Tool Storage: For smaller hand tools like shears, pruning scissors, and handheld rakes, consider using a toolbox or a tool caddy with compartments. This allows you to keep all your smaller tools together and easily transport them to different areas of your yard as needed.
- Maintenance and Care: Regularly clean and maintain your lawn care tools to keep them in optimal condition. Remove debris and dirt, sharpen blades if necessary, and lubricate moving parts. This not only extends the lifespan of your tools but also helps ensure that they perform at their best when you need them.
By implementing these organization tips for your lawn care tools, you’ll create a functional and efficient space in your shed. Finding and using the right tool for the job will become a breeze, allowing you to maintain a neat and beautiful lawn with ease.
Remember to always prioritize safety when handling and storing your lawn care tools. Keep sharp tools out of reach of children and store them securely to prevent accidents or injuries.
An organized shed with well-arranged lawn care tools sets you up for success in maintaining your yard and keeping your outdoor areas looking their best.
Store Seasonal Items
When it comes to shed organization, it’s important to consider the seasonal nature of certain items. Storing seasonal items not only helps keep your shed clutter-free but also ensures that you have easy access to the items you need based on the time of year. Here are some tips for storing seasonal items in your shed:
- Categorize By Season: Sort your items into categories based on the season they are used in. For example, have a category for summer items, such as beach chairs, umbrellas, and camping gear, and another category for winter items, such as snow shovels, sleds, and ice melt. This categorization will help you determine which items need to be stored away during specific seasons.
- Clear Containers: Use clear plastic containers with secure lids to store your seasonal items. Clear containers allow you to easily see the contents without having to open each one. Label each container to indicate the season or specific items inside. This makes it easier to locate and retrieve them when needed.
- Rotate Items: As the seasons change, rotate the items in your shed accordingly. For example, during the summer, place the winter items towards the back or in a less accessible area, and bring the summer items to the forefront. This rotation ensures that you have quick access to the items you need during each season.
- Properly Clean and Prepare: Before storing seasonal items, make sure they are clean and in good condition. Clean off any dirt or debris, and if necessary, perform any maintenance tasks or repairs. For items like gardening tools or lawn furniture, consider giving them a thorough cleaning and applying a protective coating to extend their lifespan.
- Utilize Vertical Space: Take advantage of vertical space in your shed to store seasonal items. Install shelves, hooks, or overhead storage racks to maximize the available space. This allows you to keep the floor area clear and creates a more organized storage system.
- Consider Climate Control: If your shed is not climate-controlled, be mindful of the temperature and humidity levels to avoid damage to delicate seasonal items. Extreme heat or cold can affect certain materials, so consider using additional protective measures like insulation, moisture absorbers, or even storing sensitive items in a climate-controlled space if necessary.
By storing seasonal items in your shed, you’ll be able to keep your space organized and ensure that you always have the right items on hand for each season. It also helps to preserve the quality and longevity of your seasonal belongings, as they are properly protected when not in use.
Remember to periodically review your stored items and assess their condition to determine if any need to be replaced or repaired. Keeping an inventory of your seasonal items can also help you stay organized and plan for future needs.
With a well-structured approach to storing seasonal items, your shed will become a functional and efficient space that caters to your seasonal needs throughout the year.
Have a Recycling Station
Creating a designated recycling station in your shed is not only an environmentally-friendly choice but also a practical one. By having a dedicated space for your recycling bins and containers, you can easily sort and store recyclable items until they can be properly disposed of. Here’s how to establish a recycling station in your shed:
- Designate a Space: Choose a specific area in your shed to set up your recycling station. It could be a corner, a shelf, or even a separate section of the shed that is easily accessible. Ensure that there is enough space to accommodate your recycling bins and containers.
- Recycling Bins and Containers: Invest in sturdy, durable recycling bins and containers that suit your recycling needs. Consider using separate bins for different types of recyclables, such as paper, plastic, glass, and metal. Label each bin with its designated material to make sorting easier.
- Organize and Sort: Establish a system for sorting your recyclables. Set up separate containers or boxes within the recycling station area to collect items that need further sorting, such as batteries, electronics, or light bulbs. This ensures that all items are properly sorted before they are taken to the appropriate recycling facility.
- Compress and Compact: If your recycling area has limited space, consider using tools to compress or compact certain materials, such as a can crusher or a recycling compactor. This can help save space and make room for more recyclables without taking up excessive space in your shed.
- Regularly Empty Bins: Make it a habit to regularly empty the recycling bins in your shed and transfer the sorted materials to your outdoor recycling bins or take them to a local recycling facility. This will prevent overflowing bins and ensure that your shed remains organized and free from odors.
- Dispose of Hazardous Materials Properly: It’s important to be aware of and properly dispose of any hazardous materials. Certain types of batteries, electronics, or chemicals may require special handling and should not be mixed with regular recyclables. Research local recycling resources or contact your local waste management facility for guidance on the proper disposal of hazardous materials.
Having a recycling station in your shed encourages responsible waste management and helps to keep your outdoor space clutter-free. It also allows you to easily separate recyclable items from general waste, making the recycling process more efficient and environmentally friendly.
Remember to familiarize yourself with your local recycling guidelines and regulations. Different areas may have specific requirements for recycling, so be sure to comply with the guidelines provided by your local waste management agency.
With a well-organized recycling station in your shed, you’ll contribute to a greener environment and promote sustainable practices in your home.
Keep a First Aid Kit
Ensuring safety should always be a top priority, and having a well-stocked first aid kit in your shed is essential. Accidents can happen anywhere, including in your outdoor space, so it’s important to be prepared to provide immediate medical attention when needed. Here’s how to keep a well-stocked first aid kit in your shed:
- Choose the Right Container: Start by selecting a sturdy, waterproof container to store your first aid supplies. Ensure that it has a tight-fitting lid to protect the contents from moisture and damage.
- Basic Supplies: Stock your first aid kit with basic supplies such as adhesive bandages, gauze pads, adhesive tape, antiseptic wipes, and sterile dressings. Include items like scissors, tweezers, and disposable gloves for wound care.
- Medications: Include essential medications such as pain relievers, antihistamines, and any prescribed medication that you or your family members may need. Keep these medications in their original packaging and check expiration dates regularly.
- Personalize: Tailor your first aid kit to your specific needs. Consider including items like insect repellent, sunscreen, and lip balm to protect against outdoor elements. If you or your family members have any specific medical conditions or allergies, be sure to include relevant supplies in the kit.
- Emergency Contact Information: Include a list of emergency contact numbers, including local emergency services and poison control, inside your first aid kit. It’s also a good idea to include a small first aid manual or reference guide.
- Regular Inspection and Restocking: Regularly inspect your first aid kit to ensure that all supplies are up to date, undamaged, and in good condition. Check expiration dates on medications and replace any items that have been used or are no longer viable.
- Location and Accessibility: Store your first aid kit in a designated and easily accessible location in your shed. Make sure it is visible and known to all members of your household, as well as any frequent visitors or workers in your outdoor space.
Having a well-stocked first aid kit in your shed ensures that you’re prepared to handle minor injuries and provide immediate care while waiting for professional medical assistance if needed. It promotes the safety and well-being of yourself, your family, and others who spend time in your outdoor area.
Remember, a first aid kit is only effective if you know how to use it. Familiarize yourself with the contents of the kit and refresh your knowledge of basic first aid techniques regularly. Consider taking a first aid and CPR course to enhance your skills.
By keeping a well-stocked first aid kit in your shed, you’re taking a proactive approach to safety and ensuring that you’re ready to handle any minor injuries or emergencies that may arise.
Maintain Regular Cleanouts
Maintaining a clean and organized shed is an ongoing process. Regular cleanouts are essential to keep your shed functional, efficient, and clutter-free. By purging and organizing your shed on a regular basis, you’ll create a space that is easier to navigate, find items, and complete projects. Here’s how to maintain regular cleanouts in your shed:
- Schedule Cleanouts: Set a schedule for regular cleanouts of your shed. Depending on the usage and your needs, this could be done on a monthly, quarterly, or yearly basis. Choose a date that works for you and commit to decluttering and organizing your shed during that time.
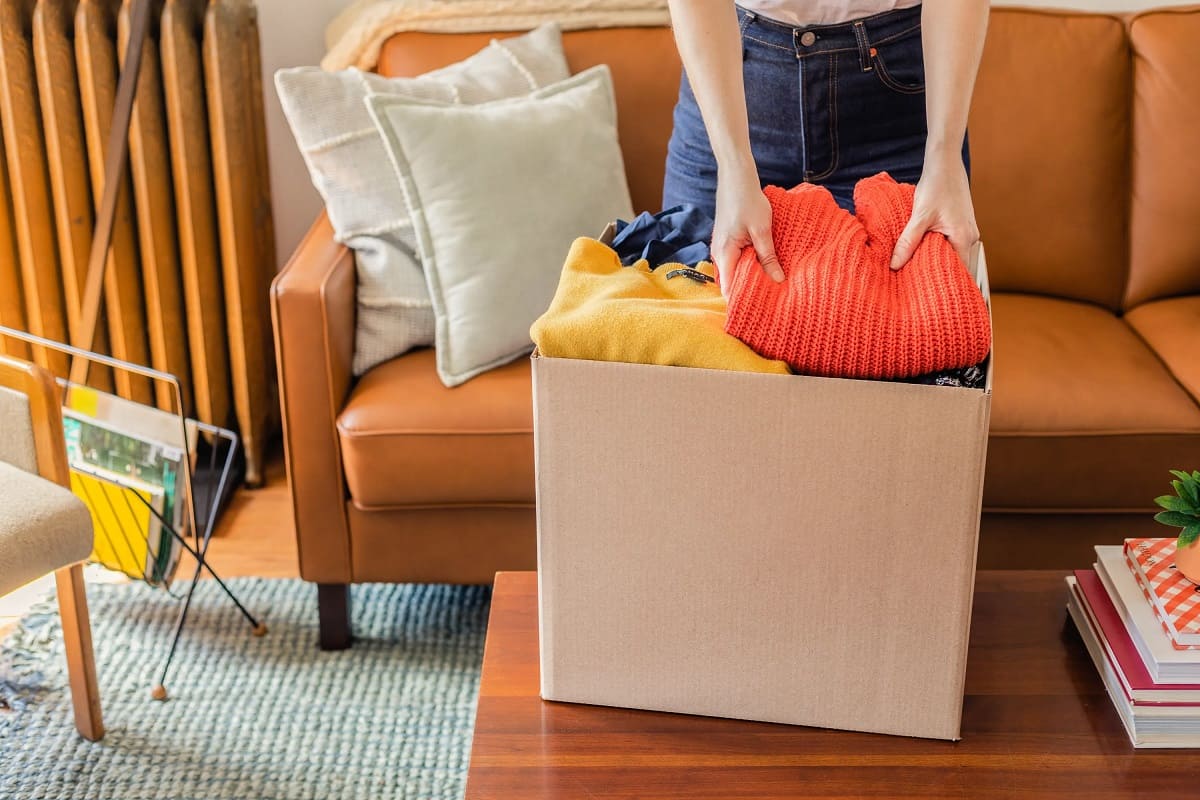
- Purge Unnecessary Items: Begin each cleanout by purging unnecessary items from your shed. Assess each item and evaluate its usefulness. If you haven’t used an item in a long time or it no longer serves a purpose, consider donating, selling, or properly disposing of it. This will help free up space and prevent unnecessary clutter.
- Group Similar Items: Organize your belongings by grouping similar items together. This will make it easier to locate specific items, reduce duplication, and assess your inventory. Keep tools with tools, gardening supplies with gardening supplies, and so on.
- Inspect for Damage: During each cleanout, inspect your shed and its contents for any signs of damage, such as leaks, cracks, or pest infestations. Address any issues promptly to prevent further damage and ensure the longevity of your shed and its contents.
- Organize and Label: Once unnecessary items have been purged, organize the remaining items in a logical and systematic manner. Use shelves, bins, and hooks to keep items tidy and easily accessible. Label containers, shelves, or tool racks to help quickly identify the contents of each area.
- Create Zones: Establish specific zones within your shed for different categories of items. For example, designate an area for gardening tools, another for outdoor equipment, and another for seasonal items. This will help streamline your storage and retrieval process.
- Maintain Order: After each cleanout, make a commitment to maintain order in your shed. Clean up spills, return tools to their designated spots, and regularly perform quick tidying sessions to prevent clutter from building up.
Regular cleanouts of your shed not only maintain an organized space but also contribute to a more enjoyable and efficient outdoor experience. You’ll be able to find tools and supplies easily, have ample space to work on projects, and maintain the condition of your belongings.
Consider involving family members or shed users in the cleanout process to teach organizational skills, share responsibilities, and make it a team effort.
By incorporating regular cleanouts into your shed maintenance routine, you’ll create a space that serves its purpose effectively, enhances productivity, and brings joy to your outdoor activities.
Conclusion
Organizing your shed is a key step in optimizing your outdoor space and enhancing your overall experience. By implementing the 17 shed organization ideas discussed in this article, you can transform your shed from a chaotic and cluttered area into a well-organized and functional storage space.
From utilizing vertical space and categorizing items to using clear plastic containers and labeling everything, these strategies will help you maximize storage capacity, maintain order, and easily locate your outdoor supplies. Creating dedicated work areas, installing pegboards, and utilizing overhead storage will further streamline your shed organization and provide quick access to tools and equipment.
Additionally, setting up a gardening station, designating a potting bench, and establishing a recycling station contribute to efficient and enjoyable gardening activities while promoting sustainable practices. Properly storing outdoor furniture, hanging bicycles and sporting equipment, and organizing lawn care tools ensure that your belongings are well-preserved and readily available.
Keeping a well-stocked first aid kit in your shed provides a sense of security and immediate care for any minor injuries that may occur while working in your outdoor space. And lastly, maintaining regular cleanouts ensures that your shed remains clutter-free, organized, and functional over time.
Remember, each shed is unique, so adapt these ideas to suit your specific needs and available space. Continuously assess, declutter, and organize to keep your shed in top shape and make the most of your outdoor activities.
By implementing these shed organization strategies, you not only create a visually appealing and orderly space but also enhance your productivity and enjoyment of your outdoor endeavors. Embrace the challenge, get creative, and transform your shed into a haven of organization and efficiency. Happy organizing!
Frequently Asked Questions about 17 Shed Organization Ideas To Keep Your Outdoor Supplies Neat And Tidy
Was this page helpful?
At Storables.com, we guarantee accurate and reliable information. Our content, validated by Expert Board Contributors, is crafted following stringent Editorial Policies. We're committed to providing you with well-researched, expert-backed insights for all your informational needs.


0 thoughts on “17 Shed Organization Ideas To Keep Your Outdoor Supplies Neat And Tidy”