Home>Articles>17 Weekend Organizing Projects To Tidy Up Your Home
Articles
17 Weekend Organizing Projects To Tidy Up Your Home
Modified: October 20, 2024
Discover 17 weekend organizing projects to transform your home into a clutter-free haven. Explore articles on efficient storage solutions and practical tips for tidying up your space.
(Many of the links in this article redirect to a specific reviewed product. Your purchase of these products through affiliate links helps to generate commission for Storables.com, at no extra cost. Learn more)
Introduction
Welcome to the wonderful world of weekend organizing projects! If you’re looking to tidy up your home and create a more organized living space, you’re in the right place. We all know that life can get busy, and sometimes our homes reflect that chaos. But fear not, because with a little time and effort, you can transform your space into a peaceful and clutter-free oasis.
Organizing your home not only provides aesthetic benefits, but it also has several practical advantages. A well-organized home saves you time and energy by making it easier to find what you need when you need it. It reduces stress by eliminating clutter and creating a peaceful environment. Additionally, an organized home can improve productivity, as you’ll have a dedicated space for work and leisure activities.
But where do you start? With so many areas of your home that may need attention, it can be overwhelming to decide where to begin. That’s why we’ve compiled a list of 17 weekend organizing projects to help you get started. Each project is designed to be manageable within a weekend timeframe so that you can see visible results and feel a sense of accomplishment.
Now, let’s dive into these projects and discover how you can transform your home into a beautifully organized haven!
Key Takeaways:
- Transform your home into a clutter-free oasis with 17 weekend organizing projects. From decluttering your kitchen to creating a storage system for your kid’s toys, each project brings peace and efficiency to your daily life.
- Embrace the journey of organizing your home and enjoy the sense of accomplishment that comes with each project. Relish in the peace and efficiency that an organized space brings to your life.
Decluttering Your Kitchen
The kitchen is often considered the heart of the home, but it’s also a magnet for clutter. From overflowing cabinets to overcrowded countertops, a disorganized kitchen can make meal preparation and cooking a stressful experience. That’s why decluttering your kitchen should be your first organizing project.
Start by taking a critical look at your kitchen items. Ask yourself if each item is useful, functional, and brings you joy. If not, it’s time to let go. Begin by emptying out your cabinets and drawers and sorting everything into three piles: keep, donate/sell, and toss.
Next, evaluate your countertop space. Make a conscious effort to keep only the essentials out and find storage solutions for the rest. Utilize vertical space by installing shelves or hooks to hang pots, pans, and utensils. Clear off unnecessary gadgets and appliances to create a clean and open workspace.
Once you have decluttered, it’s time to organize. Group similar items together, such as baking supplies, spices, and canned goods. Invest in drawer dividers, shelf organizers, and storage containers to maximize space and keep things tidy. Label containers and shelves to make it easier to find what you need.
As you declutter and organize, take the opportunity to deep clean your kitchen. Wipe down cabinets, clean appliances, and scrub countertops. It’s amazing how a clean and organized kitchen can create a fresh and inviting atmosphere.
Remember, decluttering and organizing your kitchen is an ongoing process. Regularly assess your items and make adjustments as needed. This will help you maintain a clutter-free and efficient kitchen space.
By tackling the kitchen, you’re setting a solid foundation for the rest of your organizing projects. So roll up your sleeves, put on some upbeat music, and let’s declutter and transform your kitchen into a functional and beautiful space!
Organizing Your Pantry
The pantry is often a place where chaos reigns supreme. Boxes of half-eaten snacks, expired cans, and random ingredients can quickly turn this space into a disaster zone. But fear not, with a little organizing magic, you can transform your pantry into an organized and efficient storage area.
Start by taking everything out of your pantry. This allows you to see exactly what you have and evaluate its condition. Check for expired items and say goodbye to anything that is no longer edible.
Next, clean and organize your pantry shelves. Wipe them down with a damp cloth to remove any dust or dirt. Consider installing shelf liners to protect the surface and make cleaning easier.
Now it’s time to categorize your pantry items. Group similar items together, such as baking supplies, canned goods, snacks, and spices. This will make it easier to find what you need in the future.
Invest in storage containers and bins to keep your pantry items organized. Clear, airtight containers are ideal for items like beans, grains, and pasta, as they keep them fresh and protected from pests. Use baskets or bins to corral smaller items like snacks or packets. Label each container or bin to make it easy to identify the contents.
When organizing your pantry, consider accessibility. Place frequently used items at eye level or within easy reach. Reserve the lower shelves for heavier items and the upper shelves for lighter ones. Use door organizers for spices, condiments, or small snacks.
Finally, maintain your newly organized pantry by implementing a first-in, first-out system. When you purchase new items, rotate older ones to the front to prevent them from expiring unused.
By organizing your pantry, you’ll not only create a visually appealing space but also streamline your cooking and meal planning. Say goodbye to hunting for ingredients and embrace the joy of a well-organized and functional pantry!
Creating a Cleaning Schedule
Keeping your home clean and organized is an ongoing task, and having a cleaning schedule can help you stay on top of it all. A cleaning schedule is a roadmap that breaks down your cleaning tasks into manageable chunks, ensuring that no area of your home gets neglected.
Start by making a list of all the cleaning tasks that need to be done in your home. This can include daily, weekly, monthly, and seasonal tasks. Be thorough and include everything from vacuuming and dusting to deep cleaning tasks like washing windows and cleaning baseboards.
Next, determine the frequency at which each task needs to be done. Some tasks, like making the bed or doing the dishes, need to be done daily. Others, like deep cleaning the oven or organizing the garage, can be done less frequently. Assign a specific day or time of day for each task, based on your personal schedule and preferences.
Once you have your list and schedule in place, make it visible and accessible. It can be a physical checklist on a whiteboard or a digital calendar reminder. The key is to find a system that works best for you and makes it easy to track your progress.
Consider involving your family or housemates in the cleaning schedule. Divide tasks among household members, making it a team effort. This not only lightens the load for everyone but also instills a sense of responsibility and ownership in maintaining a clean home.
Flexibility is also important when it comes to a cleaning schedule. Life happens, and sometimes unexpected events or busy periods can disrupt your regular cleaning routine. Be prepared to adapt and adjust your schedule as needed, without feeling overwhelmed or guilty.
Creating a cleaning schedule not only helps you stay organized but also ensures that cleaning tasks are distributed evenly throughout the week or month, preventing a massive cleaning marathon. By breaking down the tasks into manageable portions, you’ll find that maintaining a clean and tidy home becomes less daunting and more achievable.
So grab your cleaning supplies, put on your favorite playlist, and start creating a cleaning schedule that works for you. A clean home awaits!
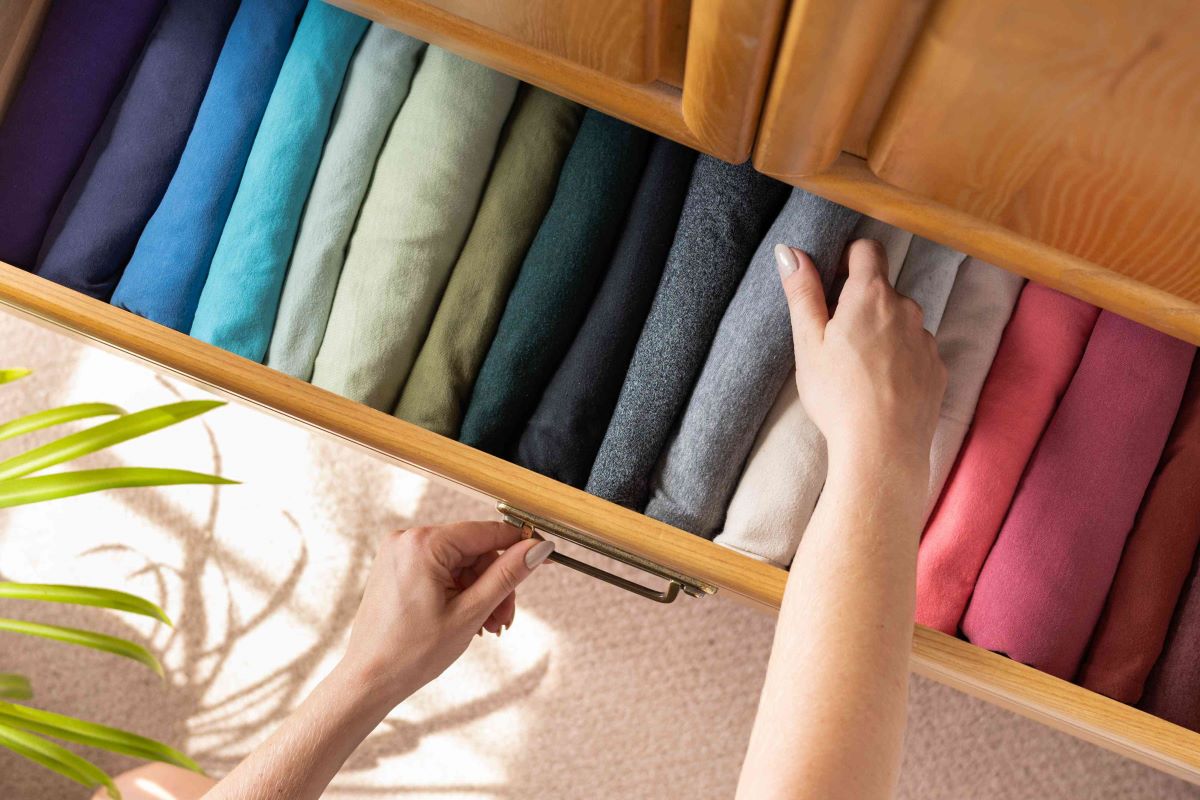
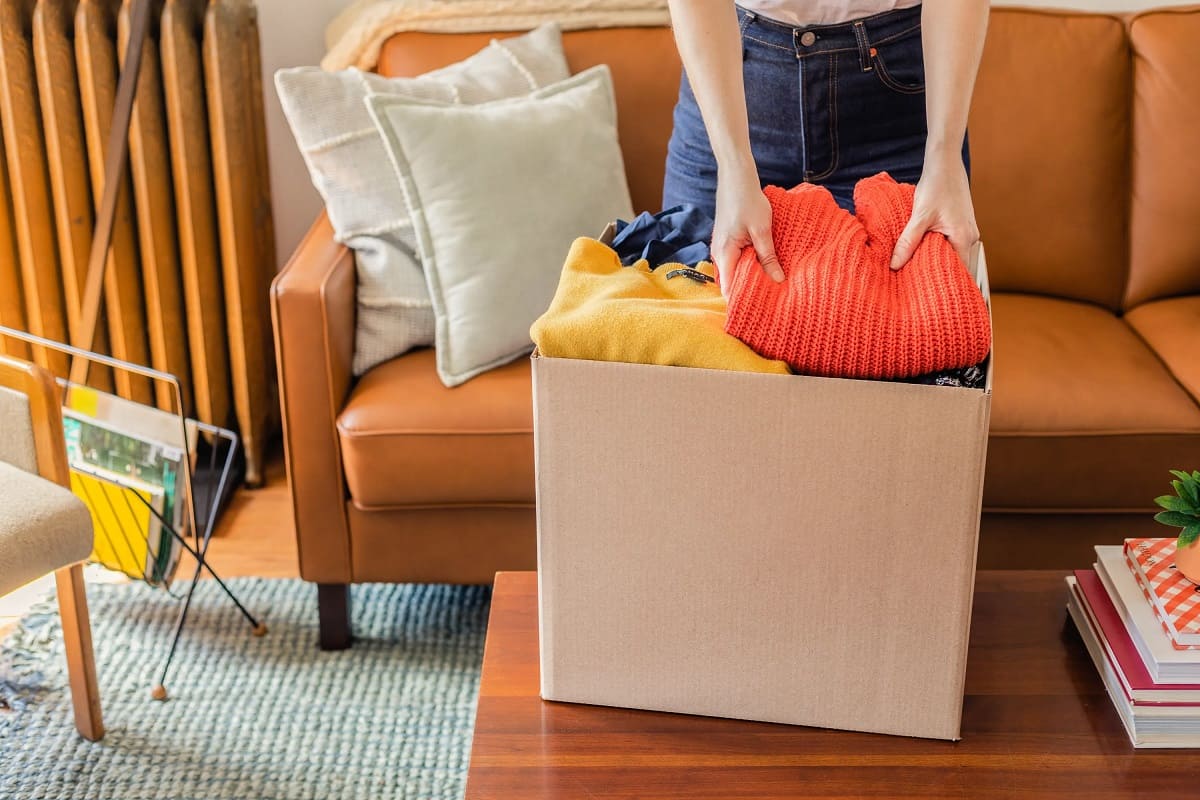
Sorting and Organizing Your Closet
Your closet is likely a treasure trove of clothing, accessories, and maybe even some forgotten items. But with a little sorting and organization, you can transform your closet into a functional and stylish space.
Start by emptying out your entire closet. Yes, everything. This allows you to assess each item and make decisions about what to keep, donate, or discard. As you go through each item, ask yourself if you have worn it in the past year and if it still fits and makes you feel confident. Be honest with yourself and let go of items that no longer serve you.
Once you have sorted through your clothing, it’s time to organize what you’re keeping. Consider organizing by category, such as tops, pants, dresses, and so on. Within each category, you can further organize by color or style if desired.
Invest in storage solutions to maximize your closet space. Use hangers for your clothes, making sure to use the appropriate type for different garments (e.g., wooden hangers for coats, velvet hangers for slippery fabrics). Utilize hanging organizers for shoes, purses, or accessories.
Consider utilizing additional storage options like bins or baskets for items like scarves, belts, or seasonal clothing that may not need to be on display year-round. Utilize the space on the back of your closet door with hooks or hanging organizers for additional storage.
For small closets, utilize space-saving techniques such as cascading hangers or adding a second clothing rod. You can also consider using vacuum-sealed bags for storing out-of-season clothing, freeing up valuable closet real estate.
Finally, maintain your organized closet by regularly decluttering and reevaluating your clothing. As seasons change or trends evolve, reassess your wardrobe and make adjustments as needed to keep your closet clutter-free.
A well-organized closet not only makes it easier to find and choose outfits but also helps you take better care of your clothes. Properly stored clothing lasts longer and looks better. So roll up your sleeves, channel your inner fashionista, and turn your closet into your personal style sanctuary.
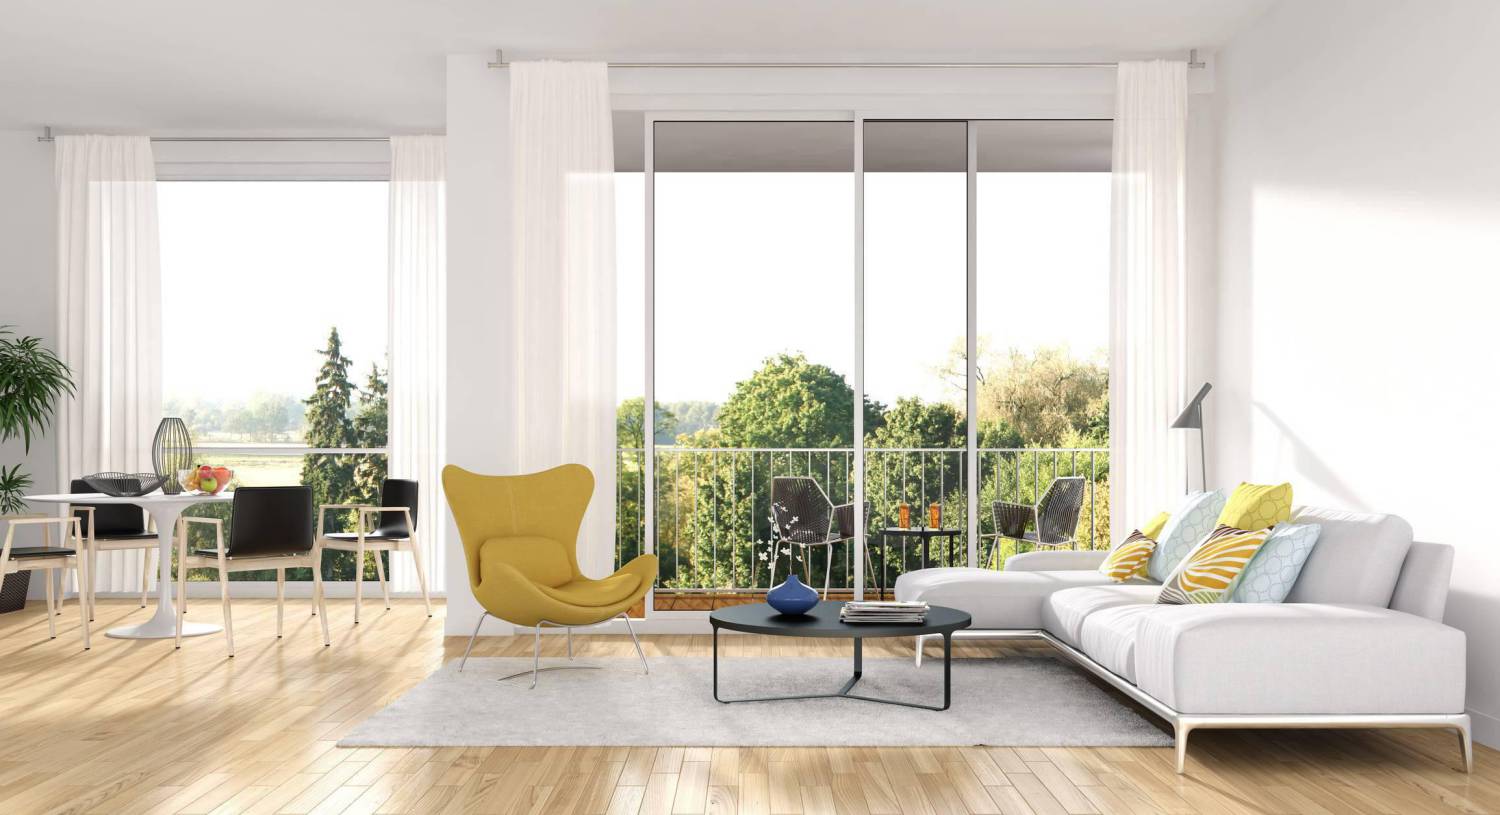
Rearranging Your Living Room
The living room is often the heart of the home, where family and friends gather to relax and spend quality time together. Rearranging your living room can breathe new life into the space, creating a fresh and inviting atmosphere.
Start by evaluating the current layout of your living room. Consider the flow of the room and the placement of furniture. Is the furniture arranged in a way that promotes conversation and easy movement? Or does it feel cluttered and awkward?
Next, determine the focal point of the room. This could be a fireplace, a large window with a view, or a TV. Arrange your furniture around this focal point, creating a cozy and inviting seating area. Use a rug to anchor the furniture and define the space.
Consider the size and scale of your furniture in relation to the room. Oversized furniture can make a small room feel cramped, while small furniture in a large room can look lost. Strike a balance by choosing furniture that fits the proportion of the room without overwhelming or underwhelming the space.
Experiment with different furniture arrangements to find the one that works best for your living room. Consider creating multiple seating areas if you have the space. This allows for flexibility and creates a more intimate and inviting atmosphere.
As you rearrange your living room, take the opportunity to declutter and organize. Remove any unnecessary items and find creative storage solutions for items like books, magazines, or remote controls. Consider using decorative baskets or bins to keep things tidy and out of sight.
Don’t forget about lighting when rearranging your living room. Make sure each seating area has adequate lighting, whether it’s through overhead lighting, floor lamps, or table lamps. This creates a warm and inviting ambiance and allows for different lighting options depending on the mood or activity.
Lastly, incorporate personal touches and decorative elements to make the space feel uniquely yours. Display artwork, photographs, or treasured mementos that reflect your style and personality. Add a pop of color with throw pillows or blankets.
By rearranging your living room, you can transform the space into a comfortable and stylish retreat. So grab a friend or family member, roll up your sleeves, and get ready to rediscover and reimagine your living room!
Tackling Your Garage
The garage often becomes a catch-all space for items that don’t have a designated place in the house. It can quickly become cluttered and overwhelming. But fear not, with a little time and effort, you can transform your garage into an organized and functional space.
Start by decluttering your garage. Take everything out and sort it into categories: keep, donate/sell, and discard. Be ruthless in your decision-making process and let go of items that you no longer need or use.
Once you have sorted through your belongings, it’s time to create storage solutions. Consider investing in wall-mounted or ceiling-mounted shelves to maximize vertical space. This allows you to store items off the floor and keep them easily accessible.
Utilize clear plastic bins or stackable storage containers to store seasonal items, sporting equipment, or holiday decorations. Label each container for easy identification. Hang tools and gardening equipment on pegboards or wall hooks to keep them organized and within reach.
Create specific zones within your garage for different purposes. Designate an area for gardening supplies, a section for sports equipment, and a space for tools. This makes it easier to find and retrieve items when needed.
Consider creating a workstation or workbench in your garage if you have the space. This provides a dedicated area for DIY projects or repairs. Install a pegboard above the workbench to hang commonly used tools and keep them easily accessible.
As you organize your garage, keep safety in mind. Make sure flammable items are stored in a separate, well-ventilated area. Keep chemicals and hazardous materials out of reach of children and pets.
Once you have organized your garage, make a commitment to maintain its cleanliness and organization. Regularly sweep the floor, declutter and reorganize as needed, and keep up with routine maintenance tasks.
By tackling your garage and turning it into a well-organized space, you’ll not only create more room for your vehicles but also alleviate stress and save time by easily finding what you need. So roll up your sleeves, put on some work gloves, and transform your garage into a functional and clutter-free zone!
Creating a Home Office Space
Whether you work from home or need a space for managing household tasks, creating a dedicated home office can enhance productivity and help you stay organized. With a few simple steps, you can transform a corner of your home into a functional and inspiring workspace.
Start by choosing the right location for your home office. Look for a quiet area with good natural light, if possible. This could be a spare room, an unused corner, or even a large closet that can be converted into a compact office space.
Once you have selected the location, consider your workspace essentials. Invest in a comfortable desk and chair that provide proper ergonomic support. Make sure there is enough surface area to accommodate your computer, monitor, and any other necessary equipment.
Organize your office supplies and paperwork to keep them within reach. Use desktop organizers or drawer dividers to separate pens, paperclips, and other small items. Consider using binders or filing cabinets to store important documents and keep them organized.
Create a designated spot for your computer and other electronic devices. Use cable management solutions to keep cords and cables neatly tucked away. This not only improves the aesthetics of your workspace but also ensures safety and prevents tripping hazards.
Add personal touches to your home office to make it a pleasant and inspiring space. Hang artwork, inspirational quotes, or photos that motivate you. Consider incorporating plants or adding a small indoor garden for a refreshing touch.
Make sure to have adequate lighting in your home office. Good lighting is essential for reducing eye strain and increasing productivity. Utilize natural light whenever possible, and supplement with task lighting or ambient lighting as needed.
Create a system for organizing and managing your tasks. This could be a physical planner, a digital calendar, or a combination of both. Set priorities, establish deadlines, and create a daily or weekly to-do list to keep yourself on track.
Lastly, maintain a clutter-free and organized home office by regularly decluttering and tidying up. Take a few minutes at the end of each day to put things away and clear your workspace. This will ensure that you start each day fresh and focused.
By creating a dedicated home office space, you’ll find it easier to separate your work life from your home life. You’ll have a designated area where you can concentrate, be productive, and achieve your goals. So set up your home office and watch your productivity soar!
Organizing Your Bathroom
The bathroom is a space where we begin and end our days, so keeping it organized and functional is essential. With a few simple steps, you can transform your bathroom into a clutter-free and serene oasis.
Start by decluttering your bathroom. Remove any expired medications, empty bottles, or unused products. Consolidate items and only keep what you truly need and use on a regular basis.
Next, tackle your bathroom cabinets and drawers. Group similar items together, such as hair care products, skincare essentials, and personal care items. Invest in drawer dividers or small storage containers to keep items organized and easily accessible.
Utilize vertical space in your bathroom by installing shelves or hanging baskets. This provides additional storage for towels, extra toiletries, or decorative items. Utilize the back of the bathroom door with hooks or an over-the-door organizer for towels or robes.
Consider using clear containers or jars to store items like cotton balls, Q-tips, or small grooming tools. This not only keeps them organized but also adds a touch of elegance to your bathroom decor.
Create a designated spot for each item in your bathroom to make it easy to find and put away. Keep frequently used items within reach, such as toothbrushes, toothpaste, and hand soap, while storing less frequently used items in a cabinet or storage bin.
Make use of under-sink storage by installing stacking bins or utilizing a slide-out organizer. This creates additional storage space for cleaning products, toilet paper, or extra towels.
Don’t forget about bathroom accessories. Install a towel rack or hooks for towels, bathrobes, or shower caps. Use a tray or small dish to corral jewelry or hair accessories. Incorporate a hamper or laundry basket for dirty clothes and linens.
Once you have organized your bathroom, maintain its cleanliness and organization by implementing a regular cleaning routine. Wipe down surfaces regularly, keep products and items in their designated places, and periodically declutter to prevent accumulation of unnecessary items.
A well-organized bathroom not only makes your morning and evening routines more efficient but also creates a calm and relaxing environment. Say goodbye to bathroom clutter and hello to a serene and functional space!
Read more: Tips For Setting Up A Pet-Friendly Home
Sorting and Cataloging Your Books
If you’re an avid reader or book collector, you know how quickly books can accumulate and create disarray in your home. Sorting and cataloging your books not only helps you keep track of your collection but also creates an organized and visually appealing bookshelf.
Start by taking out all of your books and sorting them into categories. You can organize them by genre, author, topic, or any other classification that makes sense to you. This process allows you to see what books you have and helps you decide how you want to arrange them.
Once you have categorized your books, it’s time to decide on a system to catalog them. There are various options available, depending on your preference. You can use a digital cataloging app or software, create a spreadsheet, or simply use index cards or a notebook.
As you catalog your books, make sure to include relevant information such as the title, author, genre, publication year, and any other details that are important to you. You may also want to add a brief description or personal notes about each book.
When it comes to arranging your books on the shelves, there are several options to consider. You can organize them alphabetically by author, by genre, or by color for a visually striking display. Choose a method that works for you and allows for easy browsing and retrieval of books.
Consider using bookends or book supports to keep your books upright and in place. This not only prevents them from toppling over but also adds a decorative element to your bookshelf. You can find bookends in various styles and designs to suit your taste.
If you have limited space or a growing collection, consider investing in additional book storage solutions such as floating shelves, bookcases, or even a personal library cart. These options allow you to expand your collection without sacrificing space or organization.
Don’t forget about the aesthetics of your bookshelf. Consider incorporating decorative elements such as plants, framed artwork, or small trinkets to add visual interest and make your bookshelf a focal point in the room.
Lastly, make it a habit to periodically review and update your book catalog. Add new additions to your collection, remove any books you no longer want or have read, and make sure your catalog reflects the current state of your collection.
Sorting and cataloging your books not only brings order to your bookshelf but also enhances your reading experience. So grab a cup of tea, put on some relaxing music, and embark on the journey of organizing and cataloging your beloved books.
Use clear storage bins to organize and store items in your home. Label the bins for easy identification and stack them to save space.
Reorganizing Your Linen Closet
The linen closet is often a place of chaos and disorganization. Towels, sheets, and other linens can become jumbled and hard to find. But with a little reorganization, you can transform your linen closet into a functional and tidy space.
Start by emptying out your linen closet completely. This allows you to assess what you have and declutter any items that are no longer needed or in good condition.
Once you have decluttered, it’s time to categorize your linens. Sort items into categories such as towels, bed sheets, blankets, and table linens. You can further categorize by size, color, or fabric if desired.
Invest in storage solutions to maximize your linen closet space. Use baskets or bins to neatly store folded towels and sheets. Keep similar items together to make them easier to find when needed.
To create more space, consider utilizing vertical storage options like stacking shelves or hanging organizers. This allows you to take advantage of the full height of the closet and keep items organized and accessible.
Utilize the inside of the closet door for additional storage. Hang hooks or an over-the-door organizer to store small linens or accessories like hand towels or washcloths.
Label your storage containers or shelves to make it easy to identify where each item belongs. This not only helps you stay organized but also makes it easier for family members or guests to locate and return items to their proper place.
Consider rolling your towels instead of stacking them to save space and create a visually pleasing display. This allows you to fit more towels in a small space and makes it easier to see what you have.
As you reorganize your linen closet, take the opportunity to deep clean the shelves and wipe down any surfaces. This gives your linens a fresh and clean environment to reside in.
Finally, regularly assess and maintain your organized linen closet. Keep an eye out for any items that need to be replaced or removed, and take the time to reorganize as necessary. This helps you stay on top of clutter and ensures that your linens are easily accessible.
By reorganizing your linen closet, you’ll create a more functional and visually appealing space. You’ll be able to find what you need with ease and enjoy the luxury of neatly organized linens. So roll up your sleeves and get ready to transform your linen closet into a well-organized haven for your linens.
Purging and Organizing Your Makeup
If your makeup collection is getting out of control and you find yourself rummaging through a cluttered mess each morning, it’s time to purge and organize. By decluttering and arranging your makeup, you can create a streamlined and efficient routine that starts your day off on the right foot.
Start by gathering all of your makeup items in one place. Empty out drawers, cosmetic bags, and any other storage containers you have. This will give you a clear view of what you own and make it easier to sort and declutter.
Assess the condition and expiration dates of each product. Makeup can harbor bacteria over time, and using expired products can lead to skin irritation or infections. Discard anything that is past its prime or shows signs of spoilage.
Next, evaluate which items you actually use on a regular basis. Be honest with yourself and let go of products that you don’t reach for or that don’t suit your preferences or skin tone. Consider donating gently used items to friends or family or find organizations that accept lightly used makeup.
Once you have decluttered, it’s time to organize your makeup. Consider categorizing items by type, such as foundations, blushes, eyeshadows, or lip products. Utilize dividers or small trays to keep items separated and prevent them from getting jumbled together.
Invest in storage solutions that suit your needs and available space. Clear acrylic organizers work well for displaying and keeping your makeup visible. Drawer dividers or trays can help keep smaller items like brushes or lipsticks organized.
Arrange your makeup in a way that makes it easy to find and access. Place frequently used items in a convenient spot, while keeping special occasion or less-used products stored away. This ensures that you have the products you need without overwhelming your everyday routine.
Consider labeling storage containers or sections to make it easier to locate specific items. This can be especially helpful for multi-use products or items with similar packaging.
Lastly, establish a regular cleaning routine for your makeup and storage containers. Wipe down surfaces and brushes regularly to prevent the buildup of bacteria. This not only keeps your makeup hygienic but also extends its shelf life.
By purging and organizing your makeup collection, you’ll streamline your beauty routine and reduce clutter. You’ll have a clear view of the products you love and enjoy using, making it easier to get ready each day. So take the time to declutter and organize your makeup, and embrace a more simplified and enjoyable makeup experience.
Cleaning and Organizing Your Fridge
The refrigerator is an essential appliance in every kitchen, but it can also become a breeding ground for expired food and clutter. Cleaning and organizing your fridge not only ensures food safety but also creates an efficient space where you can easily find what you need.
Start by emptying out your fridge completely. Take out all the food items and place them on your countertop. This allows you to see everything you have and makes it easier to clean the shelves and compartments.
Dispose of any expired or spoiled food. Check the expiration dates on all items and discard anything that is no longer safe to consume. This includes condiments, leftovers, and any items that have an unusual smell or appearance.
Remove all the shelves, drawers, and compartments from the fridge. If they are dishwasher safe, place them in the dishwasher to clean. Otherwise, wash them by hand using warm soapy water and a sponge or cloth. Pay attention to any spills or stains and make sure to remove them thoroughly.
While the shelves and compartments are drying, wipe down the interior walls of the fridge with a mixture of warm water and mild detergent. Make sure to get into all the nooks and crannies, including the door seals and corners.
Once the shelves and compartments are dry, place them back in the fridge and start organizing your food. Group similar items together, such as fruits, vegetables, dairy products, and meats. This makes it easier to find what you need and prevents cross-contamination.
Consider using storage containers to maximize space and keep things organized. Clear plastic bins or containers are great for grouping smaller items like condiments or jars. Label each container or section to make it easy to locate specific items.
Utilize the doors and the top shelf for frequently used items, such as milk, condiments, and sauces. Place leftovers and ready-to-eat items at eye level for easy access. Store raw meats on the lower shelves to prevent any potential cross-contamination.
Regularly clean out your fridge and perform a quick inventory check to ensure that you’re using up items before they expire. This helps reduce food waste and keeps your fridge organized.
Lastly, maintain the cleanliness of your fridge on a regular basis. Wipe up spills immediately and regularly remove any expired or unwanted items. By staying on top of the cleanliness and organization of your fridge, you’ll have a fresh and efficient space to store your food.
Cleaning and organizing your fridge not only creates a visually pleasing and functional space but also helps ensure the freshness and safety of your food. So roll up your sleeves, grab your cleaning supplies, and transform your fridge into a clean and organized kitchen essential.
Read more: 17 Do-It-Yourself Outdoor Project Ideas
Establishing a System for Sorting Mail
The daily influx of mail can quickly overwhelm your home if left unattended. To keep your mail organized and prevent a pileup of paper, it’s essential to establish a system for sorting and managing your mail effectively.
Start by designating a specific area in your home as a mail station. It could be a countertop, a desk, or a small table. This will serve as a central hub for all incoming mail.
As soon as you bring in the mail, immediately sort it into three categories: To Do, To File, and To Shred. The ‘To Do’ category includes bills that need to be paid, forms that require attention, or any important correspondence that needs a response.
The ‘To File’ category is for documents that need to be kept for reference or future use. These can include financial statements, insurance documents, or any other papers that require safekeeping.
The ‘To Shred’ category is for any junk mail, pre-approved credit offers, or documents containing sensitive information that you no longer need. It’s crucial to shred these items to protect your personal information from falling into the wrong hands.
Invest in storage solutions for each category. Use a file organizer or folder system for the ‘To File’ category. Consider a small basket or tray for the ‘To Do’ category, where you can keep bills and other items that require immediate attention. And have a designated shredder or secure container for the ‘To Shred’ items.
Establish a regular schedule for going through each category. Dedicate specific times each week to pay bills and respond to important mail. Set aside time every month to file any necessary documents in your filing system. And make shredding part of your routine to ensure the disposal of sensitive information on a timely basis.
Consider going paperless whenever possible. Many organizations offer electronic statements and online bill payment options. By opting for electronic communication, you can reduce the amount of physical mail you receive and simplify your sorting process.
Remember to unsubscribe from unwanted mail or catalogs that you no longer wish to receive. Take the time to contact companies and request removal from their mailing lists. This proactive step can minimize future clutter and save you valuable time sorting through irrelevant mail.
Lastly, it’s essential to regularly declutter your mail system. Remove outdated or unnecessary items from your filing system. Shred expired documents that are no longer needed. Keep your mail station tidy and organized to ensure that it functions smoothly.
By establishing a system for sorting mail, you can avoid the stress of a cluttered mailbox and efficiently manage your correspondence. With a well-organized mail system in place, you’ll have more time to focus on the essential things in life.
Sorting and Organizing Your Shoe CollectionIf you find yourself searching for a matching pair of shoes amidst a pile of disorganized footwear, it’s time to sort and organize your shoe collection. With a structured system in place, you can easily find your favorite pair and keep your shoe collection looking neat and tidy.
Start by taking out all of your shoes and laying them out in an open space. This allows you to see the extent of your collection and assess the condition of each pair.
Next, declutter your shoes by removing any worn-out or damaged pairs. If you haven’t worn a particular pair in a year or it no longer fits properly, consider donating or selling them. By letting go of shoes you no longer wear, you can free up space for new additions and ensure that your collection consists of shoes you truly love.
Once you have decluttered, think about how you want to categorize your shoes. You can organize them by type (such as boots, sneakers, sandals, etc.), by occasion (formal, casual, athletic), or even by color. Choose a categorization method that makes the most sense to you and suits your needs.
Invest in storage solutions that best fit your space and shoe collection. There are various options to consider, such as shoe racks, shoe organizers, or even clear shoe boxes. Stackable shoe boxes are especially useful for keeping your shoes protected while maximizing space.
Within each category, consider organizing your shoes in a way that makes them easily accessible. You can arrange them by height, color, or style. Arrange the shoes you wear most frequently within easy reach, while placing seasonal or less-used shoes in a less accessible area.
Label each storage compartment or box to make it easy to locate and retrieve specific pairs of shoes. This is particularly helpful if you have a large shoe collection or frequently rotate your shoes based on the season or occasion.
Keep your shoes clean and well-maintained by wiping them down regularly and using protective sprays or conditioners. Proper care not only extends the life of your shoes but also keeps them looking their best.
Consider utilizing vertical space for shoe storage by installing shoe shelves or hanging shoe organizers behind doors or in closets. This helps you make the most of your available space and keeps your shoes off the floor.
Lastly, it’s important to regularly reassess and organize your shoe collection. Take the time to declutter and reorganize as needed. This will ensure that your shoe collection remains manageable and well-maintained.
By sorting and organizing your shoe collection, you’ll save time and frustration when searching for the perfect pair. You’ll also be able to showcase your shoes in an organized and visually pleasing way. So let’s get started on creating a well-organized and stylish shoe collection!
Organizing Your Jewelry
If you find yourself untangling necklaces or searching for missing earrings in a tangled mess, it’s time to organize your jewelry collection. With a well-structured system in place, you can easily find and showcase your favorite pieces while keeping them in pristine condition.
Start by gathering all of your jewelry and laying it out on a clean and flat surface. This allows you to see the full extent of your collection and assess the condition of each piece.
Next, declutter your jewelry by removing any items that you no longer wear or items that are broken or missing pieces. Consider donating or repairing them if they hold sentimental value, or if not, dispose of them responsibly.
Once you’ve decluttered, categorize your jewelry. Group similar items together, such as necklaces, bracelets, earrings, and rings. You can further categorize by material, color, or style if desired.
Invest in storage solutions that best suit your needs and space. There are various options to consider, such as jewelry boxes, trays, stands, or even wall-mounted organizers. Choose storage solutions that keep your jewelry protected, prevent tangling, and allow for easy access and visibility.
Consider utilizing dividers or compartments within your storage system to keep each category separate and prevent tangling or scratching. This is particularly important for delicate or valuable pieces.
For smaller items like earrings or rings, consider using a compartmentalized jewelry tray or a clear pill organizer. This allows you to separate and organize each piece while keeping them easily visible.
Utilize hooks, pegs, or a hanging jewelry organizer to display and store necklaces and bracelets. This prevents tangling and makes it easy to see and choose the perfect piece for your outfit.
Keep your most frequently worn or special-occasion jewelry in a more accessible location, such as on a jewelry stand or near your vanity. Jewelry pieces that you wear less often can be safely stored in a box or a designated drawer.
Jewelry maintenance is key to keeping your collection in great condition. Regularly clean your jewelry using appropriate cleaning methods for each material. Store your jewelry away from direct sunlight and moisture to prevent tarnishing or damage.
Lastly, reassess and organize your jewelry collection periodically. This allows you to declutter any new items you no longer wear or reorganize as needed to accommodate for new additions.
By organizing your jewelry, you’ll save time searching for the perfect accessories and ensure that each piece is well-cared for. Transform your jewelry collection into an organized and visually appealing display that adds an extra touch of sparkle to your daily routine.
Rearranging Your Bedroom
Your bedroom should be a sanctuary, a place of rest and relaxation. If you feel like your current bedroom layout is not conducive to relaxation or lacks harmony, it may be time to consider rearranging the furniture and creating a new, rejuvenating space.
Start by assessing the current layout of your bedroom. Consider the flow of the room and how you move through the space. Think about the placement of your bed, dressers, and other furniture pieces.
Decide on the focal point of your bedroom. This is usually the bed and the wall it’s positioned against. Arrange your furniture around this focal point, ensuring that it’s the main visual anchor of the room.
If possible, position your bed against a solid wall. This creates a sense of support and stability. Avoid placing your bed in front of a window, as it can disrupt the flow of energy and affect your sleep quality.
Consider functionality when rearranging your bedroom. Optimize the placement of items you use frequently, such as nightstands, lamps, and dressers. Ensure that they are easily accessible from your bed and provide convenience in your daily routine.
Create zones within your bedroom to establish different areas of focus. Dedicate one area for sleeping, another for dressing and getting ready, and potentially a cozy reading nook or a small sitting area. This division helps create a sense of purpose and organization in the space.
Utilize the space under your bed for additional storage. Invest in under-bed storage containers or drawers to store extra linens, seasonal clothing, or items that you don’t need immediate access to.
Consider the lighting in your bedroom. Natural lighting is ideal, so maximize it by keeping windows clear of heavy curtains or furniture. During the evenings, incorporate a combination of ambient, task, and accent lighting to create a warm and relaxing atmosphere.
Don’t forget about the importance of decluttering. As you rearrange your bedroom, take the opportunity to purge and remove any unnecessary items. Keep surfaces clean and free from excessive clutter to create a calm and serene environment.
Lastly, add personal touches and decor elements that reflect your personality and style. Hang artwork or photographs that bring you joy. Incorporate plants or flowers for a touch of nature and to enhance air quality.
Rearranging your bedroom can make a significant difference in the overall ambiance and functionality of the space. By creating a harmonious and organized layout, you’ll enjoy a restful atmosphere that promotes relaxation and rejuvenation. So let your creativity flow and give your bedroom a fresh new look!
Creating a Storage System for Your Kid’s Toys
If your child’s toys have taken over your home, creating a functional and organized storage system is essential. With a well-designed storage solution, you can keep toys in order while also teaching your child the importance of tidying up after playtime.
Start by assessing your child’s toy collection. Sort the toys into categories, such as building blocks, dolls, puzzles, or art supplies. This will give you a clear idea of what storage solutions are needed.
Invest in storage containers that are suitable for your child’s toys. Clear plastic bins with lids are ideal as they allow your child to easily see and access their toys. Use labels or picture labels to help your child identify where each toy belongs.
Create designated storage areas throughout your home for different types of toys. The living room can have a storage bin for larger toys, while the bedroom can have smaller containers for books or puzzles. This allows for easy cleanup and encourages your child to take responsibility for their belongings.
Utilize vertical space by installing shelves or wall-mounted cubbies. These can display toys or hold baskets for smaller items. Keep frequently played-with toys within reach and store other toys on higher shelves to prevent clutter and encourage rotation.
Consider using storage solutions that double as furniture, such as ottomans or benches with hidden compartments. These provide additional seating and create a hidden storage space for toys.
Teach your child the importance of keeping their toys organized. Set aside specific times each day or week for cleanup. Make it fun by turning it into a game or adding music. Encourage your child to participate in sorting and putting their toys back in their designated storage areas.
Regularly declutter and rotate toys to keep things fresh and prevent overwhelming clutter. Store unused or out-of-season toys in a separate area, such as a closet or under-bed storage, and bring them out periodically to keep playtime exciting.
Create functional play zones within your home. Designate a specific area for building blocks, a corner for imaginative play, or a cozy reading nook. This helps your child understand where specific toys belong and fosters creativity and organization.
Involve your child in the decision-making process by asking them how they would like to organize their toys. This gives them a sense of ownership and empowers them to take responsibility for their toys and their space.
Remember to regularly assess and adjust your storage system as your child’s toy collection evolves. As your child grows, their interests and toy preferences may change, requiring modifications to your storage solutions.
By creating a storage system for your child’s toys, you not only promote organization but also teach valuable life skills and foster a sense of responsibility. You’ll enjoy a clutter-free home while encouraging creativity and playfulness in your child. So roll up your sleeves, involve your child, and create a functional and organized space for their toys!
Conclusion
Organizing your home is an ongoing process, but the benefits are worth the effort. By implementing effective storage and organization systems, you can transform your living space into a clutter-free and functional haven. Along the way, you’ll experience the joy and satisfaction of creating an organized environment that brings peace and efficiency to your daily life.
From decluttering your kitchen and pantry to creating a home office space, each organizing project plays a vital role in improving your overall well-being. Sorting and cataloging your books, purging and organizing your makeup, and establishing a system for sorting mail are all steps toward a more streamlined and enjoyable lifestyle.
When it comes to organizing personal spaces, like your bedroom, closet, and bathroom, the benefits extend beyond mere organization. Rearranging your living room or tackling your garage not only help declutter and create space but also enhance the functionality and beauty of these areas.
And let’s not forget about the importance of organizing for your little ones. Sorting and organizing your kid’s toys and creating a storage system not only keep your home tidy but also foster valuable life skills and a sense of responsibility in your children.
Throughout all of these organizing projects, remember to be flexible and adapt as needed. Everyone’s organizational needs and preferences are different, so find what works best for you and your home. Regular maintenance, decluttering sessions, and adjustments to your systems will help ensure that your organized spaces continue to serve you well over time.
So embrace the journey of organizing your home. Enjoy the sense of accomplishment that comes with each project, and relish in the peace and efficiency that an organized space brings to your life. Start small or dive into a full home overhaul—either way, you’re one step closer to a more organized and harmonious living environment.
Frequently Asked Questions about 17 Weekend Organizing Projects To Tidy Up Your Home
Was this page helpful?
At Storables.com, we guarantee accurate and reliable information. Our content, validated by Expert Board Contributors, is crafted following stringent Editorial Policies. We're committed to providing you with well-researched, expert-backed insights for all your informational needs.


0 thoughts on “17 Weekend Organizing Projects To Tidy Up Your Home”