Articles
How To Chip And Seal A Driveway
Modified: October 25, 2024
Learn the step-by-step process of chip and seal driveway maintenance with our informative articles. Discover tips, tricks, and expert advice to achieve a smooth and durable driveway surface.
(Many of the links in this article redirect to a specific reviewed product. Your purchase of these products through affiliate links helps to generate commission for Storables.com, at no extra cost. Learn more)
Introduction
Welcome to your comprehensive guide on how to chip and seal a driveway. Whether your driveway is showing signs of wear and tear or you simply want to improve its appearance, the chip and seal method is a cost-effective and durable solution. Chip and seal, also known as tar and chip or seal coating, involves applying layers of asphalt emulsion and stone chips to the surface of the driveway. This creates a textured and aesthetically pleasing finish that helps to protect the underlying pavement from weathering and deterioration.
In this article, we will walk you through each step of the chip and seal process, from preparing the driveway to applying the final seal coat. Along the way, we’ll provide tips and advice to ensure a successful outcome. So, let’s dive in and learn how to transform your driveway with chip and seal!
Note: Before starting the chip and seal process, make sure to check with your local authorities or homeowner’s association for any specific regulations or permits that may be required.
Key Takeaways:
- Transform your driveway with chip and seal to create a cost-effective, durable, and visually appealing surface. Follow the step-by-step guide to achieve a professional finish and protect your pavement from weathering and deterioration.
- By investing time and effort into the chip and seal process, you can improve the functionality and aesthetic appeal of your driveway. Maintain the surface regularly and consider reapplying a seal coat every few years for long-lasting durability and a fresh appearance.
Read more: How To Seal A Driveway
Materials and Equipment
Before getting started, gather all the necessary materials and equipment required for the chip and seal process. Having everything ready will ensure a smooth and efficient workflow. Here’s a list of what you’ll need:
- Asphalt emulsion: This is the binder that holds the stone chips in place. It can be purchased from a local home improvement store or asphalt supplier.
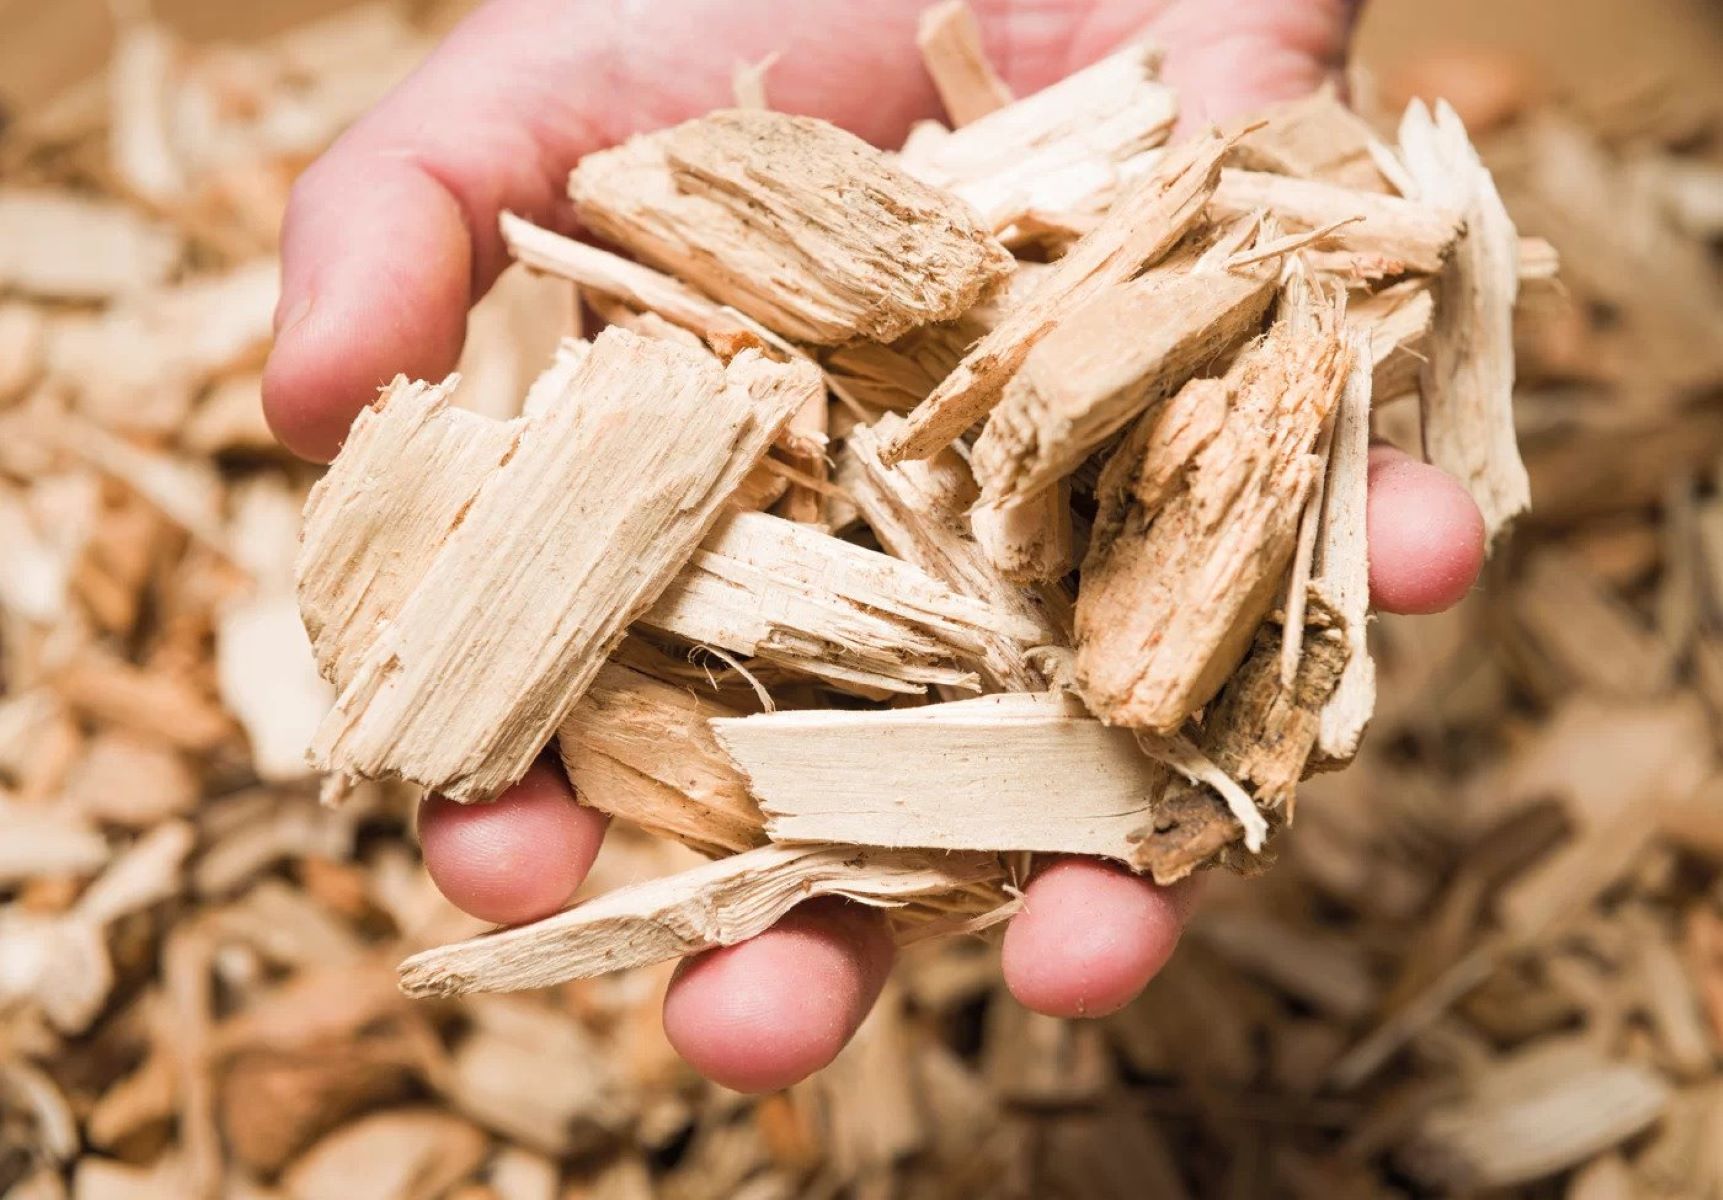
- Stone chips: These are the aggregate material used to create the textured surface of the chip and seal. You can choose from a variety of chip sizes and colors to achieve your desired aesthetic.
- Crack filler: If your driveway has any cracks or potholes, make sure to have crack filler on hand to repair them before applying the chip seal.
- Primer: A primer is used to ensure proper adhesion between the existing driveway surface and the subsequent layers of chip and seal.
- Seal coat: This optional final layer helps to protect the chip and seal from UV rays, weathering, and traffic. It also provides a glossy finish.
- Applicator: Depending on the size of your driveway, you can use a sprayer, paint roller, or broom to apply the asphalt emulsion, stone chips, and seal coat.
- Brush or squeegee: This will be used to spread the primer and ensure even coverage on the surface of the driveway.
- Cleaning equipment: Before starting the chip and seal process, it’s essential to thoroughly clean the driveway. You’ll need a broom, pressure washer, or hose to remove any dirt, debris, or vegetation.
- Safety gear: To protect yourself during the process, wear gloves, safety glasses, a dust mask, and appropriate clothing.
Once you have gathered all the necessary materials and equipment, you’re ready to move on to the next step: preparing the driveway for chip and seal.
Step 1: Prepare the Driveway
Proper preparation is key to ensuring a successful chip and seal application. Follow these steps to prepare your driveway:
- Clean the driveway: Start by removing any dirt, debris, or vegetation from the surface of the driveway. Use a broom to sweep away loose particles, and consider using a pressure washer or hose to thoroughly clean the area.
- Repair cracks and potholes: Inspect the driveway for any cracks or potholes. Fill them with a suitable crack filler and allow it to dry completely before proceeding. Smooth out the filled areas to create an even surface.
- Trim vegetation: If there are any plants, grass, or weeds near the edges of the driveway, trim them back to ensure there is a clean border for the chip and seal application.
- Protect nearby surfaces: If there are any adjacent surfaces, such as sidewalks or landscaping, that you want to protect from the chip and seal materials, use plastic sheeting or tape to cover them.
By properly preparing the driveway, you’ll ensure a clean and smooth surface for the chip and seal application. This will help the subsequent layers adhere properly and result in a more durable and visually appealing finish.
Step 2: Fill in Cracks and Potholes
Before applying the chip and seal, it’s important to fill in any cracks or potholes on the surface of the driveway. This will not only improve the appearance of the finished product but also prevent further damage to the pavement. Follow these steps to fill in cracks and potholes:
- Clean the cracks: Use a wire brush or pressure washer to clean out the cracks, removing any loose debris or vegetation. This will ensure better adhesion of the crack filler.
- Choose the right filler: Select a suitable crack filler product based on the size and depth of the cracks. There are various options available, such as liquid crack fillers or asphalt repair patches, which can be found at your local home improvement store.
- Apply the filler: Following the manufacturer’s instructions, apply the crack filler to the cracks, making sure to fill them completely. Use a putty knife or trowel to spread the filler evenly and smooth out the surface.
- Allow it to cure: Give the crack filler sufficient time to cure and dry completely. This may take a few hours or overnight, depending on the product and weather conditions.
- Level potholes: If there are any potholes present, use a cold asphalt patching compound to fill them in. Follow the product instructions for application and compaction.
- Smooth the filled areas: Once the crack filler and patching compound have cured, smooth out the filled areas with a trowel or tamper to create an even surface. This will ensure a seamless appearance after the chip and seal application.
By properly filling in cracks and potholes, you’ll prevent them from expanding and causing further damage. This will help maintain the integrity of your driveway and prolong its lifespan.
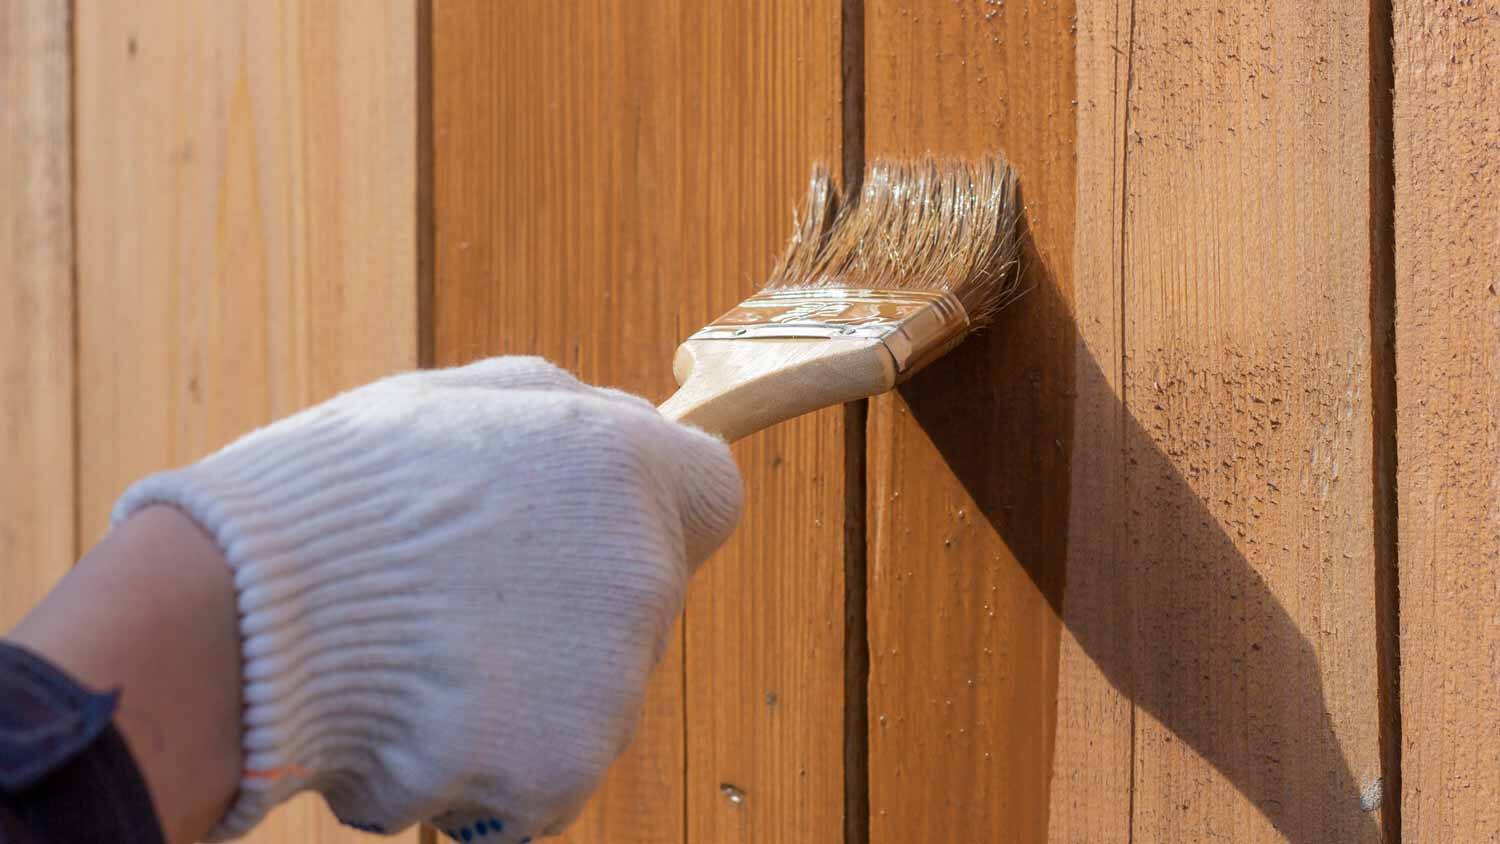
Step 3: Apply Primer
Applying a primer is an important step in the chip and seal process, as it ensures proper adhesion between the existing driveway surface and the subsequent layers of chip and seal. The primer also helps to seal the pavement and enhance its durability. Follow these steps to apply the primer:
- Choose the right primer: Select a high-quality asphalt primer that is compatible with the chip and seal materials you will be using. You can find primer products specifically designed for this purpose at your local home improvement store or asphalt supplier.
- Clean the surface: Before applying the primer, make sure the surface of the driveway is clean and free of any debris or moisture. Sweep or hose off any loose particles, and allow the surface to dry completely.
- Mix the primer: Follow the manufacturer’s instructions to mix the primer if necessary. Some primers may come ready-to-use, while others may require mixing with water or a solvent.
- Apply the primer: Use a brush or squeegee to spread the primer evenly over the entire surface of the driveway. Work in small sections to ensure thorough coverage. Apply a thin and uniform coat, making sure not to leave any puddles or excess primer.
- Let it dry: Allow the primer to dry completely before proceeding with the chip and seal application. The drying time may vary depending on the primer product and weather conditions. Refer to the manufacturer’s instructions for specific drying times.
By applying the primer, you create a strong bond between the existing pavement and the chip and seal materials. This enhances the longevity and performance of the chip and seal layer, providing a durable and attractive finish for your driveway.
Before starting the chip and seal process, make sure to thoroughly clean the driveway to remove any debris or dirt. This will ensure a smooth and even application of the chip and seal materials.
Read more: How To Seal A Gravel Driveway
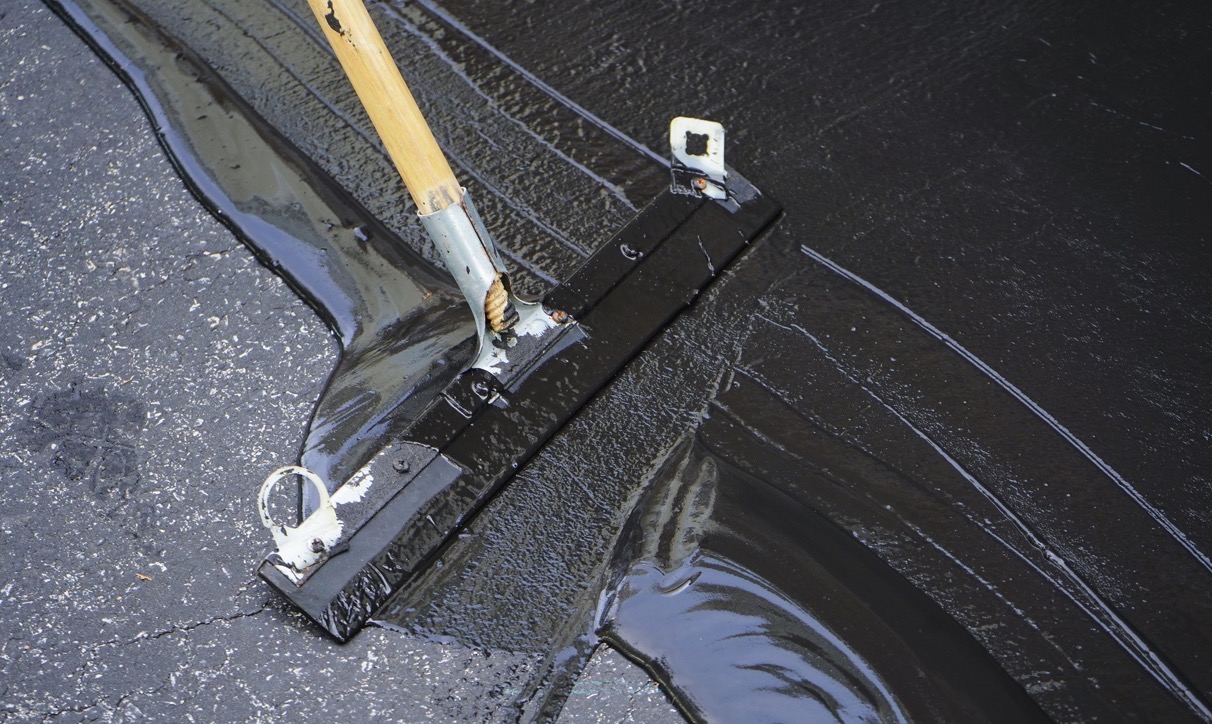
Step 4: Spread the Chip Seal
Spreading the chip seal is the core step in the chip and seal process. This is where the asphalt emulsion and stone chips come together to create the textured surface. Follow these steps to spread the chip seal:
- Mix the chip seal: Start by mixing the asphalt emulsion and stone chips in a suitable mixing container. Follow the manufacturer’s instructions for the proper ratio and mixing procedure. The mixture should have a consistent and homogenous texture.
- Begin application: Pour a portion of the chip seal mixture onto the prepared driveway surface. Use a brush, squeegee, or sprayer to spread it evenly. Work in small sections to ensure consistent coverage.
- Distribute the stone chips: Immediately after applying the chip seal mixture, spread the stone chips over the surface. Make sure to cover the entire area with a layer of stone chips. The thickness of the chip layer will depend on your desired outcome and the size of the stone chips.
- Press the chips into the emulsion: Use a roller or compactor to press the stone chips into the asphalt emulsion. This will ensure proper adhesion and create a textured surface.
- Continue the application: Repeat the process of applying the chip seal mixture and distributing the stone chips until the entire surface of the driveway is covered. Work in overlapping sections to create a seamless and uniform finish.
Spreading the chip seal requires attention to detail and precision to achieve a professional-looking result. Take your time and make sure to evenly distribute the chip seal mixture and stone chips for a durable and visually pleasing surface.
Step 5: Compact the Surface
Once the chip seal has been spread and the stone chips have been applied, it’s essential to compact the surface. This step helps to ensure proper adhesion, embed the stone chips into the asphalt emulsion, and create a solid and durable driveway. Follow these steps to compact the surface:
- Use a roller: Using a roller compactor or a similar heavy-duty equipment, begin compacting the surface. Start from the outer edges of the driveway and work your way towards the center. Apply consistent pressure to compact the chip seal and stone chips into the emulsion.
- Overlap sections: Make overlapping passes with the roller to ensure even compaction across the entire surface. This will help to eliminate any air pockets and create a smooth, uniform finish.
- Avoid excessive pressure: While it’s important to apply sufficient pressure to compact the surface, be mindful not to apply excessive pressure that could damage the chip seal or create uneven areas. Use caution and adjust the roller as needed.
- Check for any loose chips: As you compact the surface, keep an eye out for any loose stone chips. If you notice any, use a broom or brush to sweep them off the surface before continuing with the compaction process.
The compaction process helps to ensure a sturdy and long-lasting chip and seal surface. By applying consistent pressure and overlapping sections, you’ll achieve an even and properly bonded driveway that can withstand regular use and weather conditions.
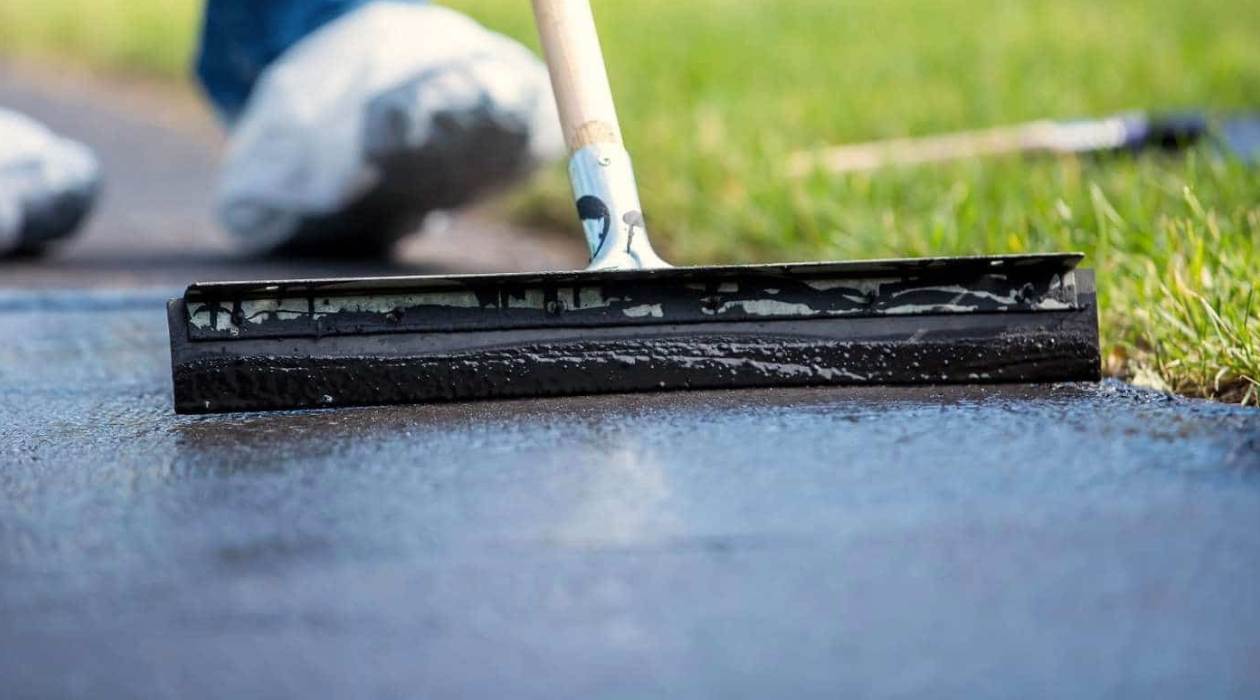
Step 6: Apply a Seal Coat
The final step in the chip and seal process is applying a seal coat. While not essential, a seal coat provides additional protection to the chip and seal surface, prolonging its lifespan and enhancing its appearance. Follow these steps to apply a seal coat:
- Clean the surface: Before applying the seal coat, make sure the chip and seal surface is clean and free of any debris or loose materials. Sweep or hose off any dirt or dust that may have accumulated.
- Choose the right seal coat: Select a high-quality seal coat product that is compatible with the chip and seal materials you used. There are various types available, ranging from water-based sealers to acrylic sealers. Consider factors such as durability, UV resistance, and glossy or matte finish.
- Mix the seal coat: If required, mix the seal coat according to the manufacturer’s instructions. Some sealers may come ready-to-use, while others may need to be diluted with water.
- Apply the seal coat: Use a sprayer, paint roller, or brush to apply the seal coat evenly across the entire chip and seal surface. Work in small sections, making sure to achieve a uniform and thin layer. Avoid applying the sealer too thickly, as it may result in a sticky or tacky finish.
- Allow it to dry: Let the seal coat dry completely before allowing any foot or vehicle traffic on the driveway. This may take a few hours or longer, depending on the product and weather conditions. Refer to the manufacturer’s instructions for specific drying times.
Applying a seal coat adds an extra layer of protection to your chip and seal driveway, helping to shield it from UV rays, weathering, and regular wear and tear. Additionally, a seal coat can enhance the appearance of the surface, giving it a renewed and polished look.
Conclusion
Congratulations! You have successfully completed the chip and seal process for your driveway. By following the steps outlined in this guide, you have transformed your worn-out pavement into a durable and visually appealing surface. Here’s a recap of the key steps:
- Prepare the Driveway: Clean the surface, repair cracks and potholes, trim vegetation, and protect nearby surfaces.
- Fill in Cracks and Potholes: Clean the cracks, choose the right filler, apply the filler, let it cure, and level any potholes.
- Apply Primer: Choose the right primer, clean the surface, mix the primer, apply it evenly, and allow it to dry.
- Spread the Chip Seal: Mix the chip seal, begin application, distribute the stone chips, and press them into the emulsion.
- Compact the Surface: Use a roller to compact the chip seal, overlap sections, avoid excessive pressure, and remove any loose chips.
- Apply a Seal Coat: Clean the surface, choose the right seal coat, mix it if necessary, apply it evenly, and let it dry.
By following these steps and investing time and effort into the chip and seal process, you have taken a cost-effective approach to improve the functionality and aesthetic appeal of your driveway. The chip and seal surface is now protected against damage from weather, traffic, and age, providing you with a long-lasting and low-maintenance solution.
Remember to regularly maintain your chip and seal driveway by keeping it clean, inspecting for any signs of wear, and addressing any necessary repairs promptly. This will help prolong its lifespan and ensure continued durability. Additionally, consider reapplying a seal coat every few years to maintain its protective properties and fresh appearance.
Thank you for reading this comprehensive guide on how to chip and seal a driveway. We hope it has provided you with the knowledge and confidence to tackle this project successfully. Now, you can enjoy a beautiful and resilient driveway for years to come!
Now that you've got the lowdown on maintaining your driveway with chip and seal techniques, why not delve deeper into another popular option? Our next read shines a light on the robust qualities and maintenance tips of an asphalt driveway. This article will help you weigh different options, ensuring your driveway not only looks stellar but lasts longer too.
Frequently Asked Questions about How To Chip And Seal A Driveway
Was this page helpful?
At Storables.com, we guarantee accurate and reliable information. Our content, validated by Expert Board Contributors, is crafted following stringent Editorial Policies. We're committed to providing you with well-researched, expert-backed insights for all your informational needs.


0 thoughts on “How To Chip And Seal A Driveway”